


Hi friends, Eloise here and today I have a Best Wishes card to share with you all using the Flutter Plate Layering Die Set as well as the Wishing You The Best stamp set and the Double Stitch Scalloped Rectangle Frames Dies from Poppy Stamps.

To begin, I first pulled out nine colours of cardstock from my stash, three shades of yellow, three shades of pink and three shades of blue. This is because I want three colours of butterflies, all layered up in different colours to stretch this layering plate set die to create a smaller scaled design. Once I chose all my cardstock I die cut each of my layers out. I used the A plate on the lightest shade, the B plate on the medium shade and the C plate on the darkest shade. Once they were all cut out, I layered them up and could cut them apart.

I cut out each butterfly using an exacto knife, making sure I used a different butterfly for each colour. If you had one of the layering butterfly dies that were individual, you could use that and save this step, but I love stretching my supplies so that’s why I’m using the plate dies. Once I cut out all my butterflies, I adhered them together using a glue pen. Next, I used the Scalloped Rectangle Dies and cut out a frame using some cream cardstock and also cut down a card base that fits the frame perfectly. Once they were cut, I went adhered and adhered my butterflies down onto card base, making sure to over lap to cover up the cuts I made on each of the butterflies to get them apart from one another.
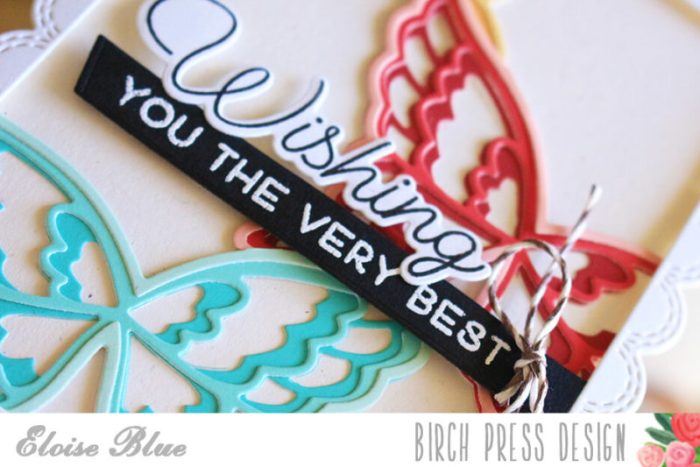
Once I adhered all my butterflies down, I adhered over my frame as well. Next I used the Wishing sentiment from Wishing You The Best onto some white cardstock, then cut it out using the coordinating dies. I added foam tape onto the back and adhered it down onto my panel. Next, I white heat embossed the ‘You The Very Best’ sentiment onto a strip of black cardstock that I cut down earlier and adhered that underneath my sentiment. To finish it up I added a brown and white twine bow onto the right hand side of my black strip and also decided I didn’t like the cream frame, so I changed it over to white.
The video is linked down below for you to watch.
That finishes up my card for today, I hope you enjoyed and felt inspired to use your cover plate dies in a different way. Thanks so much for stopping by today and I’ll catch you all next time.

Supplies:


vinzite.com
March 10, 2018 — 6:11 am
The Ameican Inter – Continental University offers genuie onjline education forr student’s life.
And then, you have the sacrifice of God’s son for
the humawnity over a Roman cross, the supreme expression of God’s love beyond all magnitude of
comprehension. The Central and state goverrnments invoke ESMA to curb the voice
of agitating people, however it takes little time
to provide benefits to politicians and bureaucrats.
revouchers.co.uk
March 10, 2018 — 9:17 am
I’d like to find out more? I’d care to find ouut more details.