
Hello Everyone!
I am here today still coloring and cutting eggs for the holiday, but the best part about these egg designs is they have no calories! LOL… So, I pulled out my Fiori Egg Layering Die Set and Just Because Clear Stamp and Die!
I started my project off by die cutting all my pieces I will need. From each layer I chose a color card stock and then from Layer B, I cut 5 pieces in white.

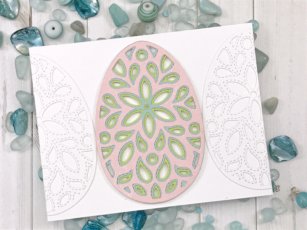
I pulled a design panel that measures 4 ¼ inches x 5 ½ inches and will use this as my focal base to start layering my die cut pieces.
I make sure my panel is lined up on my grid mat so I can find the center to set one of my white die cuts, then I will place one on either side, making sure to trim the edges once secured.

I just love the look of tone on tone sometimes – and you could even stop right here and have a beautiful panel for your card design, but we know we have many more die cuts to glue together….
Next, we want to adhere our color die cuts together, this is where we get to see the magic of the layering dies come together!
Now we still have two white die cuts left! We want to glue them to the back of our focal point… By doing this, they will not be seen on the back but they will create dimension between the layers of our egg!

I stamped my sentiment from the Just Because Clear Stamp Set onto white card stock using my Black Versafine Ink and added black embossing powder and heat set until melted. I used the matching die to cut out my sentiment and adhered it to the inside of our card base.

We don’t always have to put our sentiment on the outside, LOL…

For our final step I used my sparkle pen to add just a touch of shimmer to my egg!

As always, I hope you enjoyed today’s project… and if you want to see more details just click on the video below and see how these projects come together step by step!
Make sure you stay tuned for more wonderful projects coming soon! Have a great day and always remember… Be Creative!

Supplies


