
Hello Everyone and Welcome Back!
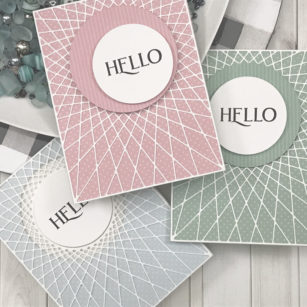
For today’s project, I used the String Art Frame Die to add dimension and texture to our card’s backgrounds!

As before we start out by getting our die cuts ready and cutting our pattern paper down to the size of our card front which is 4 ¼ in x 5 ½ in!


We will then trace a line from the center of the die cut to our pattern paper and use a slightly larger circle die to cut out our shape from our pattern paper.

Let the gluing begin, using our liquid adhesive we will attached out die cut front to our pattern paper. By the way we cut our circle shapes from our paper we will create different focal areas for our sentiments!

Our sentiment is stamped on the center cut out from our die plate and then placed onto our circle cut out from the pattern paper earlier!
As always, I hope you enjoyed today’s project… and if you want to see more details just click on the video below and see how these projects come together step by step!
Make sure you stay tuned for more wonderful projects coming soon! Have a great day and always remember… Be Creative!

Supplies

