
Hello Everyone and Welcome Back!
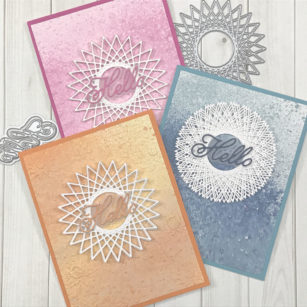
For today’s project I wanted to create some backgrounds for the String Art Circle Die! I used a combination of oxide sprays and embossing folders and played around to see what would happen to the pattern.
I used my mix media paper and my spray box to apply the color. For each color I chose two shades to obtain a variegated effect.
Once they were dry, I grabbed some embossing folders to add texture to the back ground for our focal point.
While they were drying, I grabbed my die and cut it out of white card stock multiple times for the different techniques I was going to complete.
I put the die together in three different ways. The first I simply layered three to each other. This creates a wonderful chip board that will hold up nicely through the mail.

The second I only used my liquid adhesive in the center ring of each of the circles. This allowed the tips of the string art to lift and give more texture to the image.

For the final card when applying each layer to each other I shifted the die over one section on itself. This gave a great effect of the die and really showed the string art!

As always, I hope you enjoyed today’s project… and if you want to see more details just click on the video below and see how these projects come together step by step!
Make sure you stay tuned for more wonderful projects coming soon! Have a great day and always remember… Be Creative!

Supplies


