Hello everyone, it’s Amanda from Twiddler’s Nook bringing you a beautiful gift box tutorial today.
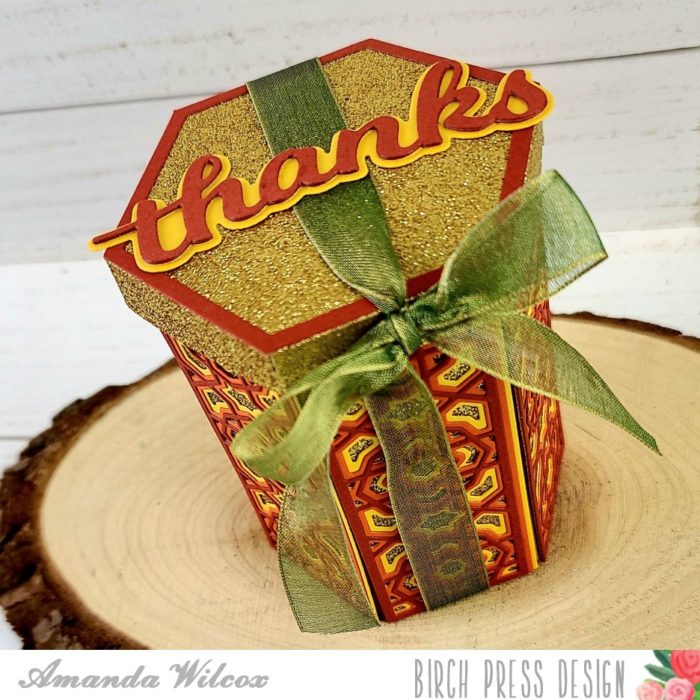
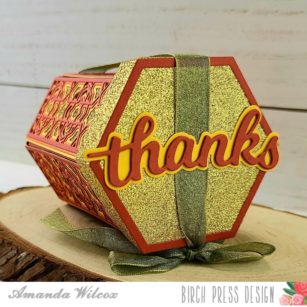
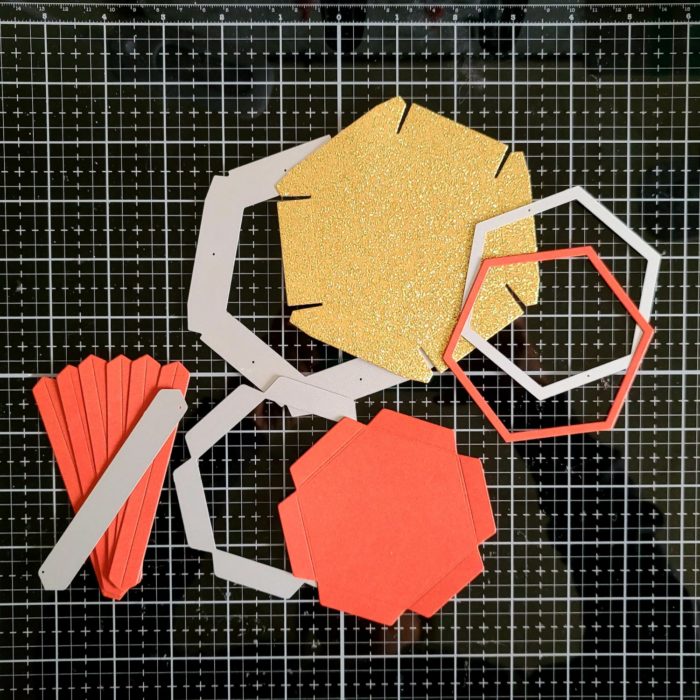
I paired the newer hexagon box lid and base with the mini grandoise bevel plates for a bold autumn feeling gift box.
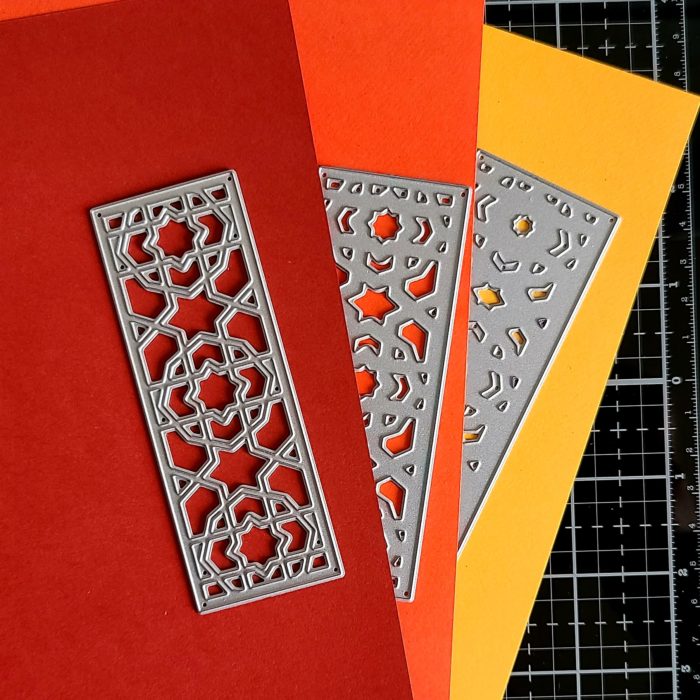
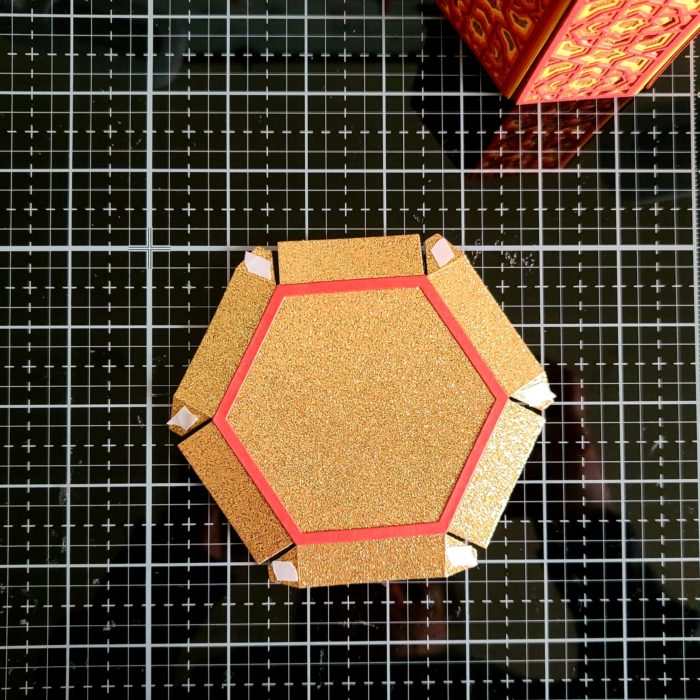
I chose the colors of paper I wanted to use and die cut each layer 6 times.
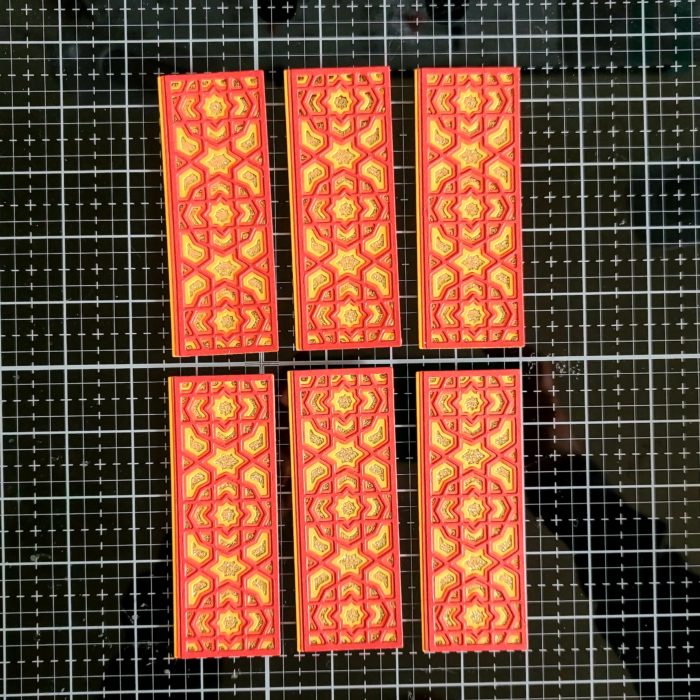
I used liquid glue to adhere all the layers and put acrylic blocks on top while they dried to be sure the layers really stuck together. While those were drying I moved on to the lid and base.
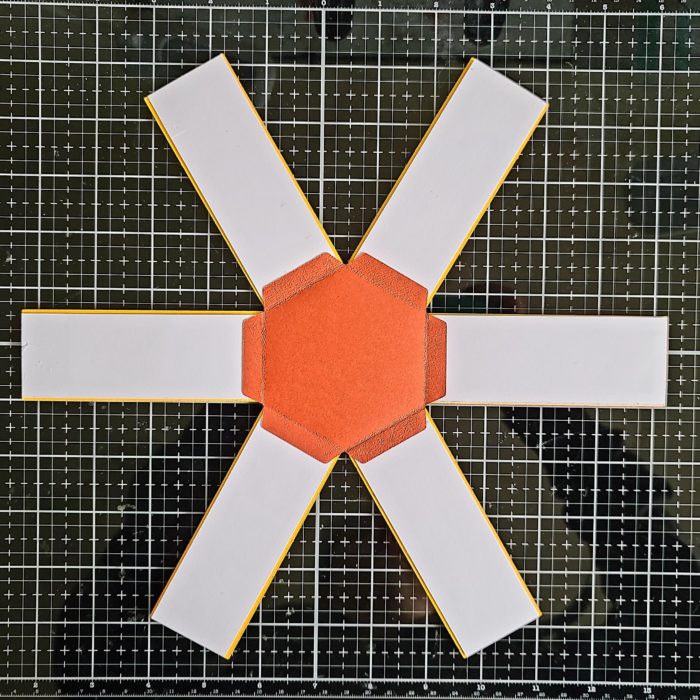
I die cut all the pieces needed and set the base and corners aside while I adhered my lid together.
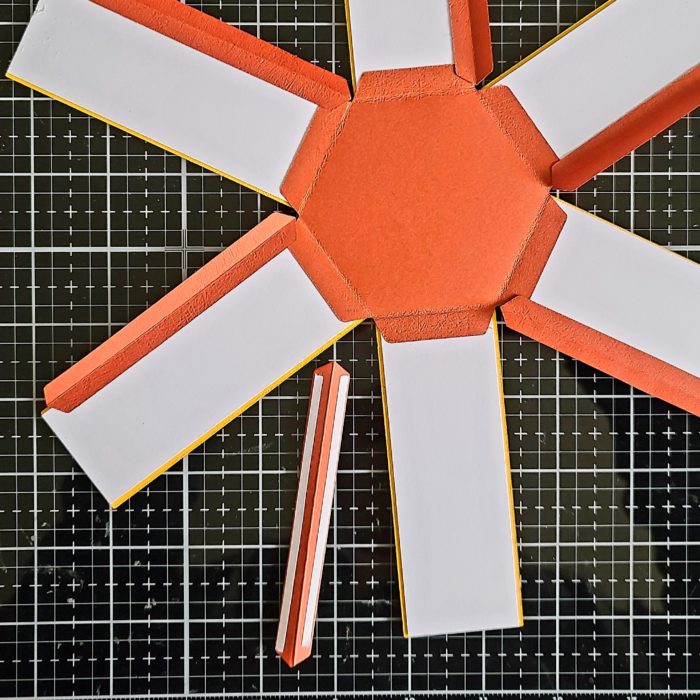
I used liquid glue to adhere the frame on top and tear tape for the tabs on the side. ***Disclaimer: Learn from my mistake and take your time with this piece. Use liquid glue and tweezers on tab at a time. The tear tape didn’t stick to the glitter paper and I ended up fixing it the next day.***
Finally, I adhered my layered sides to the tabs on the base with tear tape. This worked because it was sticking regular cardstock to regular cardstock, no glitter.
Finally, I added tear tape to the corner pieces and adhered them to the layered panels one at a time. Then I removed the second piece of release paper and formed my box, one side at a time.
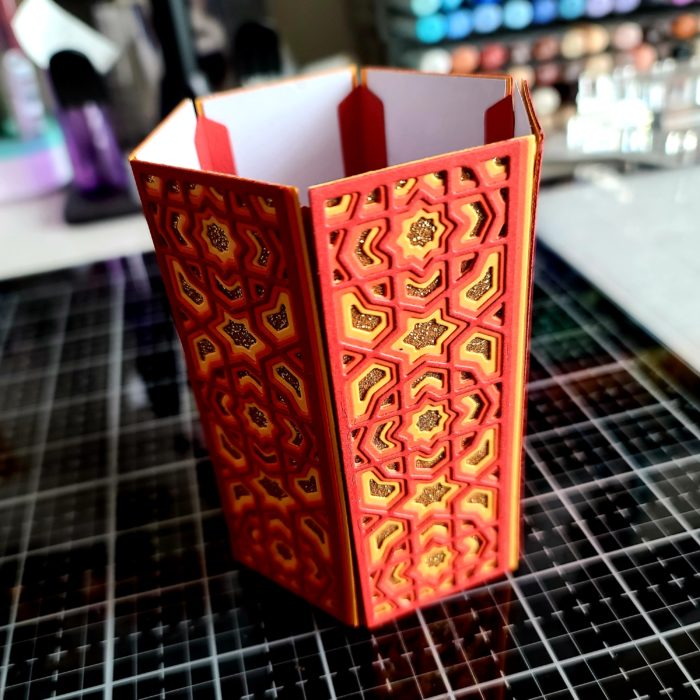
Here’s a look at it all glued together before I put the lid on it and finished things off. It’s just beautiful and the options are endless with colors!
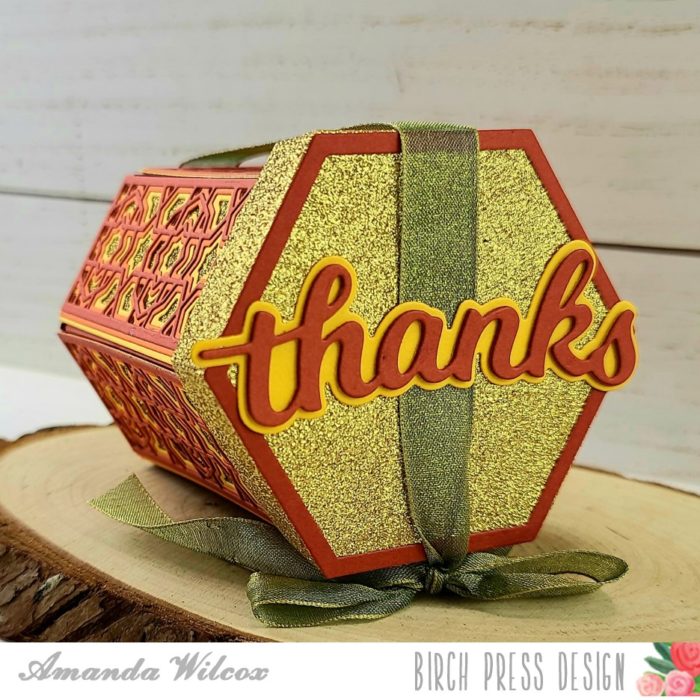
To finish things off, I cut an extra long piece of green organza ribbon and tied it around my box. Then I die cut the word “thanks” and it’s shadow and glued them together. I did layer 4 sets of the actual word together for a little dimension. Then I used liquid glue and adhered the word and ribbon to the box lid.

I’m blown away at how regal this looks and how fun it was to build. They would be amazing party favors or great for special gifts too.
What would you put inside a box like this? I’d love to know!
I appreciate you sharing your time with me. Have a fabulous day!

Supplies


