Happy Tuesday and welcome back to the Birch Press Design blog. On Saturday I shared a card I created using the Adornment Peony die set – post found here. Today, I’m sharing what I did with the pieces I saved after using the outline for the previous card.
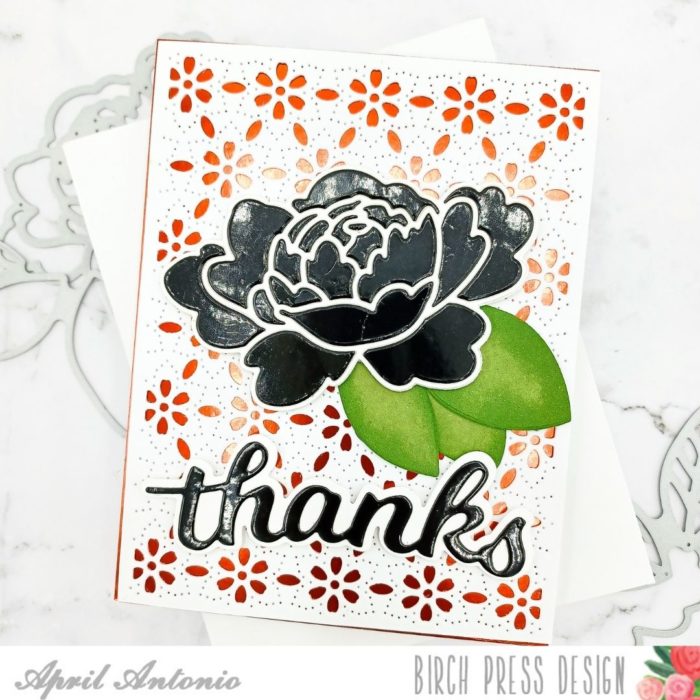
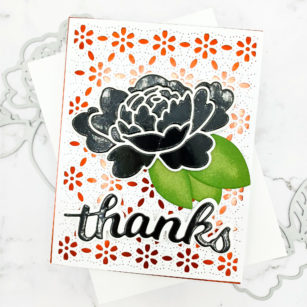
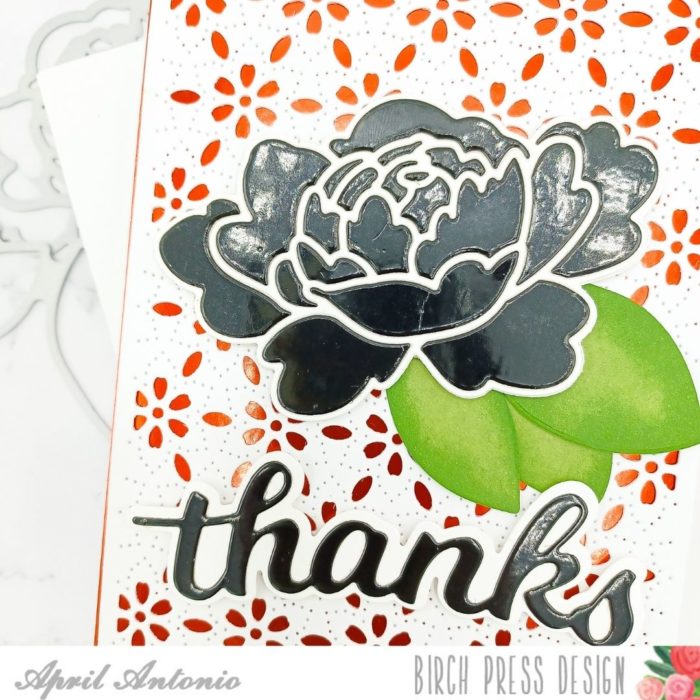
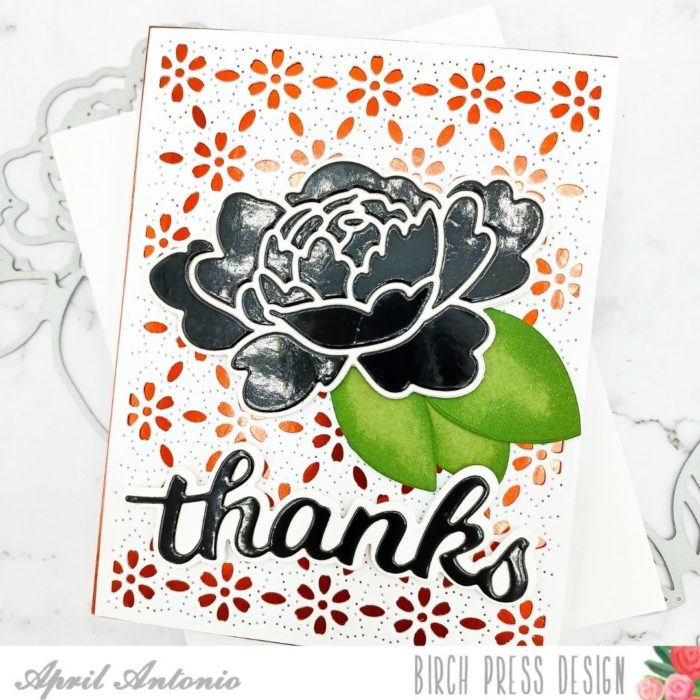
First, I cut the Adornment Peony die – both the detailed and the outline die – from heavyweight white cardstock. I did adhere a double sided adhesive sheet to the white cardstock before die cutting it. I then adhered the outline of the peony to the solid outline piece.
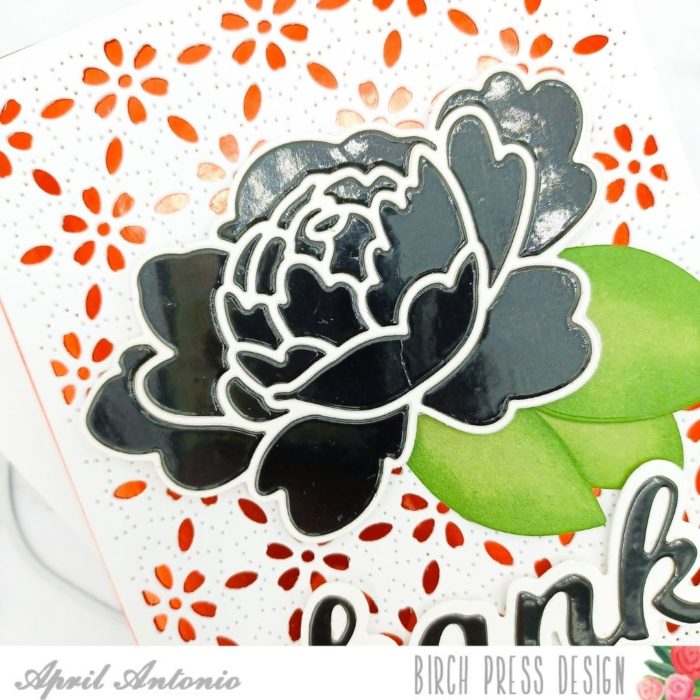
Next, I took the black pieces from my previous card and used them to do die cut inlay into the peony outline. I made sure to save all the little pieces so they could be glued into their respective spaces. Next, I took some of the leftover leaves I had and did some light green inking on the edges.
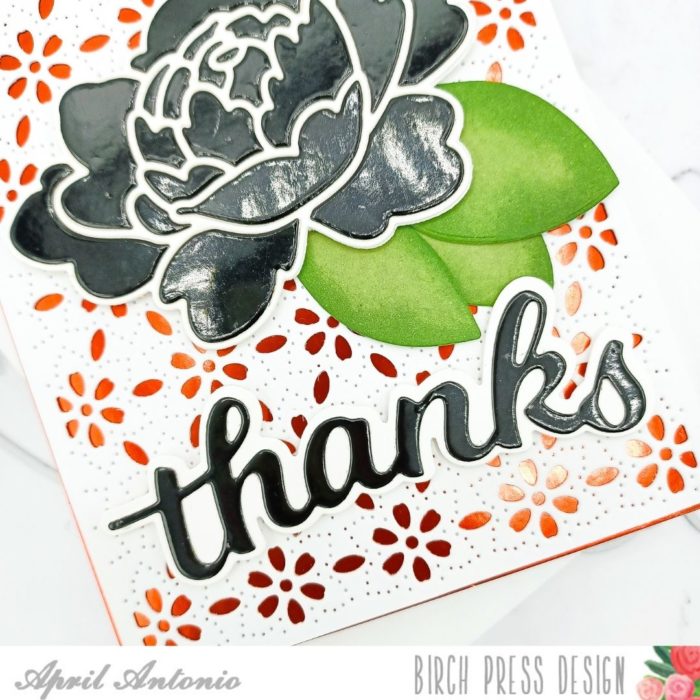
To create my background I cut a piece of red foil cardstock from the Rainbow Reflections Mirror Pad to 4.25″ x 5.5″. I glued this to an A2 card front. On top of this I glued Layer B from the Flora Plate Layer Set because I wanted to make sure the red foil would show through some of the background.
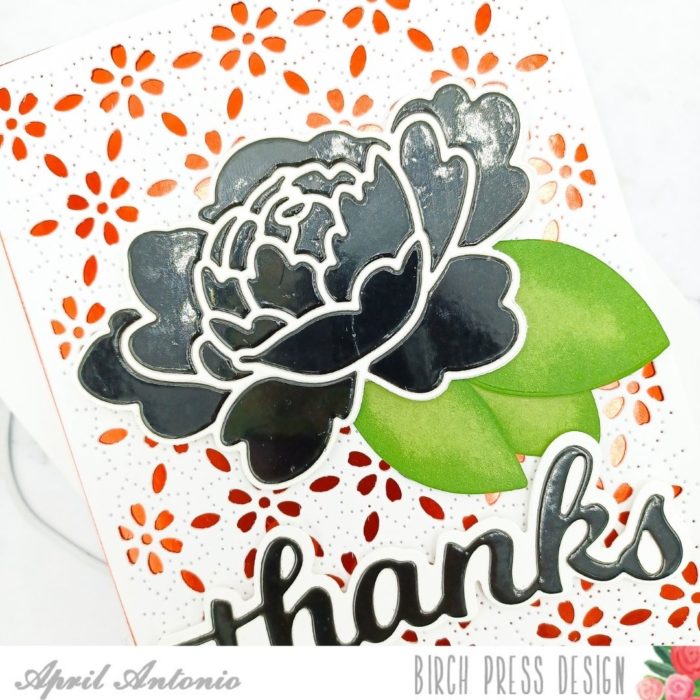
I adhered the assembled peony and leaves using some thin foam tape. I also cut out the ‘thanks’ and shadow using the same Thanks Honey Script I used for the previous card, keeping with the theme of white and the shiny black cardstock.
That is it! This card was easy to put together, and another way to use black, shiny cardstock this Spring.
As always, I hope you’re inspired to create and have a great rest of your week.
-April

Supplies


