Hello and welcome back to the Birch Press Design blog. I’m so excited to be joining you this Friday with a project featuring some of items from the newest release.
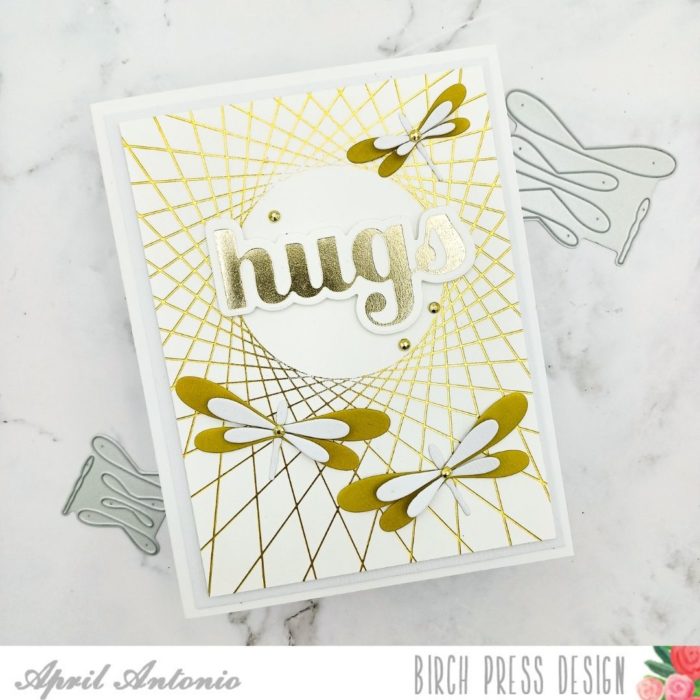
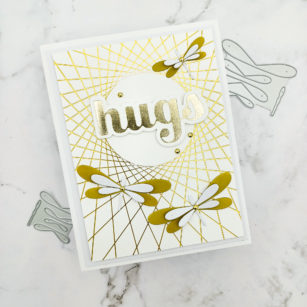
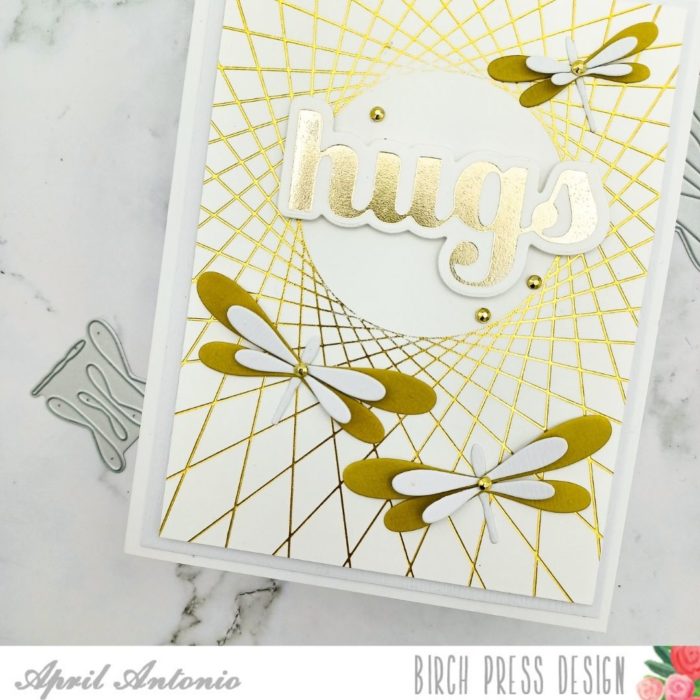
I’m loving today’s project because it is gold galore. To start, I used the new String Art Frame hot foil plate to create the delicate webbed background and the new Hugs Sugar Script hot foil plate to create the golden ‘hugs’ sentiment.
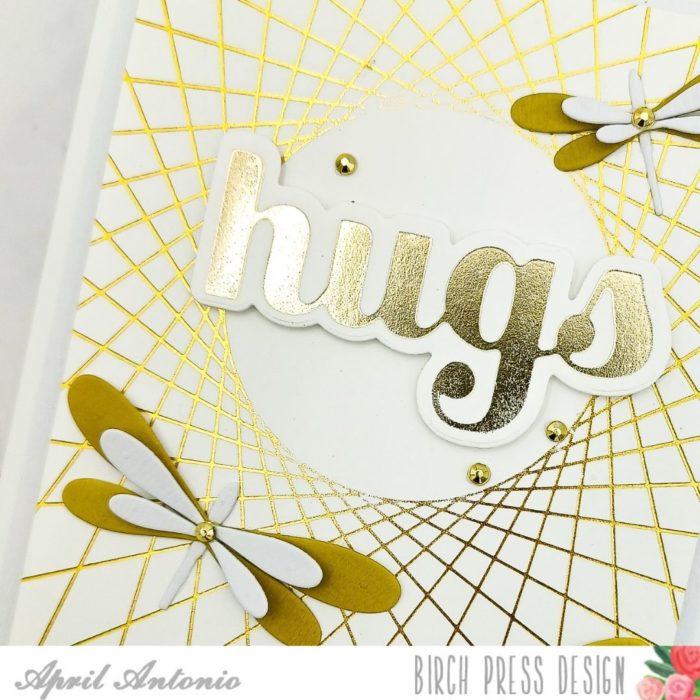
Next, Birch Press has a new Simple Dragonfly die set that is really fun. It let’s you create both large and small realistic 3D dragonflies. I decided to cut this twice using the large die set and once using the small die set from heavyweight white cardstock.
I then took the bottom layer and ink blended the Stardust color from Concord & 9th onto the bottom layer of the dragon fly. Then, using liquid glue, I adhered the top white layer, making sure to put only a dot of glue in the center so that the wings could remain free to ‘fly’.
Once all my pieces were assembled I put together the entire card. First, I cut a piece of the White Woodgrain cardstock to 4” x 5.25” and adhered it to an A2 card base.
Next, I took the card panel I made with the String Art hot foil plate and cut it slightly smaller to 3.75” x 5” and adhered that on top of the woodgrain base with foam tape to create some dimension.
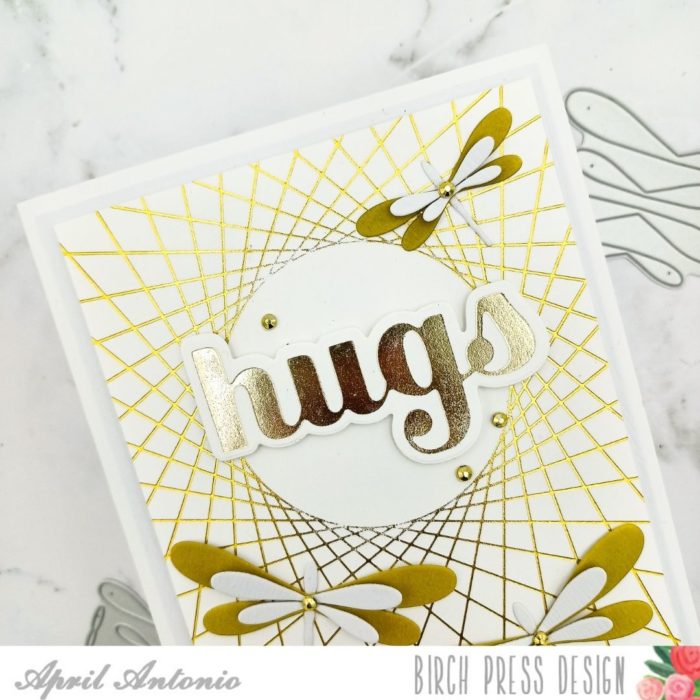
Next, I adhered the hot foil ‘hug’ sentiment into the middle of the card in the circle. I placed my three dragonflies around the hug..two at the bottom and one at the top.
Lastly, I couldn’t help but add even more bling, so I used gold bling from the Christmas Fairy Jewels set to add gold jewels to the center of each dragonfly, and a few sprinkled around the card.

That is it! I love just how much bling hot foiling adds to a card. If you don’t have a hot foil machine just yet, using gold cardstock, heat embossing and adding jewels is a great way to add bling to a card. Birch Press has a lot of great glitter and foil paper pads that can help with this. If you do have a hot foil machine, I would encourage you to check out their new hot foil line.
I hope today’s post has inspired you to go create and keep creating beautiful things!
Have a wonderful weekend!

Supplies


