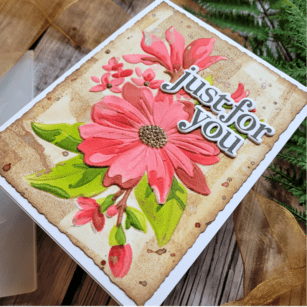
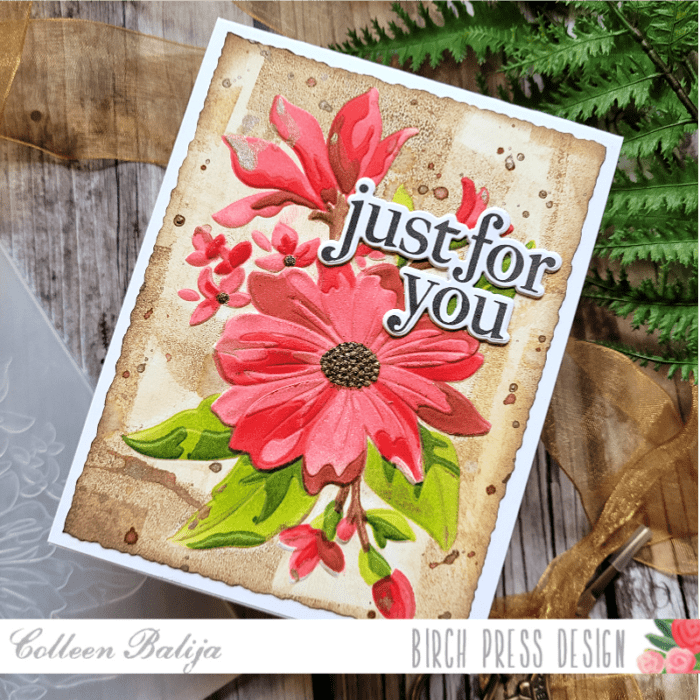
HI friends! Today I’m going to share an easy way to add color to your embossed images using the new Gracious Floral Embossing Folder, Stencil, Stamp, and die set by Memory Box. This set coordinates together to help you create TONS of unique cards! I’ve linked the Supply List at the end of my post if you’d like to purchase any of the items (and I think you will want this set!!!)
First step was to create a colorful background to the embossed Gracious Florals. I applied shades of brown ink directly onto the flat side of the Gracious Florals embossing folder using my mini brayer. The brayer creates a unique pattern, and I change directions with it to get an even more playful, mixed media look (see the photo below). If you don’t have a brayer, use your ink pads directly onto the embossing folder and change directions with the ink pad. You’ll get a similar look!
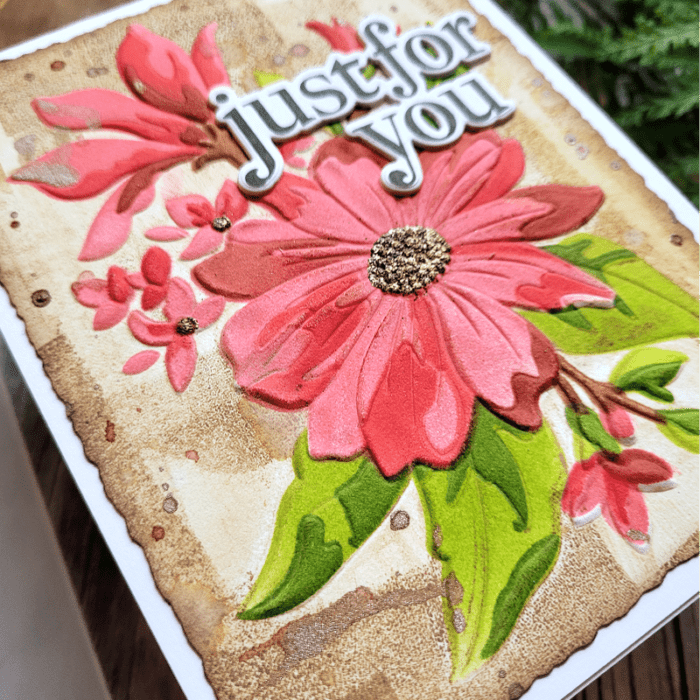
Once I inked up the embossing folder, I added a white piece of heavy duty cardstock inside the embossing folder, closed it, and ran it through my die cut machine per the usual method of dry embossing. I was left with this awesome colorful background, but the flowers remained white!
Next, I stenciled the flowers using the coordinating stencil set from Gracious Florals.
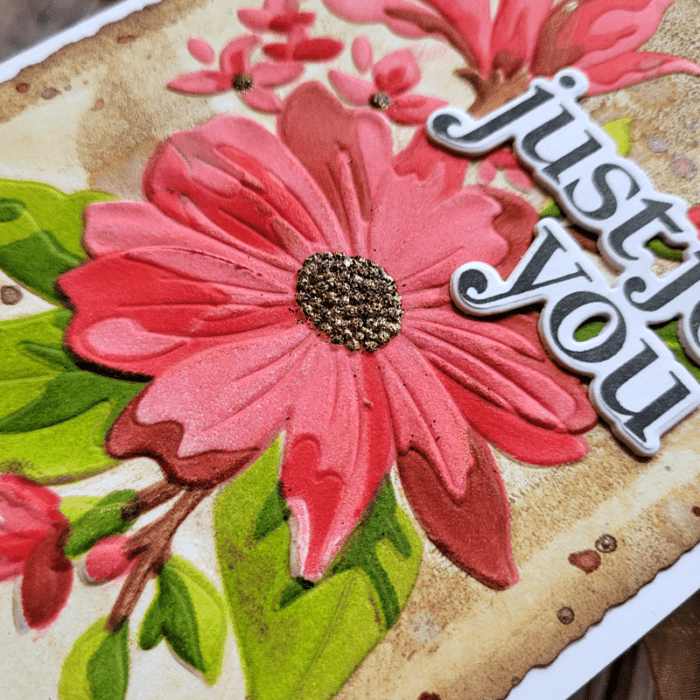
The flowers are bold and absolutely BEAUTIFUL!!! The stamp set comes with the outline image of these flowers so you colorists will have a great time coloring the image! Getting back to my stenciling, I stenciled the layers using coral shades for the florals because they looked bold against the brown background. Then I stenciled the leaves in green and added gold embossing powder to the stamin for a touch of shine. I also added metallic gold splatters over the entire card panel for even more shine! Then I die cut the card panel using my deckled paper trimmer, added brown ink to the edges of the panel, and adhered it over a white 5.5×4.25 card base.
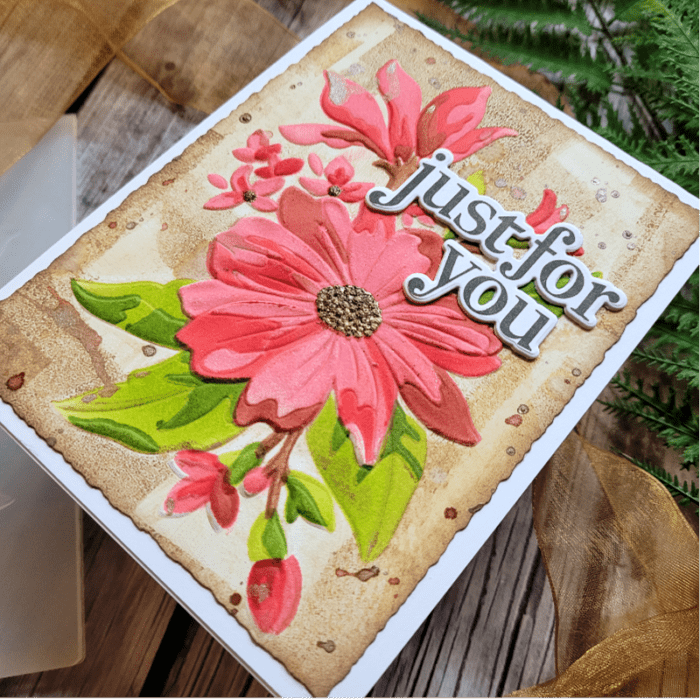
The last step was to add the sentiment from the Gracious Floral stamp. The sentiments are bold and amazing, and I love how the die cuts right around the wording! I kept the sentiment simple in black and white so that the floral remained the focal point.
I love how the brown background seemed to surround and embrace the florals! I hope you enjoyed today’s post and thank you for visiting me!

Supplies


