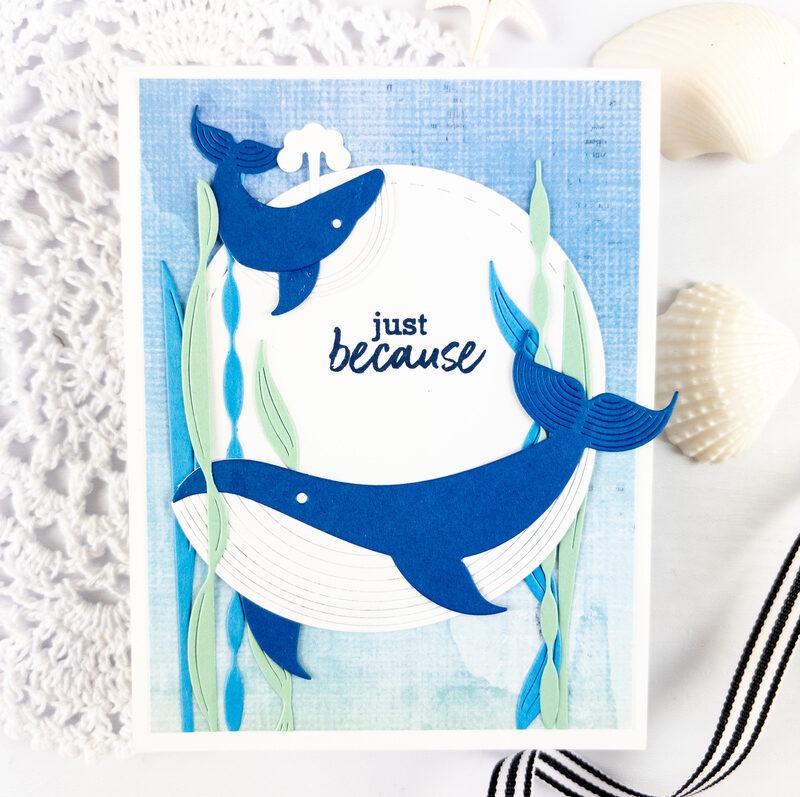
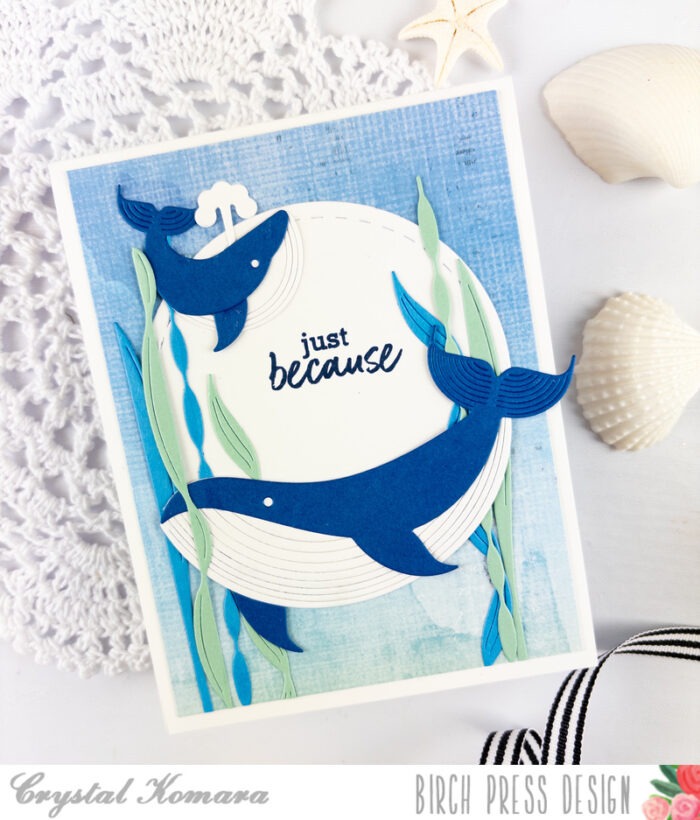
Hello readers! This is Design Team member Crystal Komara here with you today sharing a card that I made using products from the Block Print Ocean inspired collection. Yes, this is my third card this month using some of these products, because it is such a beautiful collection, particularly if you are into the nautical theme.
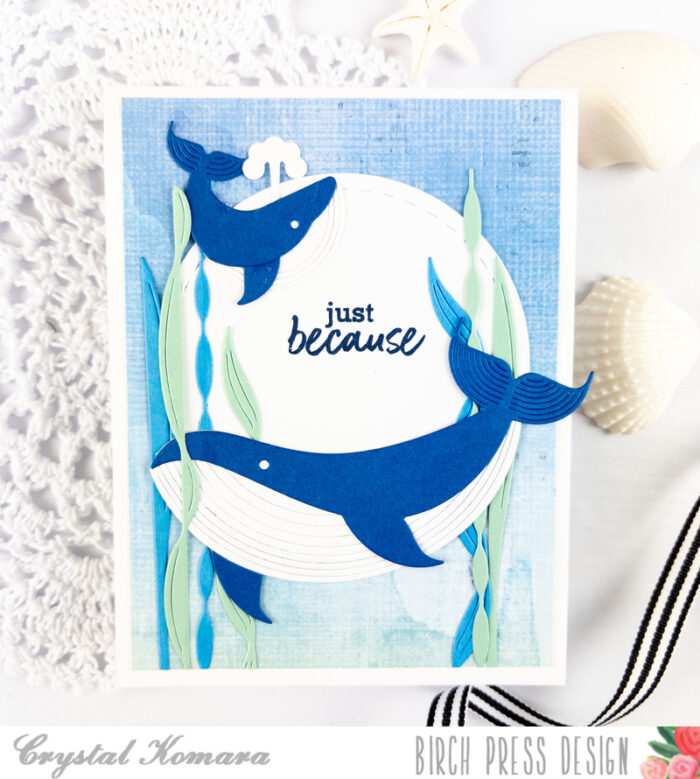
The base of this A2 sized card is made from 110 lb. Neenah Solar White Smooth cardstock. I used a piece of pre-watercolored background paper as the first layer. I keep a stack or supply of watercolored backgrounds and alcohol ink backgrounds, because it’s SO much easier to just pull from them, rather than creating on the fly.
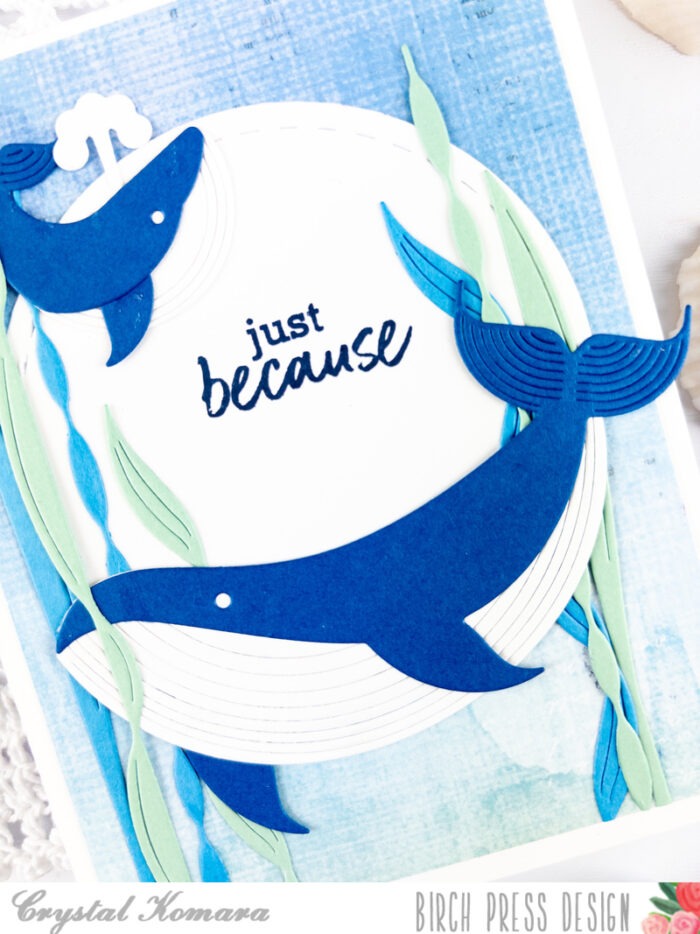
Using the Block Print Majestic Whale and Block Print Whale duo, I die cut the whales from a navy blue cardstock and white cardstock. I used a liquid adhesive to adhere the components together and then once the whale pieces were assembled, I added the whales to the card using 3M foam adhesive for added dimension.
Using the Sea Kelp and Mini Fish dies, I die cut the key from a lighter blue and a green cardstock. I stamped the sentiment on a white circle in navy ink.
What a majestic whale! It makes for such an elegant card. Thanks for visiting and have a wonderfully creative day.
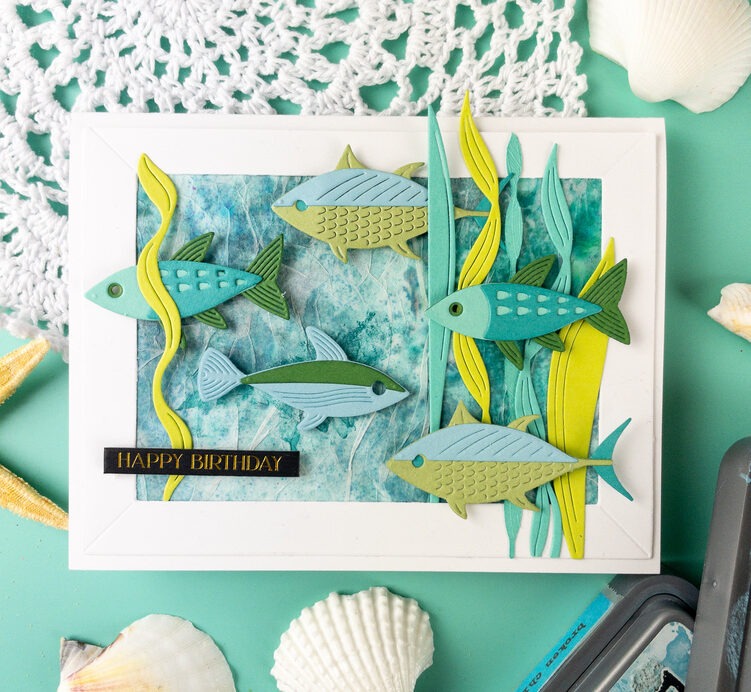
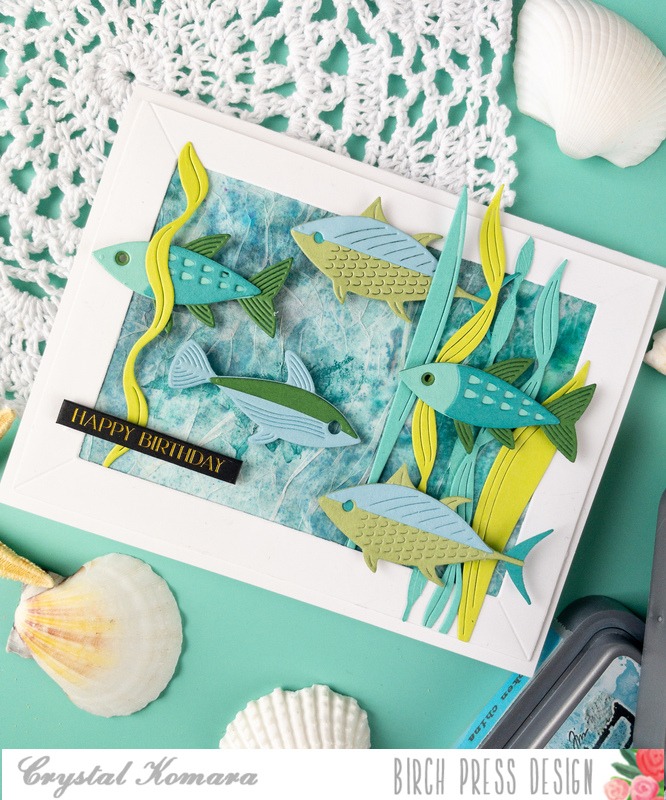
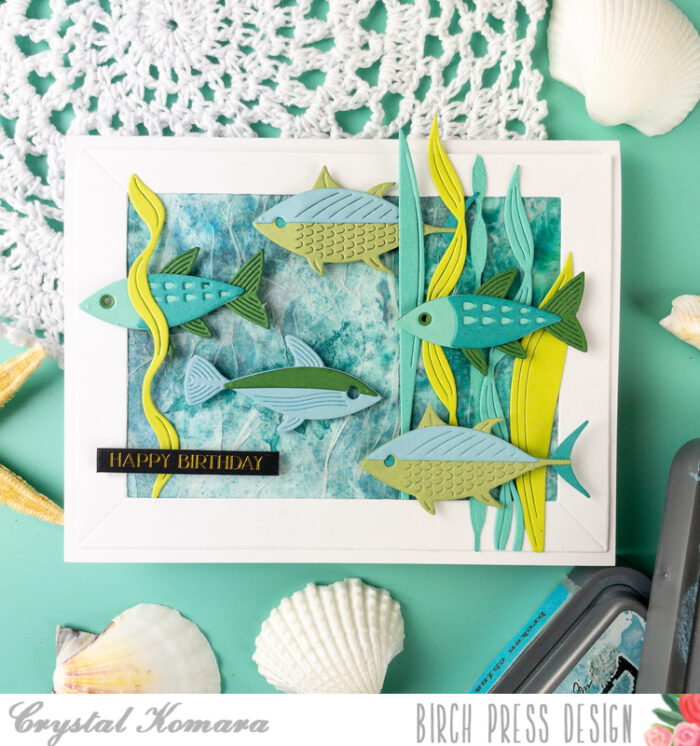
Hello friends and happy Tuesday! I hope your week is off to a good start. This is Design Team member Crystal Komara here with you today, sharing a card that I made using a variety of new Block Print Ocean themed products. Let’s take a closer look at the cards and which products I used below:
The base of this A2 sized card is made from 110 lb. Neenah Solar White Smooth cardstock. I used a piece of my own premade watercolor paper for the background of the card and cut a frame around the watercolor paper.
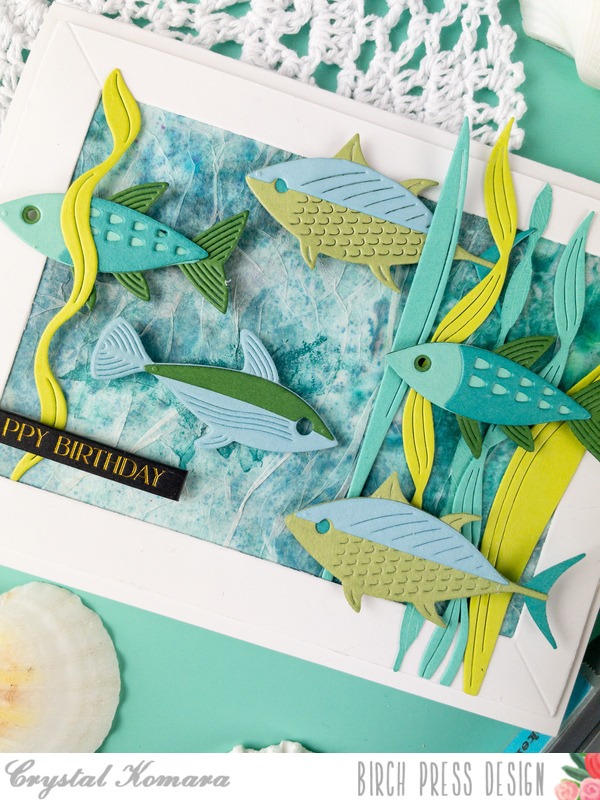
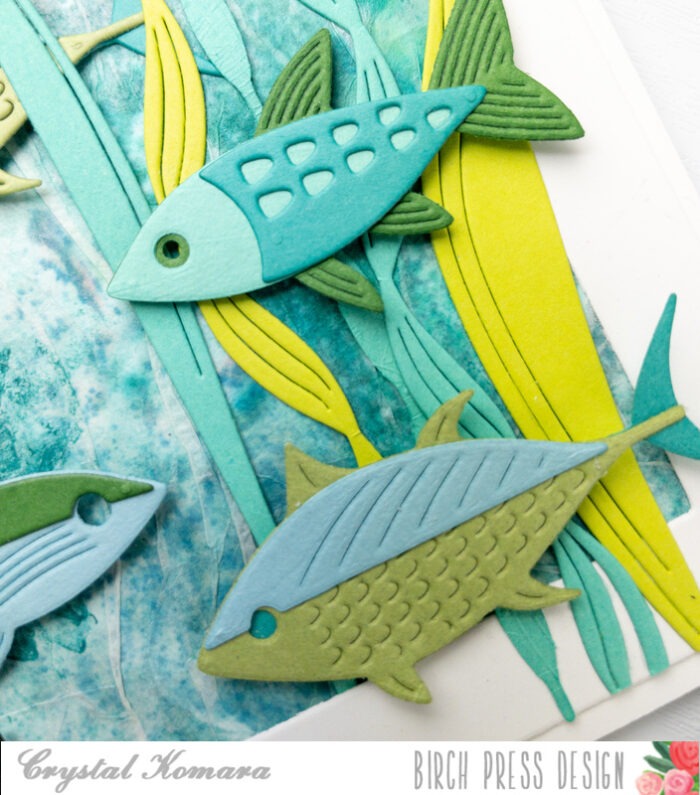
I adhered all of the fish to the card using 3M foam adhesive for added dimension and then lastly, I added a tabbed foil sentiment (from sister company Memory Box) to the card.
I love these beautiful new ocean themed products. Thanks for visiting and have a wonderfully creative day!
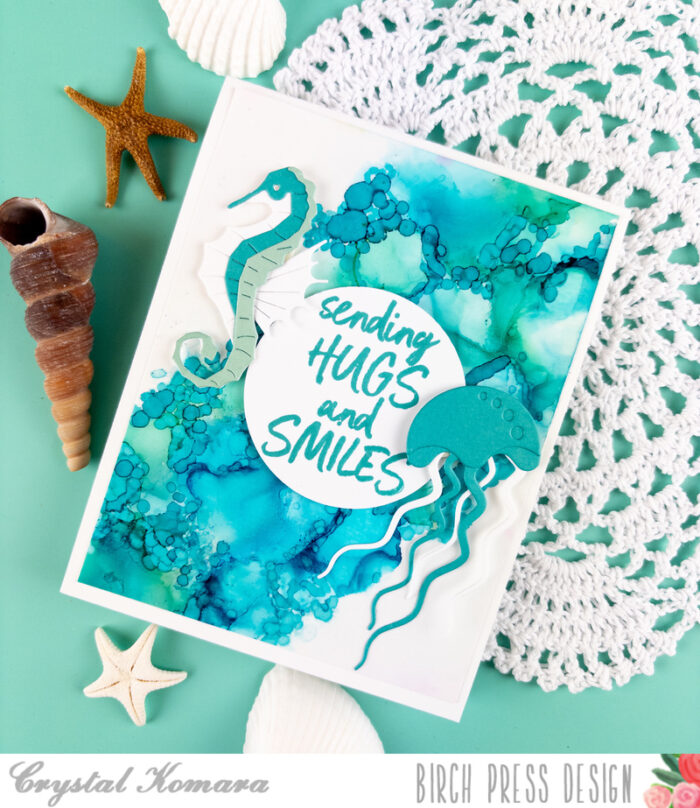
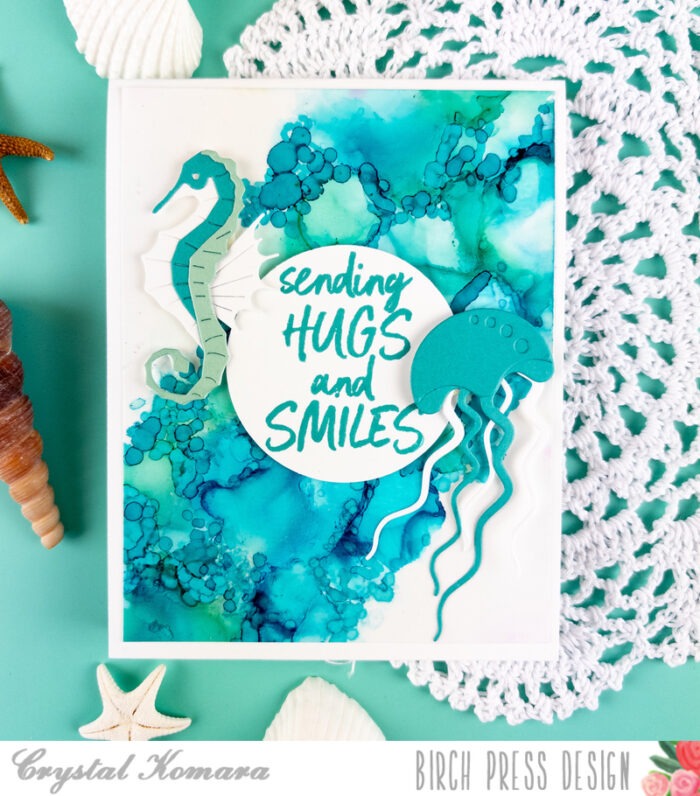
Hello Birch Press Design friends and fans! This is Design Team member Crystal Komara here with you today sharing another card that I created using products from the Block Print Ocean Inspired collection. What a beautiful collection this is!
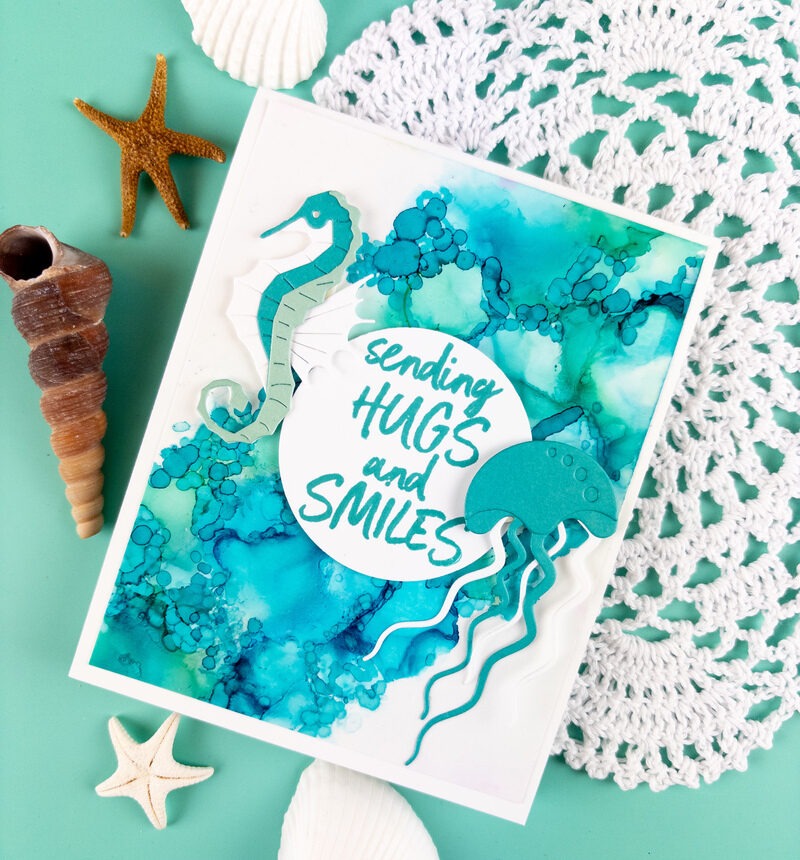
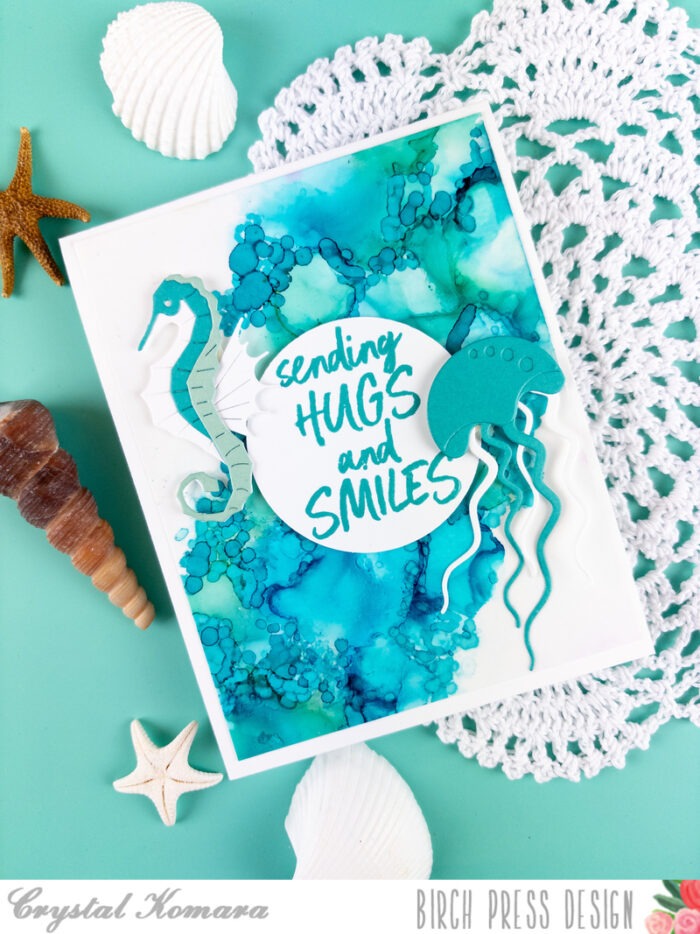
The base of this A2 sized card is made from 110 lb. Neenah Solar White Smooth cardstock. This is my go-to cardstock for everything! I use it to make cards, card bases, die cutting, stamping and Copic coloring. It’s a great quality paper and one that I highly recommend.
For the first layer of this card I used one of my pre-made alcohol ink backgrounds. I keep a stash of pre-made alcohol ink background in a drawer, because they are so easy to pull from, rather than pulling out all that ink and making a mess on the fly.
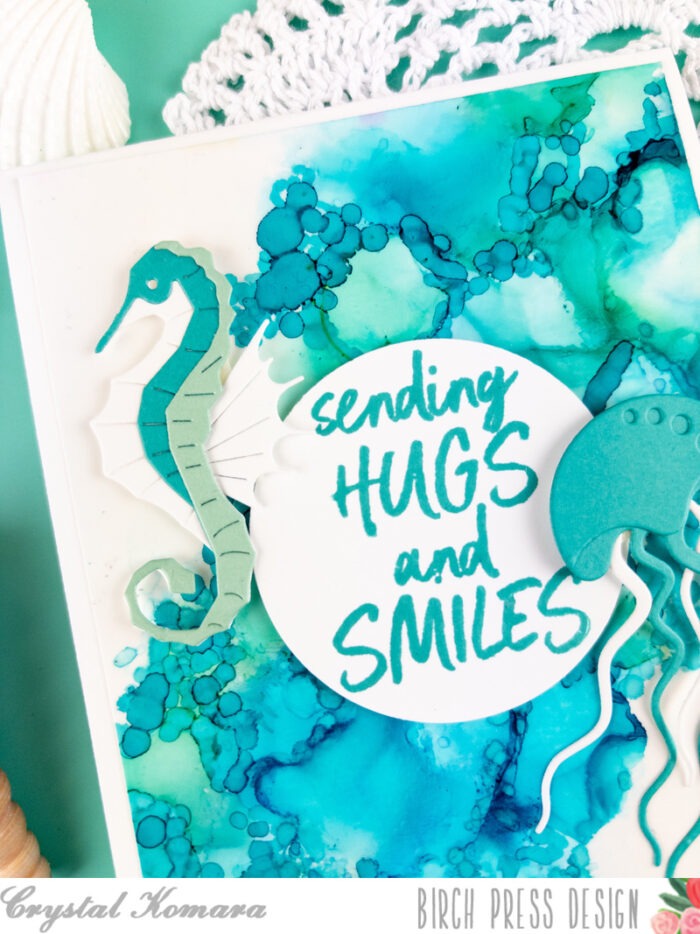
On a 2″ circle of white cardstock, I stamped the sentiment “sending hugs and smiles” in teal ink. Unfortunately I did not realize it at the time, but this sentiment is from a now-retired set. Sorry! But, you could use ANY saying of your choosing and that would work just fine for this card.
Using the Block Print Proud Seahorse and the Block Print Floating Jellyfish, I die cut the pieces from white, blue and green cardstock. I then assembled the small pieces using a fine tip liquid adhesive. I adhered the seahorse and the jellyfish to the card using 3M foam adhesive for added dimension.
The Block Print Ocean inspiration collection is available to shop now online at Birch Press Design. Thank you for visiting and have a wonderfully creative day!
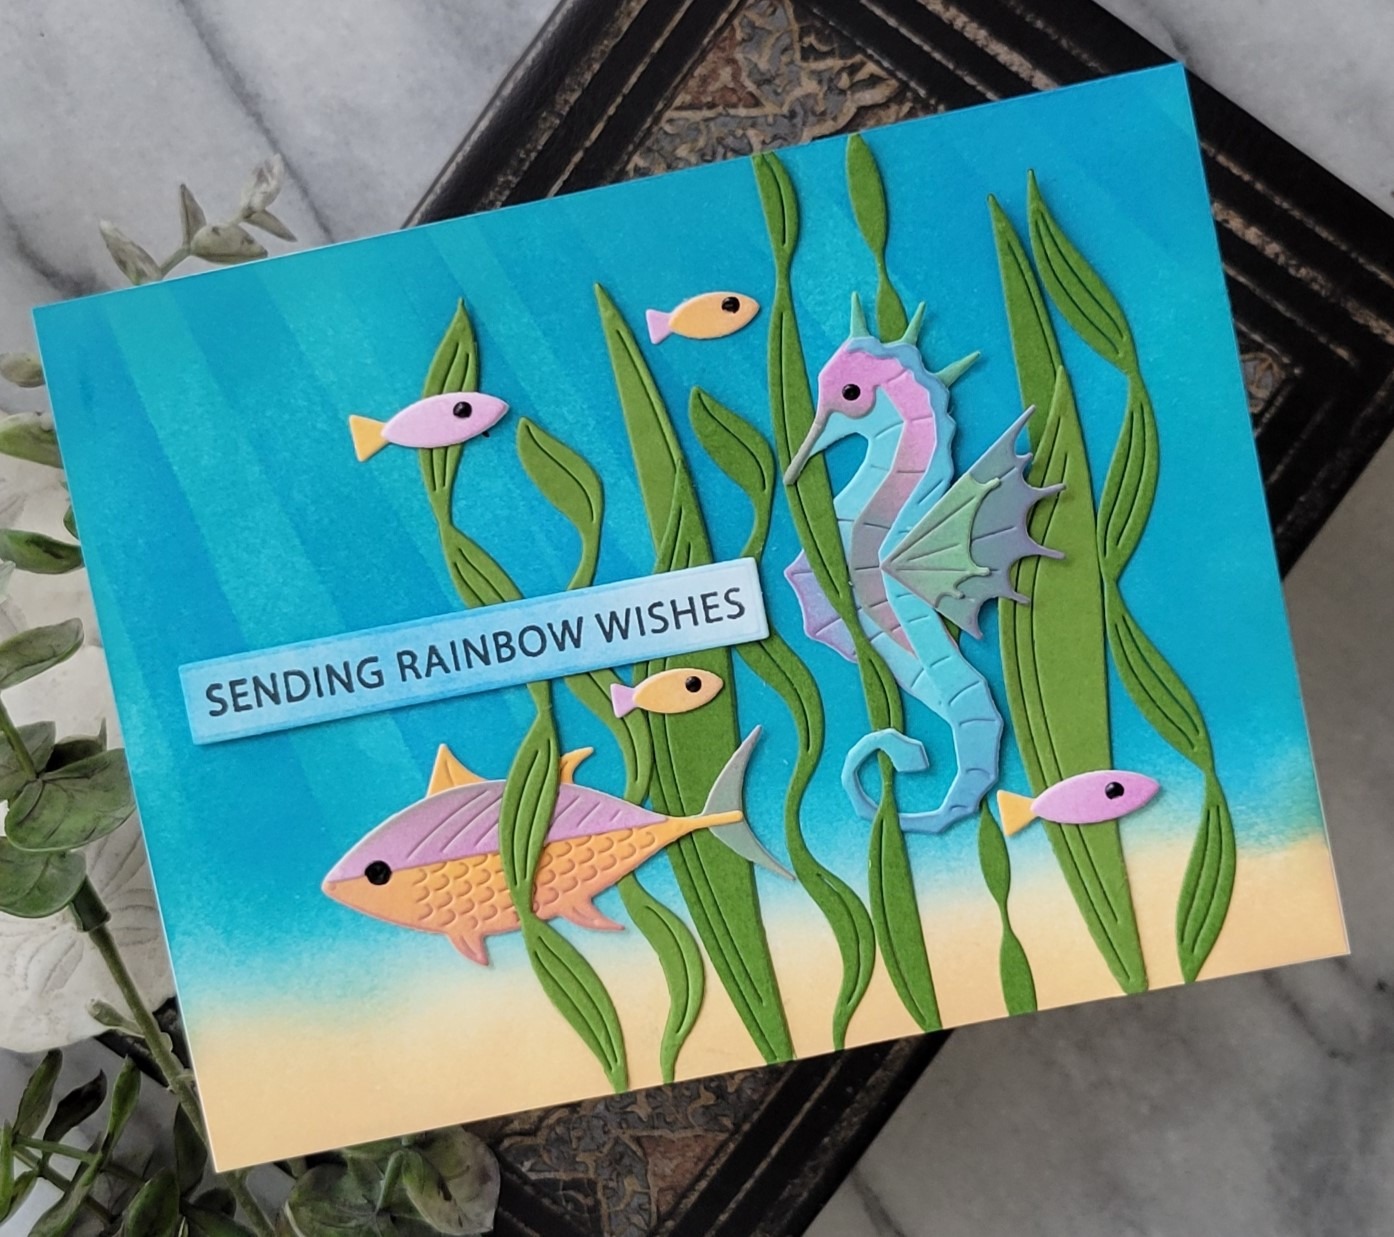
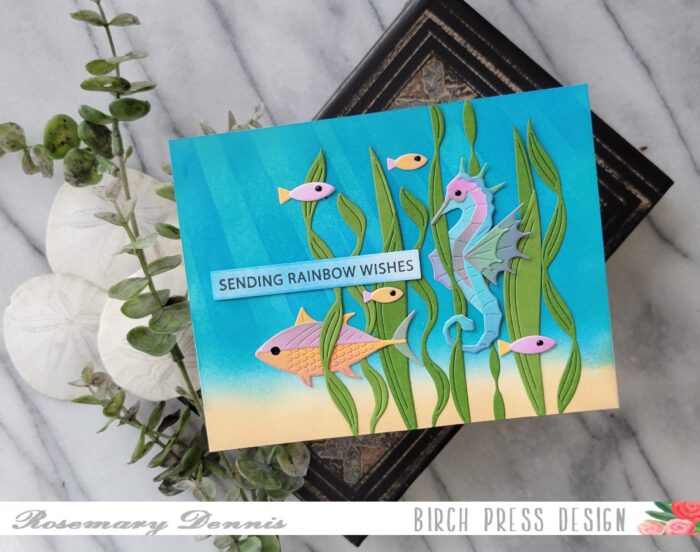
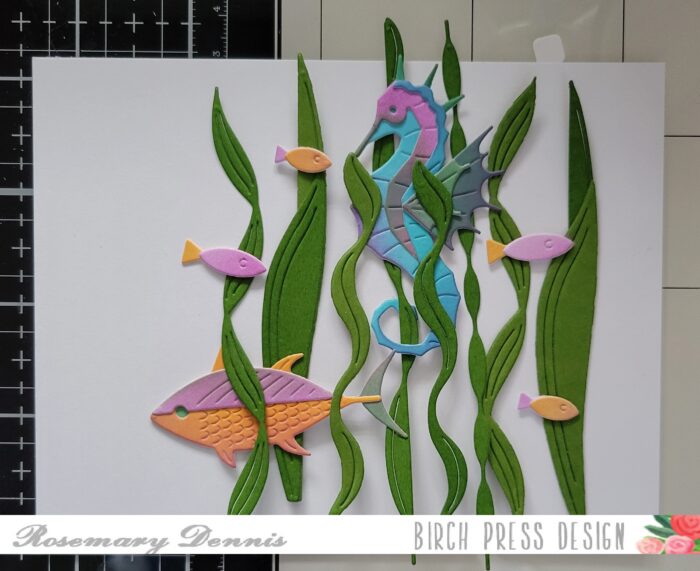
Hello! Hope your September is off to a great start. Today I’m sharing a card that was inspired by a seahorse exhibit that used to be at the Point Defiance Zoo and Aquarium located in Tacoma, Washington where I live. I used the new Block Print Proud Seahorse die set, as well as two other sets from the current release.
The exhibit had several tanks with different species of seahorses with the final and biggest tank exhibiting one of the largest species. It was so fun to watch them swimming around in the water or clinging to strands of kelp. I started by die cutting all the pieces for my seahorse and the fish that would be inside my “aquarium”. I used just a few colors of distress oxide ink to color the seahorse and fish. I did alot of mixing and matching to create colors.
Once I had all the pieces inked up and they were dry I assembled my seahorse and fish. The Sea Kelp and Mini Fish die set is fast becoming one of my most used set from the release. It is so versatile! I thought I needed a little bit bigger fish for my scene so I used the Block Prink Ocean Fish because it was just the right size. Then it was time to play around with the layout. Once I had that figured out I took a photo so I could recreate it.
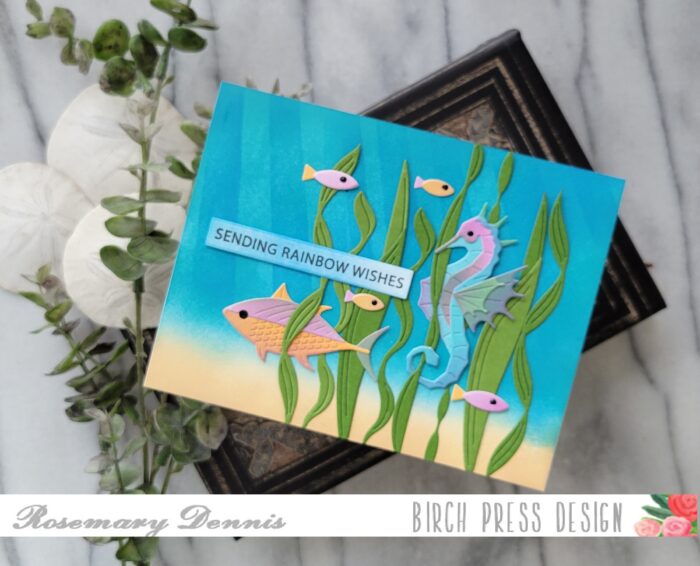
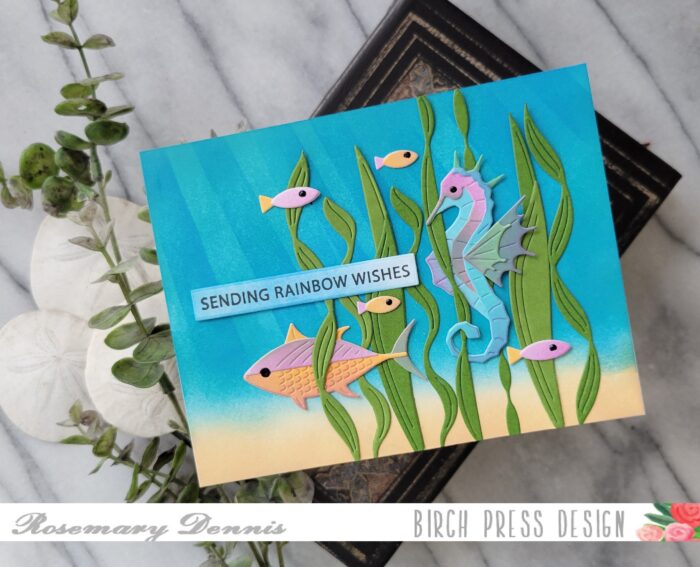
Now it was time to create my background. I inked up the bottom with Antique Linen distress oxide ink for my “sand” and Tumbled Glass and Mermaid Lagoon distress oxide inks for the water. I also used the Light Ray Stencil set to create the filter sunlight look. Now it was time to put together my scene.
Using the photo as my guide I adhered everything in place using liquid adhesive. When I was done with adhereing everything to my background I added the panel to a white cardstock base using strong double sided adhesive. Small dot of Nuvo jewel drops in black were added to the fish and seahorse for the eyes. The sentiment is from the older Rainbow Days Lingo stamp set. I stamped it on white cardstock with black ink, die cut it with a label die and then inked it up with ink left on my blending brush.
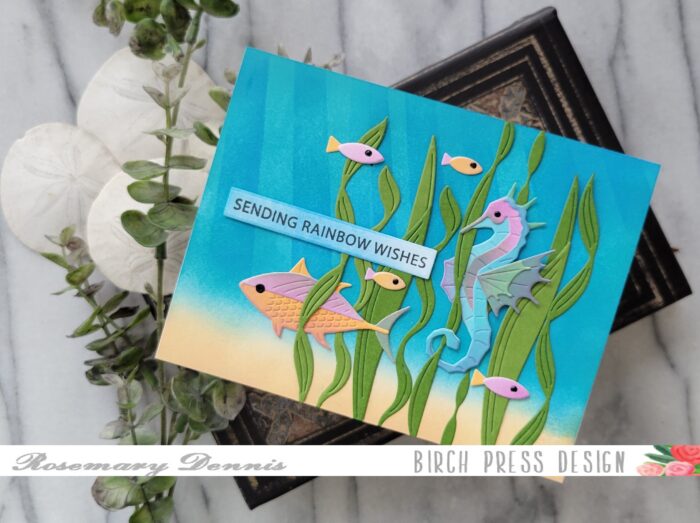
I hope you enjoyed today’s card. I had so much fun creating it! I also wanted to let you know that Birch Press Design is sponsoring the Die Cut Divas challenge this month. You can find all the details on the challenge and how to win here. Thanks so much for stopping by and have a wonderful day.
Hi friends! Christina here to share a masculine nautical-inspired card featuring the most delightful pelican from the new Block Print Pelican die set. He makes the perfect focal point for this little coastal scene I created using the Corner Waves and the Waterfront Pilings. To really play up the nautical theme of this design, I framed up the scene with a porthole window that was a breeze to make with just a couple of nesting circle dies. Let’s dive into the details of this card!
I started by die-cutting all the elements for my scene from colored cardstock. I chose ivory, slate gray, and orange for the pelican, and two shades of brown and matte silver for the waterfront pilings. I chose leaf green for the tiny fish from the Sea Kelp and Mini Fish die set and classic blue for the water. I assembled the diecuts and arranged them in a scene on the center of a light blue cardstock panel.
To create the porthole frame, I first die-cut a large circle from the center of a kraft woodgrain cardstock panel to be the porthole window. I attached this over the scene with foam tape. Then, I die-cut a circle frame from matte gold cardstock using two nesting circle dies. The smaller, inside circle is the same size as the porthole window, so it would match up perfectly. I attached this to the woodgrain panel and added a few matte gold pearls to complete the porthole look.
Finally, I heat embossed a sentiment with cream embossing powder on a slate gray sentiment strip and added a shiny black pearl to the pelican’s eye.
Thank you so much for reading about this masculine nautical-inspired card I created using new dies from the latest release. See you soon!
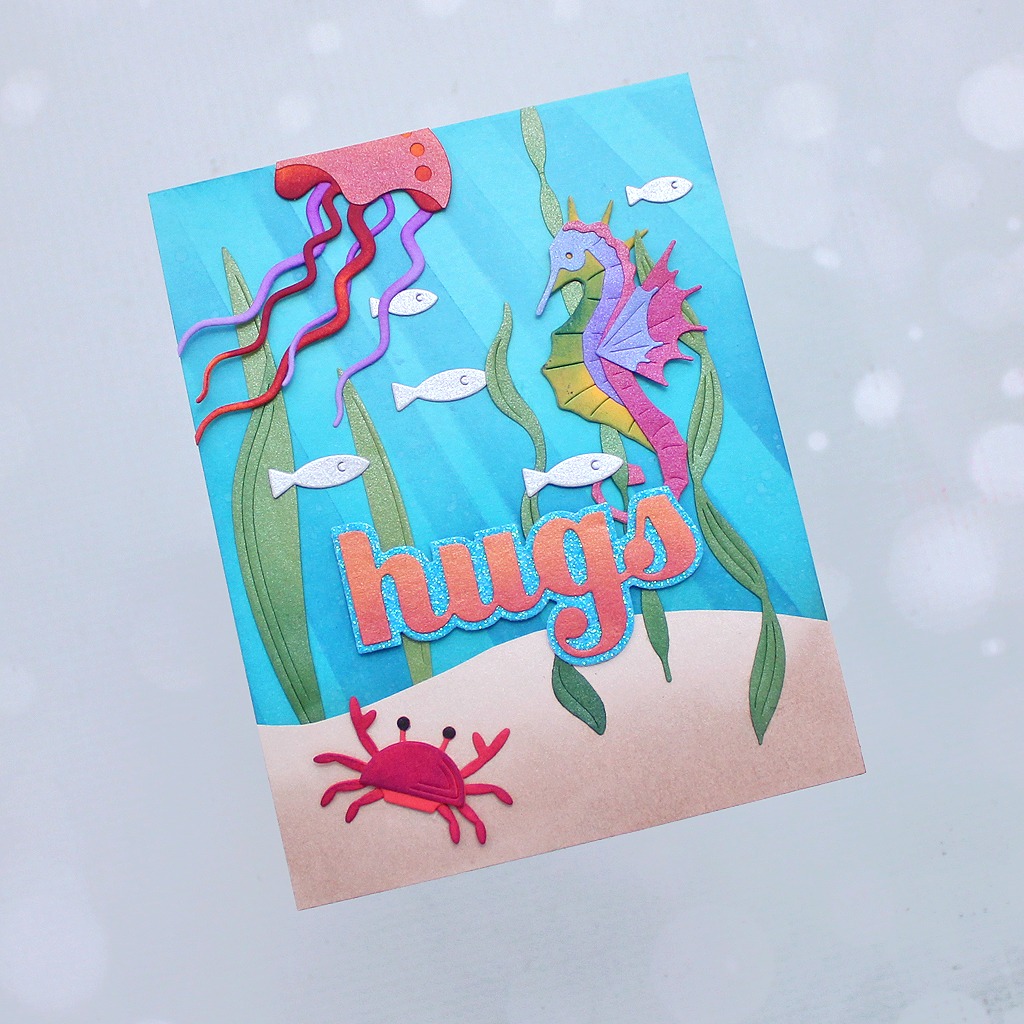
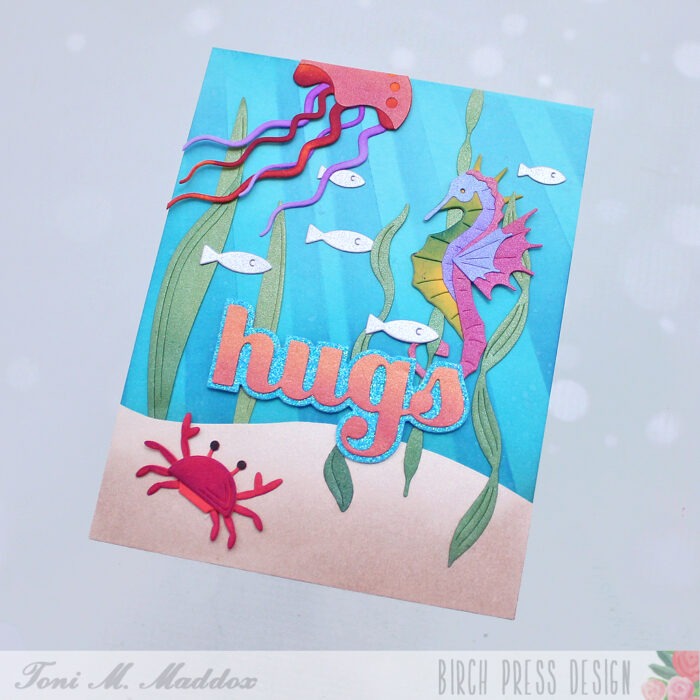
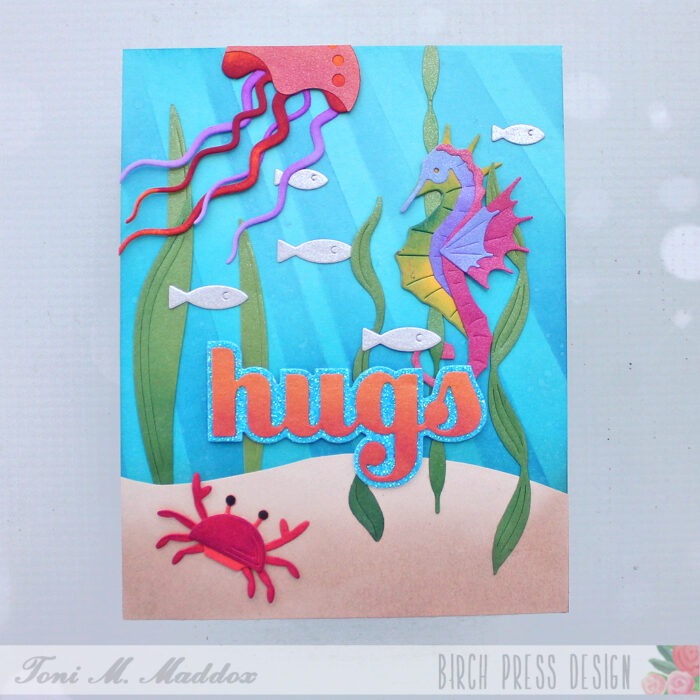
Hello, everyone! This underwater scene was so fun to create. I love seahorses. And that jellyfish–look at it!
My first step was to sponge the blue card base with Catherine Pooler inks and one layer of the two-part Light Ray Stencil. I spattered this with water and set aside.
Next I fussy cut the sand layer using a piece of scrap kraft cardstock and sponged it with CP Sand Castle ink.
I cut a few of the Block Print Sea Kelp & Mini Fish from a shimmery green and silver cardstock. I sponged the Sea Kelp with CP ink for a bit of shading.
I diecut the Block Print Proud Seahorse, Block Print Floating Jellyfish, and Block Print Dancing Crabs from a few Memory Box cardstocks with shimmery cardstock scraps for highlights.
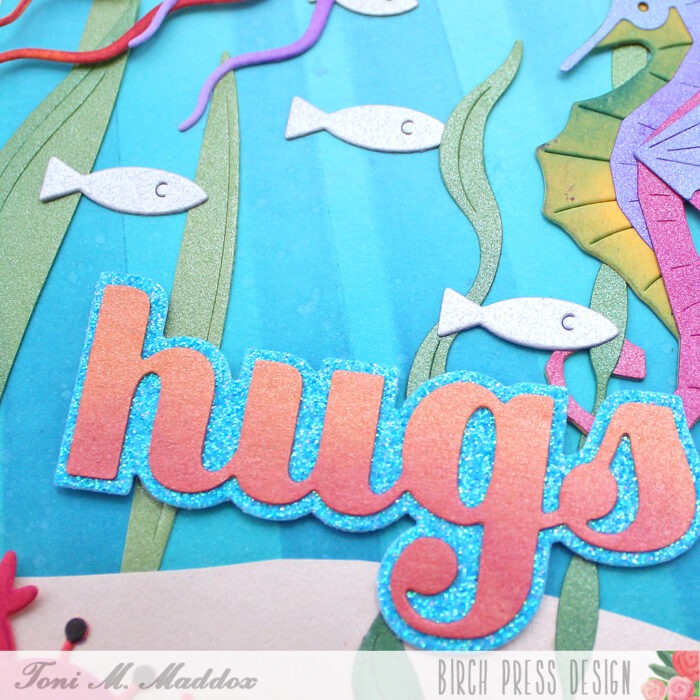
I sponged the cardstocks, including the Sugar Script Big Hugs sentiment, with CP inks. I assembled the final scene, tucking the creatures in among the greenery. So cute!
Do visit my blog, Frankie Helps Craft, for a full list of ingredients and to check out my other projects.
I hope you enjoyed today’s card and have a great rest of your week!
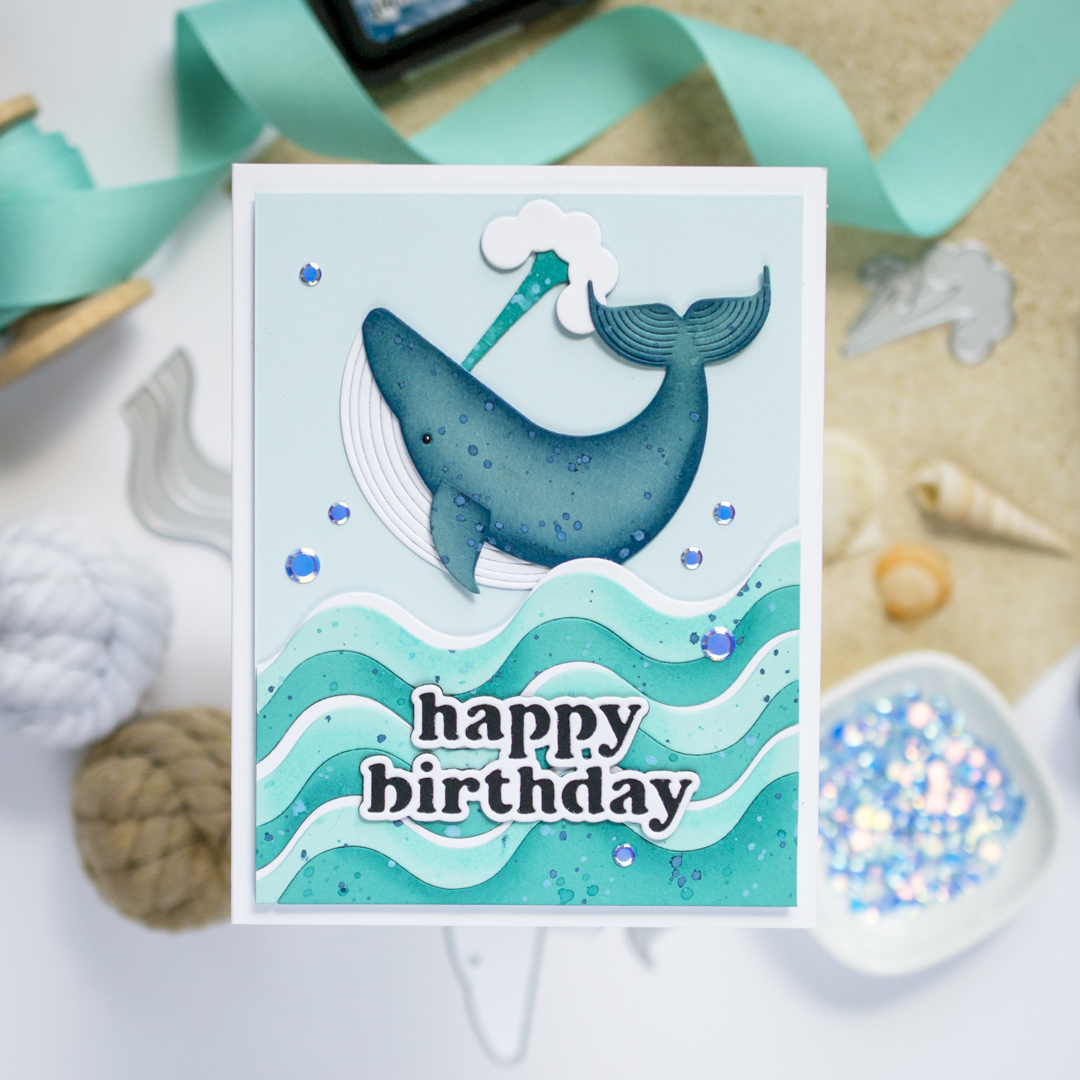
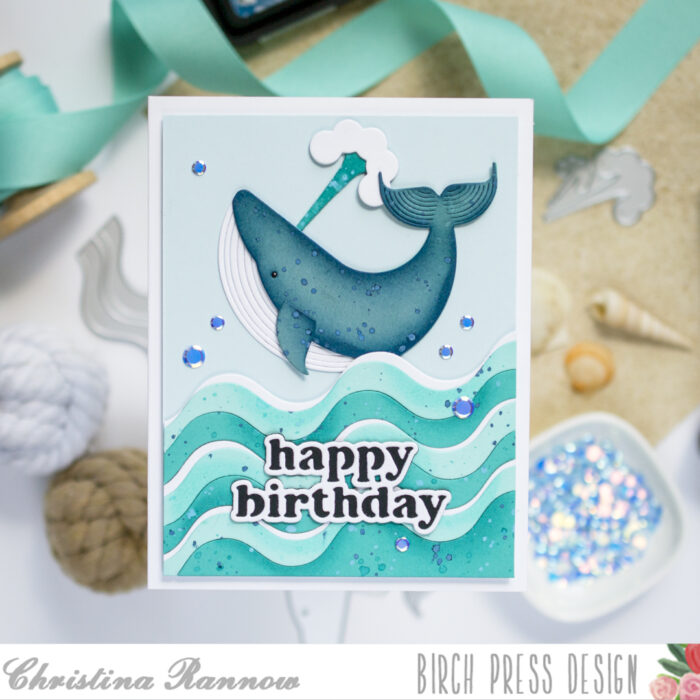
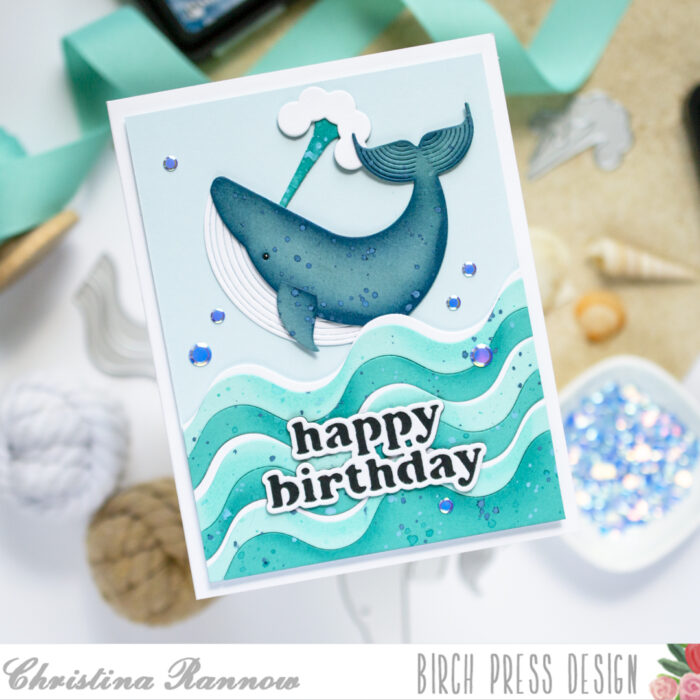
Hello! Christina here to share another card featuring products from the latest ocean-inspired release. I adore this release, and I have many favorites so far, but this whale from the Block Print Whale Duo is at the top of the list! I paired him with the new Corner Waves Die for a fun cool blue ocean scene. Let’s jump in!
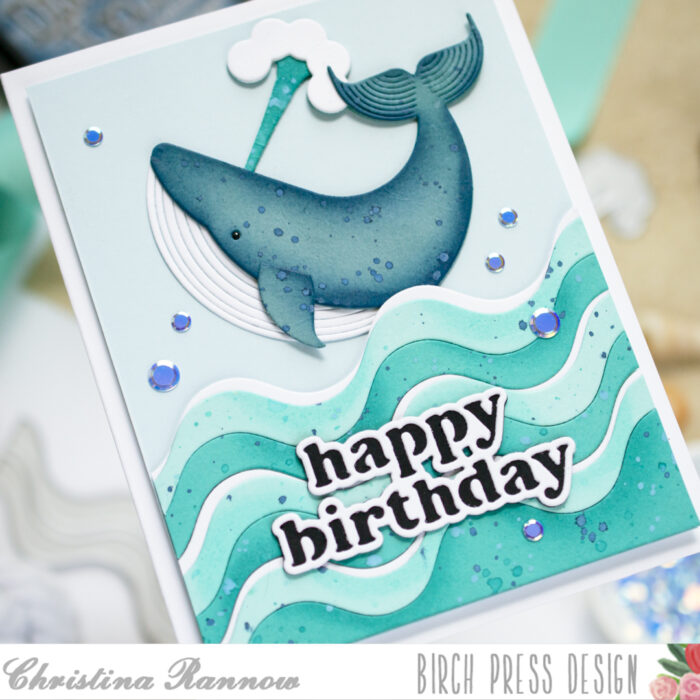
For this card, I started with the wavy ocean water. I die-cut the corner waves multiple times from two shades of teal cardstock as well as white cardstock. I inked the edges of the teal pieces and then spattered them with Uncharted Mariner, Peacock Feathers, and Salvaged Patina Distress Inks, and with a couple of Distress Oxide Sprays -Salvaged Patina and Uncharted Mariner. I stacked these, along with the white wavy pieces, onto a light blue cardstock panel trimmed to 4 x 5 1/4 inches. As I was stacking them, I layered the white pieces under the lighter teal pieces, letting only a small border peek above, and used foam tape to attach all the pieces, fitting them together like a puzzle.
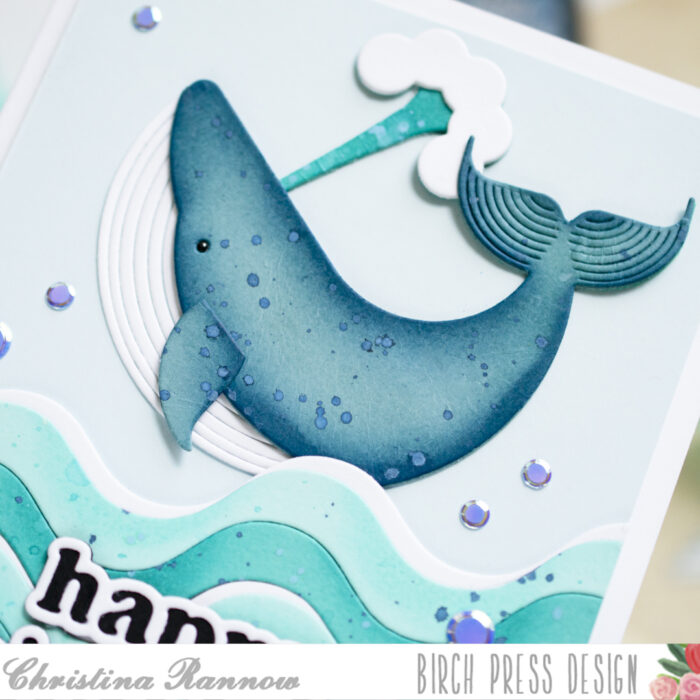
Next, I die-cut the whale and his spout. I used blue cardstock for the whale and teal for the spout. I gave both pieces the same treatment as the wavy water pieces, inking the edges and adding plenty of spatter. Then I assembled the diecut pieces and attached them to my card front, tucking him slightly behind the water.
To finish things up, I added the Happy Birthday Vintage Sentiment diecut, choosing black and white cardstock, and a scattering of sparkling sequins for embellishment.
Thank you so much for visiting today and reading about my latest ocean-inspired card design using products from the latest release. See you again soon!
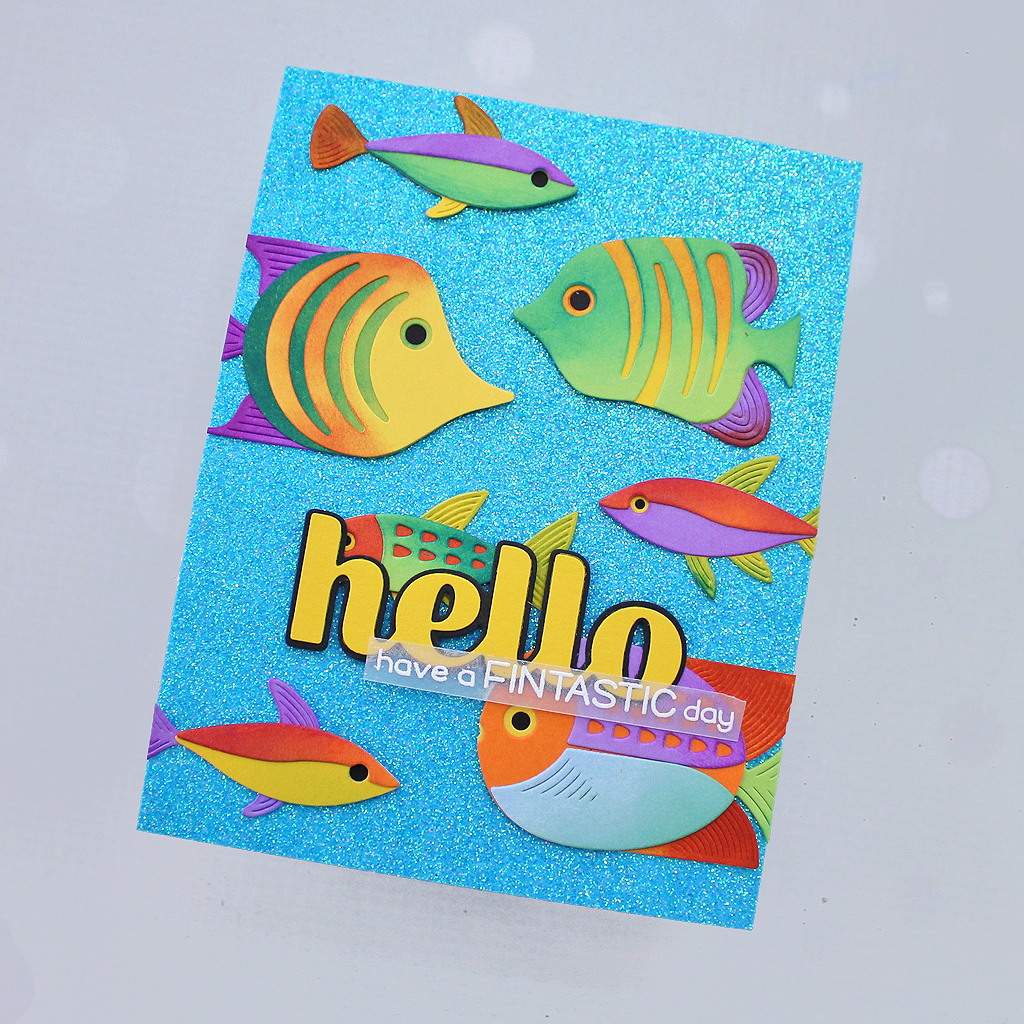
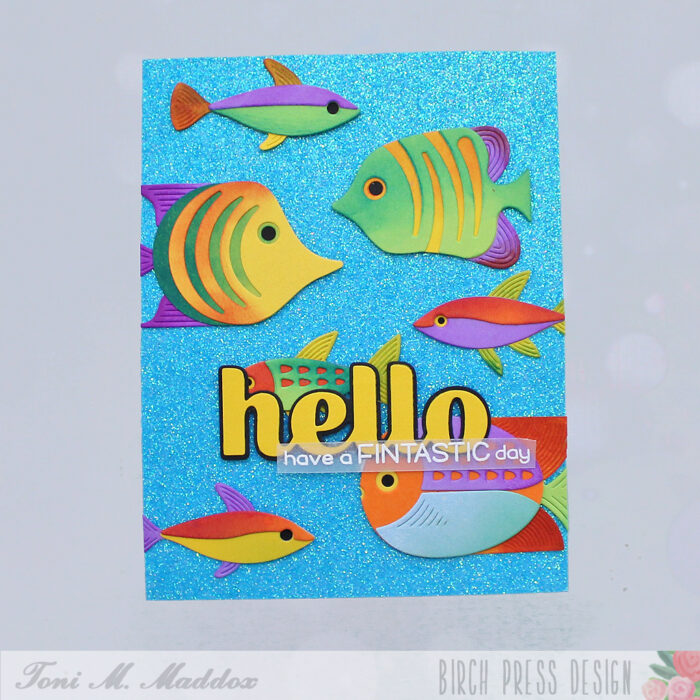
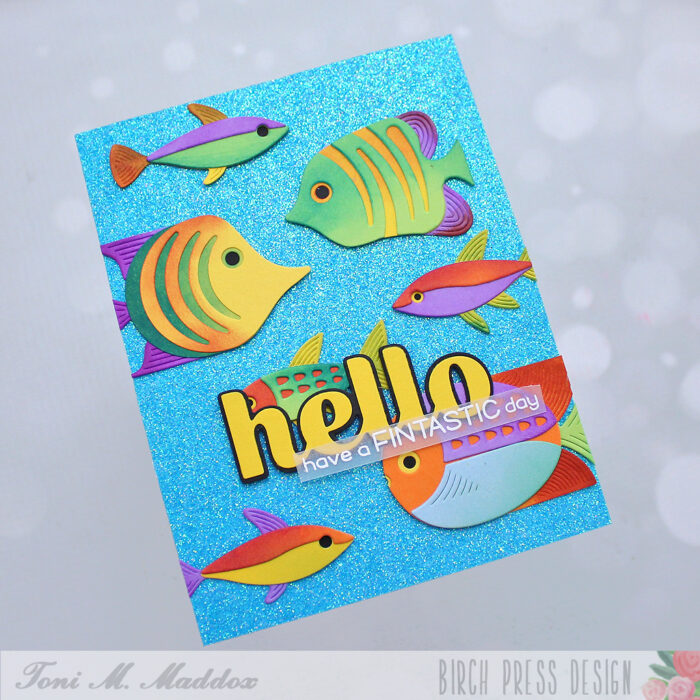
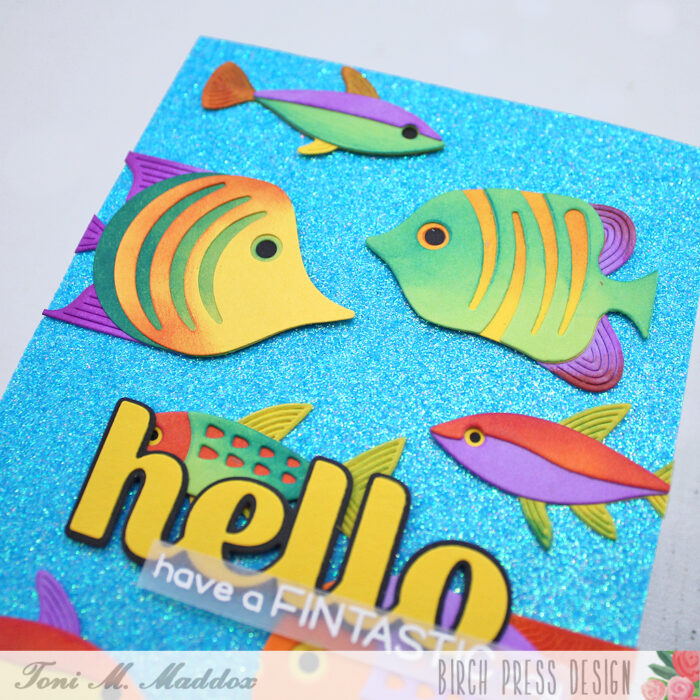
Hello, everyone! It’s summer and the water’s fine! Toni here with you today sharing a card made using some cute fishies from the new release. I love them so so much!
I wanted a school of fish, like what you might see in a giant aquarium. To achieve that I cut out a variety of fish using Memory Box cardstock.
I used Catherine Pooler inks with the cardstock to create variations in color for each fish.
For the sentiment I used the Sugar Script Big Hello die and outline in Summer Squash and sturdy black. The sentiment embossed on vellum is Lawn Fawn which coordinates so perfectly.
I added some glam with a no-shed aqua glitter cardstock as the card front. Swoon!
Feel free to visit my blog, Frankie Helps Craft, for a full list of supplies and to check out my other projects.
I hope you enjoyed today’s card and have a great rest of your week!
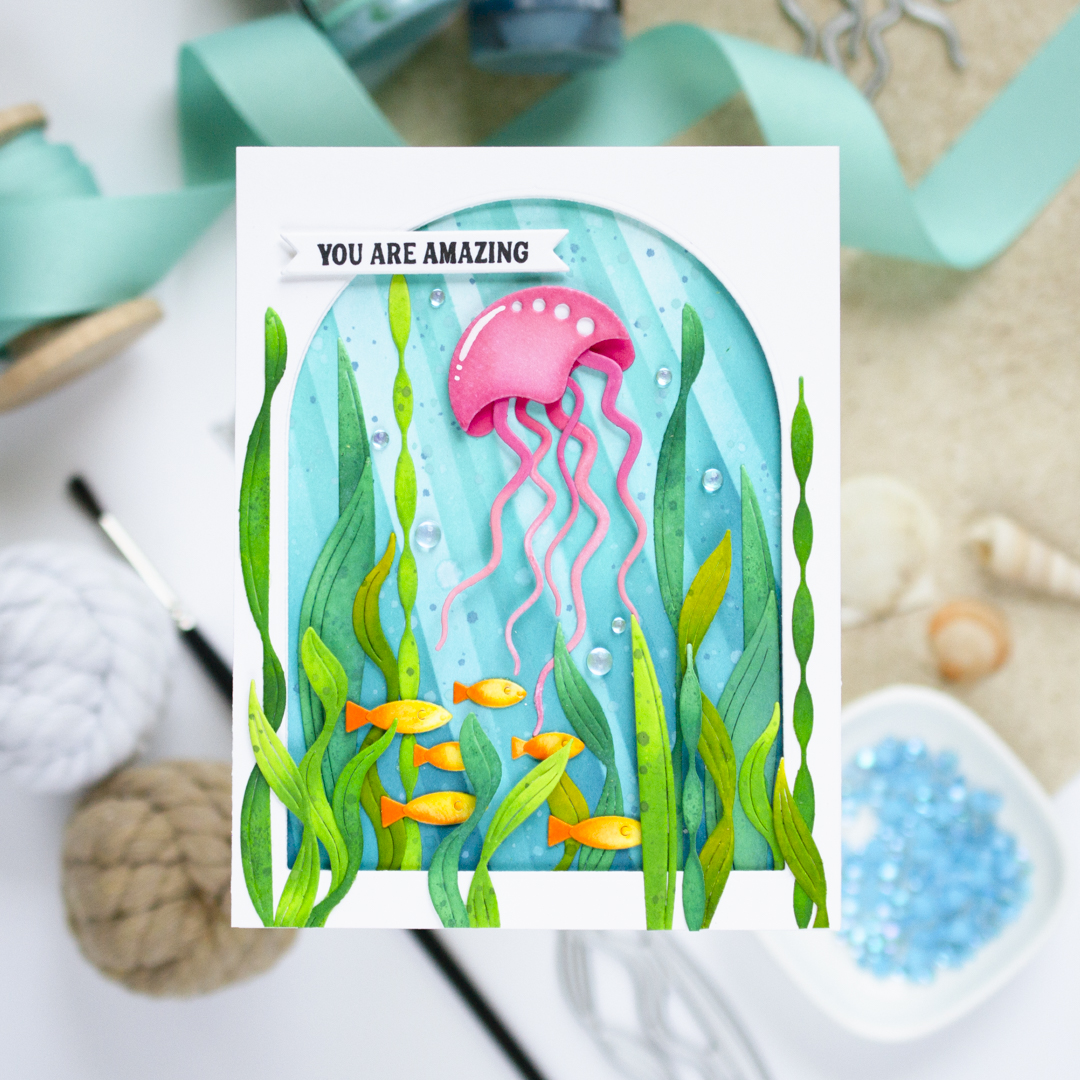
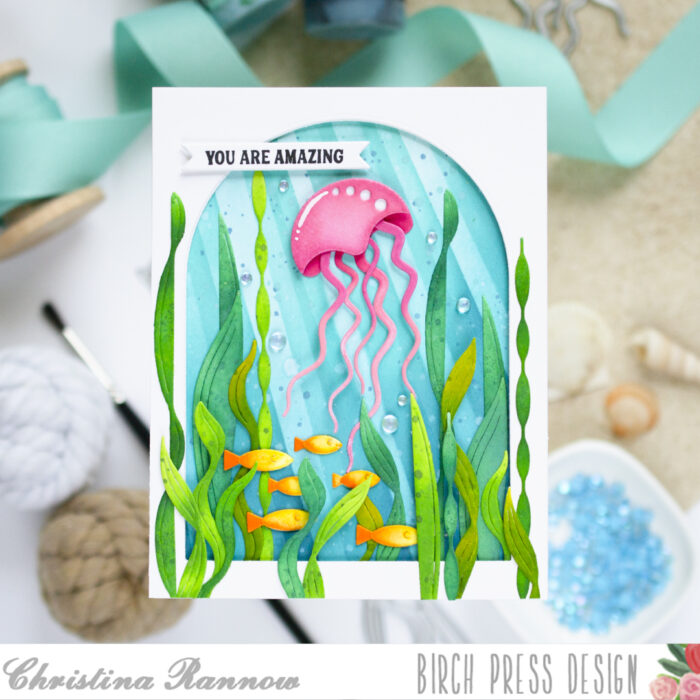
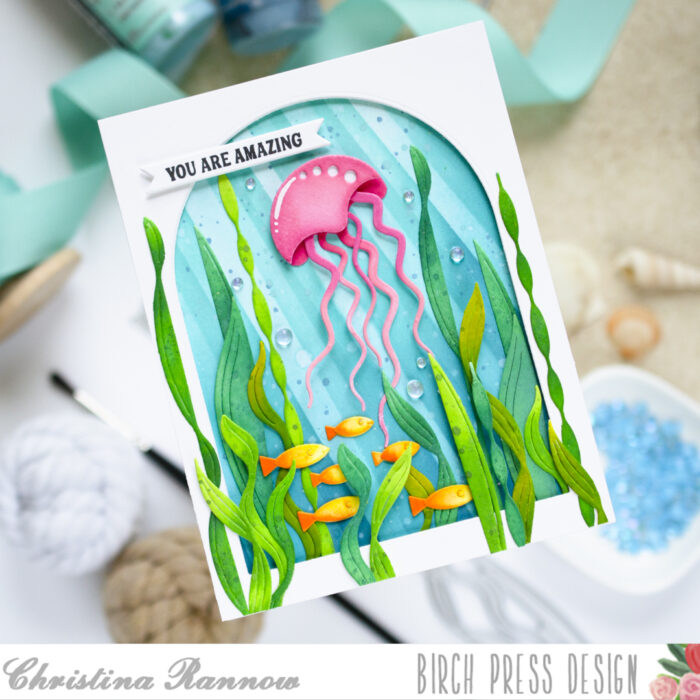
Hello! Christina here, and I’m so excited to share this magical under-the-sea card design with you today featuring products from the beautiful new ocean-themed release. I paired the new Block Print Floating Jellyfish with the new Sea Kelp and Mini Fish dies, inked and spattered everything with bold, saturated color, and then framed up the scene with a simple arched window. Let’s dive into this under-the-sea card design!
My first step was to create the ocean background panel with light rays filtering through. I chose regular Distress Inks in Salvaged Patina, Peacock Feathers, and Uncharted Mariner to use with the new layered Light Ray Stencil. I used Salvaged Patina and Peacock Feathers for the first layer and then Peacock Feathers and Uncharted Mariner for the second layer. And when stenciling, I started in the upper left corner, using a lighter hand with the ink colors, and gradually increased the pressure and the amount of ink I applied as I moved toward the lower right corner. This helped with the illusion of light filtering down through the water. And now for the fun part! With the stenciling done, I spattered the panel with plain water and with Distress Oxide Ink Sprays in Salvaged Patina and Uncharted Mariner. I just love the texture and interest this gives, especially to a watery ocean scene.
My next step was to die-cut the other elements of my card design from white cardstock. I started with the arched window frame and attached it to my background panel with foam tape. Then, I moved on to the sea kelp. I inked them with a variety of green Distress Inks and then spattered them with plain water and more ink. The green inks I chose were Lucky Clover, Pine Needles, Twisted Citron, Mowed Lawn, and Rustic Wilderness.
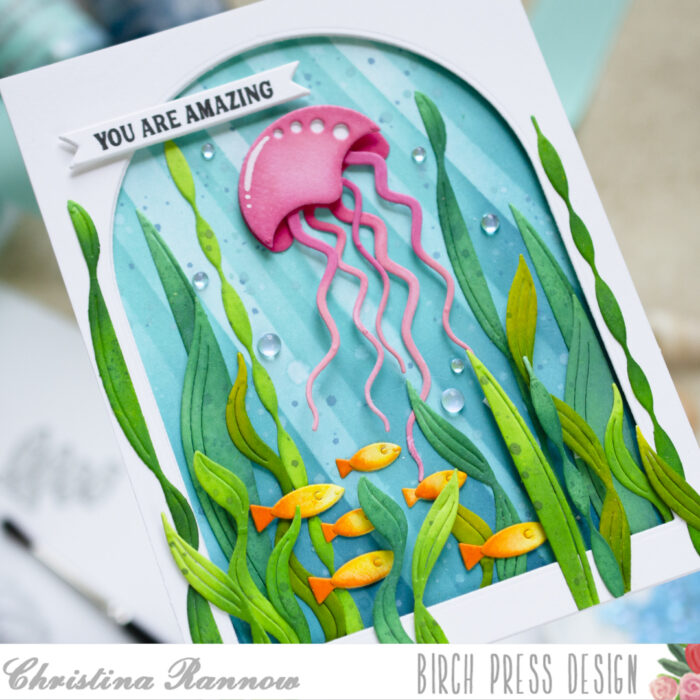
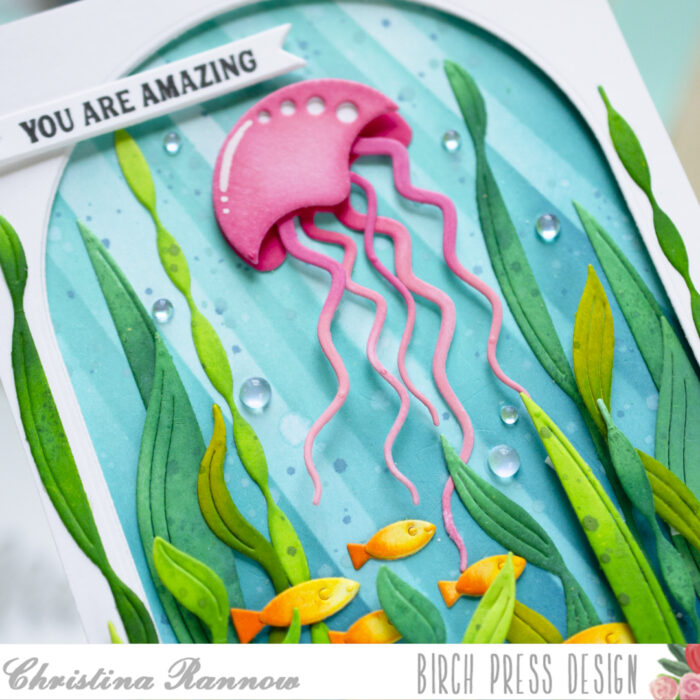
Next, I die-cut the jellyfish and inked the components with Spun Sugar, Worn Lipstick, and Picked Raspberry Distress Inks before assembling them with thin foam squares. Finally, I die-cut the mini fish and inked them with Mustard Seed and Carved Pumpkin.
With the other elements of my design ready, I got to work assembling the scene. I started with the sea kelp, tucking them inside the arched window against the background and also adding some to the outside of the window. I used foam squares or partial foam squares to secure the ones on the outside of the window to the background. Then I added the jellyfish and the mini fish to my scene. Finally, I added sentiment stamped on a fishtail banner, popping it up with foam squares, and finished with a few tropical blue water droplet embellishments.
Thank you so much for reading about my magical under-the-sea card I designed using some of the new ocean-themed products from the latest release. See you again soon!