Category: pumpkins

  • Pink Adornment Pumpkin | by Crystal Komara

    Pink Adornment Pumpkin | by Crystal Komara

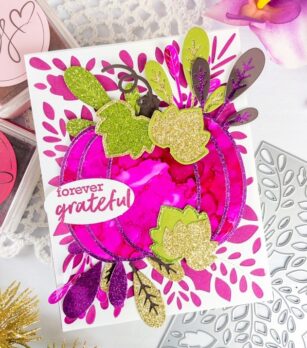
    Hello friends and happy Friday! I hope you have fun things planned for the weekend ahead! This is Design Team member Crystal Komara here with you today sharing a card made using the new Adornment Pumpkin dies.
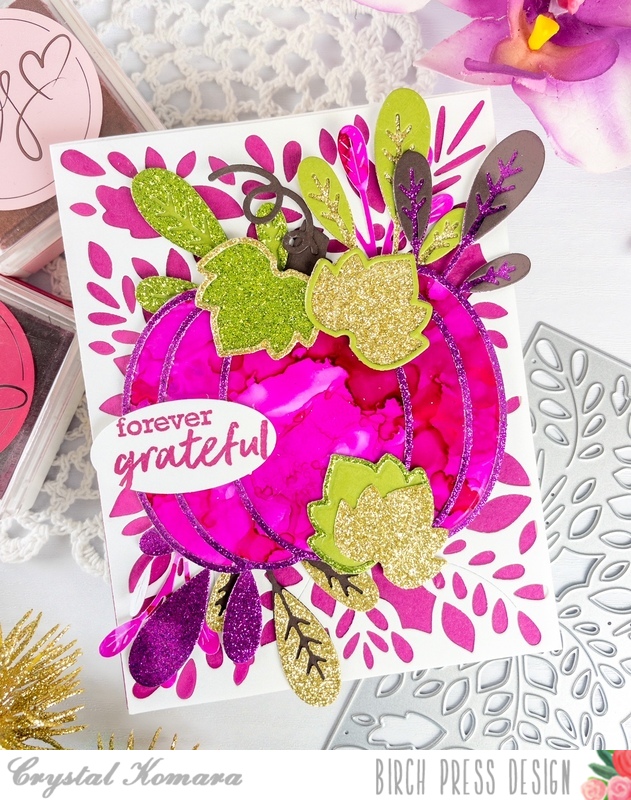
    I looooooove how this card came out, if I do say so myself! While the pink alcohol ink pumpkin is a little more vibrant than I had initially intended, it works. That’s the thing with alcohol ink, you never quite know what you’re going to get and they can be a bit unpredictable in how they move and dry as you blow them around.
    Card details:

    *Please note, a full list of supplies is located at the end of this post.

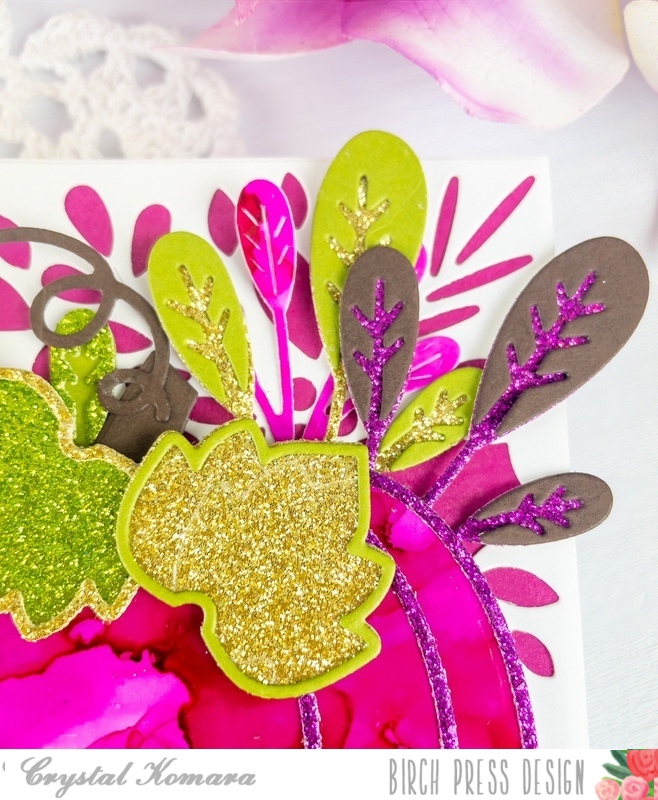
    The base of this A2 sized card was made from 80 lb. Neenah Solar White Smooth alcohol ink. Using Layer Plate A (the top layer) of the Herbarium Plate Layering Set, I die cut this from white cardstock and then mounted a sheet of magneta cardstock behind it before adhering it directly to the card base. I die cut the solid pumpkin from a scrap piece of an alcohol ink background I had in my craft bin and then die cut the frame using pink glitter cardstock from the 6″ x 6″ Glitzy Glitter paper pack. I adhered the two layers together with a fine tip liquid glue.
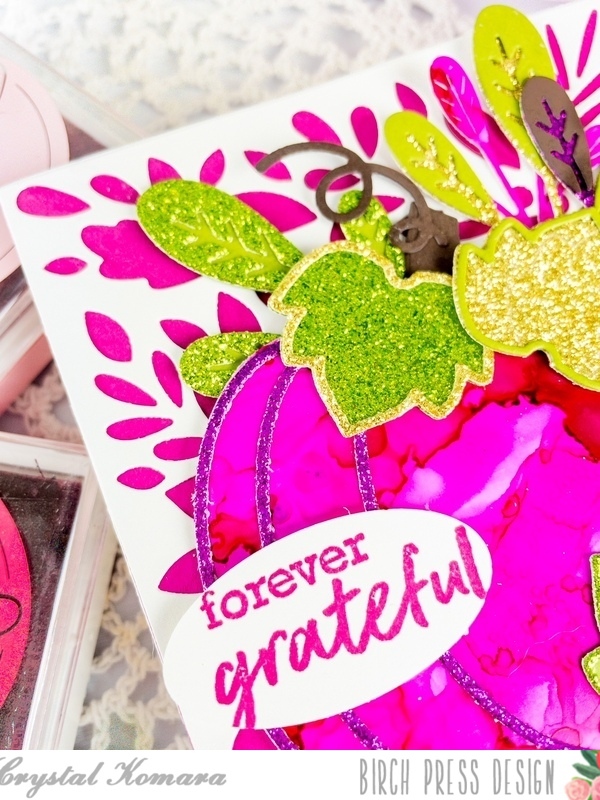
    I created a pumpkin stem from espresso brown cardstock and leaves from both green cardstock and green glitter cardstock. There was a lot of piece work here using these smaller contour dies. Next, using the new Oval Leaf Branches Contour Layers, I die cut leaves from pink glitter cardstock, espresso brown carsdstock and the same green and green glitter cardstock used on the leaves. Then I pieces all the layers of the leaves together (again, a little bit time consuming here to do all these small details, but SO worth it in the end). Then it was just a matter of adhering all the small branches and leaves into a pattern that was pleasing to the eye.
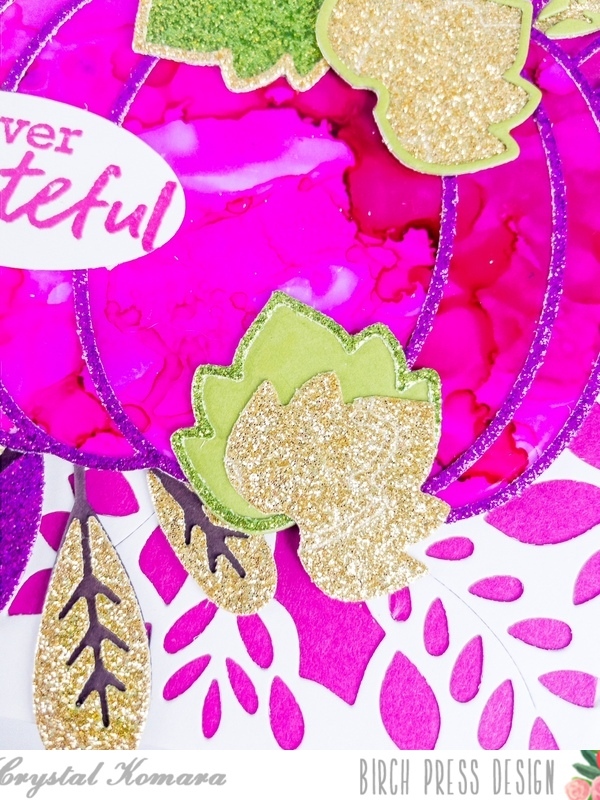
    I stamped the sentiment “forever grateful” in magenta ink on white cardstock and used oval punch to punch it over before adhering it to the pumpkin with 3M foam adhesive. This sentiment is from the Brush Sentiments clear stamp set.
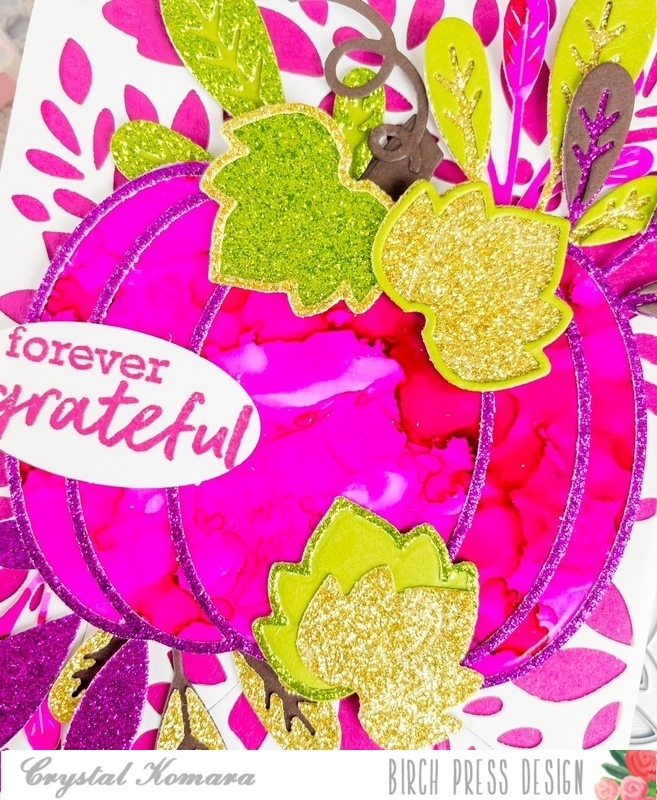
    I love using non-traditional colors to create holiday or seasonal cards. Pink is perfect in lieu of traditional orange pumpkins.

    Thanks for visiting and have a wonderfully creative day!

    Supplies
  • Autumn Breeze Twist | by Crystal Komara

    Autumn Breeze Twist | by Crystal Komara

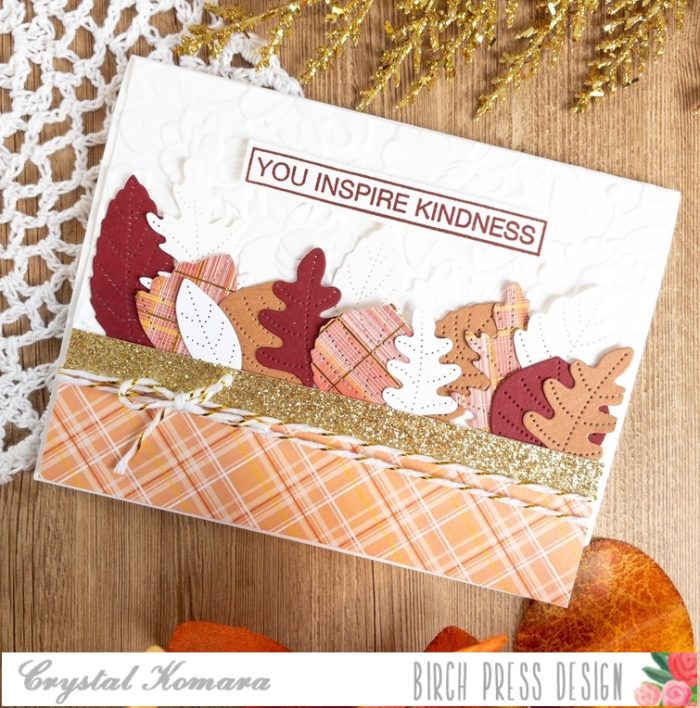
    Hello Birch Press Design readers! Happy September, and welcome to the beginning of fall, my favorite time of the year. This is Design Team member Crystal Komara here with you today sharing a unique way to use the Autumn Breeze Layer Plate.

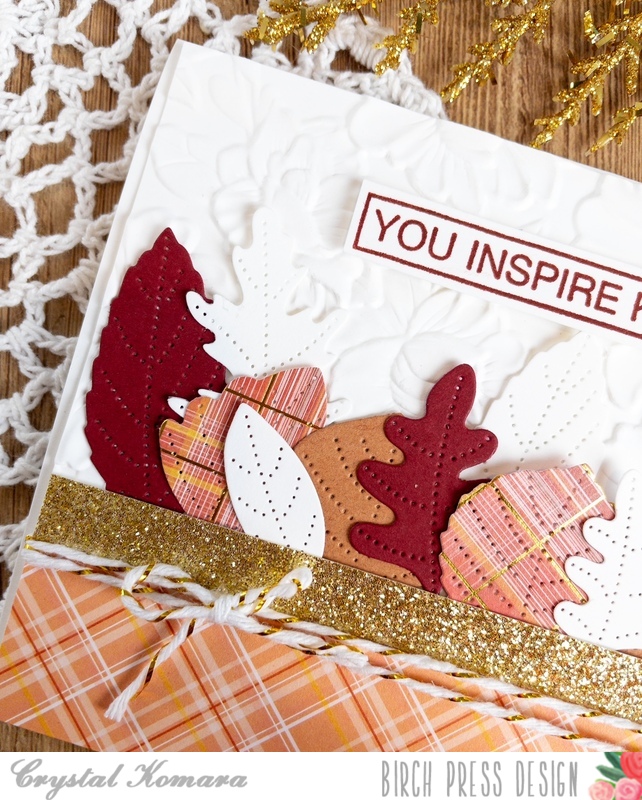
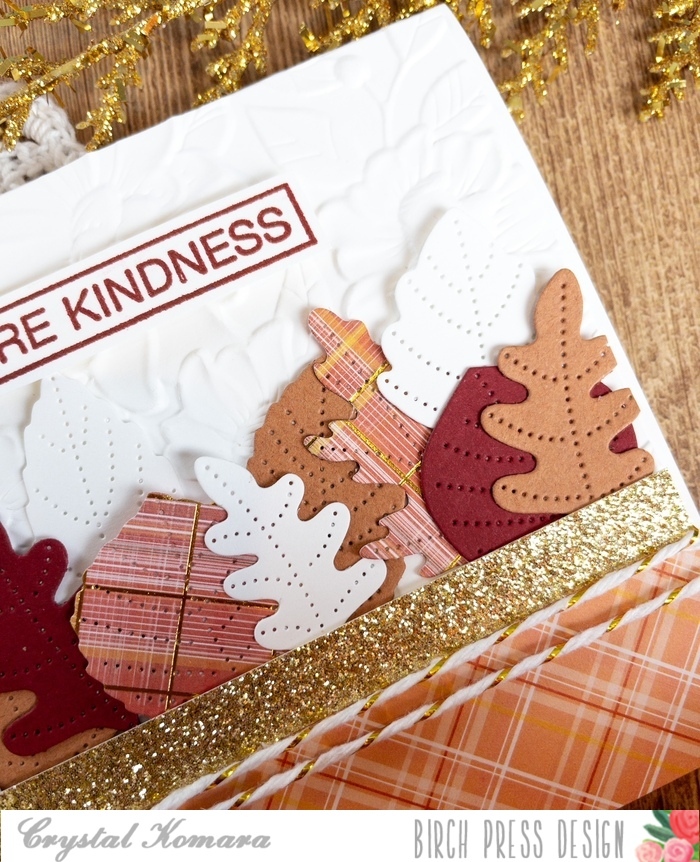
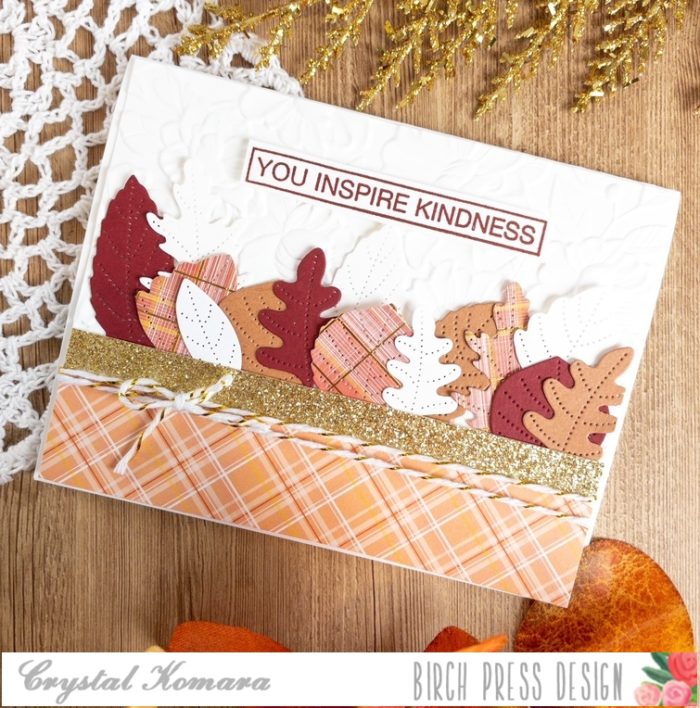
    The base of this A2 sized card is made from 80 lb. Neenah Solar White Smooth cardstock. I cut a 5 1/4″ x 4″ piece of the same white cardstock and ran it through my Big Shot using the Memory Box Blooming 3D embossing folder. I adhered this to the card base. I cut a 5 1/2″ x 1″ strip of decorative Madras Plaid coral paper for the bottom of the card. I cut a 5 1/2″ x 1/2″ strip of gold glitter paper above the plaid paper for contrast.

    Using Layer Plate B of the Autumn Breeze Layering Plates, I ran the plate through my Big Shot multiple using white cardstock, burgundy cardstock, rust cardstock and the same Madras Coral plaid cardstock. Using the stitched leaf cutout pieces only, I adhered them in a line across the center of the card.

    I stamped the sentiment “you inspire kindness” in cherry ink on white cardstock. This stamp is from the Awesome Ticker Tape clear stamp set. I adhered the sentiment to the card using 3M foam adhesive for added dimension.

    Ooh, I just can’t wait to create more fall themed cards. I’m here for all the cozy sweater vibes and yes, even the PSL (pumpkin spiced lattes) too! ; )

    Thanks for visiting and have a wonderfully creative day!

    Supplies

  • Pumpkins in Every Color | by Crystal Komara

    Pumpkins in Every Color | by Crystal Komara

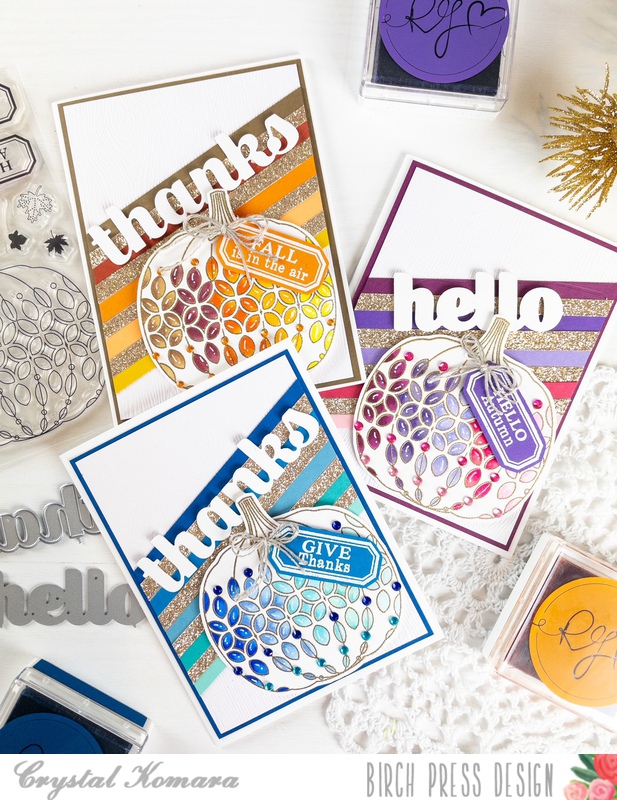
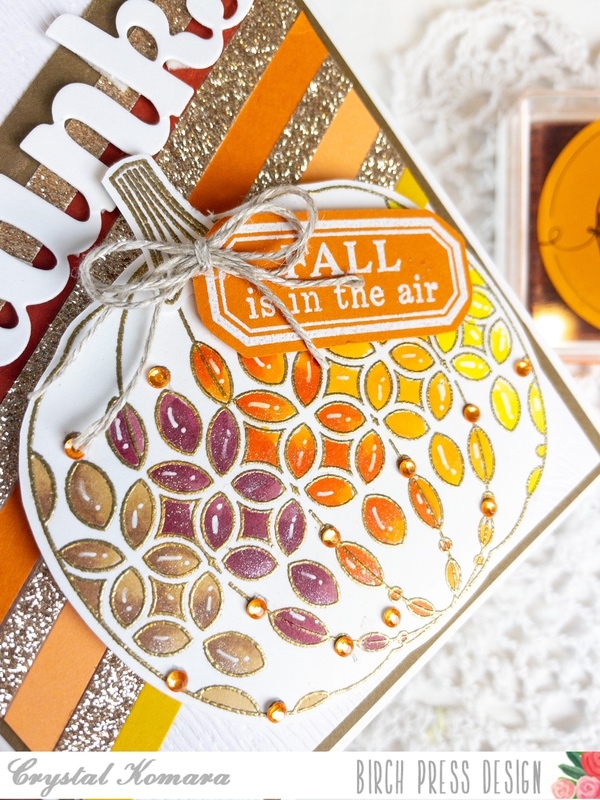
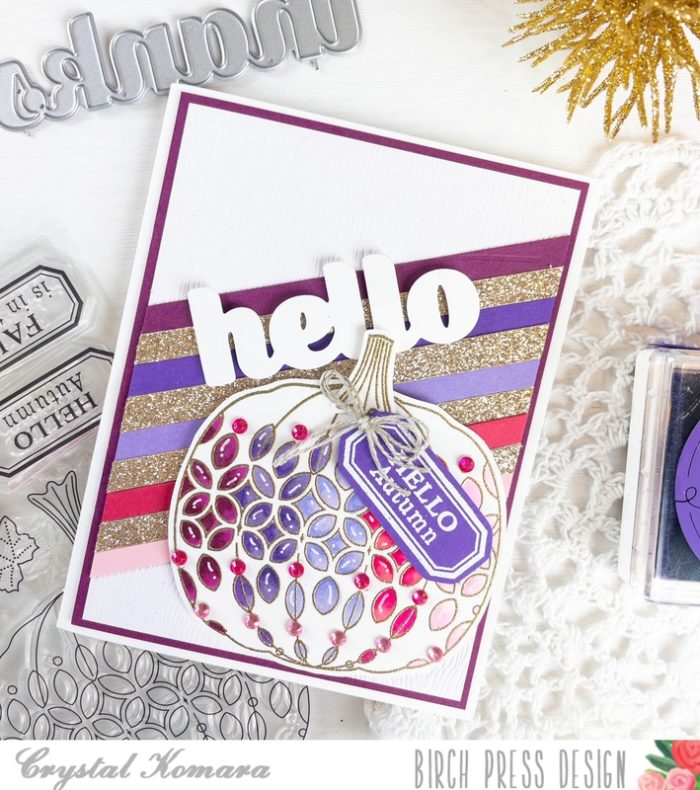
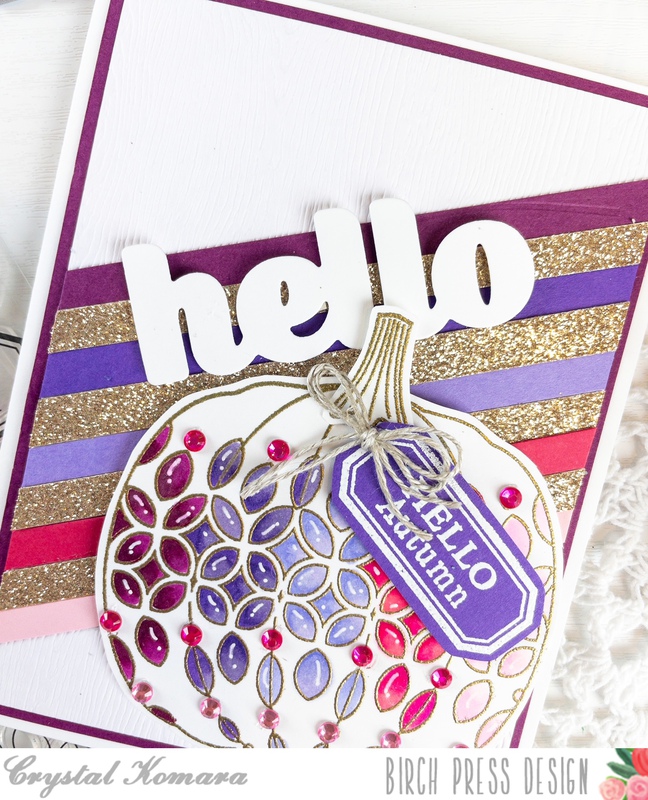
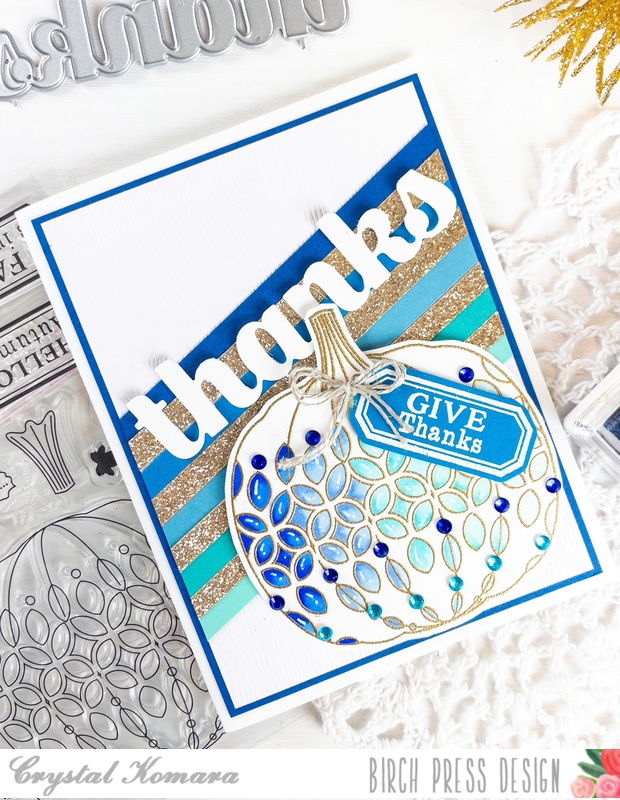
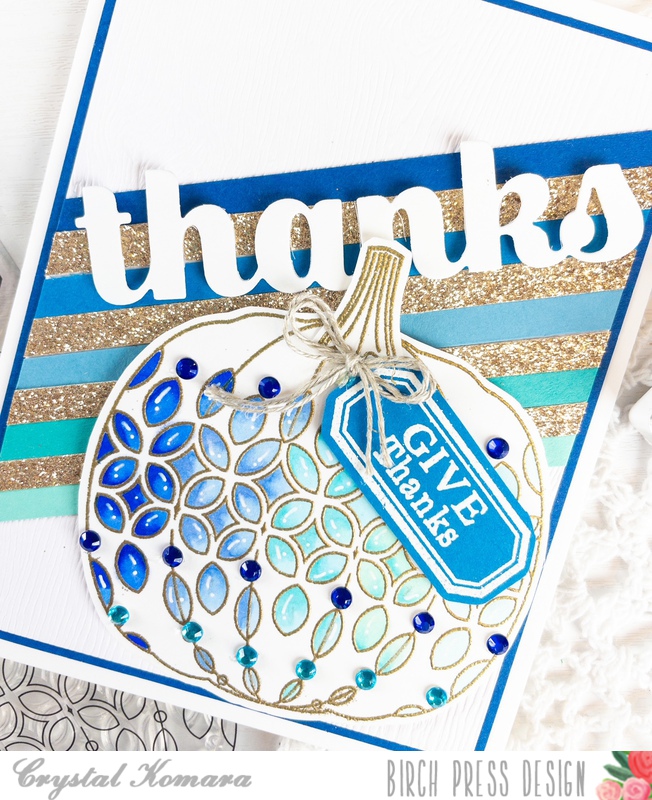
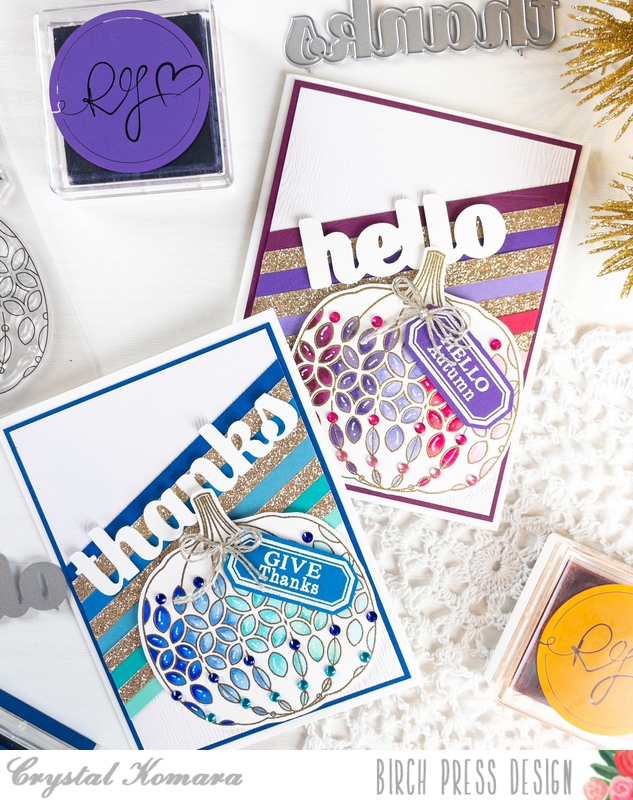
    Hello crafty readers! This is Design Team member Crystal Komara here with you today sharing a couple cards made using the beautiful Pumpkin Lacework stamp set and coordinating dies. This is probably my favorite stamp set from Birch Press Design, so just like the old expression “if the shoe fits, buy it in every color”, I decided to stamp it in every color! Now the question is, do YOU prefer the more traditional orange/brown pumpkin, or do you like the blues and purples?

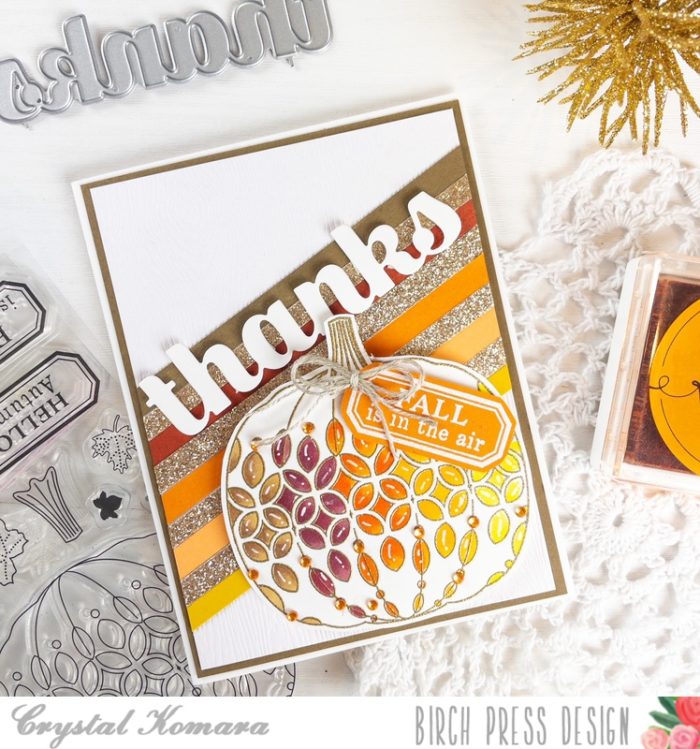
    So, let’s take a look at the most conventional card first. It’s beautiful and elegant heat embossed with gold embossing powder and then colored using Copic markers in brown, oranges and yellows. It is very traditional, warm and earthy.

    But, now let’s step outside-of-the-box and try the same exact card simply using a different color pattern. Does it still emit fall vibes? I think so!

    Card details:

    Each of these A2 cards were made using all the same dimensions and products, I simply alternated some colors. The base of each card is made from 80 lb. Neenah Solar White Smooth cardstock. I matted a 5″ x 3 3/” piece of white woodgrain cardstock with a coordinating piece of blue, purple or brown cardstock from the Ocean Blue, Vibrant Violet and Earth Neutral 6 x 6″ paper packs. I cut 5″ x 1/4″ strips of ombre colors from these same paper packs and diagonally lined them up along the card alternating with 1/4″ strips of gold glitter cardstock from the Twinkling Jewel Glitter 6 x 6″ pad.

    I stamped the pumpkins and stems using the Pumpkin Lacework stamp set. I stamped the image in Versamark ink on white cardstock and heat embossed it with gold embossing powder. I used the coordinating dies to cut the pumpkin and stem out. I colored the pumpkins with Copic markers and then adhered the colored pumpkins to the card with 3M foam adhesive. I stamped the tag in coordinating colored cardstock in Versamark ink and heat embossed it with white embossing powder. I adhered the tag to each pumpkin and added linen thread for extra dimension. Lastly, I cut the sentiment “thanks” and “hello” from white cardstock using the Thanks Sugar Script and Hello Sugar Script.

    I hope you have enjoyed seeing these cards in a variety of colors and that you’ll feel encouraged to try adding more color to your fall cards. Thank you for visiting and have a wonderfully creative day!

  • Hello Autumn | by Crystal Komara

    Hello Autumn | by Crystal Komara

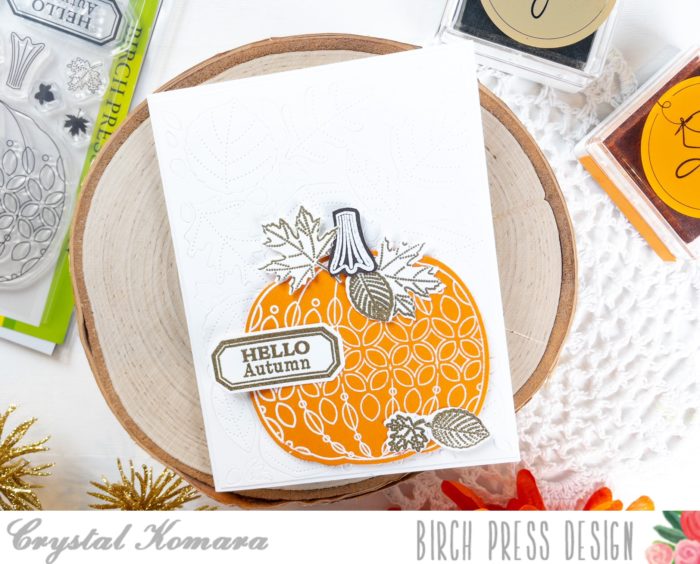
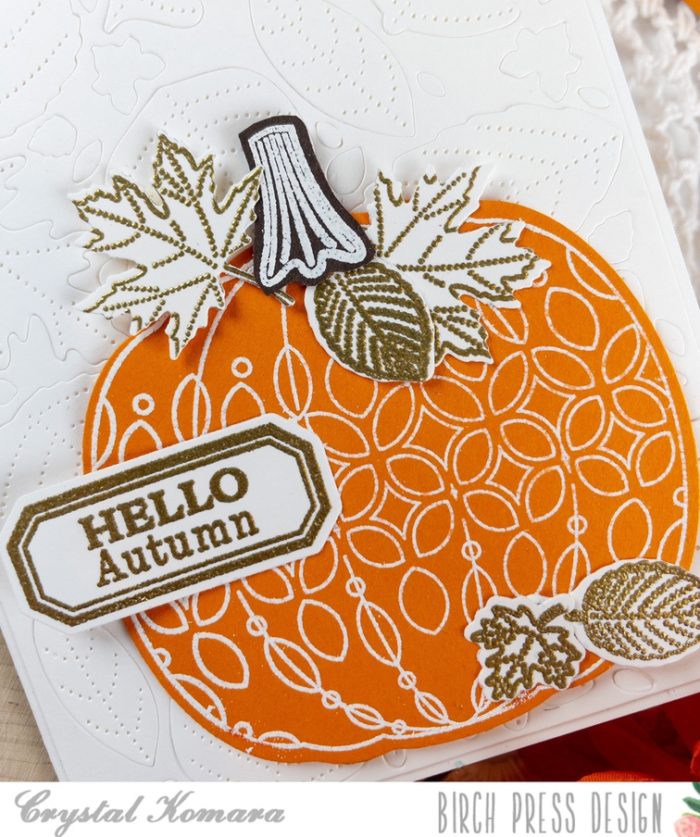
    Hello friends, it’s almost the last day of September and we are officially in the midst of PSL season! That’s Pumpkin Spice Latte for anyone unfamiliar with the popular influencer inspired lingo. This is Design Team member Crystal Komara here today inspiring you to embrace fall (while dreading winter) and I’m sharing a simple, yet elegant card made using my favorite Birch Press Design stamp set called Pumpkin Lacework.

    Card details:

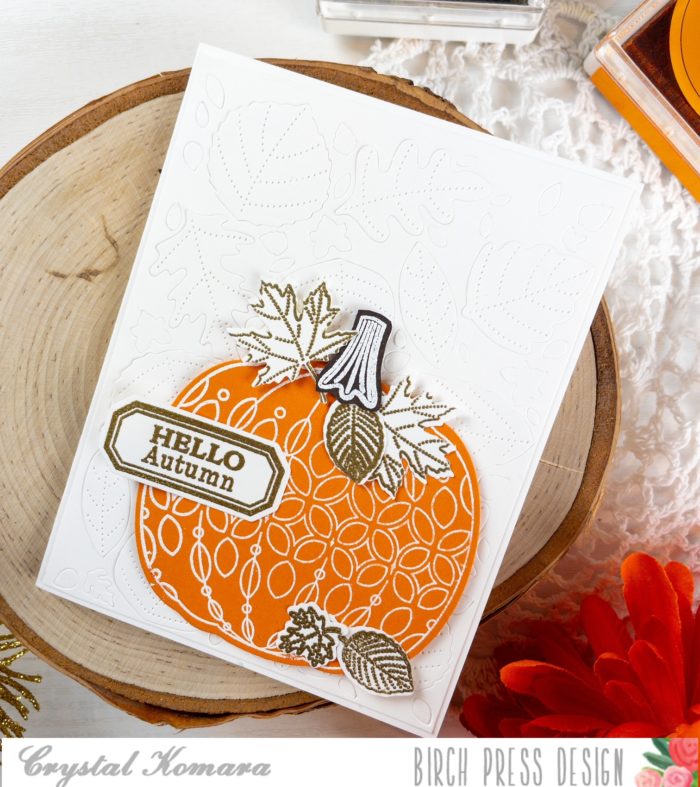
    The base of this A2 sized card is made from 80 lb. Neenah Solar White smooth cardstock. Using Layer B of the Autumn Breeze Layering Plates, I cut the background from white cardstock. I adhered this leafy imprinted background directly to the card base.

    Using the Pumpkin Lacework stamp set, I stamped the large pumpkin in Versamark ink on orange cardstock. I heat embossed the pumpkin with white embossing powder. I used the coordinating Pumpkin Lacework die to cut the pumpkin out. I adhered the pumpkin to the lower right side of the card using 3M foam adhesive. I stamped the pumpkin stem in Versamark ink on brown cardstock and heat embossed it with white embossing powder. I also stamped a variety of the leaves in Versamark ink on white cardstock and heat embossed the leaves with gold embossing powder. I used the Pumpkin Lacework dies to cut all the small images out before adhering them to the pumpkin using a Tombow adhesive runner.

    I stamped the “hello autumn” sentiment from the same Pumpkin Lacework stamp set in Versamark ink on white cardstock. I heat embossed the sentiment with gold embossing powder and used the coordinating die to cut the sentiment out. I adhered the sentiment to the left side of the pumpkin using 3M foam adhesive.

    I hope today’s card will inspire YOU to create some beautiful fall things! Thanks for visiting and have a wonderfully creative day.

  • Happy September | by Crystal Komara

    Happy September | by Crystal Komara

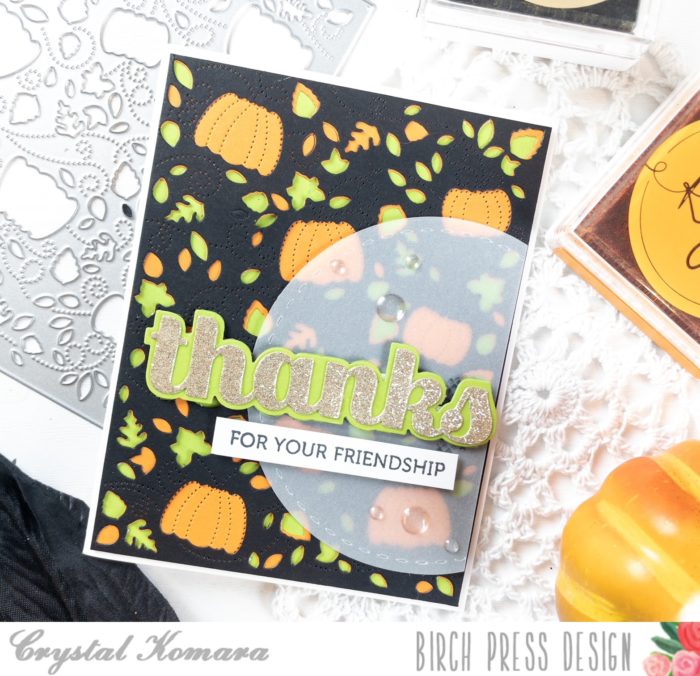
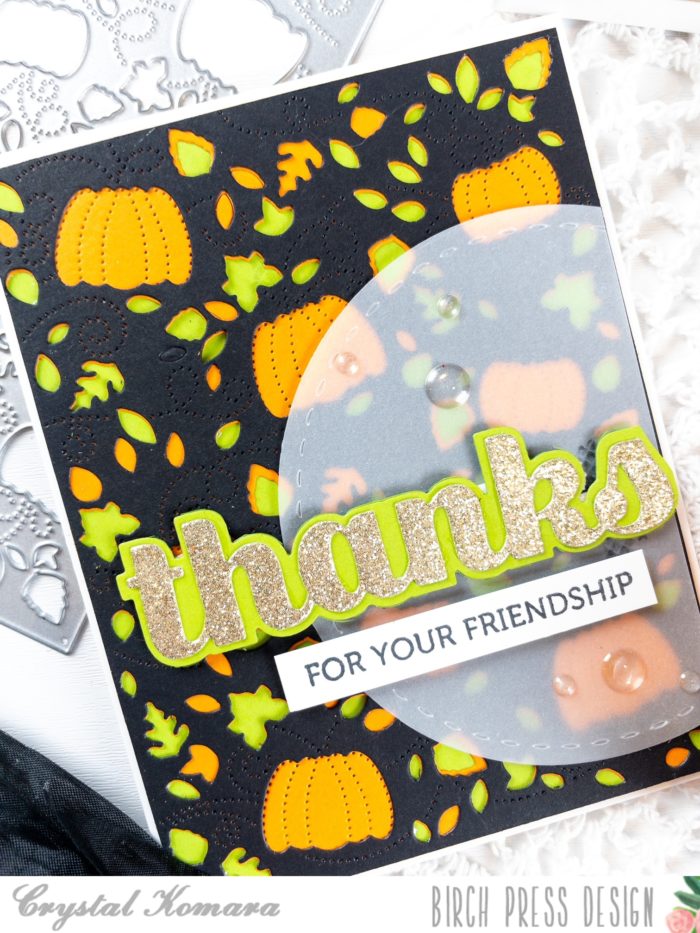
    Hello crafty readers and happy 1st of September! For those of us who love fall (ME ME ME!) then let the pumpkin spice season begin! If you’re still sippin’ on your summer ‘ritas, no shade here, you do you! But, I’m full speed ahead to apple pies, sweater weather and all things fall. This is Design Team member Crystal Komara here with you today sharing a fun (and mildly Halloween inspired) card using the Autumn Breeze Layering plates:

    Card details:

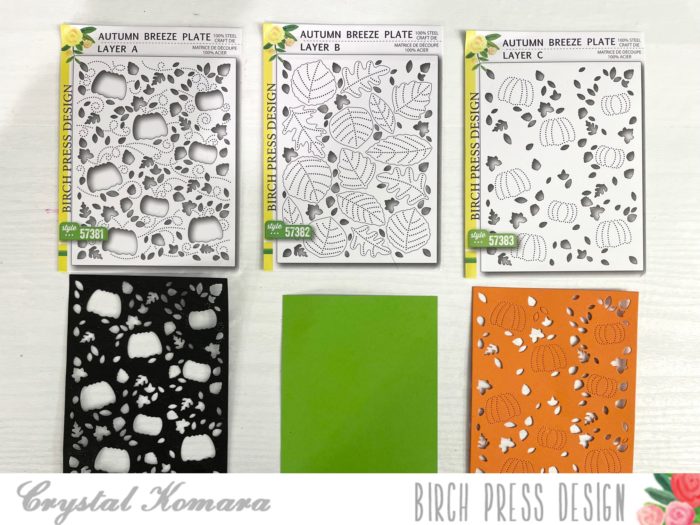
    The base of this A2 sized card was made from 80 lb. Neenah Solar White Smooth cardstock. Using two out of three layers of the Autumn Breeze Layering Plates, I used a piece of garden green cardstock as the bottom layer (in lieu of Layer B). For Layer C I die cut the plate using pumpkin orange cardstock. Layer A was cut from basic black cardstock. You can see my photo below for all three layers:

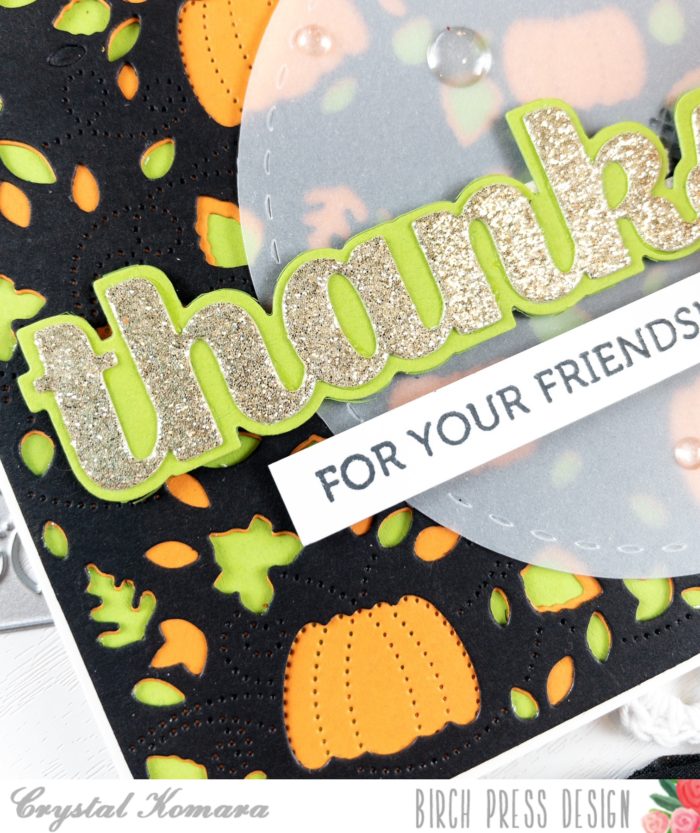
    I adhered all three layers together using a Tombow adhesive tape runner before gluing the three layers down to the card base. I cut a 3″ circle from vellum cardstock, cutting of the right side just a bit before adhering it to the card. Using the Big Thanks Sugar Script dies, I die cut the large shadow sentiment from garden green cardstock and the thinner sentiment from gold glitter cardstock from the 6″ x 6″ Holiday Glitter Pad. I adhered the two layers together with Tombow adhesive before adhering the enticement sentiment strip to the card using 3M foam adhesive for added dimension.

    On a thin strip of white cardstock I stamped the sentiment “for your friendship” in Memento Tuxedo black ink. This sentiment is from the Lingo Thanks stamp set. I adhered this sentiment strip below the large “thanks” using 3M foam adhesive for added dimension.

    I hope you have enjoyed this card! Thank you for visiting and have a wonderfully creative day.

  • Fall is in the Air | By Amanda Wilcox

    Fall is in the Air | By Amanda Wilcox

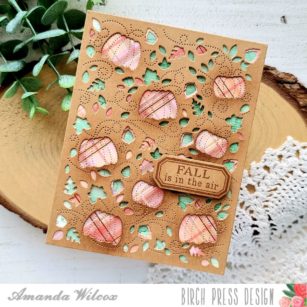
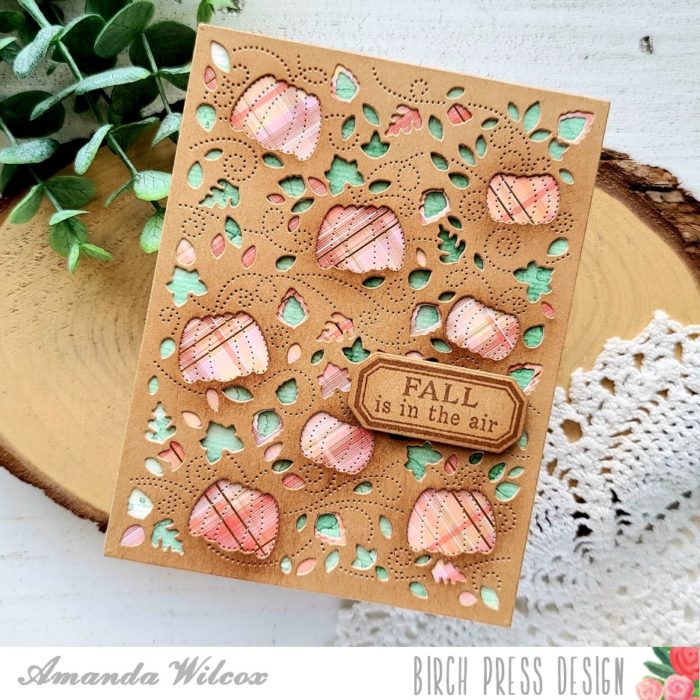
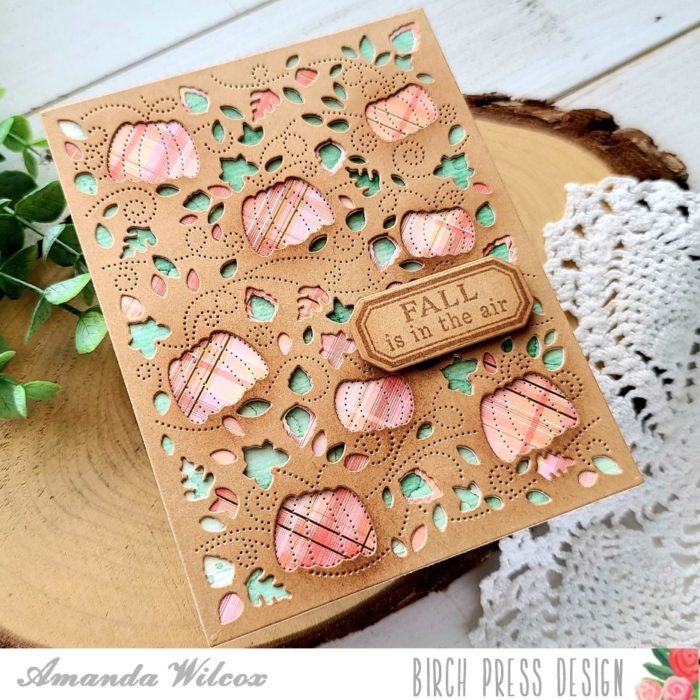
    Hello crafty friends! It’s Amanda from Twiddler’s Nook popping in with a festively, fun fall-themed card for you today. We got a little taste of fall at home this week and I’m so ready for pumpkins and leaves changing and all the things!

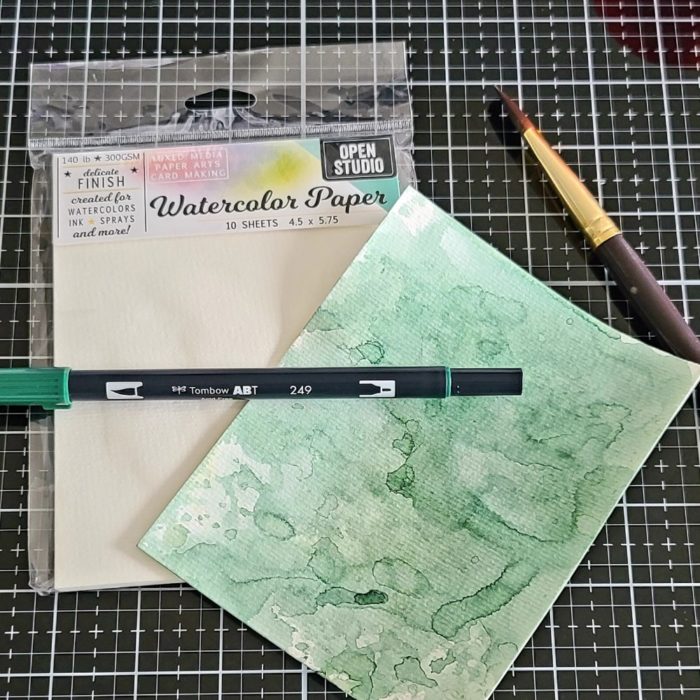
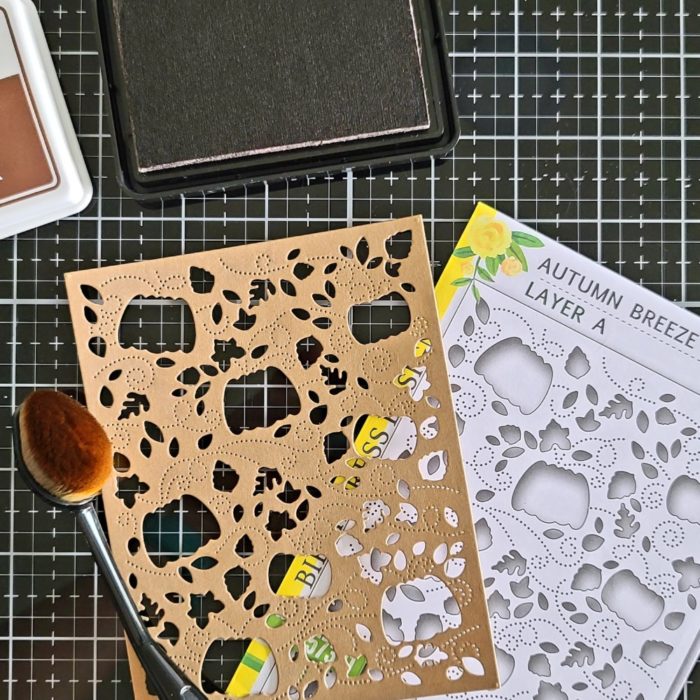
    I knew that I was using the awesome Autumn Breeze layering set so I started looking at what I wanted my layers to be. Since the bottom layer shows mostly leaves I did some ink smooshing on watercolor paper with a green tombow marker and lots of layering.

    Remember, if you heat your paper in bewteen layers, you will get those cool imperfections and lines. If it’s still wet, it just flows together smoothly. Both can be beautiful, it’s all about what you are trying to achieve.

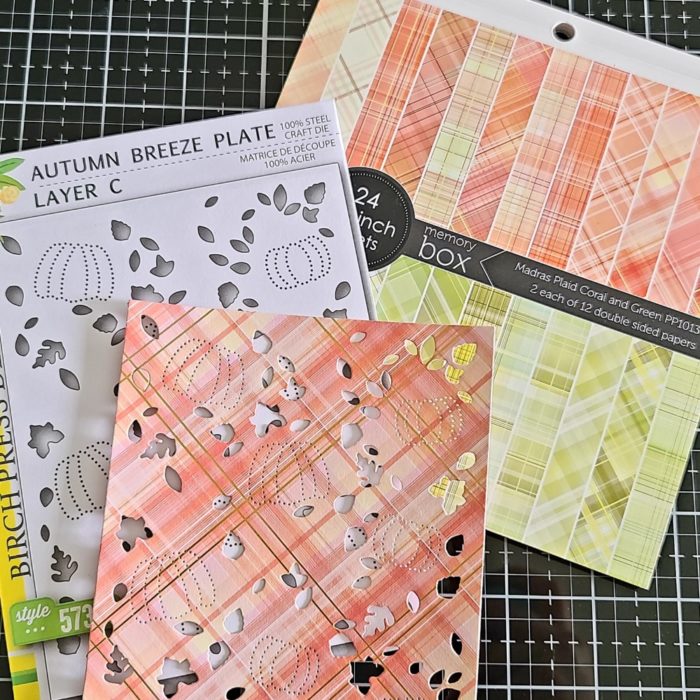
    Then for my middle layer, I chose a plaid paper from the Memory Box Madras Plaid paper pad. I love the gold foil lines in this plaid paper. It’s just gorgeous!

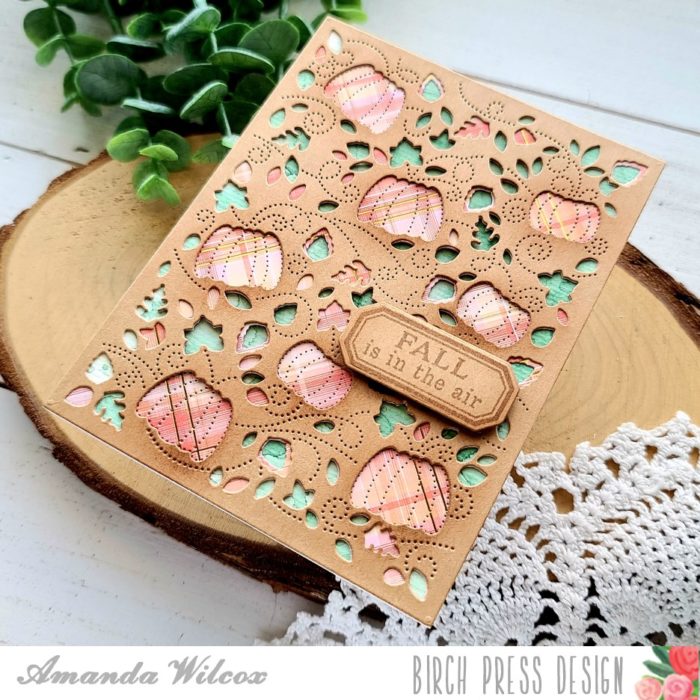
    Next, I die cut the top layer from kraft cardstock and used a blending brush with brown dye ink to ink up all the pumpkin openings. It just gives it some depth and interest. I really love the effect it had on the whole card.

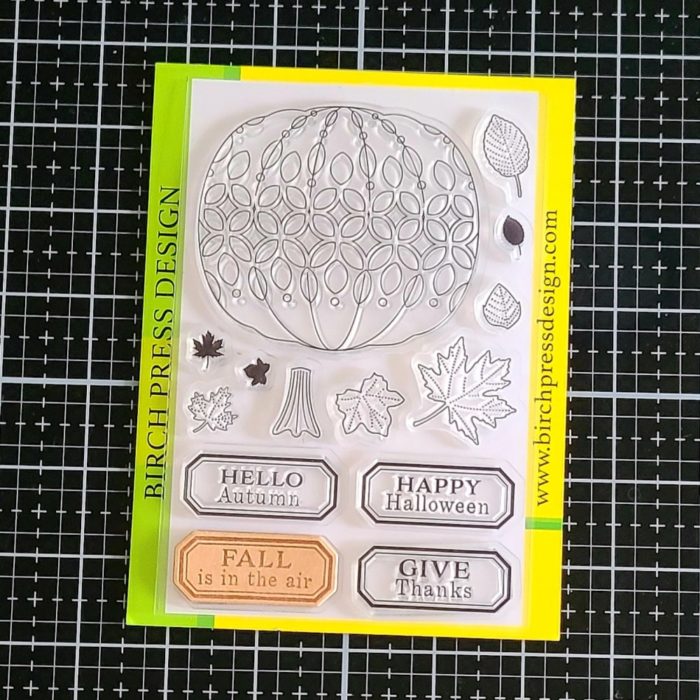
    Last, I pulled out the Pumpkin Lacework stamp set and stamped a sentiment on the same kraft cardstock with brown ink. Now it’s time to assemble everything!

    Sometime the watercolor paper can ripple so I heated up my laminator and ran it through a few times. This always helps flatten it out and makes it easier to adhere to other elements.

    I used liquid glue to adhere the layers together and to a white card base. Then I plopped a few acrylic blocks on top and left it to dry for a bit.

    Once they were dry, I added foam squares to the back of my sentiment and popped it in place on the lower right side. I really love these pumpkins so I chose a space that would cover up the least of those.

    I hope you enjoyed today’s card and found some inspiration to create something wonderful!

    I appreciate you sharing your time with me. Have a fabulous day!

    Supplies
  • Give Thanks | By Amanda Wilcox

    Give Thanks | By Amanda Wilcox

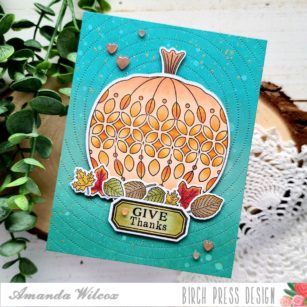
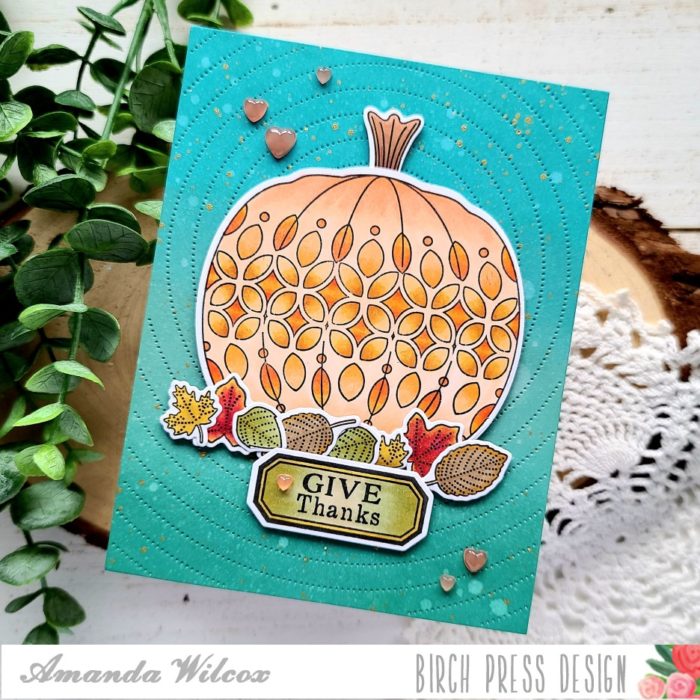
    Hello friends. It’s Amanda from Twiddler’s Nook today and I wanted to pop in to share one more Thanksgiving themed card while there’s still time.

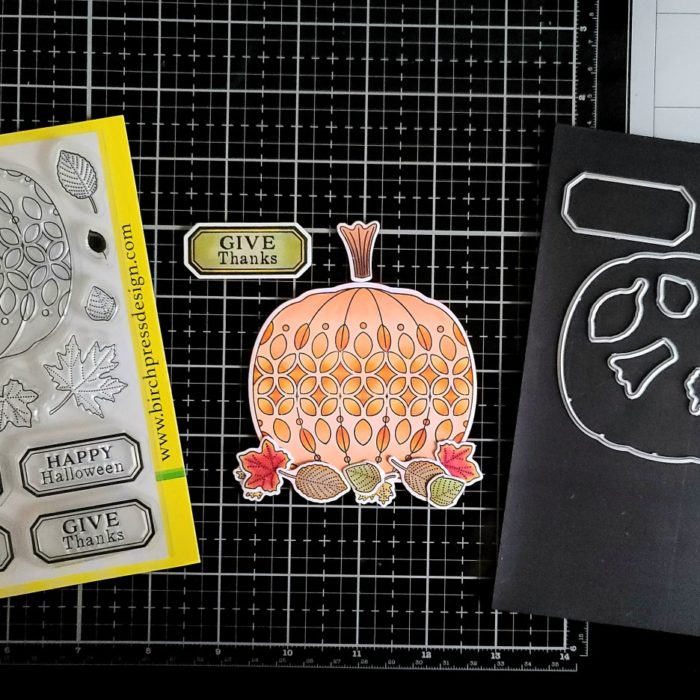
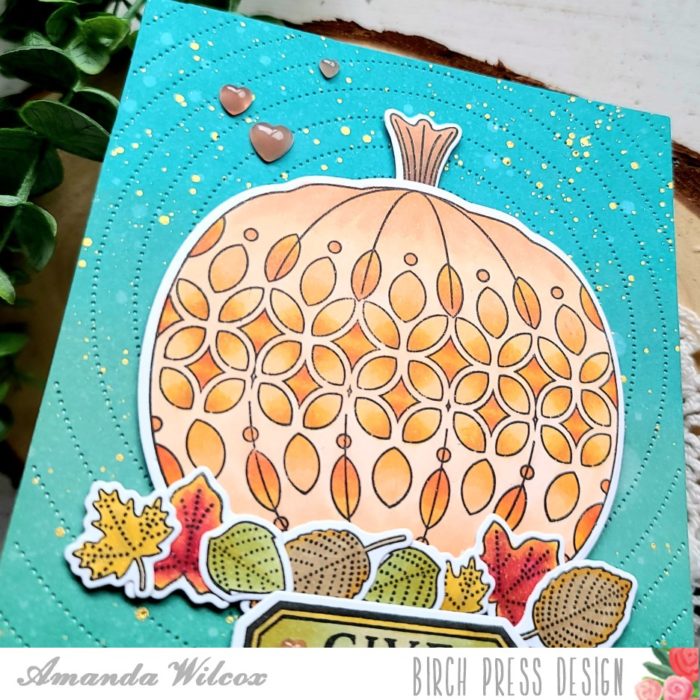
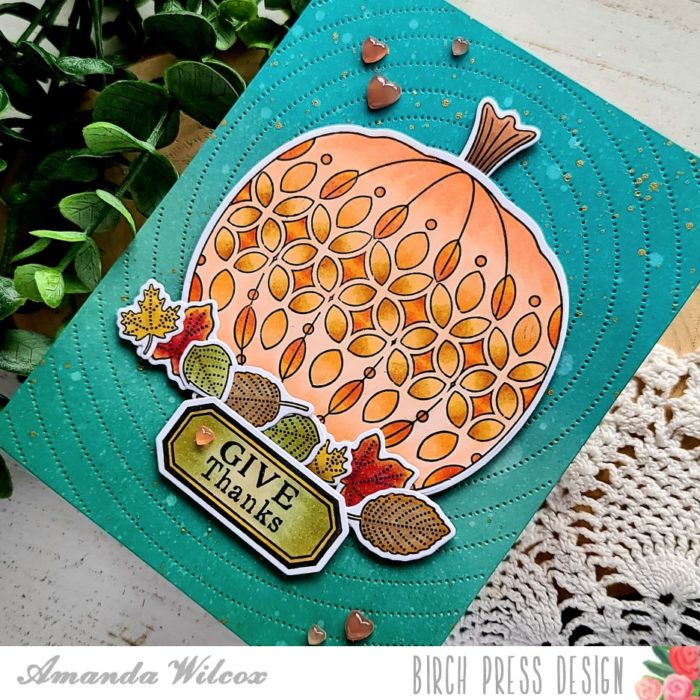
    To create this card, I started by stamping and coloring the images from Pumpkin Lacework with my copic markers. Then I used the coordinating dies to cut them all out.

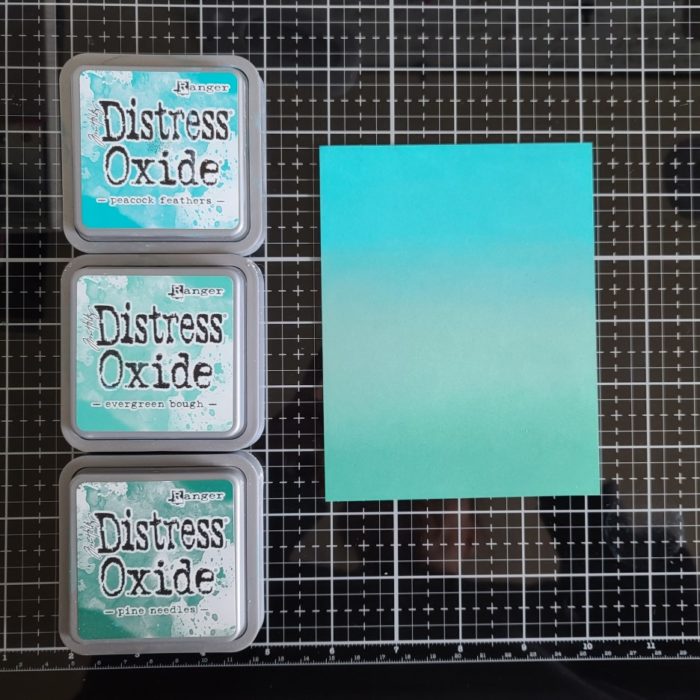
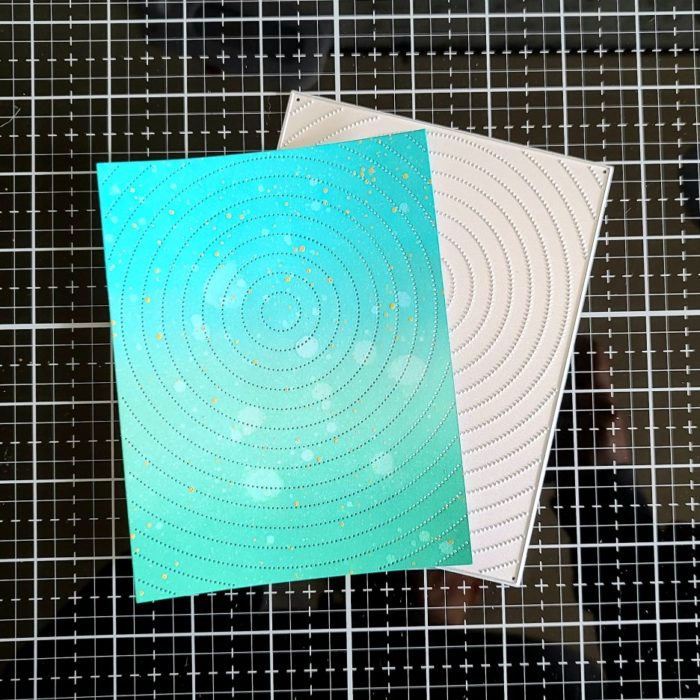
    Next, I cut down a white cardstock panel to 4.25×5.5 and inked it up with distress oxide inks in peacock feathers, evergreen bough and pine needles. This is a different combo for me and I really like the look.

    I spritzed the panel with water and let it dry. Then I ran it through my die cut machine with the pinpoint radial plate. That looked a little flat to me so I pulled out some gold watercolor and flicked that over the whole panel. This adds so much visual interest and I just love it!

    I used liquid glue to adhere all of my images together and then backed them with foam tape. I popped them in place on the inked panel and adhered that to a white card base. Then I finished things off with some peach colored heart embellishments.

    Here’s a look at the card tipped in the light so you can really see the gold watercolor. It’s so fabulous in person!

    I’m super thankful to be here sharing this card with you and appreciate the time you share. Happy Thanksgiving to everyone! I hope you have a wonderful holiday.

    Supplies

  • Using Your Dies to Create a Scene

    Using Your Dies to Create a Scene

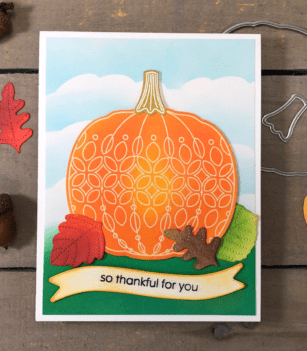
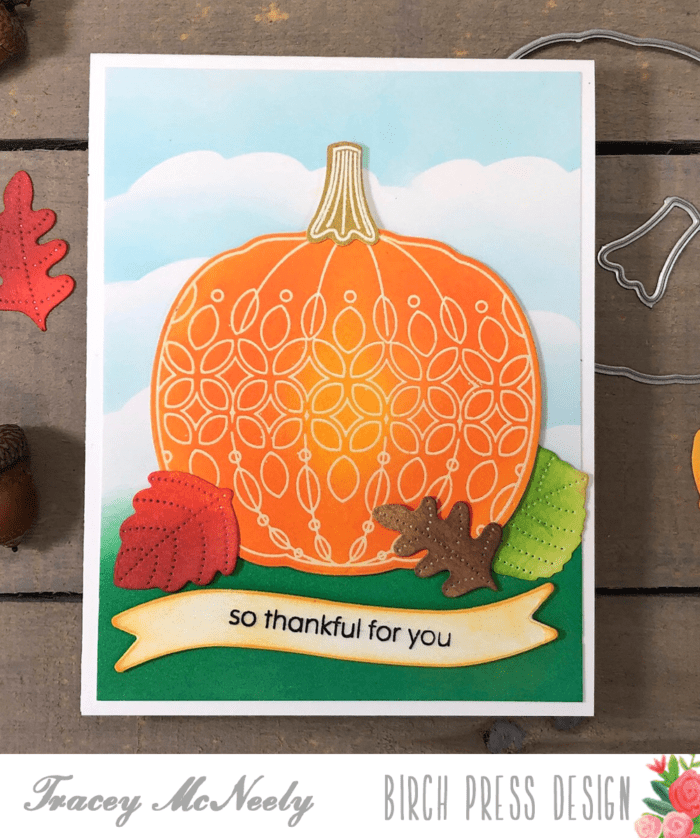
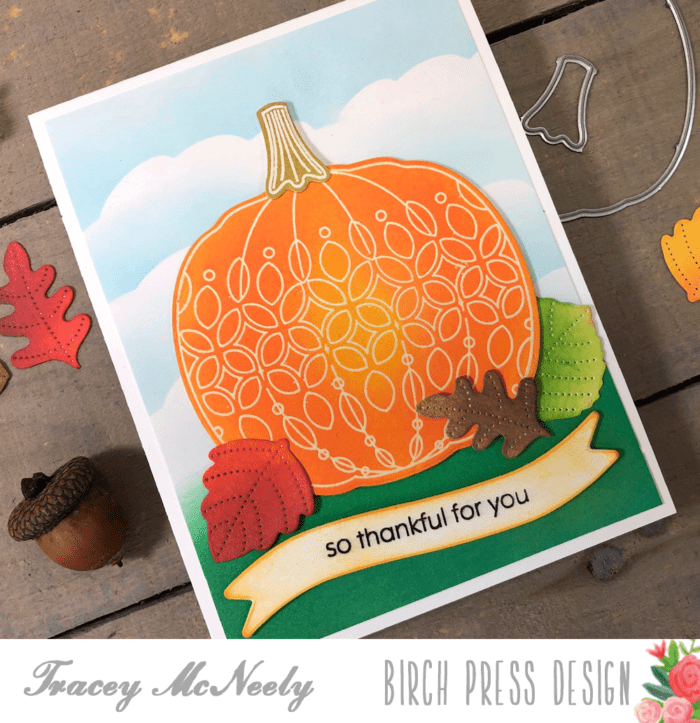
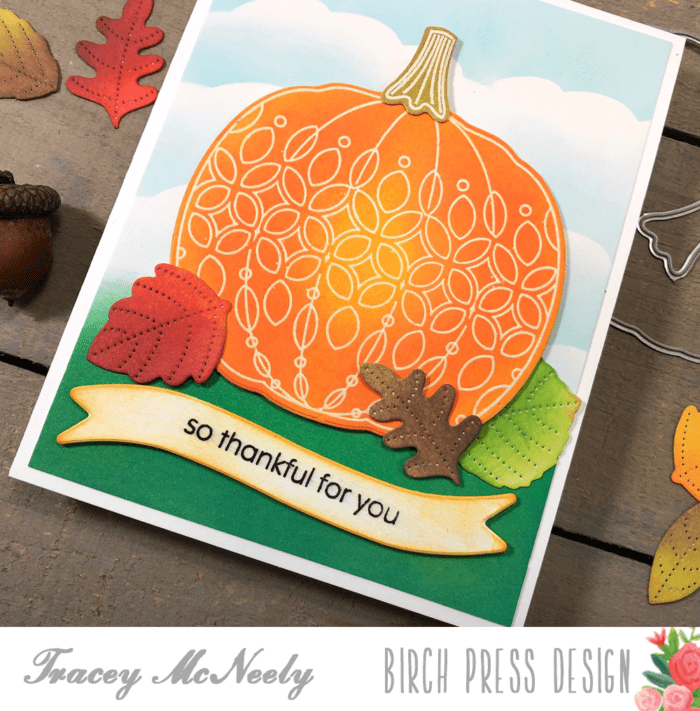
    Hi there, it’s Tracey back here today and I have a quick tutorial to show you how I got inventive with my dies to help me create a scene on a grassy field.

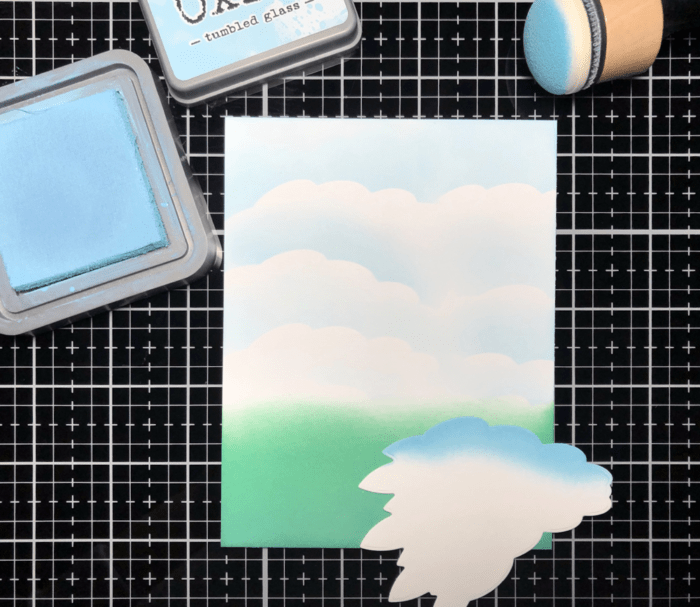
    I started off with a panel of Bristol Smooth cardstock, my favourite for use with Disress Oxides inks. All my colouring today was done with Distress Oxide inks. I ink blended my grass at the bottom of my panel using Pine Needles and Lucky Clover inks.

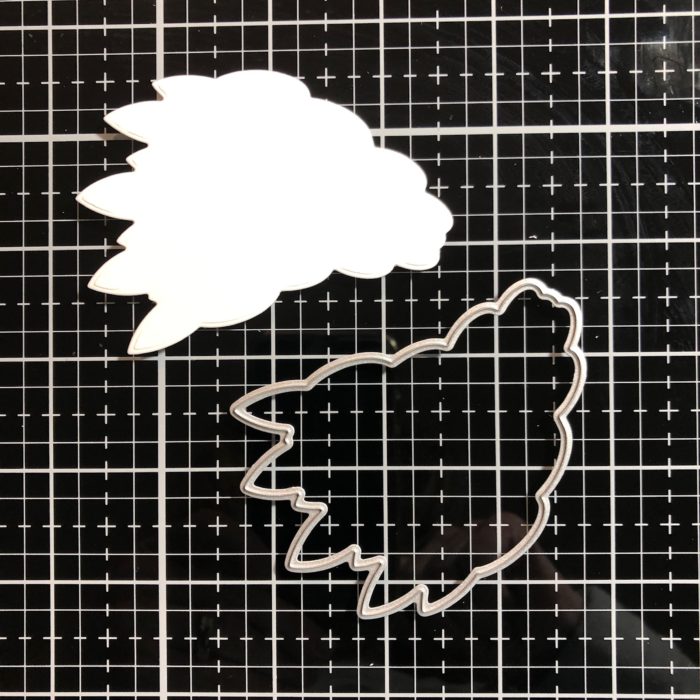
    I wanted to create clouds for my sky but I didn’t have a cloud stencil or die. So I used the Regal Peacock dies set, Layer A to make my own stencil.

    I cut the tail using lightweight cardstock, and turned the tail on it side and blended a cloudy sky using Tumbled Glass ink. Moving the stencil along from left to right, carefully turning it to fit the cloudy scene I was trying to make. Now that my background is done I set it aside to dry while I worked on the rest of the card.

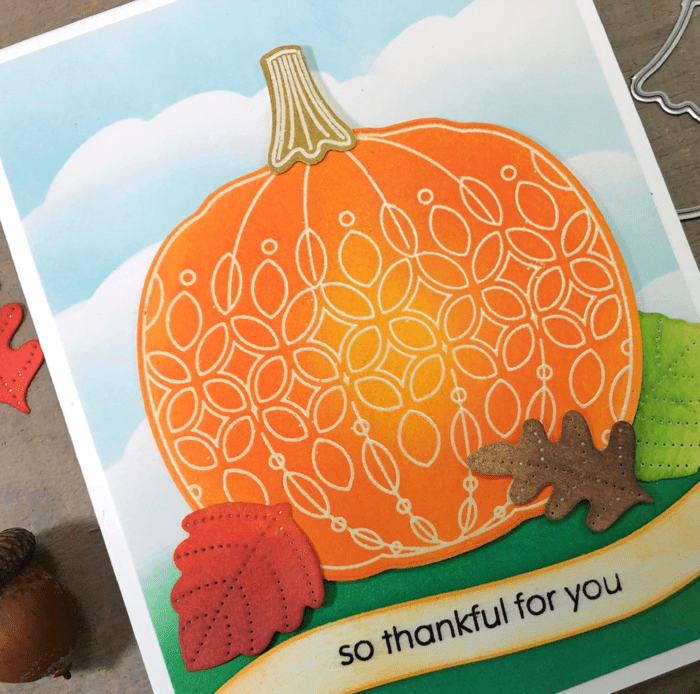
    The pumpkin and stem from the Pumpkin Lacework stamp set were stamped and clear embossed on Bristol Cardstock once again. I blended Wild Honey, Spiced Marmalade and Carved Pumpkin ink over the embossed pumpkin to add a bit of shading and dimension. I blended Peeled Paint and Frayed Burlap ink over the pumpkin stem. I cut the ink blended shapes out with the coordinating dies.

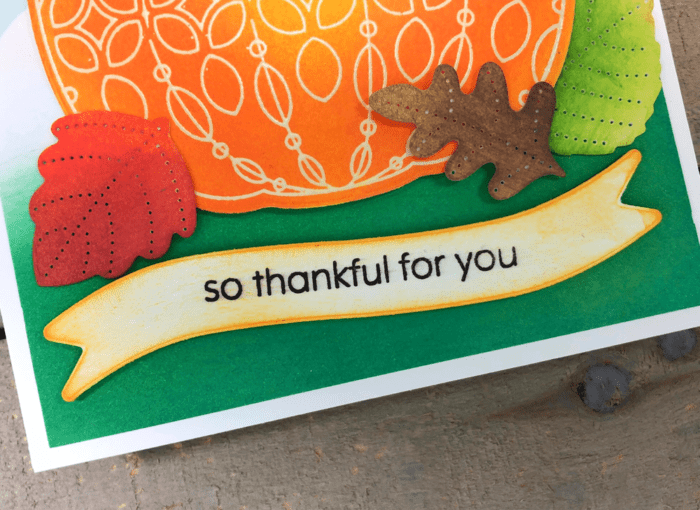
    The leaves that are around the base of the pumpkin are from Layer B of the Autumn Breeze dies set. After I cut the panel, with Bristol Smooth cardstock, I ink blended the individual leaves in autumn colours.

    I cut the wavy banner die from the Christmas Ornaments and Labels stamps set from white cardstock. Then I stamped a sentiment is from the You Are Awesome stamp set on to the banner. When I picked up the banner I got a bit of orange ink on to the one side of the banner. No need to start again, I just blended orange ink all around the banner. So now it is just between you and me!

    It was so fun to create a my scene using just what I had on hand. The peacock tail die came in handy to create those clouds in my scene. I  hope I have encouraged you to look at your supplies a bit differently. Just another way to maximize the use of what you have.
    Thanks so much for stopping in today and have a wonderful week!
    Supplies