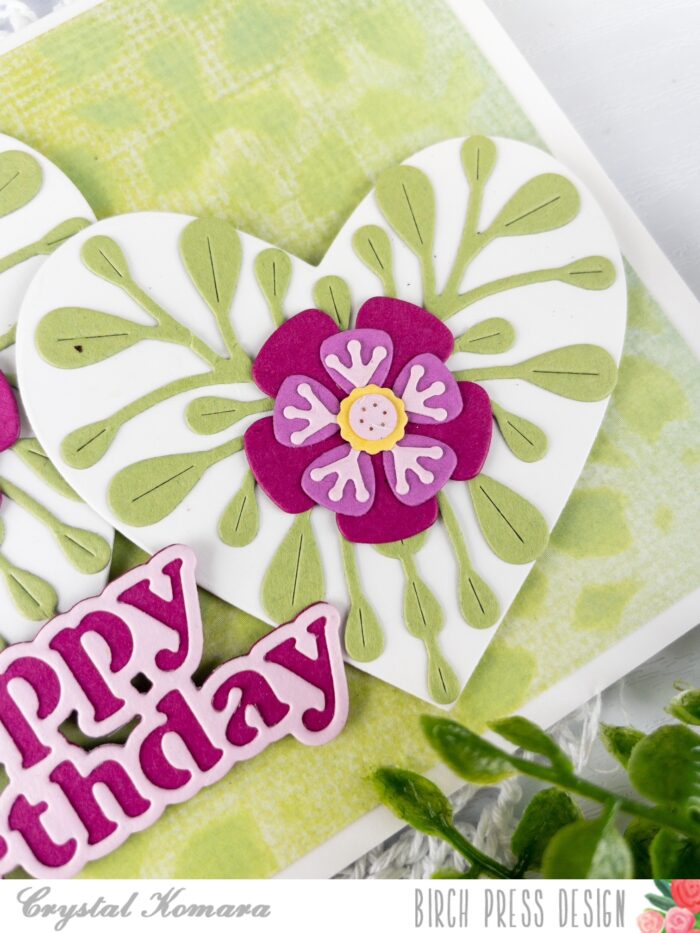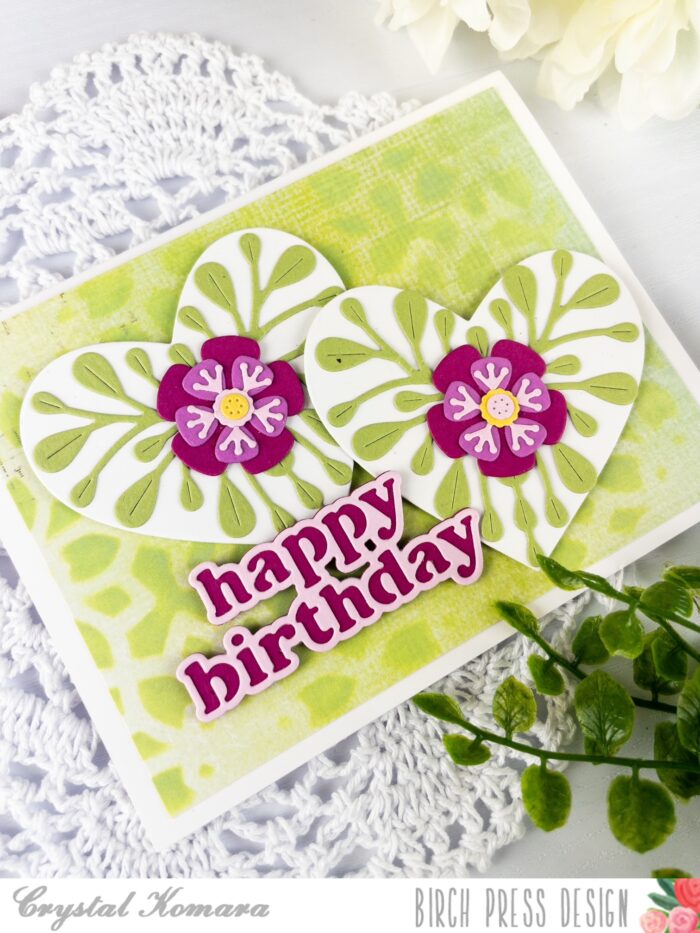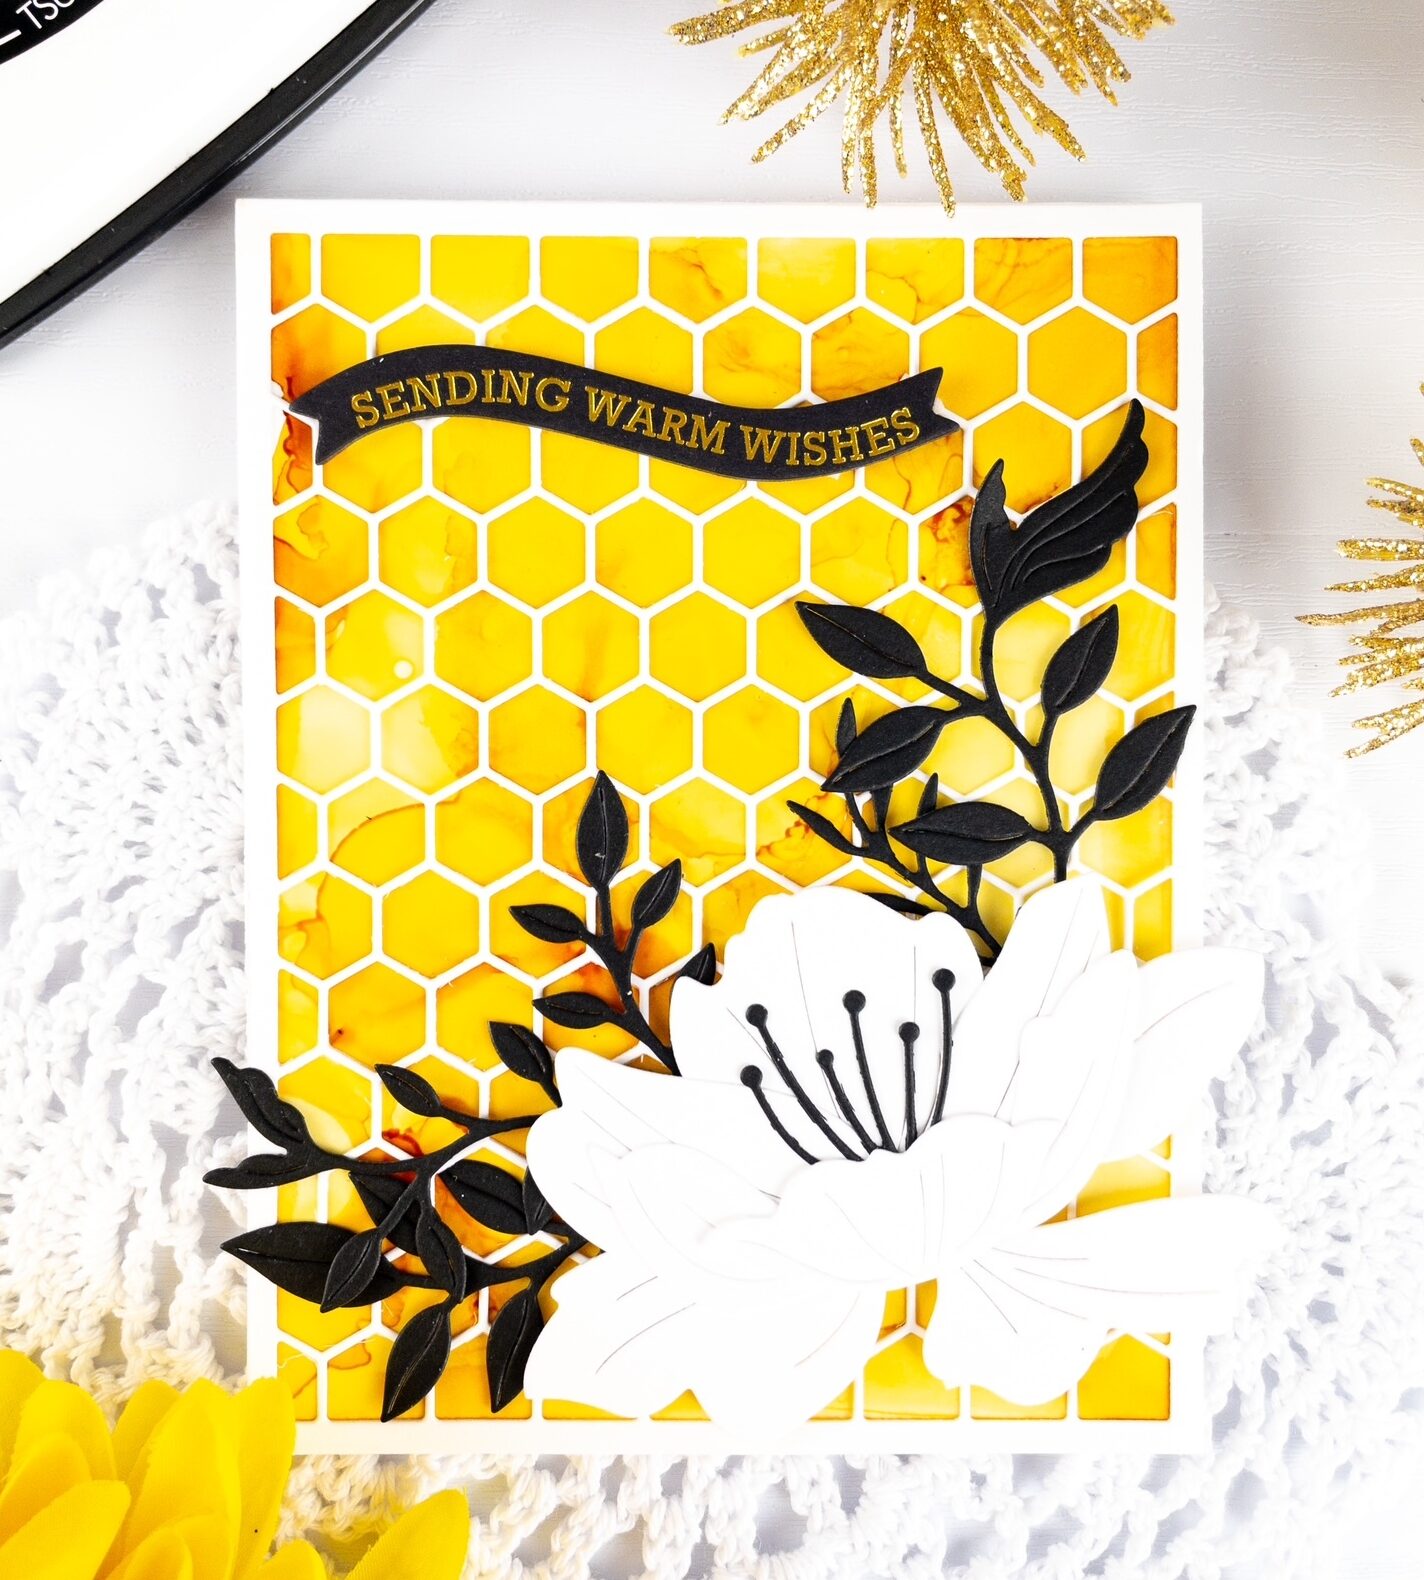
Hello friends and happy Tuesday! I hope you are all having a wonderful day so far. This is Design Team member Crystal Komara here with you today sharing a “warm wishes” card and nothing says warm like the color yellow, right?
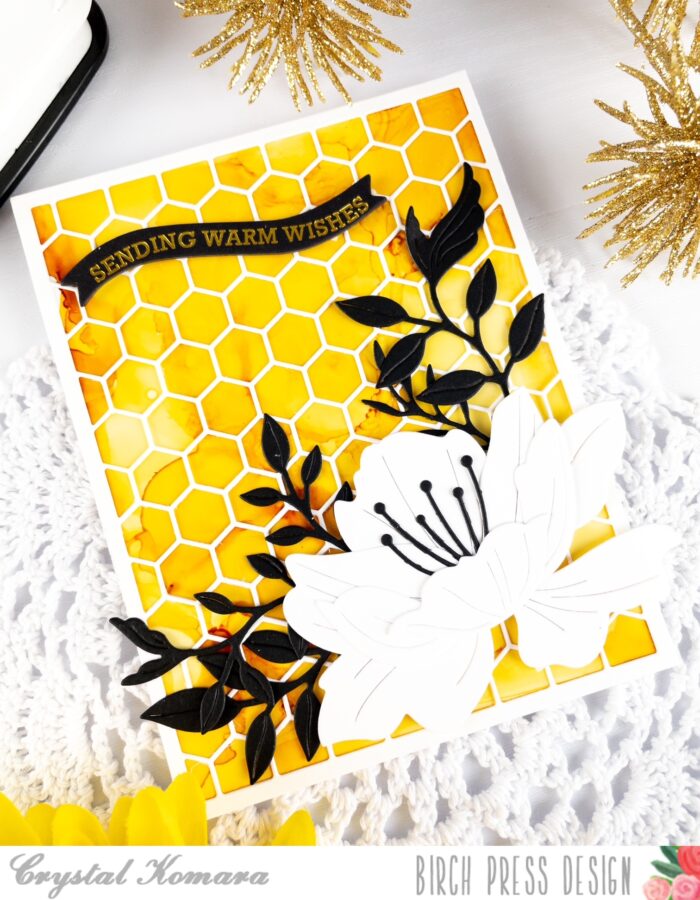
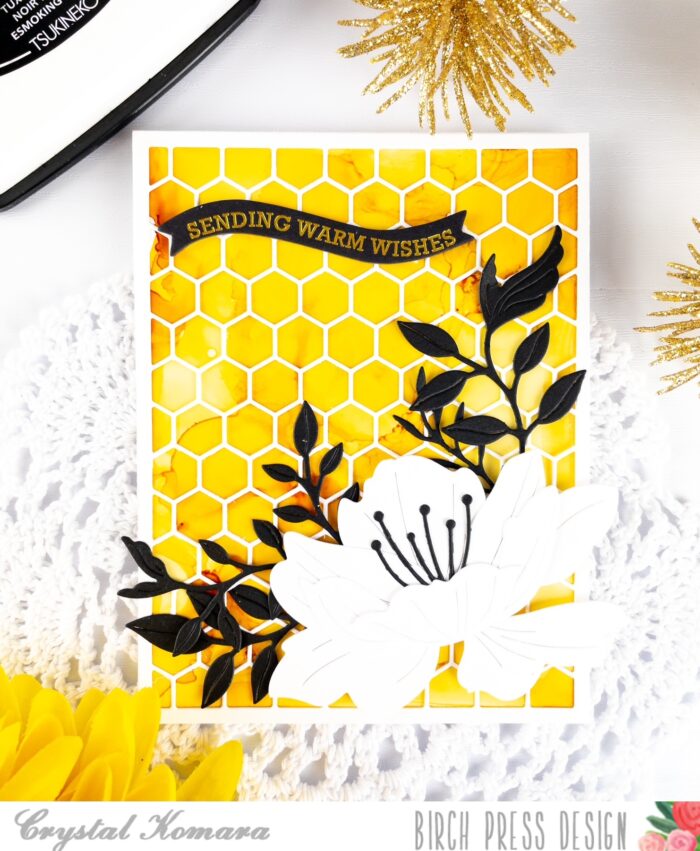
The base of this A2 sized card is made from 100 lb. Neenah Solar White Smooth cardstock. First, I created an alcohol ink background from Butterscotch Ranger Adirondack alcohol ink on Yupo paper. Once that dried, I adhered the background directly to the card base.
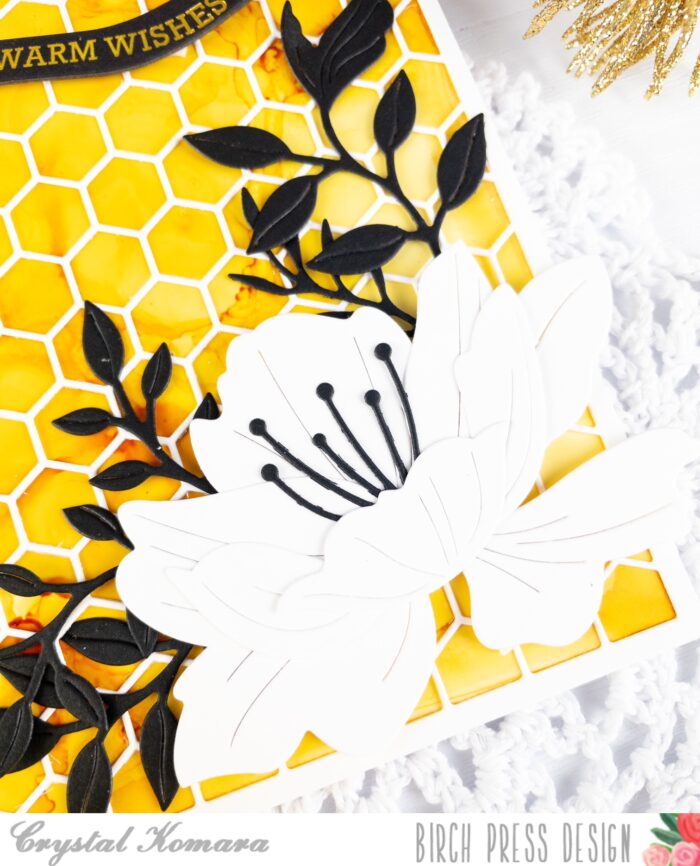
Using the new Honeycomb Plate, I die cut the honeycomb frame from white cardstock. I adhered the frame to the card using a very fine-tip liquid glue. Next, using the Perky Bloom Contour Layers die, I created the flower. I die cut all pieces of the Perky Bloom Contour Layers die from white cardstock to create a solid white flower (minus a black stamen) that would pop against that bold alcohol ink background. I adhered the layers of the flower together and adhered the flower to the lower right corner of the card.
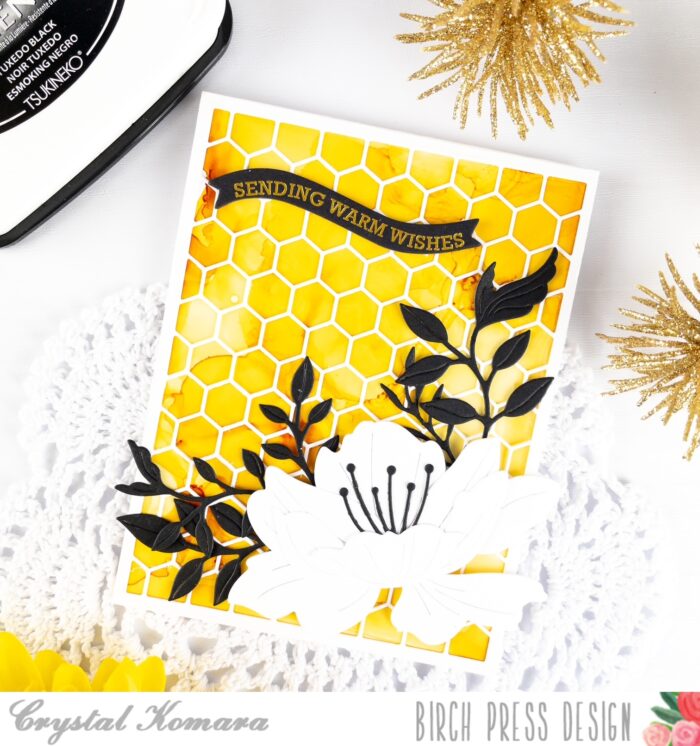
Using the Foliage Bunch dies, I die cut foliage from black cardstock. I adhered the foliage under the flower. Lastly, for a sentiment I added a foil tab from Memory Box, a sister company to Birch Press Design.
I hope you like today’s card. Thank you for visiting and have a wonderfully creative day!