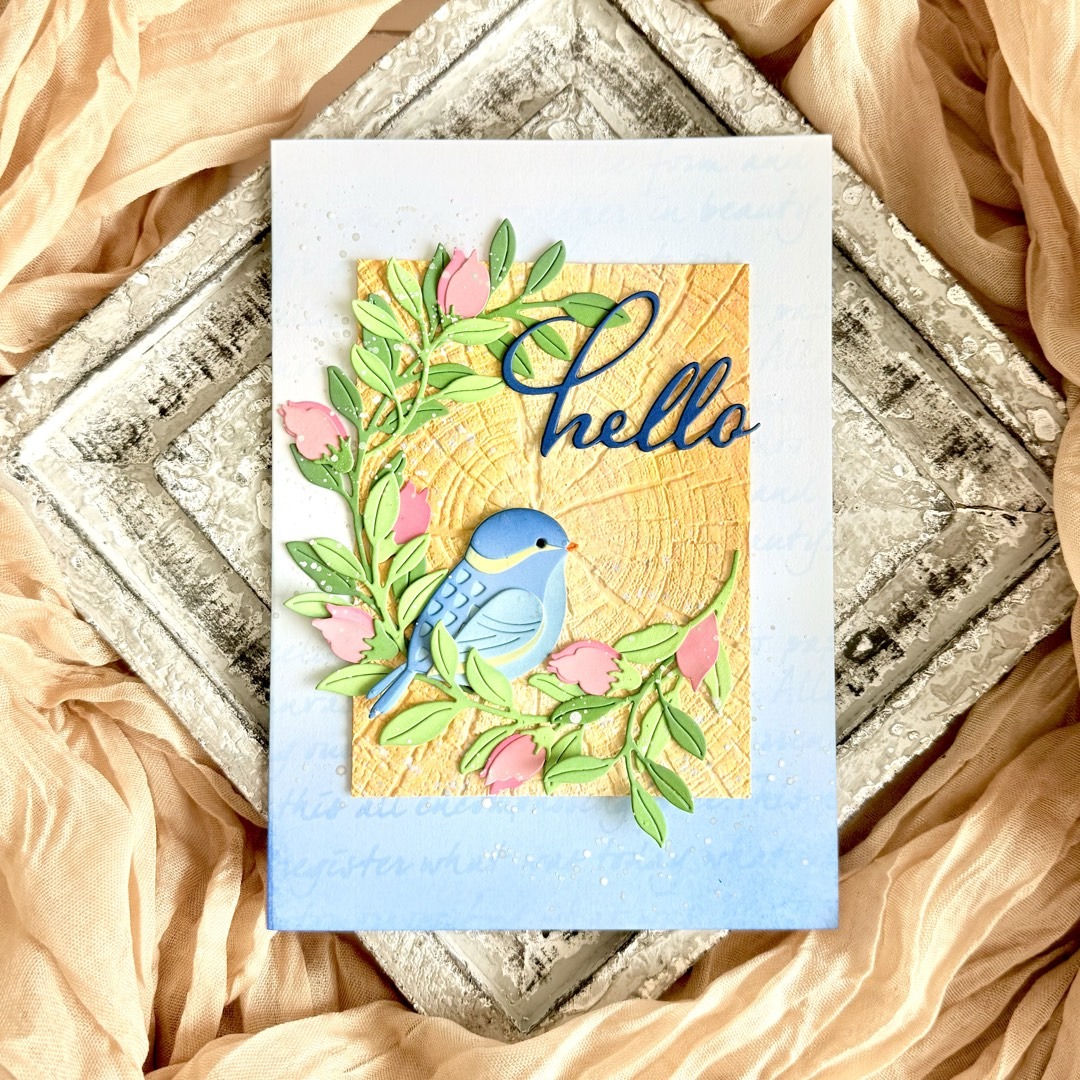
Hi, crafty friends! Sandhya here, and I’m excited to share a card I created using some gorgeous Birch Press Design dies and Memory Box cardstock. This card was a joy to make, combining intricate layering, soft ink blending, and a little ink splatter to bring this charming bluebird to life.

I started with a white card base and lightly ink-blended blue Distress Ink around the edges to create a soft, dreamy effect. I also added subtle script details using a stencil from my collection. Next, I embossed a piece of gel-printed cardstock from my stash with a woodgrain pattern to add texture and warmth.
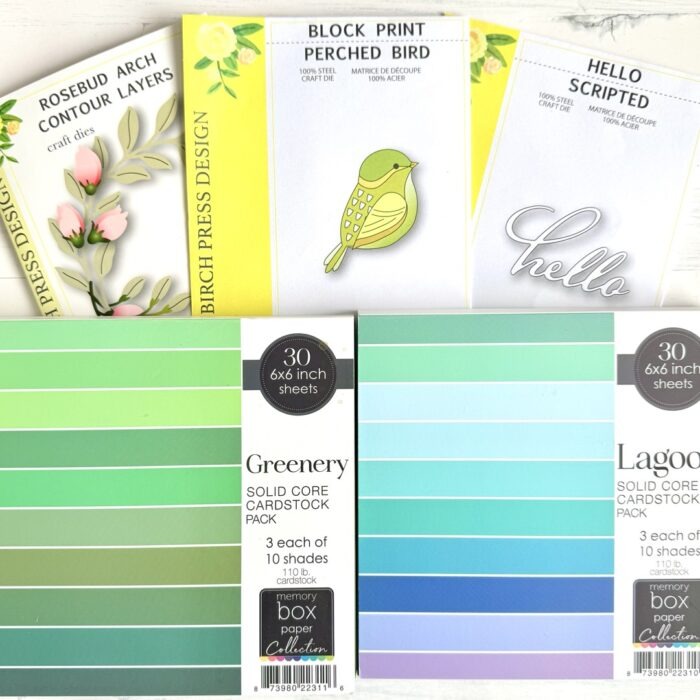
I used the Block Print Perched Bird die to cut out my adorable bluebird, layering different shades of blue and gray from the Lagoon cardstock pack. The result? A dimensional, eye-catching bird with intricate details!
The Rosebud Arch Contour Layers die set was perfect for adding a graceful frame around the bird. I die-cut the leaves in varying shades of green from the Greenery cardstock pack and the flowers in soft pinks, lightly inking the edges for added depth.
The Hello Scripted die provided a delicate yet bold sentiment. I cut it from deep blue cardstock and adhered it near the top for balance. I then arranged all the elements—bird, floral frame, and sentiment—onto the woodgrain panel, ensuring a harmonious composition. To bring everything together, I splattered some white ink across the background for a subtle artistic effect. This step adds a hint of whimsy and enhances the overall dreamy vibe of the card.
I love how this project turned out—full of dimension, texture, and soft, natural beauty. I hope this inspires you to experiment with layering, color palettes, and die-cutting to create your own nature-inspired cards. Happy crafting!

Supplies:


Happy Birthday Blooms | Natasha Vacca
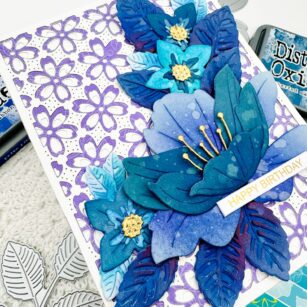
Hello Crafty friends! It is Natasha here and I am excited to be back up on the blog today. Today I am sharing a card using a few Birch Press Designs dies! I fell in love with the new Perky Blooms Contour Layers die set and was so excited to use it! So let’s get started!
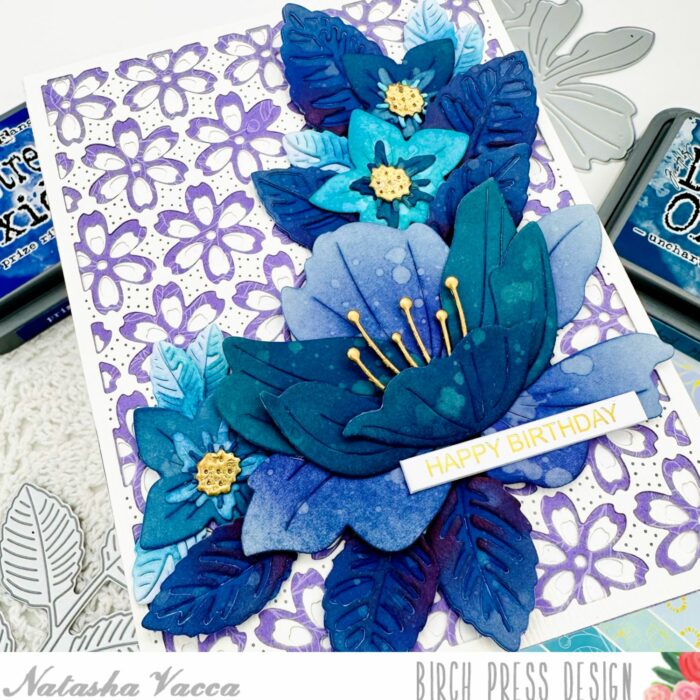
I started by die cutting the Perky Blooms Contour Layers die set, as well as the Rose Leaves Contour Layers set using Memory Box paper in Fresh Aqua and Stormy Blue. Once all the layers were die cut I inked all the layers using a combination of Distress Oxide Inks, as well as Dye Inks. I also completed the same process with the Gentle Flowers and Leaves Contour Layers set. I also added water droplets to the flowers and leaves and picked up the color with a paper towel. I love the texture this provides. I also heat embossed the centers of all the flowers.
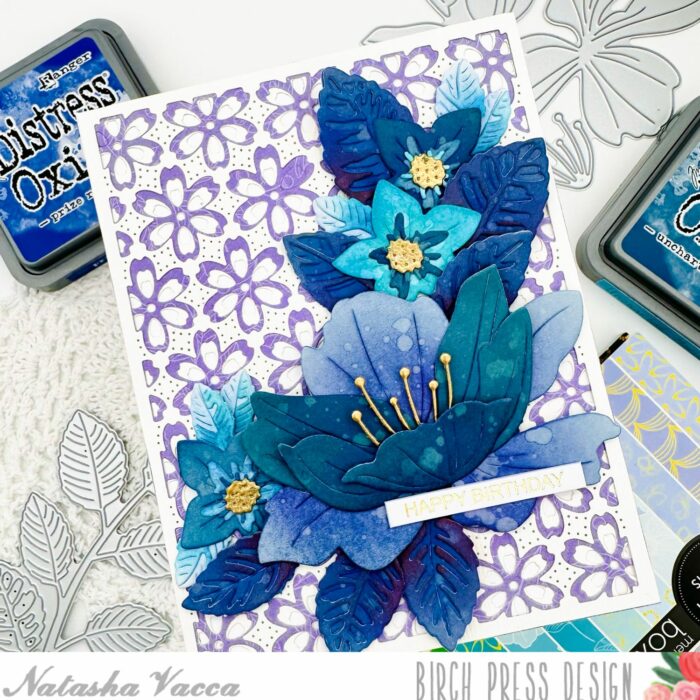
Once all the layers were inked, I adhered them together with liquid glue. I set them aside to work on my background. For the background I used the Flora Plate. I used all 3 layers. For layer A and C I die cut with the Wood Grain Cream paper pack. For Layer B I chose a piece of pattern paper from the Anemone Grove paper pack. I then adhered all the layers together using liquid glue.
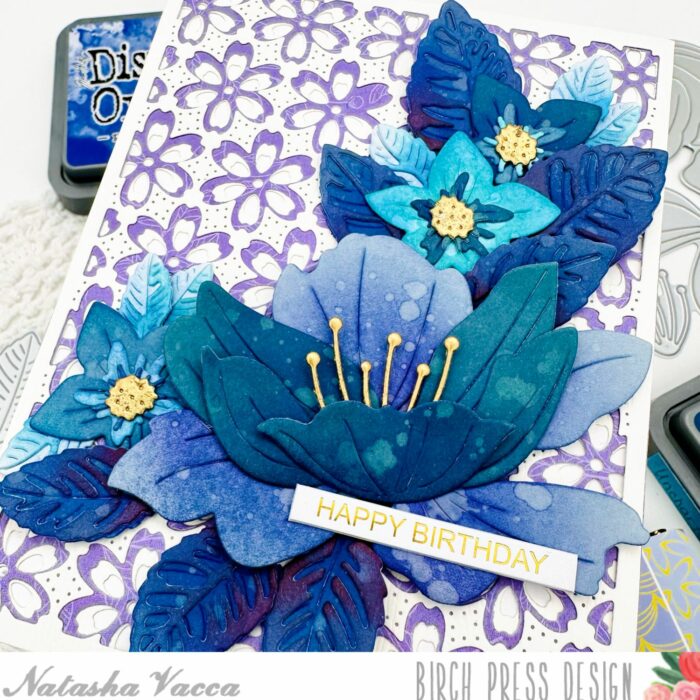
I then adhered the Flora Plate layers onto a top folding A2 card base. I chose the arrangement for my flowers and adhered them with liquid glue and foam tape. Once they were all adhered down, I chose a Happy Birthday sentiment from the new Greeting Tabs from Memory Box! These are so AMAZING and I am so excited for these!
Thanks so much for stopping by today! I will be back soon with more crafty inspiration!

Supplies


Supplies

