Tag: Floral dies

  • Enjoy the Moment – A Spring-Summer Tag | Sandhya Iyer

    Enjoy the Moment – A Spring-Summer Tag | Sandhya Iyer

    Hello Birch Press Design friends! Sandhya here, and I’m buzzing by with a bright and cheerful spring-summer tag that’s sure to bring a smile to your face! With warmer days ahead, I was inspired to create a tag full of color, texture, and a bit of whimsy using some of my favorite new dies from Birch Press Design.

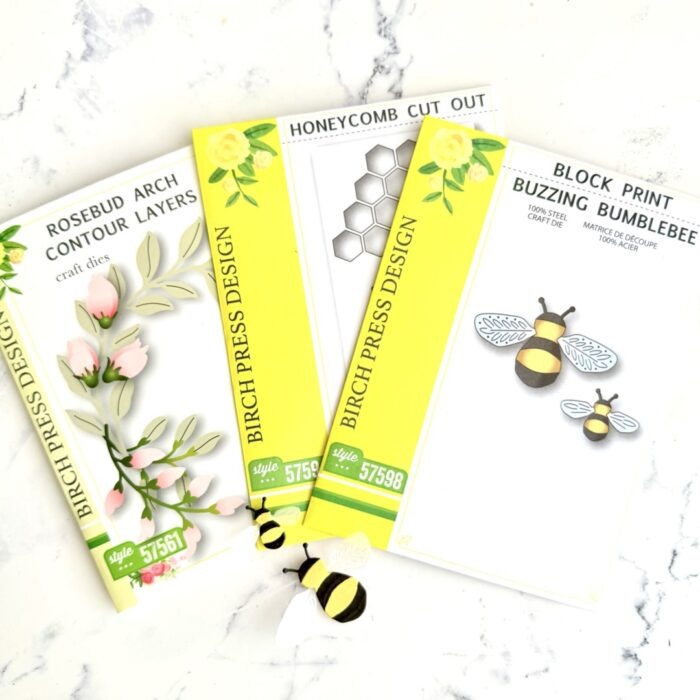
    Here’s a quick rundown of the featured products:

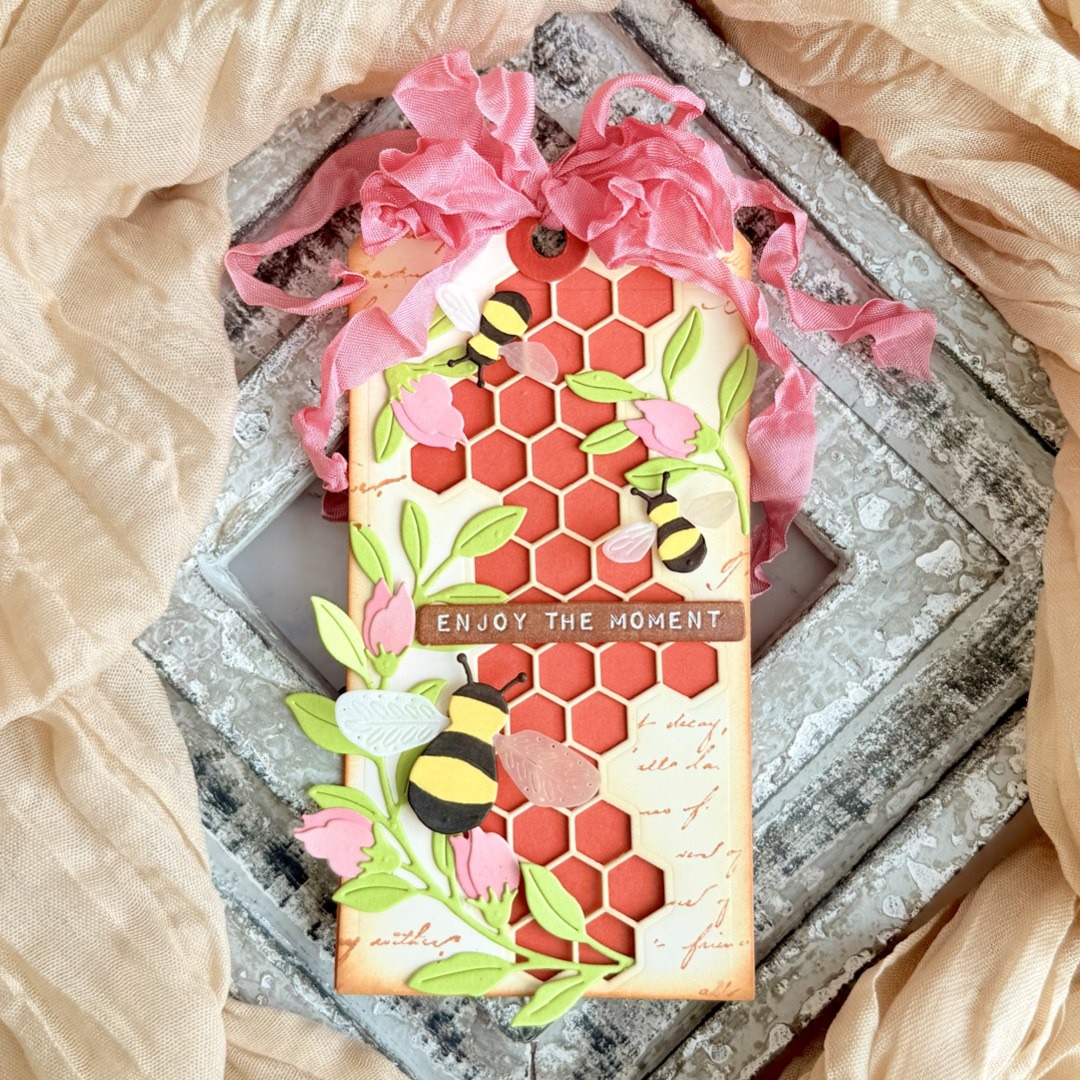
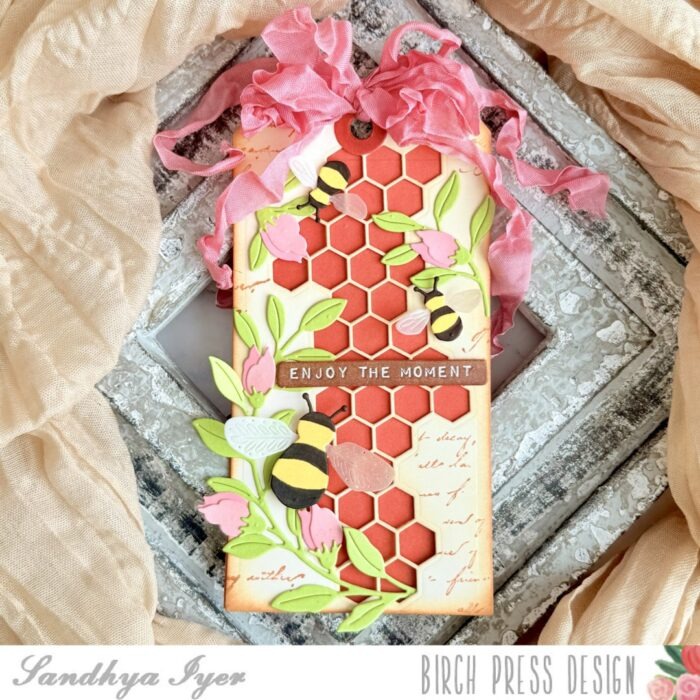
    Honeycomb Cut Out Die – the star of the background, adds depth and pattern

    Rosebud Arch Contour Layers Die Set – for the soft, dimensional blooms and leafy vines

    Block Print Buzzing Bumblebee Die Set – these adorable bees add the perfect whimsical touch

    To begin, I cut two tag bases from cream-colored cardstock and rusty red-colored cardstock. Any generic large size tag dies or readymade tags should work for this. I cut the honeycomb panel out of the cream tag and softly ink-blended the edges for a warm glow. Then I added some scripty stamping details to add a vintage effect. I backed the honeycomb layer with a red layer to give my tag a vibrant focal point.

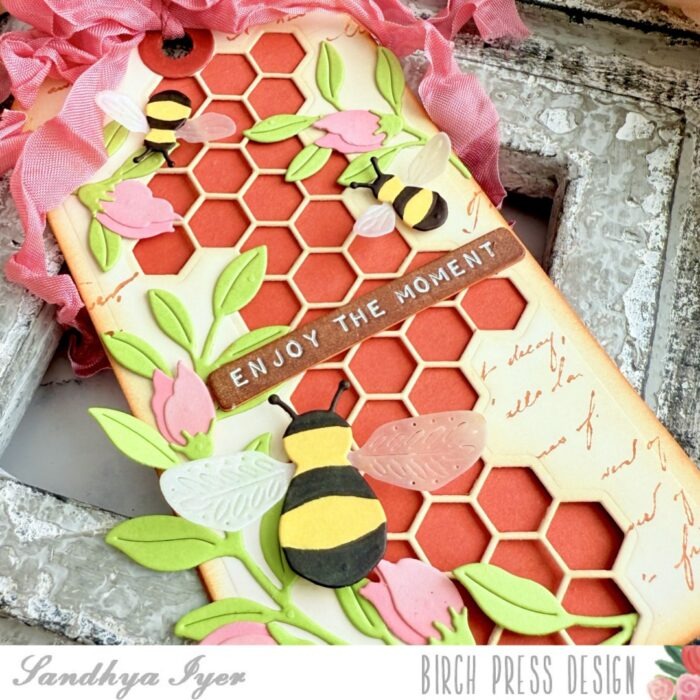
    Next, I die cut and assembled the florals and vines as well as the bees. The bee-wings were die-cut from vellum cardstock to give them realistic wings and a soft texture. I cut the bee bodies from yellow cardstock and added the black portion with an alcohol marker.

    I then tucked in leafy stems and rosebuds to build a garden around the honeycomb. I carefully added the bees and a chipboard sentiment from my stash to complete the top layer.

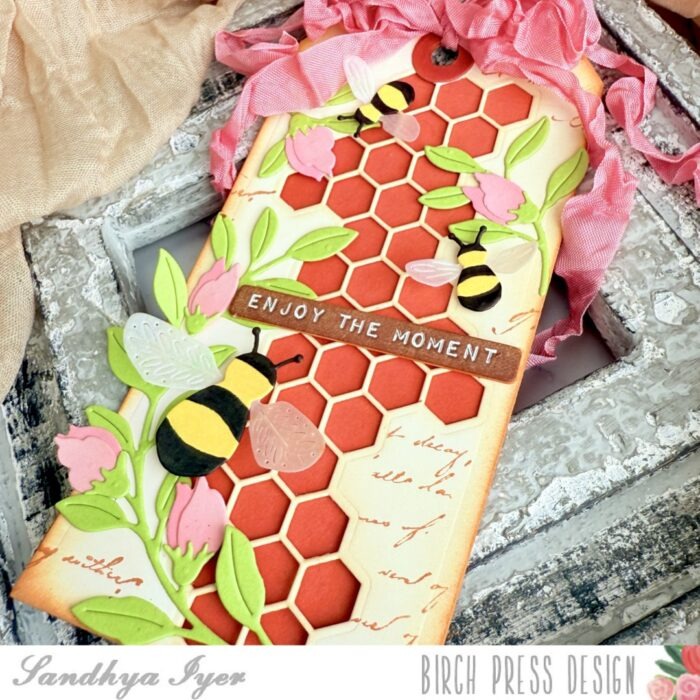
    Finally, I used some crinkled ribbon to tie a blow and connect the 2 tag layers. I hope this project inspires you to check out the fun new bee themed release and create some fun summer projects. Happy crafting!

    Supplies:


  • ATC (Artist Trading Cards) Thank You Notes | By, Natasha Vacca

    ATC (Artist Trading Cards) Thank You Notes | By, Natasha Vacca

    Hello Birch Press friends, I am excited to be back on the blog today sharing an Artist Trading Card idea with you! Today’s project is using 3 die sets: Budding Twigs Contour Layers, Sylvan Berries and Leaves Contour Layers, and the Simple Dragonfly. Let’s get started!

    I started by die cutting all 3 sets: Budding Twigs Contour Layers, Sylvan Berries and Leaves Contour Layers, and the Simple Dragonfly onto Canson XL watercolor paper. I die cut 2 sets of the Budding Twigs. Next I used pigment powders to color each of the die cut layers. I place all the die cuts on my glass work surface, add the pigment powder to the die cuts with a fan brush, then spritz the pieces with water. I move the color around with my paintbrush. I set all the layers aside to dry.

    Once all the layers were dry, I added more texture to the layers using dye ink. I applied the ink to the edges of each layer and then adhered the layers together using liquid glue. Next I chose a background from my stash and trimmed the panel into 2 Artist Trading Cards (2.5 x 3.5).

    I then added texture to each of the ATC backgrounds using crackle paint. Once the paint dried, I added distress crayon over the crackled paint. Next I added washi tape from my stash, as well as applied distress ink and acrylic paint with a sponge. I then distressed the edges of each ATC.

    Once the background was complete, I chose a piece of coordinating cardstock from the Magnolia Plaid paper pad from Memory Box. I tore the paper and distressed the edges. Next I determined the placement for my twigs and berries and then adhered them with my tiny stapler to my torn piece of cardstock, with a piece of lace on the back. I adhered the dragonfly, as well as a thank you sentiment strip from the Foil Greeting Black Tabs set.

    I had a lot of fun creating these ATC’s today! I hope you enjoyed them! I’ll be back soon!


    Supplies


    Supplies


    Supplies