Tag: heart

  • Just a Note | by Crystal Komara

    Just a Note | by Crystal Komara

    Hello friends and happy week after Valentine’s Day! This is Design Team member Crystal Komara, and, as per my usual, I’m a wee bit late to the game. But, even though Valentine’s Day has passed, every day is a day to celebrate love and today’s card could be shared all throughout the year.

    Card details:

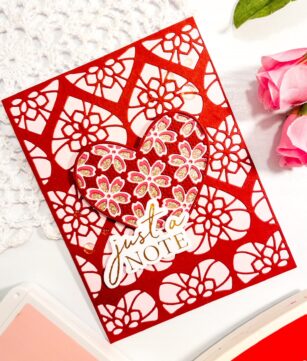
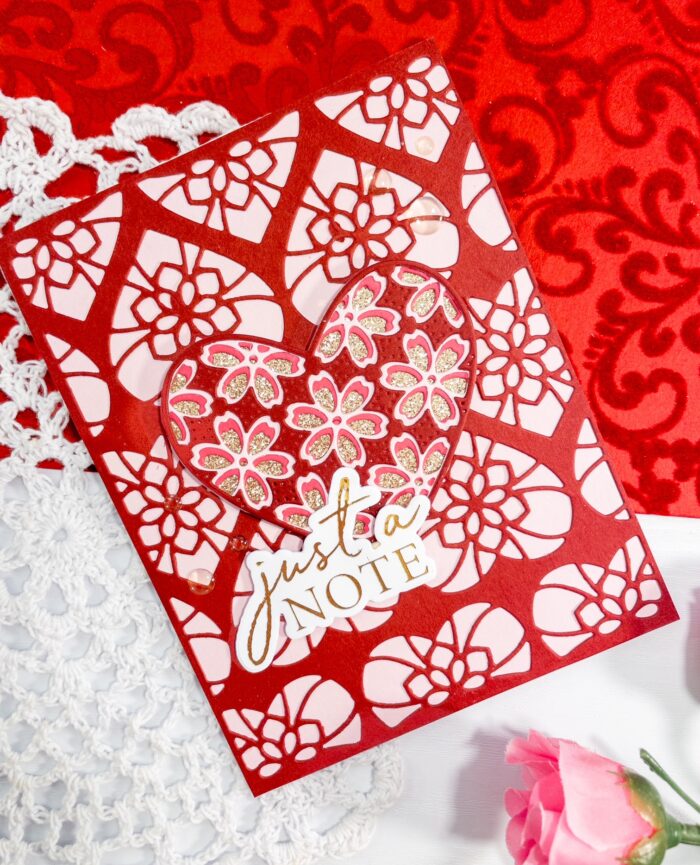
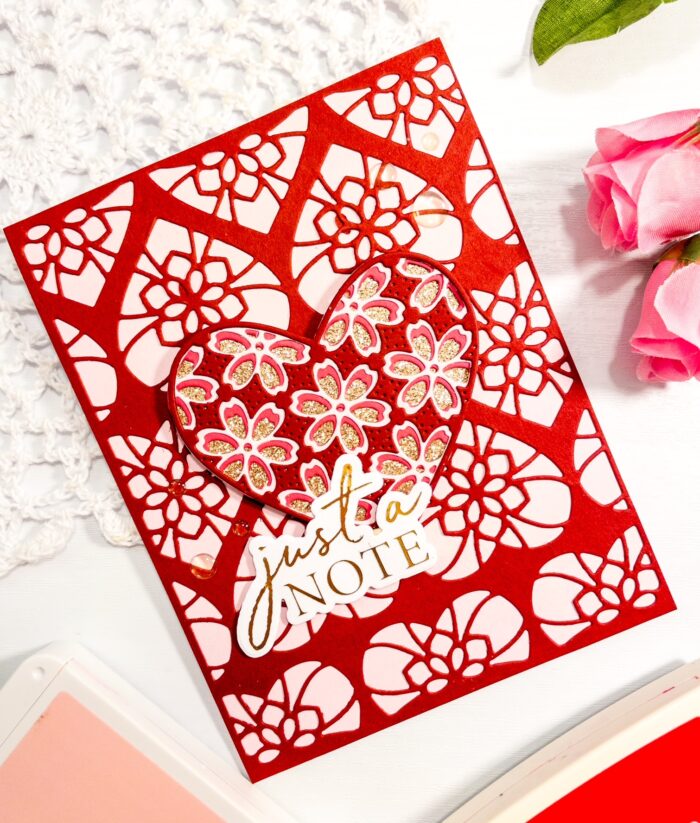
    The base of this card is made from 80 lb. Neenah White Solar Smooth cardstock. Using a sheet of red cardstock, I die cut Layer A from the Kinsley Heart Layer Plate set. I adhere this directly to the card base. I heat foiled the sentiment “just a note” using the Just a Note Script Hot Foil Plate. I used gold foil on white cardstock.

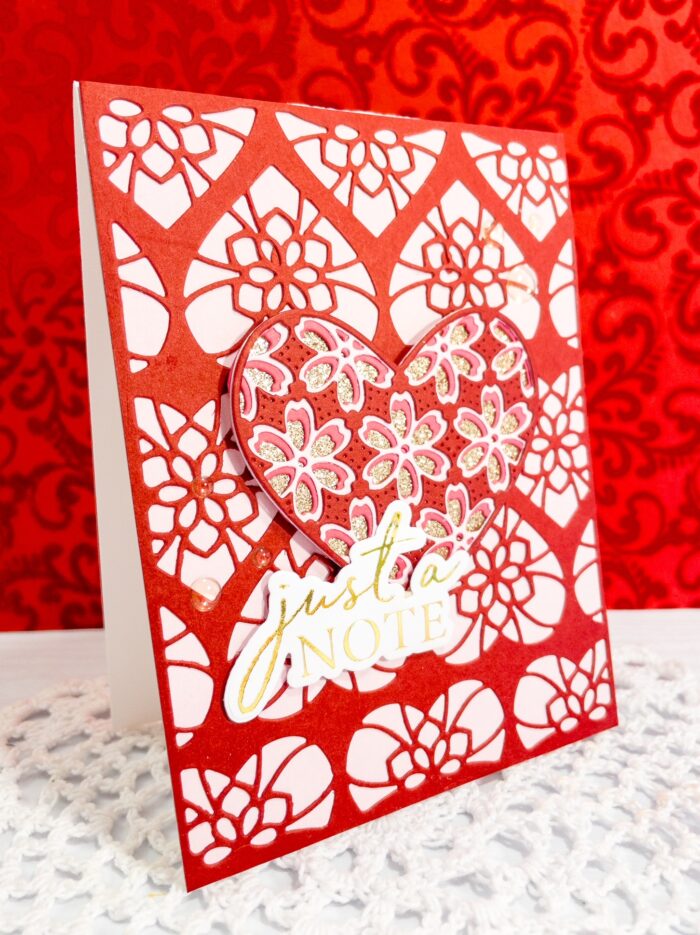
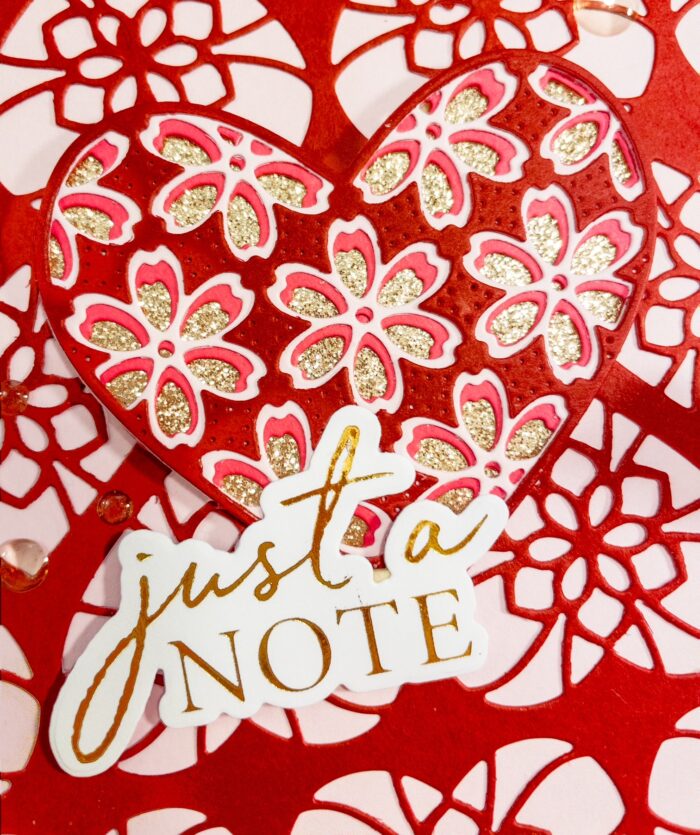
    To create the heart focal piece I used a layering heart die. Apparently the one I used must have retired, so might I suggest using the Caprice Heart Layering Die instead, which would yield da very similar look! I die cut Layer C from a bold pink cardstock, Layer B from a light pink cardstock and Layer C (the top layer) from red cardstock. I adhered all three layers together with a fine tip liquid glue. Once all three layers were adhered together, I placed the heart over a piece of gold glitter cardstock and trimmed it by hand to fit behind the entire heart.

    I adhere the heart to the center of the card and then adhered the gold foiled sentiment just slightly off center using 3M adhesive. Lastly I added a couple clear rhinestone gems for added texture.

    I hope you like this beautiful card! Thanks for visiting and have a wonderfully creative day!

    Supplies

  • Sending Love | By Natasha Vacca

    Sending Love | By Natasha Vacca

    Hello Birch Press friends, I am excited to be back up on the blog today sharing a fun and easy card using the Banner Heart Layering die set! So let’s get started!

    For today’s card I started with the Banner Heart Layering die set. I die cut layer A and C using white card stock. I then die cut layer B using the Festive Glitter paper pad. For the glitter layer I chose a dark blue shade from the paper pad. I then ink blended layer A and C using Distress Oxides. I used a combination of Distress Oxides: Saltwater Taffy, Picked Raspberry, Seedless Preserves, Shaded Lilac, and Villainous Potion. Once the layers were ink blended I set these aside to dry.

    Next on layer B, I wanted to add a bit more texture to the glitter paper pad. I used a combination of paper glaze, as well as embossing powder! I love the texture this provides. Once the other heart layers were completely dry, I added Gilded Foundry wax to sections of the heart. I then adhered all the heart layers together using liquid glue.

    Next I chose a gelli print from my background stash and dry embossed the background using the Ringadings embossing folder from Memory Box. I then applied white pigment ink to sections of the folder and ran it through one more time. I like this effect and the random texture this provides the dry embossed background. I allowed the ink to dry, then trimmed the panel using my paper trimmer for my card base.

    I completed my card by stamping a sentiment from the Contempo Greetings stamp and die set. I stamped the sentiment in purple, trimmed using the coordinating die, then applied foundry wax and ink on the edges as well. I then adhered the card panel, heart, and sentiment to my card base.

    Thank you so much for stopping by today! I will be back soon!


    Supplies


    Supplies