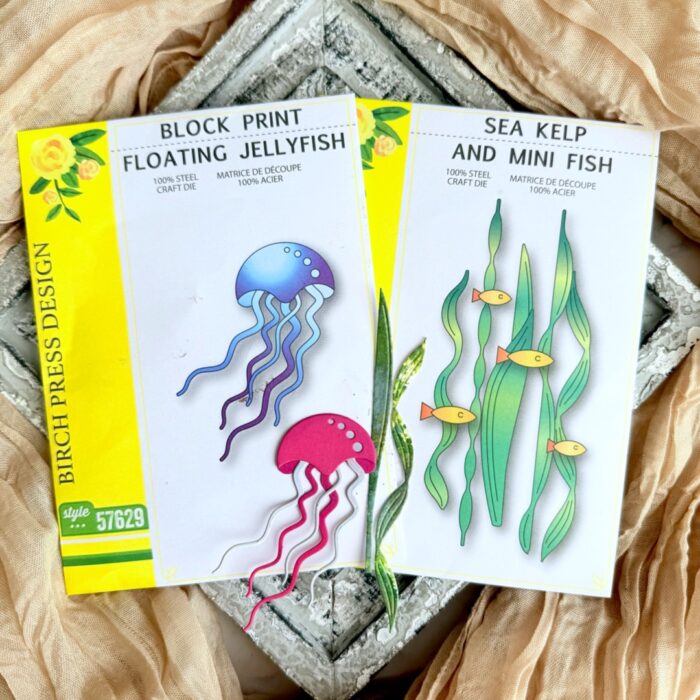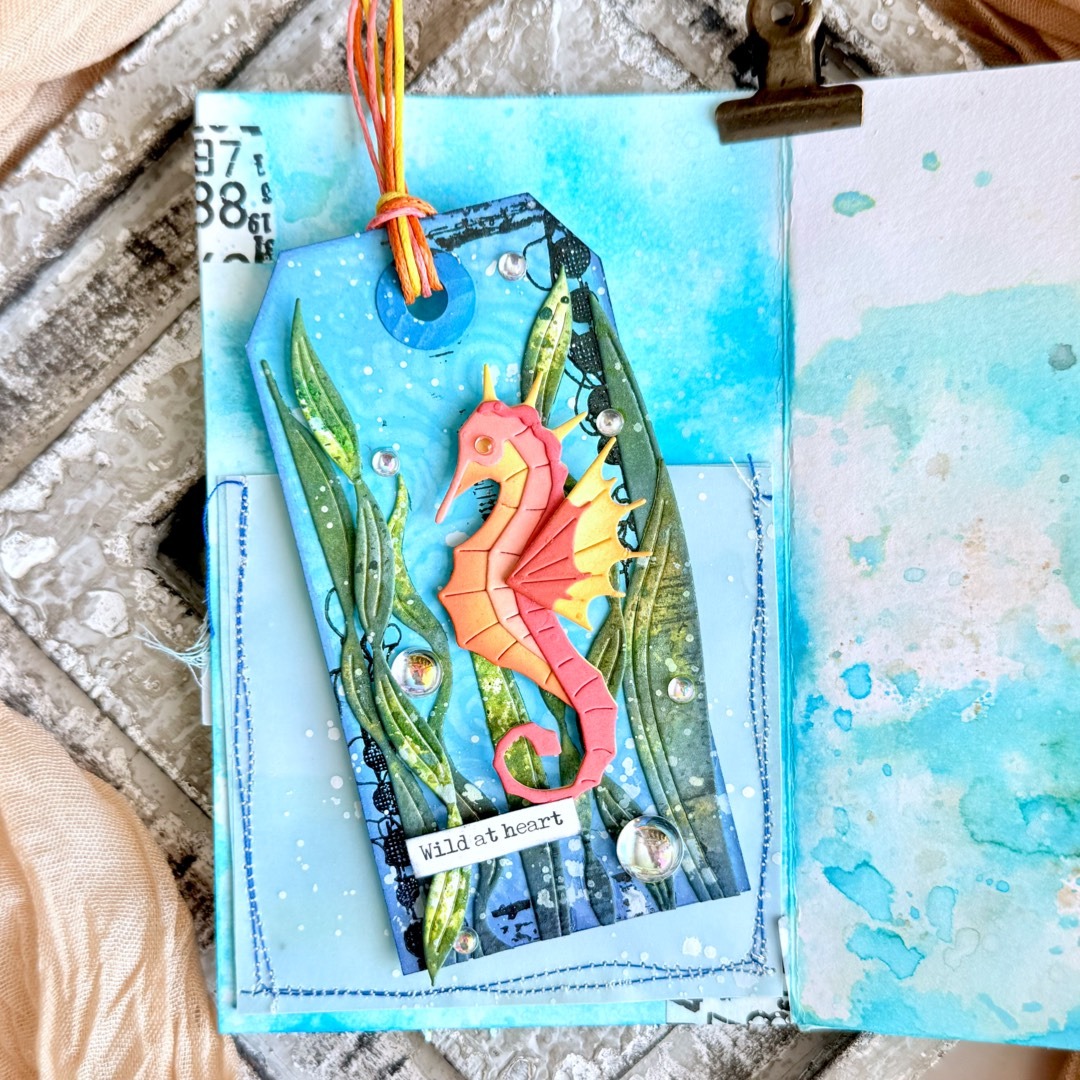
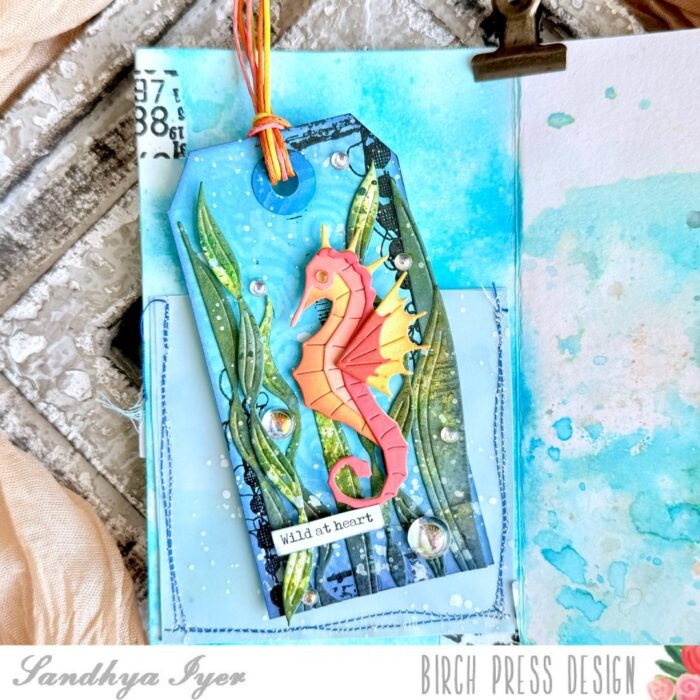
Hello again, crafty friends! Sandhya here with another ocean-themed zine page featuring the stunning new dies from Birch Press Design’s latest release. This time, I’m spotlighting the elegant Block Print Proud Seahorse paired with the graceful Sea Kelp and Mini Fish dies.
For this zine page, I wanted to create an underwater scene that feels both magical and empowering—something that invites you to pause and take in all the details.
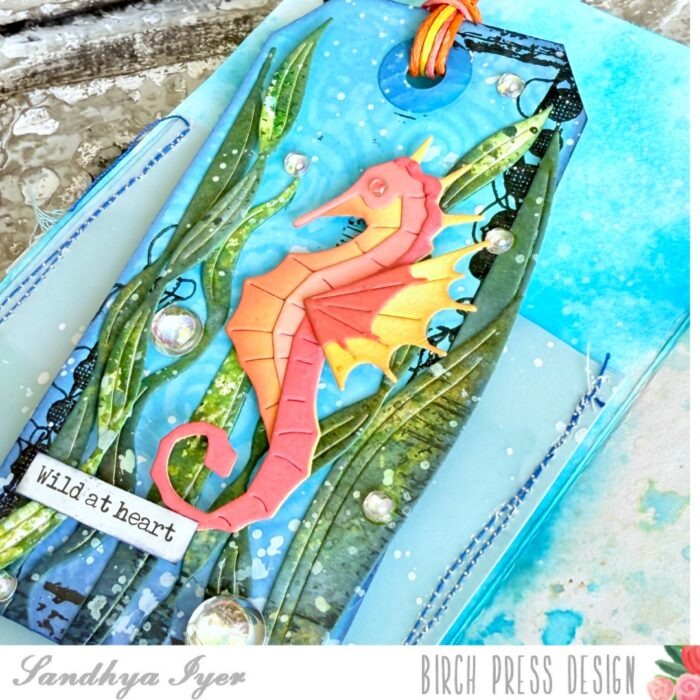
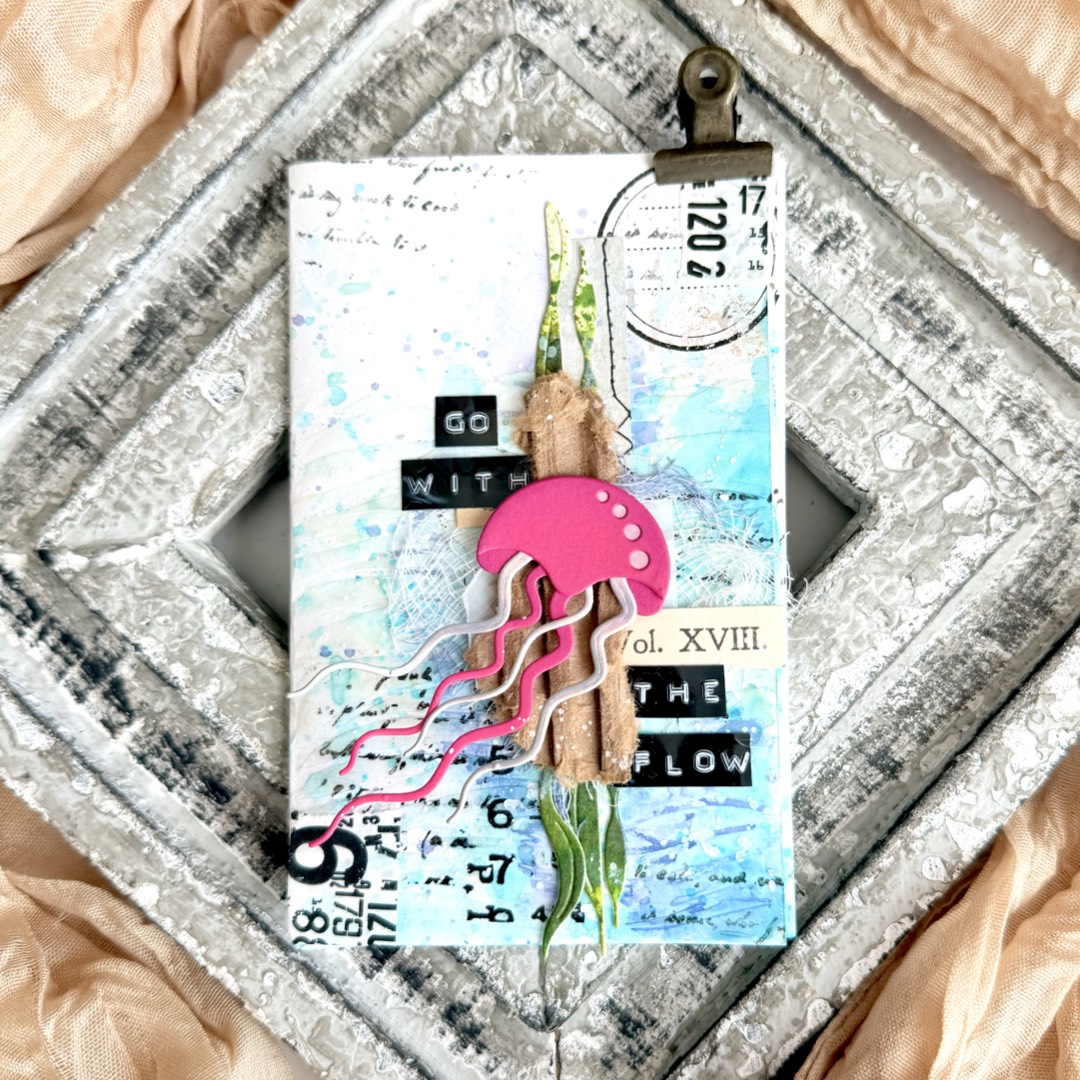
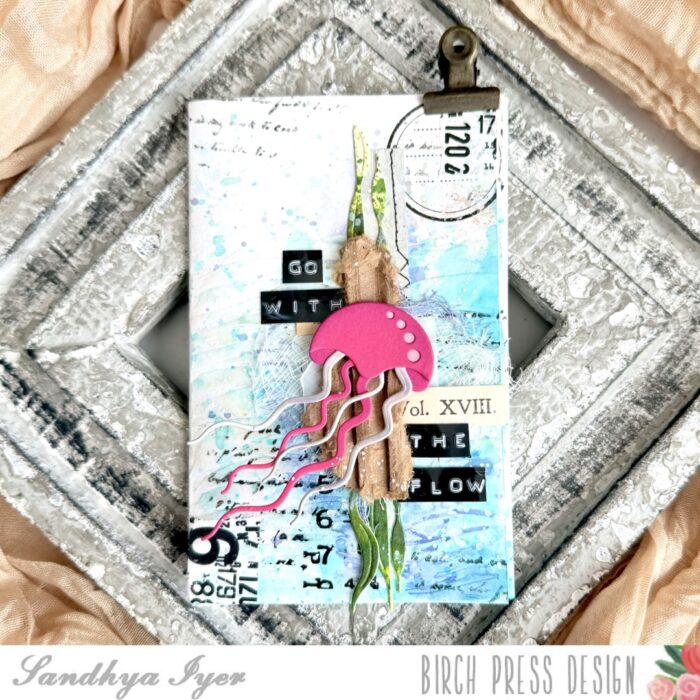
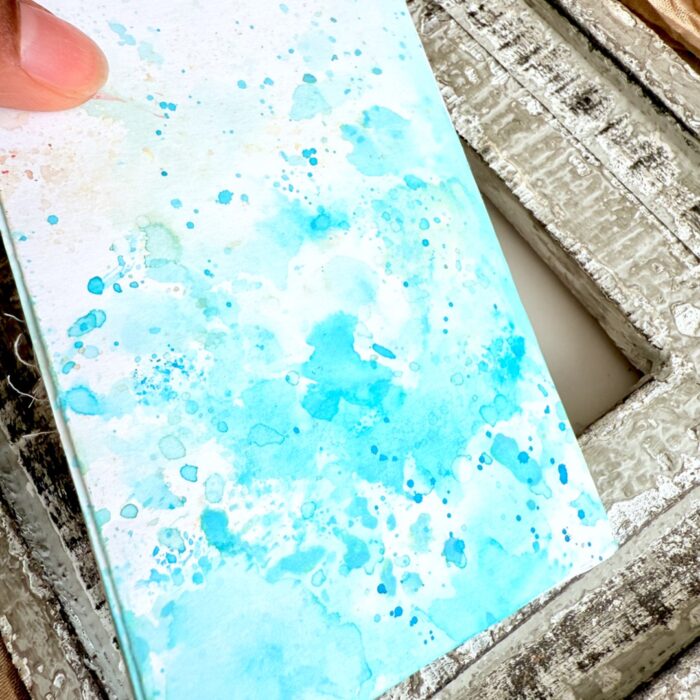
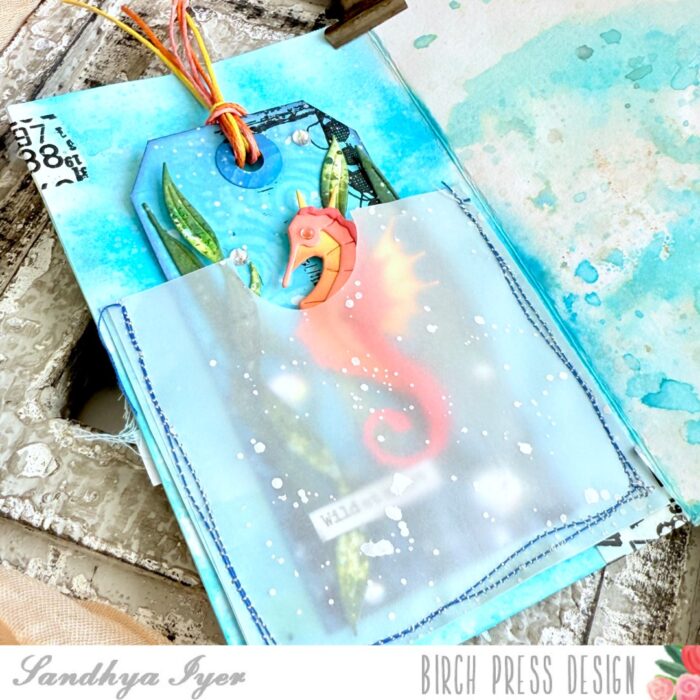
To start, I worked on a tag and created a textured background using layers of ink blending and splatter with Distress Oxides in aqua, teal, and sea green. I used a stencil to lift away some ink for wave-like motion.
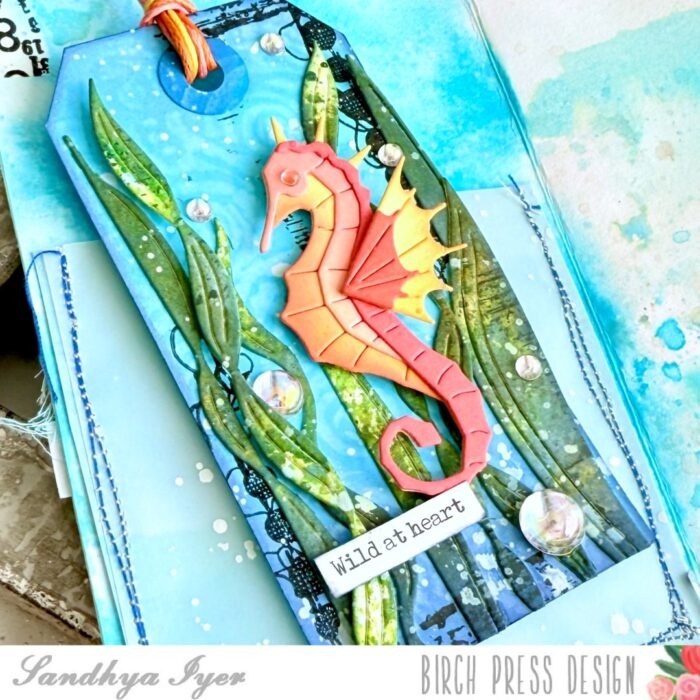
The seahorse is cut from watercolor cardstock—inked with Distress Oxide inks. I love how the bold lines of the die really stand out against the soft ocean tones. I nestled the seahorse into a cluster leafy die cuts from the Sea Kelp and Mini Fish set.
I then added my “wild at heart” sentiment and a generous splattering of white paint. I also added some flatback gems for added glam.
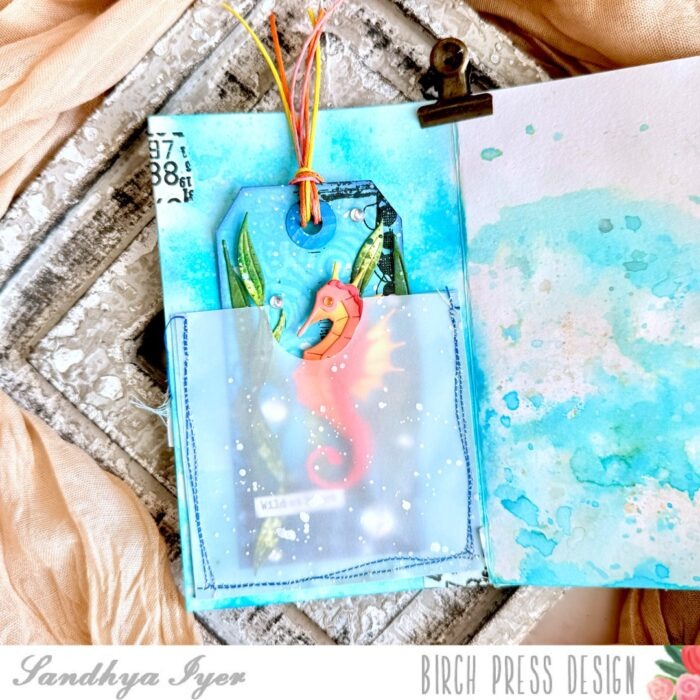
I then created a pocket by sewing some vellum over pattern paper and adhered it to my zine page. This was perfect to insert my little tag.
This zine page is one of my favorite ways to celebrate the ocean theme—it’s small, detailed, and full of heart. I hope this inspires you to experiment with mixed media and dive deep into your stash of dies!
Thanks for stopping by! I’ll be back soon with more ocean-inspired creations.
Crafting with joy,
Sandhya