Tag: natasha vacca

  • Holiday ATC’s | By, Natasha Vacca

    Holiday ATC’s | By, Natasha Vacca

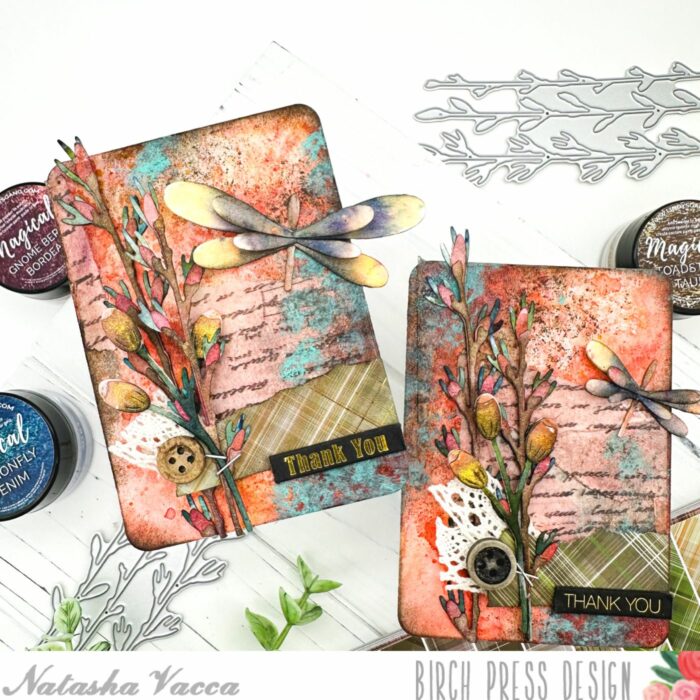
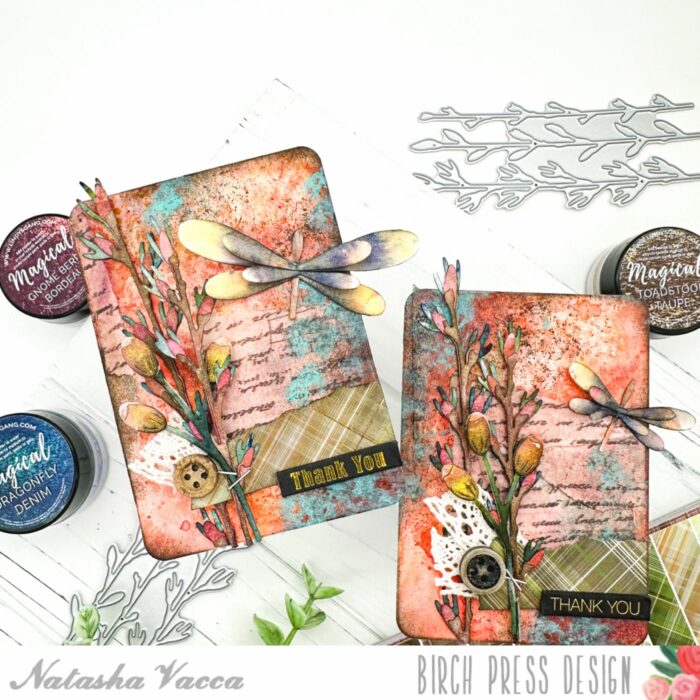
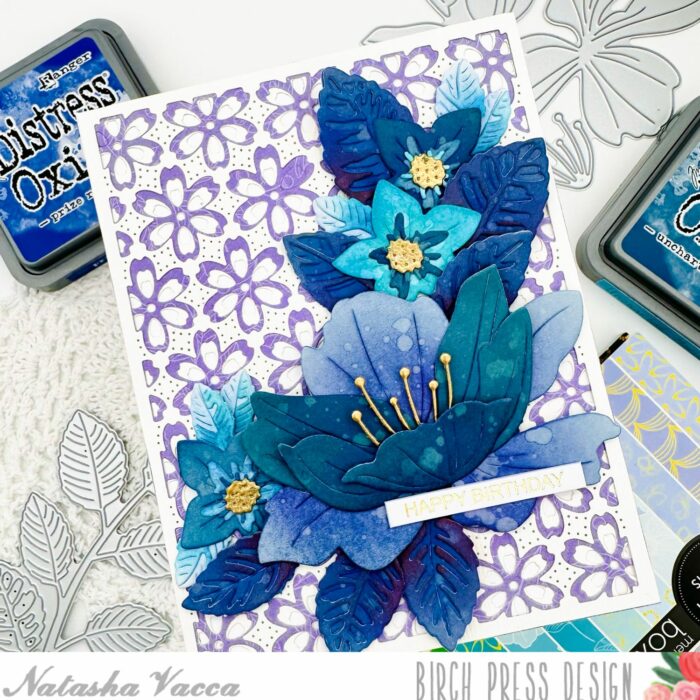
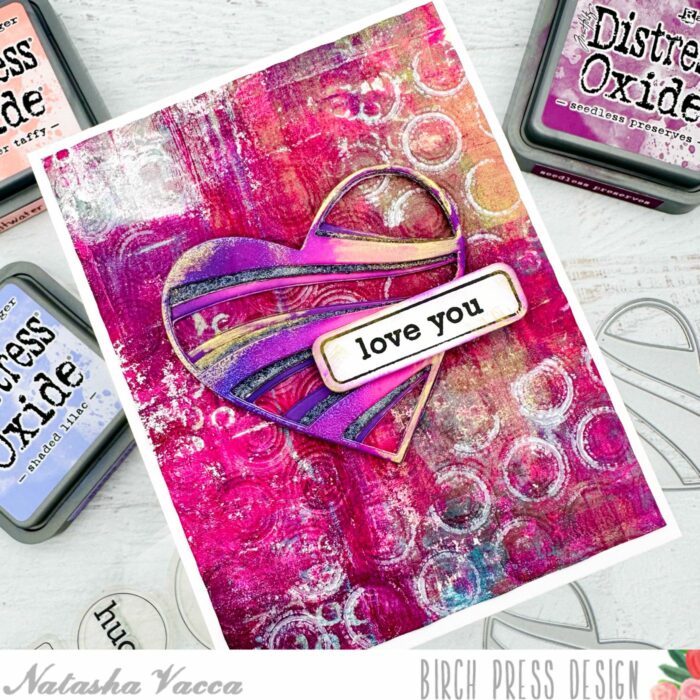
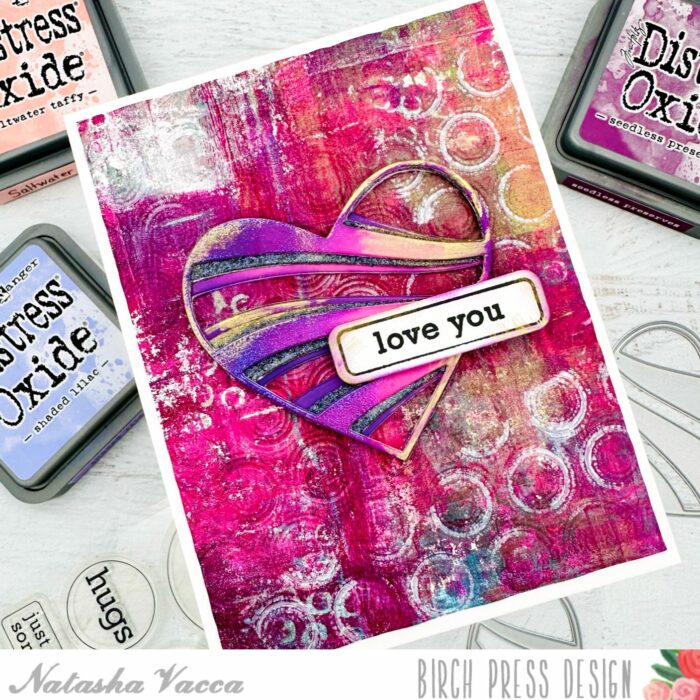
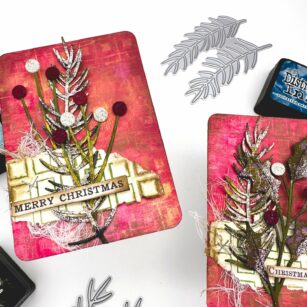
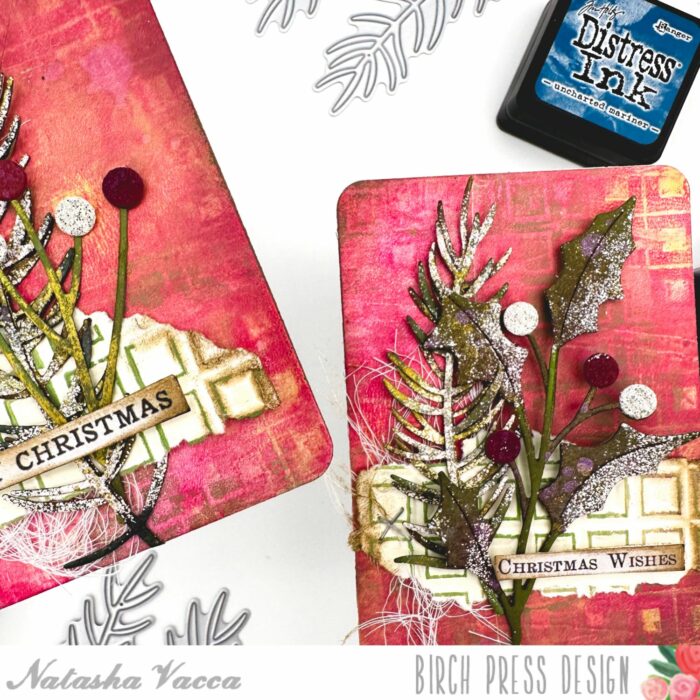
    Hello Birch Press friends, it is Natasha here today sharing a couple of ATC’s (Artist Trading Cards) using the Holly Sprig and Pine Needle Twigs die sets. I had a lot of fun creating these, let’s get started!

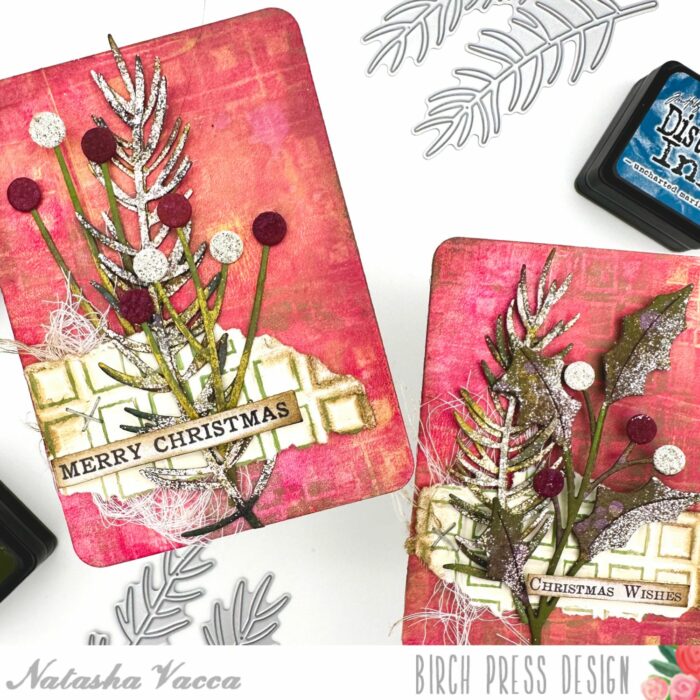
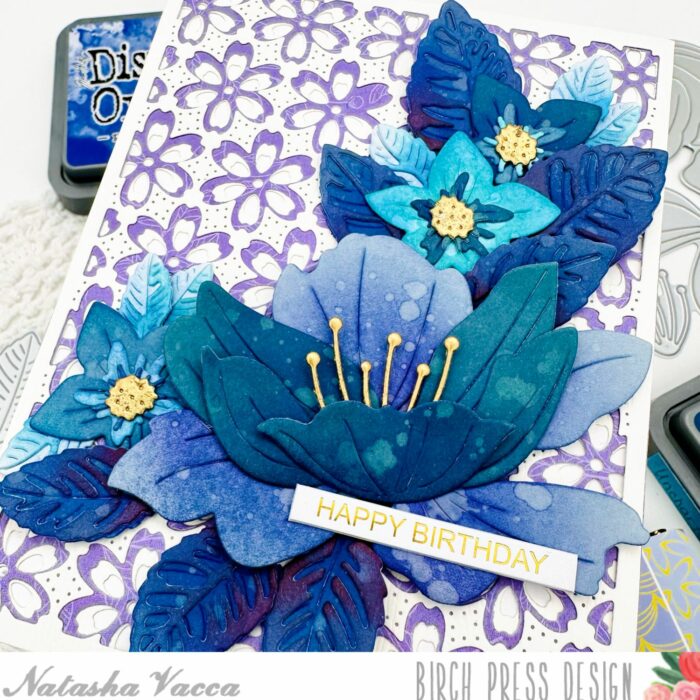
    I started by die cutting both the Holy Sprig and Pine Needle Twigs die sets using paper pads from Memory Box. I used the following pads: Blush, Greenery, Earth Neutral, and the Festive Glitter Pad. For each of the die cuts I used a combination of dye inks, sprays, as well as embossing powder to add texture to each of the die cuts. Once everything was completed, I adhered all the layers together using liquid glue.

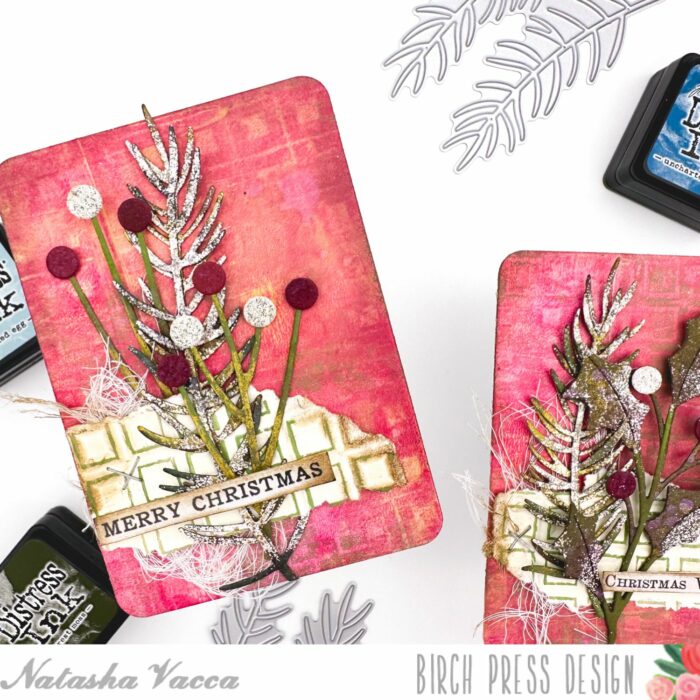
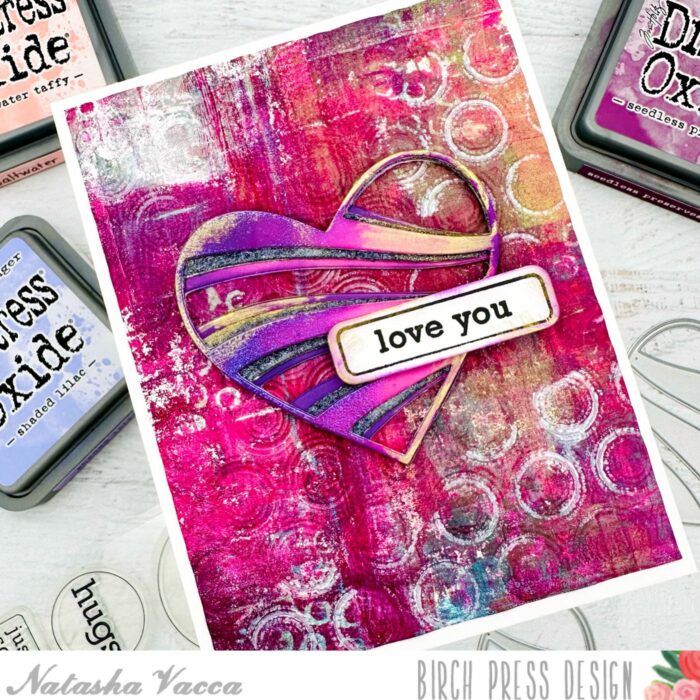
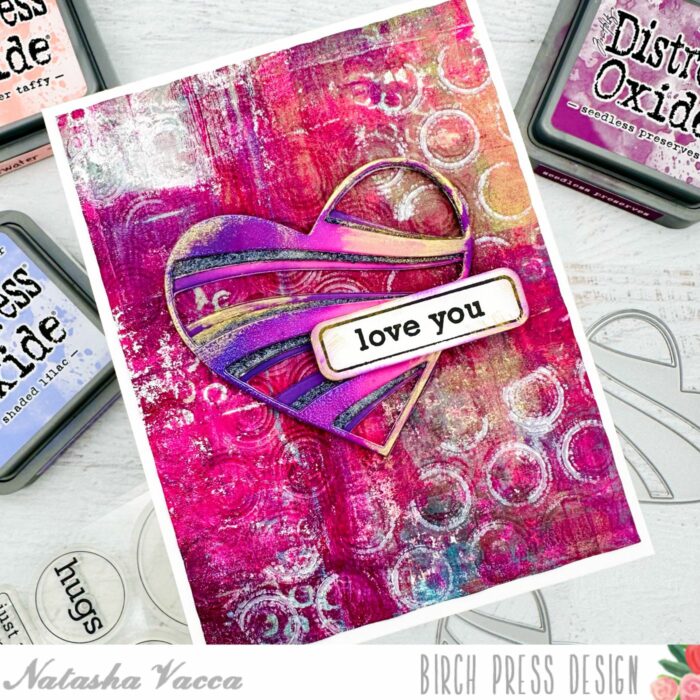
    Next I chose a gelli print background from my stash. The background was made on my gelli plate using the Geometric Crystals embossing folder. I dry embossed the folder, then used the dry embossed panel to create prints on my gelli plate. I also kept the dry embossed panel as an extra piece for additional layers. I trimmed the panel down into 2 ATC’s. I then inked the edges using Distress Ink.

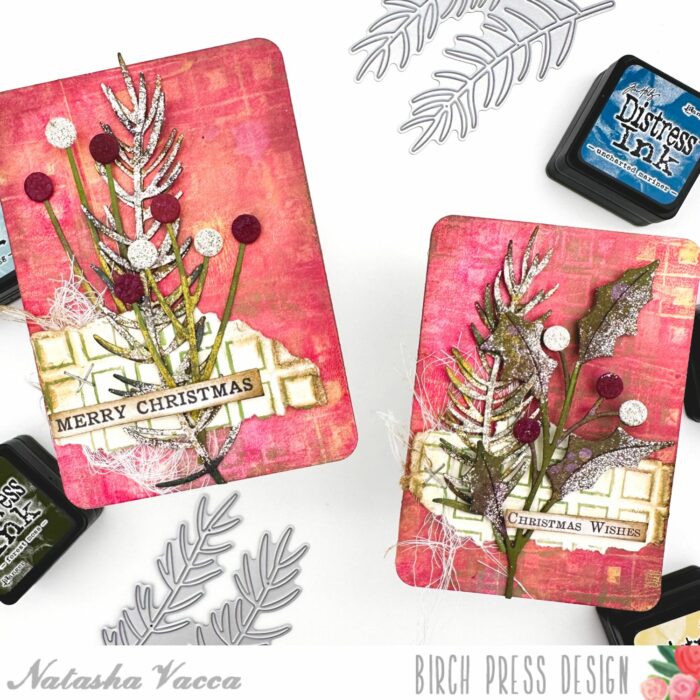
    Next I determined the layout for each ATC. I added additional texture to each ATC with a piece of cheesecloth, as well as pieces of the Geometric Embossing folder. I adhered everything using liquid glue and foam tape.

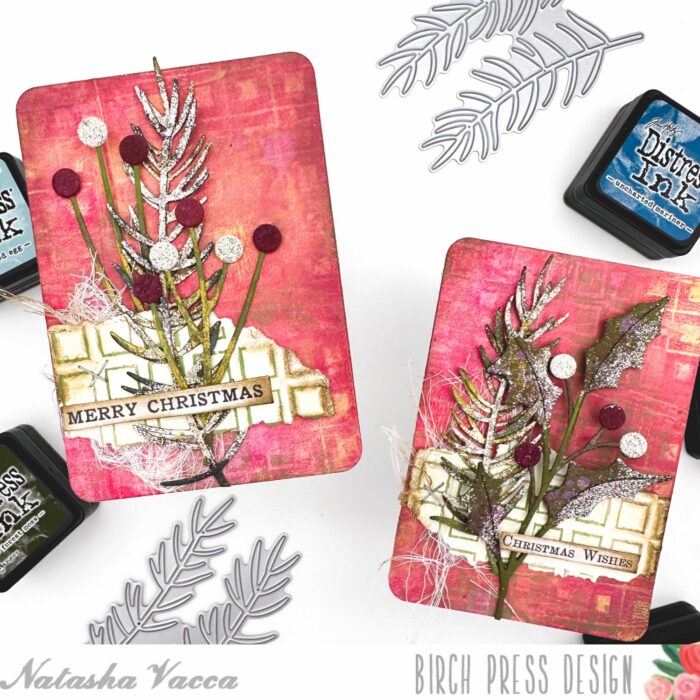
    I completed the project with 2 small sentiment strips from my stash. I had a lot of fun creating these and I hope you enjoyed them!


    Supplies


    Supplies


  • ATC (Artist Trading Cards) Thank You Notes | By, Natasha Vacca

    ATC (Artist Trading Cards) Thank You Notes | By, Natasha Vacca

    Hello Birch Press friends, I am excited to be back on the blog today sharing an Artist Trading Card idea with you! Today’s project is using 3 die sets: Budding Twigs Contour Layers, Sylvan Berries and Leaves Contour Layers, and the Simple Dragonfly. Let’s get started!

    I started by die cutting all 3 sets: Budding Twigs Contour Layers, Sylvan Berries and Leaves Contour Layers, and the Simple Dragonfly onto Canson XL watercolor paper. I die cut 2 sets of the Budding Twigs. Next I used pigment powders to color each of the die cut layers. I place all the die cuts on my glass work surface, add the pigment powder to the die cuts with a fan brush, then spritz the pieces with water. I move the color around with my paintbrush. I set all the layers aside to dry.

    Once all the layers were dry, I added more texture to the layers using dye ink. I applied the ink to the edges of each layer and then adhered the layers together using liquid glue. Next I chose a background from my stash and trimmed the panel into 2 Artist Trading Cards (2.5 x 3.5).

    I then added texture to each of the ATC backgrounds using crackle paint. Once the paint dried, I added distress crayon over the crackled paint. Next I added washi tape from my stash, as well as applied distress ink and acrylic paint with a sponge. I then distressed the edges of each ATC.

    Once the background was complete, I chose a piece of coordinating cardstock from the Magnolia Plaid paper pad from Memory Box. I tore the paper and distressed the edges. Next I determined the placement for my twigs and berries and then adhered them with my tiny stapler to my torn piece of cardstock, with a piece of lace on the back. I adhered the dragonfly, as well as a thank you sentiment strip from the Foil Greeting Black Tabs set.

    I had a lot of fun creating these ATC’s today! I hope you enjoyed them! I’ll be back soon!


    Supplies


    Supplies


    Supplies


  • Happy Birthday Blooms | Natasha Vacca

    Happy Birthday Blooms | Natasha Vacca

    Hello Crafty friends! It is Natasha here and I am excited to be back up on the blog today. Today I am sharing a card using a few Birch Press Designs dies! I fell in love with the new Perky Blooms Contour Layers die set and was so excited to use it! So let’s get started!

    I started by die cutting the Perky Blooms Contour Layers die set, as well as the Rose Leaves Contour Layers set using Memory Box paper in Fresh Aqua and Stormy Blue. Once all the layers were die cut I inked all the layers using a combination of Distress Oxide Inks, as well as Dye Inks. I also completed the same process with the Gentle Flowers and Leaves Contour Layers set. I also added water droplets to the flowers and leaves and picked up the color with a paper towel. I love the texture this provides. I also heat embossed the centers of all the flowers.

    Once all the layers were inked, I adhered them together with liquid glue. I set them aside to work on my background. For the background I used the Flora Plate. I used all 3 layers. For layer A and C I die cut with the Wood Grain Cream paper pack. For Layer B I chose a piece of pattern paper from the Anemone Grove paper pack. I then adhered all the layers together using liquid glue.

    I then adhered the Flora Plate layers onto a top folding A2 card base. I chose the arrangement for my flowers and adhered them with liquid glue and foam tape. Once they were all adhered down, I chose a Happy Birthday sentiment from the new Greeting Tabs from Memory Box! These are so AMAZING and I am so excited for these!

    Thanks so much for stopping by today! I will be back soon with more crafty inspiration!


    Supplies


    Supplies


  • Sending Love | By Natasha Vacca

    Sending Love | By Natasha Vacca

    Hello Birch Press friends, I am excited to be back up on the blog today sharing a fun and easy card using the Banner Heart Layering die set! So let’s get started!

    For today’s card I started with the Banner Heart Layering die set. I die cut layer A and C using white card stock. I then die cut layer B using the Festive Glitter paper pad. For the glitter layer I chose a dark blue shade from the paper pad. I then ink blended layer A and C using Distress Oxides. I used a combination of Distress Oxides: Saltwater Taffy, Picked Raspberry, Seedless Preserves, Shaded Lilac, and Villainous Potion. Once the layers were ink blended I set these aside to dry.

    Next on layer B, I wanted to add a bit more texture to the glitter paper pad. I used a combination of paper glaze, as well as embossing powder! I love the texture this provides. Once the other heart layers were completely dry, I added Gilded Foundry wax to sections of the heart. I then adhered all the heart layers together using liquid glue.

    Next I chose a gelli print from my background stash and dry embossed the background using the Ringadings embossing folder from Memory Box. I then applied white pigment ink to sections of the folder and ran it through one more time. I like this effect and the random texture this provides the dry embossed background. I allowed the ink to dry, then trimmed the panel using my paper trimmer for my card base.

    I completed my card by stamping a sentiment from the Contempo Greetings stamp and die set. I stamped the sentiment in purple, trimmed using the coordinating die, then applied foundry wax and ink on the edges as well. I then adhered the card panel, heart, and sentiment to my card base.

    Thank you so much for stopping by today! I will be back soon!


    Supplies


    Supplies