Welcome back for another Tuesday inspiration post. Today I am going to share with you how you can stretch your stamps to create beautiful customized patterned paper to use in your paper crafting.
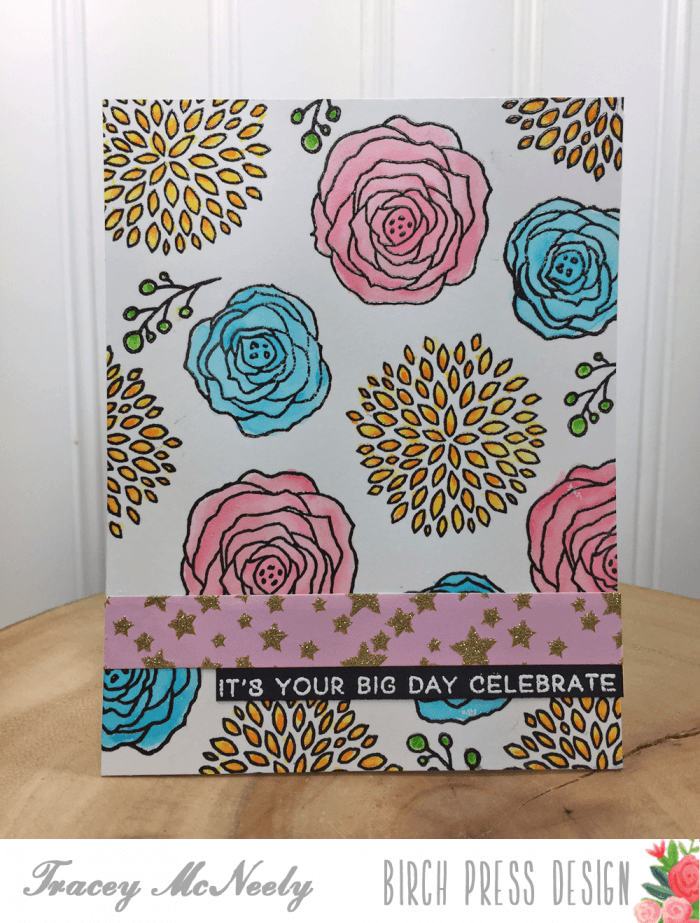
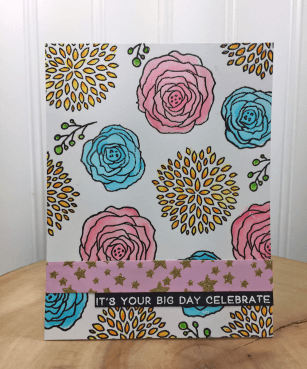
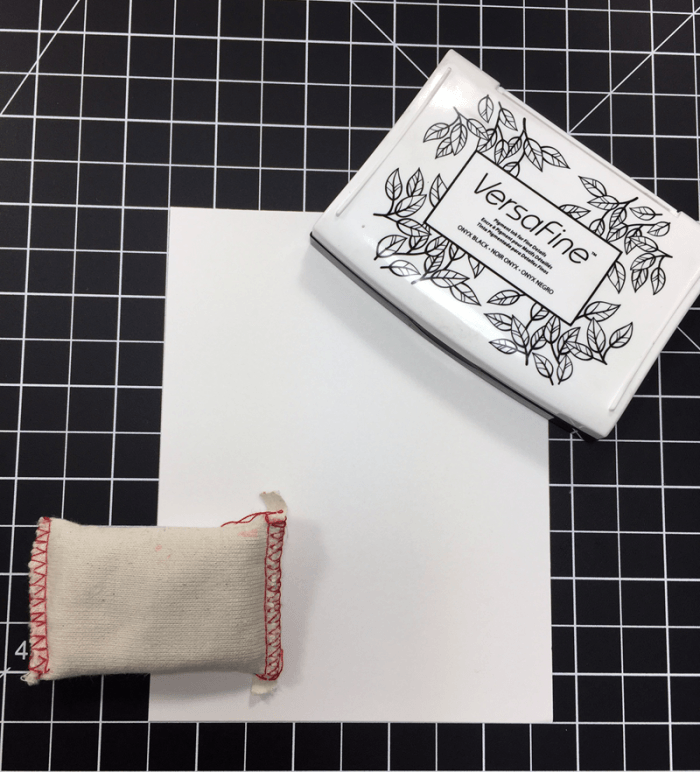
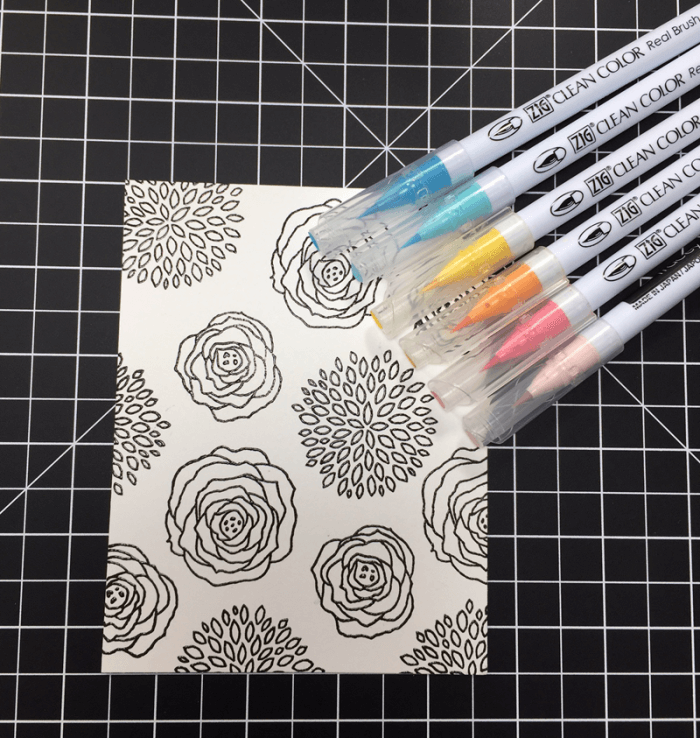
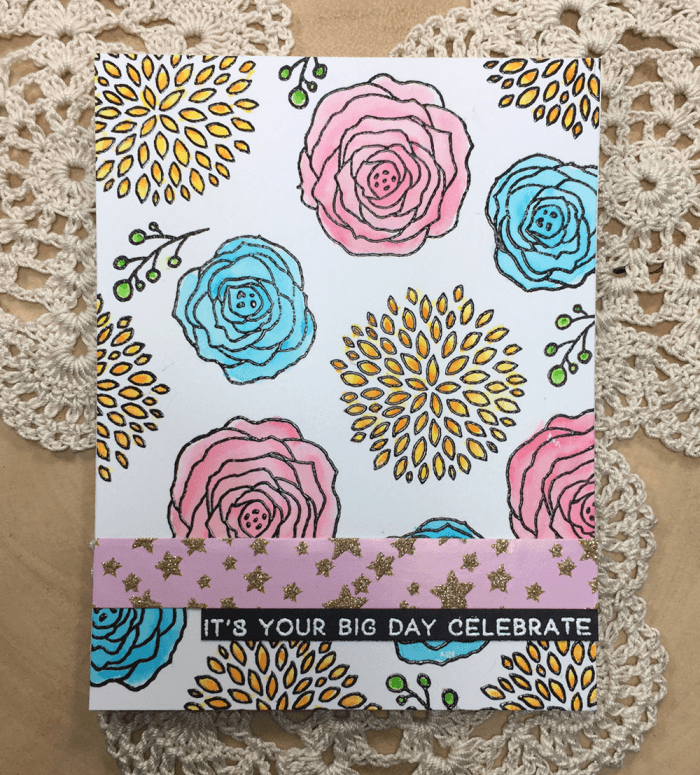
Creating customized patterned paper with your stamps is so easy following a few simple guidelines. We are using the beautiful Birch Press Design Time to Celebrate clear stamp set for today’s example. When you create a custom pattern paper you will soon see that every time your design will be slightly different. I started off by cutting a white Bristol Smooth cardstock panel to 4 1/4″ x 5″. I chose to use Bristol because I will be colouring the images on my custom patterned paper using watercolor markers but this techniqie would work with any watercolors, like the Watercolor Packs at Birch Press Design. The images are going to be stamped with VersaFine Onyx black ink and then heat embossed with clear embossing powder. Before we get started you want to rub your anti static tools over the panel so that the embossing powder only sticks where you want it to.
When I stamp custom patterned paper I like to use my MISTI so that I can double stamp images where necessary to make sure I am getting a good impression. There are many methods to stamp your images but this is the method that I use and find that works for me. I like to begin in the top left of my panel and stamp the initial image(s) off the panel to give my design a random appearance. I start from the top left of the panel and move down the panel left to right towards the bottom right of the panel. VersaFine ink dries slowly but you do need to move quickly so that the ink is still wet enough for the embossing powder to stick to it. I have prepared a short video for you to see the process.
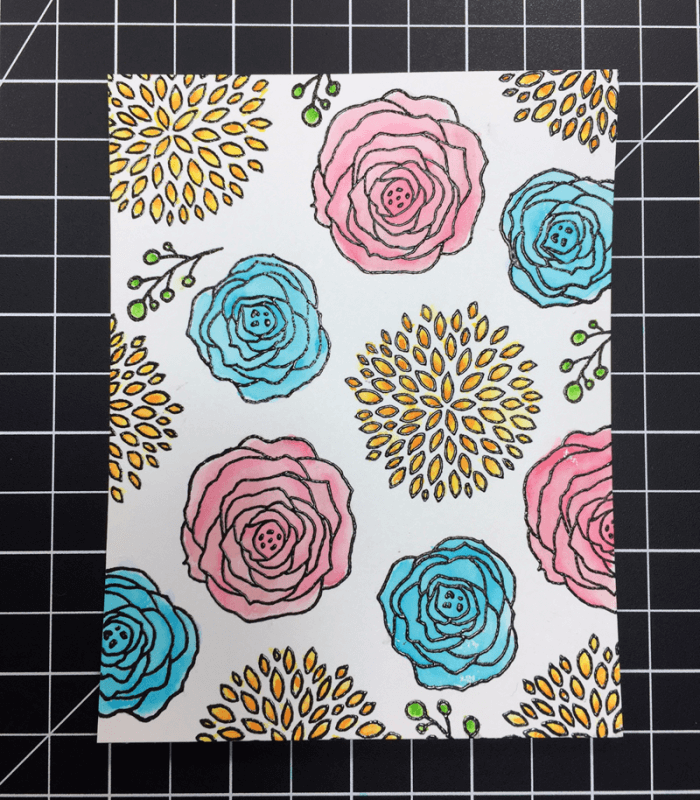
Once I have stamped the panel I poured the clear embossing powder over the images and heat set them. The embossed lines of the images create a ‘well’ for my watercolor so that it does not spread where I don’t want it to or create a muddied look.
After the flowers were coloured I went back in and heat embossed a few branches for a bit of contrast and fill in a few spaces to help finish out the randomness of the pattern. The panel was set aside to dry.
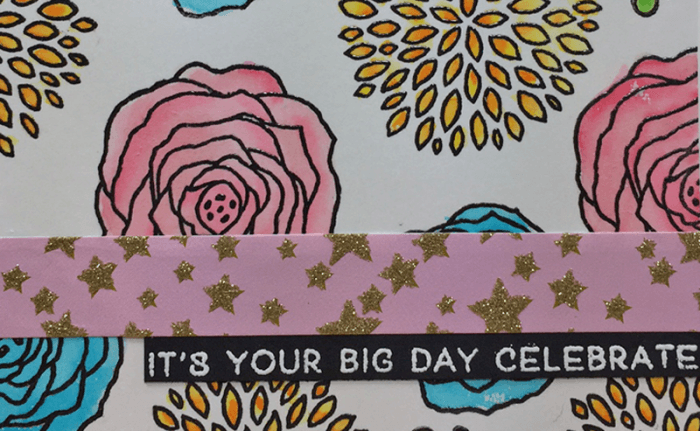
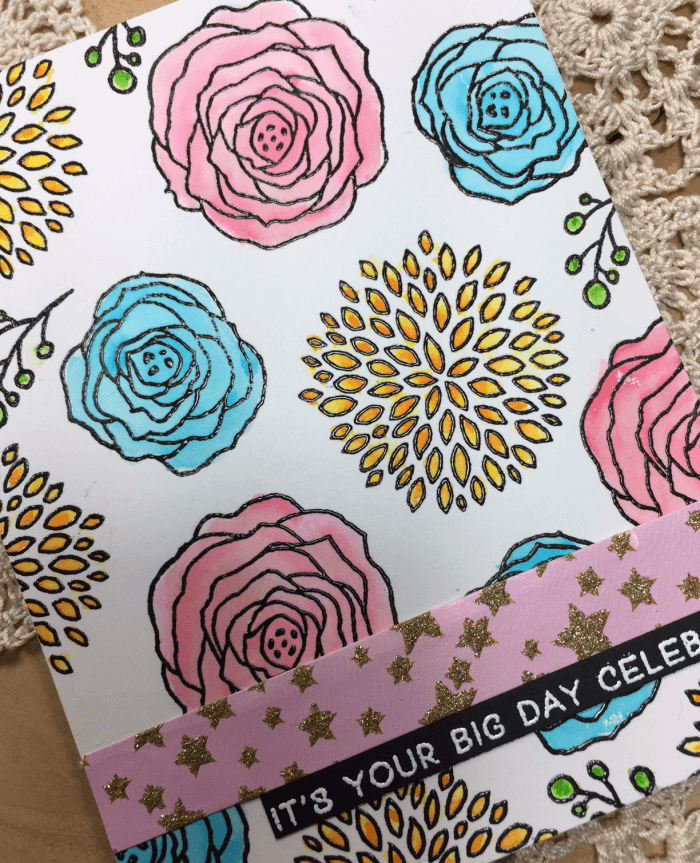
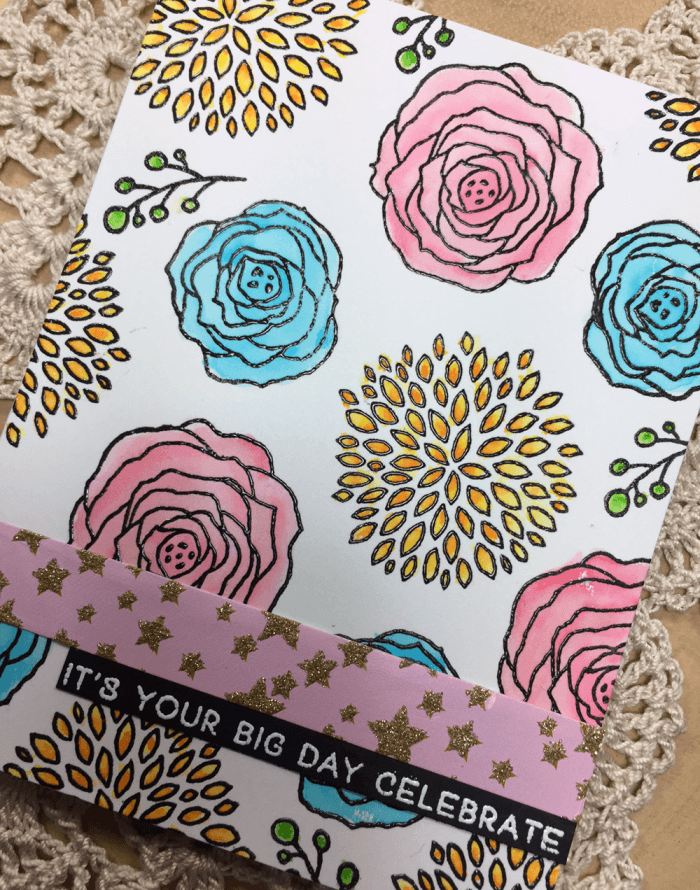
I white embossed a sentiment also from Time to Celebrate clear stamp set on black cardstock. Once trimmed it was added to the bottom right of the panel. A strip of glitter tape was added just above the sentiment. Finally the panel was adhered to a 4 1/4″ x 5″ white top folding card base.
Another angle…
Thank you for stopping in today and I hope that I have inspired you to make your own patterned paper using your stamp sets from Birch Press Design. See you again next Tuesday for another installment of Tuesday inspiration.

 |
Comments
5 responses to “Stretching Your Stamps | by Tracey McNeely”
Wonderful looking card, love all those flowers. Nothing nicer than a floral background.
This is beautiful Tracey, thanks for sharing the video and tutorial. A great idea.
Tracey – this is absolutely gorgeous! I love the colours and the contrast between the organic flowers and the graphic stars – fun!
A beautiful job on your background Tracey. Thanks for the tutorial, now I want to try this! LOL
Terrific video Tracey and a very pretty card!