Month: November 2017

  • Serene Holiday Cards By Laurie Schmidlin

    Serene Holiday Cards By Laurie Schmidlin


    Hi there!  It’s hard to believe that November is almost over!  I try my best to have all of my Holiday cards finished by the first week of December.  I like the idea of mass producing cards but usually end up with four or five designs to keep things interesting.  🙂


    Today, I’m sharing one of those card designs with you.  The great thing about this card is that it is easy to personalize them by just switching up the accent color!


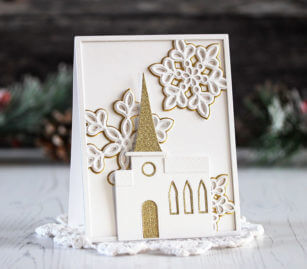
    When I first saw the Simple Church die I thought of the couple of Christmas holidays that we spent in Europe with our extended family.  I wanted to create a card to send to send to them that embodied the peaceful holidays that we spent together.


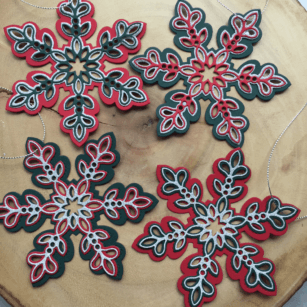
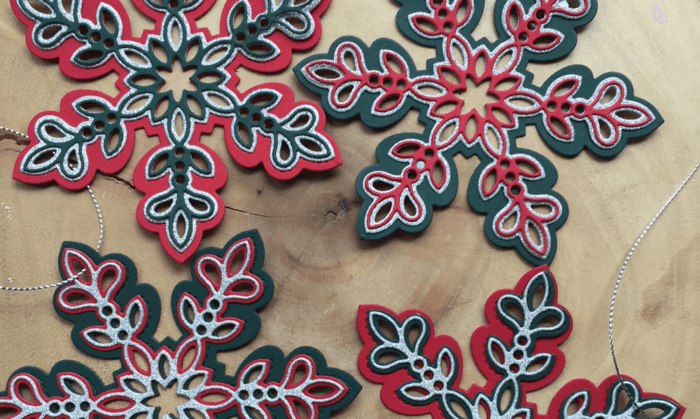
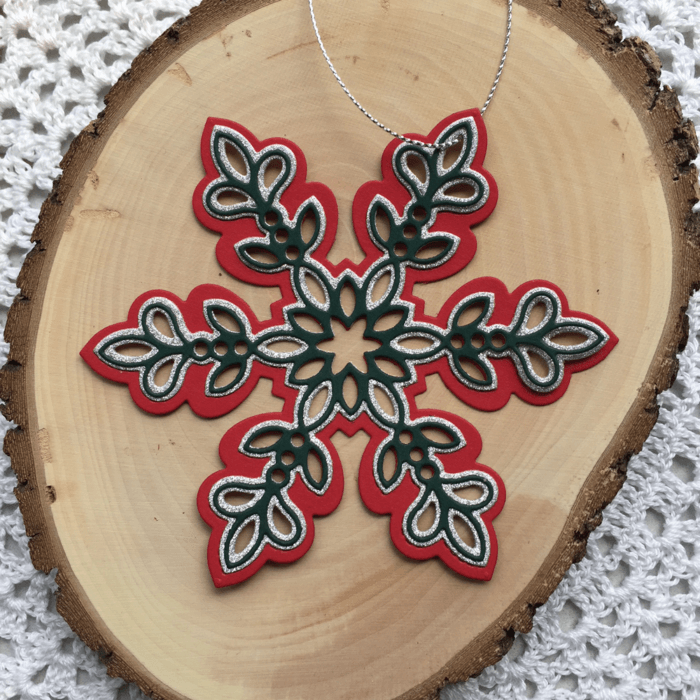
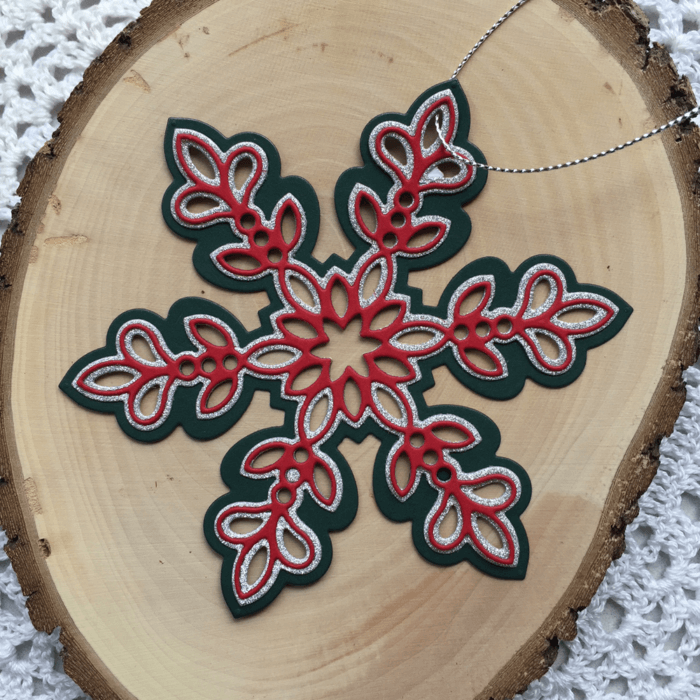
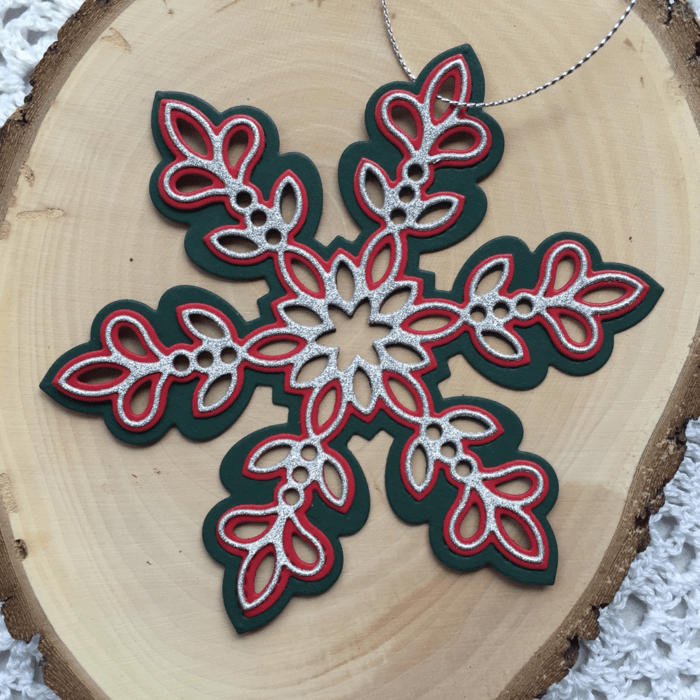
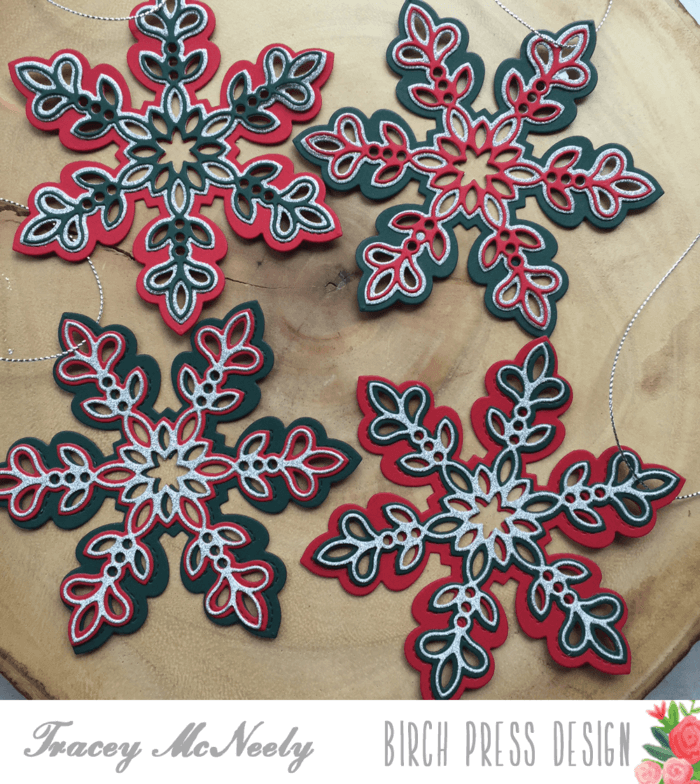
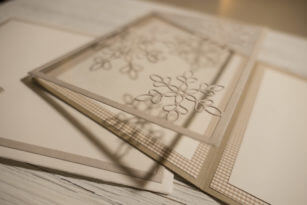
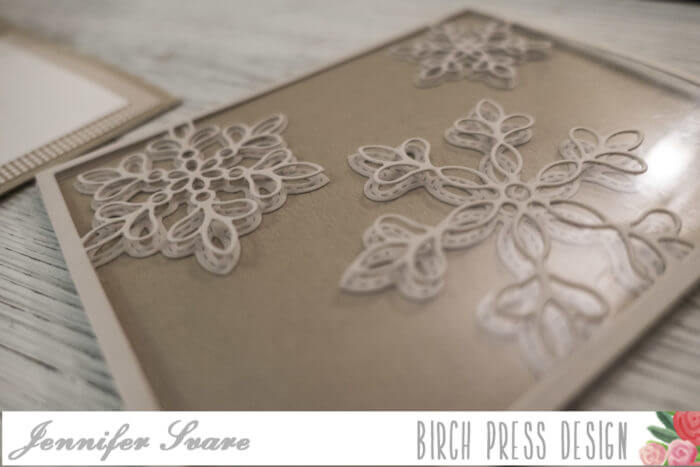
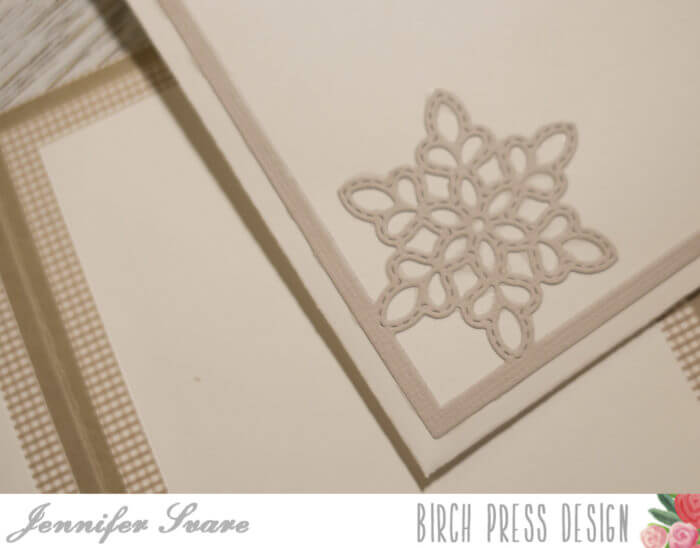
    I started by die cutting three layers (two white and one metallic) using the Shimmer Snowflake Frame Layer die set.  I alternated between a metallic gold and metallic silver accent color.  This design would also work well with other colors, such as red or blue.


    I then die cut the church using mostly white cardstock with just a few metallic accents.  This die set comes wired together and can easily be separated if you wish.  I found it handy to keep them together, but that is just a personal preference.


    I purposefully did not add a sentiment to the outside of my card.  I just really liked the simplicity of the mostly white design and thought that the sentiment could easily be added to the inside.


    My favorite thing about this particular die set is the incredible details!  There are separate cut lines for the window outlines so that you can add an accent color if you wish.  I also really love the detail on the roof pieces!


    I’m so glad that you joined me here today!
    ~Laurie


    Supplies


  • Happy Thanksgiving and A Sale!

    Happy Thanksgiving and A Sale!


    It’s the most wonderful time of the year!   For shopping that is!  We’re excited to share our Black Friday sale!  It begins today and runs through Midnight USEST on November 27!!   Now’s the time to add all your favorites to your collection!  Use code “create25” at check out to save 25% off your entire order!

  • Birthday BalloonsBy Jeanne Jachna

    Birthday Balloons
    By Jeanne Jachna


    Thanks for stopping by!  I hope you’re having a great day!  Today I’m sharing a birthday card made with the Party Balloon die set! This set includes six nested dies – detached and deburred on a magnetic sheet.   The balloons each have a beautiful stitched detail along the outer edges and come in a variety of sizes.

    Balloons always make me smile and they’re perfect for any celebration!  I cut mine in a rainbow of colors!  Did you notice that where they overlap the colors change?  This is an easy technique to try!  I started by cutting balloons in the three primary colors (red, yellow, and blue).  Where they overlap I will cut the dies in secondary colors.

    I layered a yellow balloon over a large red balloon.    Where they overlap I want the color to be orange so I  cut a second smaller balloon from orange.

    Lay the orange balloon over the yellow balloon.  Next place the die for the red balloon over the red balloon and secure the die with tape over the orange balloon.  Pick up the die and die cut the orange balloon.

    Adhere the orange die cut piece over the yellow balloon.

    I topped the balloons with a simple sentiment – the Calligraphy Pop Happy Birthday Die.  I cut the sentiment from green card stock so it would stand out from the colorful balloons.

    I die cut the bit of purple balloon the same way I did the orange.

    The finishing touch was a sprinkle of gold sequins in different shapes and sizes.  If you love sequins you need to check out all the new mixes in the store!  You can see them all here!

    All the bright colors and sparkly sequins are a party inside an envelope!

    Finished Size 4.25 x  5.5″

    Supplies


  • Gingham Trifold Card with Matching Envelope | by Jennifer Svare

    Gingham Trifold Card with Matching Envelope | by Jennifer Svare


    Hello!  This fun tri-fold card uses the Shimmer Snowflake Frame set’s multiple layers to create a snowflake overlay with the top layer. This card was very hard to photograph, so the video below is a must-see of this card in action!

    Because this is a tri-fold card, the inner message space will not be seen when the card is on display. The Latte gingham paper matched the Kraft, and made the perfect background for that message space.

    To bring everything together, I made a custom envelope with the gingham paper.  I love how there is a beautiful, creamy white on the backside so that envelopes can easily be made using the reverse!  Using the B layer of the set, I trimmed off all but the frame and one snowflake for the perfect envelope frame.

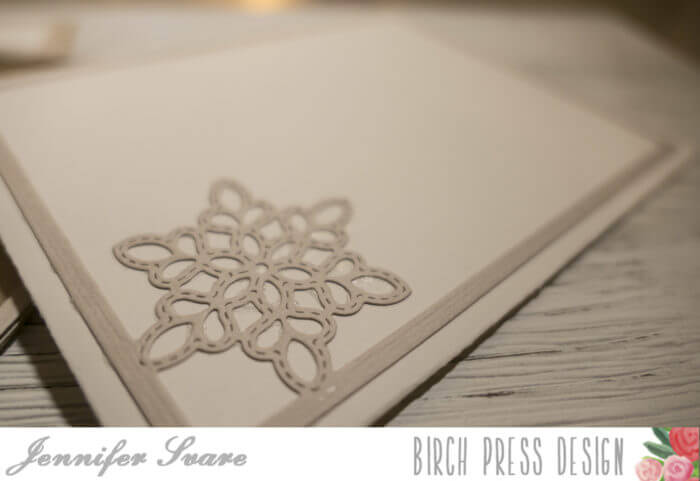
    Thank you for stopping by, and here is a video of this card that shows a fun variation!

  • Ribbon Sale

    Ribbon Sale

    Stock up on Ribbon now!

    STOCK UP SALE – RIBBON!
    25% off Fine Italian Ribbon in 15 shimmering metallic shades – perfect for holiday cardmaking and gift wrapping!
    Available in 2 yard spools or 54 yard bolts!
  • Snowflake Glitz  | by Tracey McNeely

    Snowflake Glitz | by Tracey McNeely


    Good morning, Tracey here for some Birch Press inspiration. Birch Press Design is sponsoring The 25 days of Christmas Tags event on my personal blog once again this year.

    The Glitz Snowflake die set it’s a gorgeous set that requires minimal effort to create gorgeous tags, embellishments and even Christmas ornaments.You can create gorgeous unique snowflakes with only a couple different colours of card stock. When you change the order of how you adhere Layers A, B and C together you get a completely different result. For my examples today I have chosen two colours of card stock and piece one glitter paper. For the first two snowflakes I have cut Layer B from the glitter paper.


    For the next two snowflakes I cut Layer C from the glitter paper. See how the snowflakes are completely different once again.


    To finish the tags off I tied a piece of silver cord to the top of the Snowflake so that it could become a gift tag, a package embellishment or an ornament to put on the Christmas tree. Packaged together they would make a lovely hostess gift for the holidays. Head over to the In My Creative Opinion blog to see the post for day 7 of the 25 days of Christmas Tags event and your chance to win a prize from Birch Press.

    Thanks for joining me today and come back again next Tuesday for more creative inspiration.