
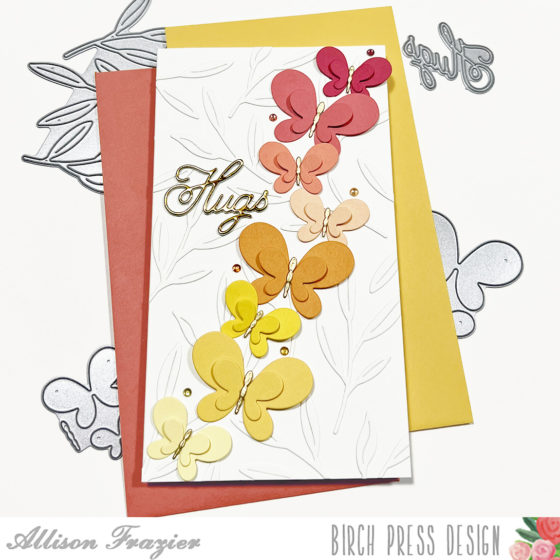
Hello, Everyone! Today, I am sharing more inspiration from the new Floral Contour Layers release. I made a mini slimline card featuring two of the new die sets – the Simple Butterfly Contour Layers and the Tiny Tuft Flowers and Leaves Contour Layers.
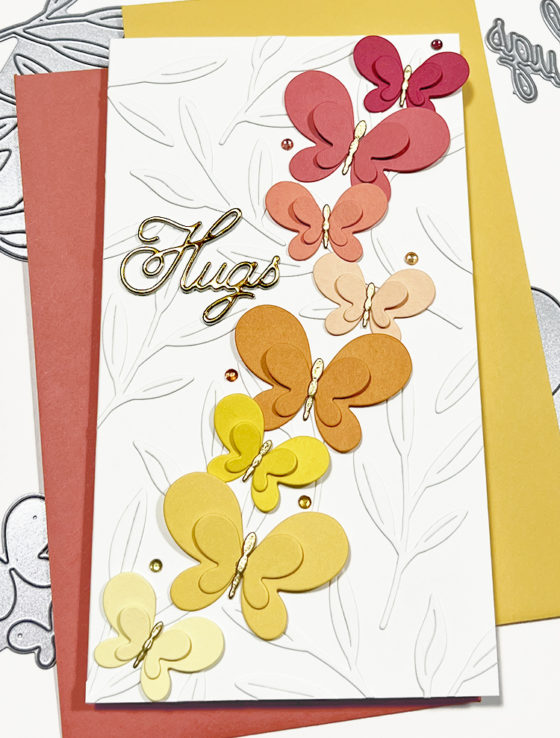
I started by creating a white card base that measures 3.5″ x 6.25″. I used the leaves die from the Tiny Tuft Flowers and Leaves Contour Layers set to cut a bunch of leaves from the same white card stock. I then arranged these leaves on my card base and adhered them with liquid glue. I love the texture that these leaves give – it’s almost like creating your own background die.

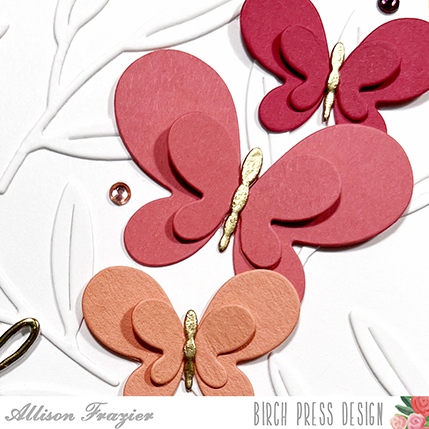
Next, I started die cutting my butterflies. I chose to stick to a warm palette, so I used different shades of yellow, pink and orange card stock. I adhered the smaller parts of the butterflies to the larger parts, making sure to only put glue in the center, so that the sides could lift up for dimension.
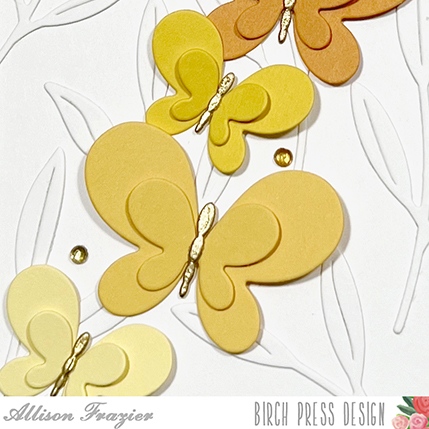
The small, delicate bodies of each butterfly were the same color as the rest of the butterfly, but I wanted them all to be gold. So, rather than use the dies to cut more bodies out of gold card stock, I just used the bodies that I had. I took a piece of Post-it tape (washi tape would also work) and taped the very ends of it to a piece of paper so that the adhesive side of the tape was facing out. I then put all of the butterfly bodies onto the adhesive, inked them up with VersaMark ink and heat embossed them with gold embossing powder. Once embossed, I was able to just pull the bodies off of the Post-it tape and glue them onto the butterflies. This was the easiest way for me to emboss all of those delicate die cuts.
I arranged all of my butterflies onto the card base and then glued them down when I was happy with the placement. Again, I only applied glue in the very centers so that the butterfly wings could lift up and look dimensional. For the sentiment, I used the Handwritten Hugs die and some gold foil card stock. To give it dimension, I stacked the gold Hugs onto two more layers that I had cut out of white card stock. After adhering that to my card, I finished by scattering some tiny Fairy Jewels around the butterflies in coordinating colors.
I love the simplicity and dimension of these butterflies! I hope my card brought a smile to your face today. Thank you so much for joining us.
Wishing you all a crafty day,
Allison

Supplies


