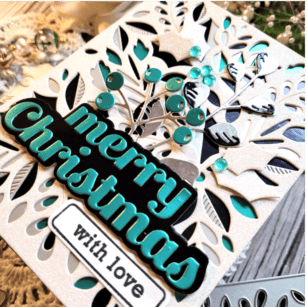
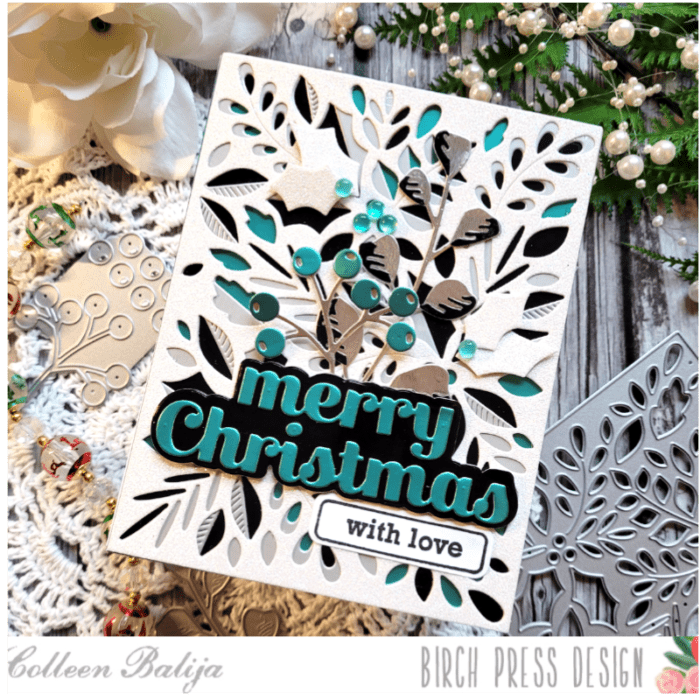
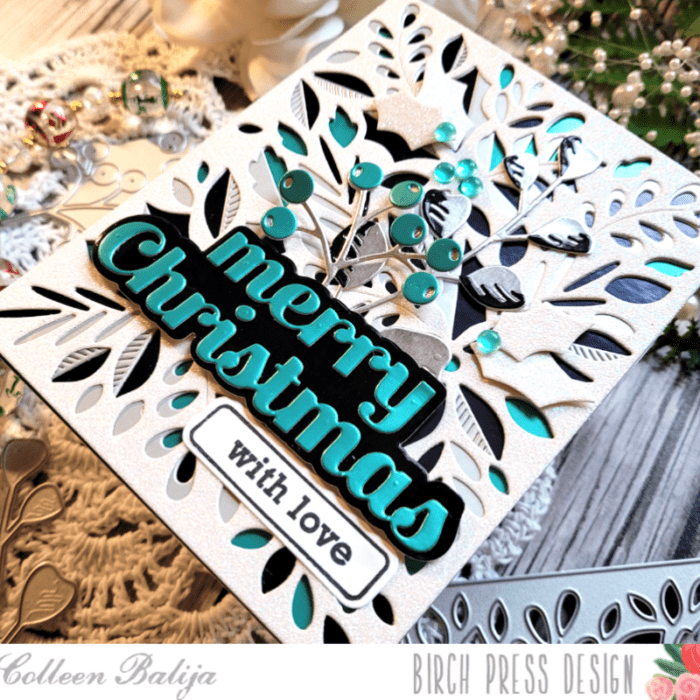
Today I want to share a non-traditional holiday card! I am a big fan of testing the waters on unique color schemes for my holiday cards. I think they keep things fresh and interesting! Let’s get started with today’s card, called Merry Christmas with Love!
First step was to choose the colors for this holiday card. I wanted to use a lot of black and white with just a touch of bold color, so I chose a shade of teal green. Now, green is a holiday color, but teal green is a bit different than the traditional Forest or Mistletoe green! NOTE: You could also go with shades of pink or yellow or purple! Choose a color that you love, and your card will be amazing!
Once my colors were selected, I chose my Birch Press Design elements, which were Herbarium Layering Plates, Contempo Christmas Greetings stamp and coordinating die, Merry Christmas Sugar Script die, and Memory Box Vintage Pastel paper. I wanted foliage on this card, so I also chose Eucalyptus Stem and Berries Contour dies! These foliage dies will be perfect on holiday cards!
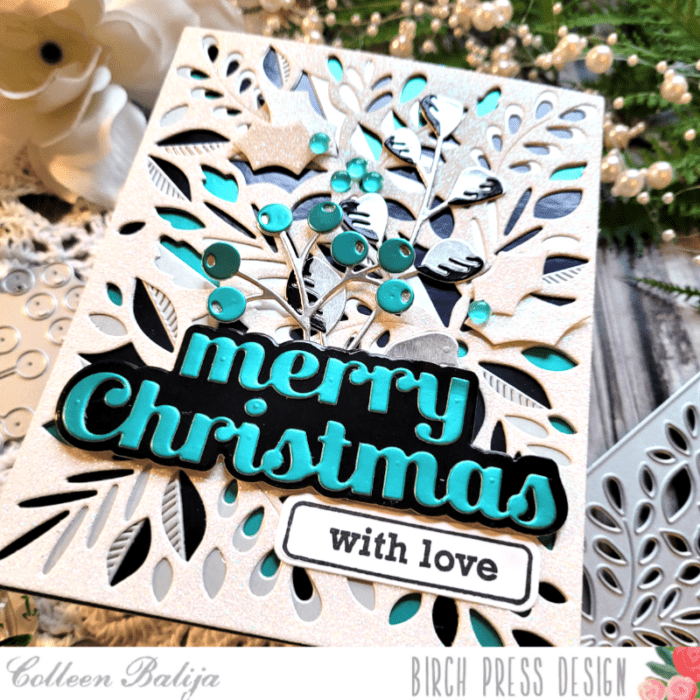
With my colors and design elements chosen, I started on the background piece. the background here is also a focal point, so I wanted it to pop! I chose black, teal green, and a shimmery white for the layers of the Herbarium Layering Plates. I die cut each layer and adhered them together using liquid glue, going from darkest color to lightest on top. I just love how that black and teal green shine through all the layers! Once my background was finished, I set it aside and started on my sentiment and foliage.

I wanted the sentiment and foliage to be in the same colors as the background. This way everything is cohesive and is easy on the eyes! I die cut the Merry Christmas Sugar Script in black and teal green and adhered the 2 layers together. I also stamped a sentiment “with love” and adhered both to the lower third of the background card panel.

Next, I die cut the foliage from Eucalyptus Stem & Berries Contour set in silver, teal green, and black. I adhered the layers together and tucked them behind the Merry Christmas sentiment. I finished with embellishments in teal green.

I love how the colors blend beautifully together to create a lovely and unique Christmas card! This card has the holiday shine and shimmer, but the colors are unique and will stand out to your recipients! Thanks for stopping by!

Supplies


