Hi friends,
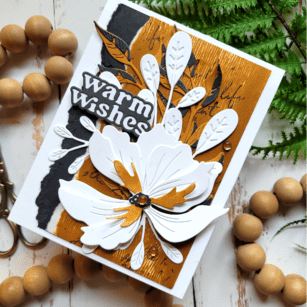
I like to get really playful with color palettes on my cards, and I’m always on the search for new inspiration! Recently I found a card on Instagram that used neutral colors and the end result was just so cool! So, I decided to test those colors out on my next BPD card, and today I want to share with you how I brought my card to life using neutral colors! I’ll be using Large Cosmos Contour Layer die, NEW Curved Leaf Branch Contour Layers die, NEW Oval Leaf Branches Contour Layer die, Memory Box Woodgrain paper, Warm Wishes die, and NEW Fairy Gemstones! You will find a link to these products at the end of this post.
Generally, my first step in creating a card is to choose the color palette. In this case, I went with a wheat color along with black and white! I searched for an ink color that was closest to the Wheat color I wanted. Next, I die cut the BPD flowers and leaves and adhered the layers together. I love how BPD embosses each layer, making it easy for you to build your layered dies!
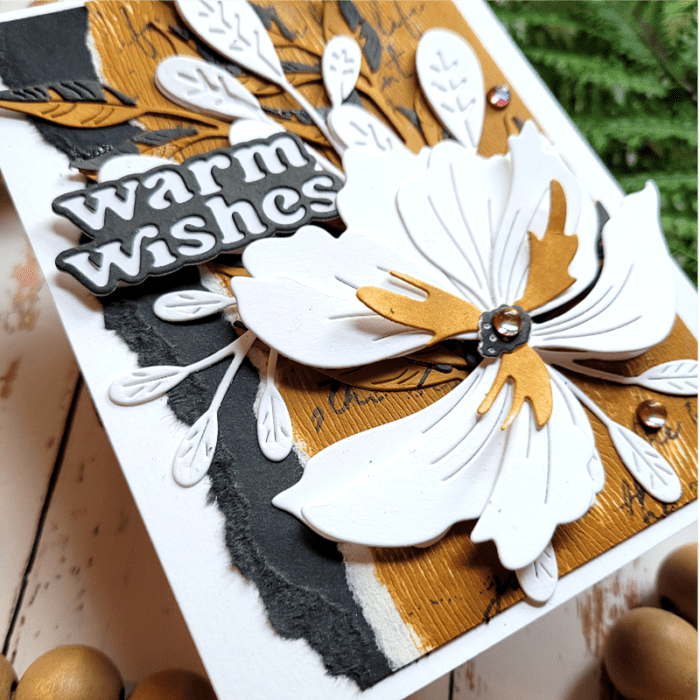
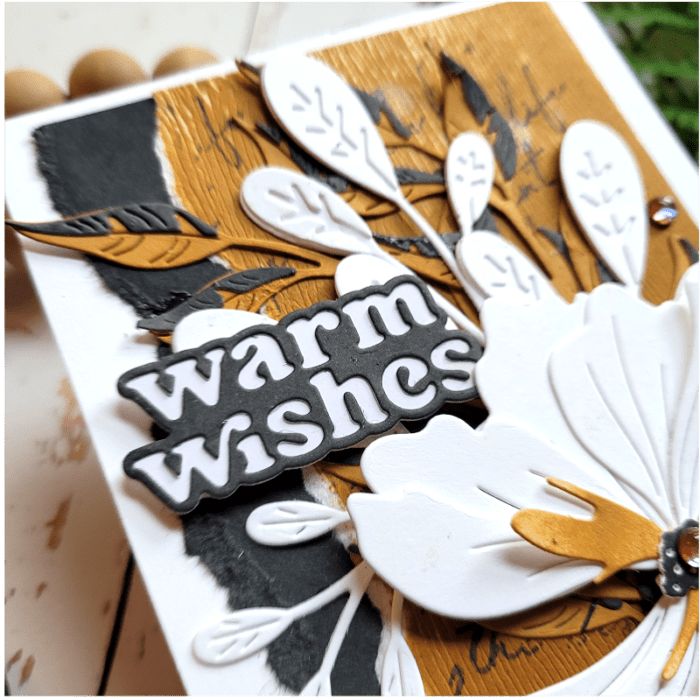
Most of my leaves and the Cosmos flower were done in white with exception to the center of the flower and the Curved Leaf Branches. Those were inked up in Mustard Brown and black ink. You can get a good visual of them in the photo below!
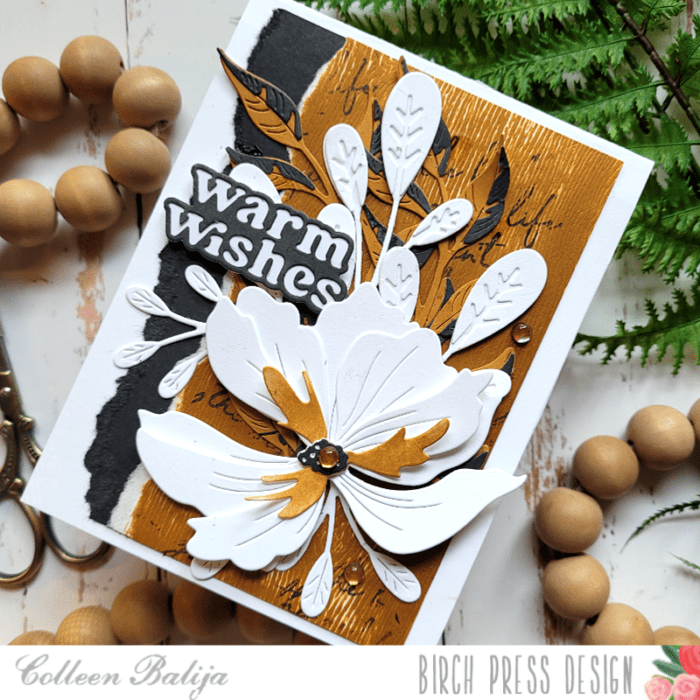
Next, I created a background to compliment the foliage. I trimmed a piece of Woodgrain paper by Memory Box to 5.25×4.00 and then ran the Mustard Brown ink directly over the card panel quite generously. The woodgrain gives it a cool texture! I also trimmed a piece of black card to the same size. I tore the left edge on both panels, making the brown layer slightly smaller than the black, and adhered them together. I also stamped a sentiment randomly in black ink over the Woodgrain panel to add interest and give the card a mixed media vibe. You can see the stamping, the texture from the woodgrain, and the torn edges in the photo below.
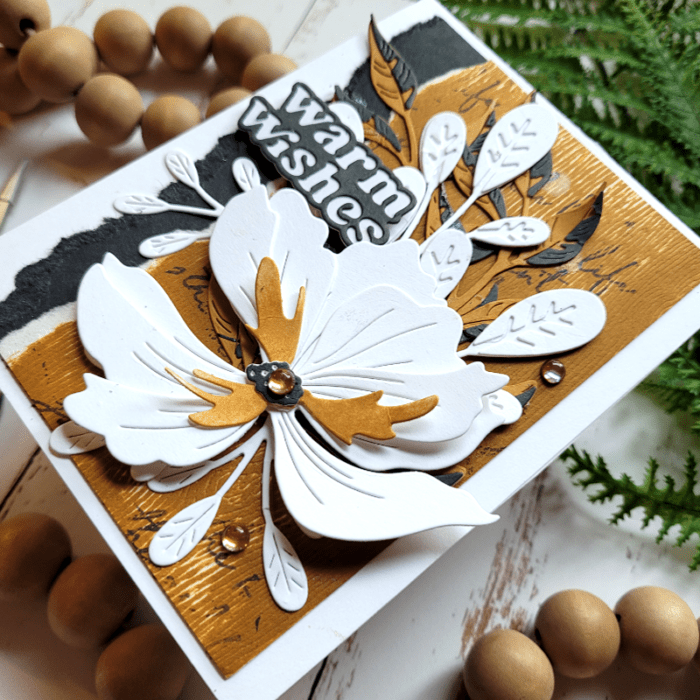
Next, I adhered both layers to a 5.5×4.25 white card panel. Then I created a sentiment using the new Warm Wishes layering die in black and white. Now it was time to finish my card! I like to play with placement of my flowers and leaves before I adhere them down so that they are exactly where I want them! I adhered the Curved Leaf Branch (the ones in black and brown) first, then the Cosmos flower (popped up on foam tape), and then placed several white leaves around the flower. I was careful to leave a bit of the stamping peek through on the Mustard Brown card panel! Then I finished with the Warm Wishes sentiment, propped up on foam tape. Below is a closer look at that lovely new sentiment die! It’s the perfect size!
What makes this card pop is the amount of detail, from stamping onto the Mustard Brown ink to tearing the edges of the panels. The BPD dies are so detailed that die cutting them in white is beautiful! Also, there is a good balance of color between the white, black, and brown, going from lightest to darkest.
Next time you create a card, pull out your neutrals and see what you come up with! This is the perfect time of year as we head into fall to create a card in these colors! Thanks for stopping by!

Supplies Used:


Comments
One response to “Using Neutral Colors on Flowers and Leaves | by Colleen Balija”
Stunning, love the colour palette