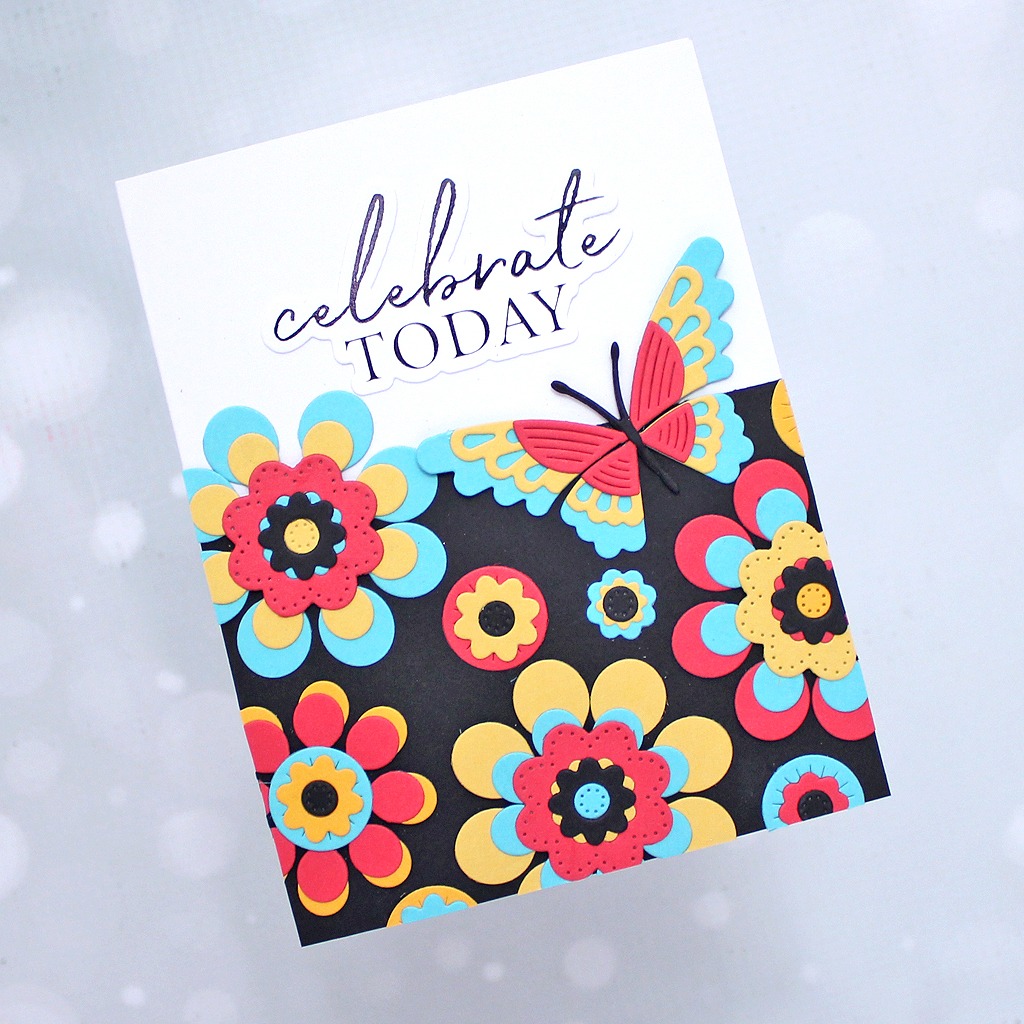
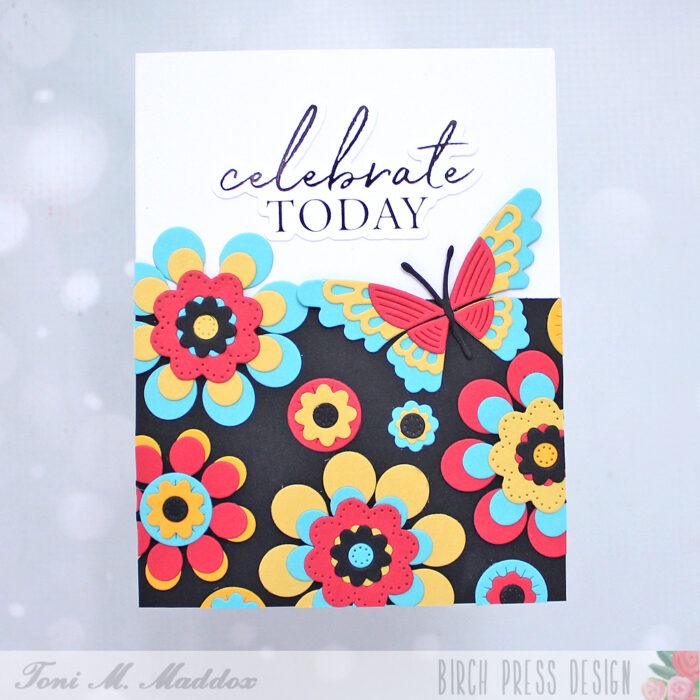
Hello, friends! Toni here with the first of many cards I’ve made using the new release. The florals are to die for!
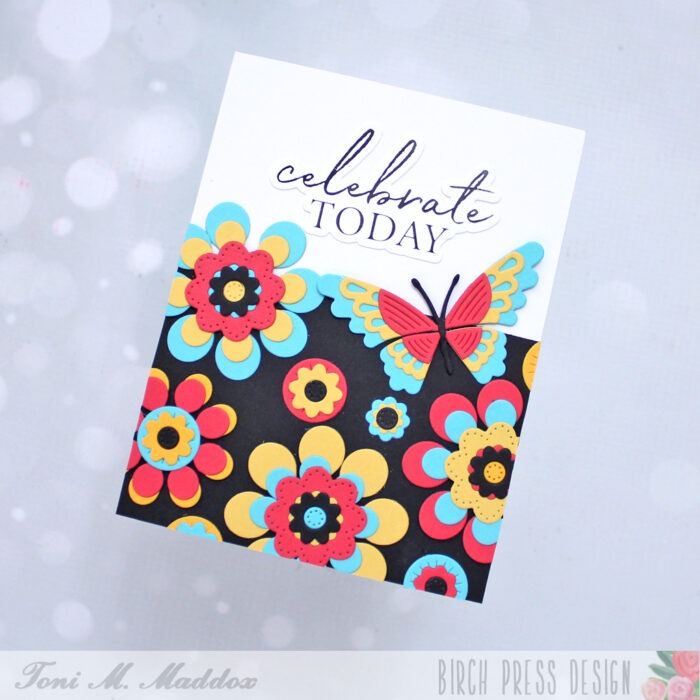
The Block Print Star Flowers remind of 60s/70s floral designs (showing my age!) so I created my own fabric out of paper.
I used Memory Box Raspberry Sorbet, Golden Wheat, Summer Squash, and Pool Party cardstock on the various layers to create a variety of different flowers.
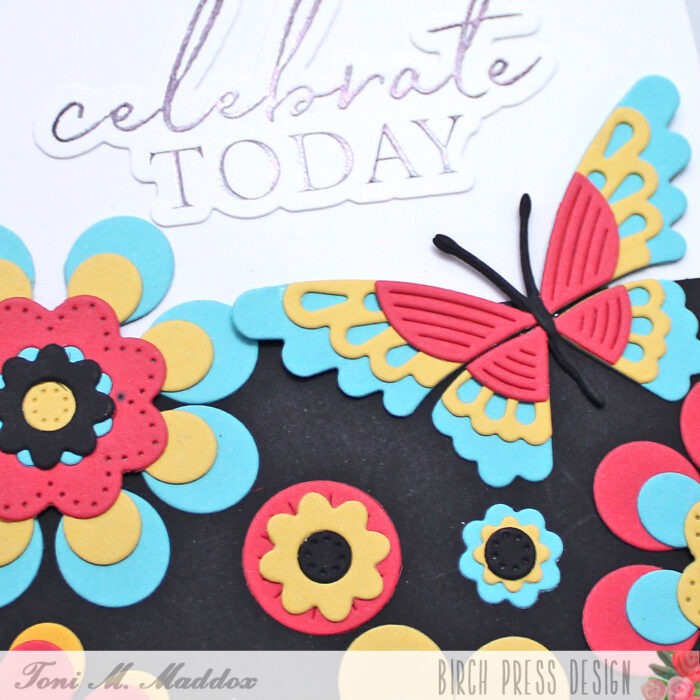
I used the same colors for the Block Print Scalloped Butterfly so they would coordinate.
Final touches include adhering the diecuts onto a piece of black cardstock, leaving enough room for the Celebrate Today Noted Script Hot Plate & Outline Die to be added.
I hope you enjoyed today’s card and have a great rest of your week!
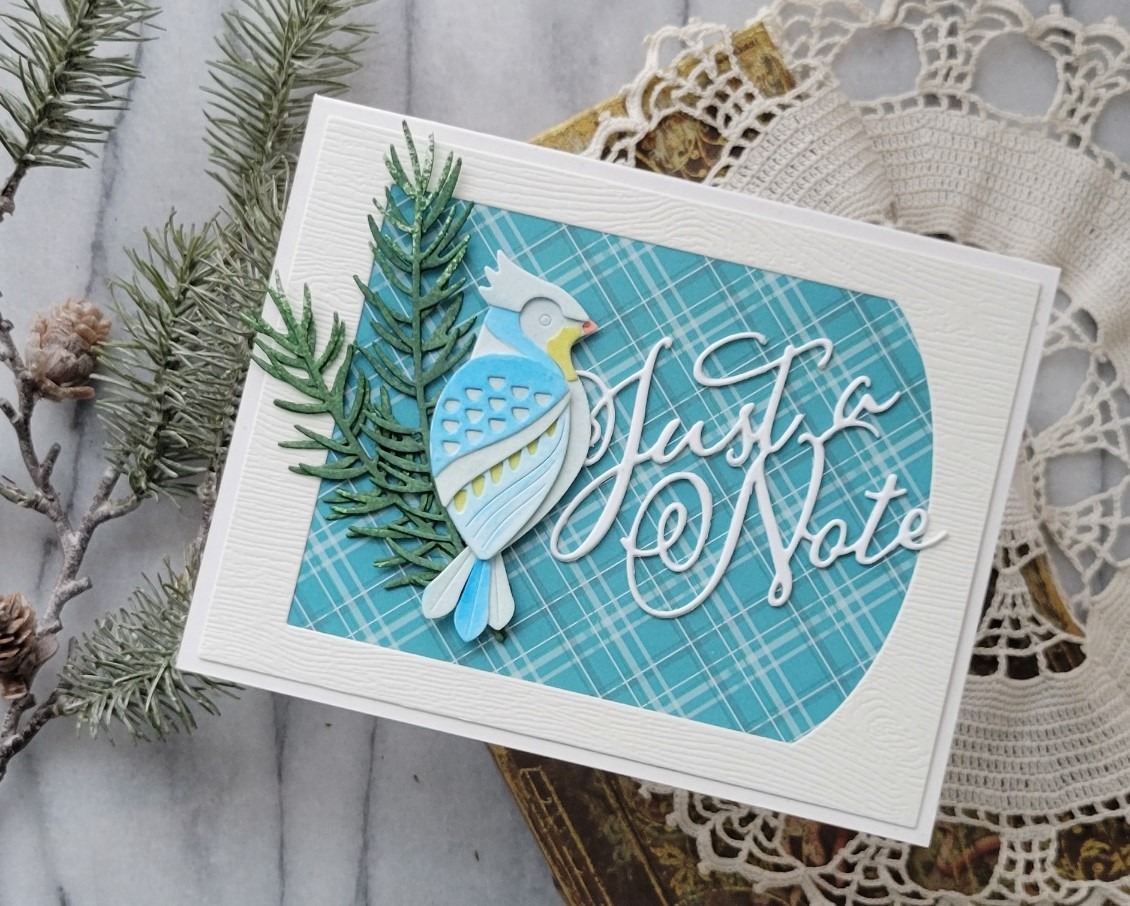
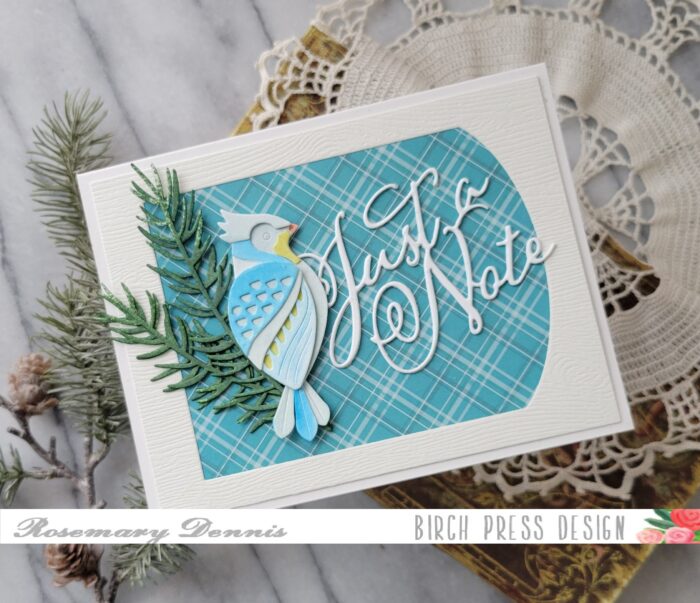
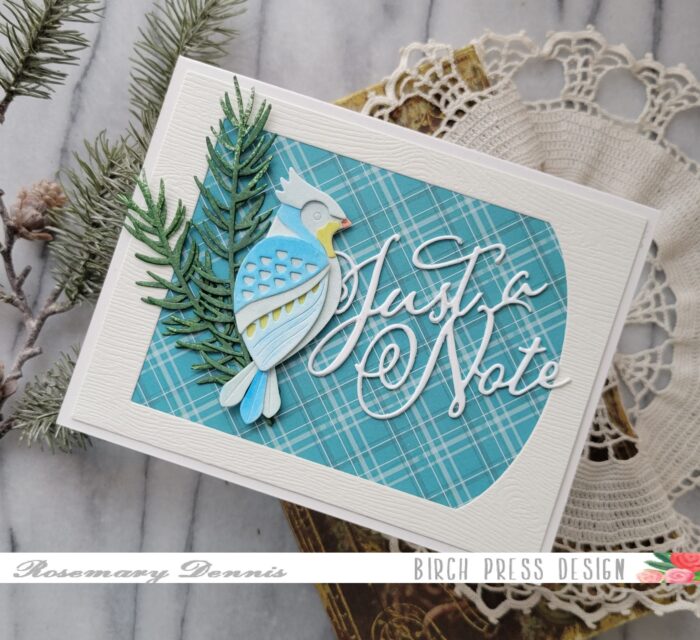
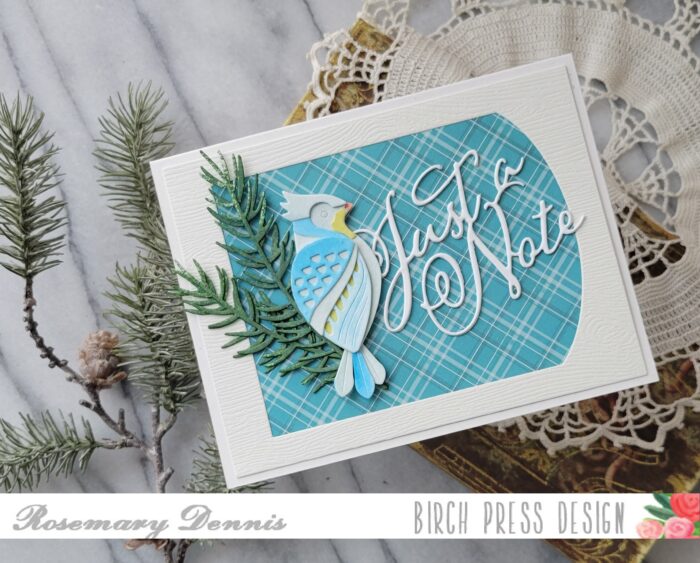
Hello everyone! Rosemary here on the blog today. Have you seen the all the new Block Print products that have been added to the Birch Press Design website? They are absolutely AMAZING and I can’t wait to create some projects with them! Today I’m sharing a card I made with the Block Print Tufted Bird die set. Let’s have a look.
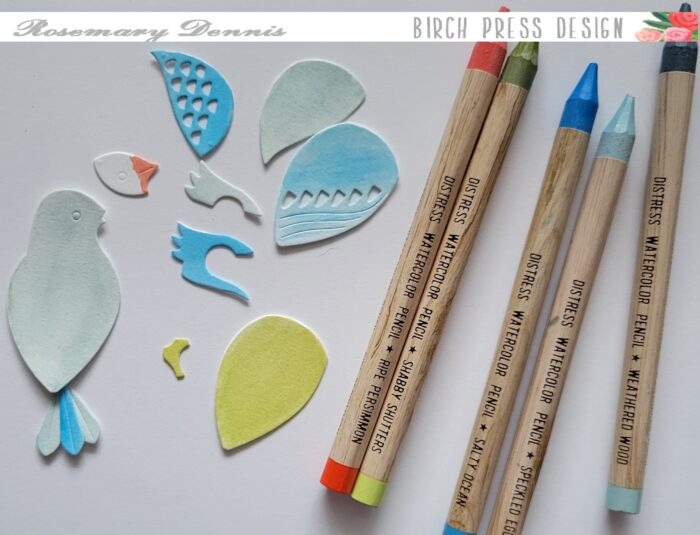
For this card I went with a softer approach using some Tim Holtz woodless distress watercolor pencils to color the pieces of my bird.
In the above photo you can see the watercolor pencils that I used and the pieces prior to assembling my little bird.
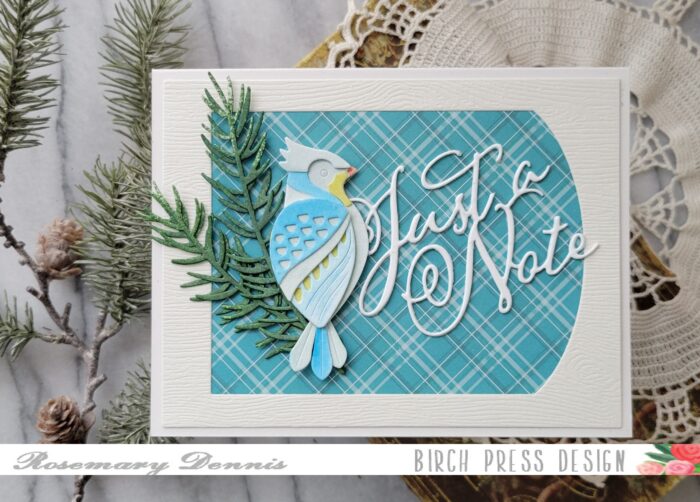
Once all the piece were dry I adhered everything together using liquid adhesive. Once I had the bird together I worked on the rest of the card. I decided to use some plaid patterned paper from the Memory Box Anemone Plaid 6×6 pad for the background for my little bird. Diecutting the paper with a rectangle die. I also diecut pine branches using Pine Needle Twig Contour Layers die set from watercolor cardstock and then sprayed them with distress spray stain in Rustic Wilderness.
I decided to create a frame around my plaid background by using a die from the Memory Box Curved Cap Pinpoint layers die set. I die cut cream Memory Box woodgrain cardstock with the same rectangle die I used for the plaid paper and then die cut the Curved Cap die from the center. The frame was then adhered to the plaid paper with liquid glue. I die cut the Just A Note Scripted die from watercolor cardstock twice and adhered them together.
Now all my pieces are ready to adhere to my card front. I adhered the pine branches and the sentiment first using liquid glue. To finish off the card I added the bird with a combination of thin foam squares and liquid adhesive.
Well, that’s it for me. I hope you enjoyed by project today. Thanks for stopping by and have a great day!
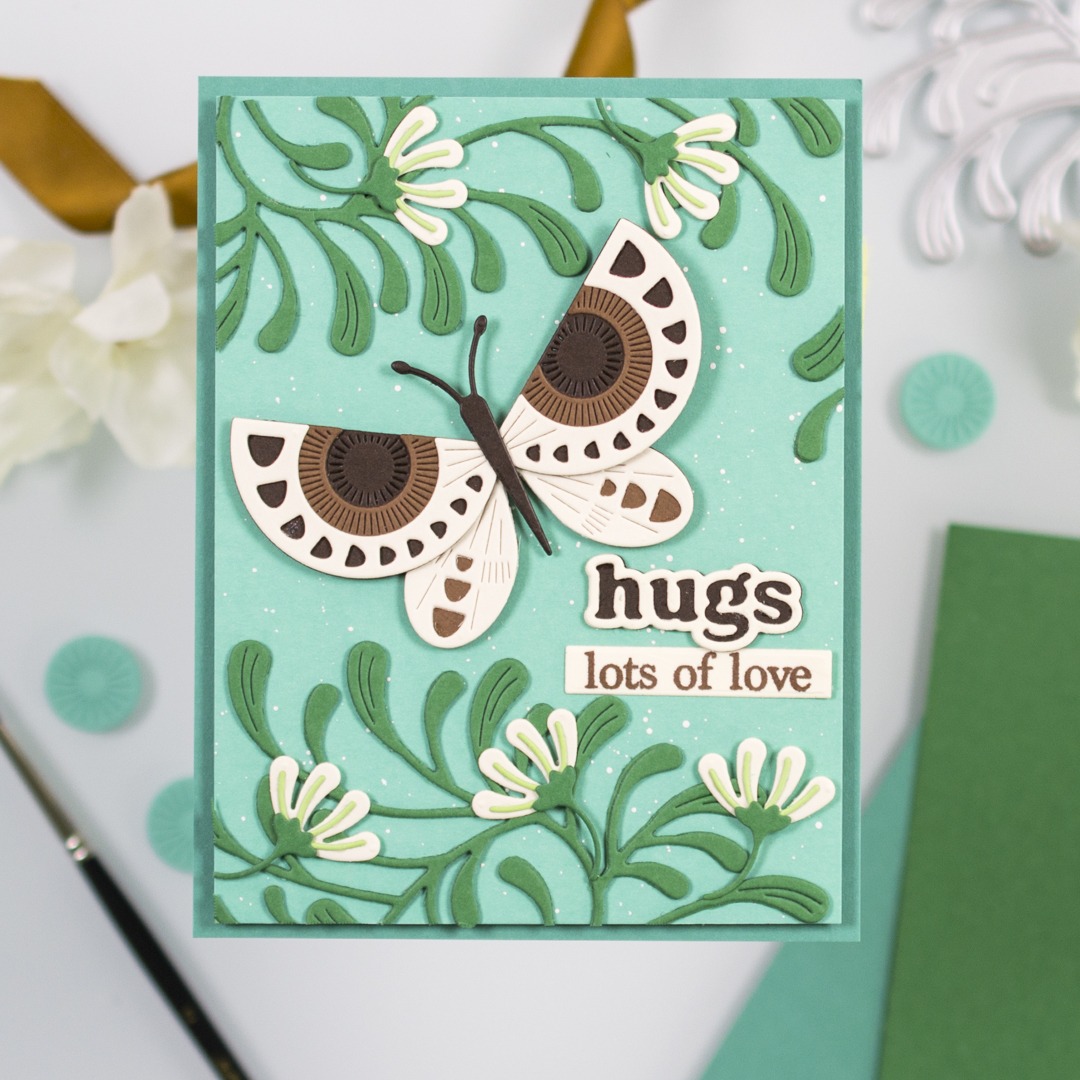
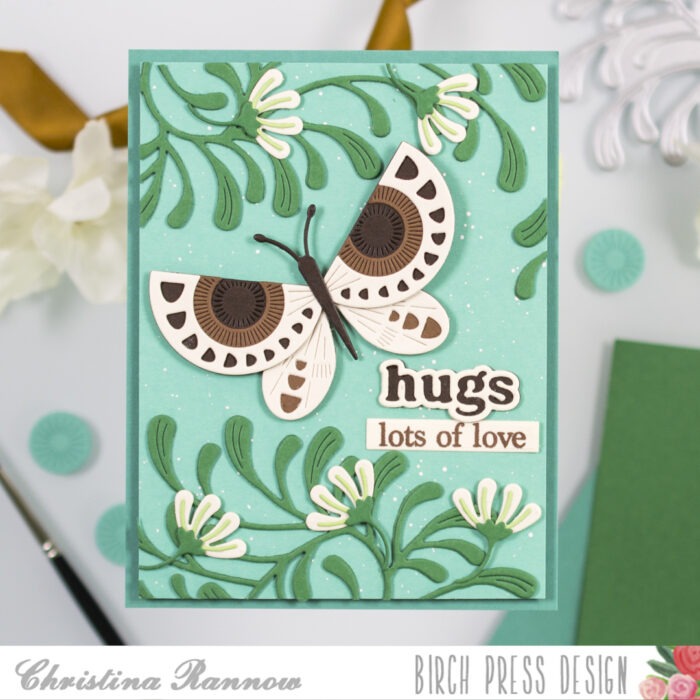
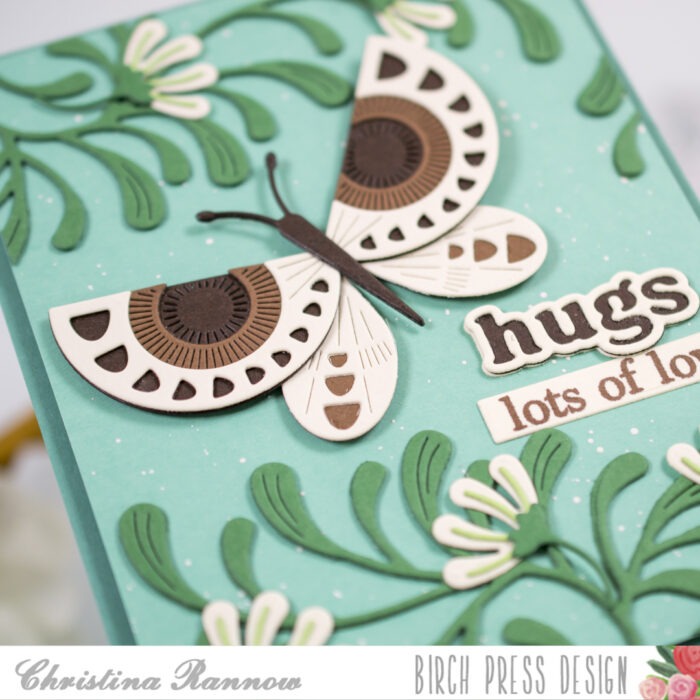
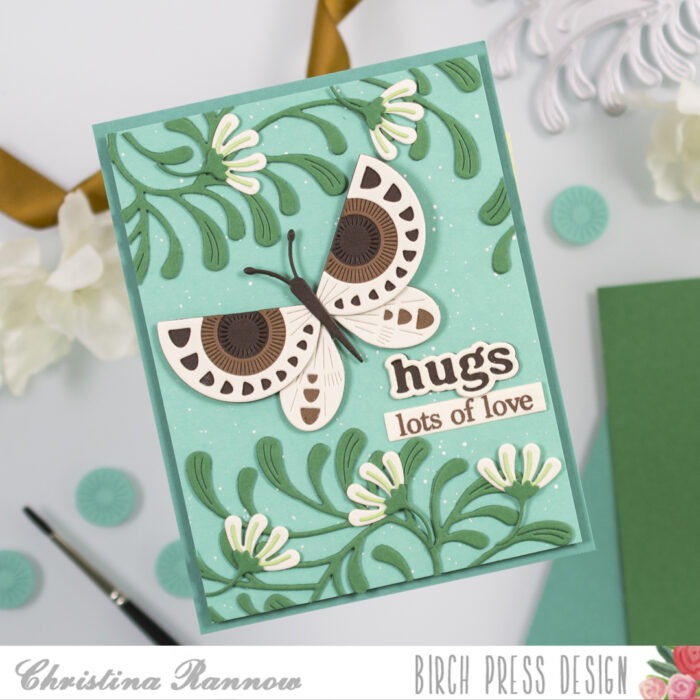
Hi friends! Christina here to share a card featuring some of the beautiful things from the new Block Print Garden release. I created a magical moth scene using the Block Print Radiant Butterfly and the Ornamental Branch plus a few blooms from the Fabulous Flourishes set. Follow along below with the steps to creating this magical twilight scene.
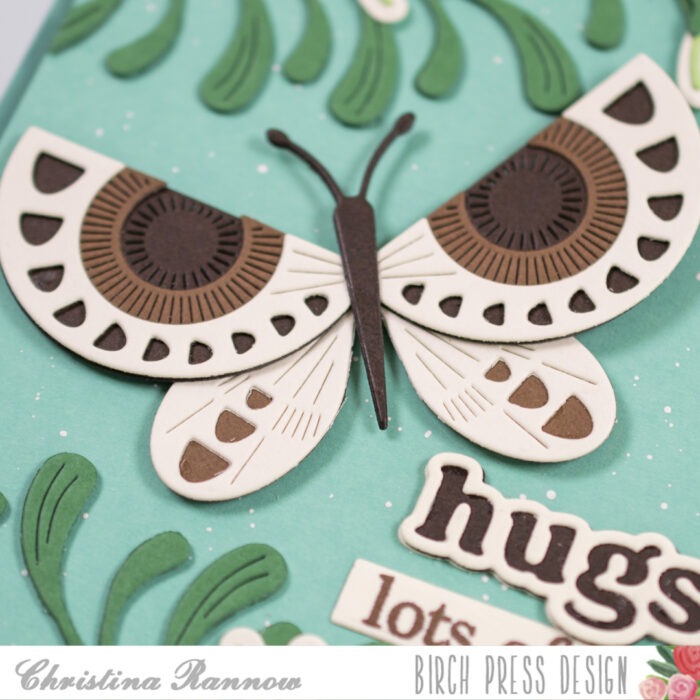
I started by die cutting the elements for my card design. I used ivory and shades of brown cardstock for the Radiant Butterfly, or in this case, the moth. I used a jade green shade from the Memory Box 6 x 6 Greenery paper pad for the Ornamental Branch, and for the small blooms, I used more of the greens plus ivory cardstock. I assembled the die cuts and secured everything with liquid adhesive.
Next, I trimmed a piece of teal cardstock from the Memory Box Lagoon 6 x 6 paper pad to 4 x 5 ¼ inches to be the background panel. Then I thinned white gouache paint with a bit of water and used a paint brush to splatter the panel by lightly tapping the paint brush across the surface. Once dried, I attached this panel, using foam tape for some dimension, to another teal cardstock panel measuring 4 ¼ x 5 ½ inches.
With the background completed, I got to work attaching the assembled die cuts to the panel. I attached two of the Ornamental Branches to my card, one at the top and one at the bottom, trimming off anything that overhung the panel before adding five of the blooms to the branches. Then I attached the butterfly, or moth, with thin foam squares. Finally, I added the Hugs Vintage Sentiment, die cut from ivory and brown cardstock, and a secondary sentiment from the Vintage Everyday Greetings stamped with brown ink and die cut with a sentiment strip.
And that completes this magical card featuring some of the new things from the Block Print Garden release. Thanks so much for reading all about my latest card design. See you again soon!
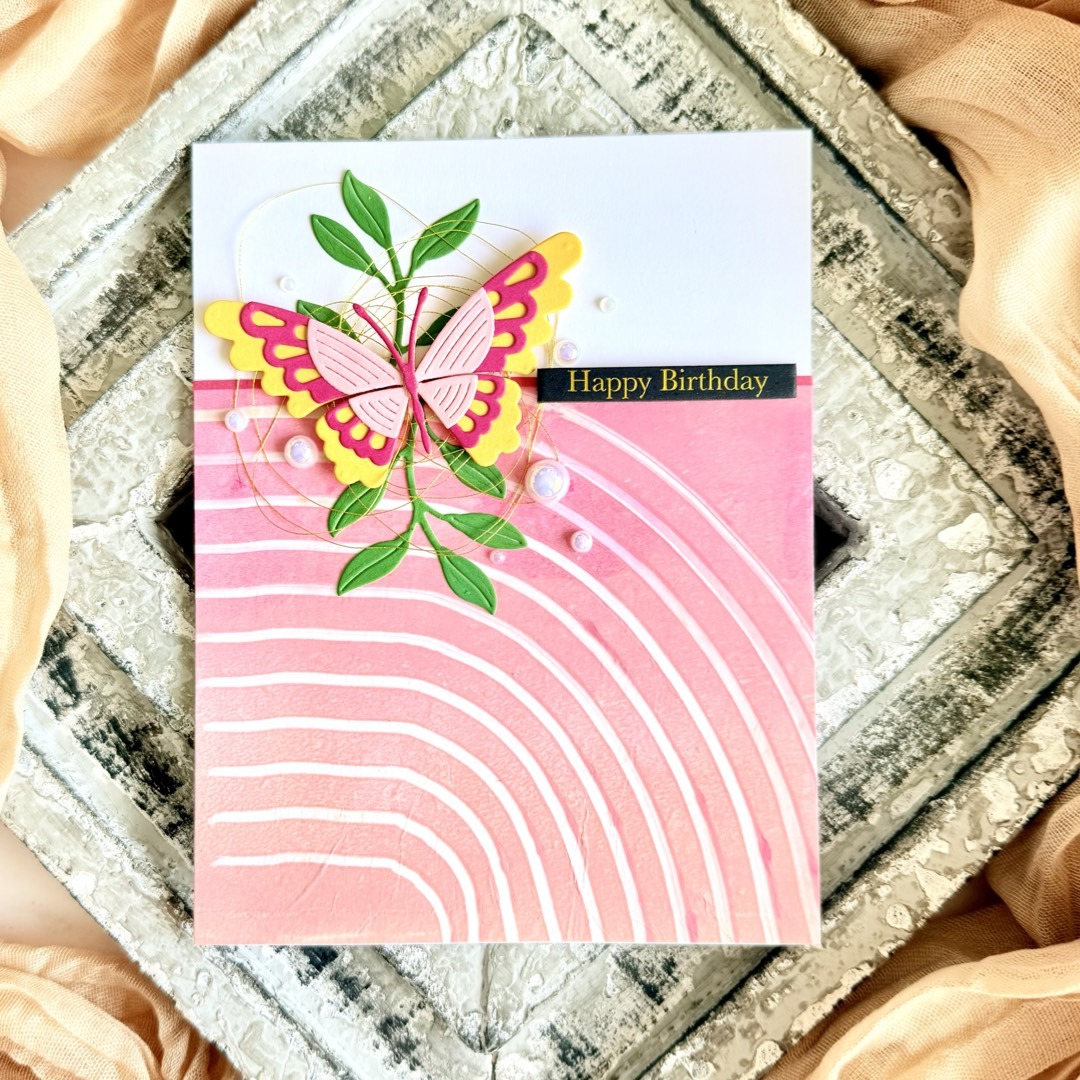
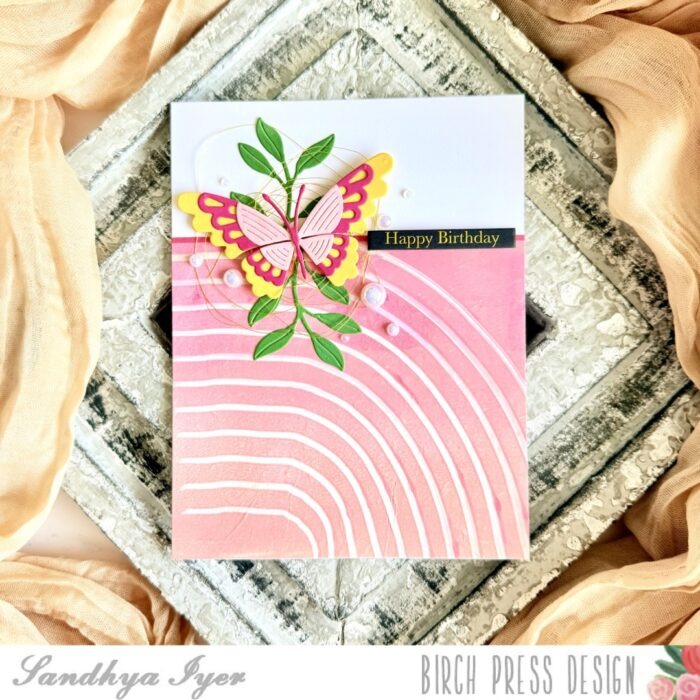
Hi, crafty friends! Sandhya here, and I’m thrilled to be back on the Birch Press Design blog today with a card that is all about texture, dimension, and a touch of elegance. This butterfly-themed birthday card was such a joy to create, and I hope it inspires you to play with layers and die-cutting in your own projects!
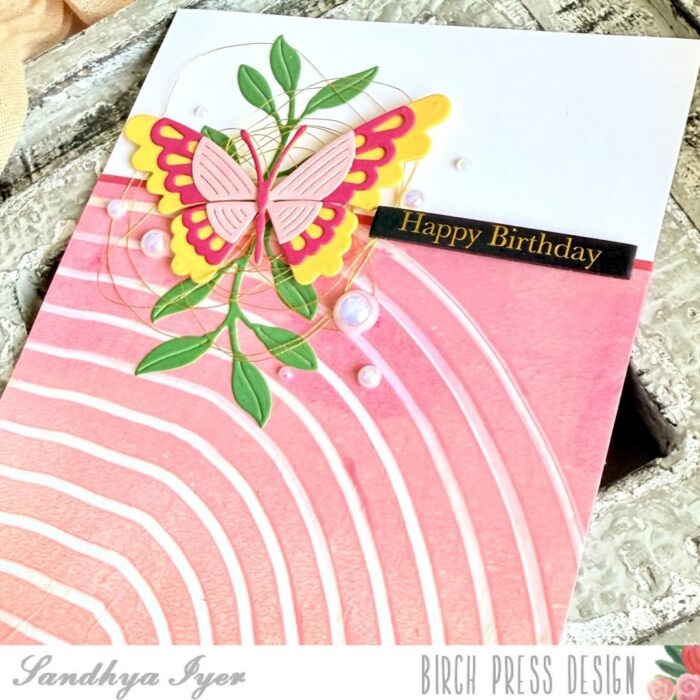
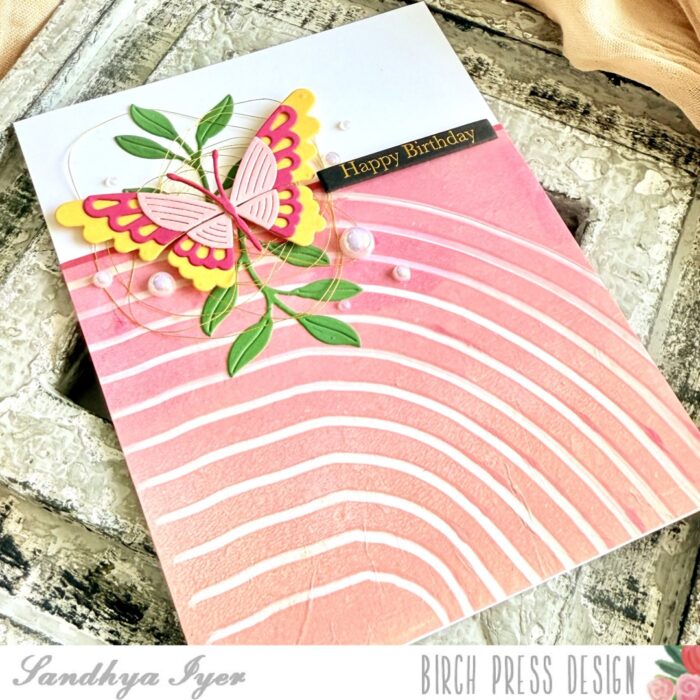
For the background, I used a Gelli print on deli paper to achieve a soft, organic texture. I adhered the deli paper to a piece of white cardstock to give it stability and enhance the colors. The soft pink hues and subtle variations from the Gelli print created a unique, artistic effect that makes the background truly special.
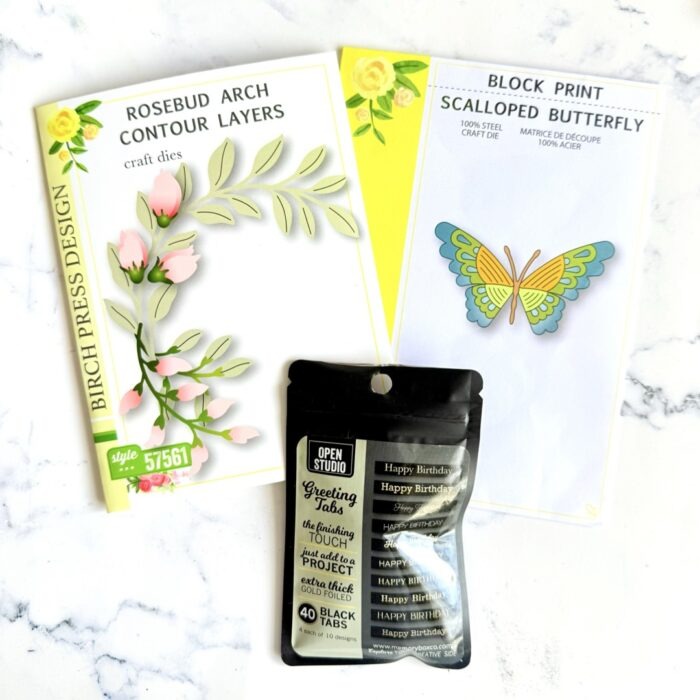
For the focal element, I used the Birch Press Design Block Print Scalloped Butterfly Die, layering different shades of pink and yellow to give it a bright and cheerful look. I love how the delicate cutouts in the butterfly wings add an airy, elegant feel to the design.
To add a bit of greenery and movement, I tucked in some die-cut leaves from the Birch Press Design Rosebud Arch Contour Layers Dies behind the butterfly. Then, I added a few loops of gold thread to bring in a hint of shine and sophistication.
I wanted to keep the sentiment simple yet elegant, so I used a foiled ‘Happy Birthday’ sentiment strip from the Memory Box Greeting Tabs. Finally, I embellished the card with a few iridescent flatback pearls for a soft, glistening effect.
This card is perfect for birthdays, but you could easily swap out the sentiment for a ‘Thinking of You’ or ‘Congratulations’ greeting. The combination of gelli printing texture, layered die-cuts, and a soft color palette makes it a versatile design for many occasions!
I’d love to hear what you think! Do you enjoy working with Gelli prints, embossing folders, and layering dies? Let me know in the comments, and don’t forget to tag me @sanjuscreations if you give this technique a try!
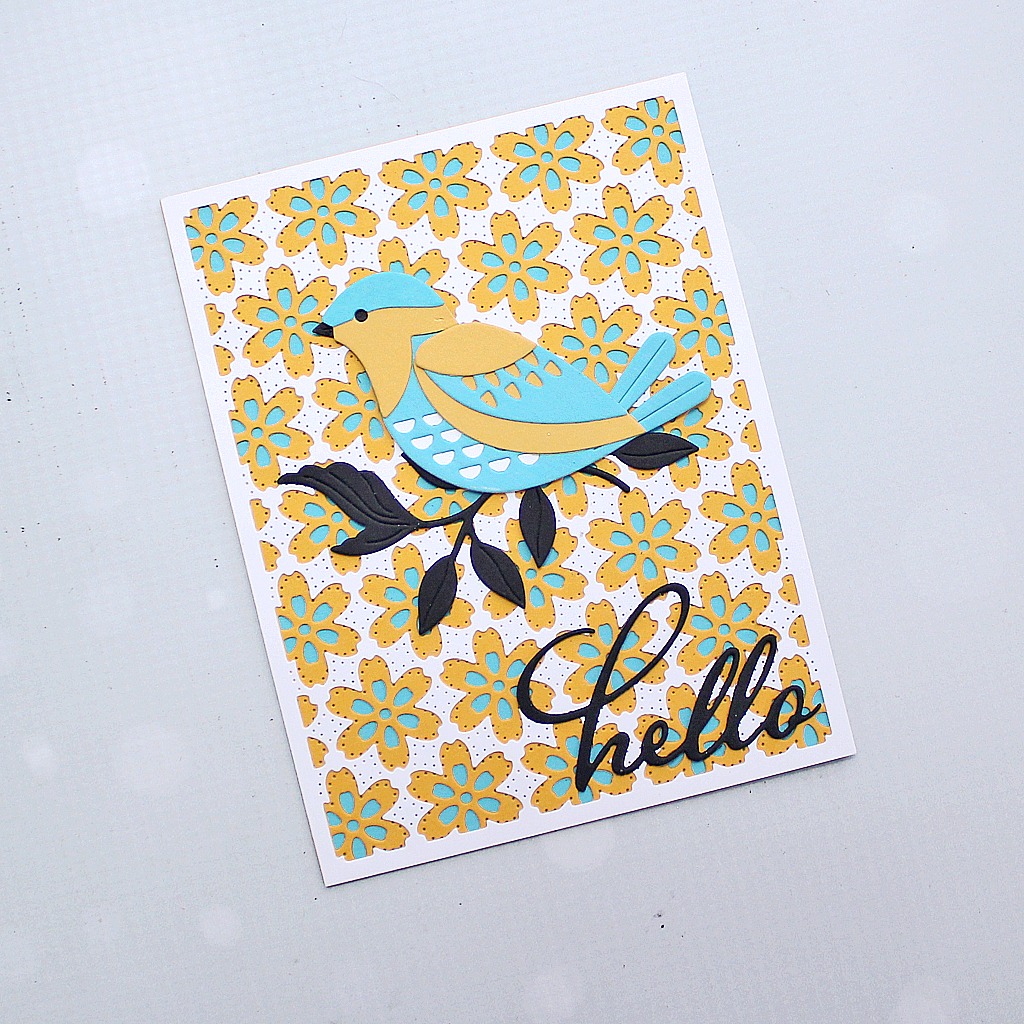
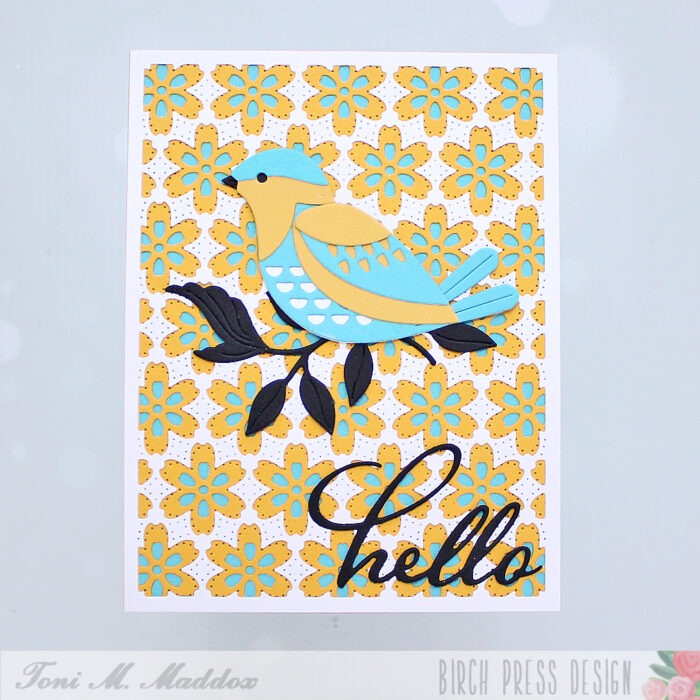
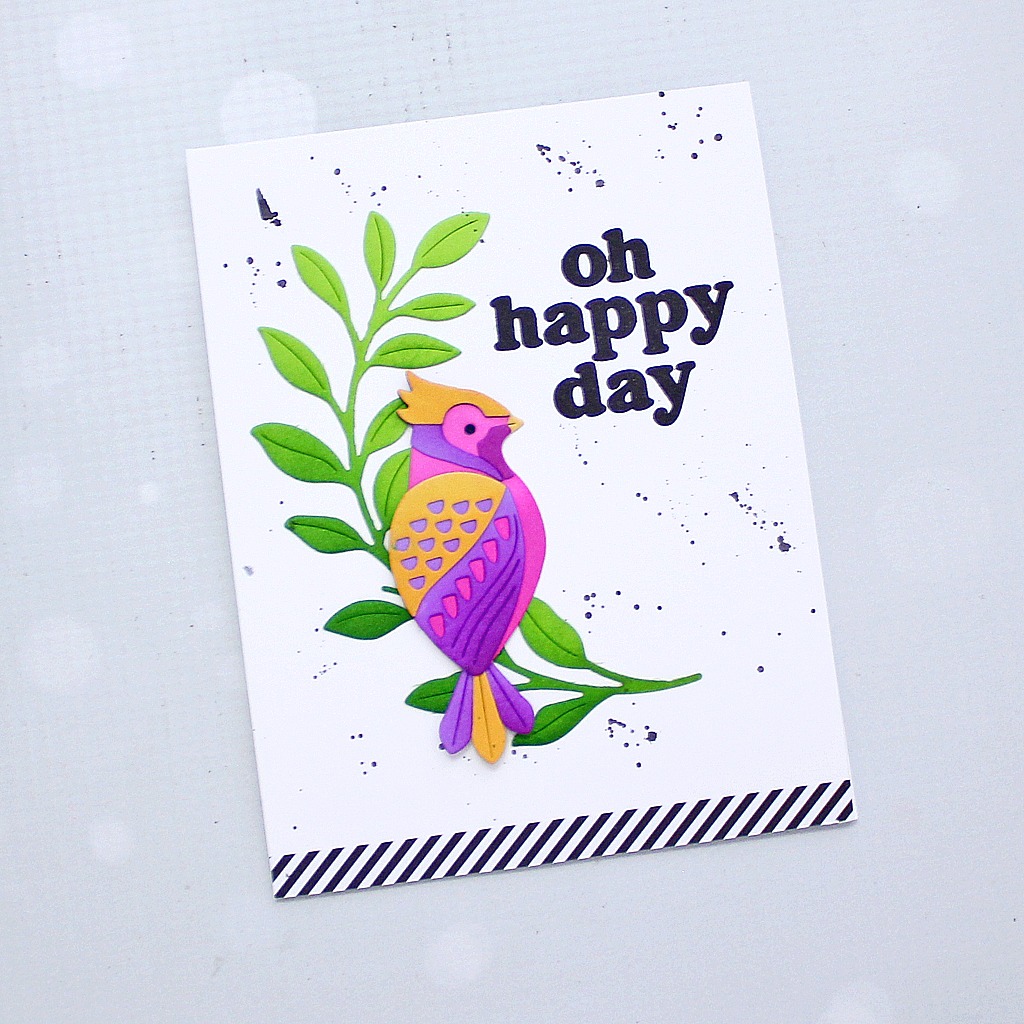
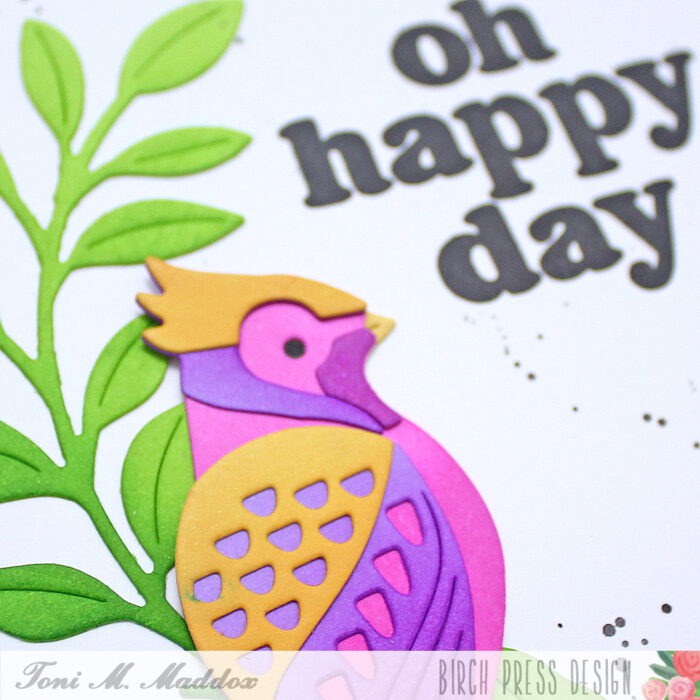
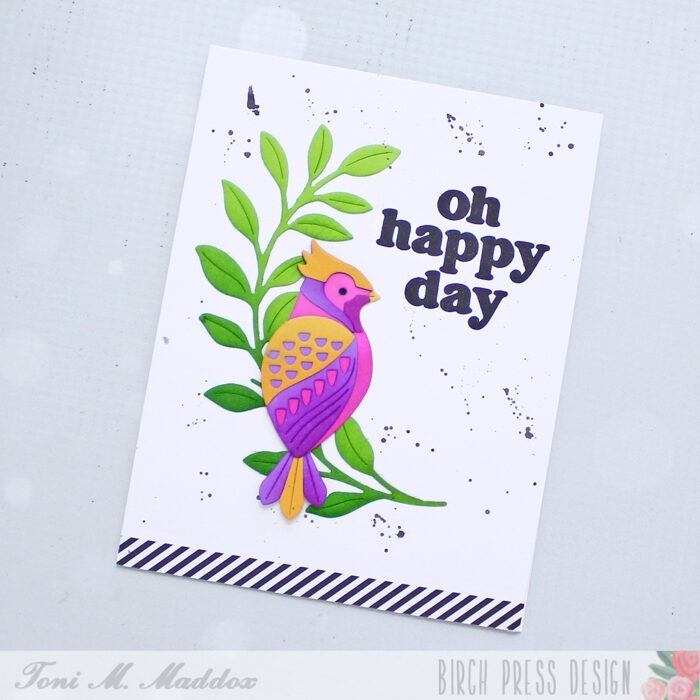
Hello, friends! Toni here today and I’m still loving the Block Print Birds. They lend themselves to all sorts of card designs.
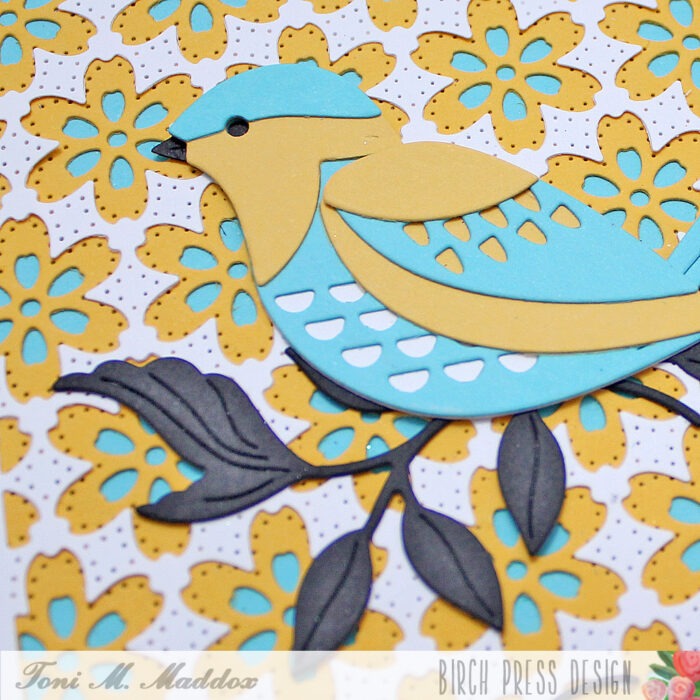
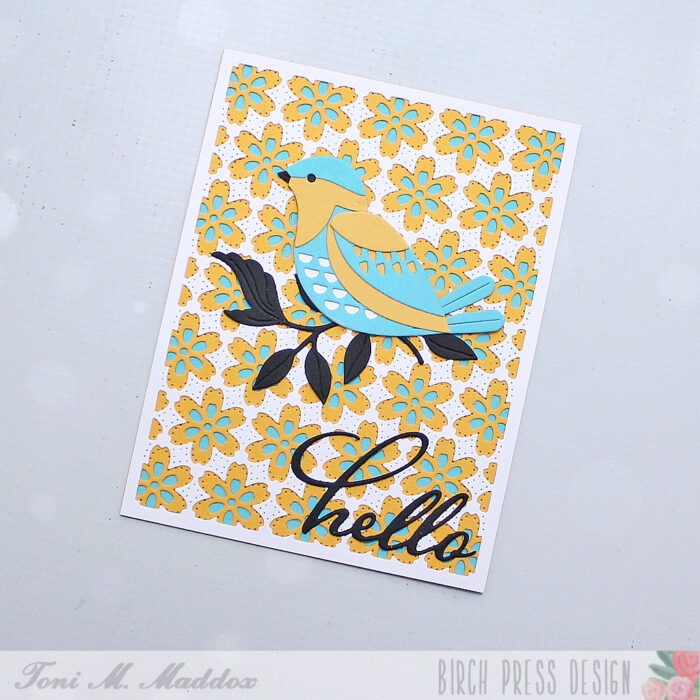
For this one, I created a Scandinavian folk style of sorts using the Block Print Bright Bird, Foliage Bunch, and Hello Scripted on the Flora Plate Layer Set.
I love the boldness of the black against the more muted Memory Box Muted Squash and Pool Party colors.
I hope you enjoyed today’s card and have a great rest of your week!
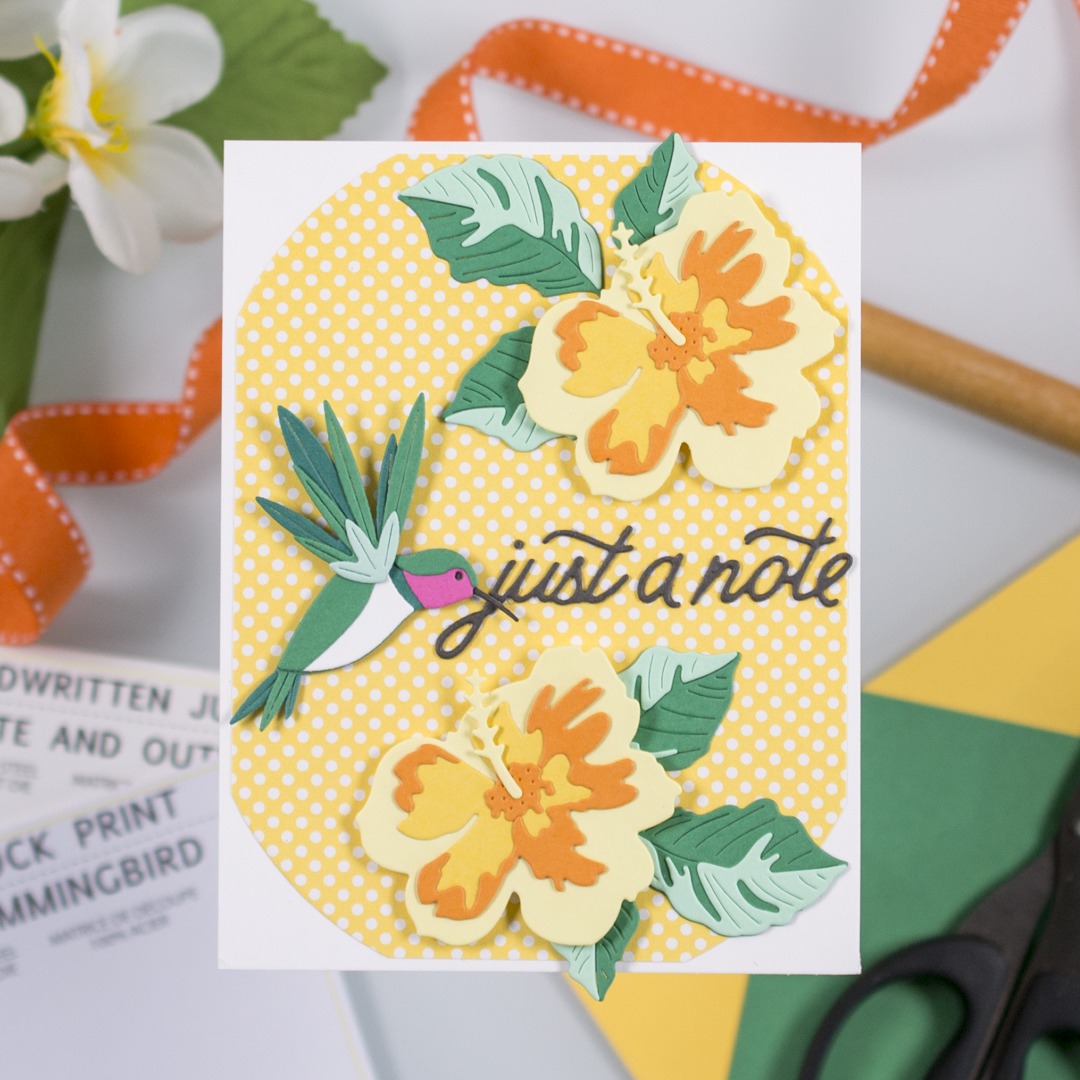
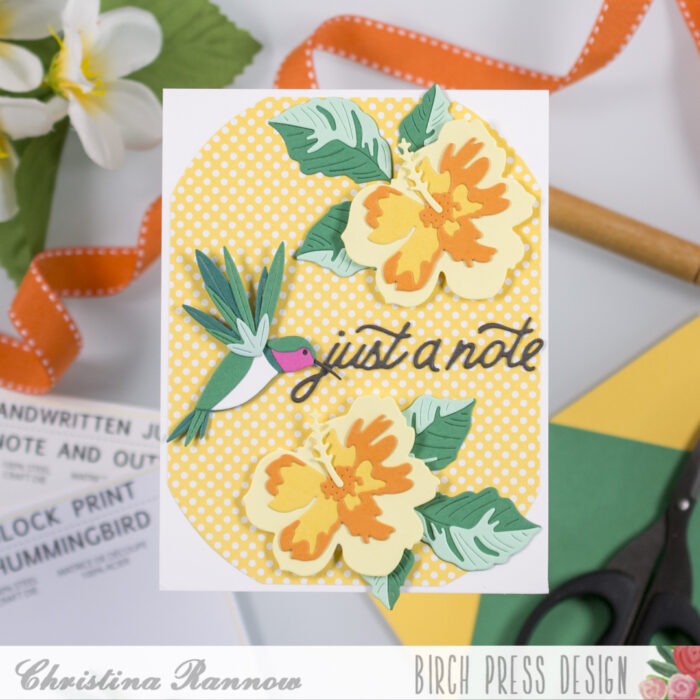
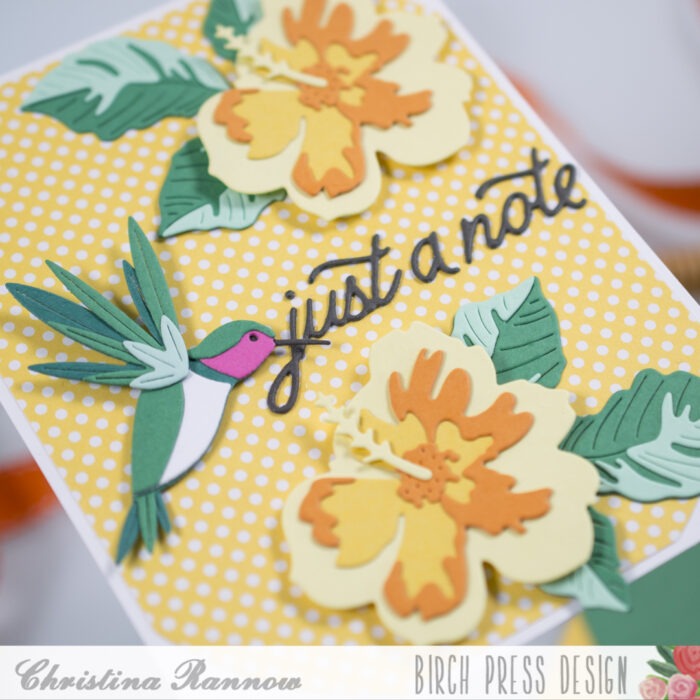
Hello! Christina here to share a sunny tropical card perfect for sending a quick note of happiness to someone. For this card I paired the beautiful new Block Print Hummingbird with the Tropical Hibiscus Contour Layers and added a fun polka dot patterned paper as the backdrop. Keep reading to get all the details for this sunny notecard!
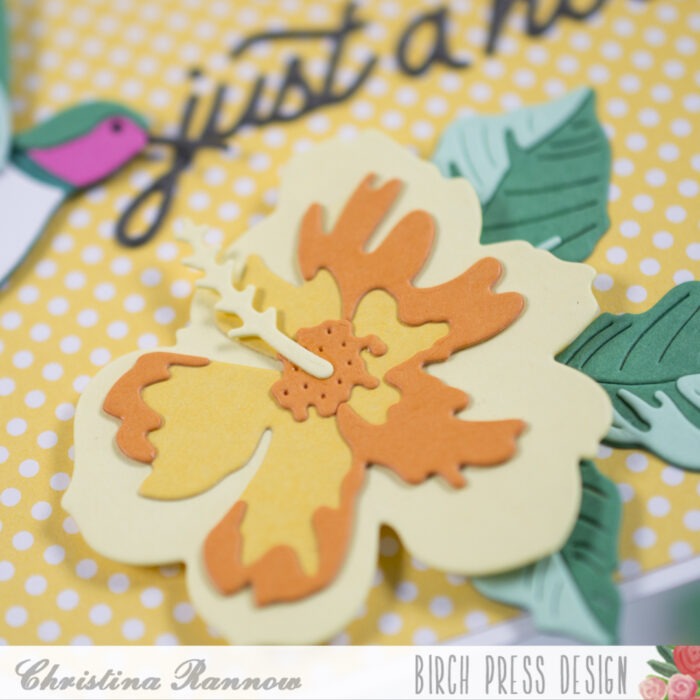
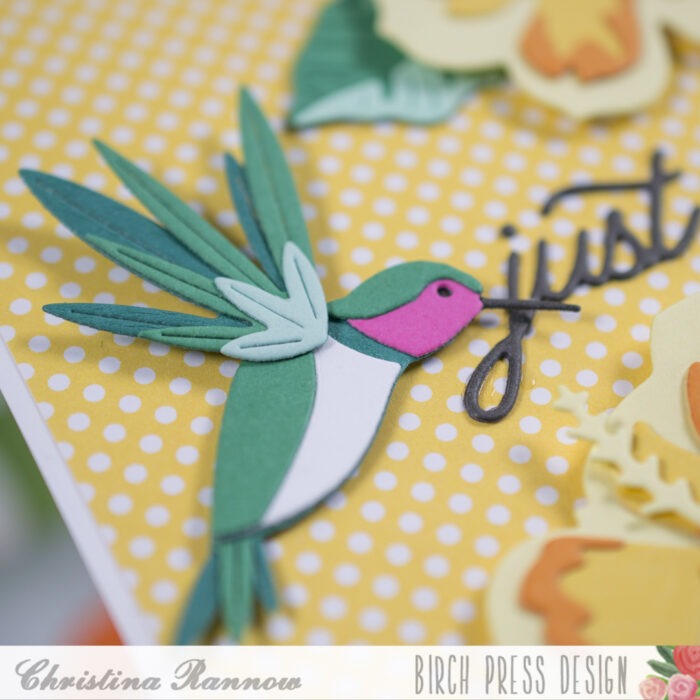
I started by die cutting all the hummingbird and hibiscus elements for my design from brightly colored cardstock. I used yellows, oranges, and teals, with a pop of fuchsia on the hummingbird. All of the die cuts layered together beautifully, plus the Tropical Hibiscus flowers come with a layering guide to make assembly super easy too.
After I assembled and secured my die cut elements with liquid adhesive, I created a simple background. I trimmed a piece of yellow polka dot patterned paper to approximately 4 x 5 ¼ inches and then used a large circle die to round the corners. A corner rounder paper punch would work great for this step if you have one! Then I adhered this rounded panel to an A2 top-fold card base.
Next, I attached the flowers to the card base with foam squares and tucked the leaves under them, securing the leaves with liquid adhesive. I attached the hummingbird with thin foam squares, giving my design multiple levels of dimension. The last step was to die cut the sentiment, the Handwritten Just a Note, from a dark gray cardstock and secure it to my card.
And that completes this sunny tropical card using the Block Print Hummingbird and the Tropical Hibiscus sets. See you again soon!
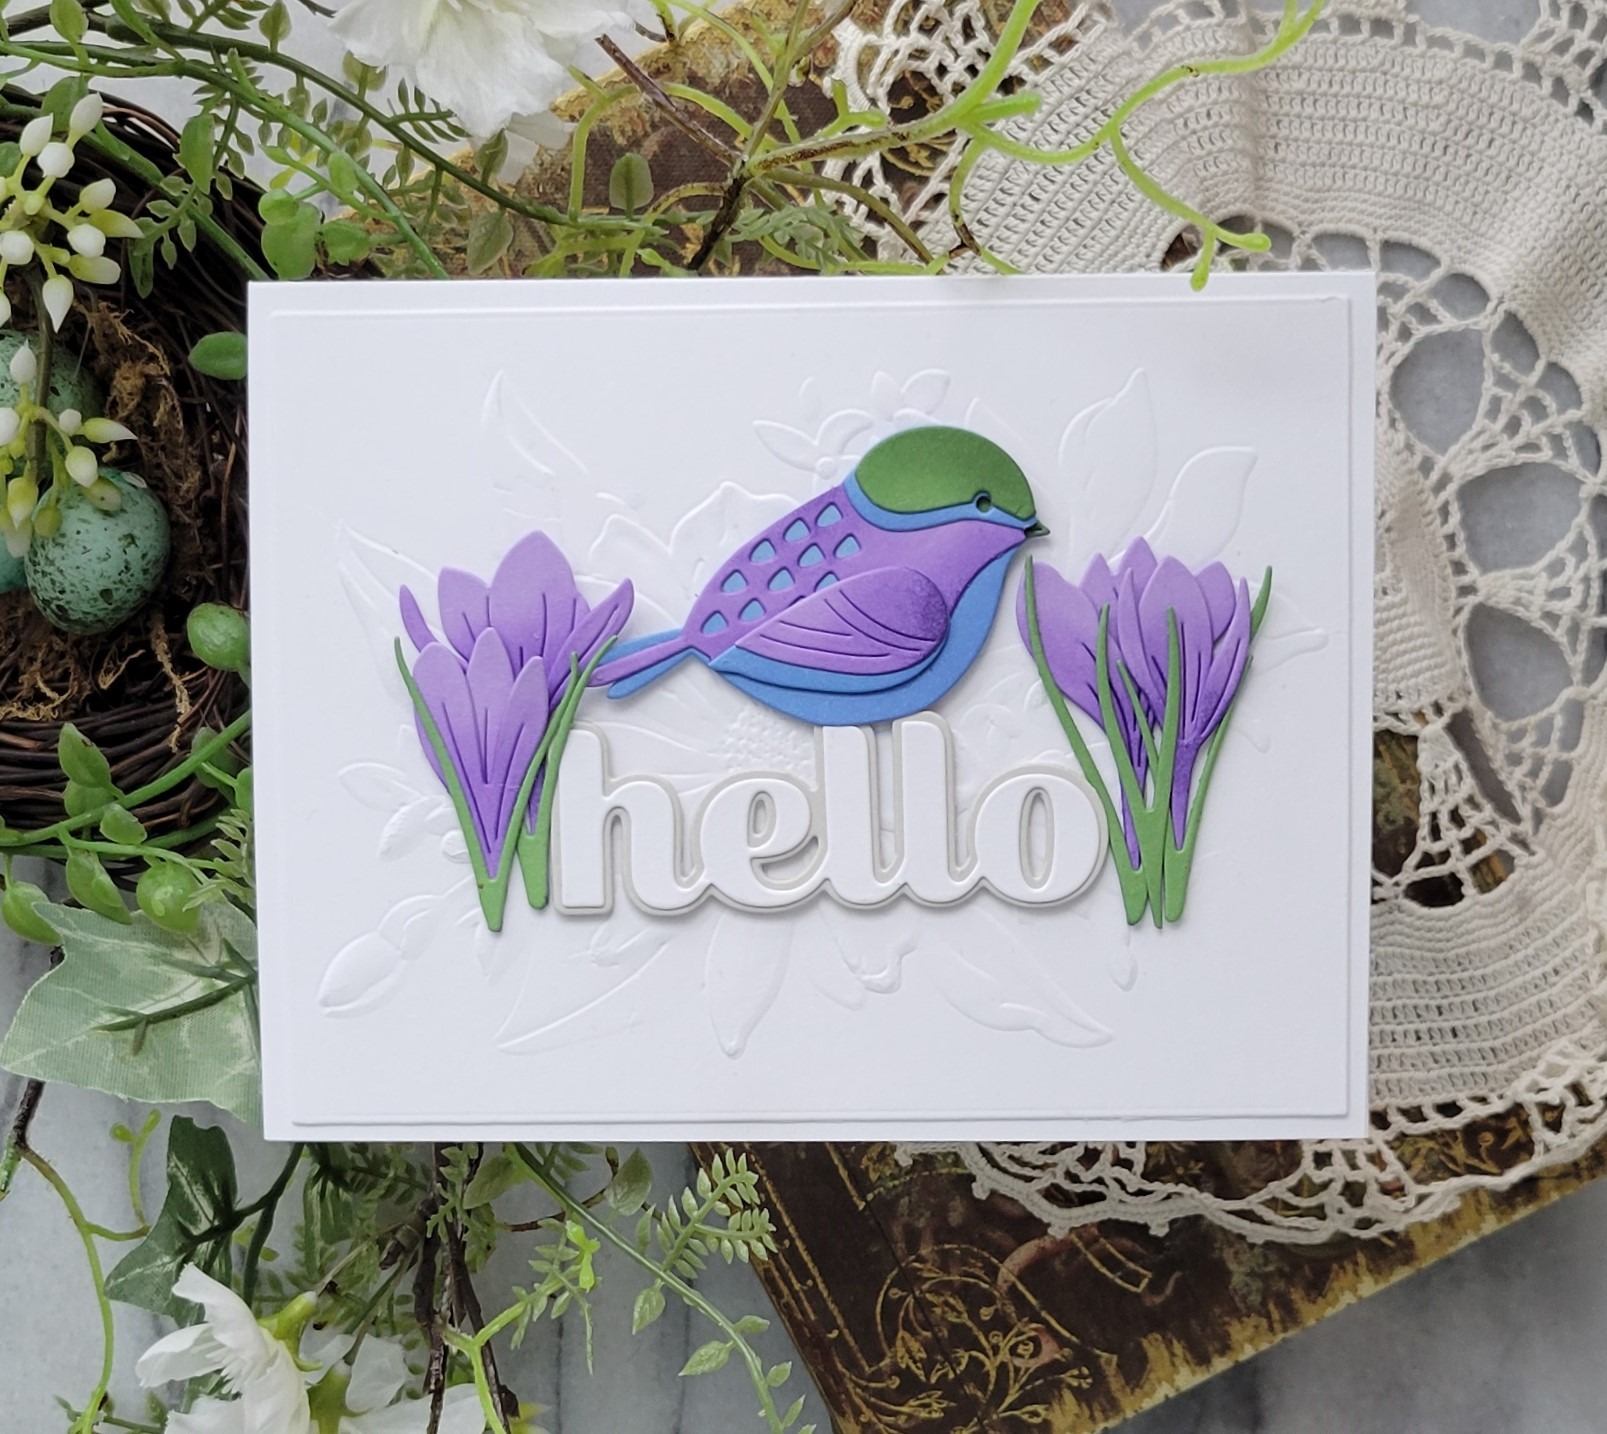
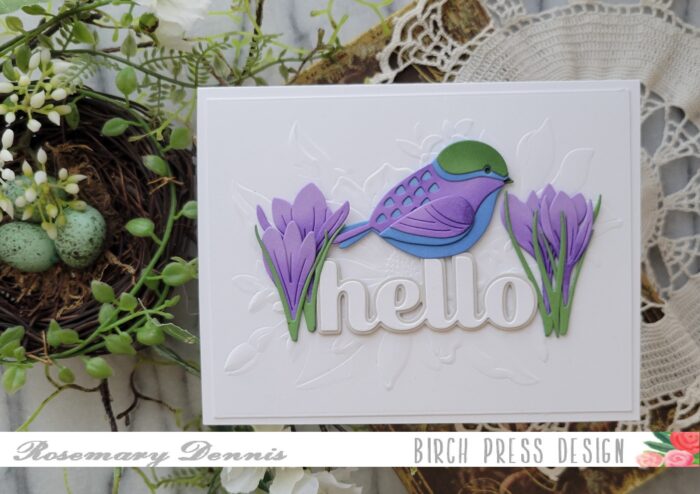
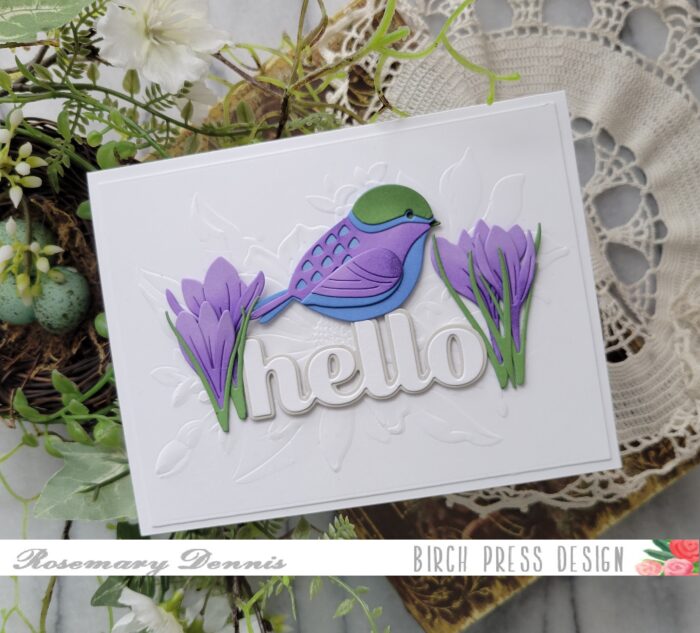
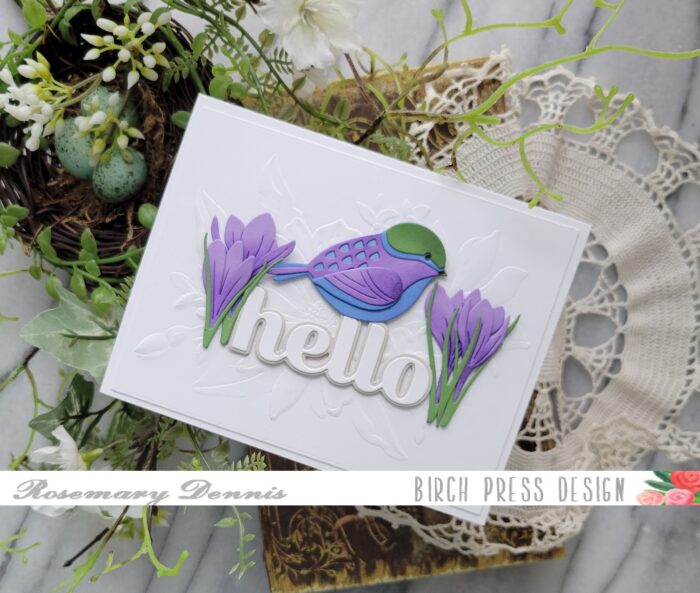
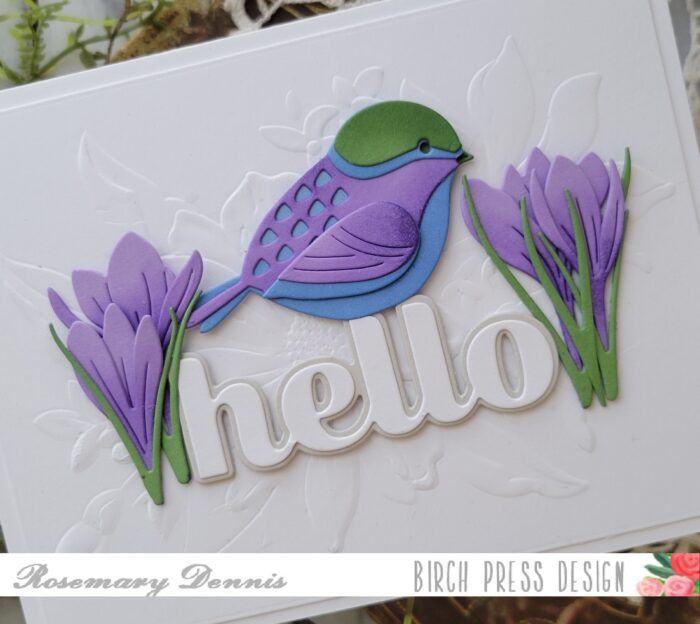
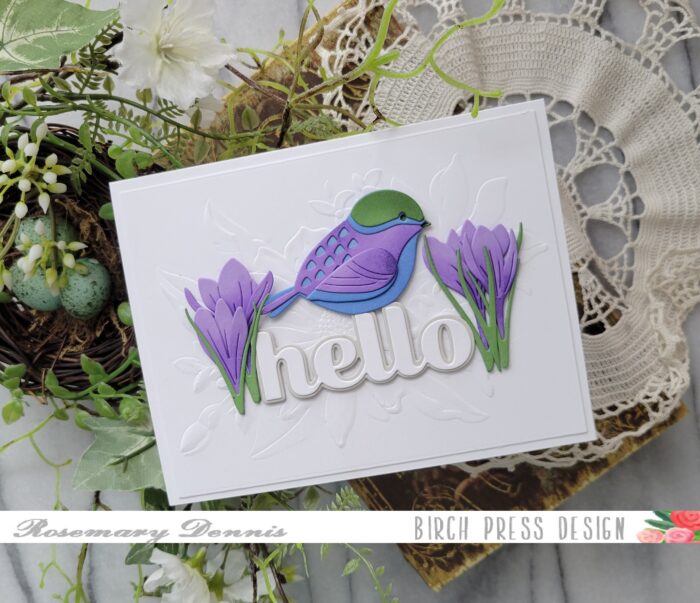
Hello, hello! Rosemary here today and I am back with a card featuring another super sweet Block Print die set. This time I’m using the Block Print Perched Bird. Let’s have a look at what I made.
I knew I wanted to perch my little bird on one of the big Sugar Script die sets and settled on the Big Hello die set. I die cut the word from white cardstock and the shadow from a light gray. I did this because I wanted the focus to be on my little bird.
I decided to go with a blue/purple/green color combo because I thought it would be fun to add some flowers around the word and little bird. Since spring is on the way I decided to use the Sprouting Crocus Contour Layers dies.
I pulled out the colors of cardstock I wanted to use and then die cut all the pieces. To add some depth to the diecuts I did a little bit of inking to each piece with an ink color that was about two shades darker than the cardstock. Once everything was inked up I let the pieces dry a bit before adhering them together with liquid adhesive.
I wanted to add more interest to the background that my little scene would be sitting on. I initially had a different idea, but as I was looking through my products I saw the Memory Box/Open Studio embossing folders and decided to use one of them. I went with the Gracious Floral embossing folder. I embossed the white cardstock and then die cut it with a rectangle die. I did this because I wanted the embossing to be flattened just a little bit.
Now it was time to put it all together. I adhered the embossed panel to a white cardstock base and then arranged all my elements as you see. I used a combination of liquid adhesive and thin foam squares to adhere everything.
Well, that is it for me. I hope you enjoyed today’s project. Thanks for stopping by and have a wonderful day!
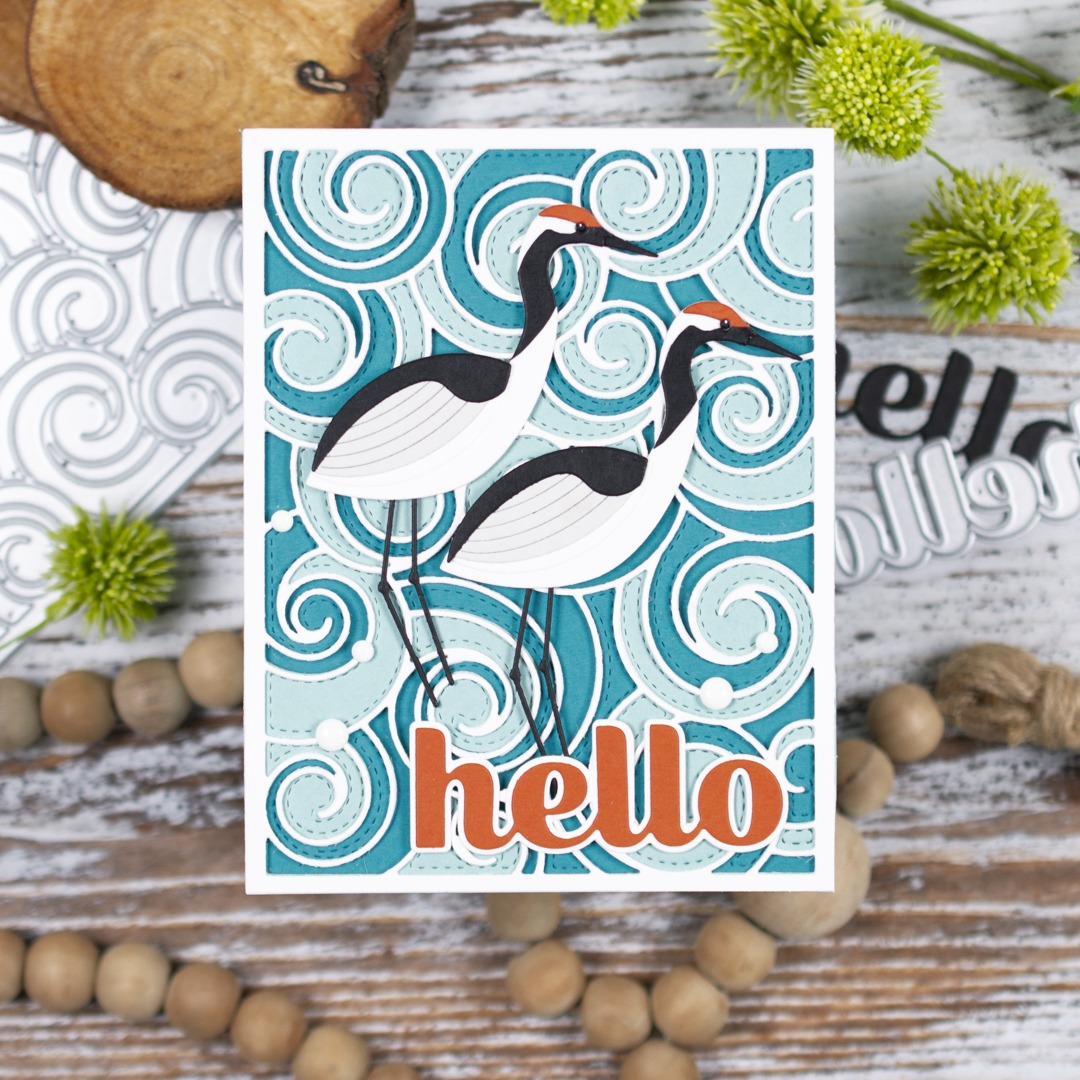
Hi friends! Christina here to share a project featuring the new Block Print Crane. I used red-crowned cranes as my inspiration for this lovely duo, and I paired them with the Waves Plate Die Set for a background reminiscent of Japanese woodblock art. I finished my design with the simple Big Hello Sugar Script and a few white enamel dots from my stash. Follow along below with the steps I took to create this elegant card featuring the Block Print Cranes.
I started by die cutting the layers for the background. The Waves Plate set has three plates that die cut different layers. You can use the layers individually or together to create many different designs. I chose to use all three layers. I used white cardstock for layer A, teal cardstock for layer B, and Deep Turquoise for layer C. I secured the layers together and then mounted them on an A2 Deep Turquoise card panel.
With the background finished, I got to work on the other elements. I started with die cut the pieces for the cranes. I used a combination of white, black, gray, and orange cardstock. To create the black necks of the cranes, I die cut the body a second time from black cardstock and used a pencil to lightly mark where I needed to cut with small scissors. I googled images of red-crowned cranes to get an idea of where the coloring was on their necks. I assembled the cranes, securing everything with liquid adhesive, and then attached them to my background. I used an acrylic stamp block to weigh them down a bit while the adhesive set. Next, I die cut the hello greeting from orange cardstock and the shadow from white cardstock and then attached it using the same process as I did with the cranes: liquid adhesive and an acrylic block for a little weight.
To finish up my design, I added a few white enamel dots from my stash and the tiniest white highlights to the eyes with a gel pen. And that’s all there is to this elegant card design. I hope you’re inspired to create something beautiful today!
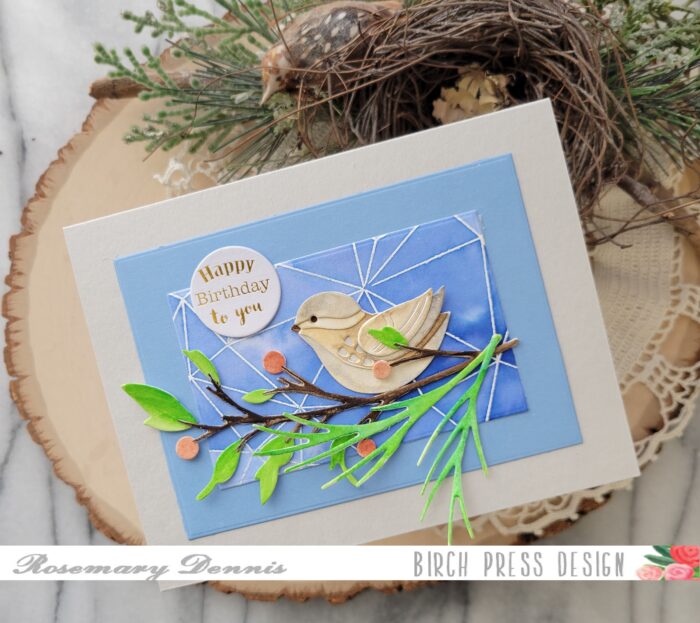
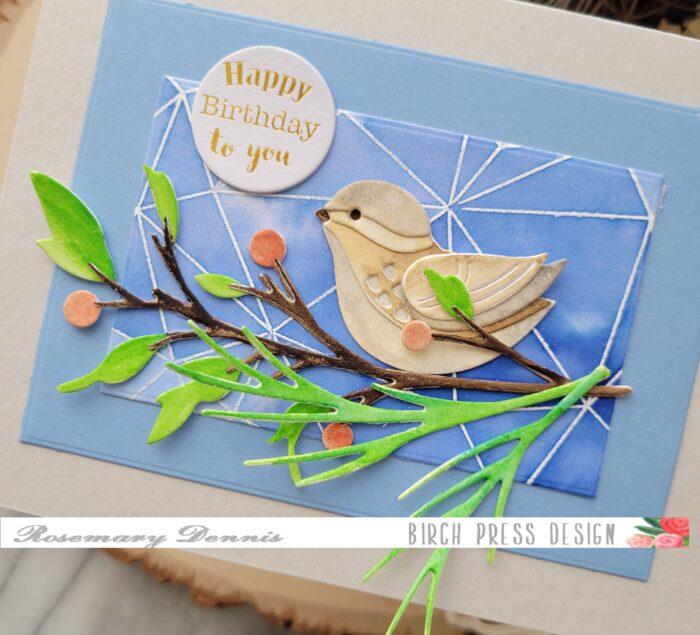
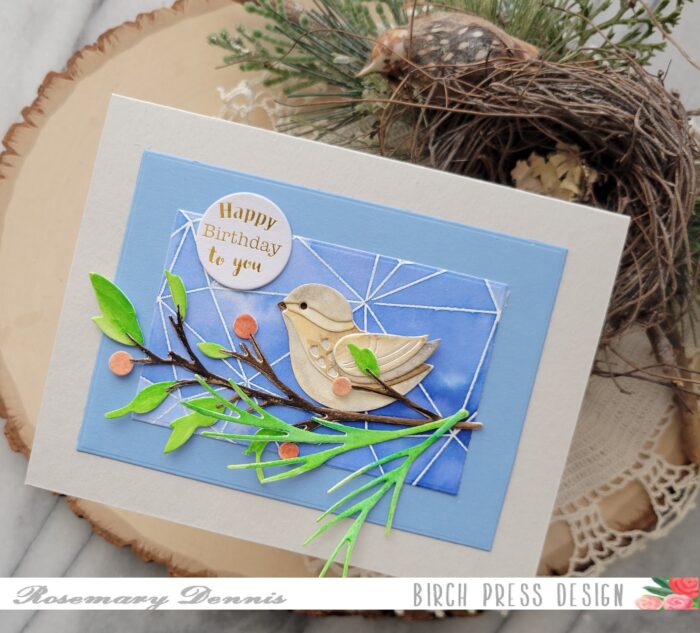
Hello everyone! Rosemary here on the blog today with a birthday card featuring the new Block Print Little Bird. Let’s have a look at what I created.
When I saw the new collection of Block Print birds I was so excited! I just love them and can see so many possibilities. For today’s card I decided to create a little wren. Besides papercrafting I enjoy cross-stitching and one of my favorite fabrics to stitch on is 32 count Lugana in the color Wren. So that was my starting point for my little “wren”. I die cut water color cardstock using the Little Bird die, as well as the Hillside Branch and Bramble Contour Layers die set. I then colored each of the pieces with various watercolors.
My coloring is very simple, but I did spend more time on the bird in an effort to achieve variation in the colors on the bird. Once I was done I set everything aside to dry.
I pulled out the watercolor panels I had created months ago using the Crystal Lingo stamp set. I had two different blue panels, one dark and one light. I went with the lighter version and die cut it down with a Memory Box A2 Rectangle Frames die. I found a complimentary piece of blue cardstock in the Memory Box Lagoon solid core cardstock pack and die cut it with a larger A2 Rectangle Frames die. The two rectangled were then layered together.
With all my pieces dry I adhered everything together using liquid adhesive and then determined how I would arrange all the pieces on my panels. I used liquid adhesive to adhere everything and then added my panels to a light gray cardstock card base.
I finished the card with a Memory Box Birthday Greetings Tab. I really love how my sweet little “wren” turned out. I can see creating other types of birds with the Block Print Little Bird die set. Thanks for stopping by and I hope you have a wonderful day!