If you’re looking for a little eye candy today be sure to check out Erum Tasneem’s blog for a trio of watercolor cards made with the Thankful Mandala stamp set (also our March item of the month here).
Hi there is Tracey here today with a video and a card to celebrate that spring has finally arrived. I still have lots of snow on the ground where I live but every day it is steadily disappearing and the signs of spring are just around the corner.
I created a video to share with you how I created my card using ink blending and alcohol inks. The video can be found below.
I started off by creating a grassy panel by blending Twisted Citron and Mowed Lawn Distress Oxide inks. I set that panel aside so that I could work on my Easter eggs.
I created my Easter Eggs using the Stitched Egg Die Set and they were coloured with alcohol inks. I used two combinations of alcohol inks Wild Plum and Purple Twilight and the second combination was Butterscotch and Stream. I used the dipping method to colour the eggs.
Next for my butterfly I blended some Distress Oxide inks on to a panel of Bristol Smooth cardstock. I blended three colours on to one panel–Fossilized Amber, Spiced Marmalade and Black Soot. Clean water was flicked on to the panel and then picked up with a clean paper towel. Once it was dry I cut the Genevieve Butterfly Layer A and Layer C from the panel. Layer C is a two part die, one for the butterfly and one for the body.
The sentiment was created using the Lingo Alphabet Dies and the Lingo Thanks Clear Stamp Set. Once the sentiment had been added to the bottom of the card front the eggs and the butterfly were added with tape runner and foam tape. The entire panel was adhered to the white top folding card base with foam tape. The design was finished off with a few sparkling clear sequins.
Thanks so much for stopping in today and creating a card with me. Be sure to check back in on Friday for another post by our fabulous design team. Have a wonderful day!
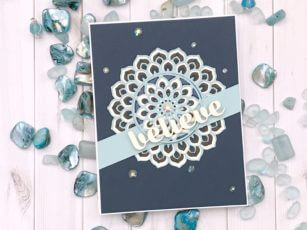
I am so thrilled to be back with another project today! We are going to work with the Calen Layering Die Set and add a sentiment using the Believe Sugar Script die.
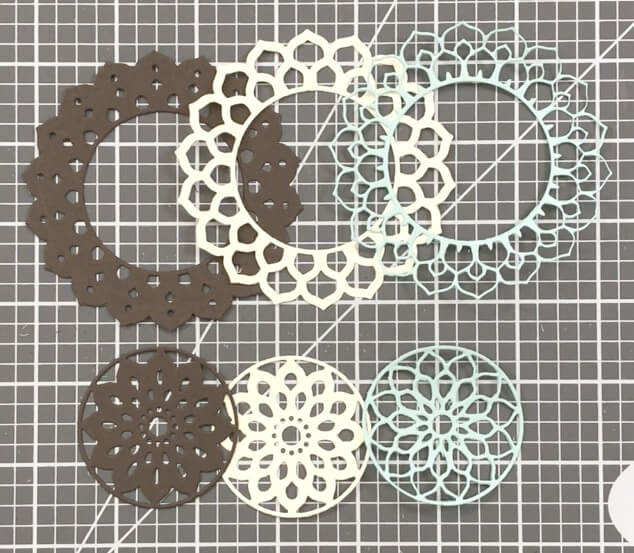
The best place to start always is let’s get out pieces die cut all at once. So, we will have a die cut from each layer of Calen and I decided to cut 6 from ivory card stock for my sentiment.
Once we have every die cut, we can now start gluing it all together!
I started with my sentiment, by cutting 6 this will create a heavy chip board piece across our focal point. Now we can glue together the three layers of Calen. I chose a brown, Ivory and Pool color for each of my layers.
I grabbed a piece of Navy-blue card stock for my back drop and set my focal point slightly above center. I cut a strip ¾ inches wide to stretch across the card front, but it will also separate the center of the Calen die cut from the outer ring!
I then set the sentiment over the center circle and adhered my design panel onto my standard A2 size card base using my liquid adhesive and added a few ivory gems to add a bit of sparkle to our card!
If you want to see more details just click on the video below and see our project come together step by step!
As always, I hope you enjoyed today’s project… Make sure you stay tuned for more wonderful projects coming soon! Have a great day and always remember… Be Creative!
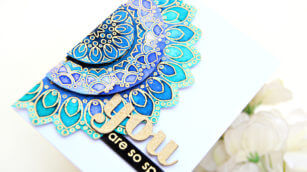
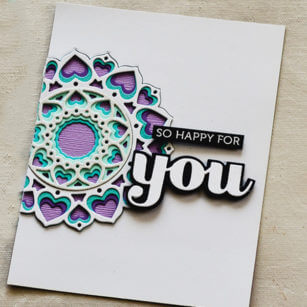
Our Adora Layer set is one of our favorites! Add it to a greeting when you want intricate and loving details. The sentiment is from our Lingo Thanks Stamp set – which pairs perfectly with the You Sugar Script die!
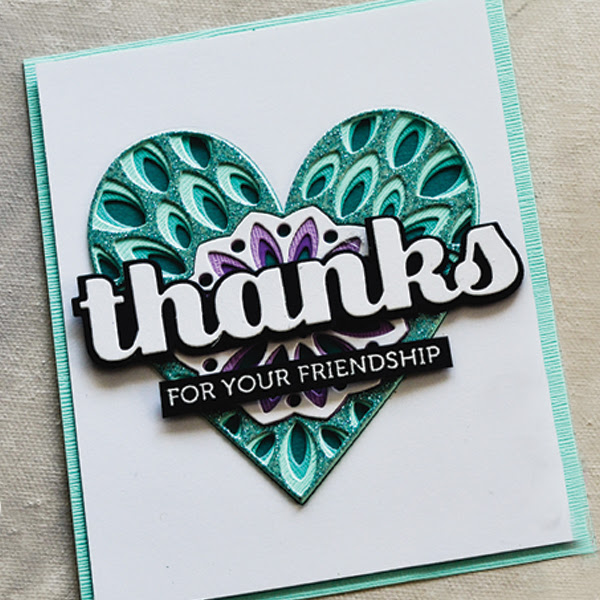
So Thankful The Kaleidoscope Heart really dazzles on this artful card! Tone on tone layers inside a heart shape are a stunning backdrop for the Thanks Sugar Script Die.
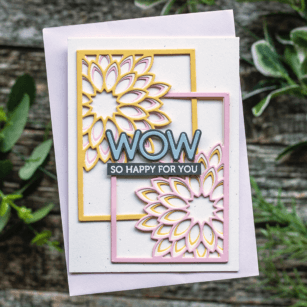
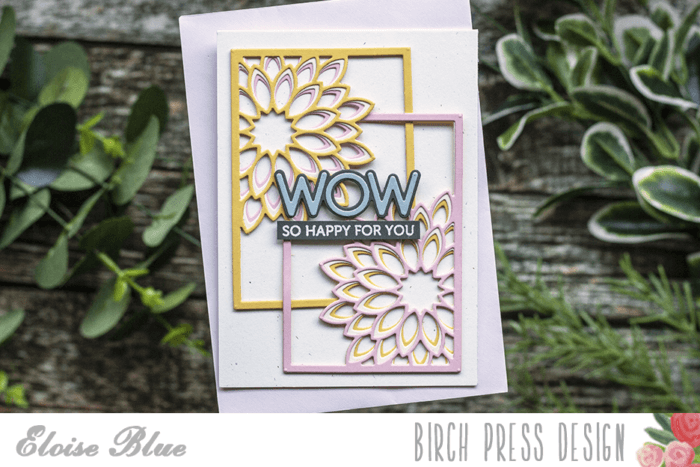
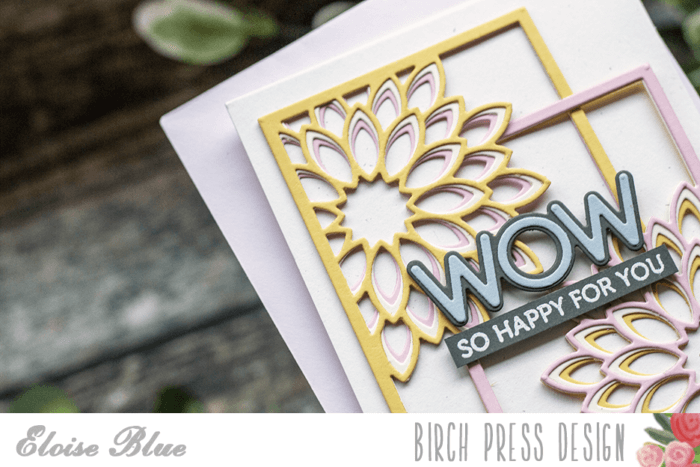
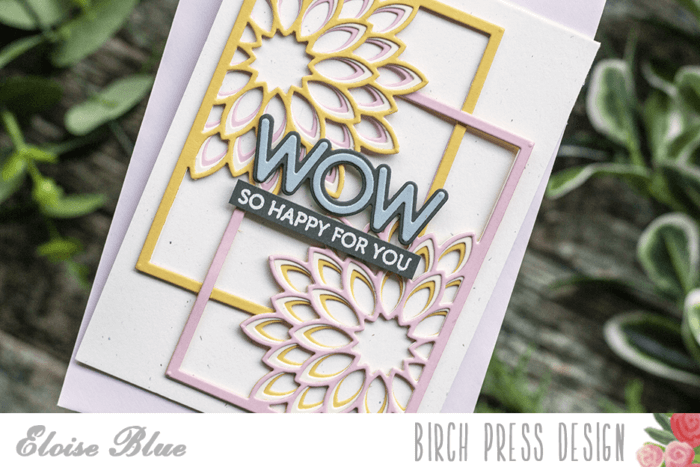
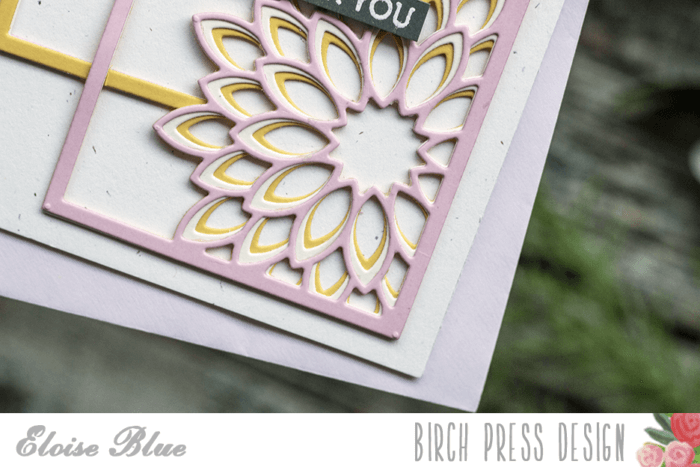
I started off with die cutting the layered dies from different colours of Cardstock. Two A Dies from yellow and pink, Two B Dies from cream and Two C Dies from yellow and pink as well. I adhered them together and layered them on top of each other.
I cut down a cream card base and adhered my frames over the top. I then die cut the word ‘Wow‘ from grey cardstock and also the inner piece from blue. I adhered them together with liquid glue and added foam tape onto the backs.
Lastly, I white heat embossed the ‘So Happy For You’ sentiment from Lingo Thanks onto a piece of grey and added foam tape to the back as well. I then adhered them into the centre of my frames and that finished up my card for today.
Thank you so much for stopping by today, and I’ll see you next time.
Hello again! I’m so glad to be back today showcasing a different way to use your dies that utilizes your scraps and turns them into treasure. Let’s get started with this video tutorial featured on my YouTube channel:
I love being able to use my scraps, and when I can do it in a way that the scraps are the focus of the project, that’s even better. The Butterfly Garden Die Plate set is one of the most versatile sets that I’ve seen from Birch Press. Plate “C” can be used alone as it offers such great detail in those stitched swirls and details, but also the butterfly cuts can be used in such beautiful ways in other cards and with other products as well. I decided to use the largest and smallest size butterfly dies in my project today.
I decided to use patterned paper for my “A” plate, but you could definitely use a solid color, or make your own watercolor panel and use that! For my “C” plate, I used vellum and then adhered the smaller butterflies to the larger ones just in the center and then curled the smaller wings to give dimension and interest. I thought this added a lot of whimsy to the card, almost like the butterflies were in flight.
It’s tough to see, but I added score lines every half an inch to my card front to add a little more interest without adding color or too much detail as I wanted the butterflies and the Big Friend Sugar Script die to be the focus of the card.
I hope that you’ve enjoyed learning a bit about how I used my scraps to create this beautifully simple card for any occasion. I’d love to know ways that you use your scraps from Birch Press dies as well! Comment below to give me more ideas. -ha! I’ll see you again very soon!
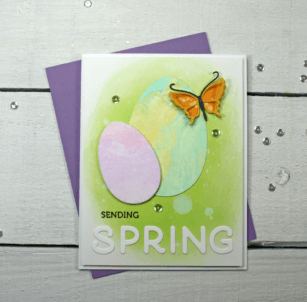
Hi and thanks for stopping by! My hands down favorite technique is color block. I love the clean lines and bold graphic design you can achieve with this effect.
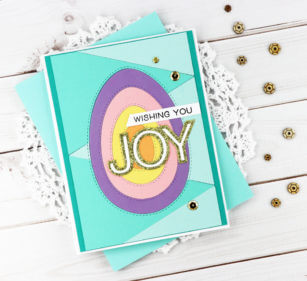
Today I’m sharing a pastel egg design that looks complicated but is very easy.
I started by creating a background with the Tall Triangle dies set. My 4.25 x 5.5″ card base is topped with a slightly smaller panel of dark teal card stock. Next I cut the second largest Tall Triangle twice with a medium teal, and three times with a light teal. I assembled the triangles on their reverse side with washi tape, and trimmed the panel to my card size.
I cut the largest Stitched Egg from the assembled Tall Triangle panel and adhered it to my card base. The pastel eggs are created by cutting the two Stitched Egg dies at the same time. I have a magnetic cutting plate that holds the dies in place for me, but you could also tape the die cuts in place before running them through your die cut machine.
Cutting the Tall Triangle panel with the Stitched Egg left a stitched outline around the die cut opening. The remaining eggs were inserted and adhered inside the egg shaped opening.
The Simple Joy sentiment makes a clean greeting when paired with the Joy and Peace clear stamp set. I love that I’m repurposing a holiday stamp set so I get more value from it.
Wishing you a wonderful day with time to do what you love best!
Hi it’s Tracey here today and I have a card to share with you for St. Patrick’s Day which is coming up this weekend!
Here are the dies that I used for today’s card…
My card used the Dahlia Mini Frame Set and I chose some gold sparkle cardstock to use for my top layer and to add a bit of luck to the recipient.
I was away at a stamping retreat last weekend and I was introduced to 4 bar cards. Such a cute, tiny canvas and the Dahlia Mini Frame fits perfectly onto it. So today’s card is a 4 bar card which is 4 7/8″ x 3.5″. I started off by cutting Layer A of the Dahlia Mini Frame from gold sparkle cardstock, then layers B and C from two different shades of green cardstock. The layers were adhered together using liquid glue. Once it as dry it was adhered to the 4 bar card base.
To create my tiny clover I die cut three tiny hearts from the Simple Hearts die set and arranged them in the shape of a clover and I hand cut a tiny stem–all from the same green I used for layer C of my frame cuts.
The little handmade clover sits perfectly inside the bottom right of the frame and is all you need to convey the message that this you are sending the Luck of the Irish!
The Dahlia Mini Frame set can be used for so many occasions throughout the year just by switching up the colours, the sentiments and even the additions, just like the closer I created here today. You just need to use a little imagination. Thanks for stopping by today and come back on Friday for some more inspiration!
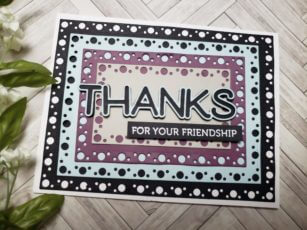
Hello! Today I am featuring the Rectangle Dot Layer Dies to create this very simple thank you card. I just love the dots on these dies. They kind of remind me of bubbles!
This die set come with 4 dies. I cut out each die with card stock from my stash. I then stacked them and adhered them to my card panel.
For my sentiment I used the Big Lingo Type Thanks die and the Lingo Thanks stamp set.
I adhered my sentiment with some foam tape for dimension.
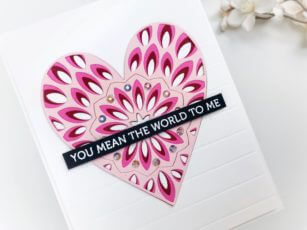
Hello, there crafters! Ashlea here. I’m thrilled to be on the blog today sharing some of my favorite tips for jazzing up a clean and simple card. I love creating CAS cards, but I often find myself wishing there was something I could add to help it be a little more elevated. Check out my YouTube video below to see how I created this fun yet clean and simple card:
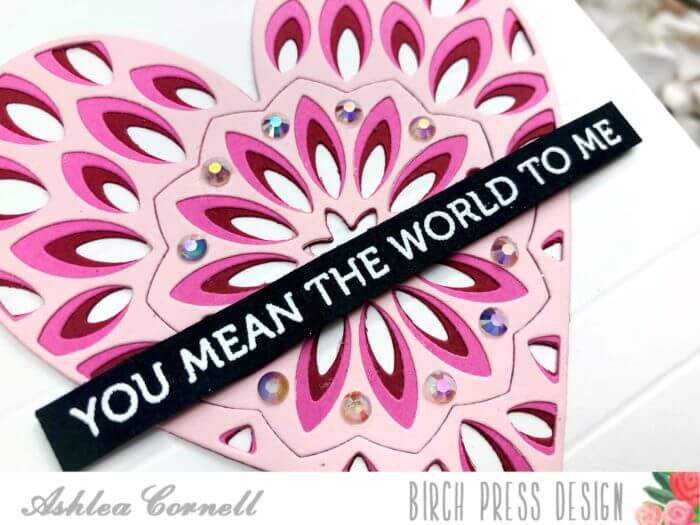
Before adhering my Kaleidoscope Heart layers A, B and C, I created score lines into my card front cut at 4″ x 5 1/4″. This is one of my favorite tricks for adding interest to a clean and simple card. It brings such detail without adding too much texture or any color at all. I then adhered my layers, C first, then B, and finally A to my card front. I used the sentiment “You Mean The World To Me” from the Lingo Thanks stamp set and embossed it in white embossing powder on a black piece of card stock.
This is another great way to add some interest and contrast to a CAS card. Finally, after adhering my card front to my A2 sized base (4 1/4″ x 5 1/2″) I used iridescent gems on each of the small circle cut outs in the center portion of the heart. I love the sparkle this added to the card and love that it adds a small amount of color based upon how the light hits the card.
I hope that you’ve enjoyed learning a bit about how I created this card and my favorite tips for elevating a CAS style. Thank you so much for stopping by today and I’ll see you again very soon!