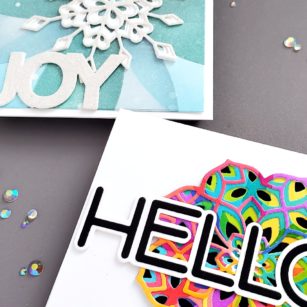
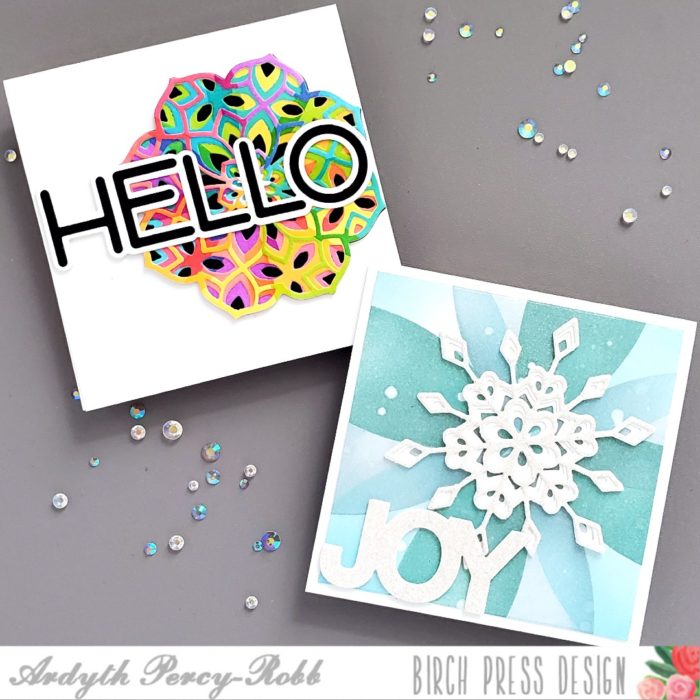
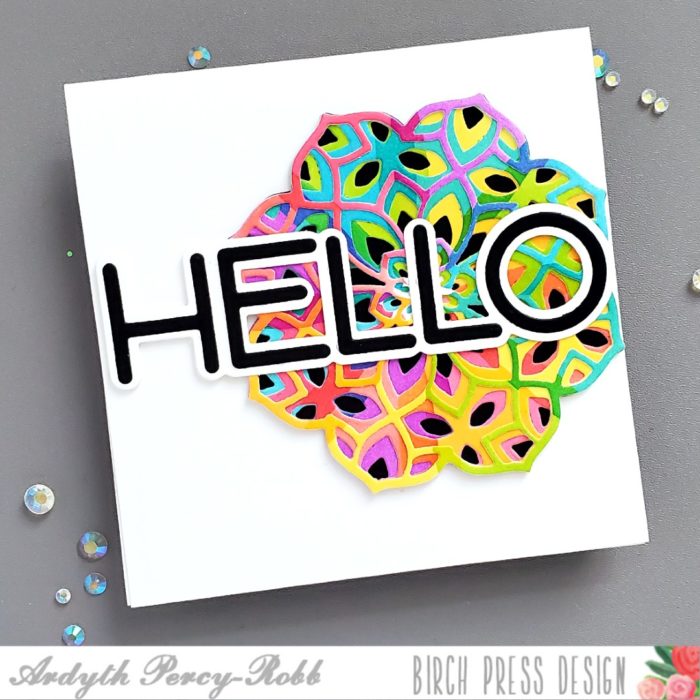
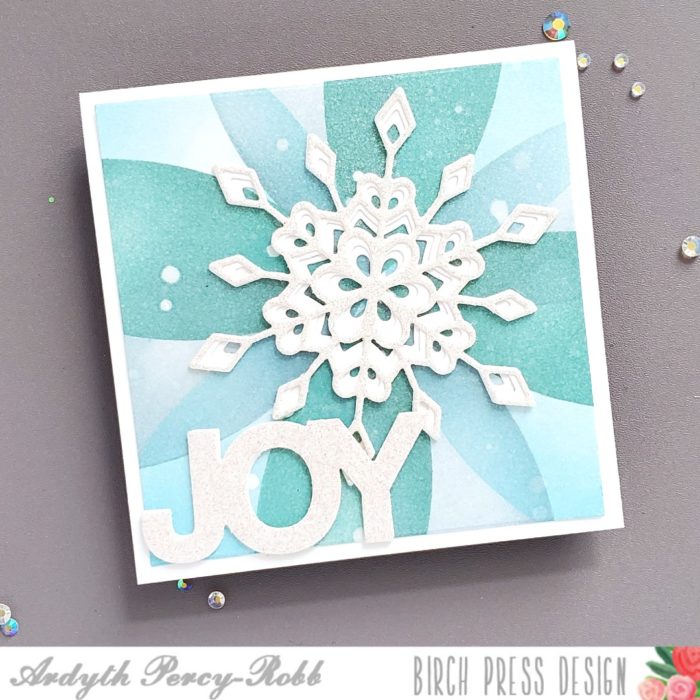
Good morning! At first glance, these two cards don’t look like they have a lot in common, but both were made with the same Petal Burst stencil and an easy turning technique!
I blended 4 colours of ink through the stencil – one colour for each petal, before turning it 45 degrees and blending 4 more colours through it. I did this 3 times and then cut the Kinsley Layering dies from the centre of each ‘flower’. I stacked them up, but turned them to create a bold patchwork of colour. I backed it with one of the Vivid Blooms Stitched layers die cut from black cardstock for drama. I finished the card with the Jumbo Lingo Hello die.
This time I turned the stencil 30 degrees each time, and I used one colour of ink for each turn, to get a more peaceful, monochrome look. I finished this card with the new (coming soon!) Frosty Flake die set along with the shadow layer of the Simple Joy die set.
Here’s a video showing how these cards came together:
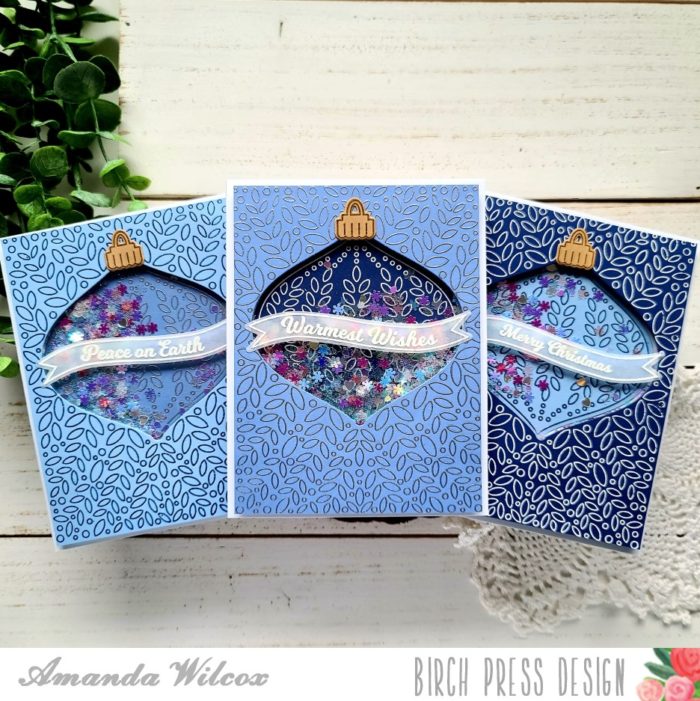
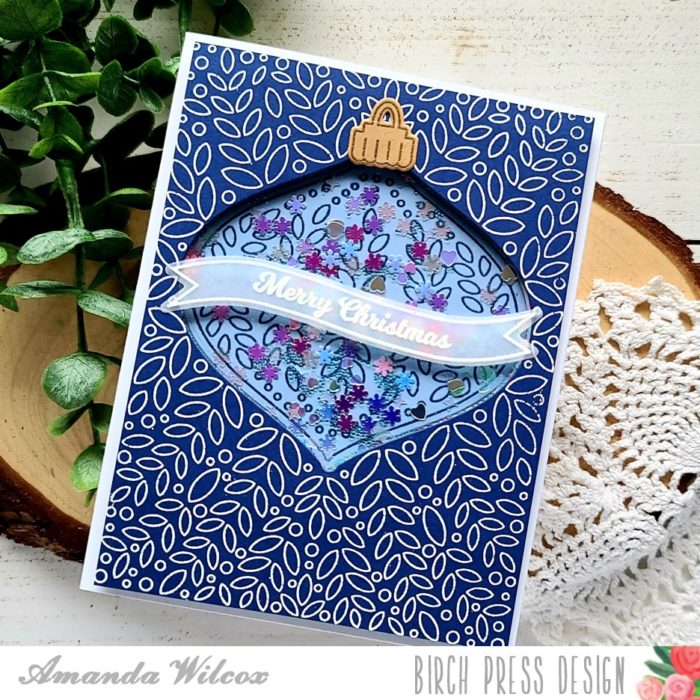
Hello everyone, thanks for stopping by. It’s Amanda from Twiddler’s Nook today sharing a trio of Christmas shaker cards.
These were really quick to put together and would be super fun to make in larger batches to mail to friends and family this Christmas. Let’s get started with how I did it.
I chose 3 shades of blue that I liked together, pulled out a scrap of kraft and vellum; stamped and heat embossed my images. For the card front I chose silver, white and blue embossing powder. For the ornament tops I chose gold and the sentiment banners are white.
Next, I used the coordinating dies to cut everything out and trimmed the card front panels down to about 4×5.25.
I lined the back of each card front panel with adhesive and added acetate. Then I put removable tape runner on the ornament fronts and lined them up in the window, then added tape runner to the back of just the ornament that I wanted to stick to the card front. That way, when I laid my panel down centered just the ornament would stick and I could rub off the removable adhesive.
Next, I lined the back of the card fronts with foam tape, piled my shaker bits in the center of the ornament, removed the backing tape and adhered the window panel to the card base.
With those stuck down, I used liquid glue to add the ornament tops. A little secret I use with vellum pieces like this is to run it through my Xyron sticker maker to add adhesive to the entire back. This way you don’t have dots of adhesive showing through at all.
I love how these turned out! I think I’ll go back and make some traditional colored combinations as well.
I appreciate you sharing your time with me. Have a fabulous day!
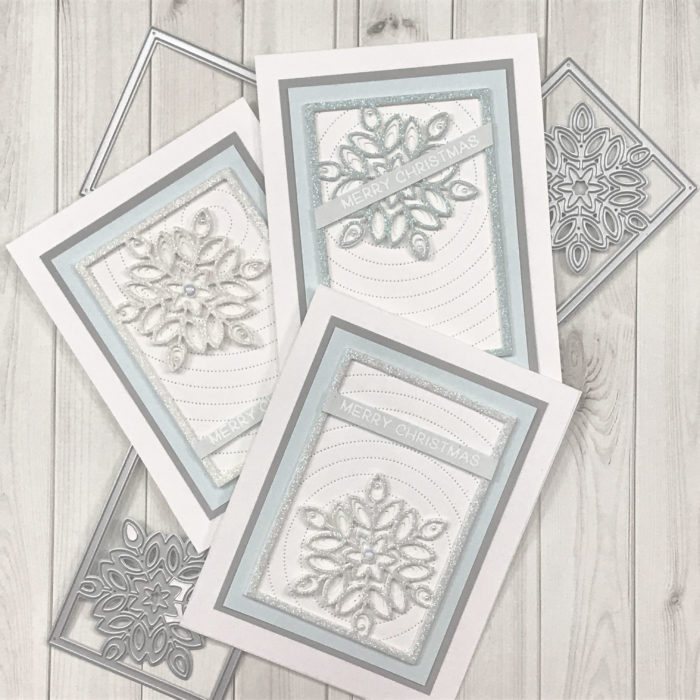
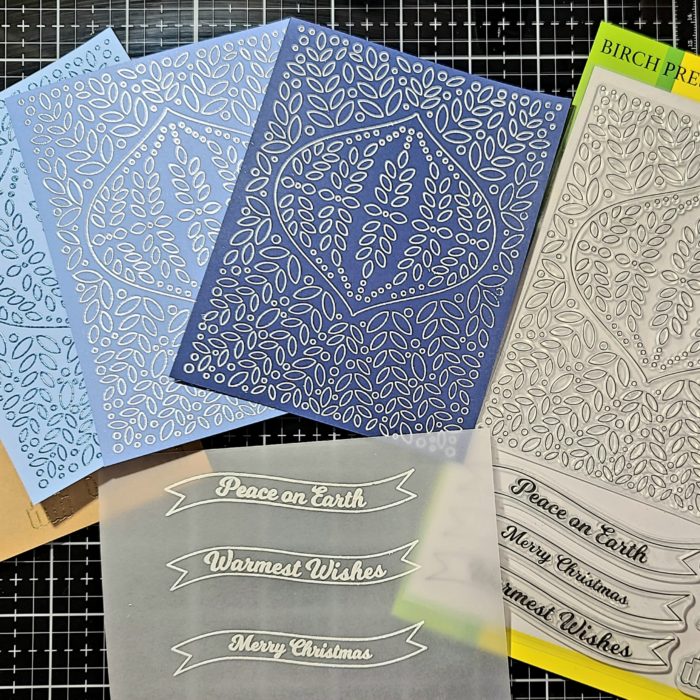
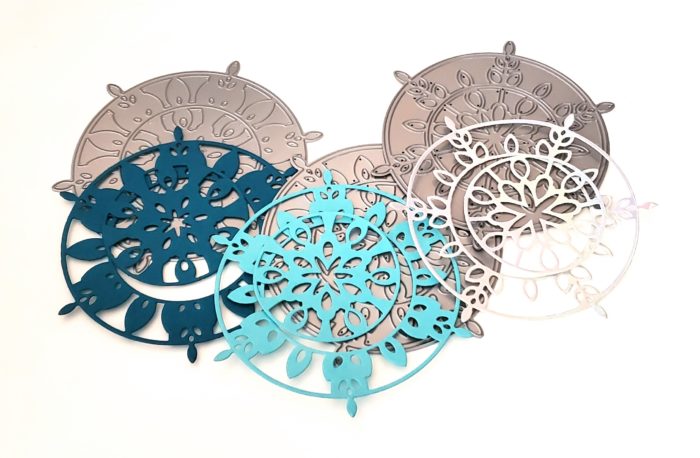
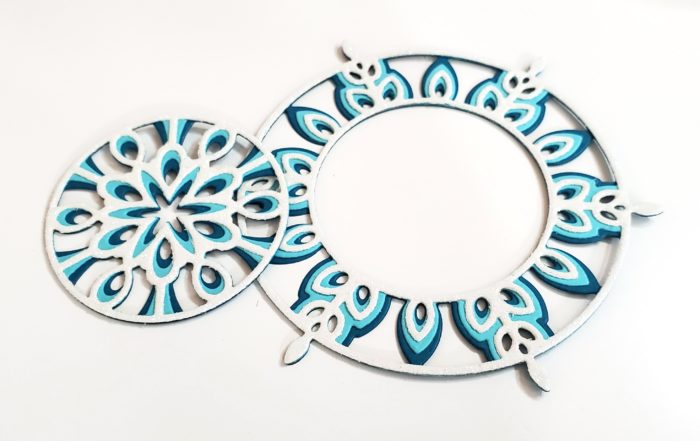
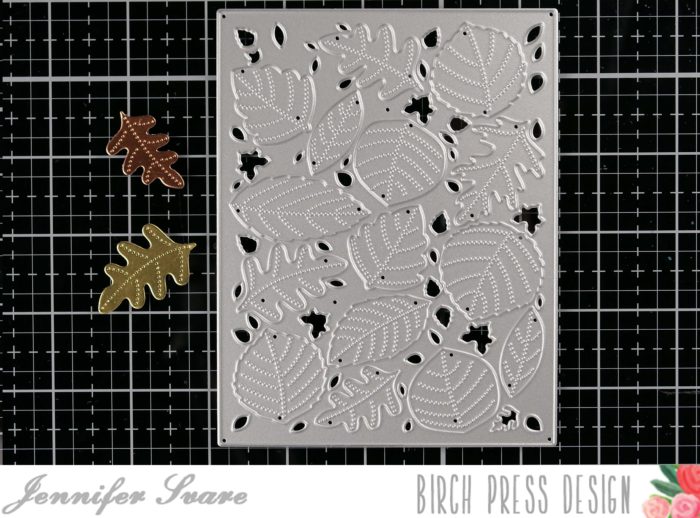
Hello crafty friends! Things are starting to look a lot like Christmas in my craftroom now that October is here. Today I am sharing a little peek with you of some new products coming to Birch Press Design soon!
Can you tell what’s new here? I hope I sparked a little excitement. Stay tuned a full tutorial will follow soon!
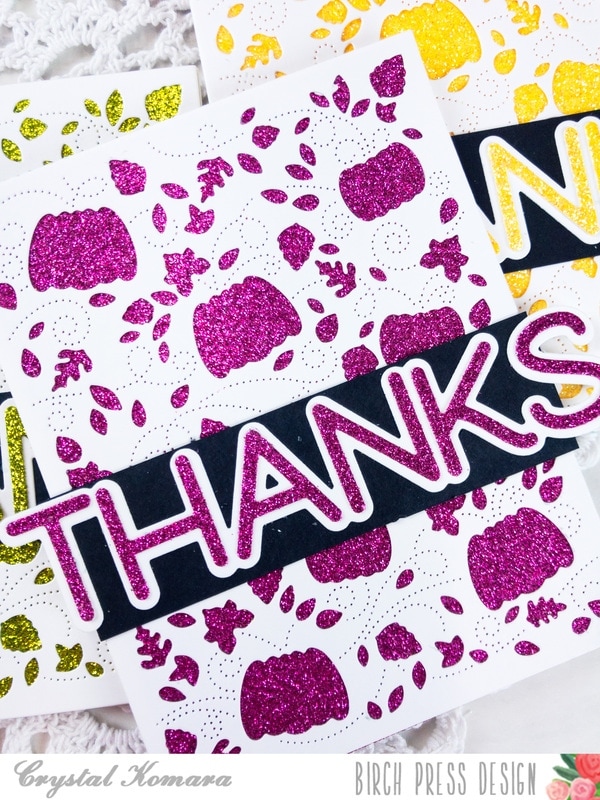
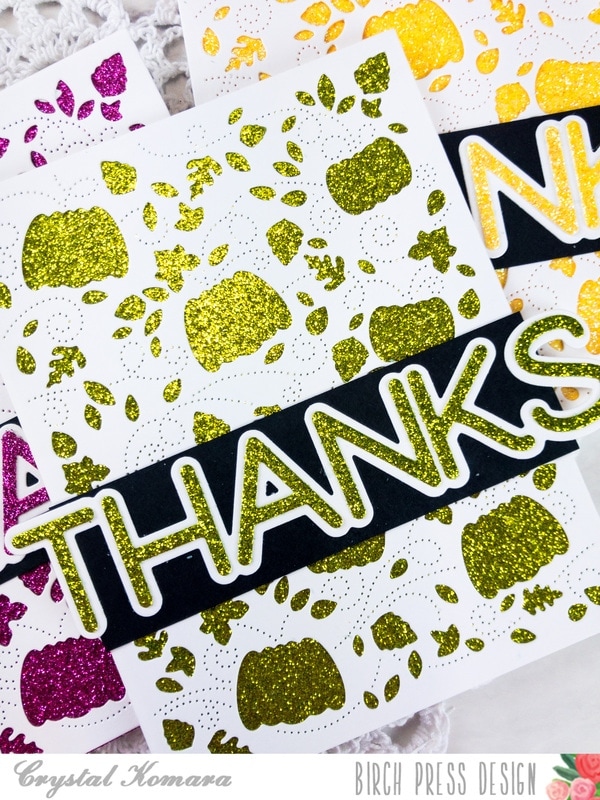
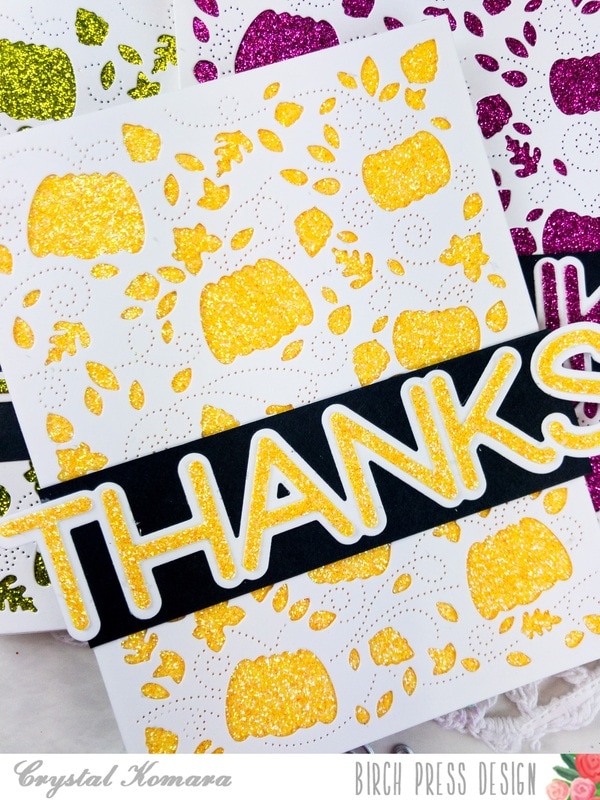
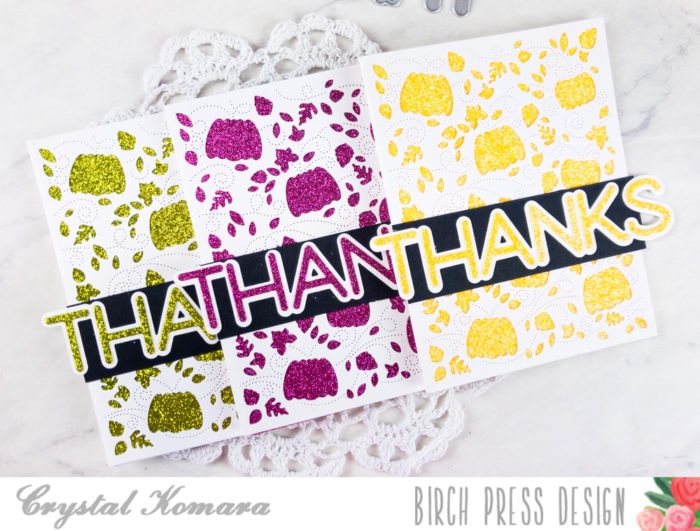
Hello readers! This is Crystal here with you today sharing some colorful thank you cards made just using one layer of a multi-layering die.
Fall is my favorite time of year and I simply can’t get enough of the beautiful Autumn Breeze Layering plates. They are simply gorgeous, whether layered using all three plates, or by just using Layer Plate A as a standalone die. The real bells and whistles on today’s cards come from the bold, colorful glitter paper BEHIND the die cut image itself!
I have created a step-by-step YouTube video showing how I created these cards. I hope you will find it helpful:
I hope you were inspired by today’s cards. Thank you for visiting and happy cardmaking!
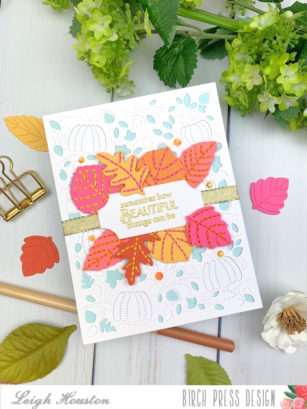
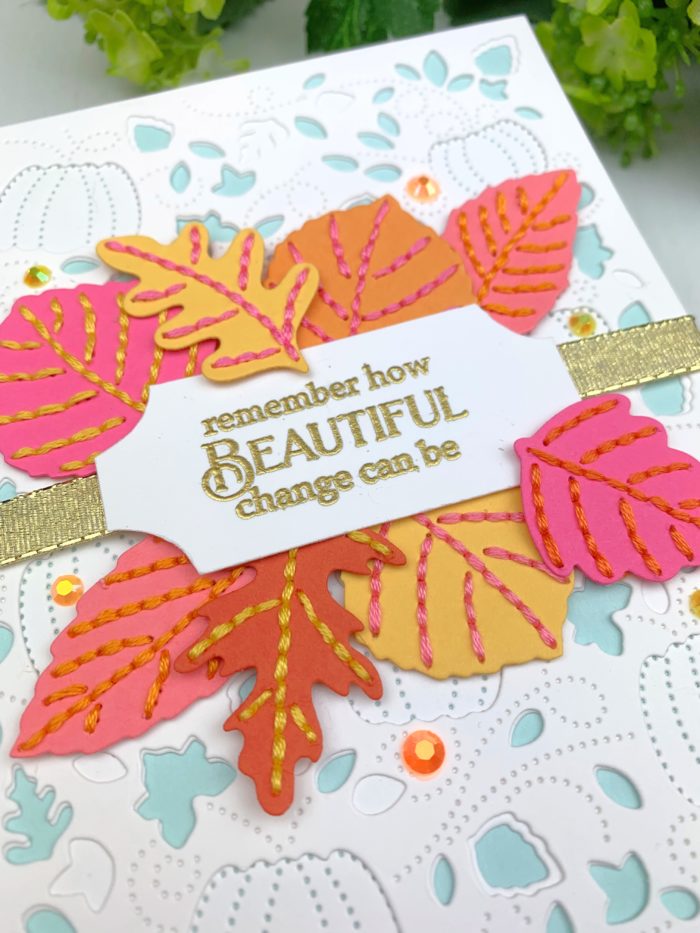
Hello, friends! I am so happy to be here today sharing this stitched card I made using Birch Press Designs’s Autumn Leaves Layering Die Set. This card was such fun and was so easy to make thanks to these beautiful layering dies!
I started my card by die cutting layers A and B, adhering them together, then adhering them atop an A2-sized aqua base. I then die cut my leaves using pretty shades of pink, orange, and yellow cardstock using layer c. To add some extra texture and dimension, I stitched the leaves using 4 strands of 6-strand embroidery floss. To achieve this, I poked holes in every about other stitch hole with a paper piercer to enlarge the holes. I then stitched through those holes using a simple backstitch.
I then used Poppystamps’s Greetings Basics stamp set to emboss my sentiment in gold onto white cardstock. I fussy cut a tag shape and popped it up on foam tape. I then adhered a pretty gold ribbon underneath the tag and adhered the leaves around the tag using liquid adhesive. A few gems here and there finished this card.
I hope you enjoyed this project! Links to the products I used are below. Thanks so much for stopping by today, and I’ll see you again soon with another Birch Press designs card project!
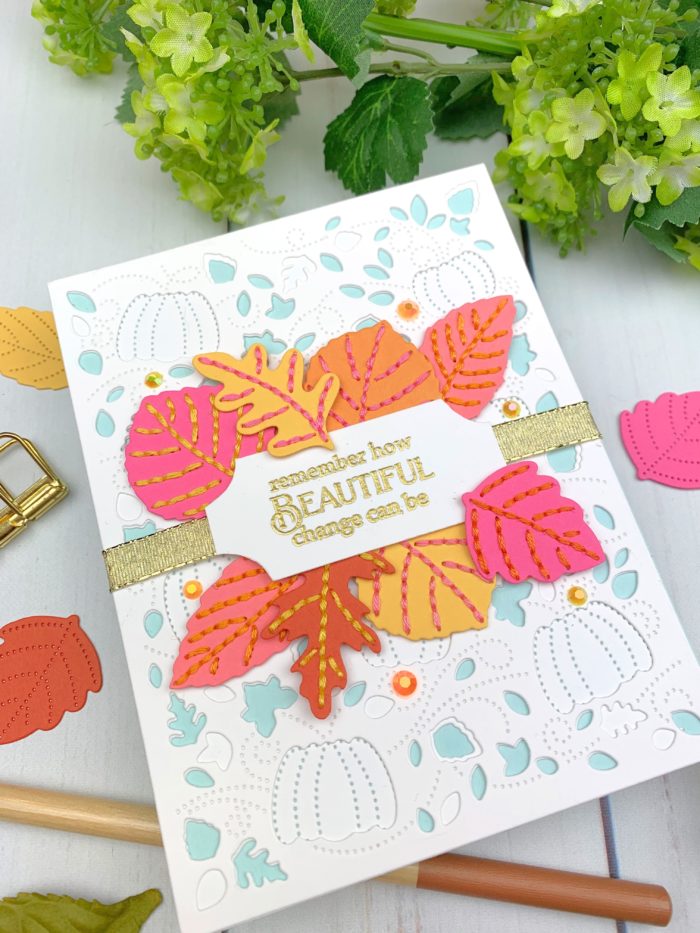
Hello! Seeka here, and today I have a card featuring the beautiful Trina Snowflake Layer dies.
I started off by die cutting the three layers of the snowflake. My bottom two layers are cut from colored cardstock in two shades of teal and my top layer is cut from a shimmery cardstock from the Memory Box Delicate Pastel Glitter Pad. Each layer cuts out two pieces that can be used together, or separately.
Next I stacked and adhered the layers of the snowflake together
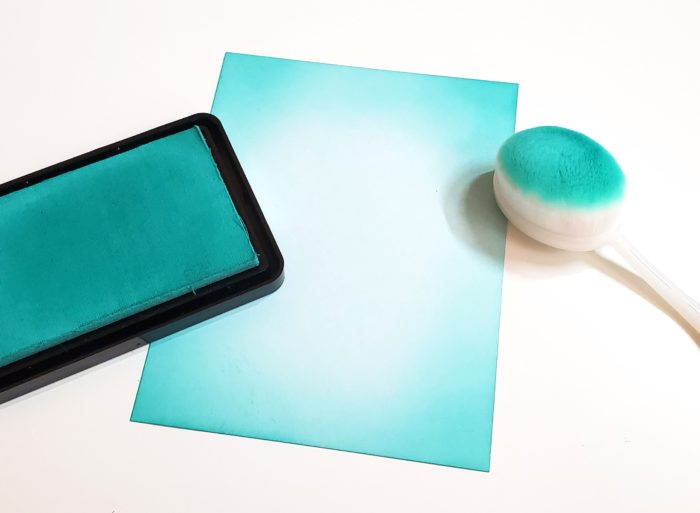
I set these pieces aside to work on the background. Using a blending brush, I blended a teal colored ink onto a light blue A2-sized piece of light blue cardstock. I concentrated the color around the edges and corners of the panel.
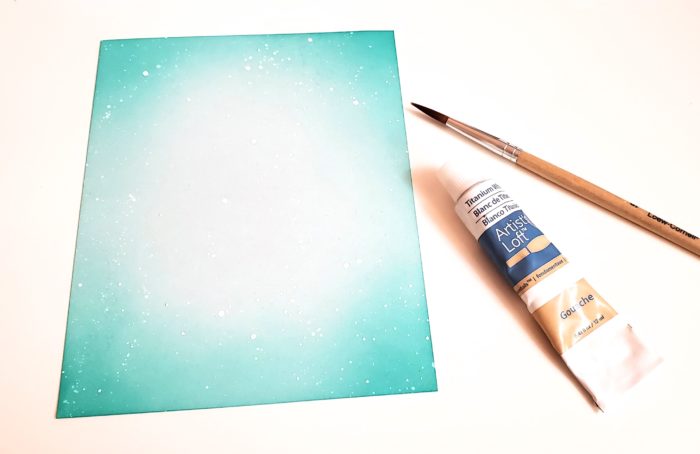
Then, I used a small paintbrush to flick a bit of watered down white gouache over the panel.
While the panel was drying, I created the sentiment using the Big Shine Sugar Script die. I cut the detail sentiment three times from white cardstock and then stacked and adhered those layers together. I cut the shadow layer from vellum and then adhered the detail sentiment to it.
To assemble the card, I adhered both the inner and outer snowflake die cuts to the background and then used foam tape to adhere the sentiment. Finally, I adhered the card front to an A2-sized card base.
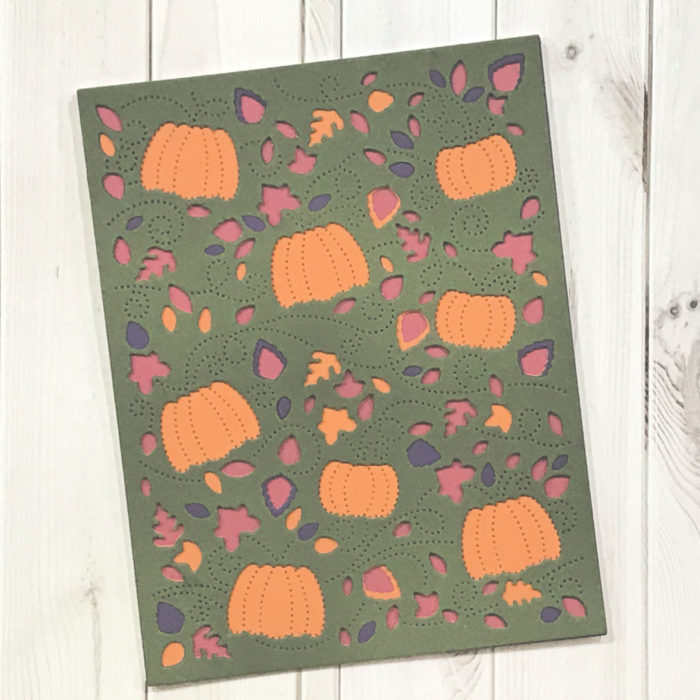
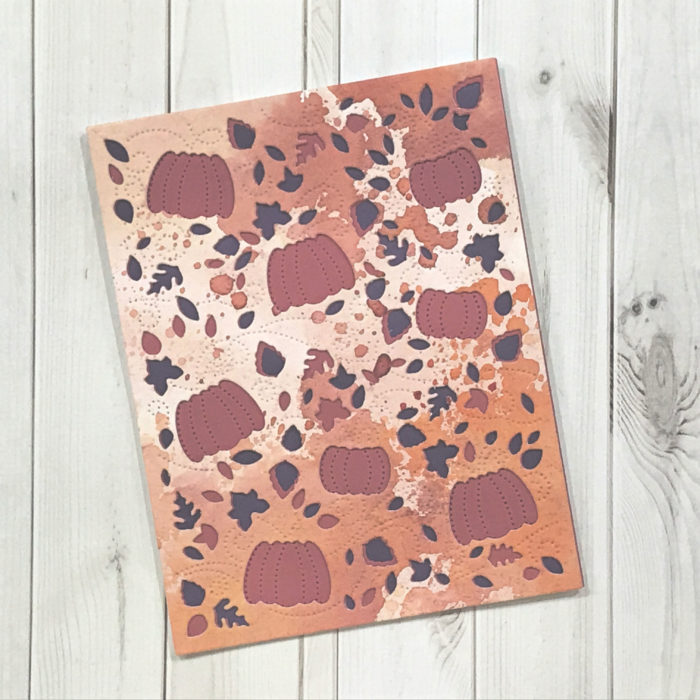
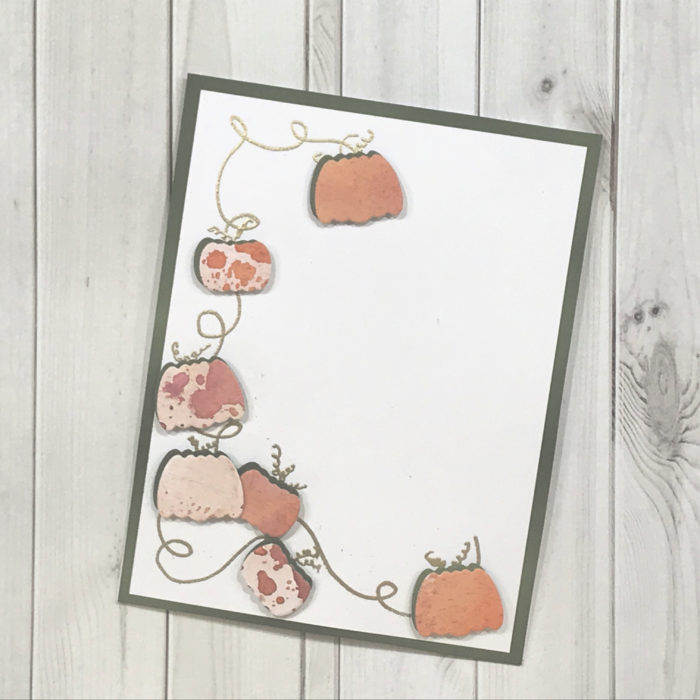
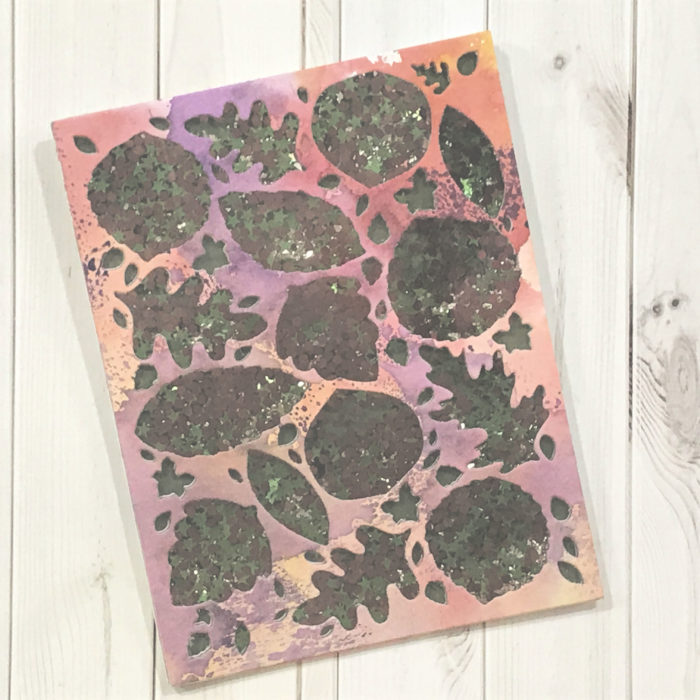
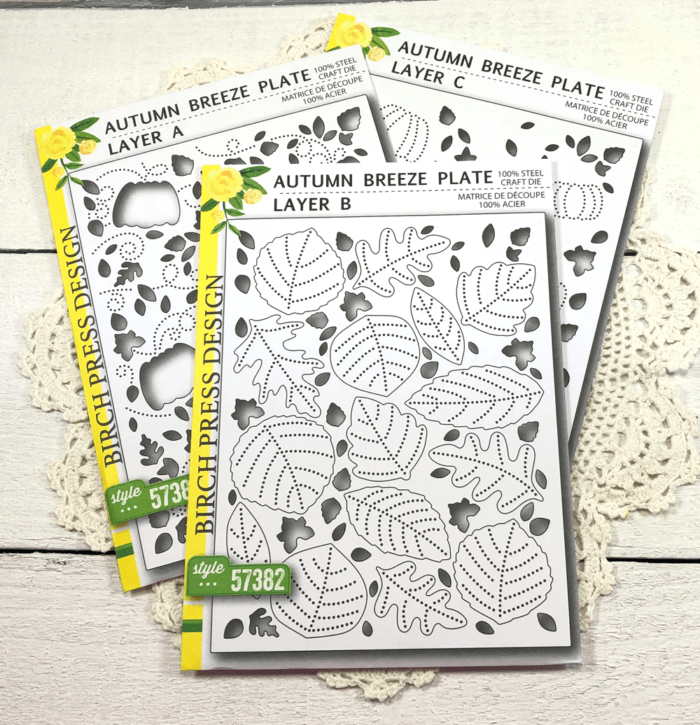
I am here featuring the Autumn Breeze Plate Layering Die Set! I am absolutely in love with this set! From three dies I am going to show you how to create 5 different cards, and there are so many more that could be created!
For my cards today I chose solid card stock and panels I had made using my favorite technique, ink smooshing!
When these layers are put together, there is a great combination of layers and cut outs showing off the pinpoint details! You can see this in the first card we created… Remember save the cut outs we will be using them throughout these projects!
For our second card I used the combination of solid card stock and one of my ink smooshed backgrounds for the top layer, and yup I saved those cut outs! We simple are just laying our card stock panels together!
Our third card, we are using those pumpkin cut outs we get from the top layer! Using the green solid card stock as a shadow of the ink smooshed pumpkins, we can create a framed scene for our card front!
It’s time for a shaker card! With all the panels we die cut, let’s not put them to waste, By layering them all together we get great dimension for a shaker card!
For our final card… Just like we had our pumpkin cut outs, we also were able to gather our leaf cut outs! With all the panels we die cut we have great fall colors in both solid and ink smooshed card stock! By adhering them in a circle we create a beautiful fall wreath!
As always, I hope you enjoyed today’s project… and if you want to see more details just click on the video below and see how these projects come together step by step!
Make sure you stay tuned for more wonderful projects coming soon! Have a great day and always remember… Be Creative!
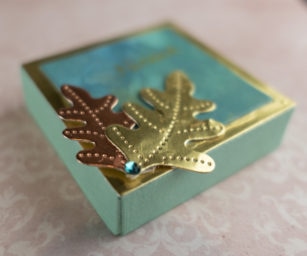
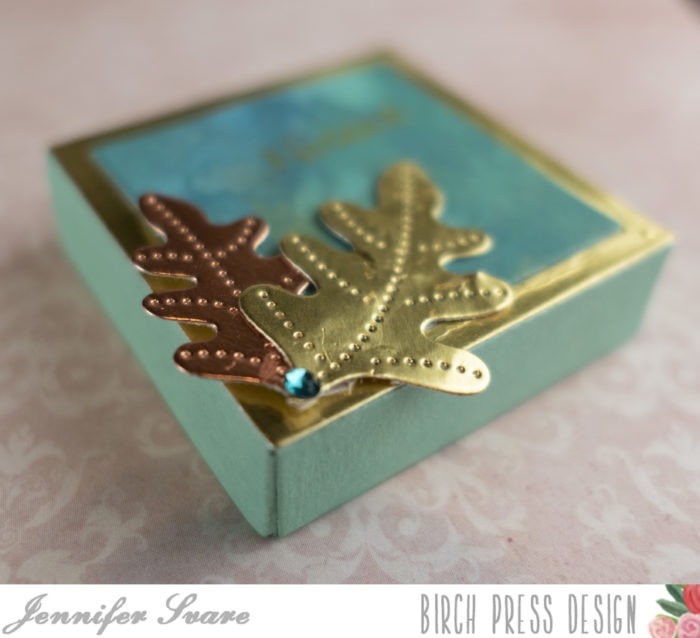
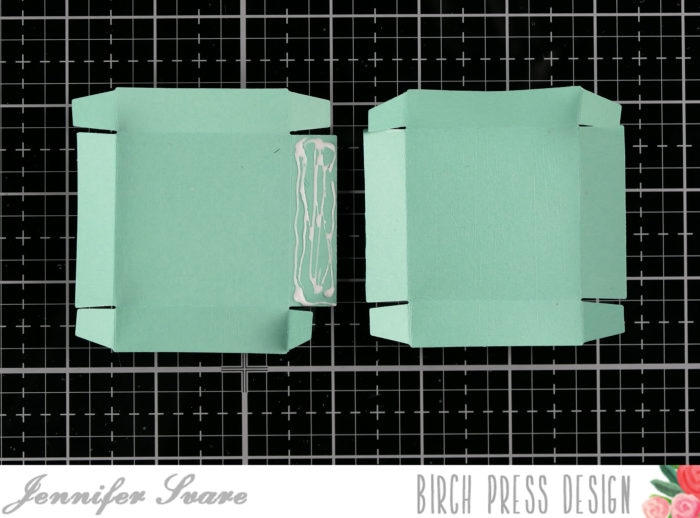
Hello! Today I am using two die cuts from just a lid to create a small box. It’s a great size to make small favors, place setting embellishments- many occasions and seasons! Above shows this as a name place holder for a Thanksgiving place setting. I simply wrote the name with a gold pen. These are a great size to send away to loved ones for their holiday tables if travel is not possible this season. Either way, and no matter the occasion, these are super easy and fast! Here we go:
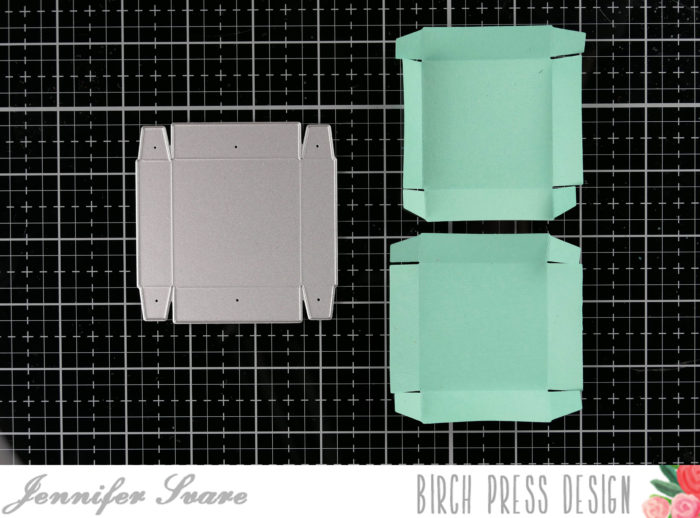
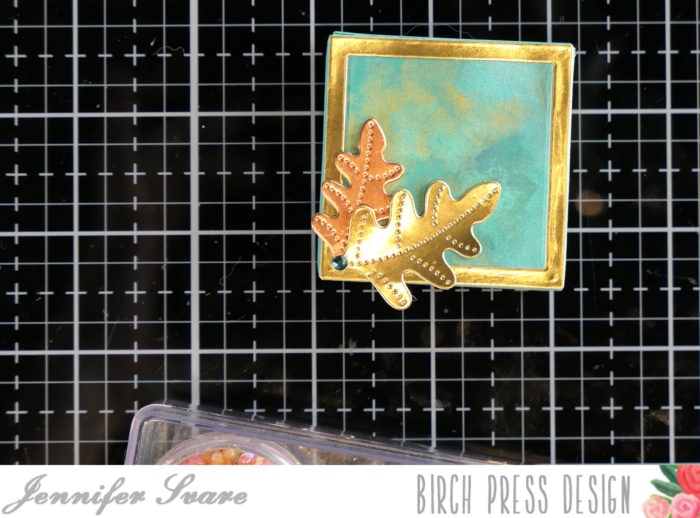
I die cut two of the Small Square Lids out of a greenish-blue cardstock (above).
Top Left: Dark greenish-blue square cut to 1.9″ x 1.9″;
Bottom Left: Small Square Lid embellishment frame die;
Middle Column are two die cuts from the square lid embellishment die; one out of gold and one out of a scrap piece of a watercolored sheet from my stash. This also cuts out the center square to be inlaid.
The Layer C of the Autumn Breeze Plate Layer Set is a great die to cut out of foil. The pinpoints show up beautifully and the leaves offer a great variety of embellishments to keep on hand. The frame can also be saved for a future layering project!
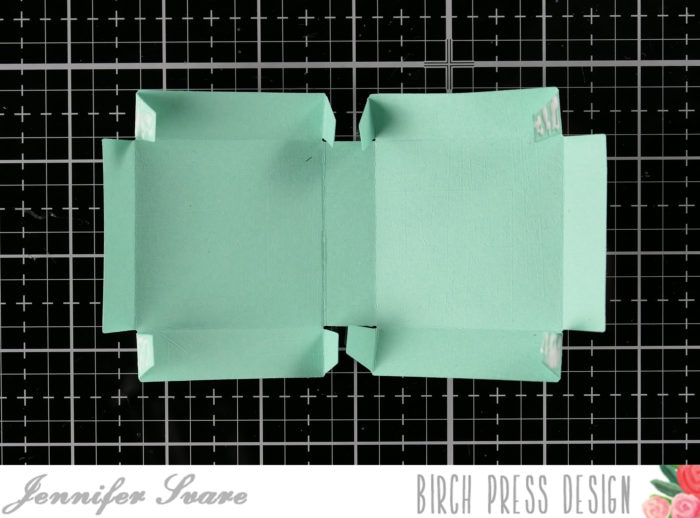
With the ends of the two lids together, I glued two sides together.
Next, I put glue on all four corners (top and bottom left, top and bottom right). These tabs were glued to the outer sides (far left and far right). This creates the sides of the box.
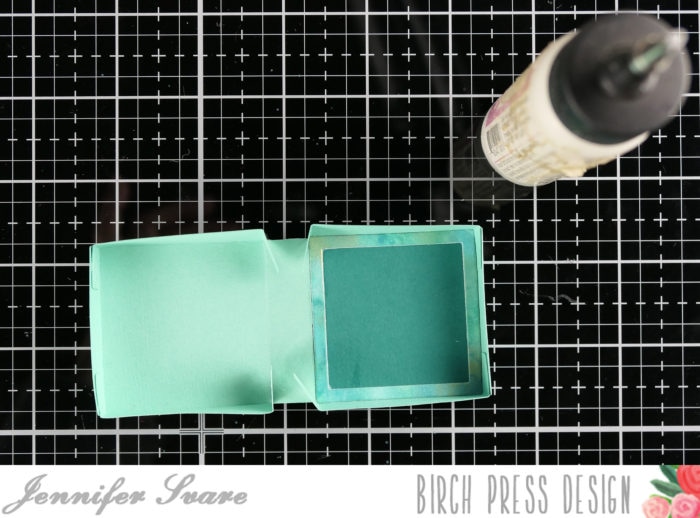
Once the sides were glued together, I glued the dark greenish background to the inside, along with the watercolored frame. The box is now ready to open and close. It’s a great idea to create a small notch with a very small circle punch. I used a regular hole punch to create a tiny notch.
I then put the gold frame on the outside of the box, and inlaid the watercolored square. This fits perfectly because it’s from the same die cut. The leaves were added, along with a small crystal.
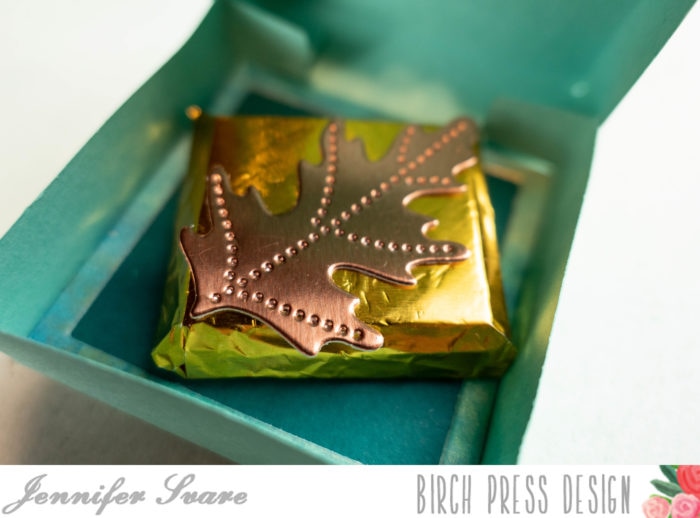
A small chocolate square was wrapped in foil, and a copper leaf was glued to the top. I was out of the individually wrapped chocolates that would normally fit inside this, but it worked well to cut down a large bar and wrap it to show the embellishment. 🙂
Thank you for stopping by the blog today. Have a wonderful day!
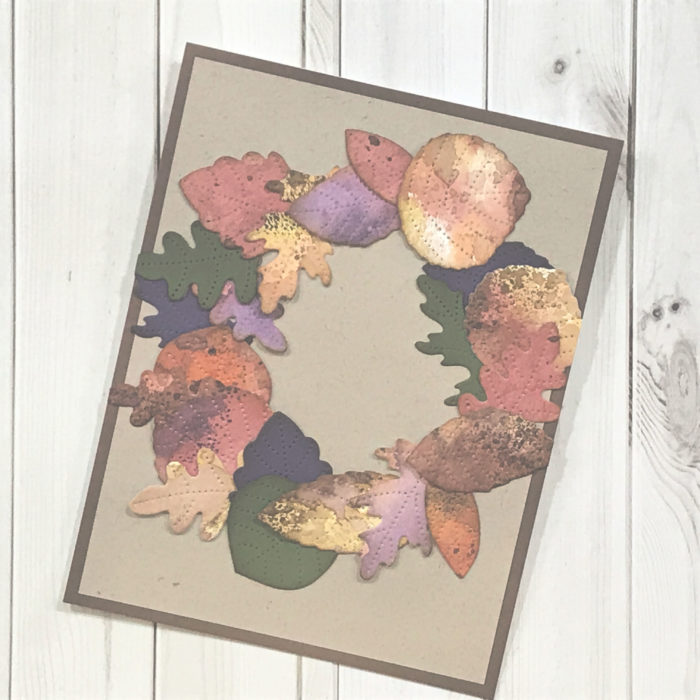
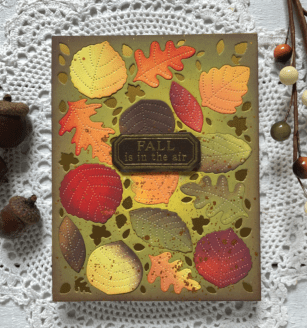
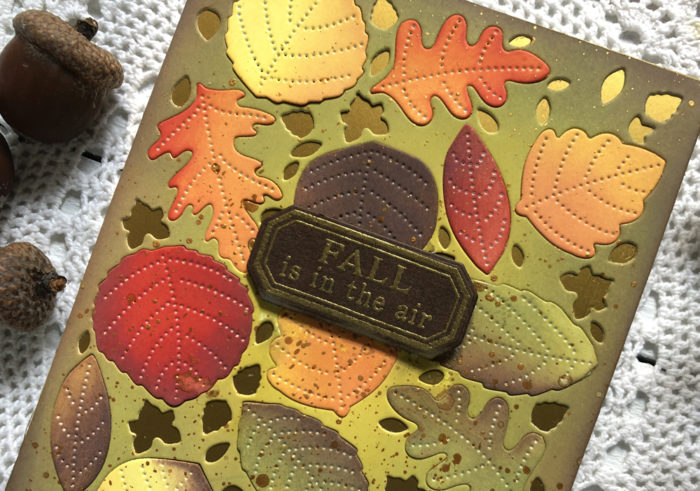
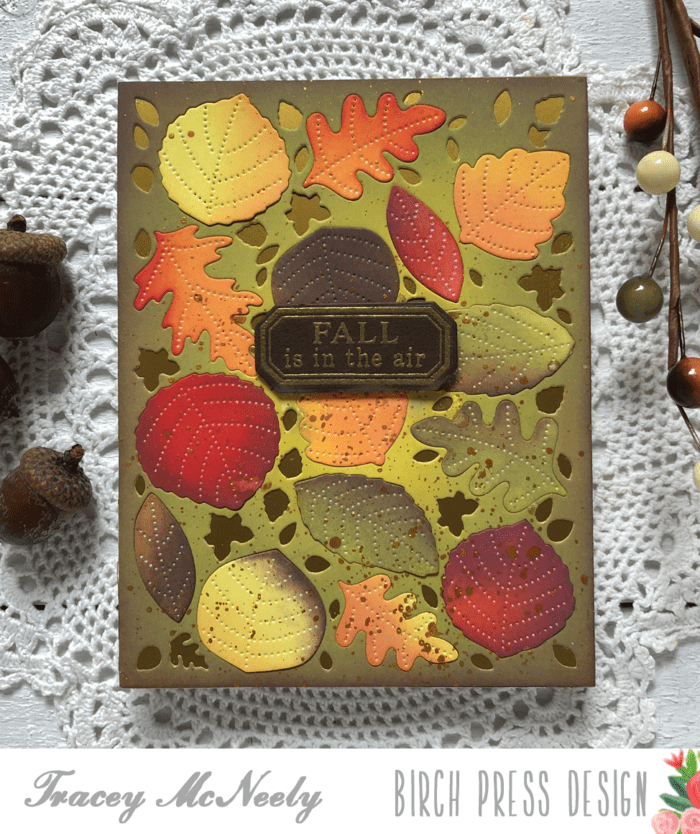
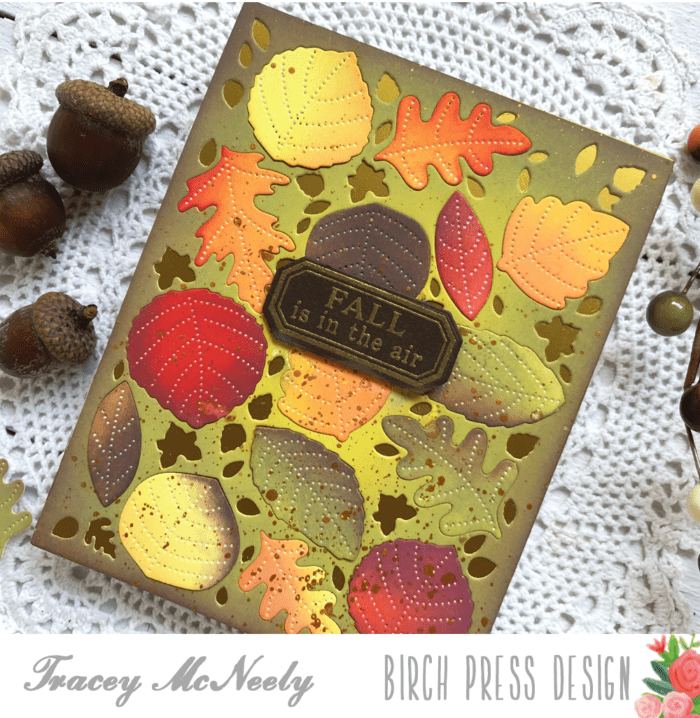
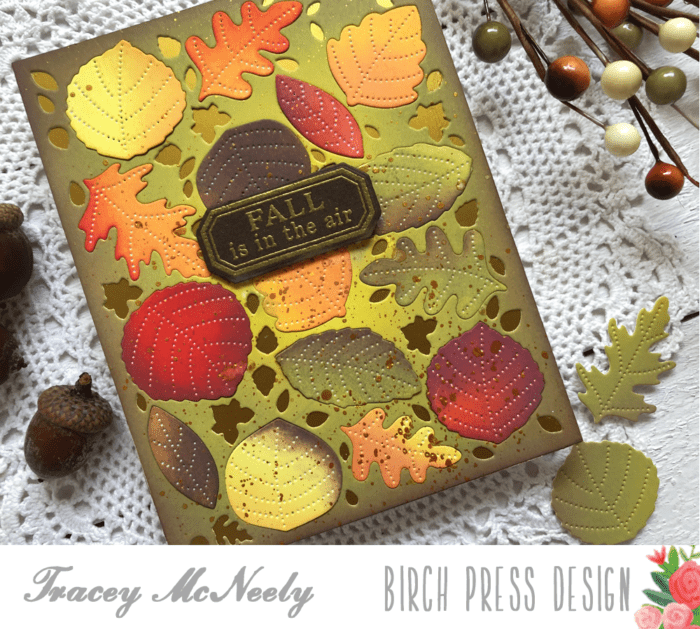
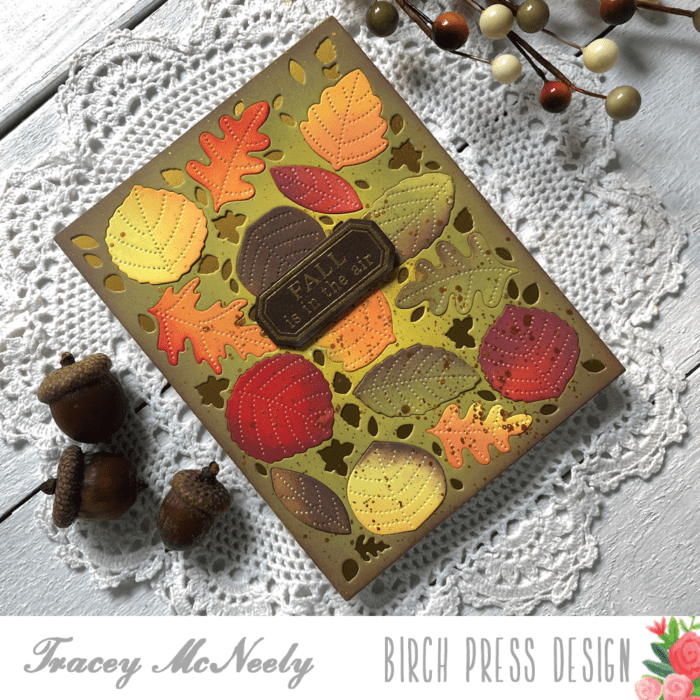
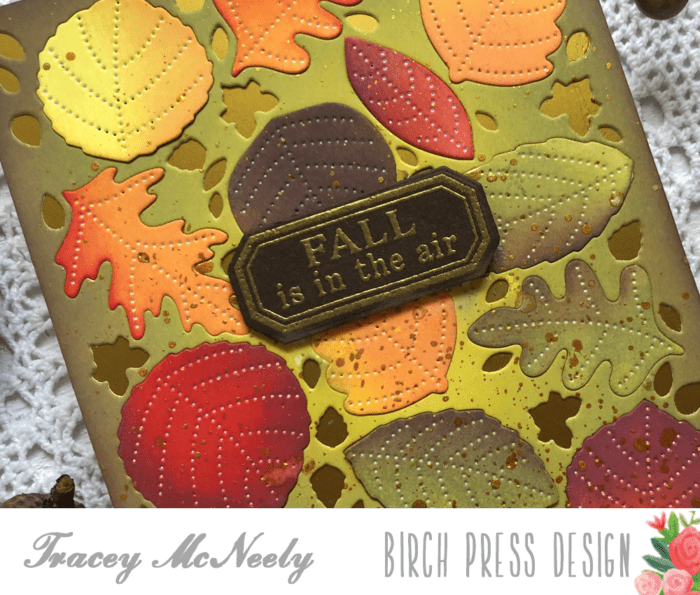
Hi there and Happy Fall! It’s Tracey here today and as I was blending my leaves for today’s post the leaves outside my window are almost blending just as fast. Just like a light switch summer turned off and autumn has arrived.
For today’s card I used only one die, Layer B, from the Autumn Breeze Layer dies. A brilliantly designed set of three dies that all work together but can each work independently of one another giving you options to showcase two different scenes. Layer B can be used all on it’s own and cuts all these beautiful stitched leaves.
I cut a panel from Bristol Smooth cardstock and I ink blended each individual leaf using Distress Oxide inks. I used Squeezed Lemonade, Wild Honey, Spiced Marmalade, Candied Apple, Fired Brick, Ripe Persimmon, Peeled Paint and Walnut Stain to create a variety of different coloured leaves.
I cut another A2 sized panel of Bristol Smooth cardstock and then ink blended a background using more Distress Oxide inks. I started with Crushed Olive and then brought in some Peeled Paint from the edges and finished off with some Walnut Stain just on the edges.
I covered the card front with a piece of gold paper from the Polished Foil pad and then I adhered the green ink blended panel over top. Each one of the blended leaves was inlaid into the die cut. The gold splatters were created from red gold metallic watercolours.
Once dry I added a sentiment from the Pumpkin Lacework stamp set. I used the ‘Fall is in the air’ quote which I gold embossed on brown cardstock and die cut it with the co-ordinating Pumpkin Lacework die set. The sentiment was added with foam tape to complete the card.
Thank you so much for stopping by today and I really hope I tweeked your interest to look at your layered die sets a bit differently. What you can do with only one layer?