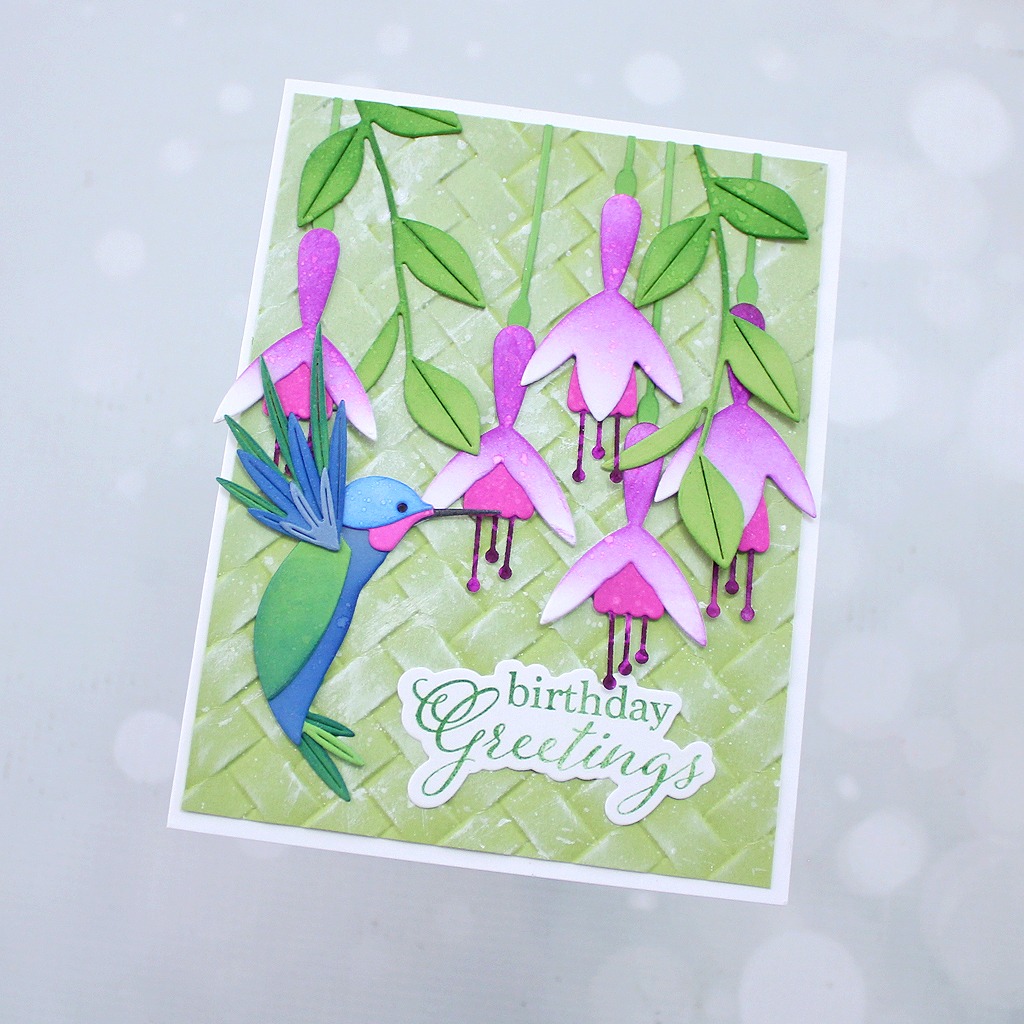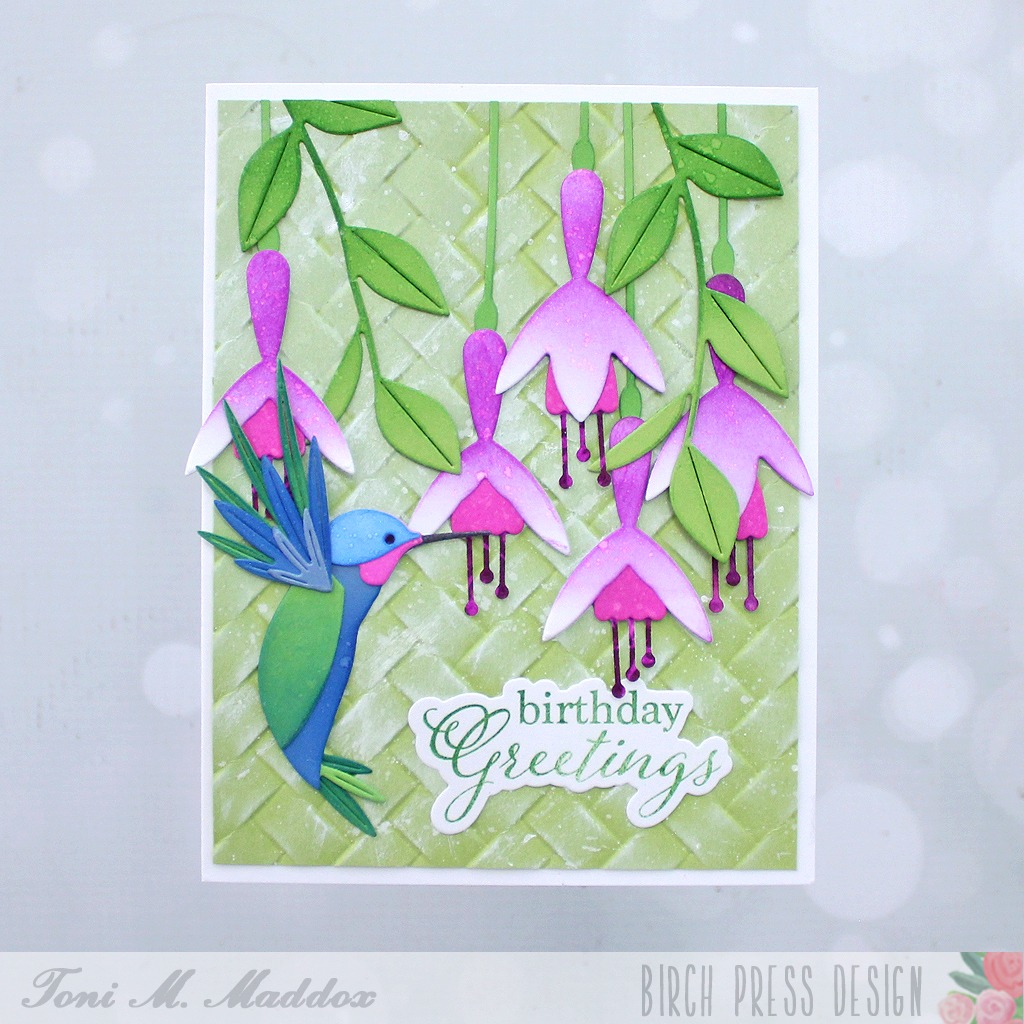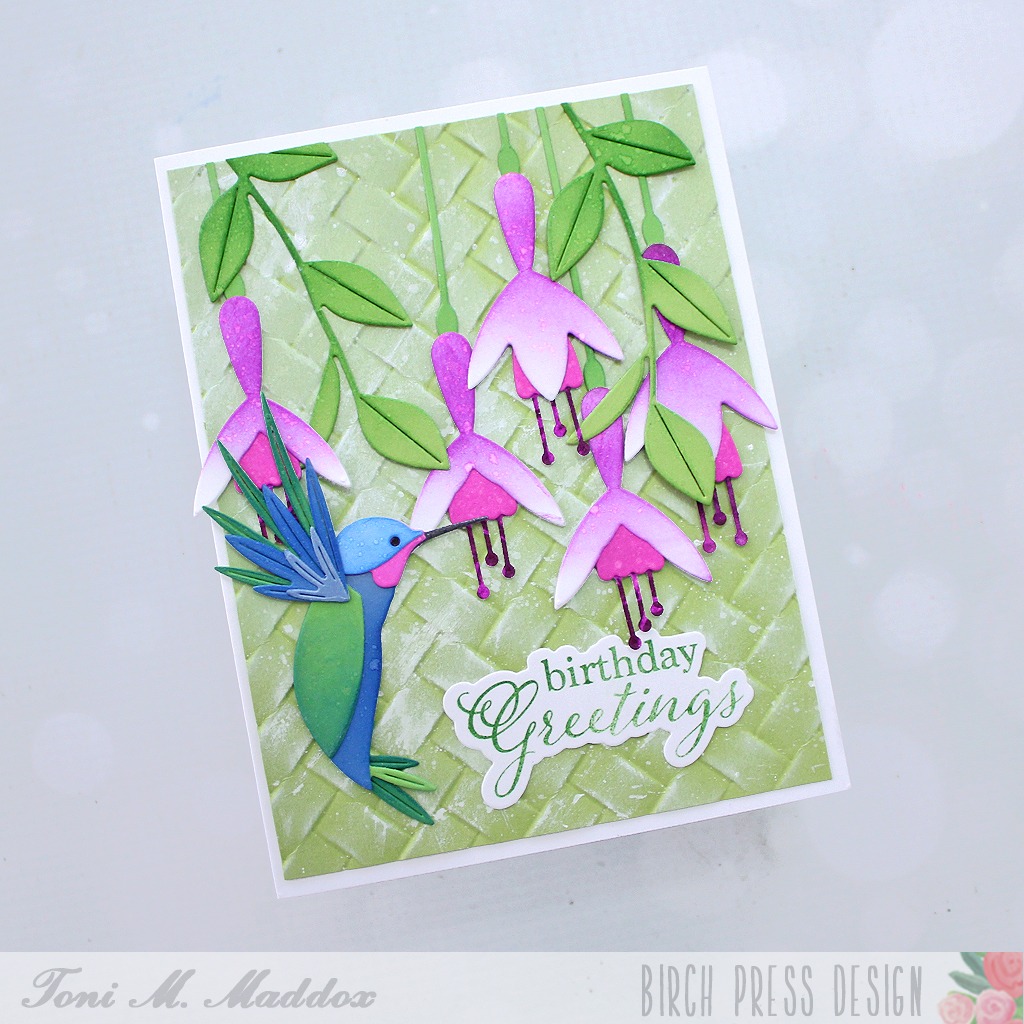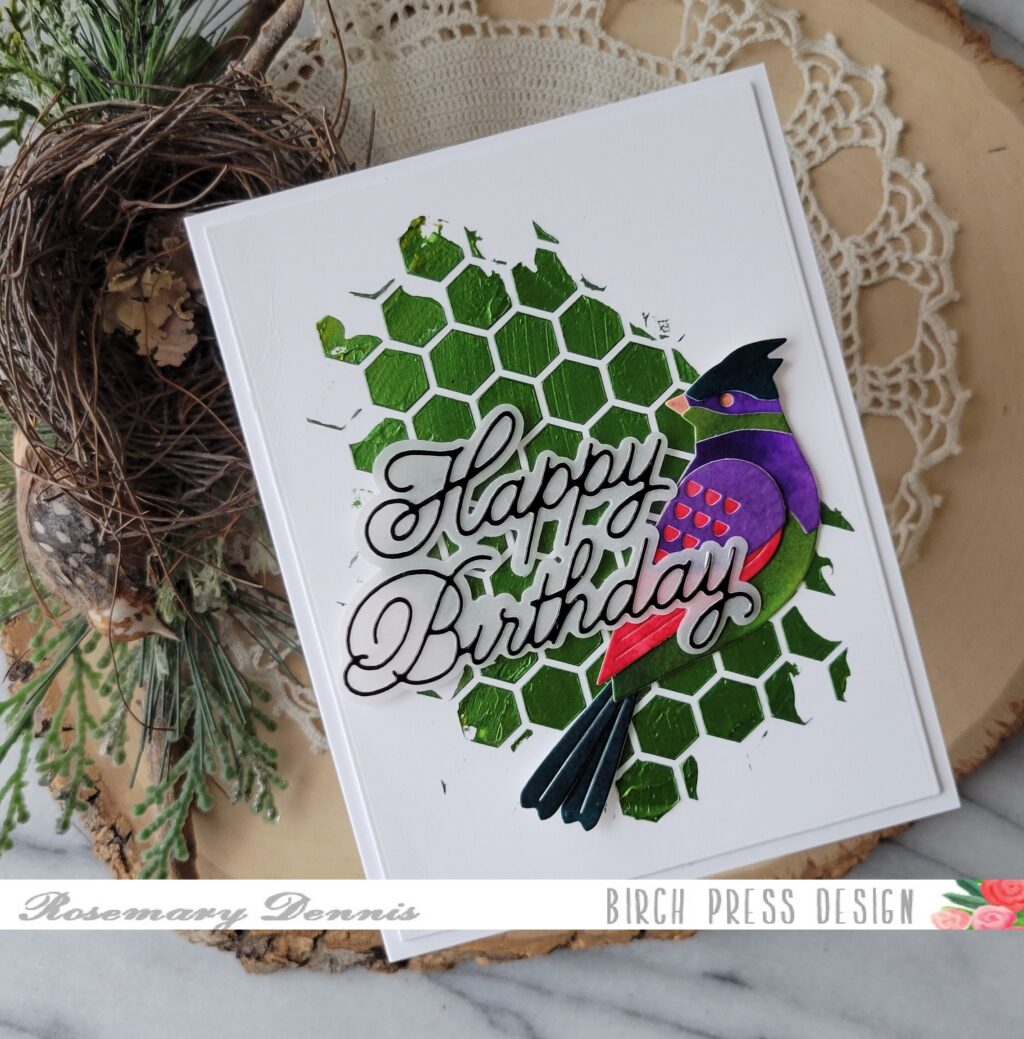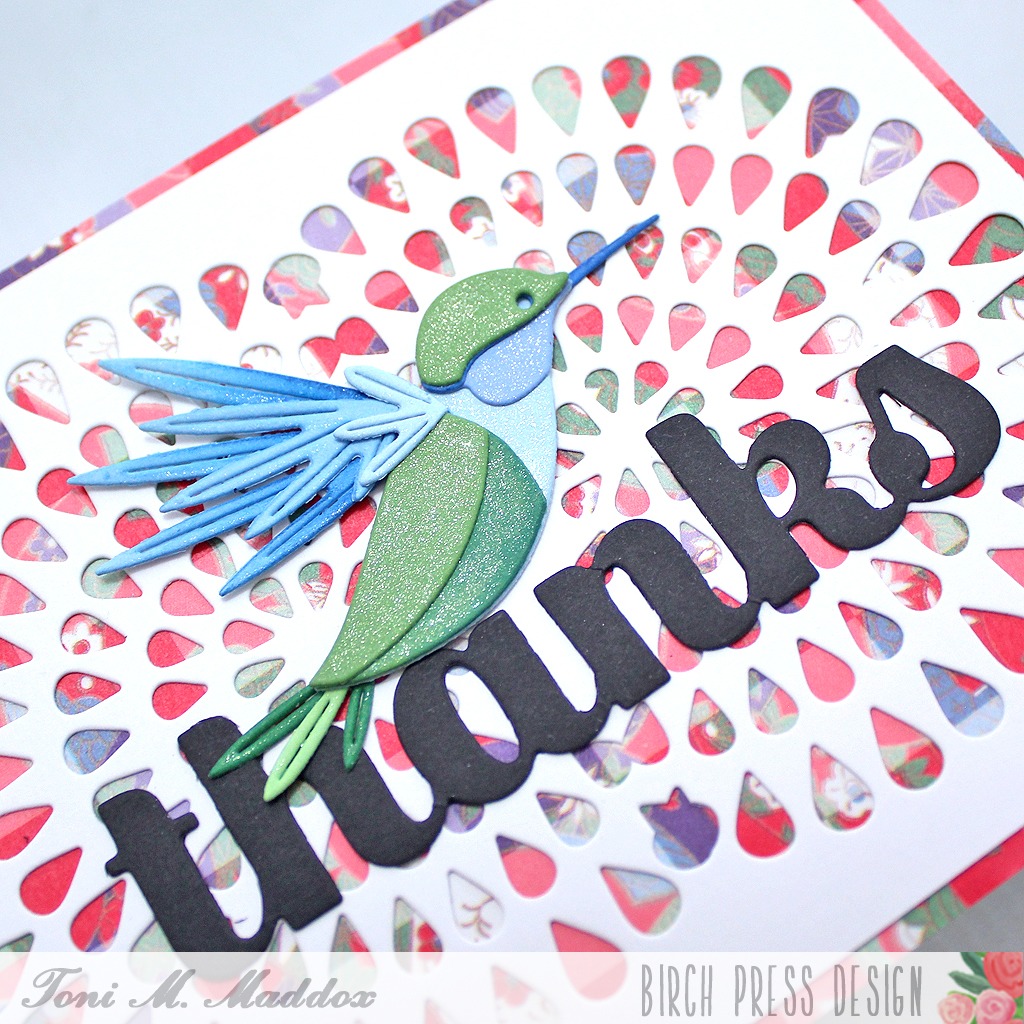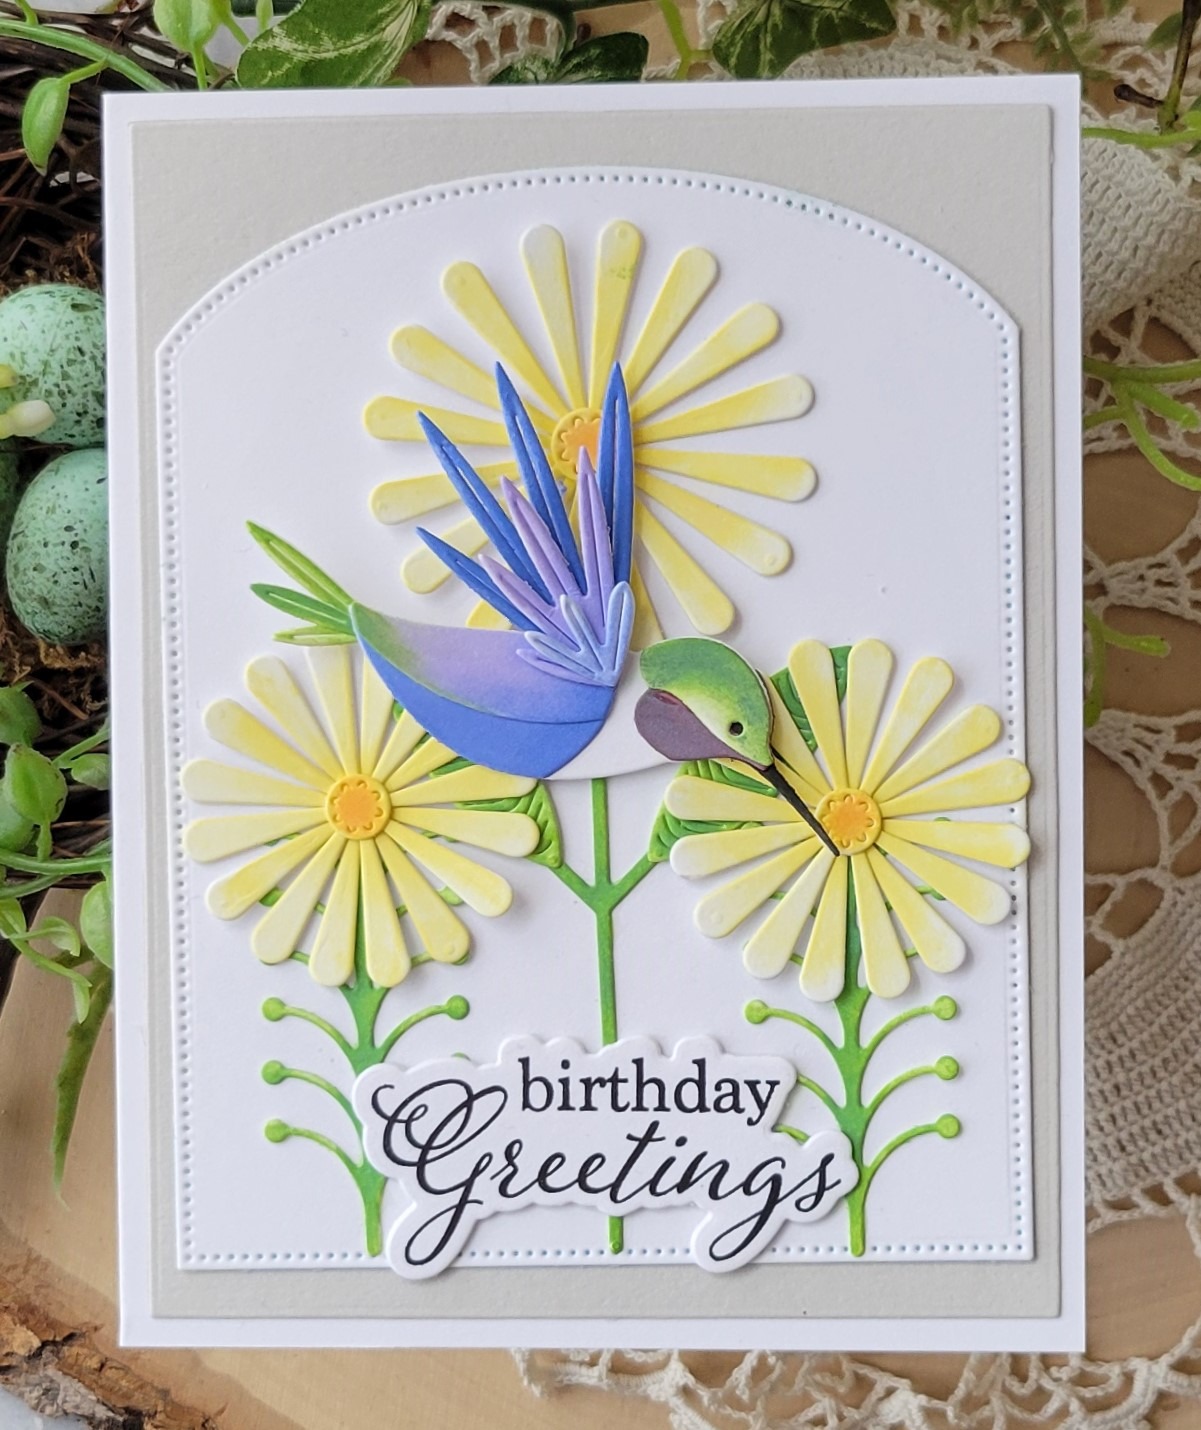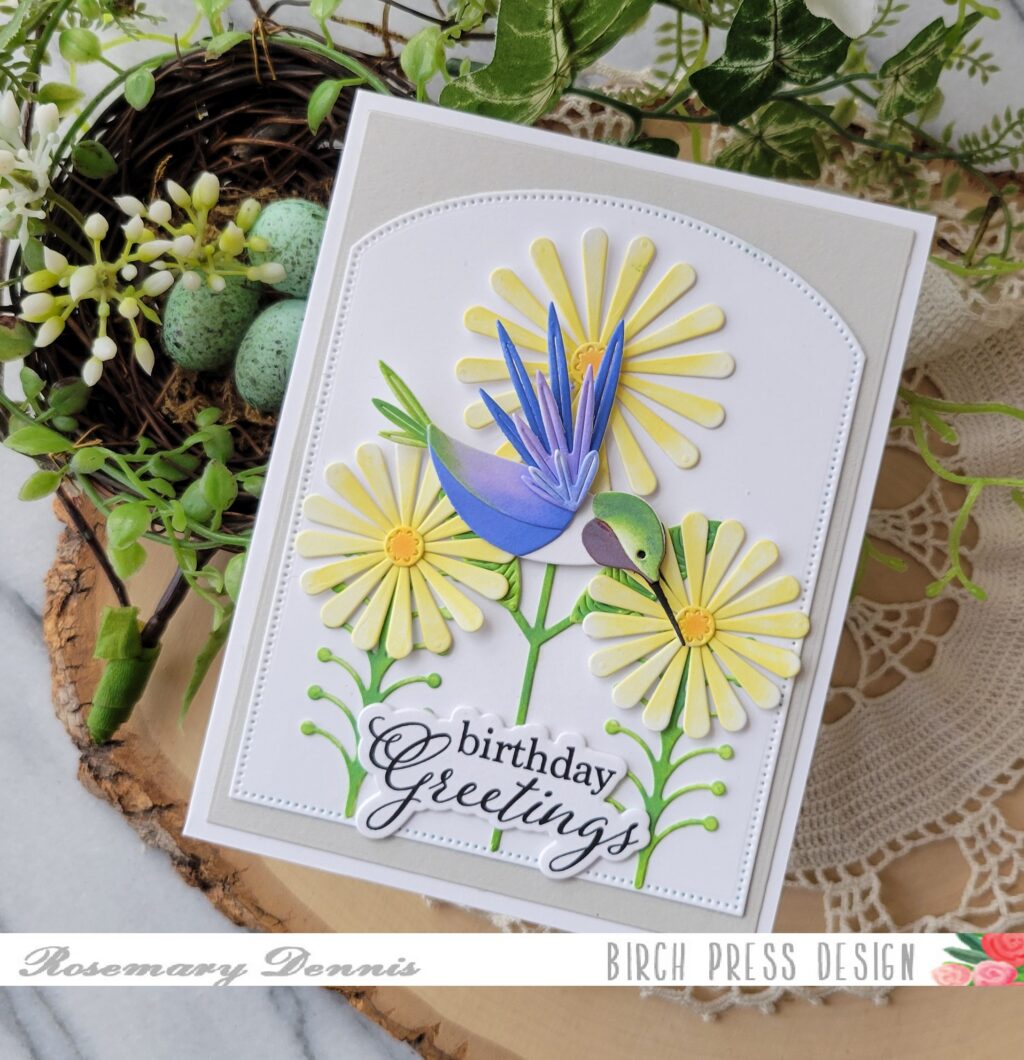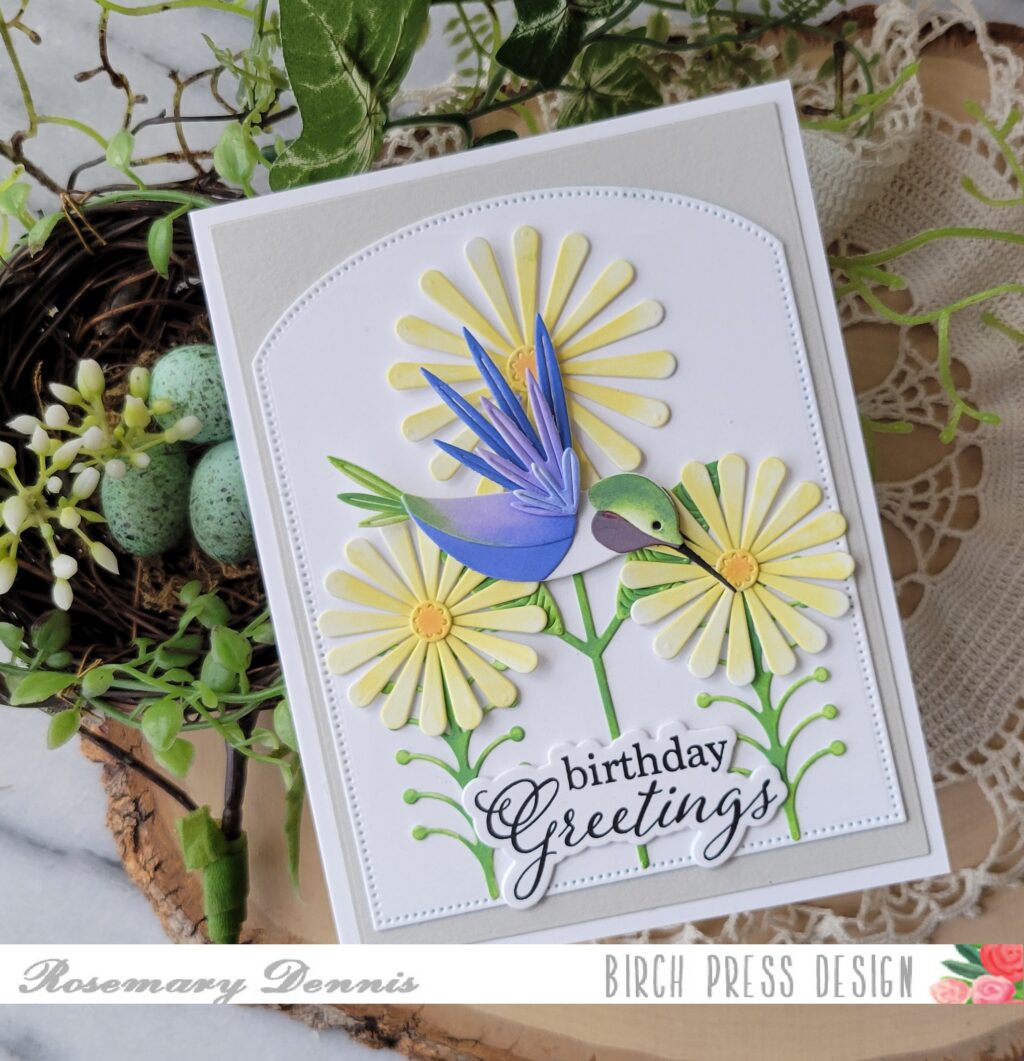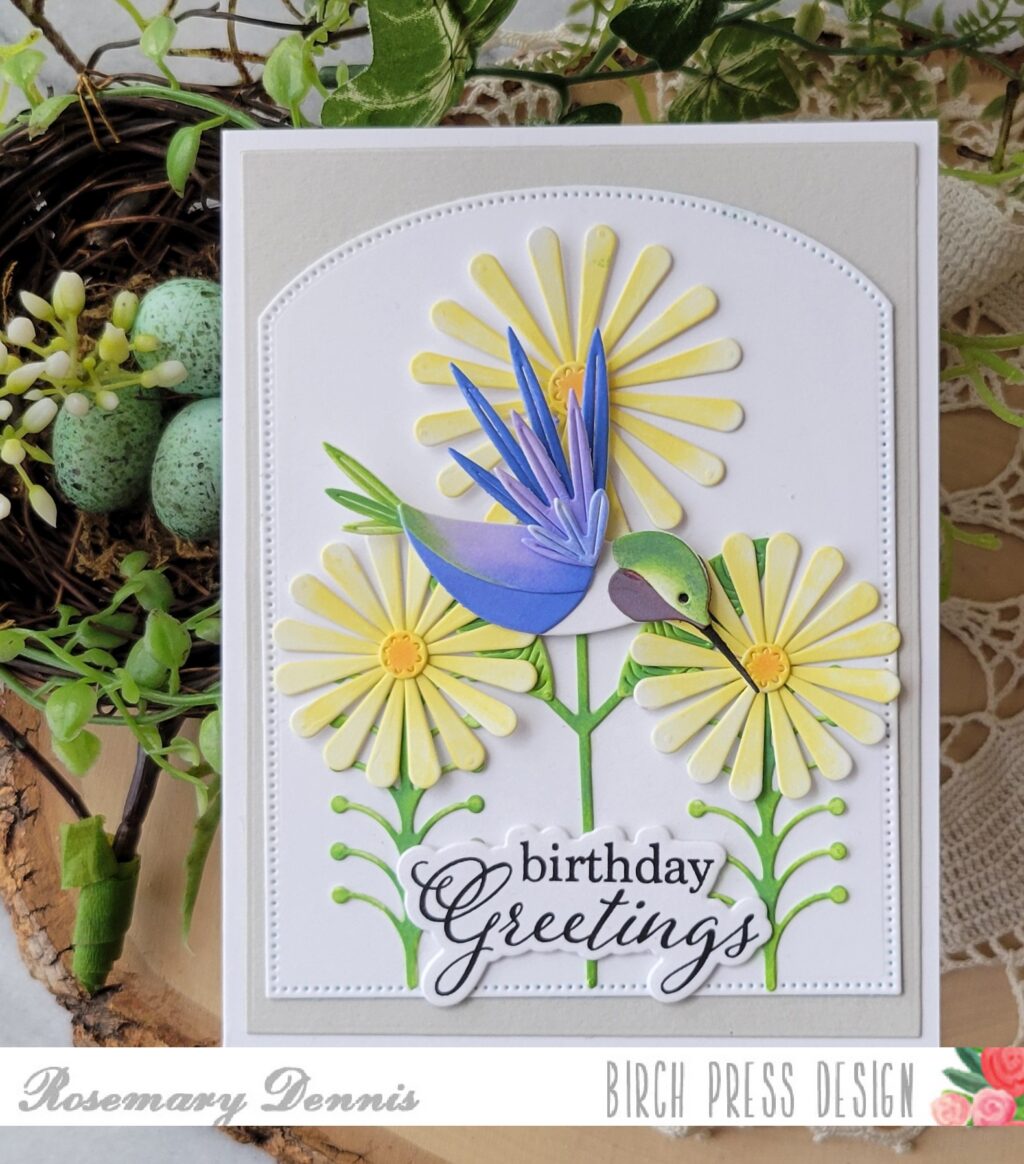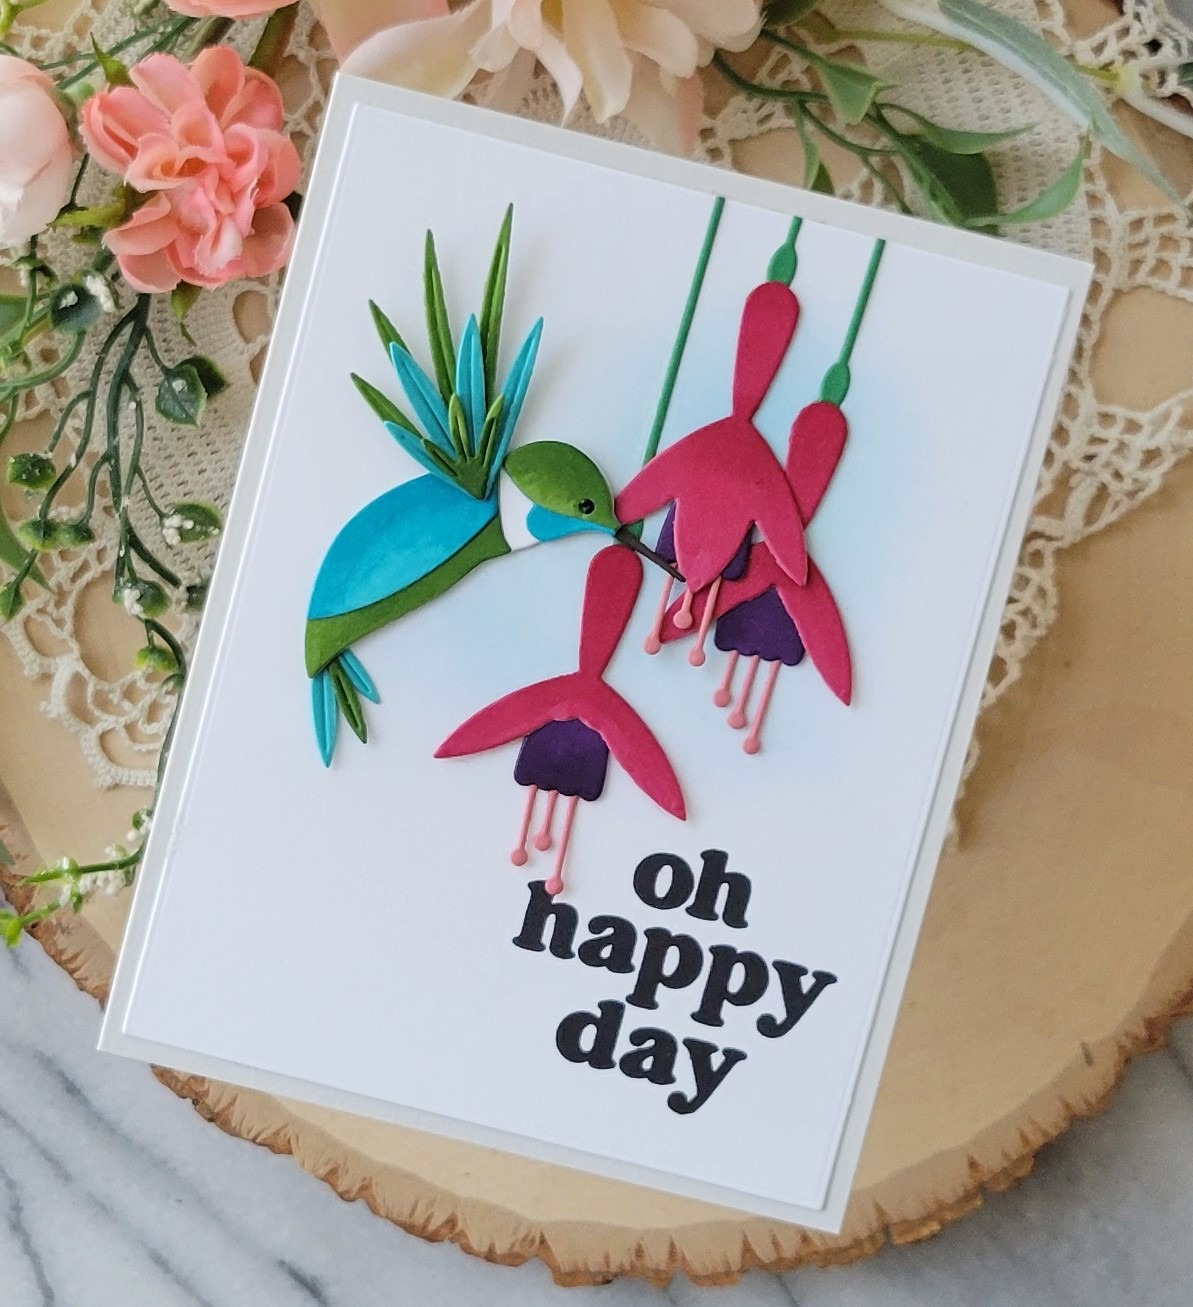
Hello, hello! Rosemary here on the blog today sharing a card made with the new Block Print Fuchsia Flowers and Block Print Flashy Hummingbird. I love all the hummingbird dies that Birch Press Design has released, but this one just might be my favorite. Fuchsias are one of my favorite flowers and so I was super excited when I saw the new fuchia related dies! Let’s look at what I made.
Growing up we always had a fuchsia hanging basket on our front porch as both my parents liked fuchsias. I remember being fascinated by the little bell shaped flowers that hung down amongst the green leaves. When I saw the new Block Print fuchsia dies I was in heaven! I went with a similar color palette as the one on the front of the packaging as it is a classic fuchsia color way and still one of my favorites!
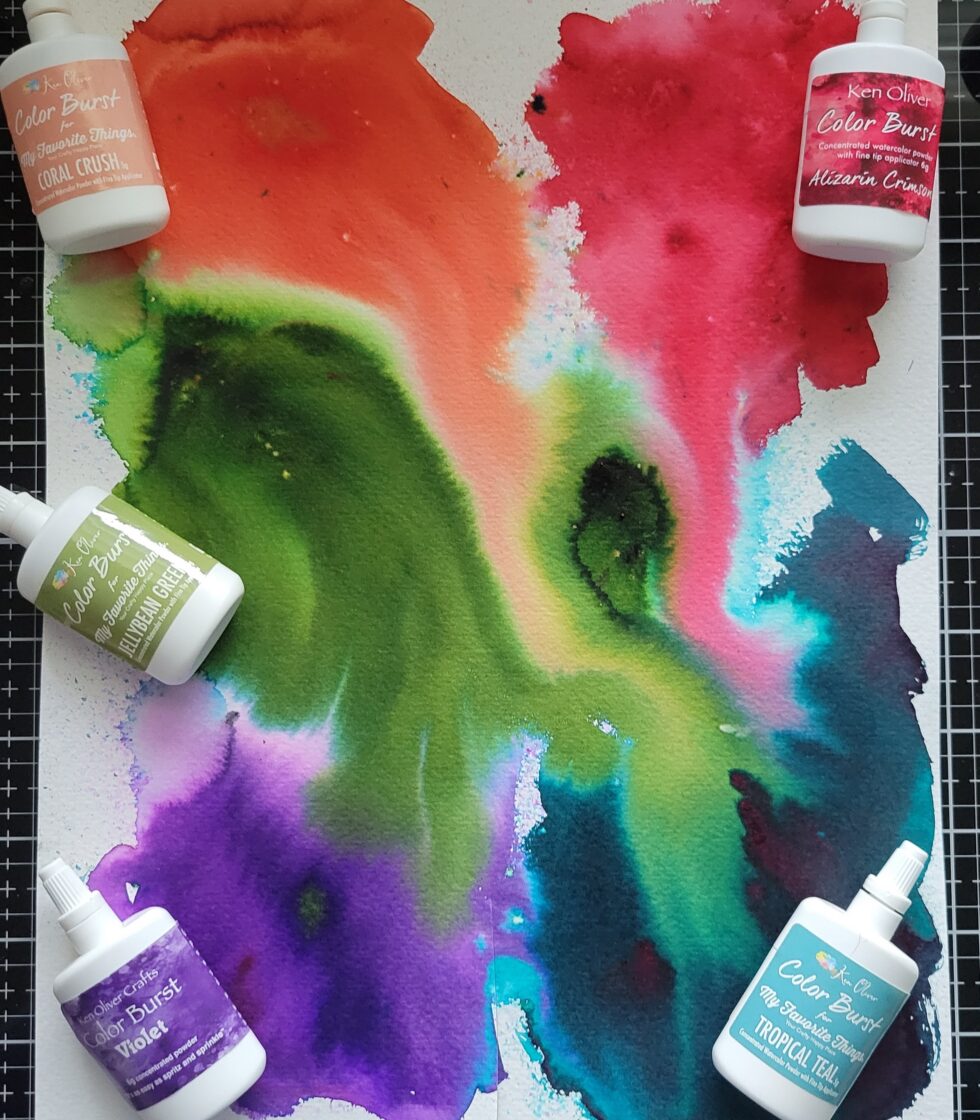
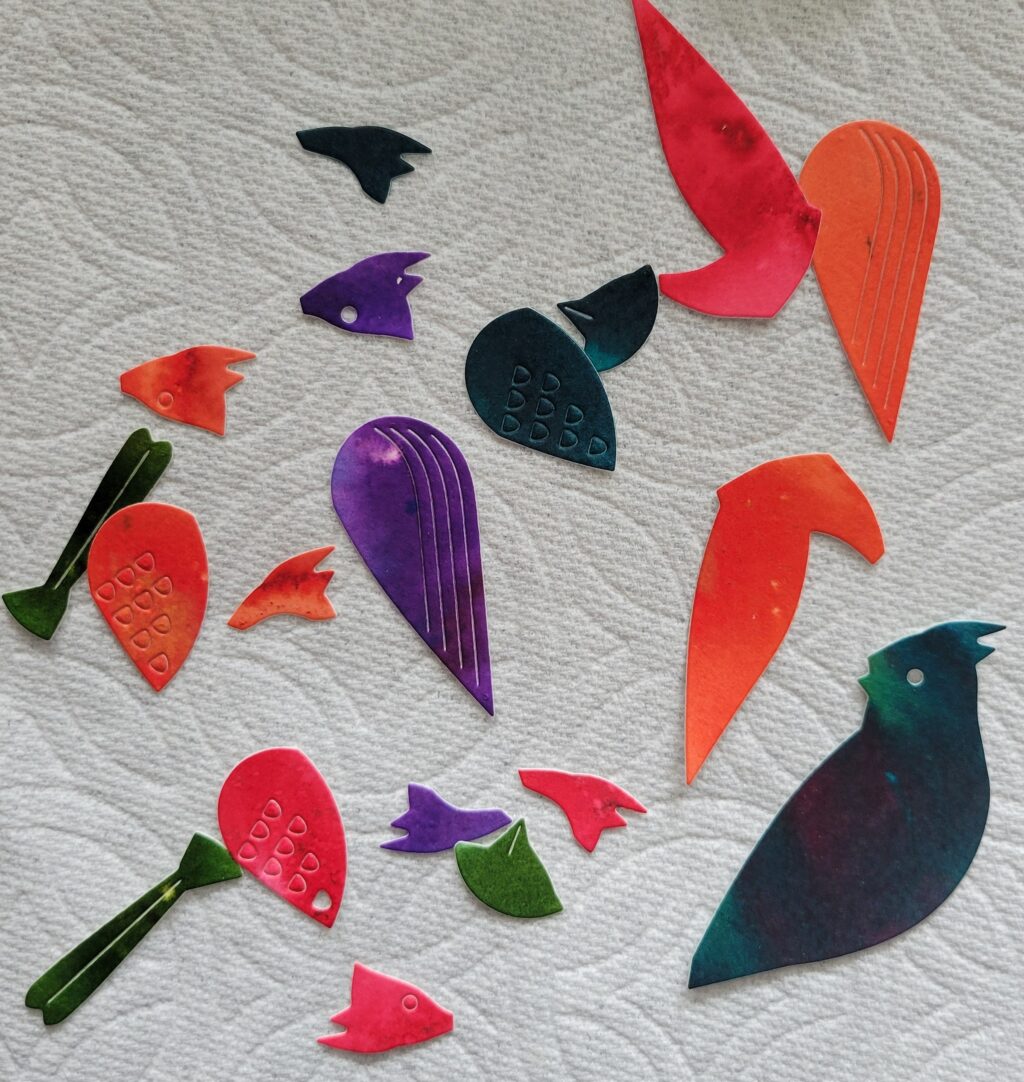
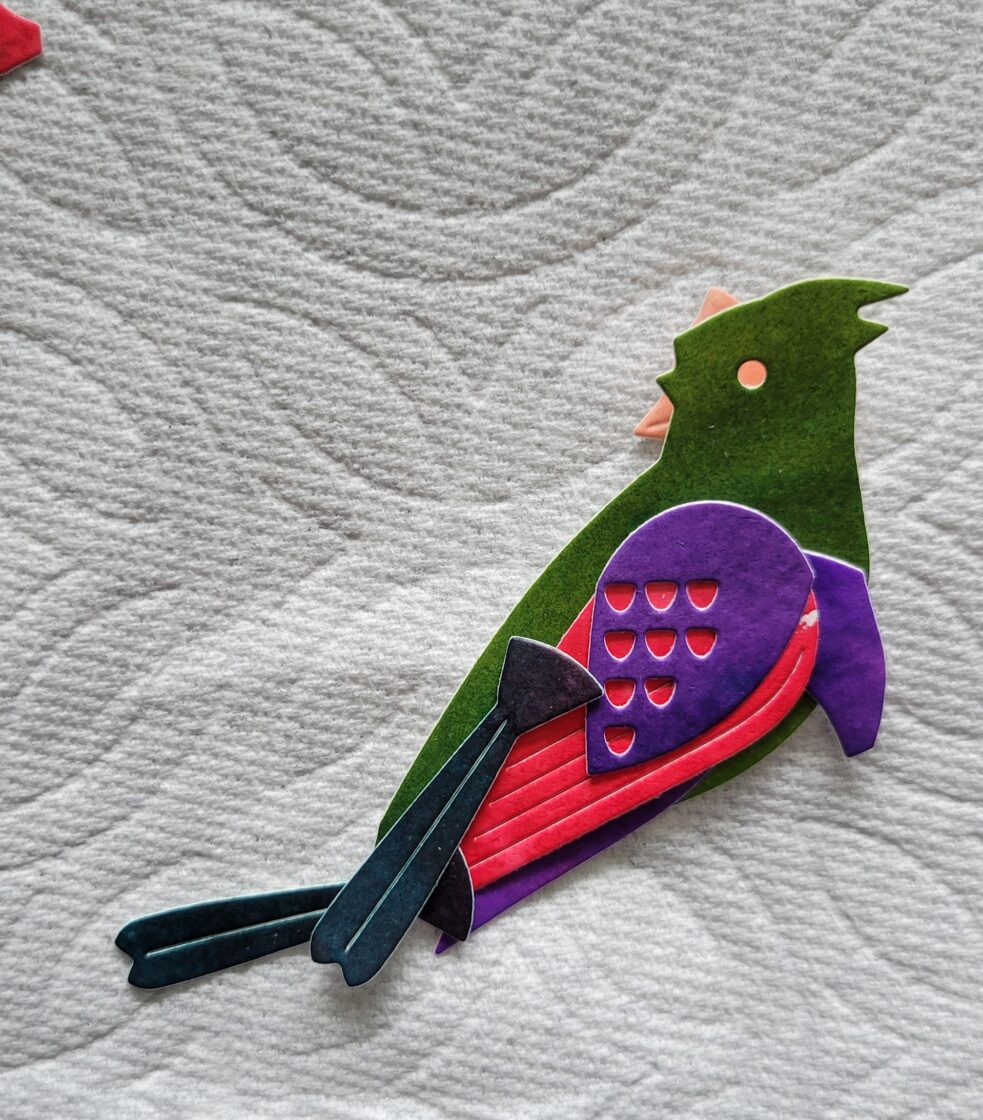
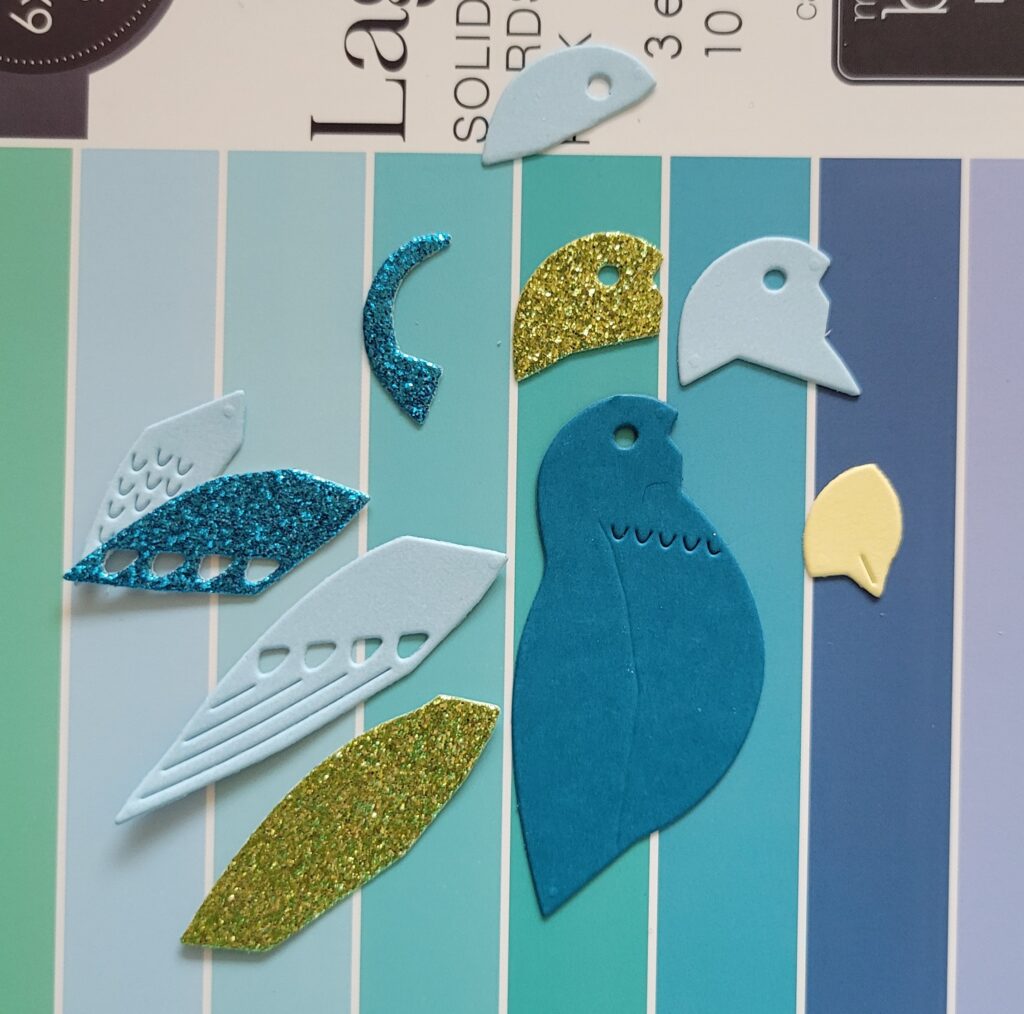
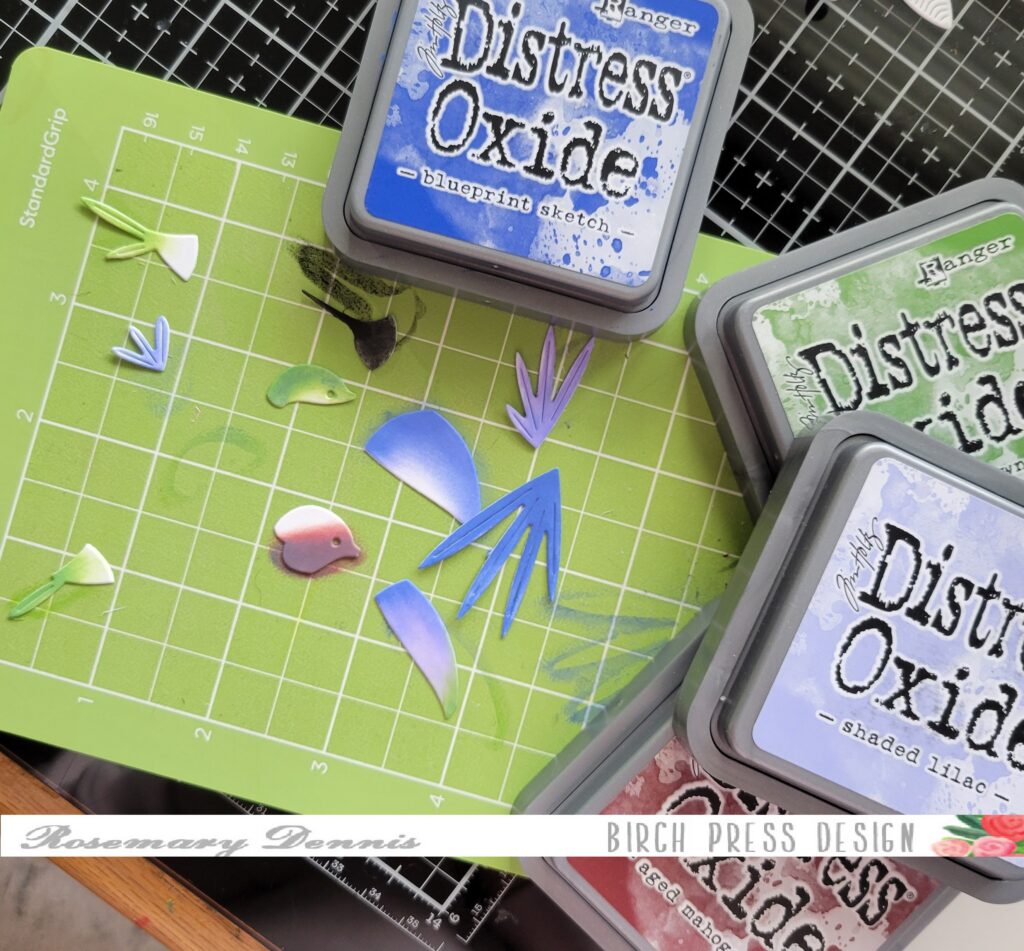
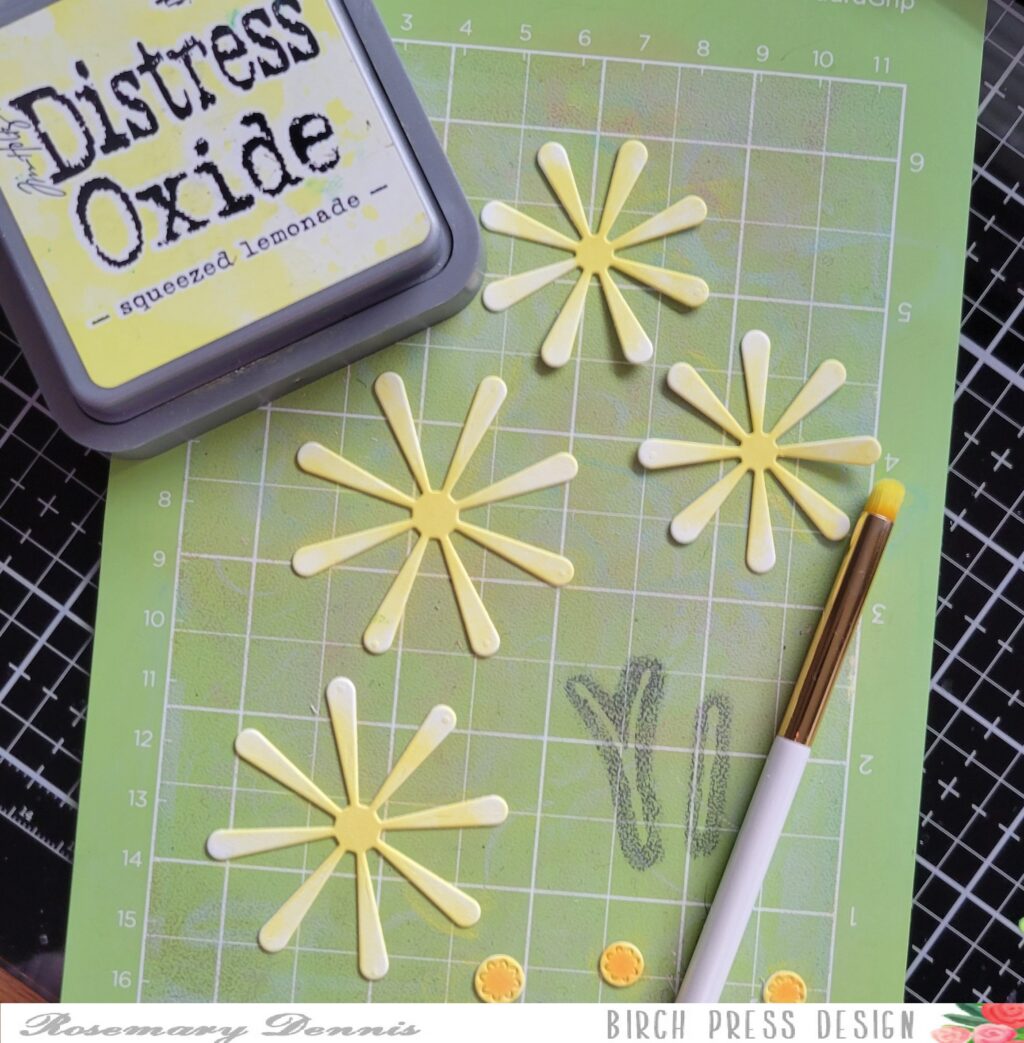
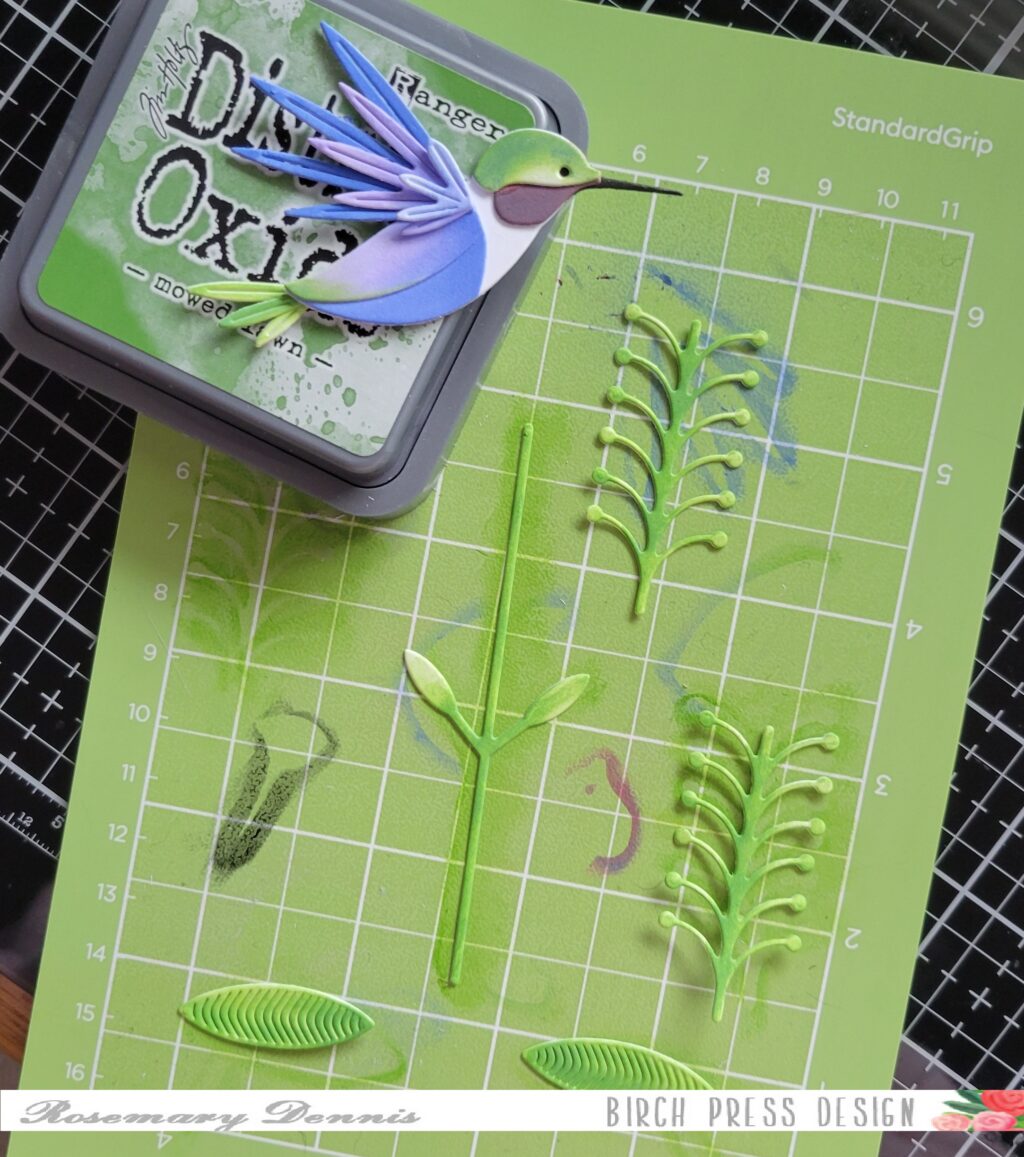
I die cut the majority of the pieces for the hummingbird and fuchsias from colored cardstock. I only used white for the body of the hummingbird that all the other pieces get layered on. I then used Copic markers to color the pieces allowing me to change the colors and provide contrast.
For the bird I started with a light aqua colored cardstock and then added color using Copics in shades of teal. Additional pieces were cut from a medium green and then shades of green Copics added to deepen the color. The pieces were set aside to dry before glueing together.
The same process was done for the fuchsia except for the stems and the little stamens that hang down. I let them dry and then adhered together with glue. White cardstock was die cut, stamped with the sentiment from the Vintage Everyday Greetings stamp set and then I added a little bit of distress oxide ink in blue to the area where the fuchsia and hummingbird would be placed. They were then adhered with a combination of thin foam squares and glue. Added the panel to my light gray cardstock base and finished with a tiny dot of black Nuvo jewel drops for the bird’s eye.
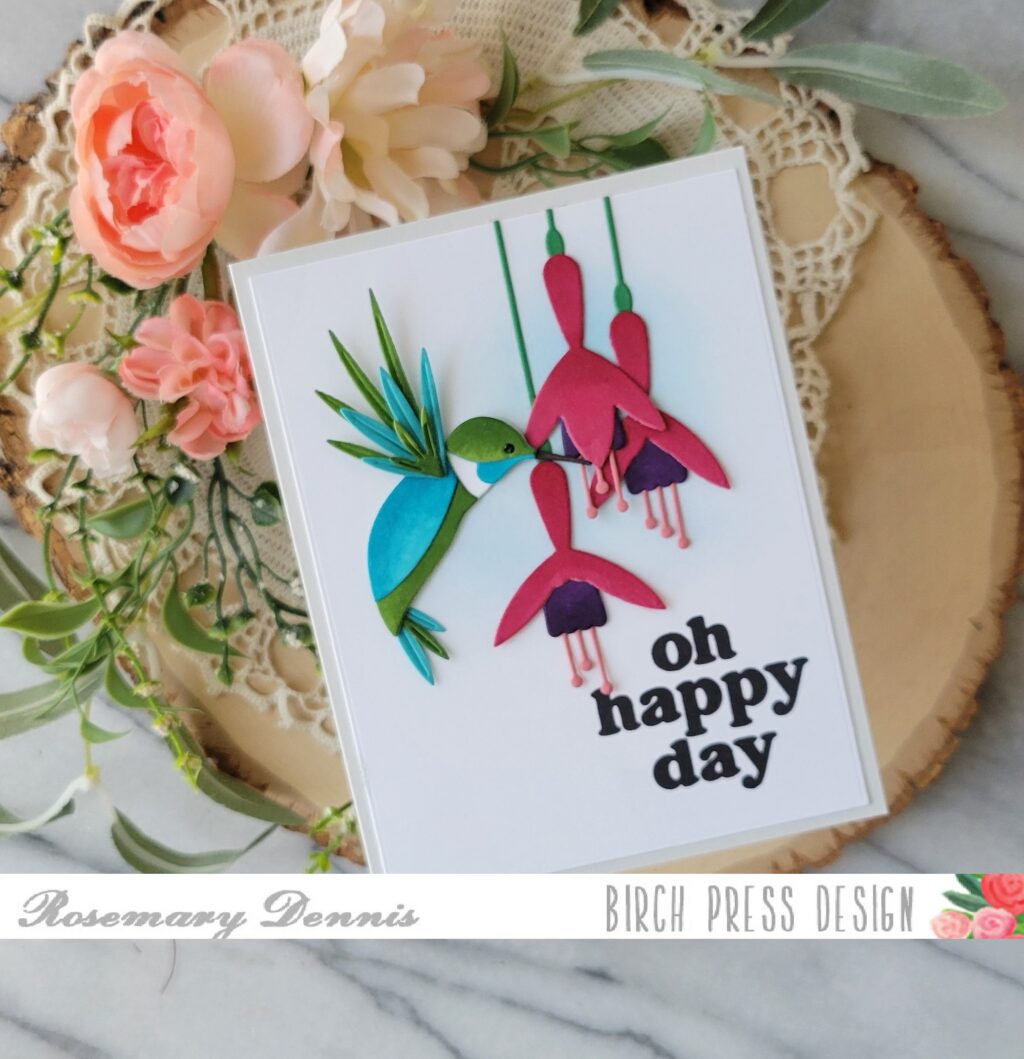
I just love how this turned out. Clean and simple yet a little on the bold side. I hope you enjoyed today’s project. Thanks for taking the time to visit the blog. Have a wonderful day!