Category: Block Print

  • Warm Winter Wishesby Christina Rannow

    Warm Winter Wishes
    by Christina Rannow

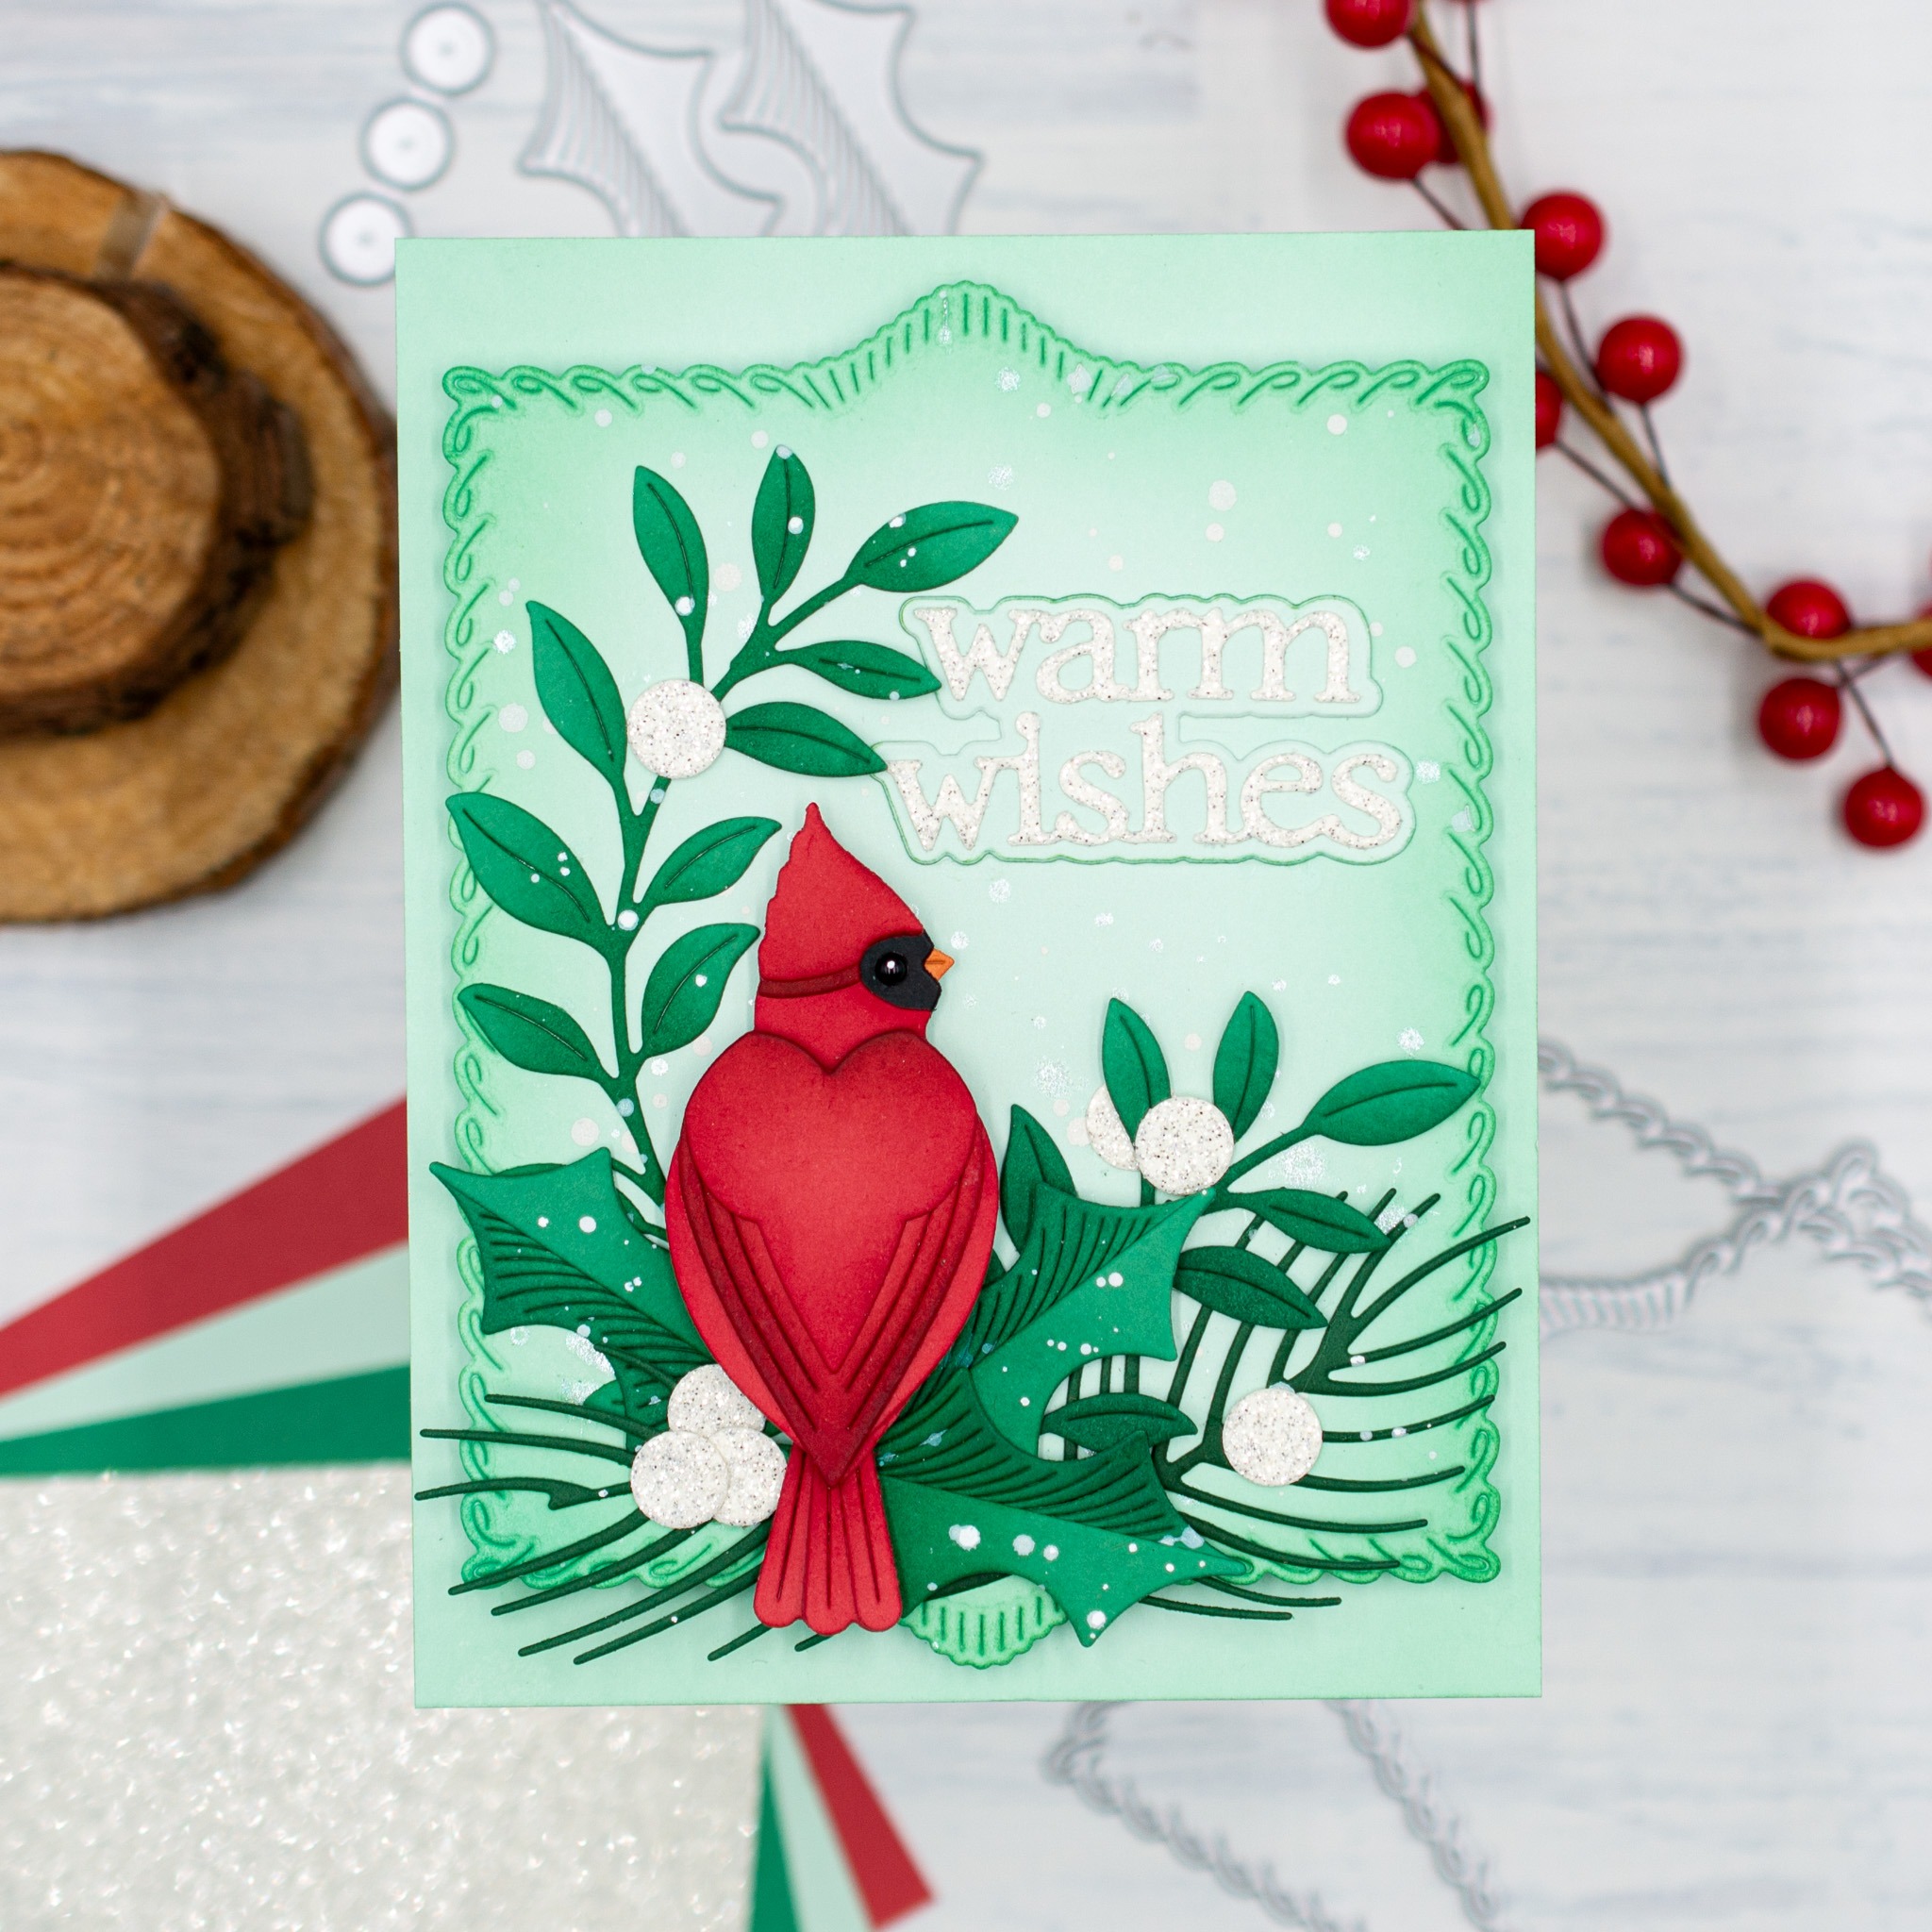
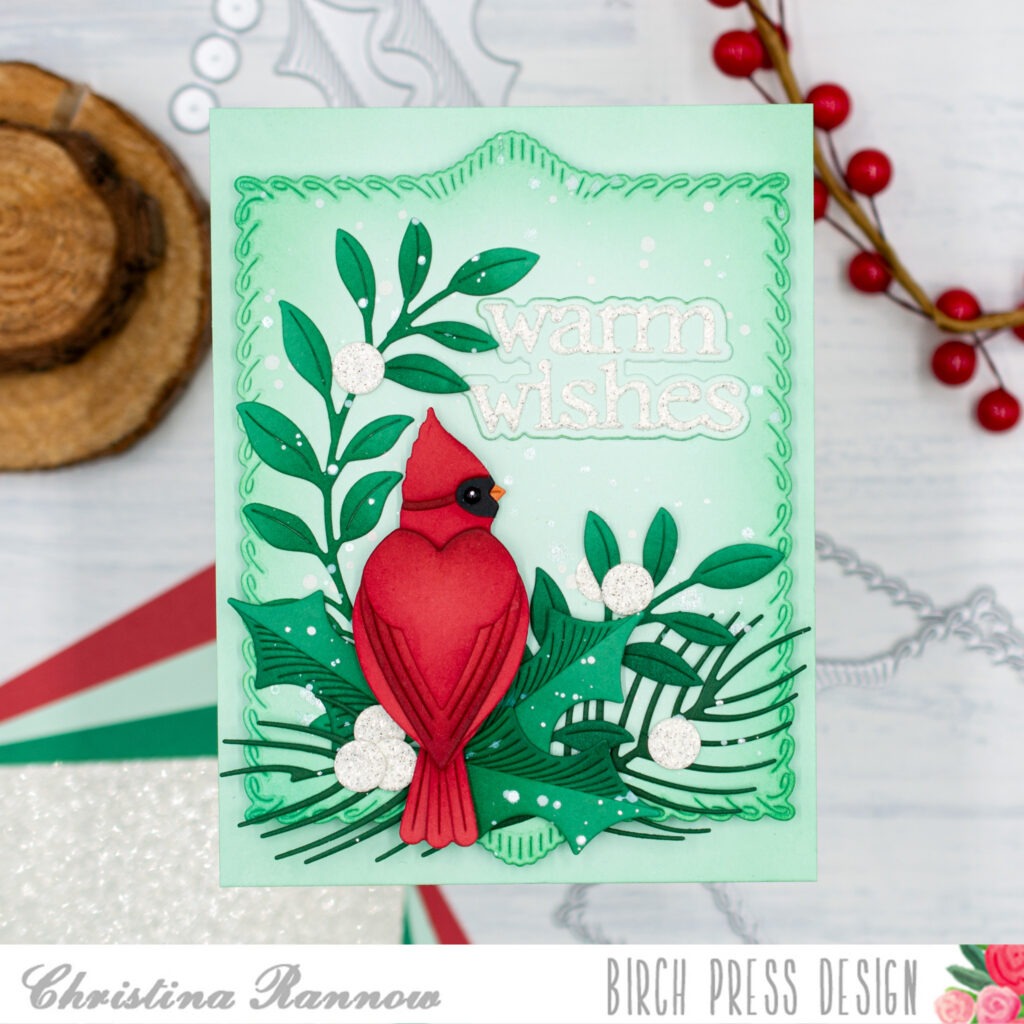
    Hello, friends! It’s Christina, and today I’m sharing a cozy card, featuring the Block Print Heart Cardinal die set, which is perfect for the holiday season or just a wintery hello. I love cardinals, especially at Christmas time and when paired with a contrasting mint green color. I used that combination for this card design, tucking the cardinal in some winter greenery with glittery berries and framing everything with a Loop Stitch Frame. Let’s take a look at how this wintery card came together.
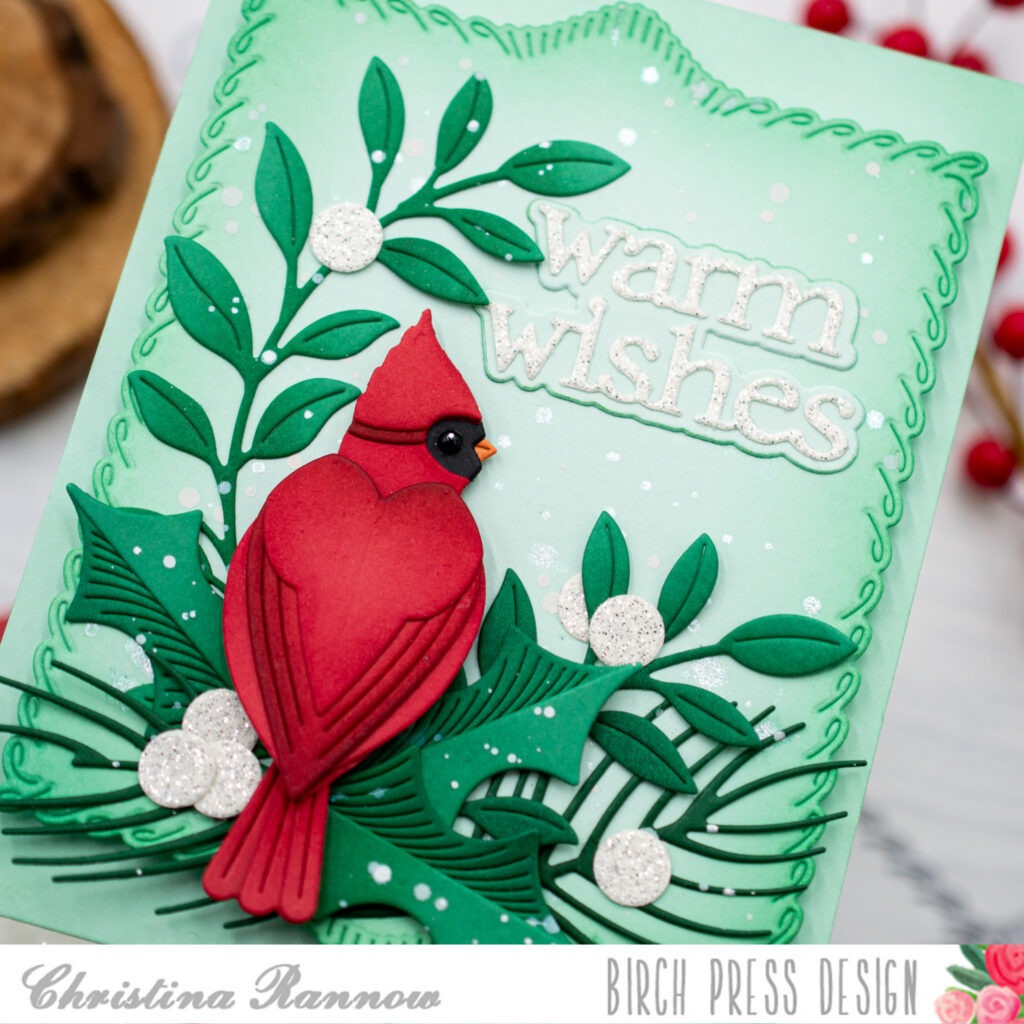
    My first step was to create the background panel. I started with mint green cardstock and die-cut it using the largest Loop Stitch Frame. Then I used Pine Needles Distress Ink and blended in color just around the edges of the frame to create a lighter center area. To give this frame panel a frosty, snowy effect, I spattered it with both an opaque white and a glitter splatter medium. Finally, I popped this up onto a 4.25 x 5.5 inch mint green cardstock panel with foam tape. 
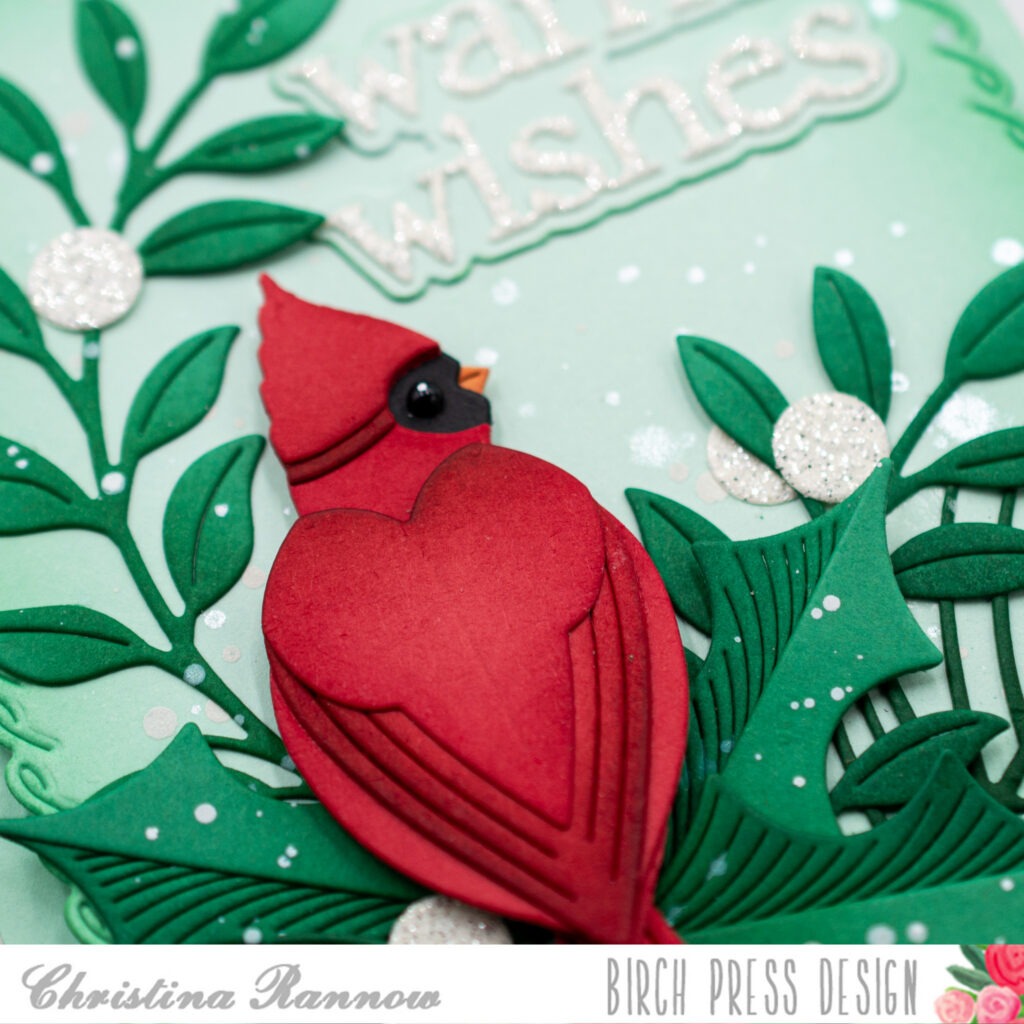
    My next step was to die-cut all the other elements for my design. I started with colored cardstock for the components of the cardinal and the greenery and, using a small blending brush, added subtle shading to each piece with a darker coordinating ink color. Then I assembled the cardinal and the holly leaves, securing the pieces with a liquid adhesive. I chose a white glitter cardstock for the berries and the sentiment but used mint green cardstock to die-cut the shadow piece for the sentiment. Before gluing the glittery sentiment onto the shadow piece, I very lightly added color to the edges with whatever color was leftover on my green blending brush. 
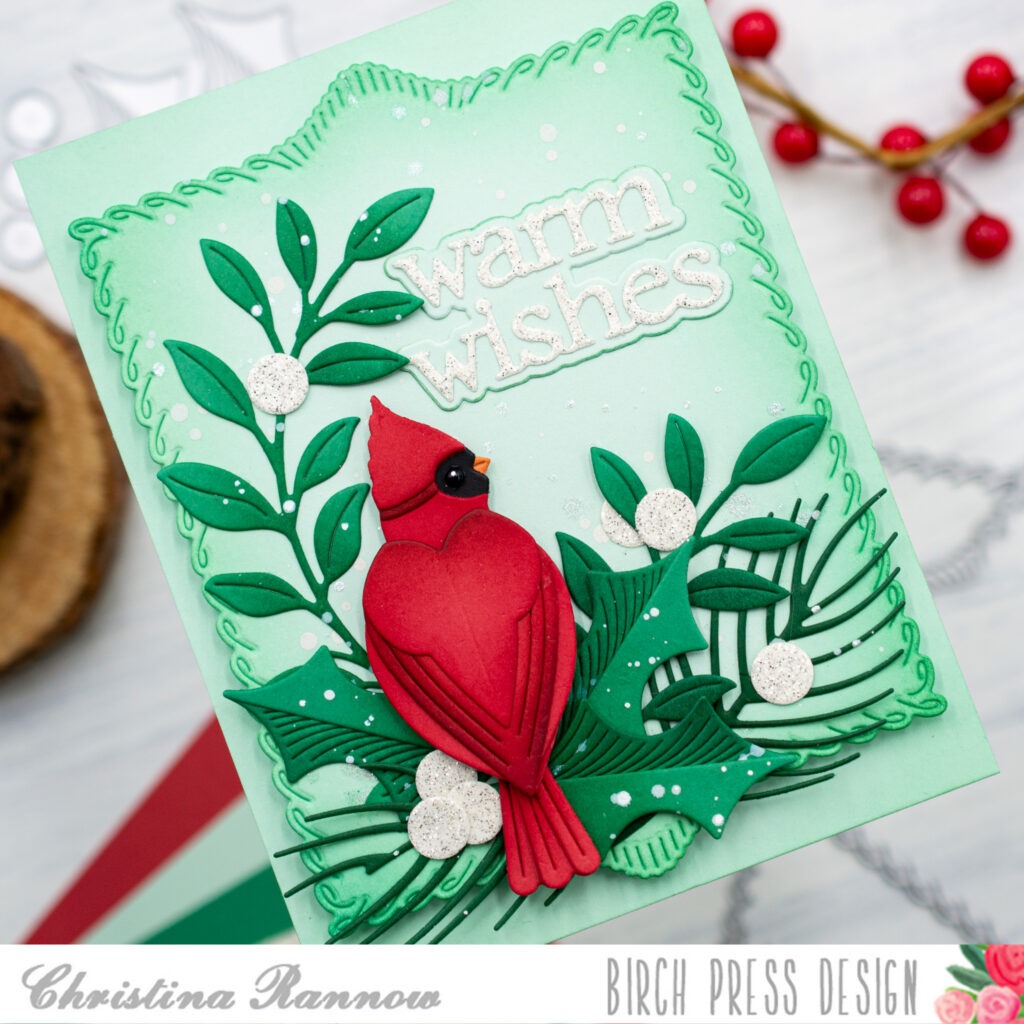
    Before assembling my card design, I spattered the greenery pieces with the same splatter mediums I used to spatter the Loop Stitch Frame panel. I let this dry before layering the greenery onto my card front, starting in the bottom left corner and securing the pieces with either a liquid adhesive or thin foam squares depending on their placement and if they overlapped another element. Generally, the elements in the very background are secured with a liquid adhesive, and the elements in the foreground are attached with foam squares. When I was happy with the placement of the greenery, I attached the cardinal, popping it up with regular foam squares in the lower left corner. Finally, I added the glittery berries and the sentiment before adhering the card front to a top-fold card base. 
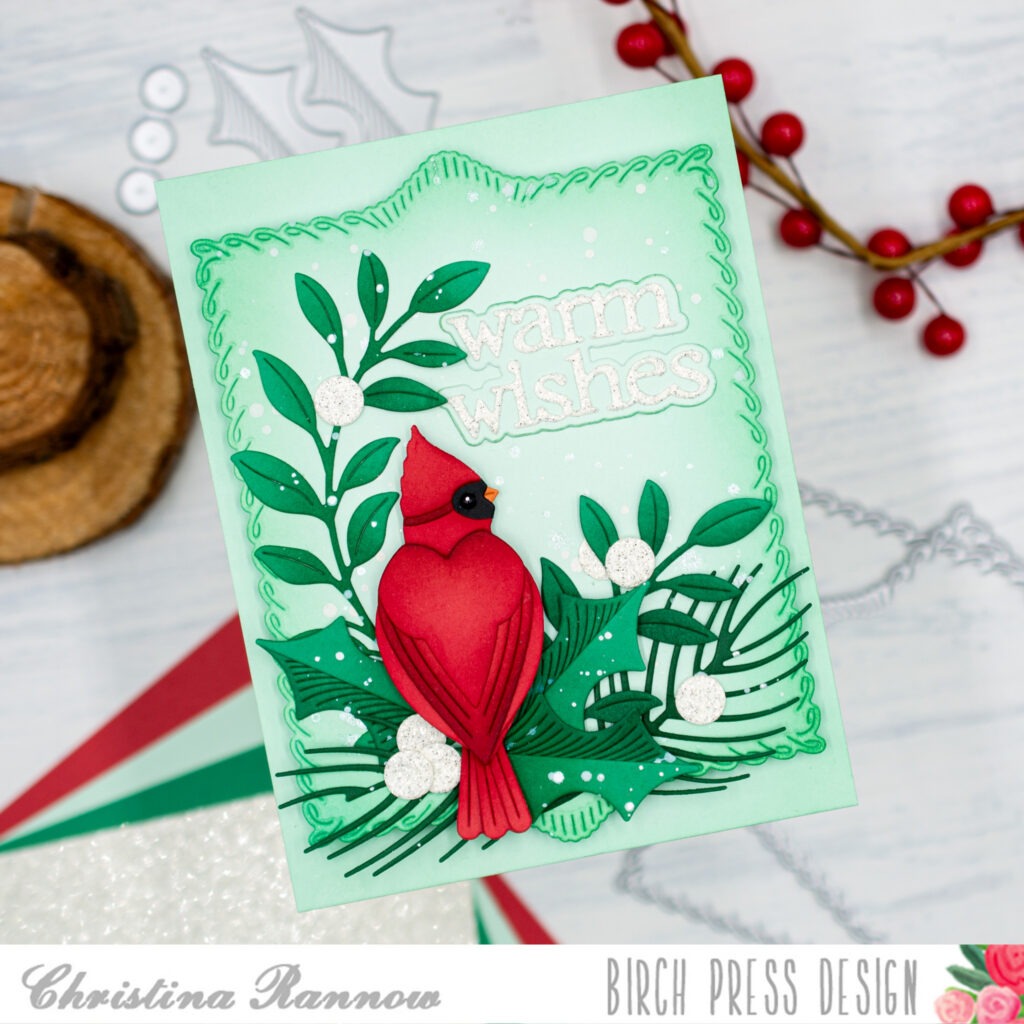
    Thank you so much for reading about how this cozy wintery card featuring the Block Print Heart Cardinal came together. See you again soon!
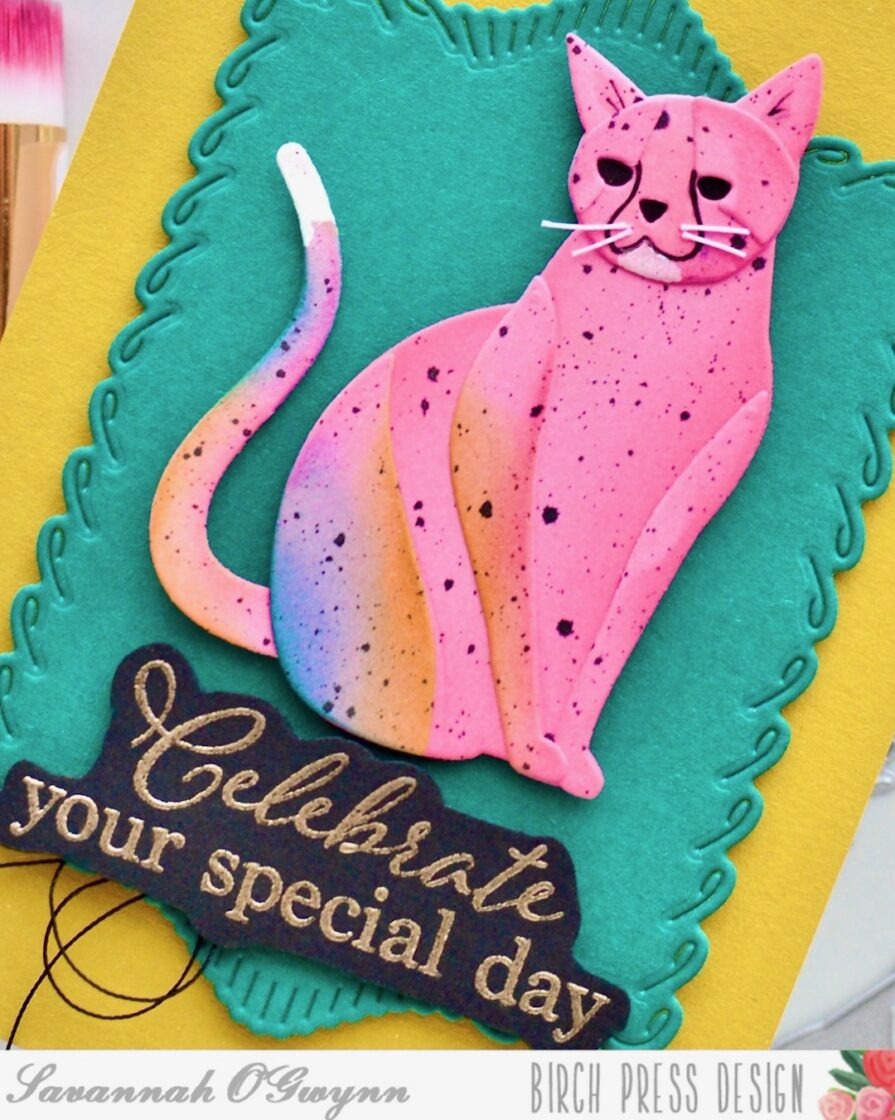
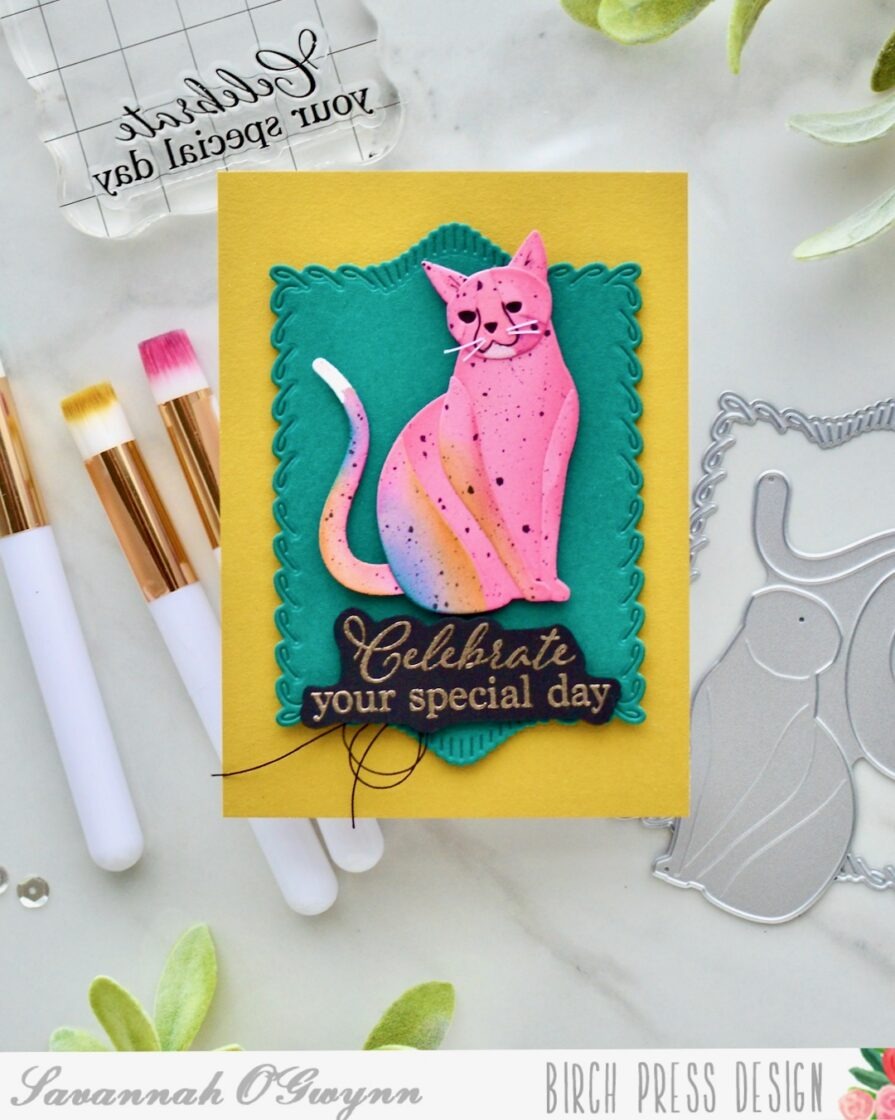
  • Leopard Lookalike- Take 2 by Savannah O’Gwynn 

    Leopard Lookalike- Take 2
    by Savannah O’Gwynn 

    Hello, Birch Press Design friends! I’m back to share another take on my leopard design!


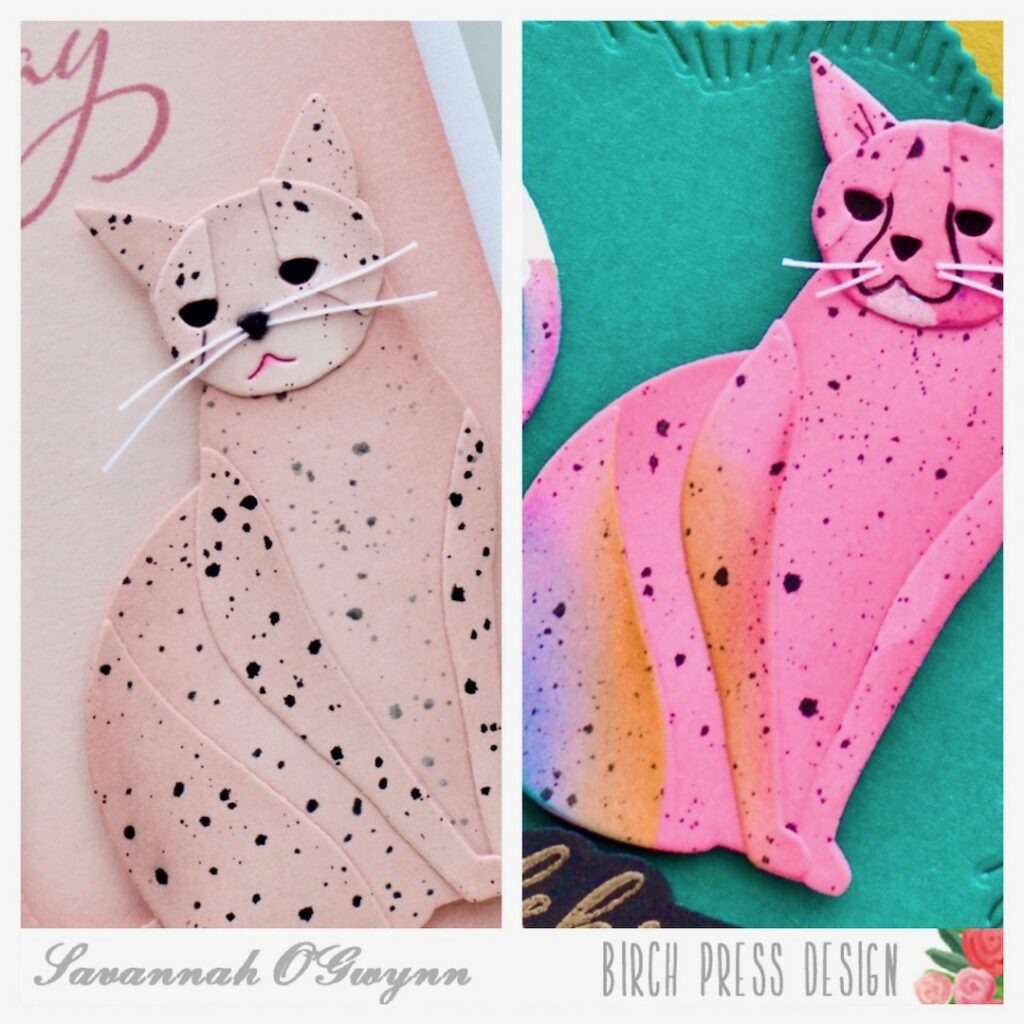
    You might remember my first leopard lookalike HERE. While I liked this original design, I mentioned in the post that I thought I could do better… so I tried again! And I really like this second leopard- the colors, the face, everything!

    Here’s a look at both the lepards- the original and new one.

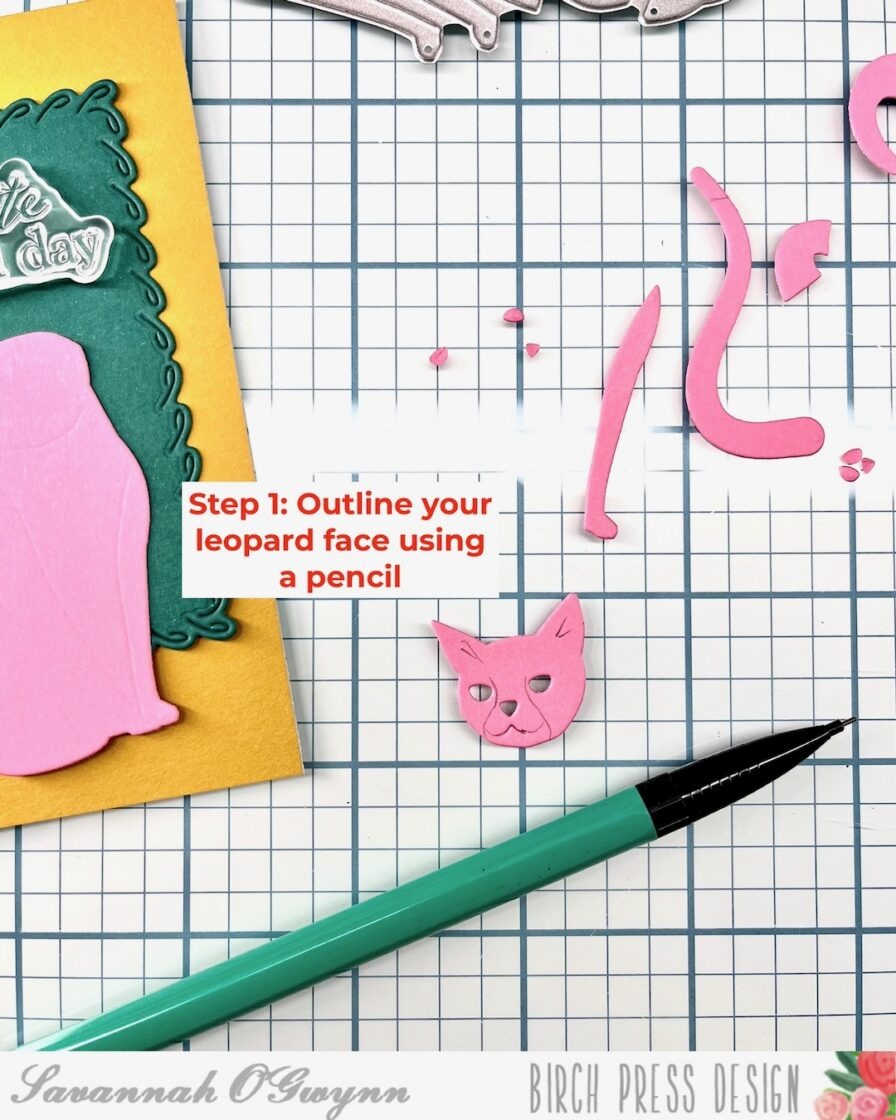
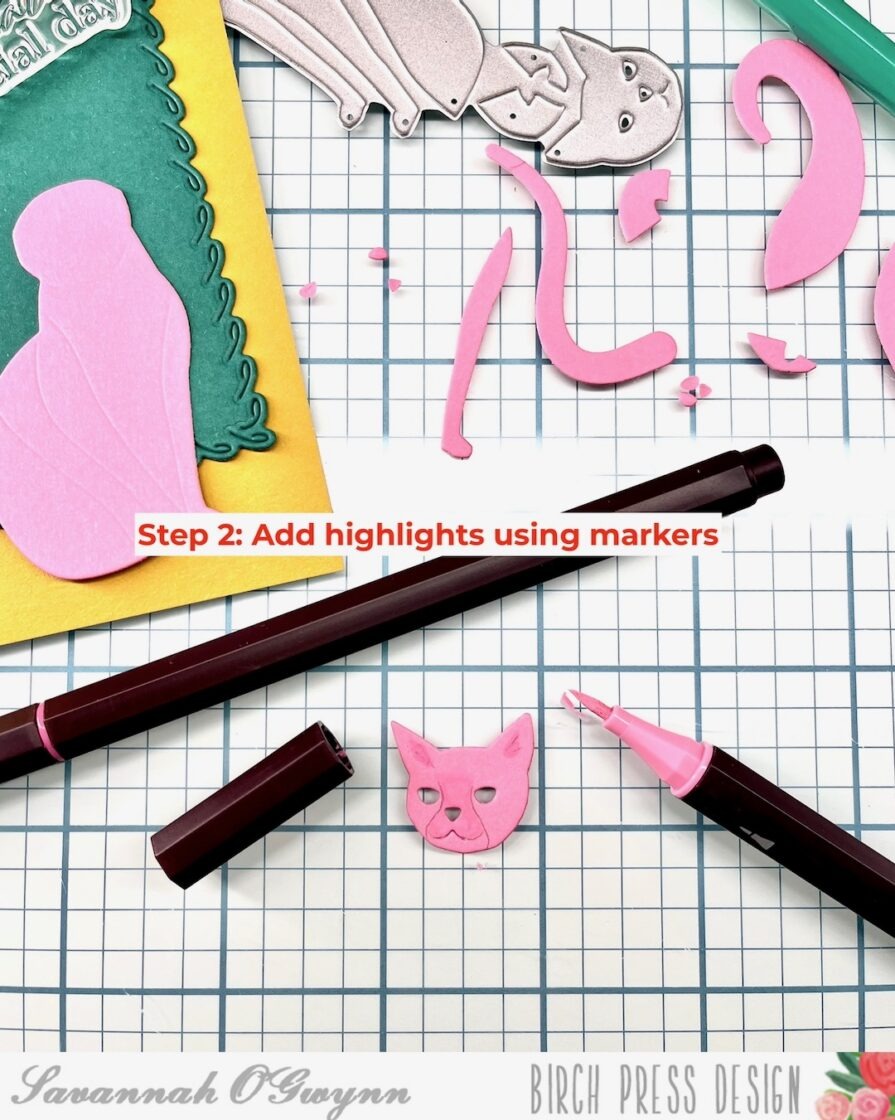
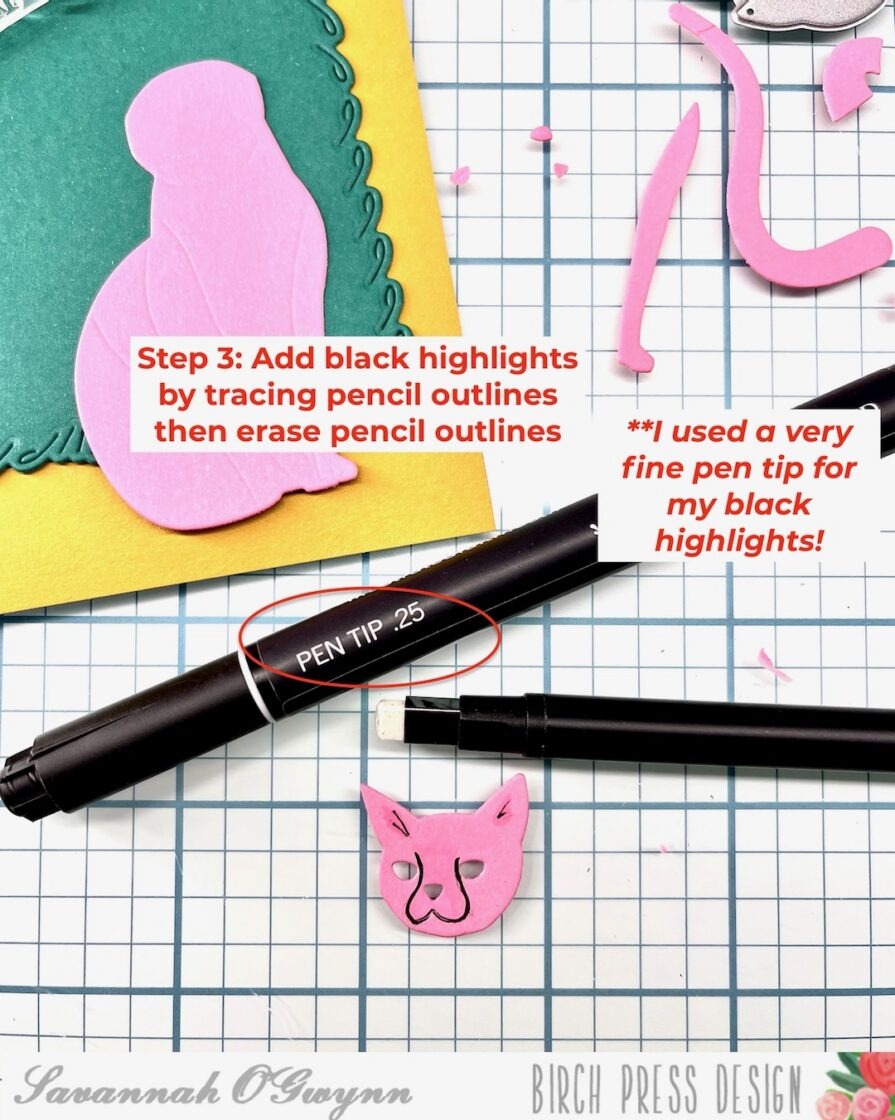
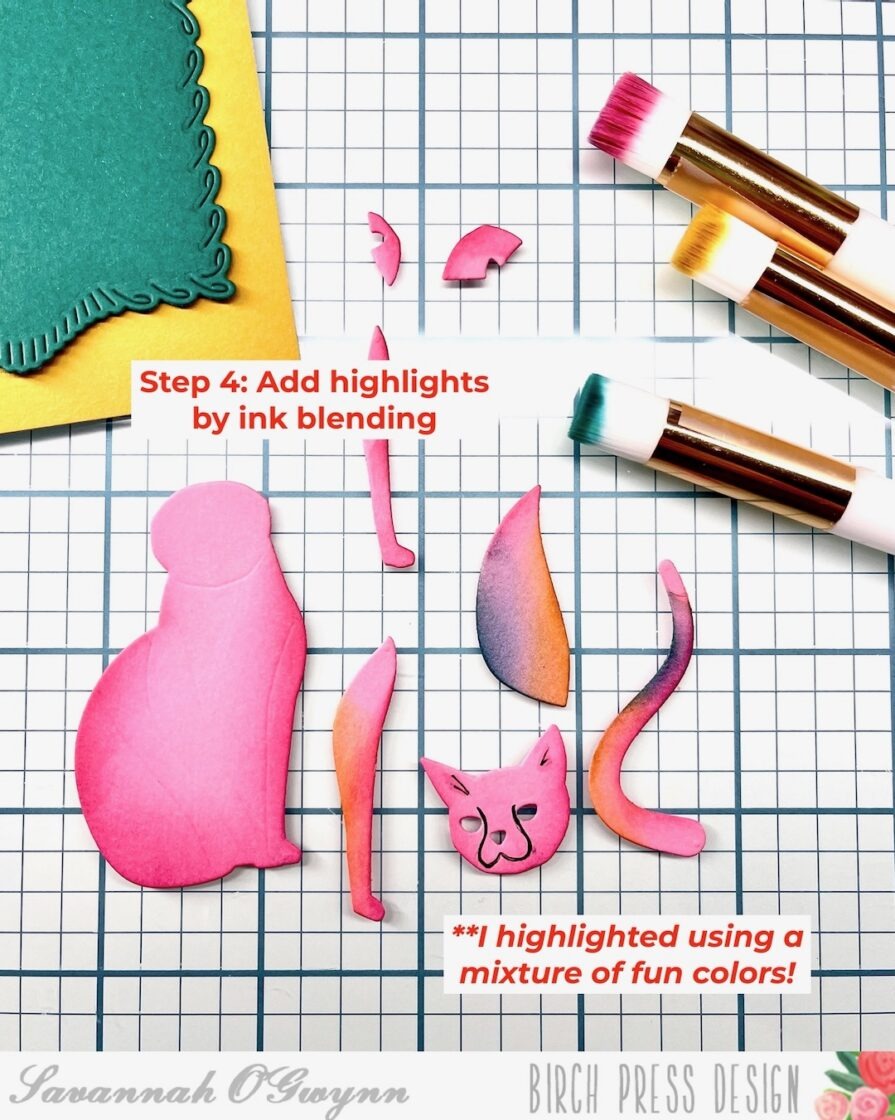
    Here is a tutorial on how I created the NEW leopard’s face:

    I looooooooooove how this colorful leopard turned out! Again- I love the first leopard… but this one is better 🙃

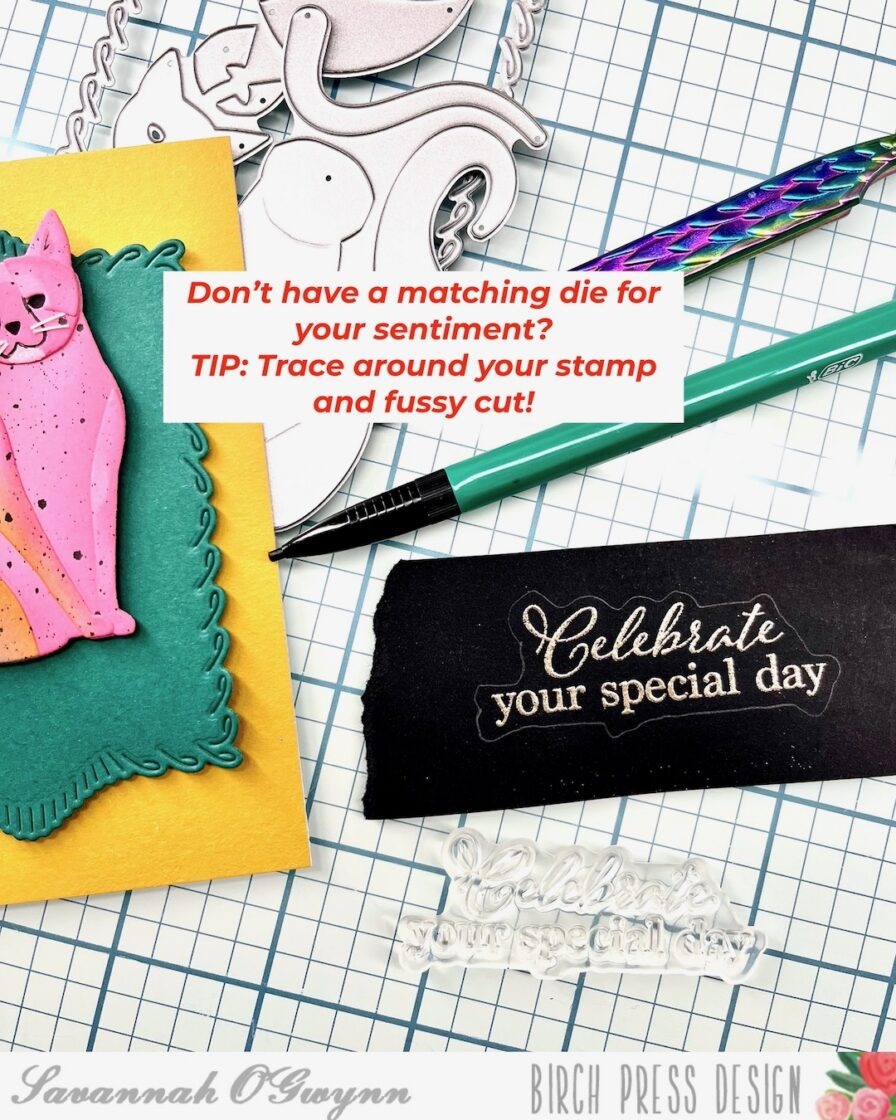
    BONUS TIP: you might have seen me do this before– if you don’t have a matching die for your sentiment, just outline your stamp image and fussy cut!

    I hope that you are inspired to create your own leopard using this BPD die and some of the tips I shared!
     

    Please remember to share what you create using any of my tips, tricks, and techniques or if you were inspired by my creation- I’d love to see what you make!

    I’ll be back with MORE soon! 
    THANKS so much for stopping by! Happy crafting:) 

    HUGS <3 Sav

  • A Bokeh Hello by Nora Noll

    A Bokeh Hello
    by Nora Noll

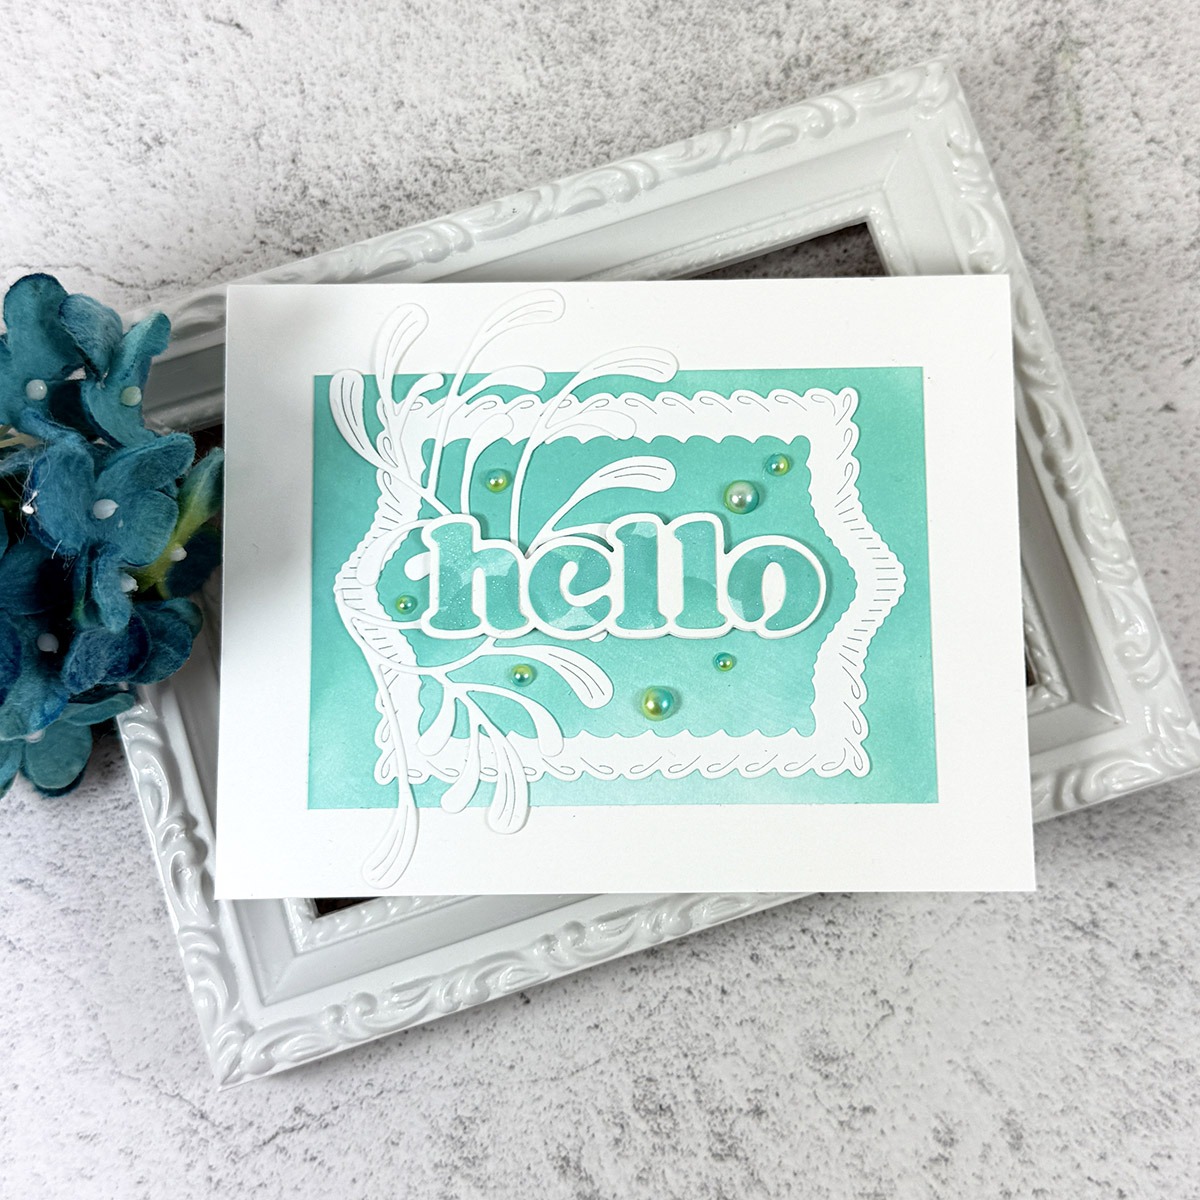
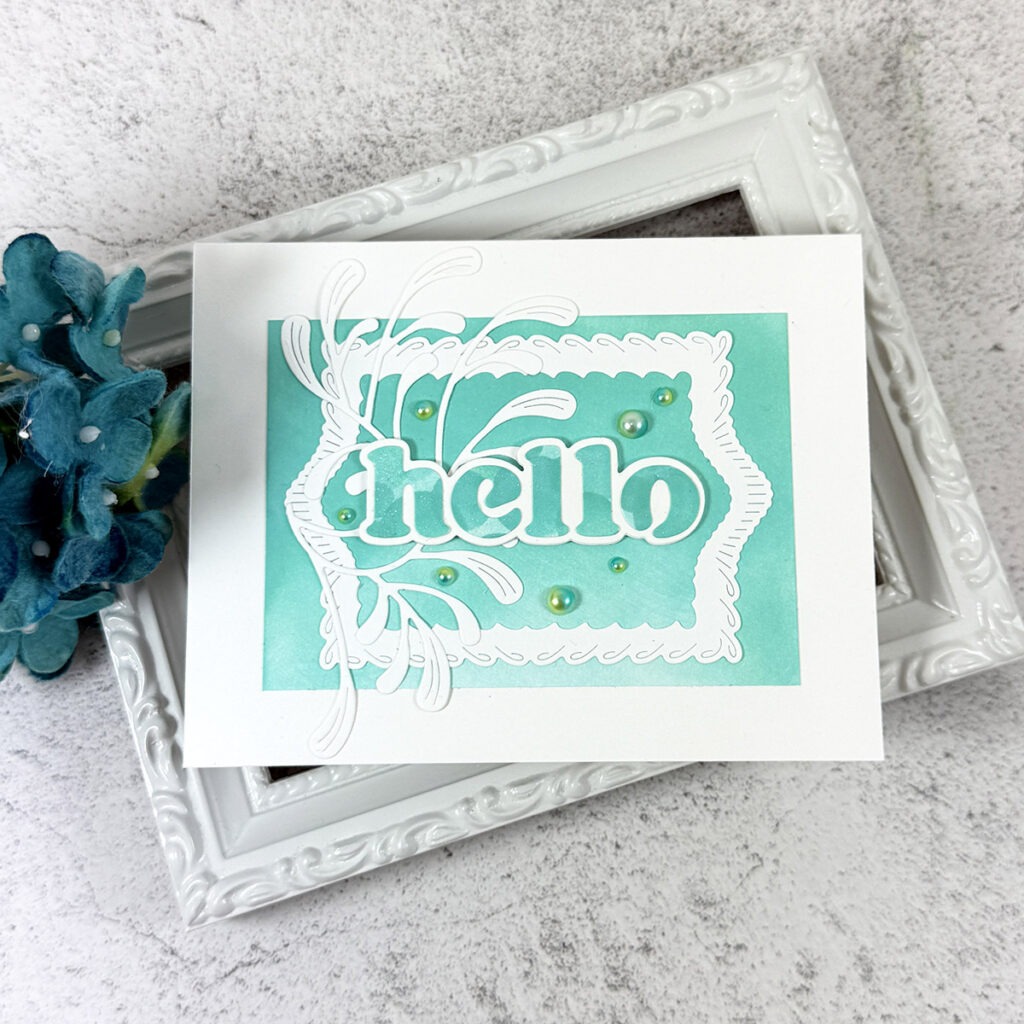
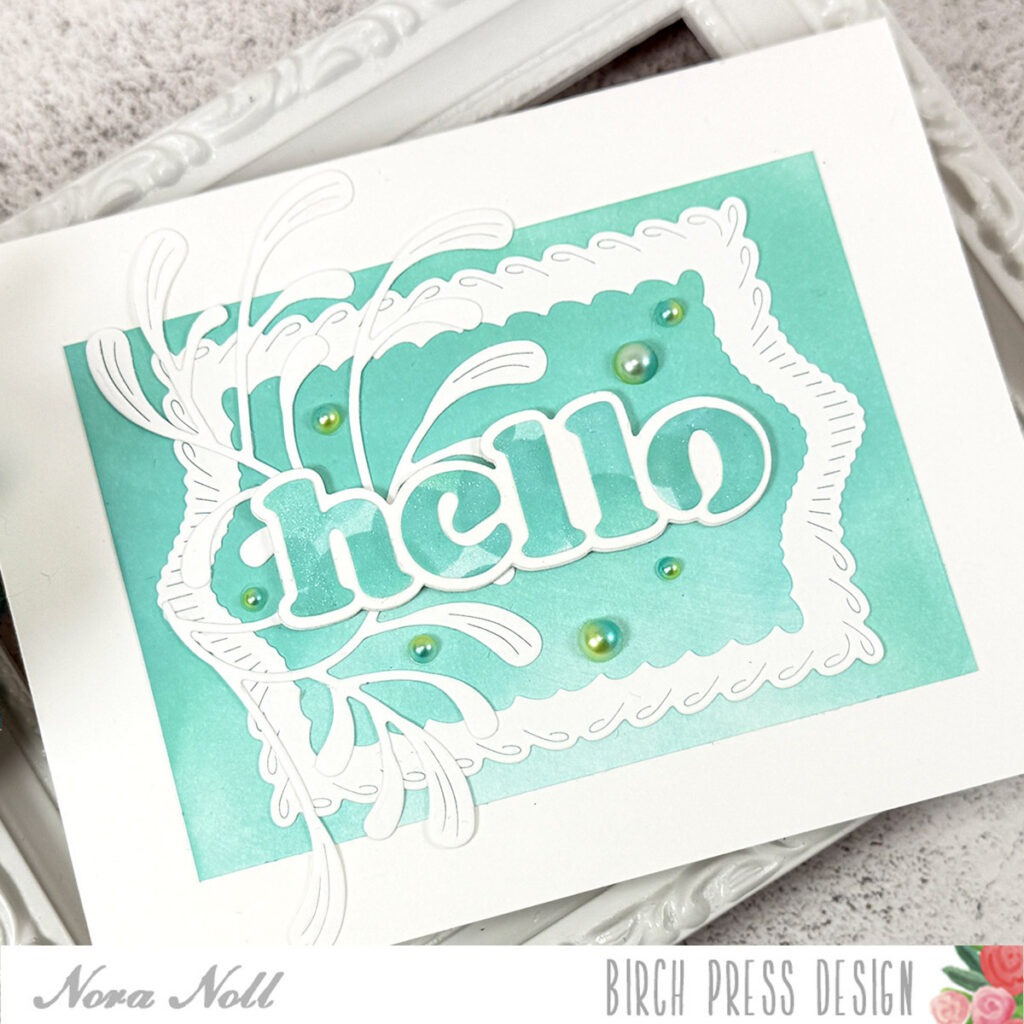
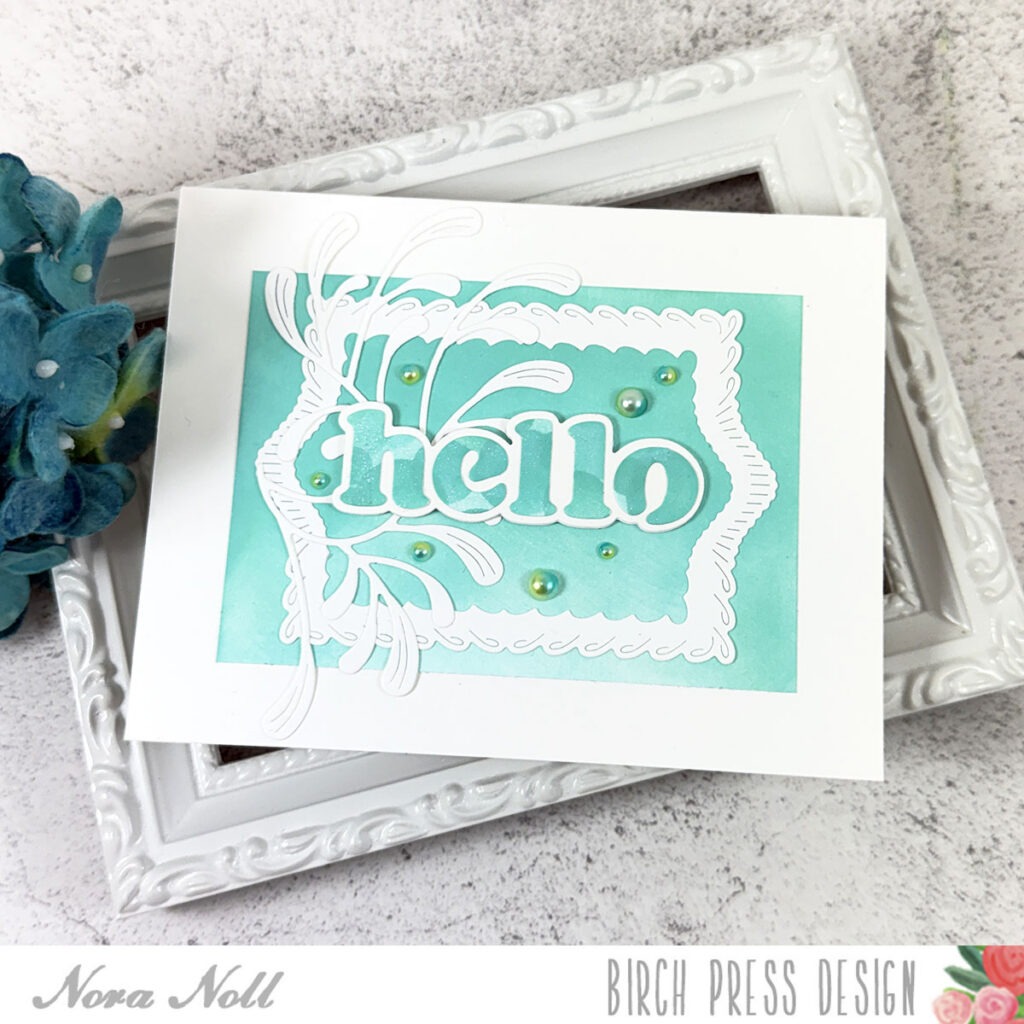
    Hello friends!! Nora here on the blog today with my first card as a Design Team Member!! I used the Bokeh Stencil Set (42048) with the Ornamental Branch die (57601), the Big Hello Vintage Sentiment die (57549) and the Loop Stitch Frames (57688) to create a simple card.

    I started off my card by ink blending aqua ink on a 4” by 3” piece of white cardstock. I then adhered the paper to an A2 sized white card base.

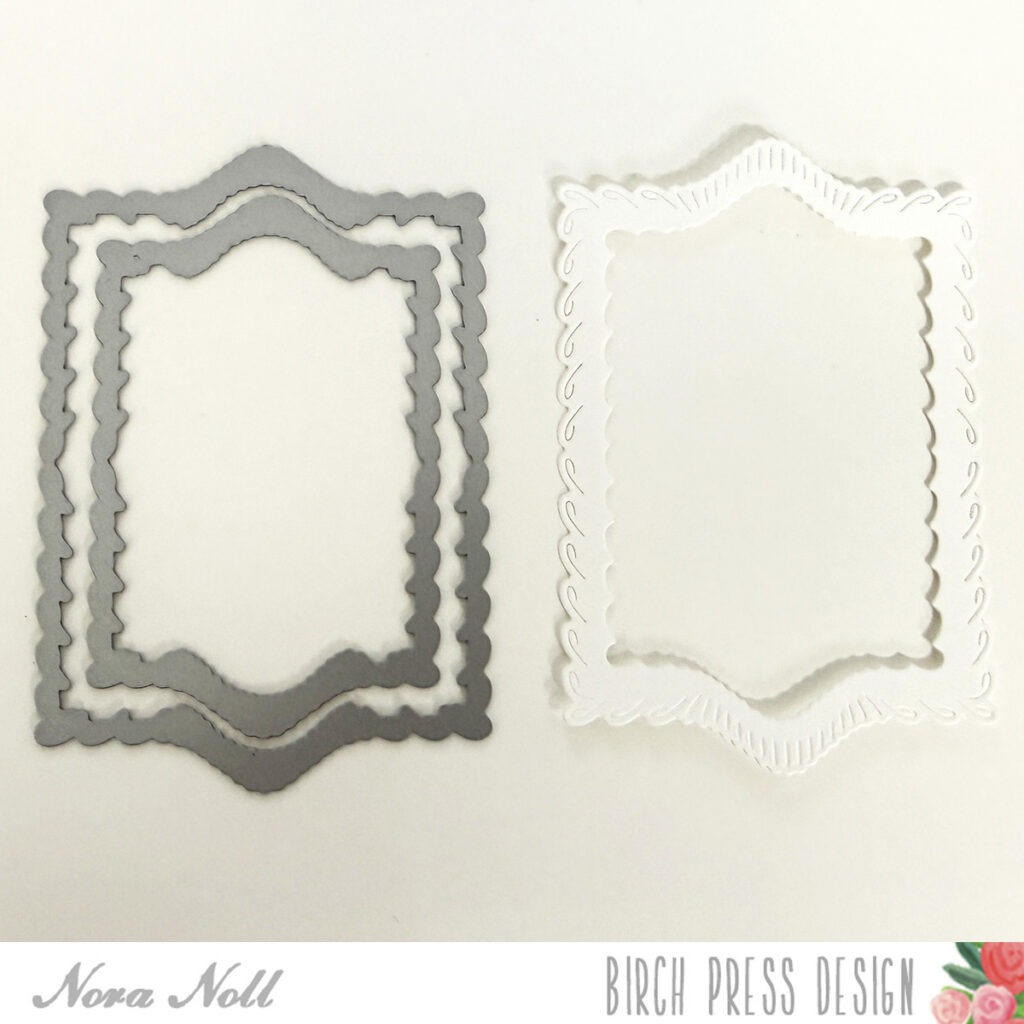
    Next I created a frame out of white cardstock using two of the Loop Stitch dies. I adhered the frame over the top of the aqua on the card front.

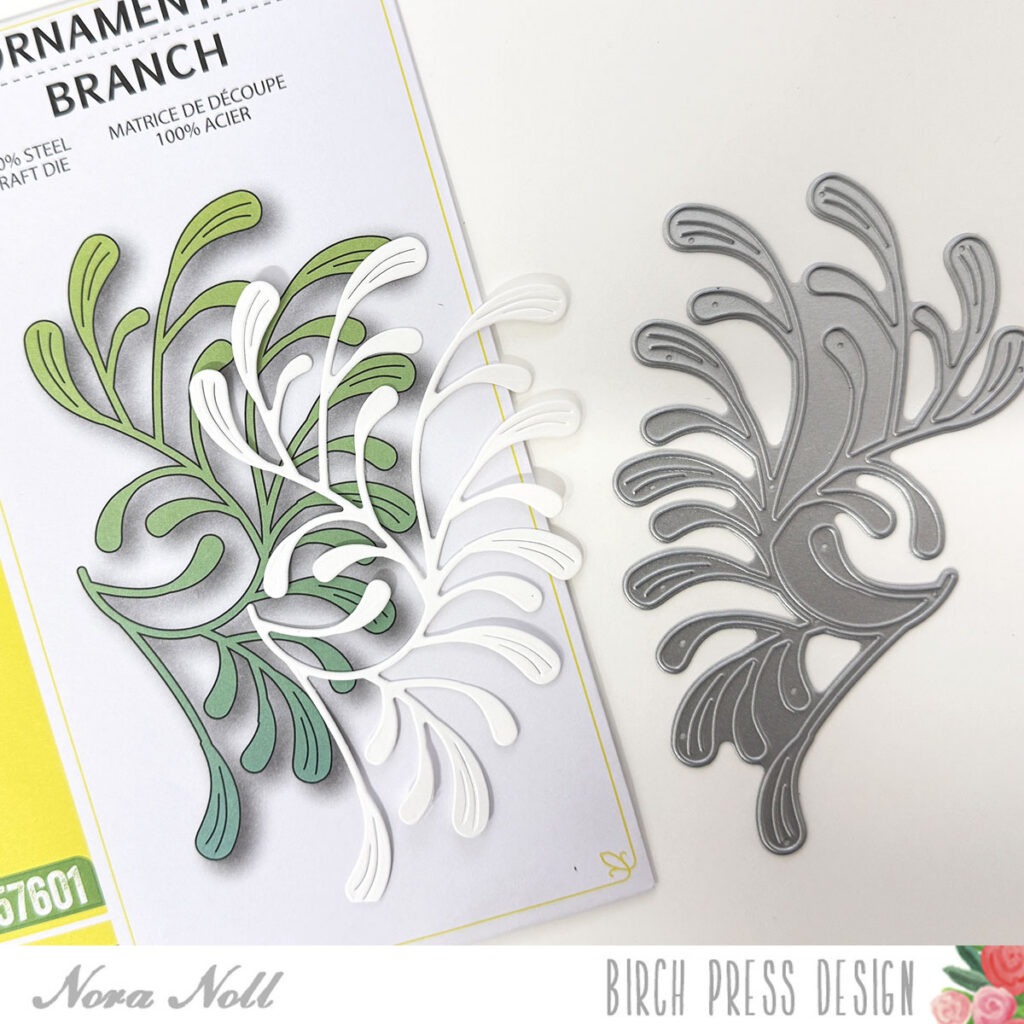
    I used the Ornamental Branch and cut a bough out of white cardstock. I adhered the branch over the left side of the Loop Frame.

    I had so much fun using the Bokeh Stencil Set to stencil a small piece of white cardstock. I actually used the stencil by lifting it up and moving it over and over to get the circles where I wanted them to go.

    I used the Big Hello Vintage Sentiment outline die to cut the “hello” out of the stenciled paper. I used the solid sentiment die to cut four, white sentiment bases. I adhered the bases together and then glued the bokeh hello over the top.

    I added my sentiment to the front of the card and finished it up by adhering some ombre pearls randomly across the card front.

    This was a fun card to make. I have never used a stencil to create paper for a die cut sentiment and I will be using this technique again in the future. I think it has a big impact for any card front.

    I hope that my card has inspired you to try this fun technique. I thank you for taking the time to stop by. Have a FABULOUS day.

  • Mushroom Forest Fox by Toni M Maddox 

    Mushroom Forest Fox
    by Toni M Maddox 

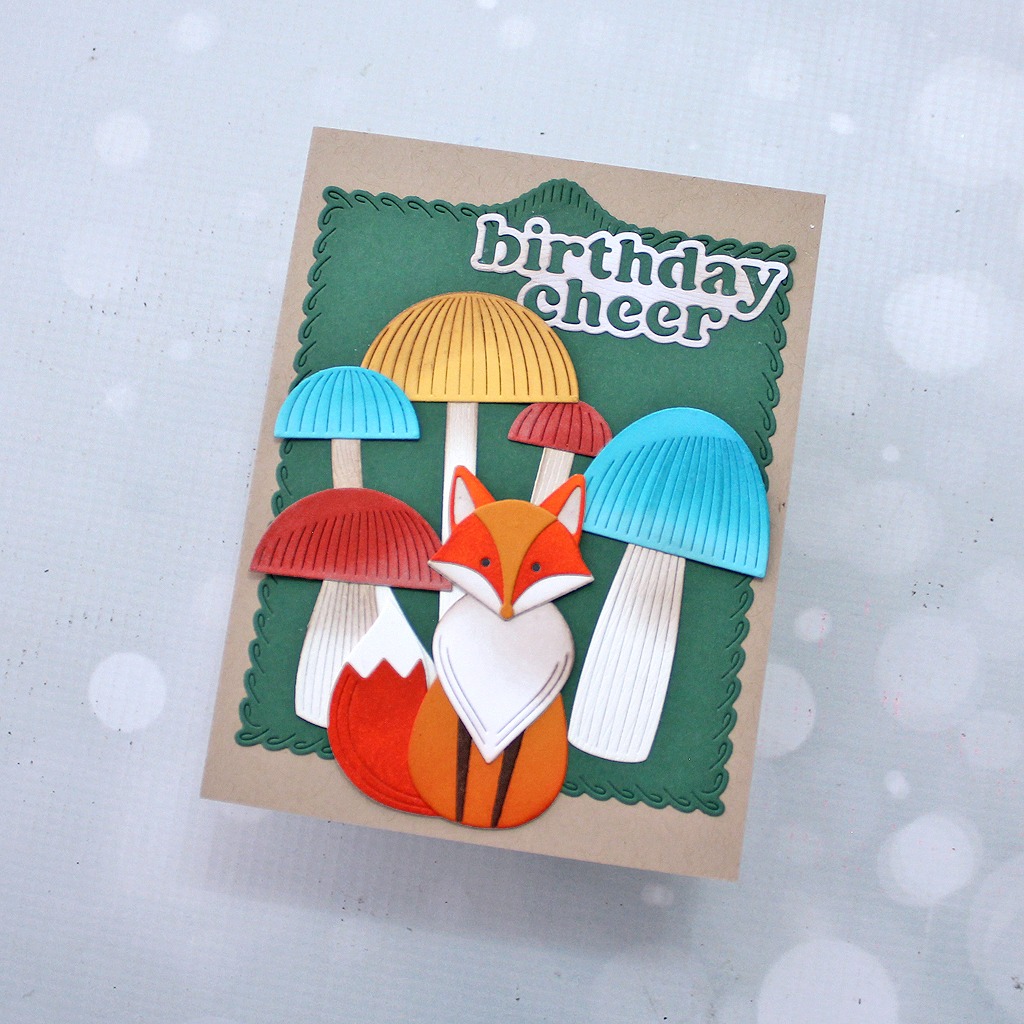
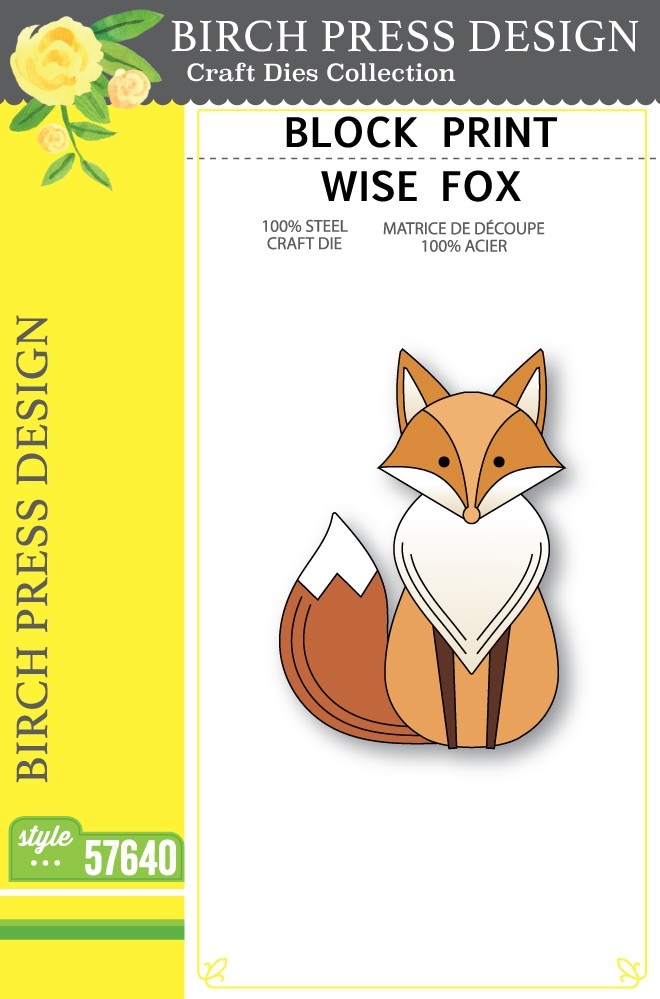
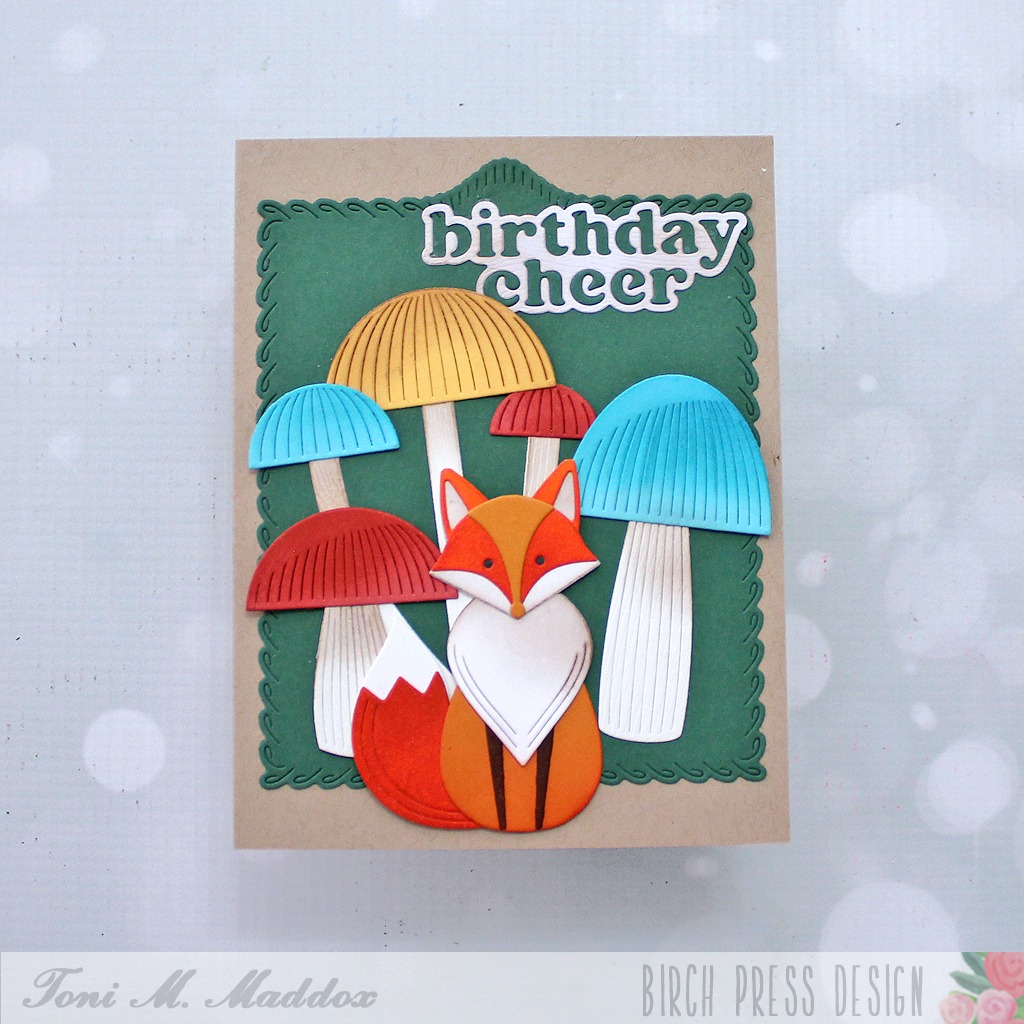
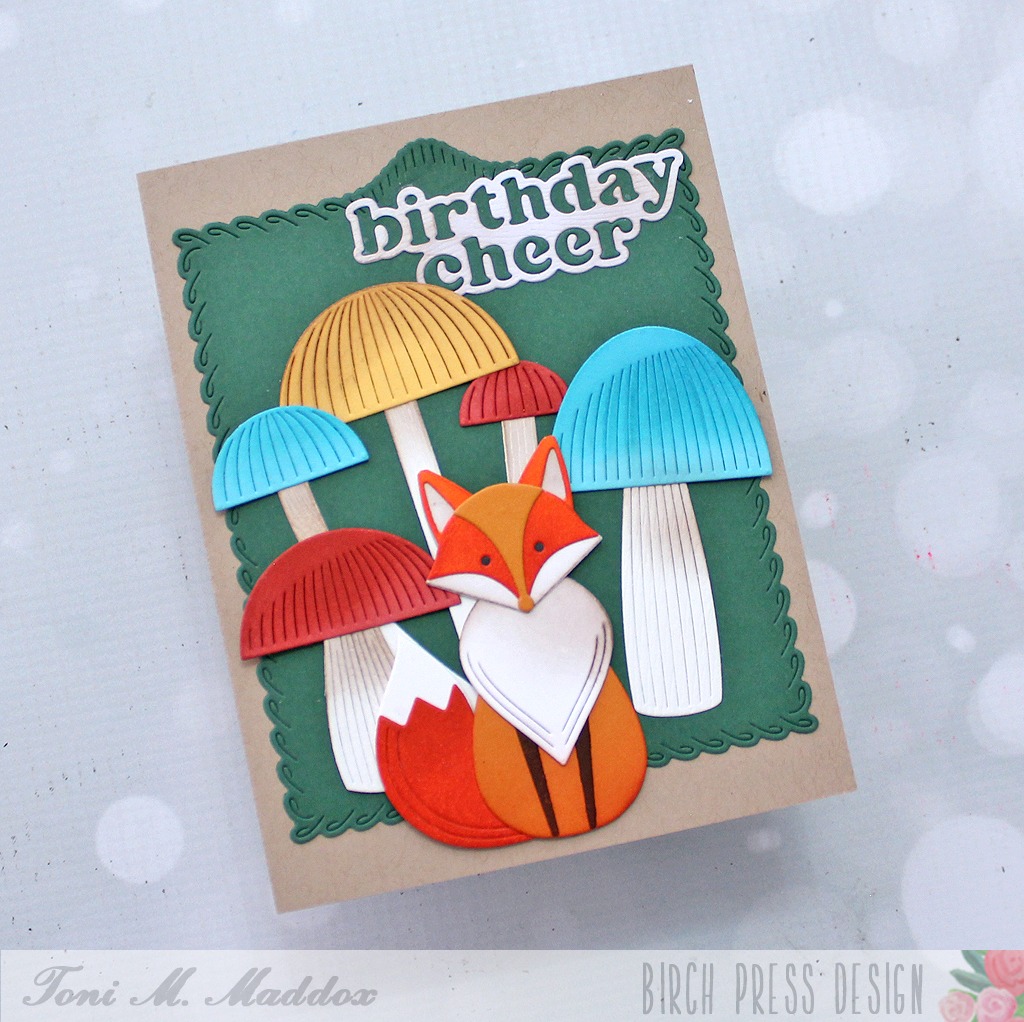
    Hello, friends! Toni with you today sharing a birthday card featuring the Block Print Wise Fox with a number of products from the new release. Let’s head to the mushroom forest!

    I first cut out the Block Print Loop Stitch Frame using Memory Box Lagoon 6×6 cardstock. I adhered this to a kraft base.

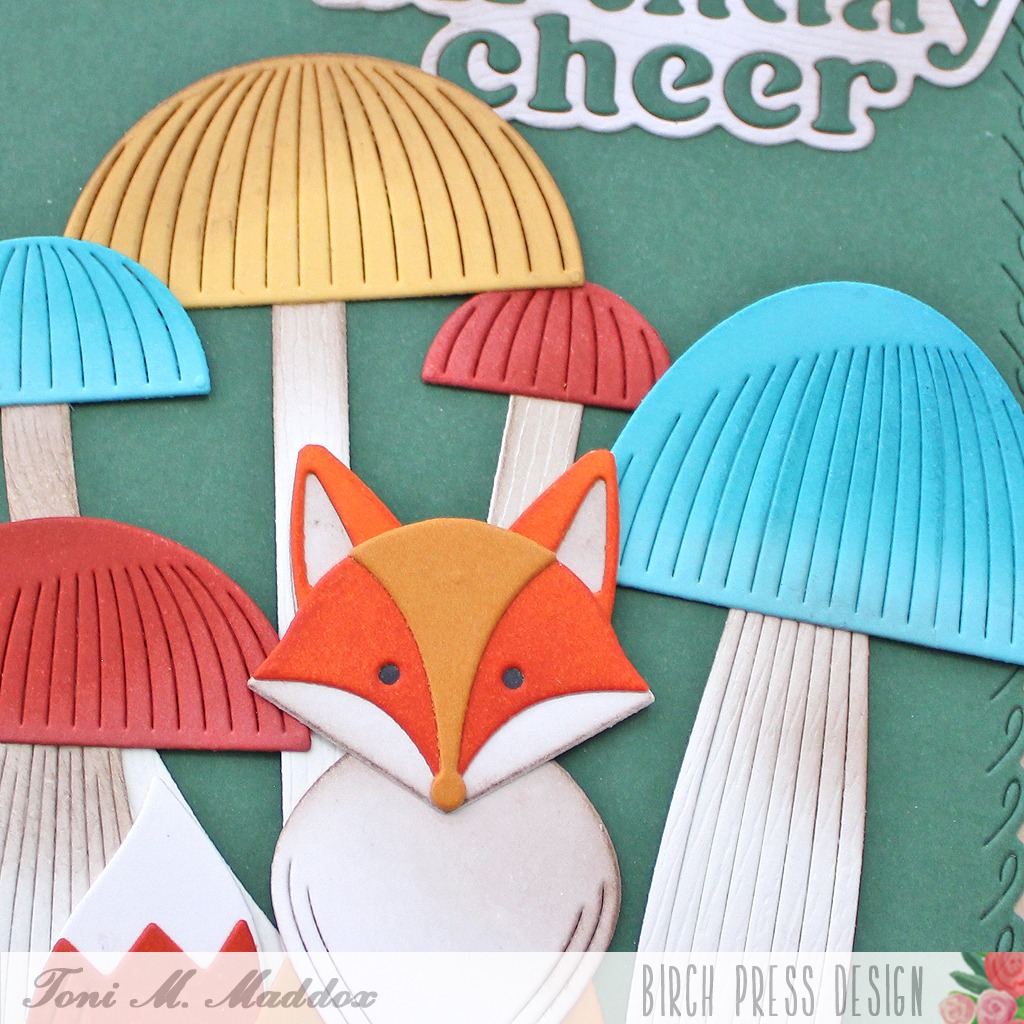
    Next, I cut out a variety of Block Print Tall Mushrooms and Block Print Round Mushrooms from Memory Box Greenery, Sunrise and Lagoon 6×6 cardstock.

    Now comes the Block Print Wise Fox. I think it’s so cute with those mushrooms. I used the same green cardstock with the Birthday Cheer Vintage Sentiment and popped that onto the upper right corner.

    I hope you enjoyed today’s card and have a great rest of your week!

    Feel free to visit my blog, Frankie Helps Craft, for a full list of supplies used and to check out my other creations.

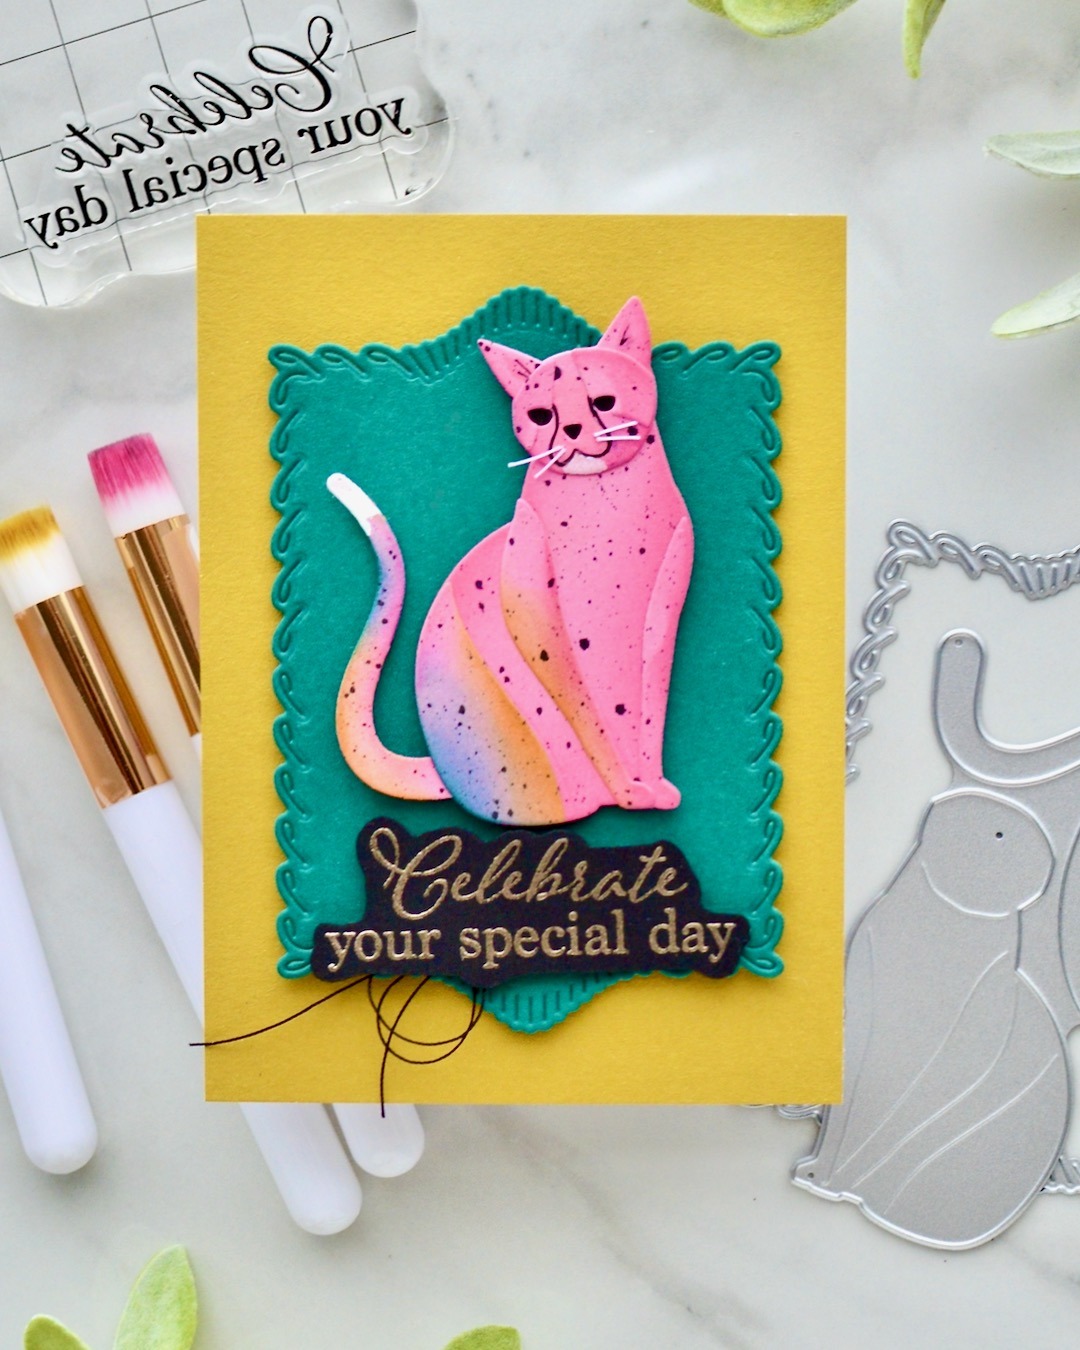
  • Pink Leopard Lookalike  by Savannah O’Gwynn 

    Pink Leopard Lookalike
    by Savannah O’Gwynn 

    Hello, BPD friends!

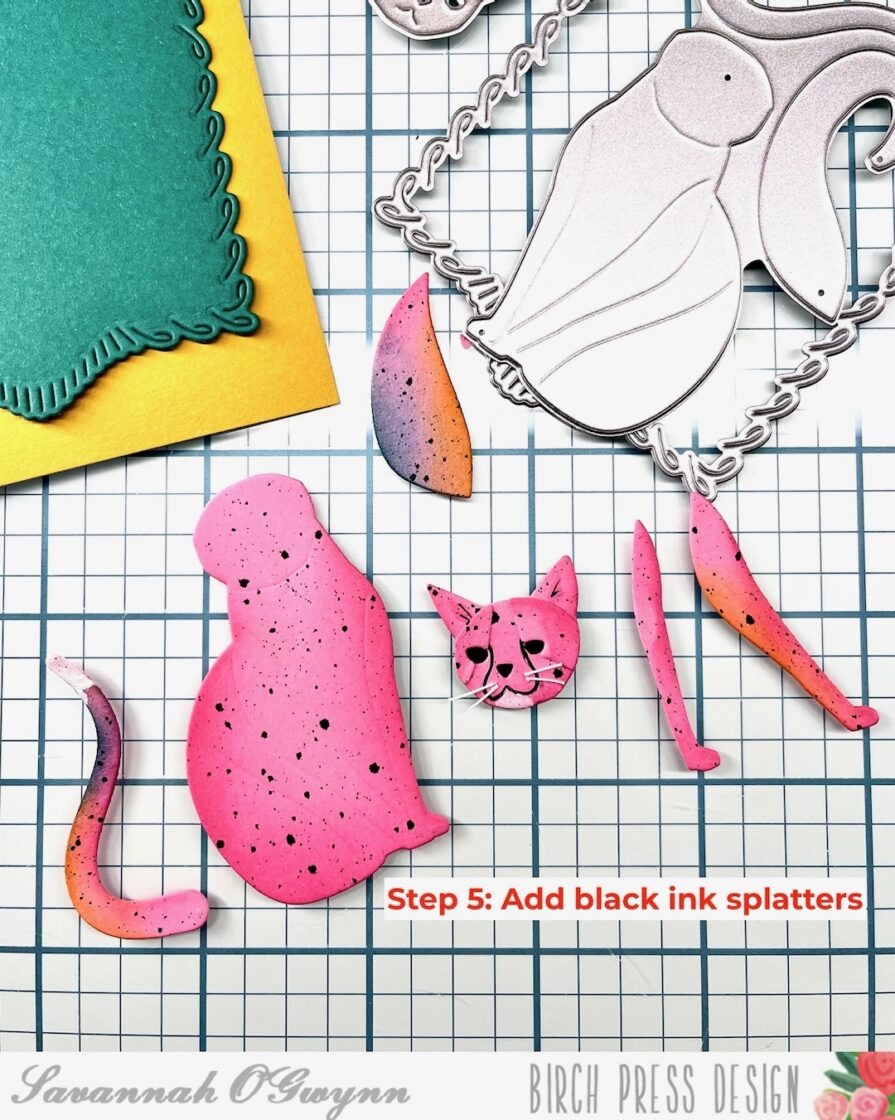
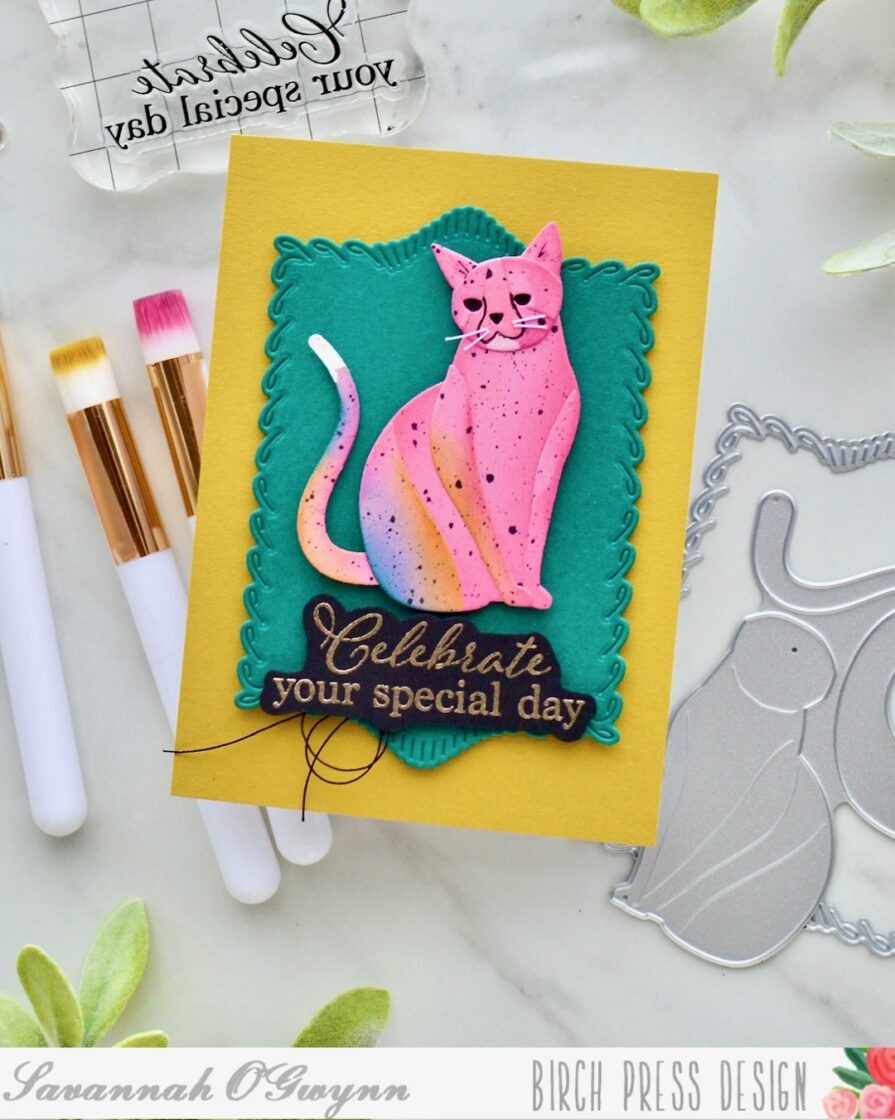
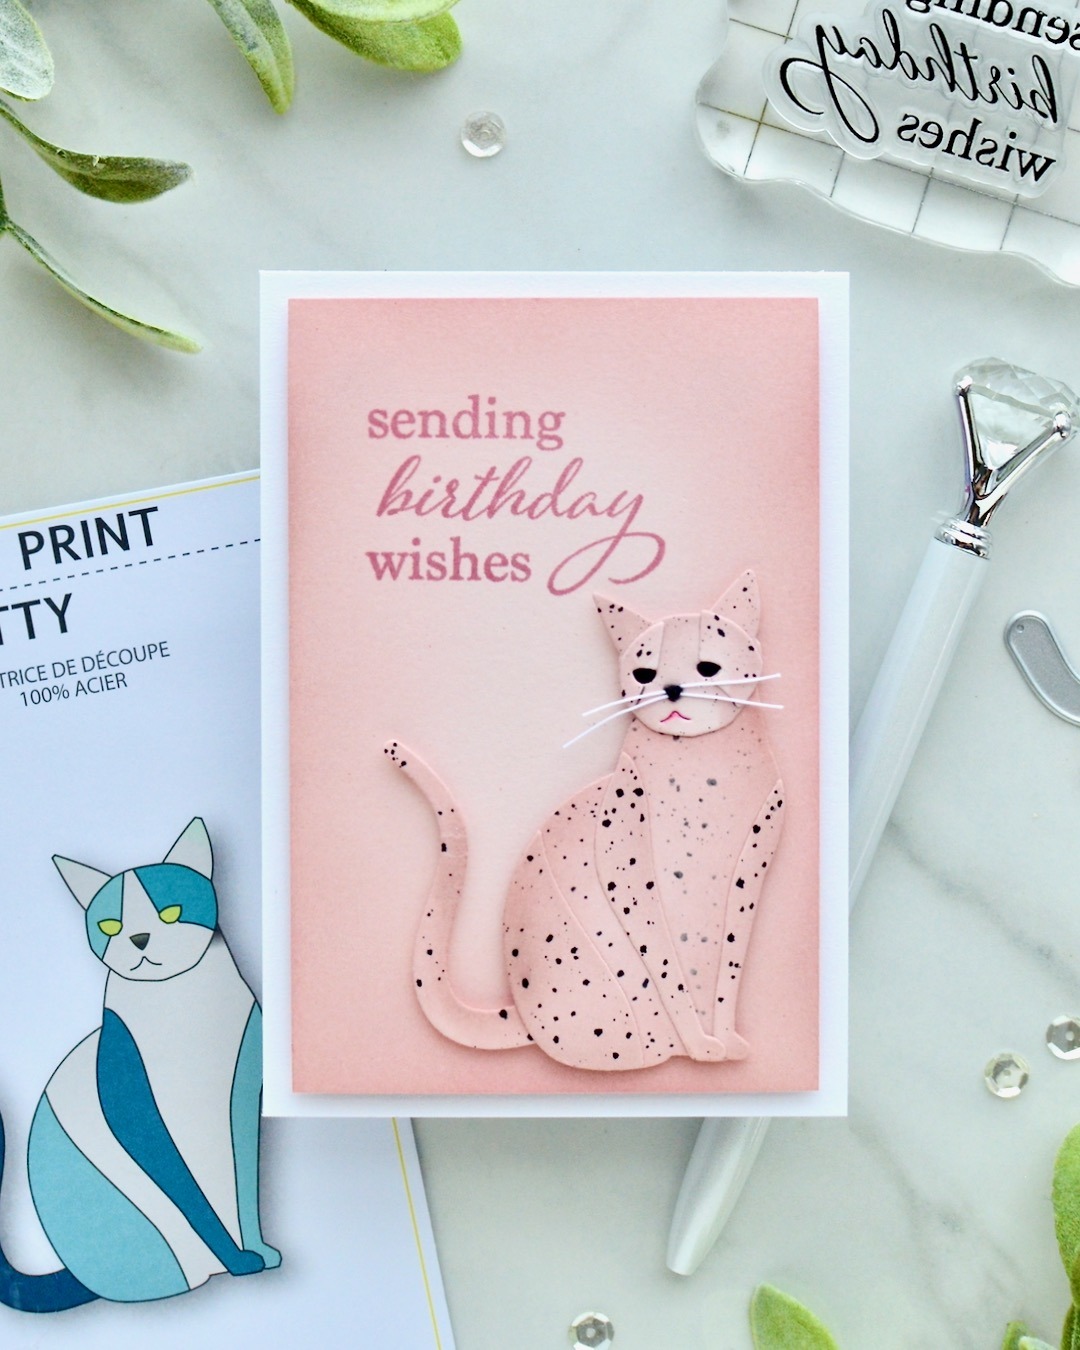
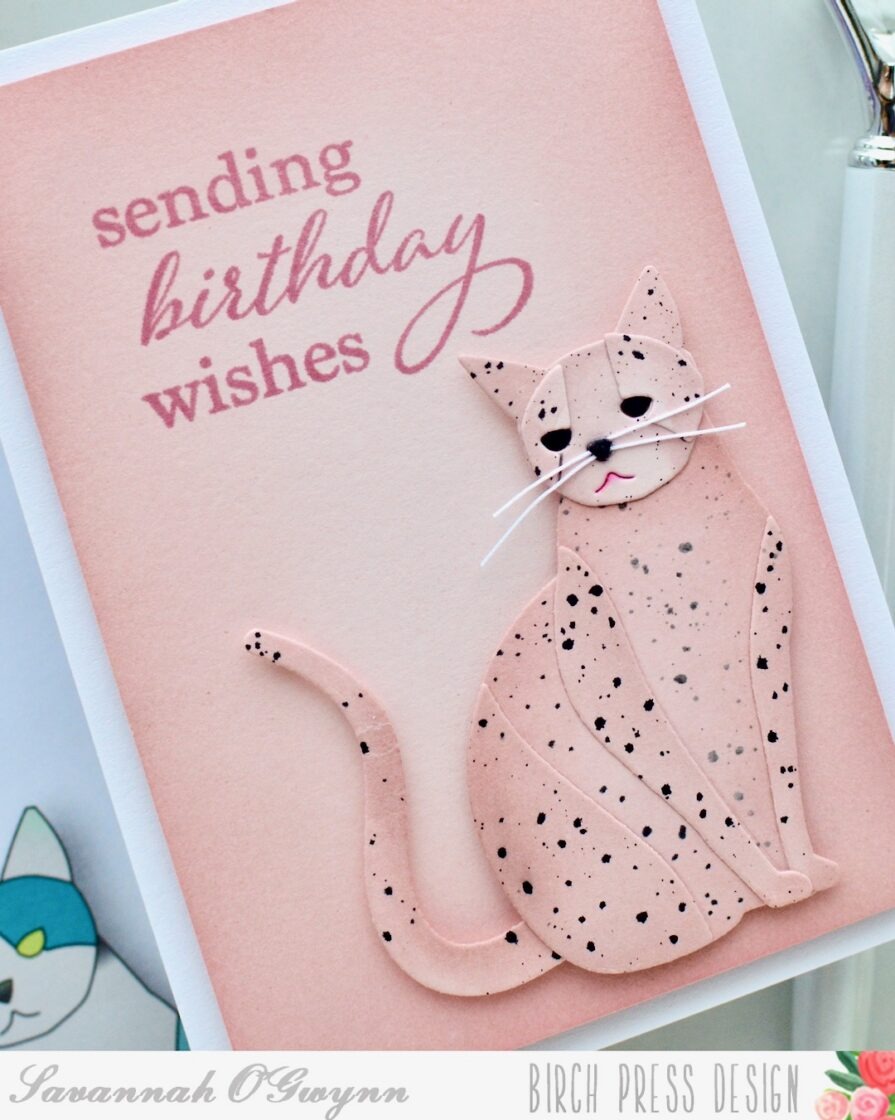
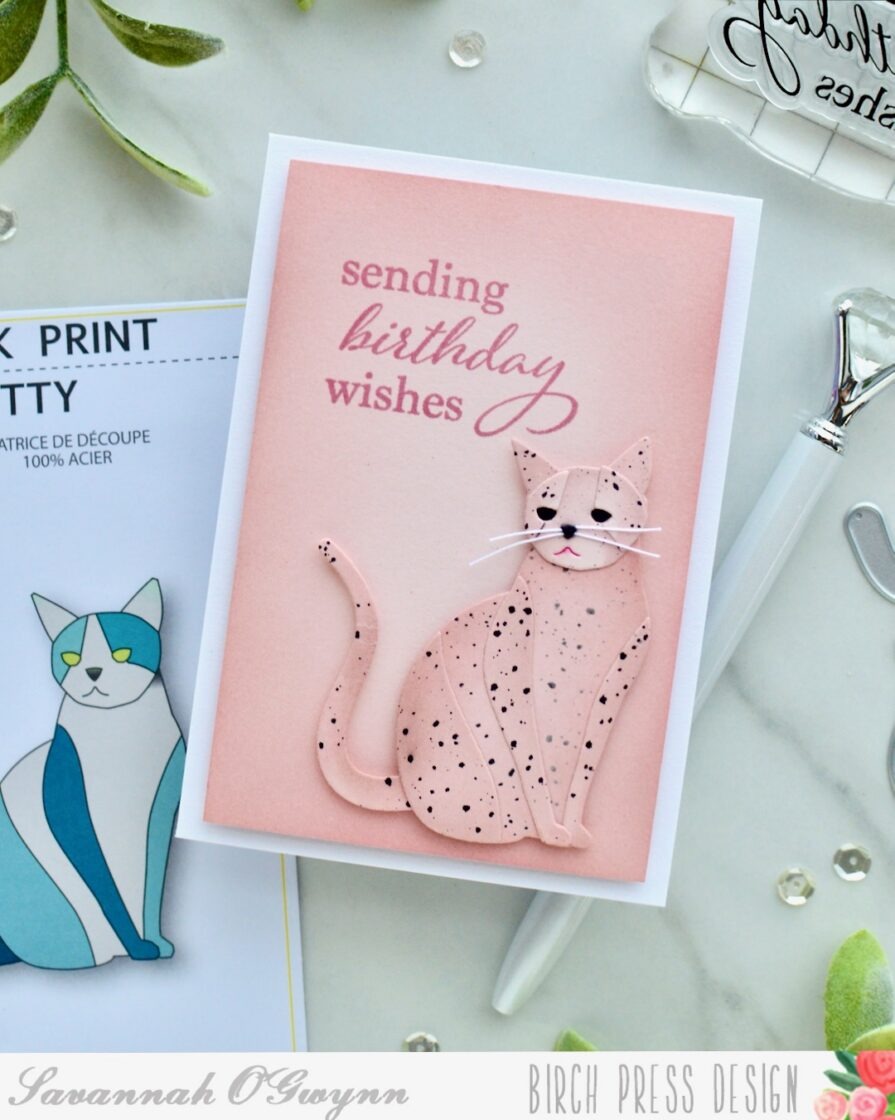
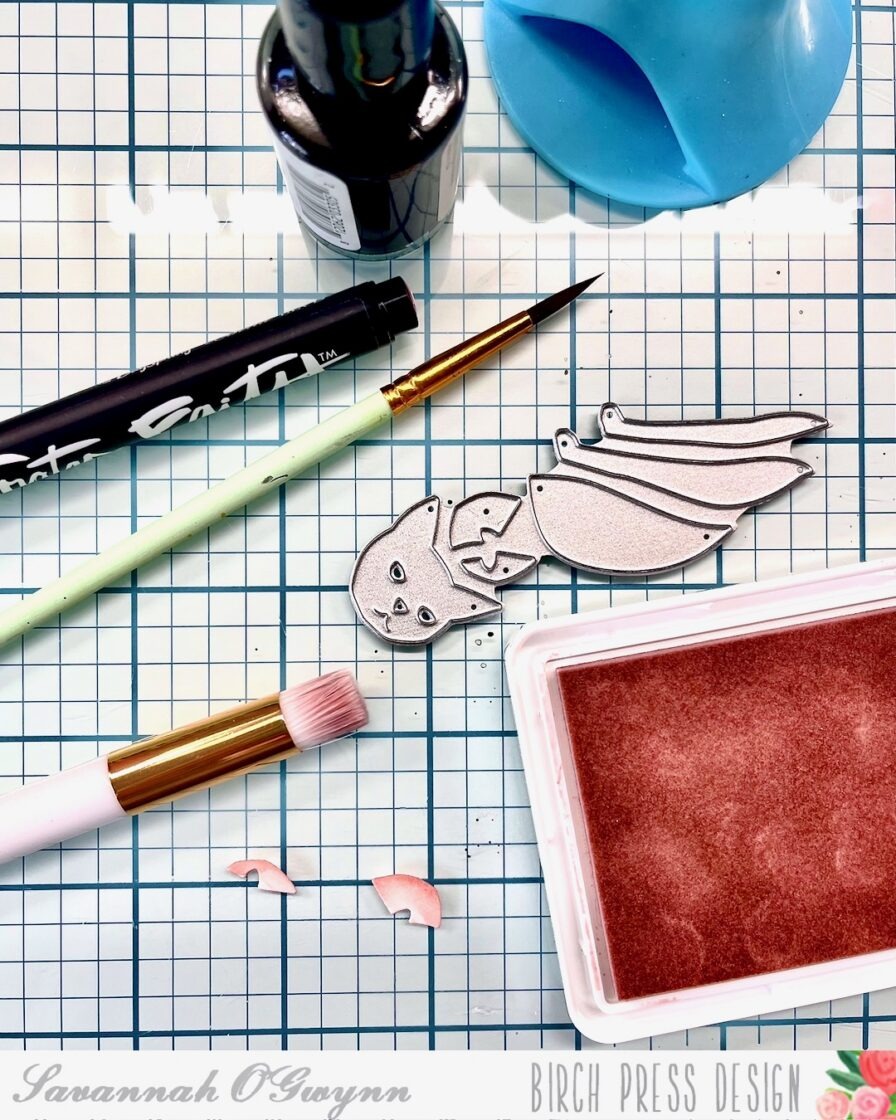
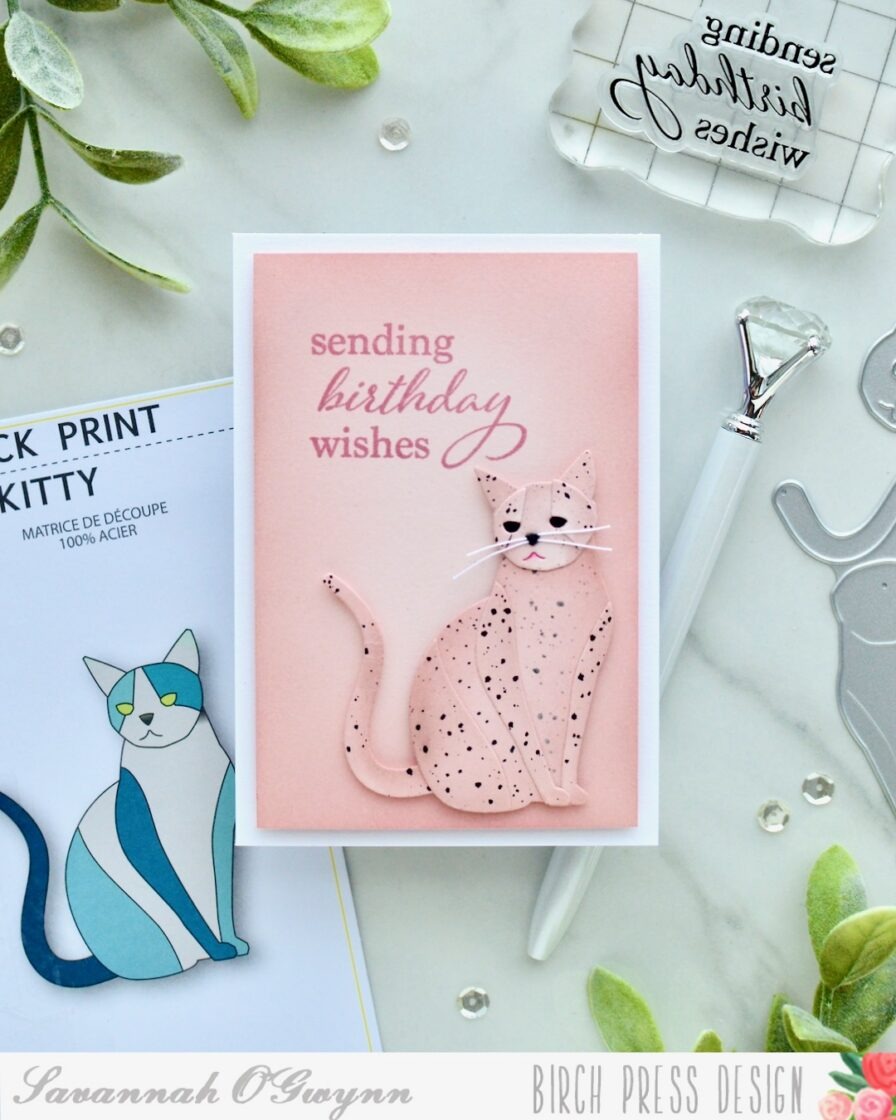
    I’m happy to be back sharing another crazy idea I had 🙃 When I saw the Block Print Kitty dies, I thought it looked a lot like a leopard. So I decided to try and make one… a pink leopard!

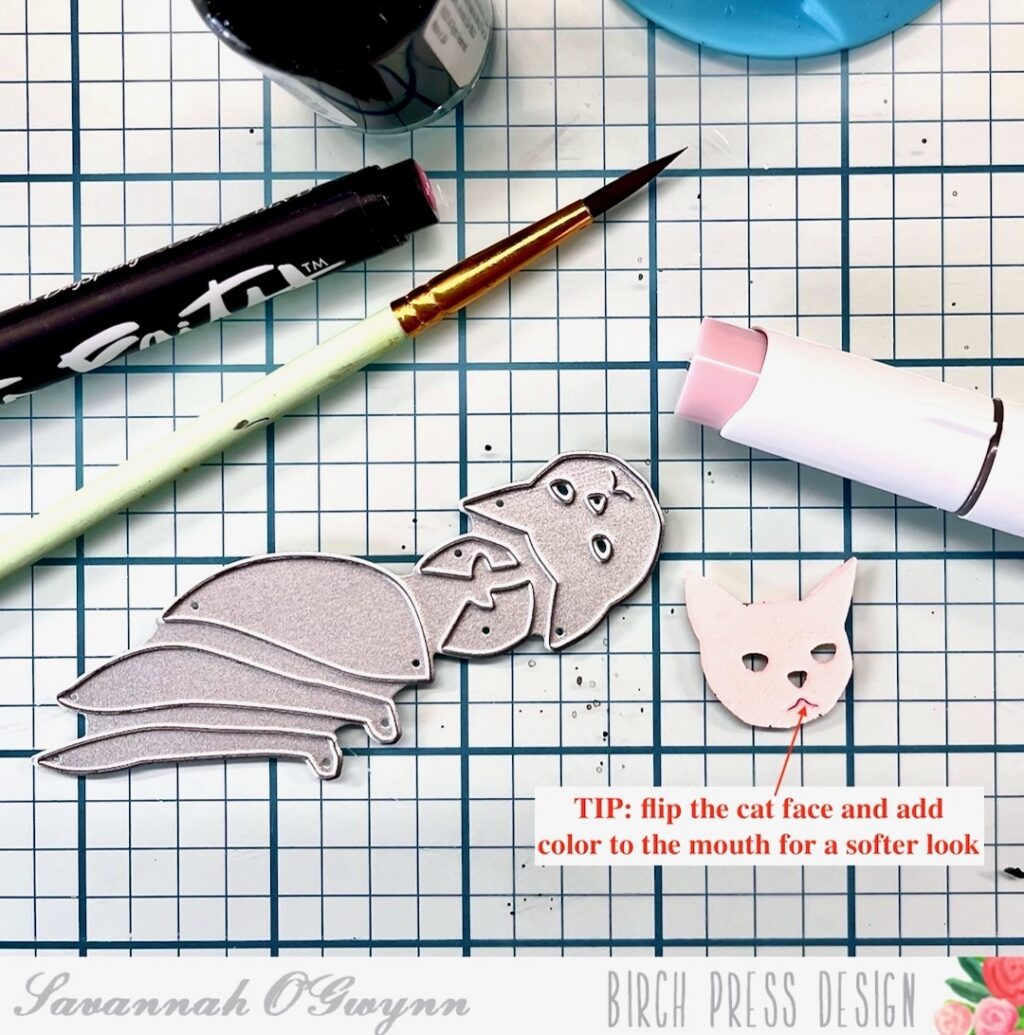
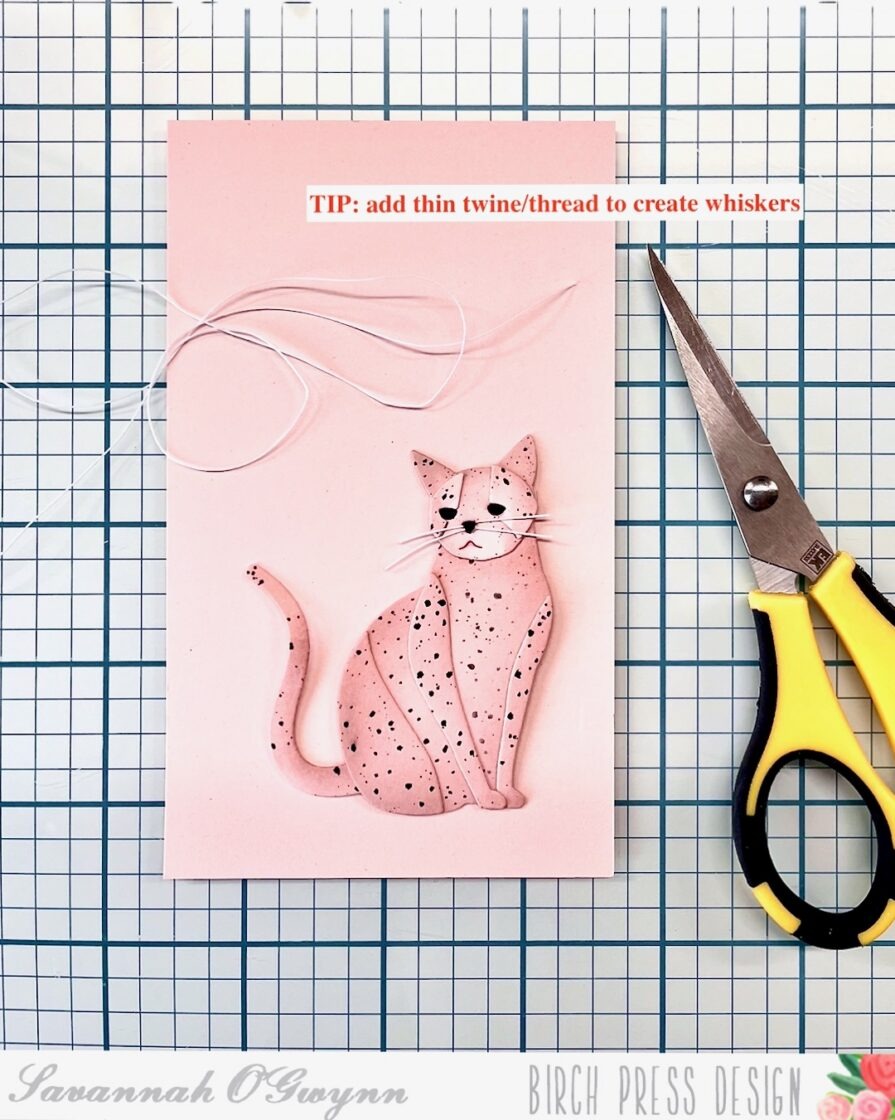
    Here are a few tips and tricks (and maybe a lesson learned for next time) to make this pink leopard:

    • Use matching ink and cardstock for a subtle highlight *Lessoned Learned: I think I would do a darker ink highlight to make the pieces stand out more.
    • Use a light colored marker on the BACK of the cat face for a softer mouth look *Lesson Learned: LIGHT colored marker! I forgot and grabbed a dark marker and had to redo the face! LOL!
    • Add some thin thread or twine to create whiskers
    • *Overall Lesson Learned: I LOVE everything about this card… but I think I can make the face look a bit MORE like a leopard with just a pencil or black marker. Be on the lookout for “Leopard:Take 2” 🙃

    I hope that you are inspired to create a pink leopard kitty! Or maybe you have a better idea for how to make the leopard face- do share any ideas you have for my Take 2 project!

    Please remember to share what you create using these tips, tricks, and techniques or if you were inspired by my creation- I’d love to see what you make with this idea! 

    I’ll be back with MORE soon! 
    THANKS so much for stopping by! Happy crafting:) 

    HUGS <3 Sav

  • A Simple Noteby: Annette Allen

    A Simple Note
    by: Annette Allen

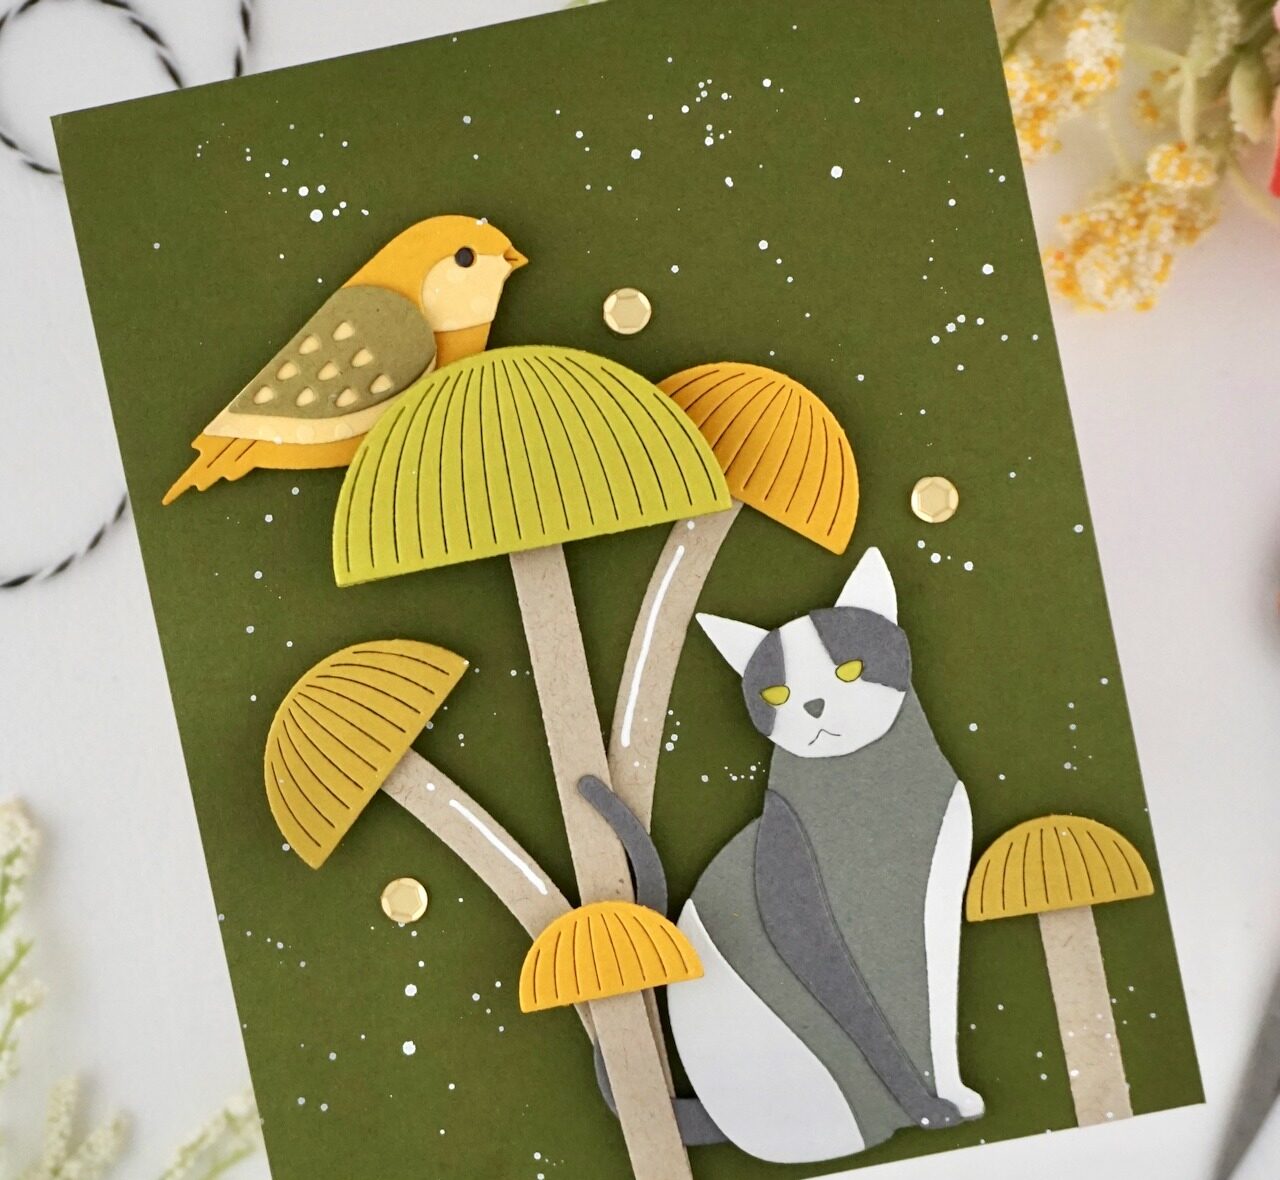
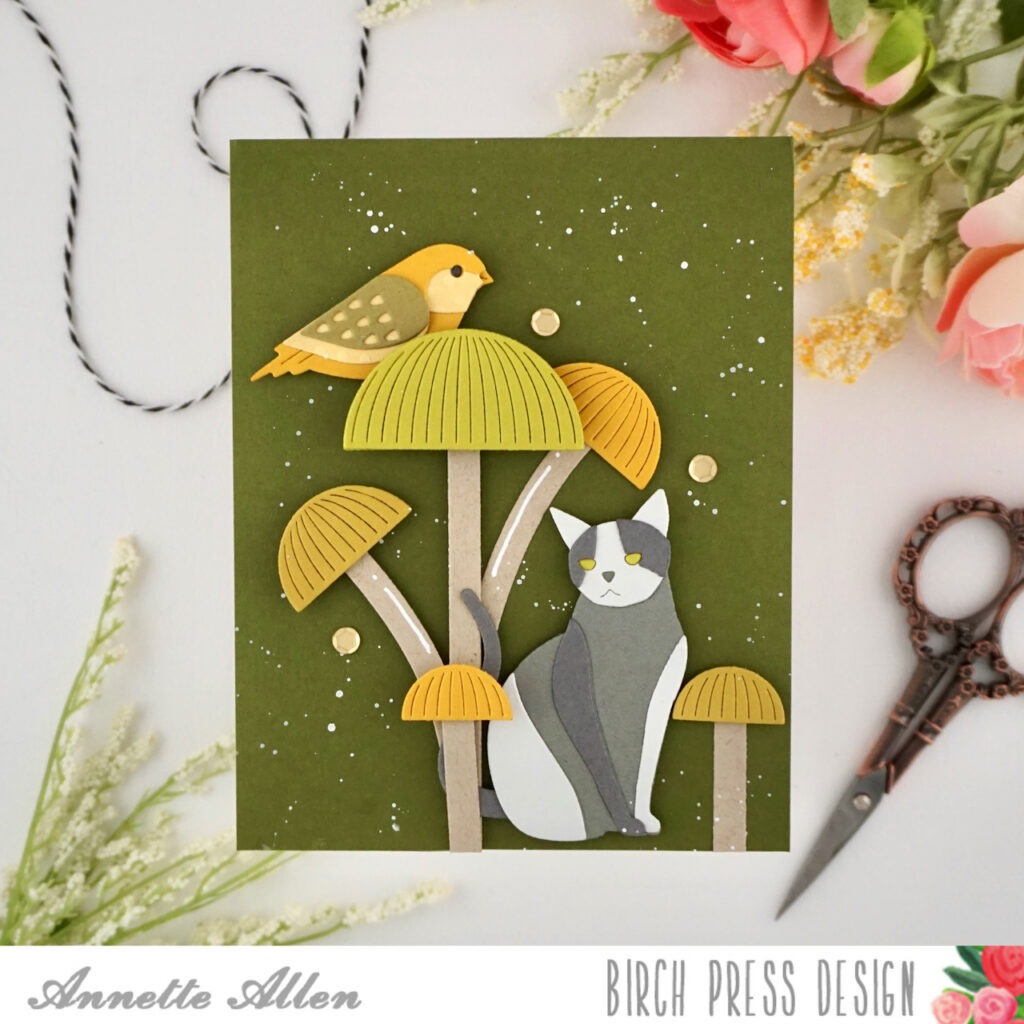
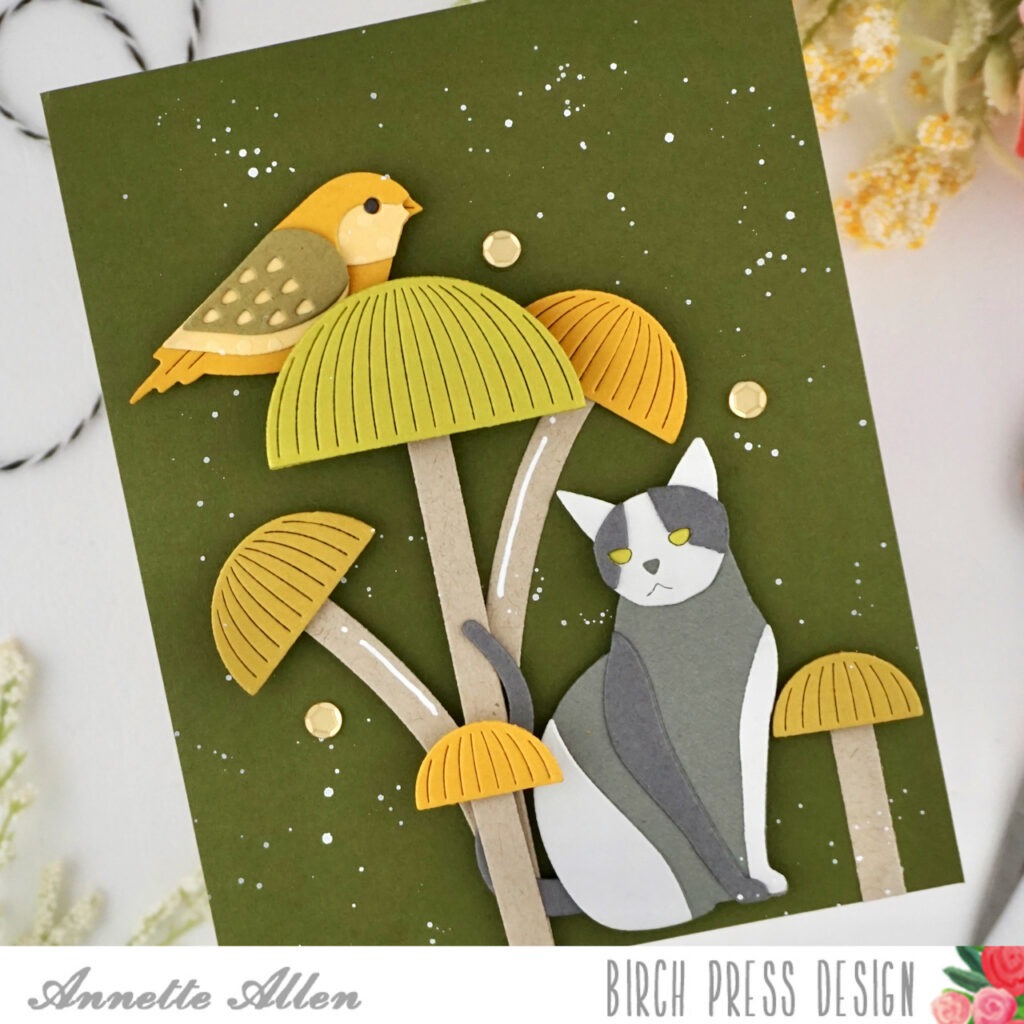
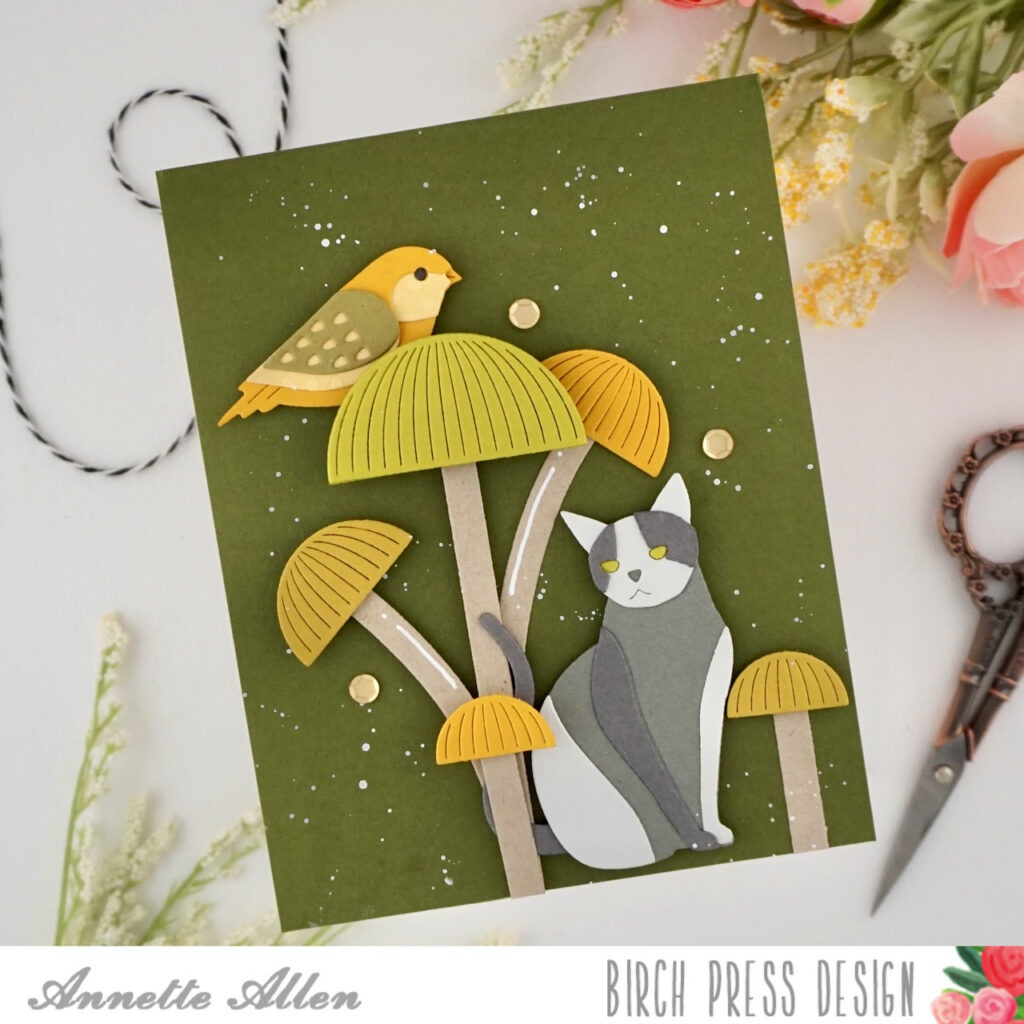
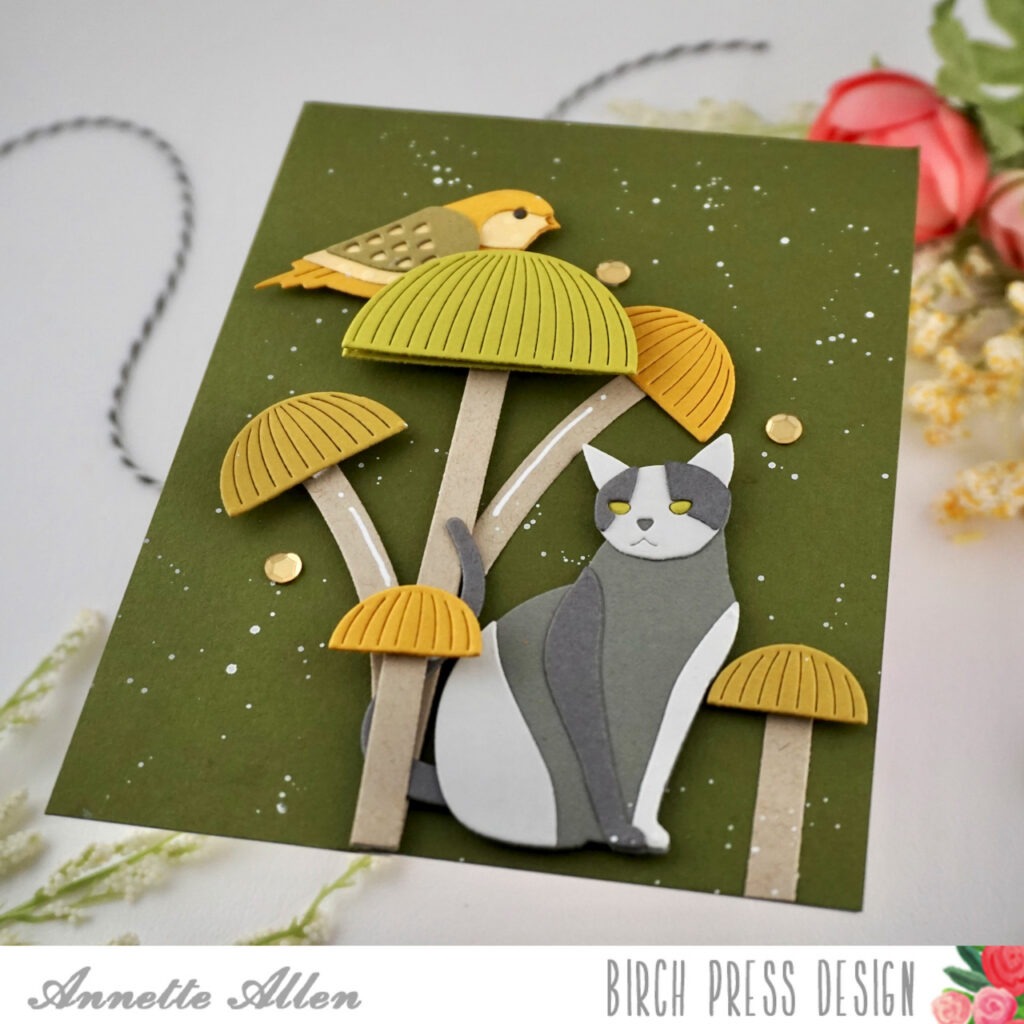
    Welcome Birch Press Design friends, Annette Allen (myclevercreations) is here with you today and I am mixing it up with a few Block Print sets. I am keeping it simple today with no sentiment so you can send out this card for any occasion.

    Create card from white cardstock A2 size.

    Cut an A2 panel on a deep green piece of cardstock and adhere it to your card base.

    Die cut the Block Print tall Mushrooms (57672) on colors that complement your green background. I die cut some of the mushrooms a few times so I can fill my card.

    Adhere the Tall Mushrooms pieces and then add them to your card using liquid glue and foam tape. The foam tape gives your card a little dimension.

    Now die cut the Block Print Kitty and one of the Bird Duo. Pick colors that compliment your card. You can see my theme is leaning more towards fall colors.

    Adhere the pieced together to create your Kitty and Bird and then add them to your card using foam tape.

    Add a few gold sequins here and there and mix some opaque with water and splatter it on your card. I was going for a little less white splatters but oh well, I got a little wild. HAHA.

    Mix and match your block print sets to create fun scenes. Sometimes it is the colors you choose that really pull the card together.

    I hope that you are inspired. Thank you for stopping by.

  • Autumn Kittyby Christina Rannow

    Autumn Kitty
    by Christina Rannow

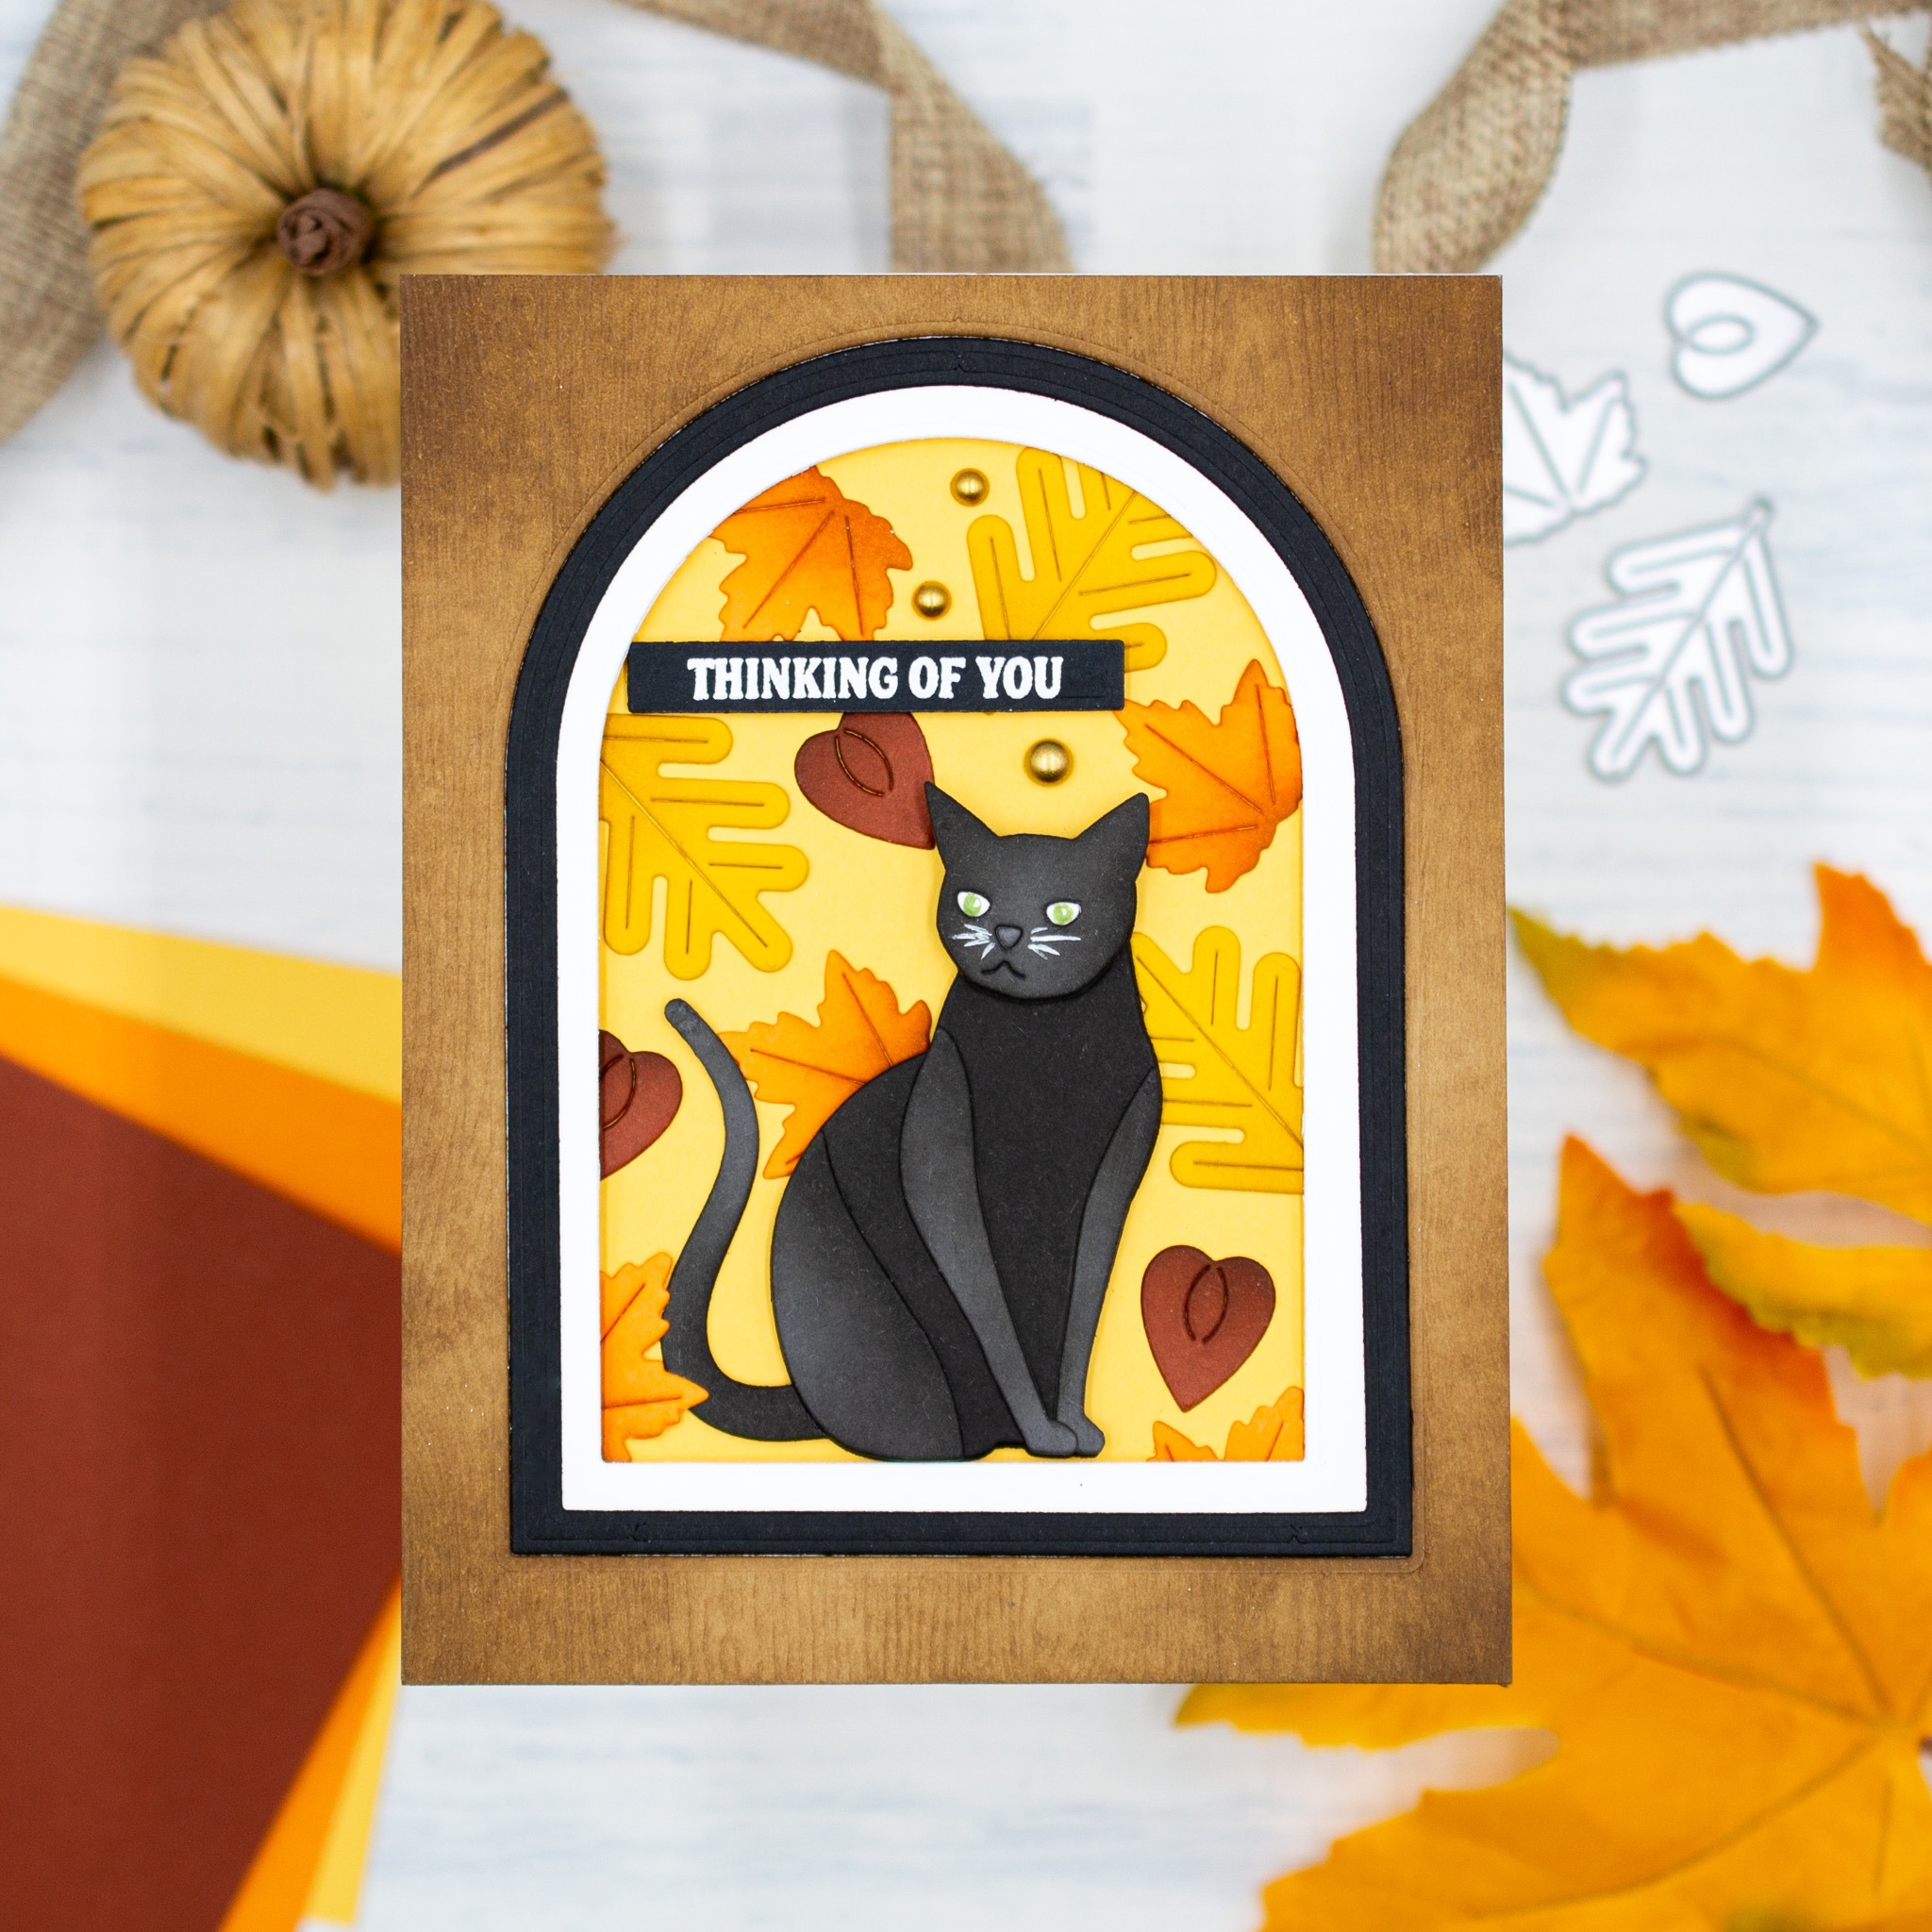
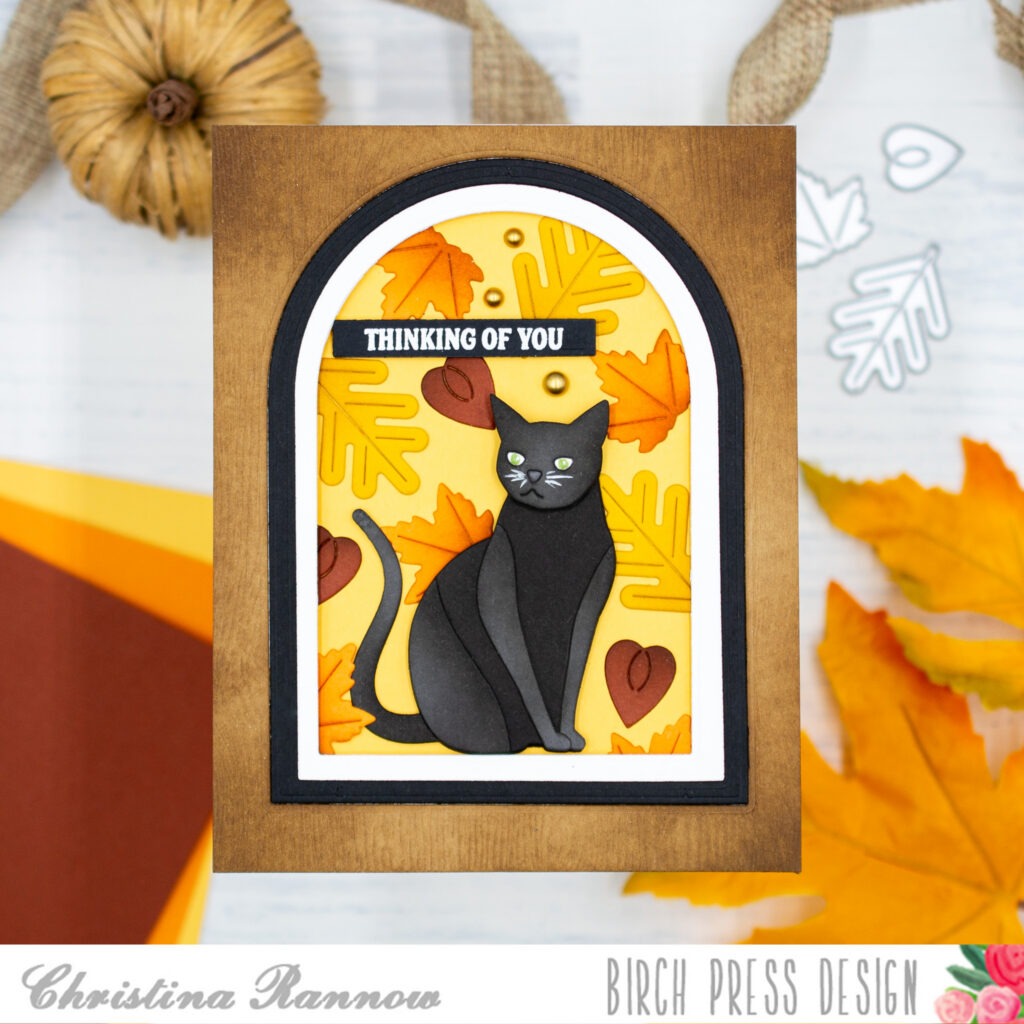
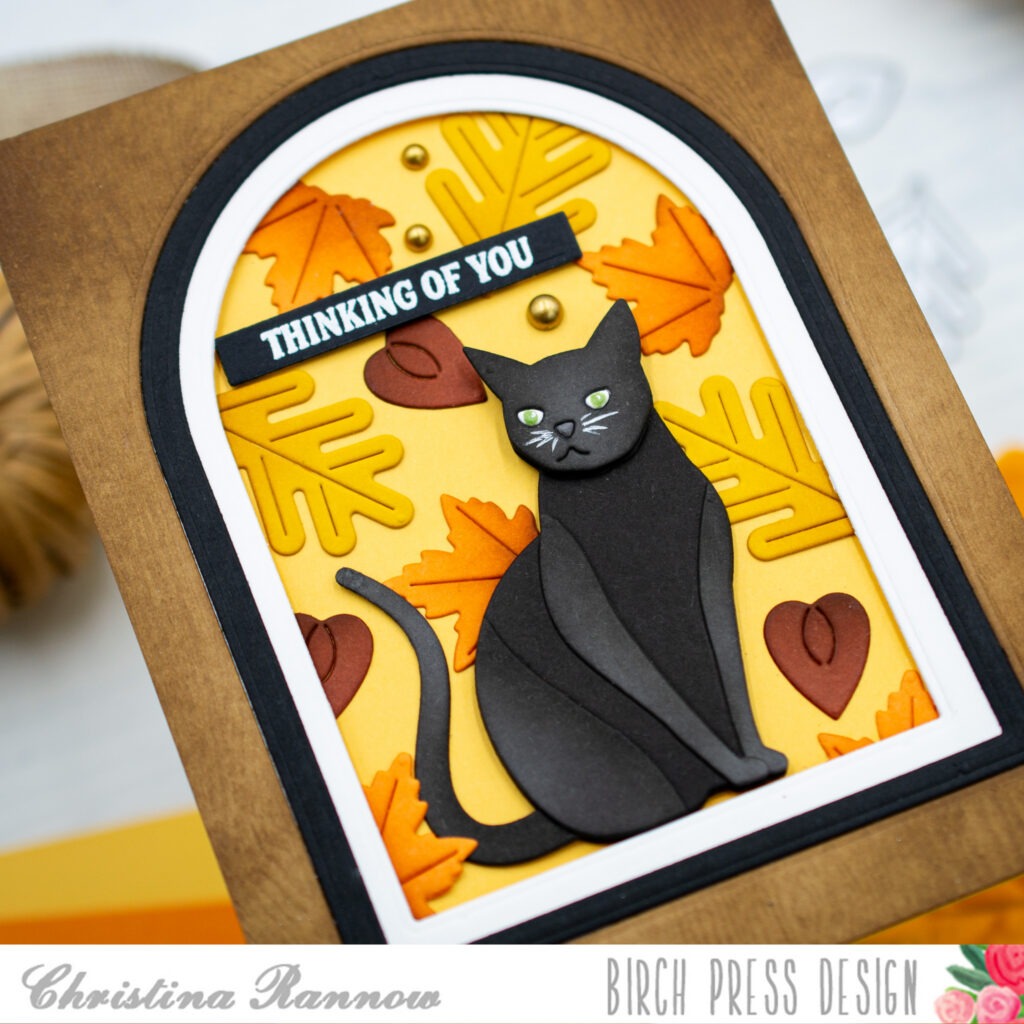
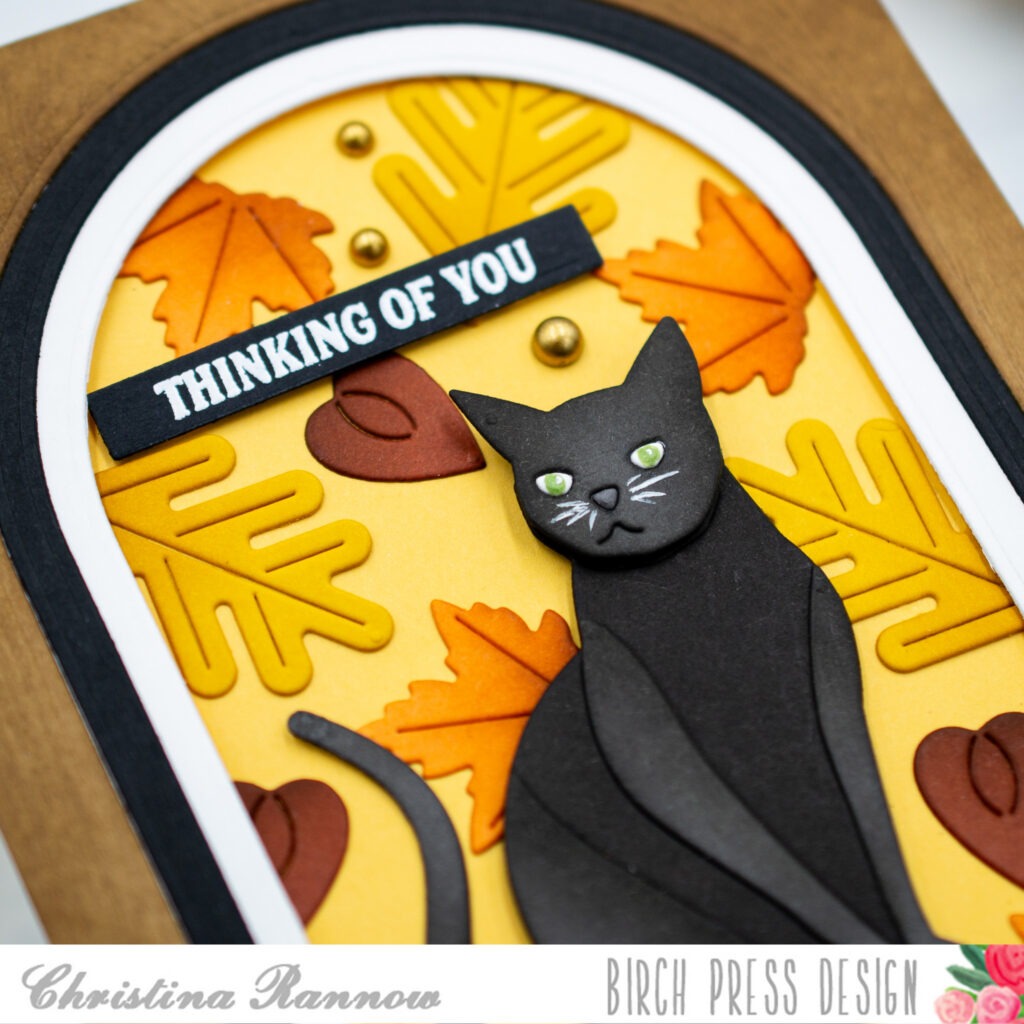
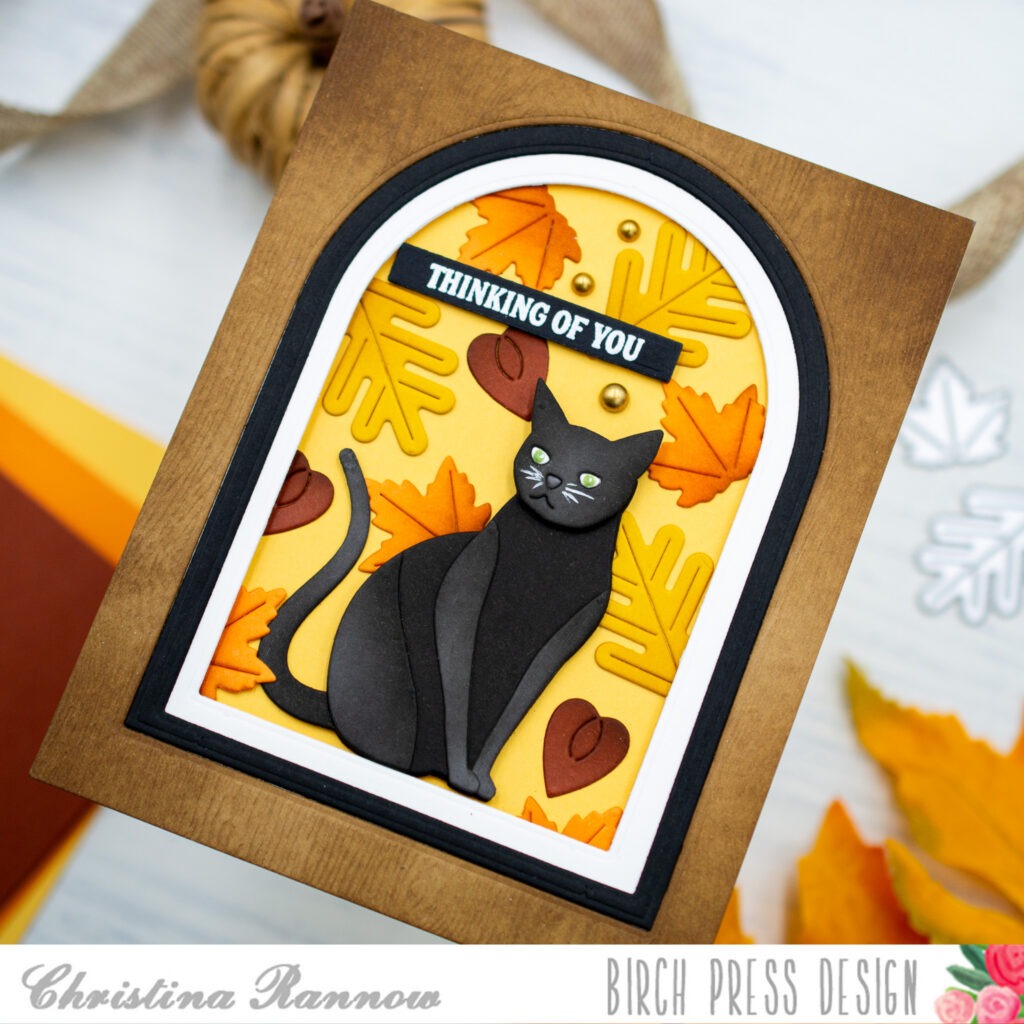
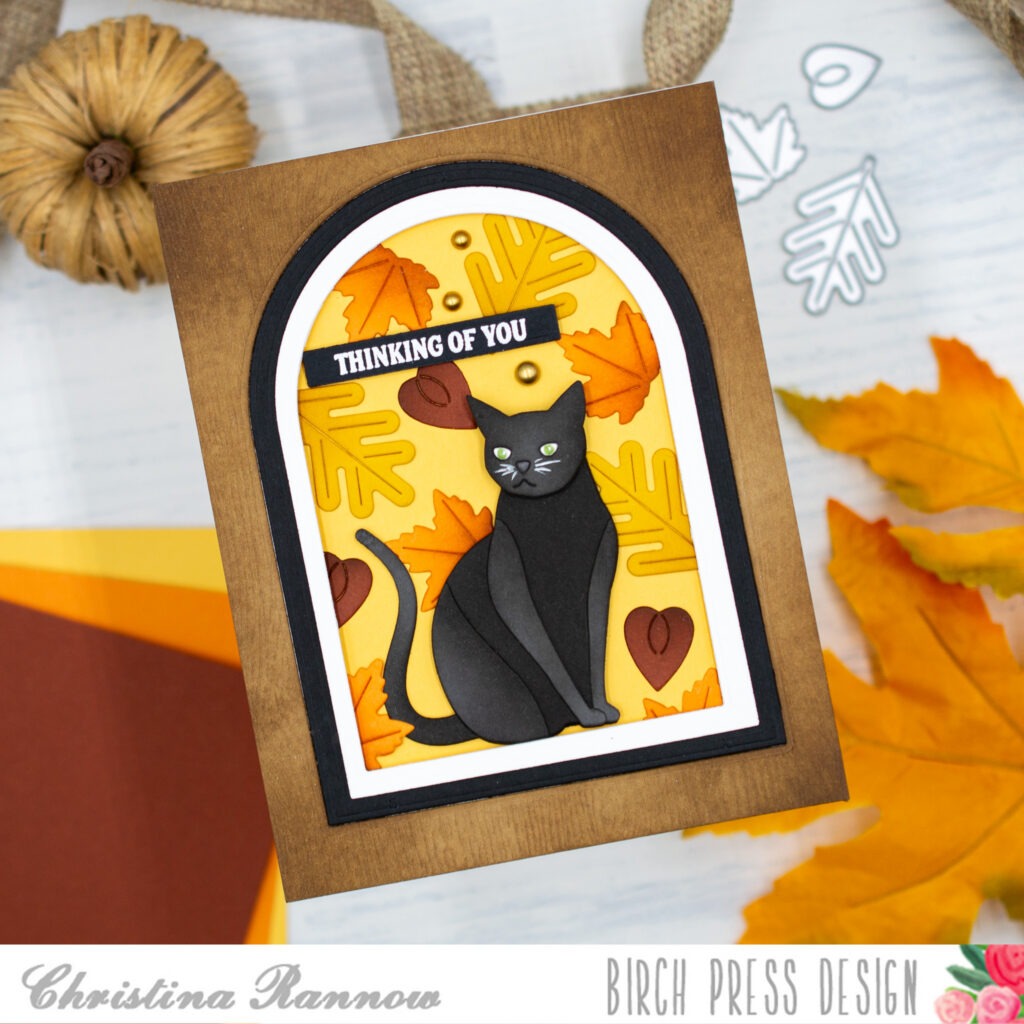
    Hello crafty friends! I can tell the seasons are changing, although it is still quite warm where I am. While I wait for cooler weather and fuzzy sweaters, I have a warm and cozy autumn-inspired card to share with you today featuring the Block Print Kitty craft dies. I gave this handsome kitty an arched window to perch in and surrounded him with a flurry of fall leaves. Let’s take a closer look at how this card came together.

    My first step was to create the background and window scene for the kitty. Using basic nesting arched dies, I die-cut a medium-sized arch from a white A2 cardstock panel. Next I created an arched frame by die-cutting two of the larger arches from black cardstock, and finally I die-cut the larger arch from an A2 kraft woodgrain cardstock panel. Before assembling the layered background, I blended Gathered Twigs Distress Ink into the woodgrain panel for a darker, richer woodgrain. Then I layered the woodgrain panel onto the white panel before finally inlaying the black frame along the woodgrain arch. I secured all the layers with a liquid adhesive and then attached them using thin foam squares to a piece of buttery yellow cardstock trimmed to 4.25 x 5.5 inches. Attaching the panels with foam squares gave more dimension to the window and gave the kitty a place to perch.

    My next step was to die-cut and assemble the other elements of my card design. I chose gold, orange, and rust-colored cardstock for die-cutting the leaves and added shading to them with a darker coordinating ink color. I die-cut the pieces for the kitty from a dark gray cardstock and used Black Soot Distress Ink for adding more color and shading to the pieces before assembling him. Then, to finish the kitty, I added some facial details. I used a Copic marker for his green eyes and a white gel pen for his whiskers and the highlights in his eyes. 

    Now it was time to bring it all together. I attached the leaves to the yellow background with a liquid adhesive, tucking them under the arches and trimming them if needed. Then I perched the kitty in the center, securing him in place with thin foam squares. I heat-embossed a sentiment on a black sentiment strip with white embossing powder and attached it to my scene with more thin foam squares. The finishing touch was a few matte gold pearls.

    Thank you for stopping by to read about my autumn-inspired card featuring the Block Print Kitty and the Fall Leaves craft dies. Happy crafting!

  • Fall Mushrooms by Rosemary Dennis

    Fall Mushrooms
    by Rosemary Dennis

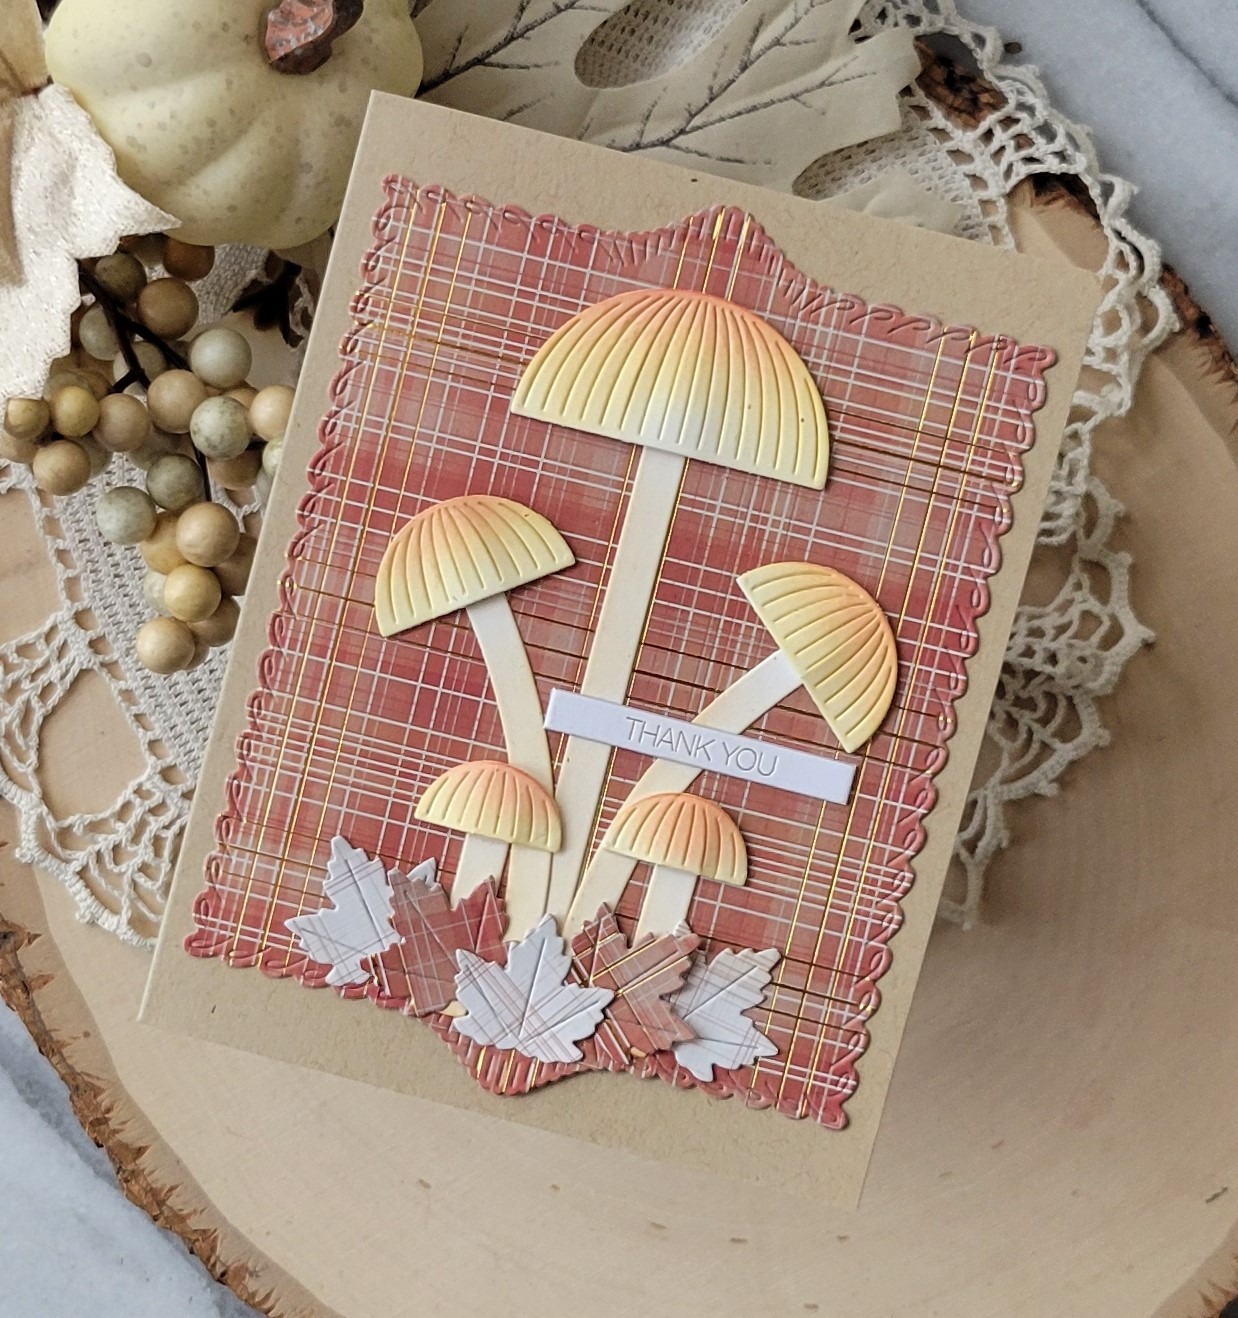
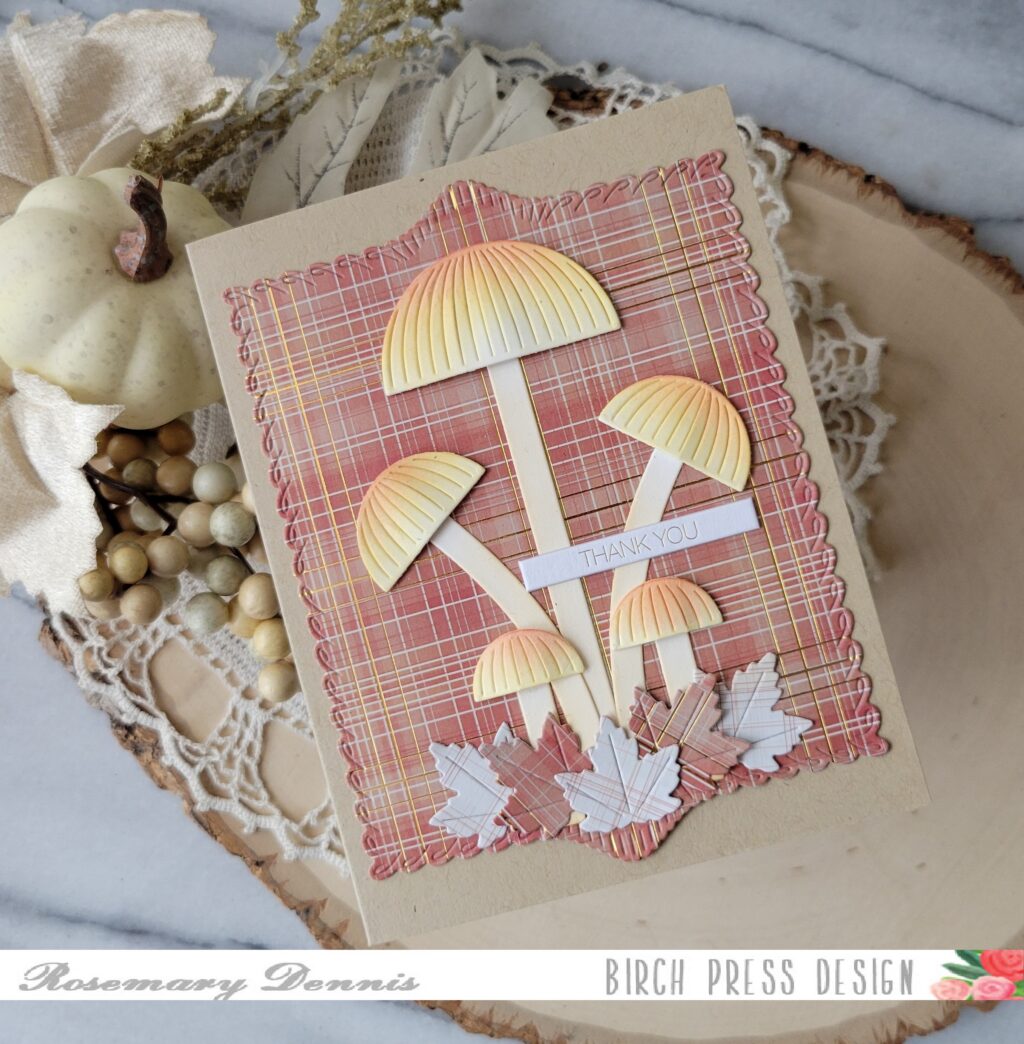
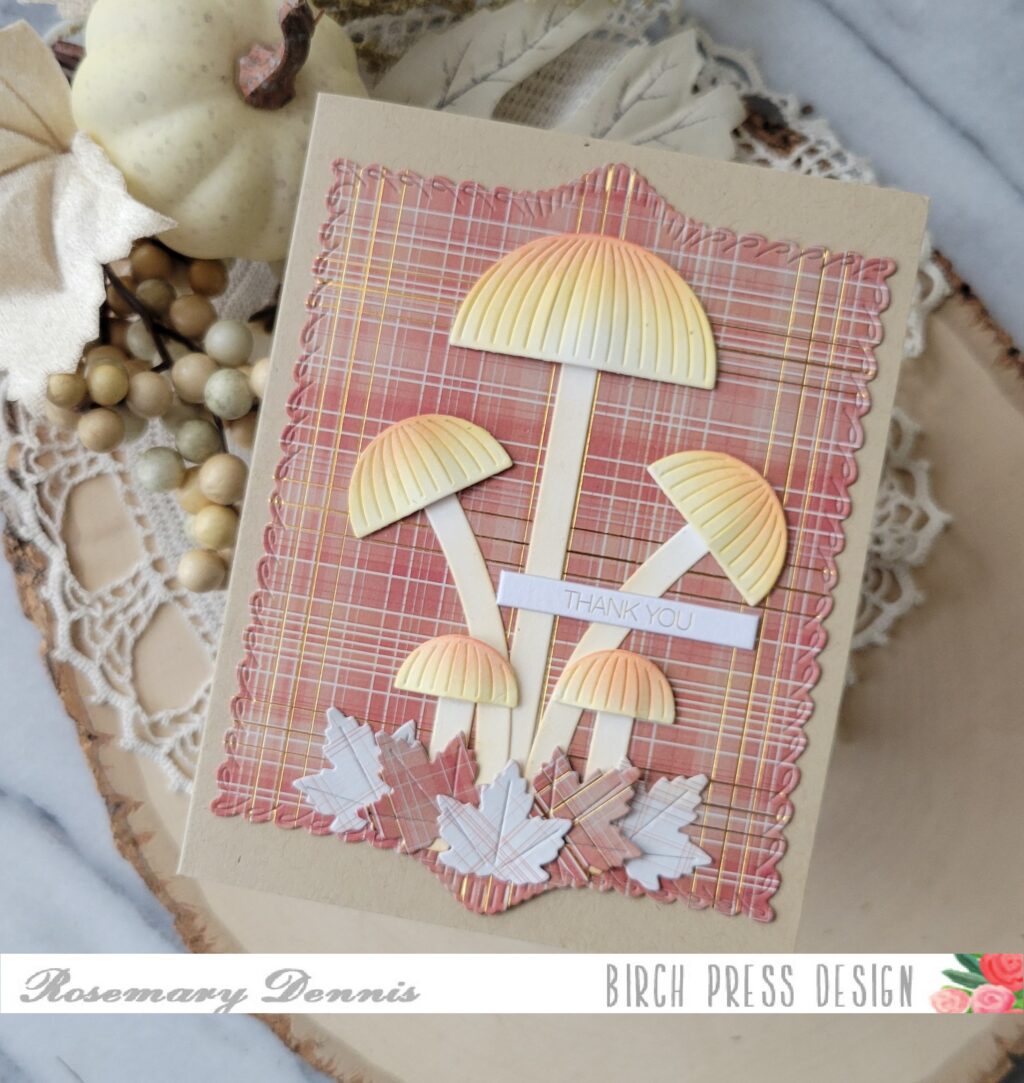
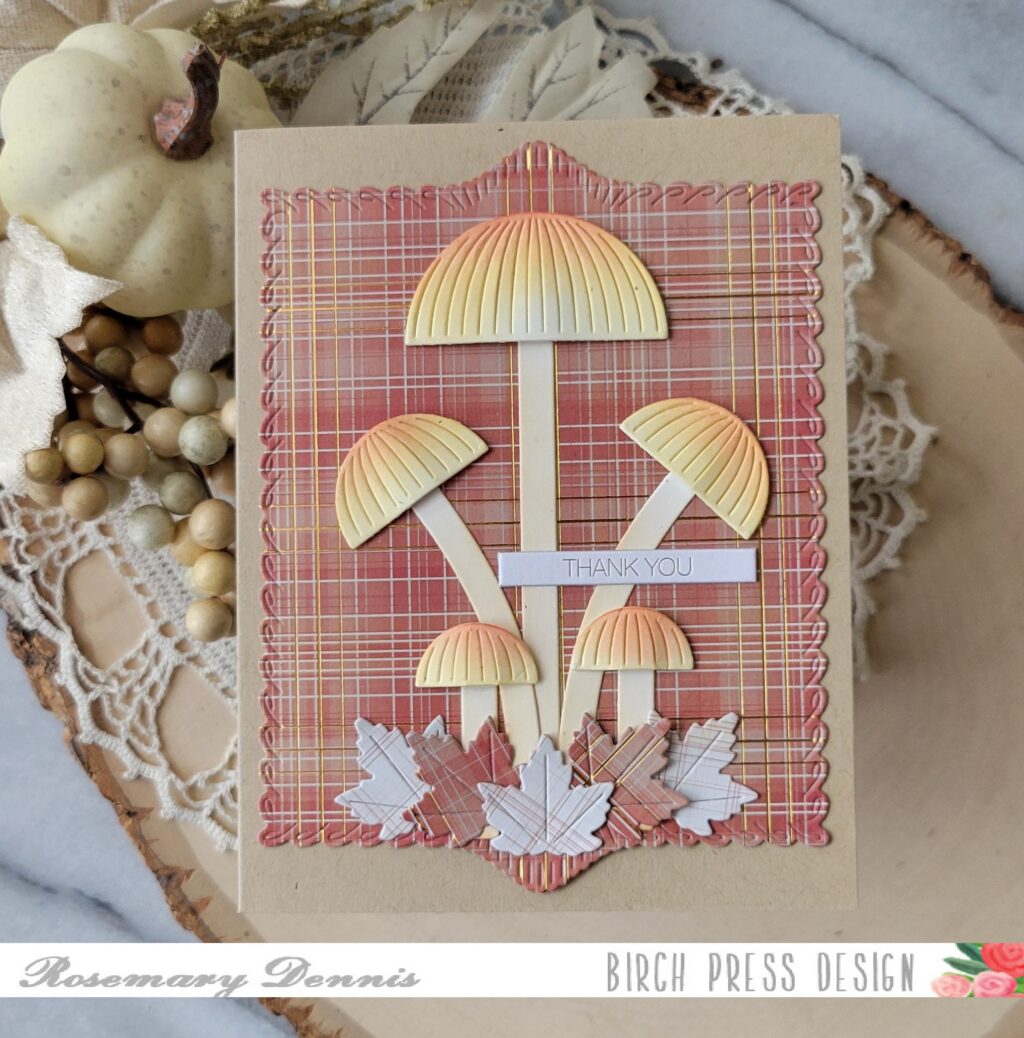
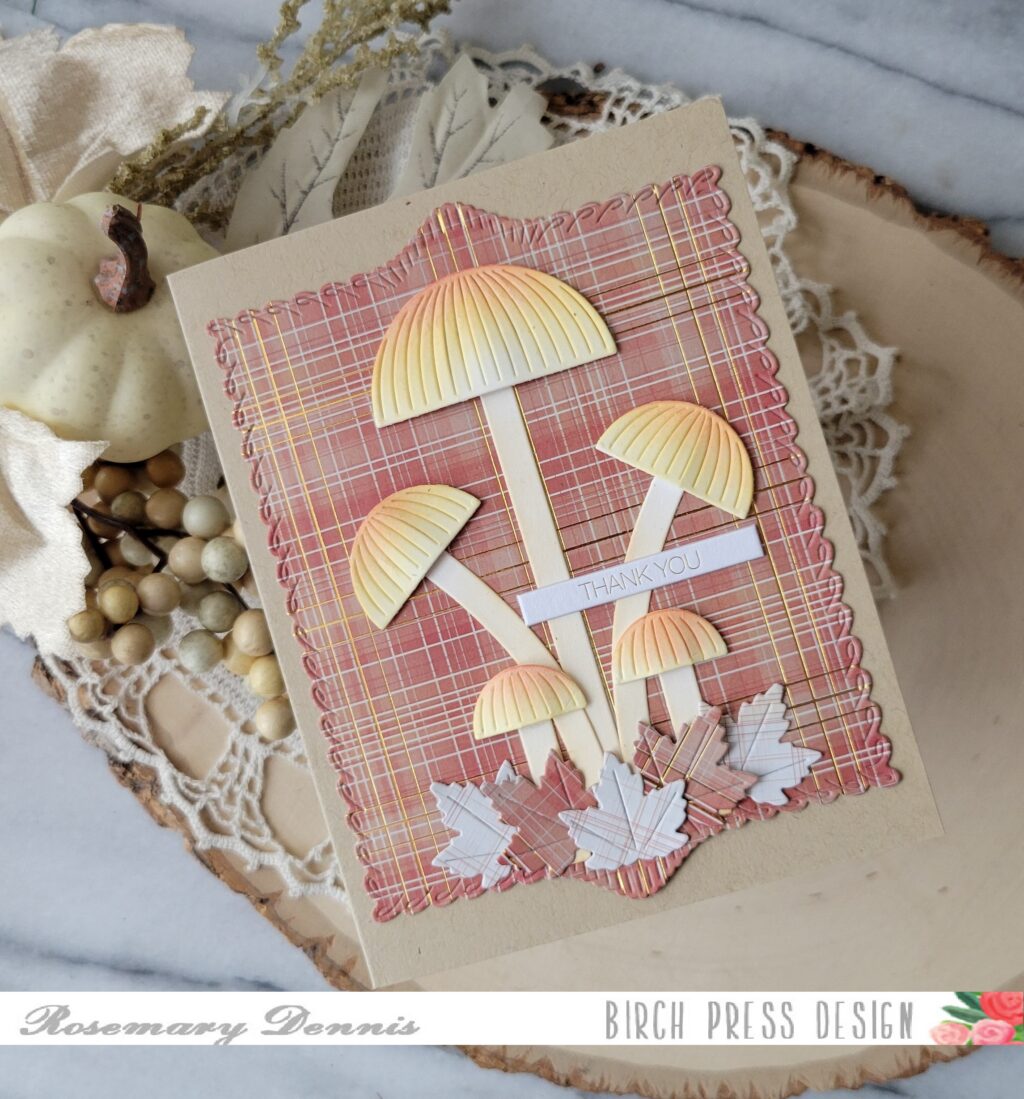
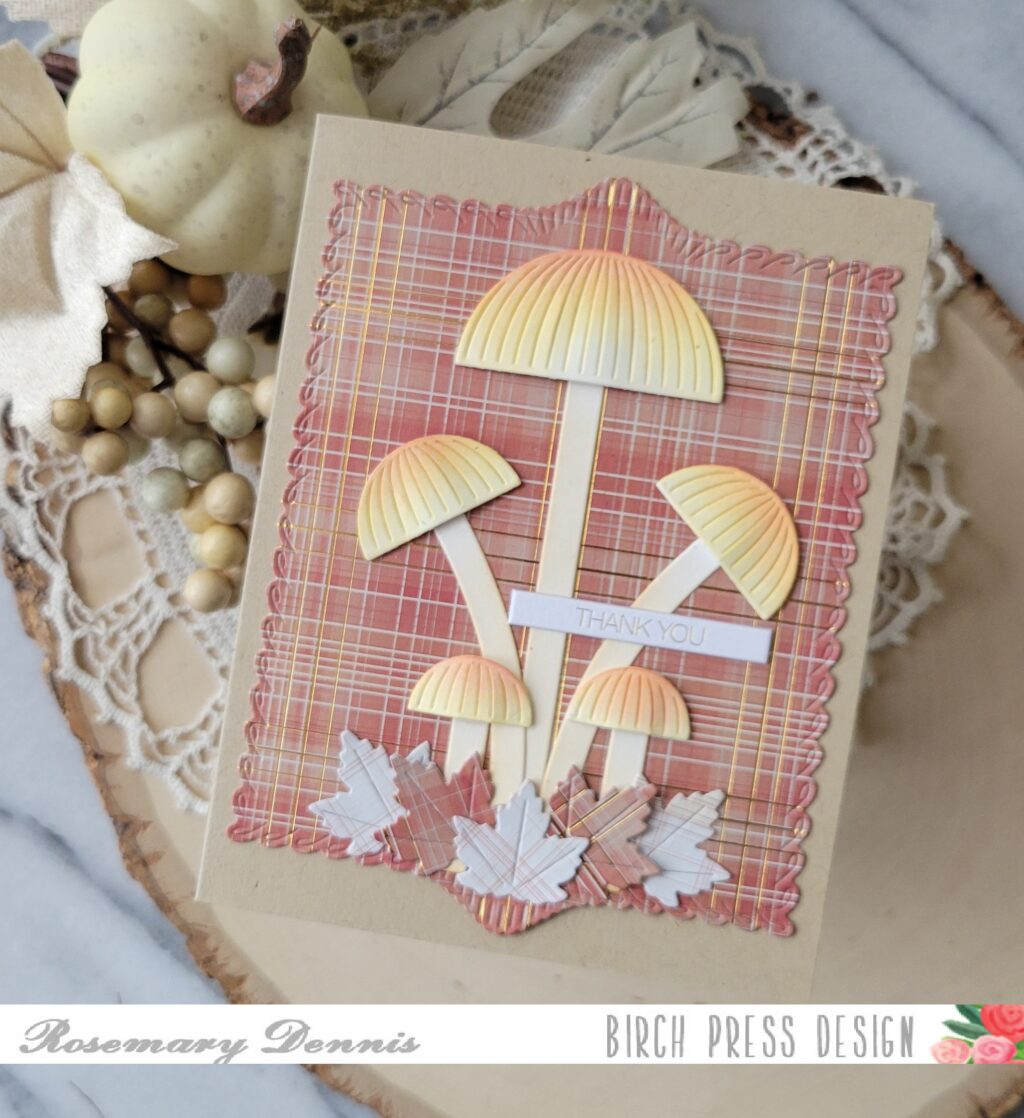
    Hello everyone! Rosemary here on the blog today. Fall is on the way and I, for one, cannot wait! I love fall most of all, lol! Today I have a card that features several new Birch Press Design products: Block Print Tall Mushrooms, Fall Leaves and Loop Stitch Frames. Let’s have a look at what I made.

    You will be seeing a lot of the new Loop Stitch Frames dies on my cards. They are so fun and versatile! I used patterned paper from the Memory Box Nutmeg 6×6 paper pad for the background, as well as the leaves.

    I die cut the mushrooms from off white cardstock and then lightly blended on distress oxide ink in shades of orange and yellow on the mushroom caps and a little bit of brown on the stems.

    I flipped through the Nutmeg plain pad and settled on this piece that has little lines of gold foil running through it for my background. I die cut the paper using the largest Loop Stitch Frame die and adhered it to a kraft card base using double sided tape.

    Since I had scraps of the background paper left over, I flipped one piece over and die cut three maple leaves from the Fall Leaves die set from that. The other two were cut from the same side as the Loop Stitched Frame.

    I adhered the mushroom by attaching the stems with liquid adhesive and the mushroom caps with varying heights of foam squares to give the mushrooms dimension. The leaves where then arranged at the bottom using liquid adhesive. I finished with a gold foil sentiment tab from Memory Box.

    I hope you enjoyed today’s project. Thanks for stopping by and have a wonderful day!

  • Birch Tree Series: Summer  by Savannah O’Gwynn

    Birch Tree Series: Summer
    by Savannah O’Gwynn

    Hello, BPD friends!

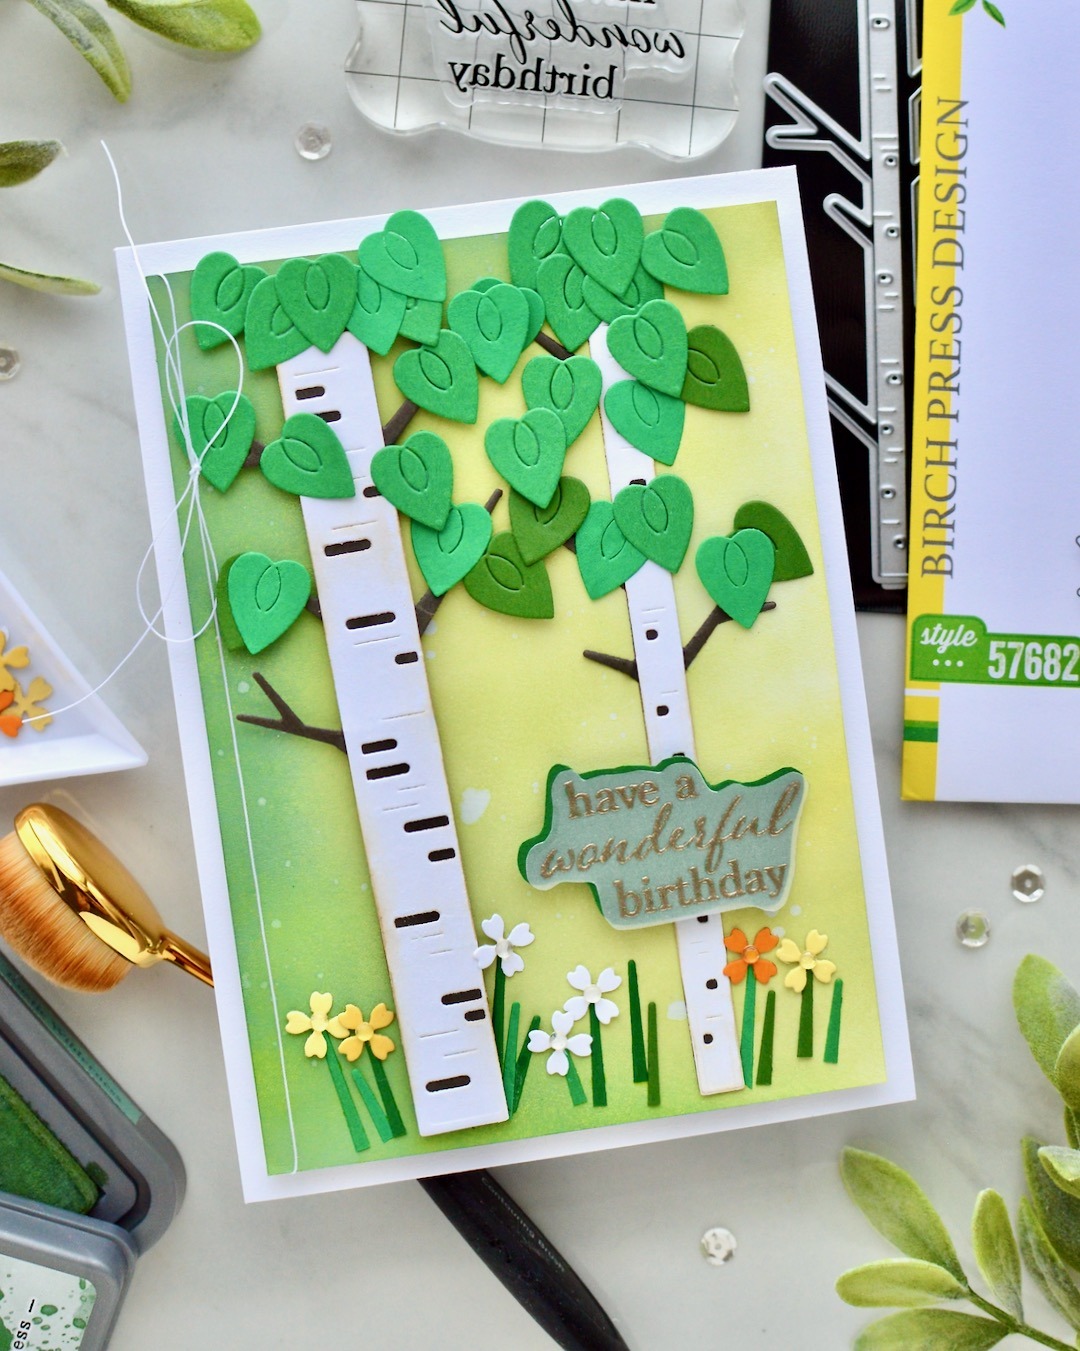
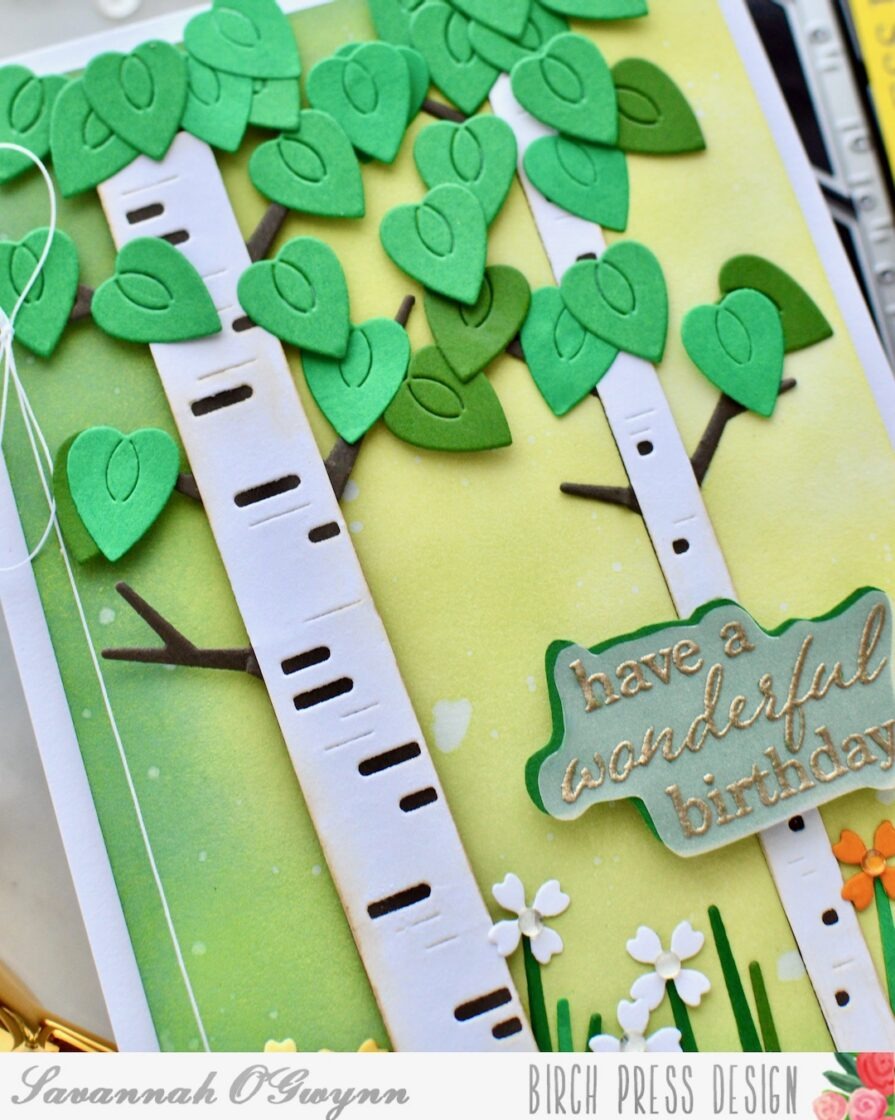
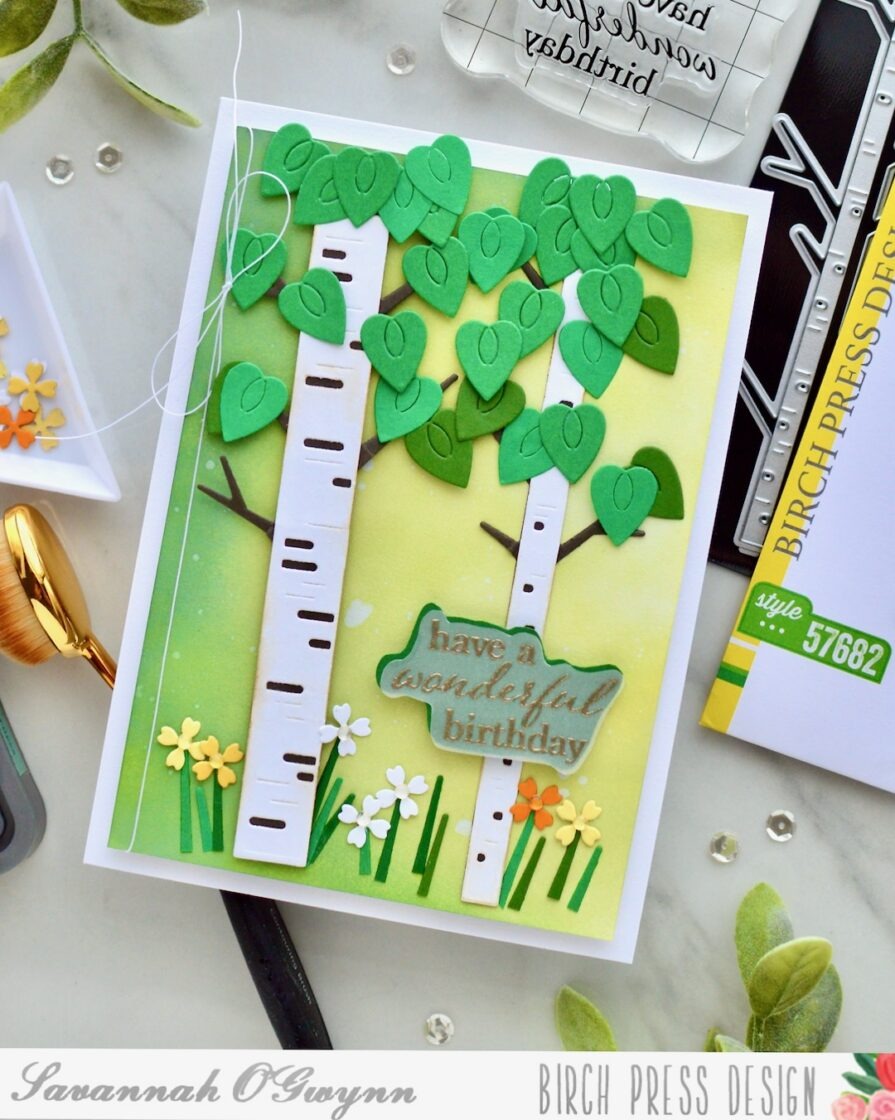
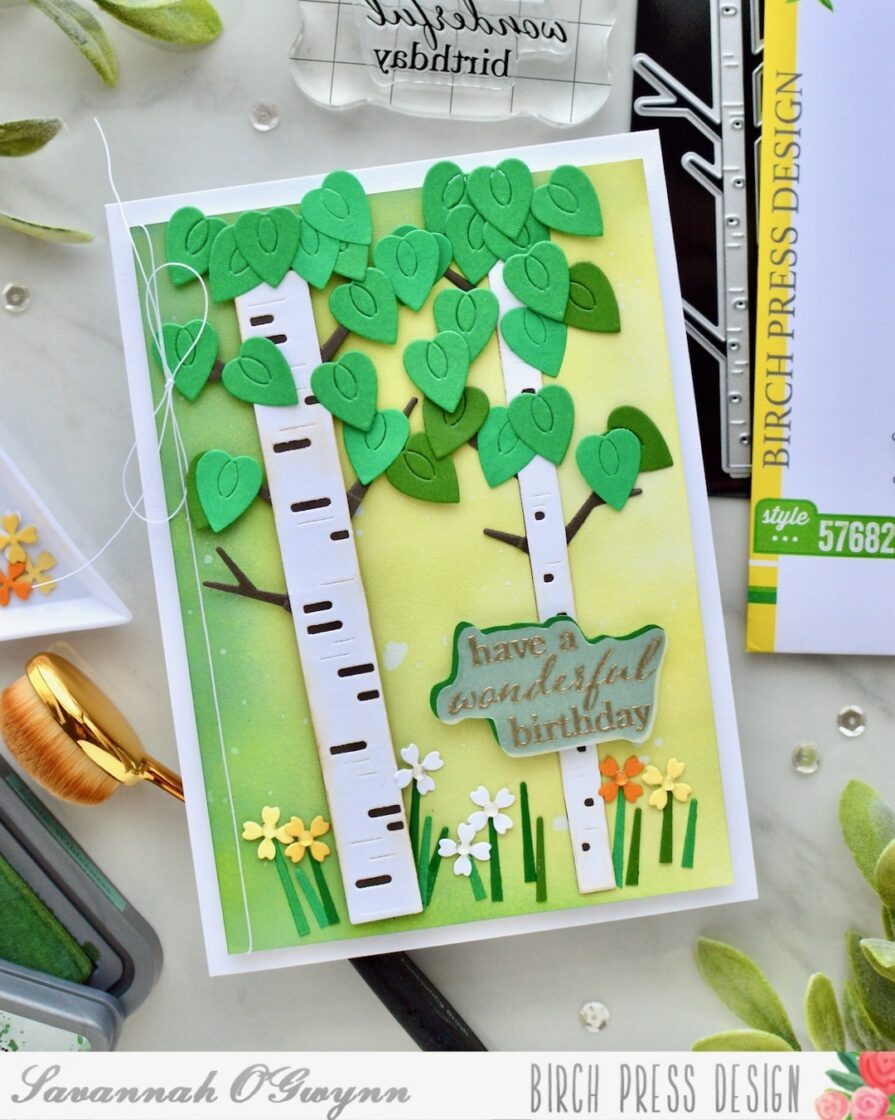
    I’m super excited to be back sharing a NEW series I’m creating using the Block Print Birch Tree dies.

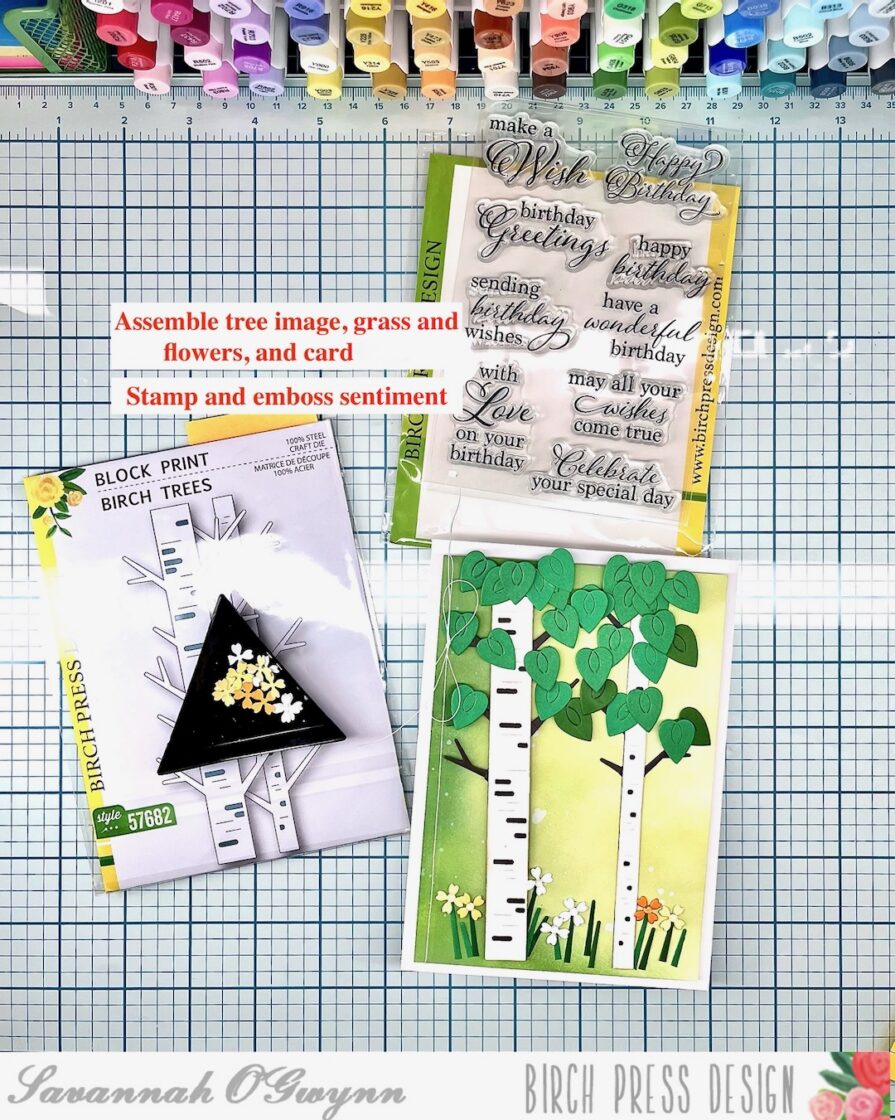
    When I received this die set, I immediately started to think of the tree in different seasons. I knew I wanted to create a series to show my idea! This card design shares the Birch Tree in the summer 🙂

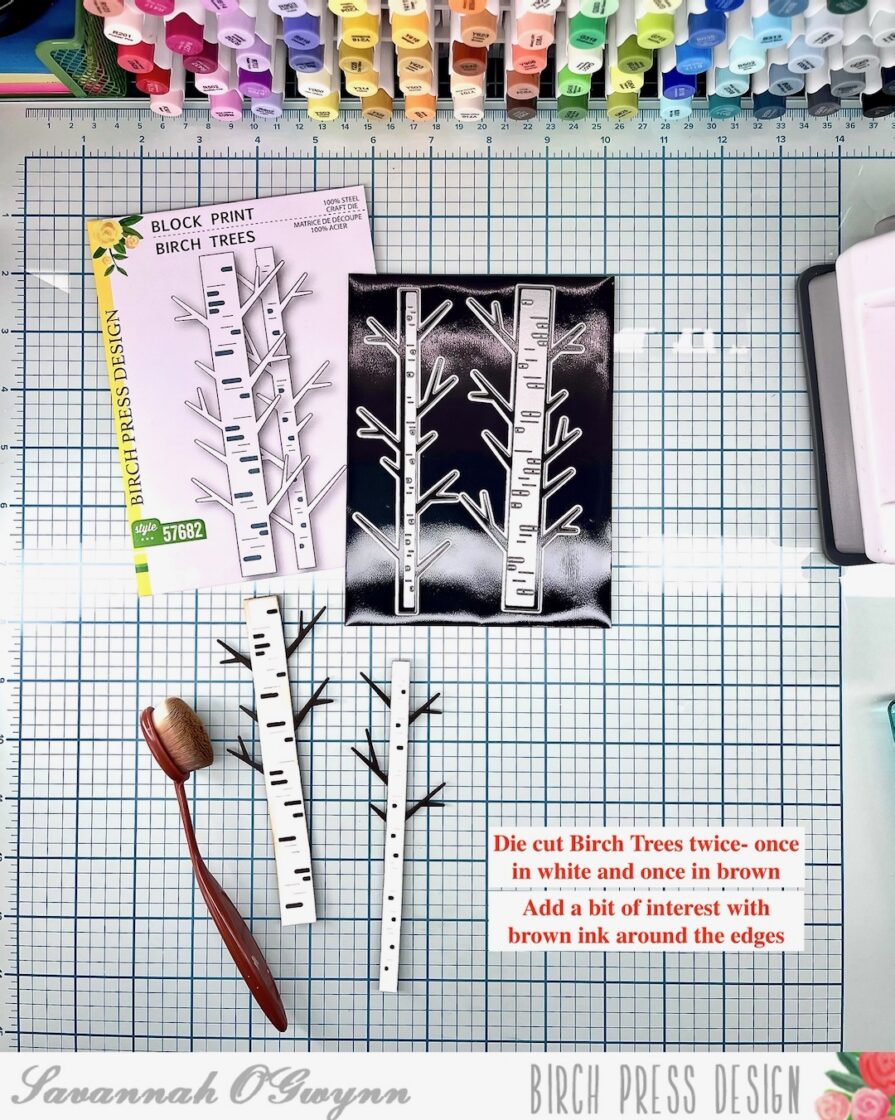
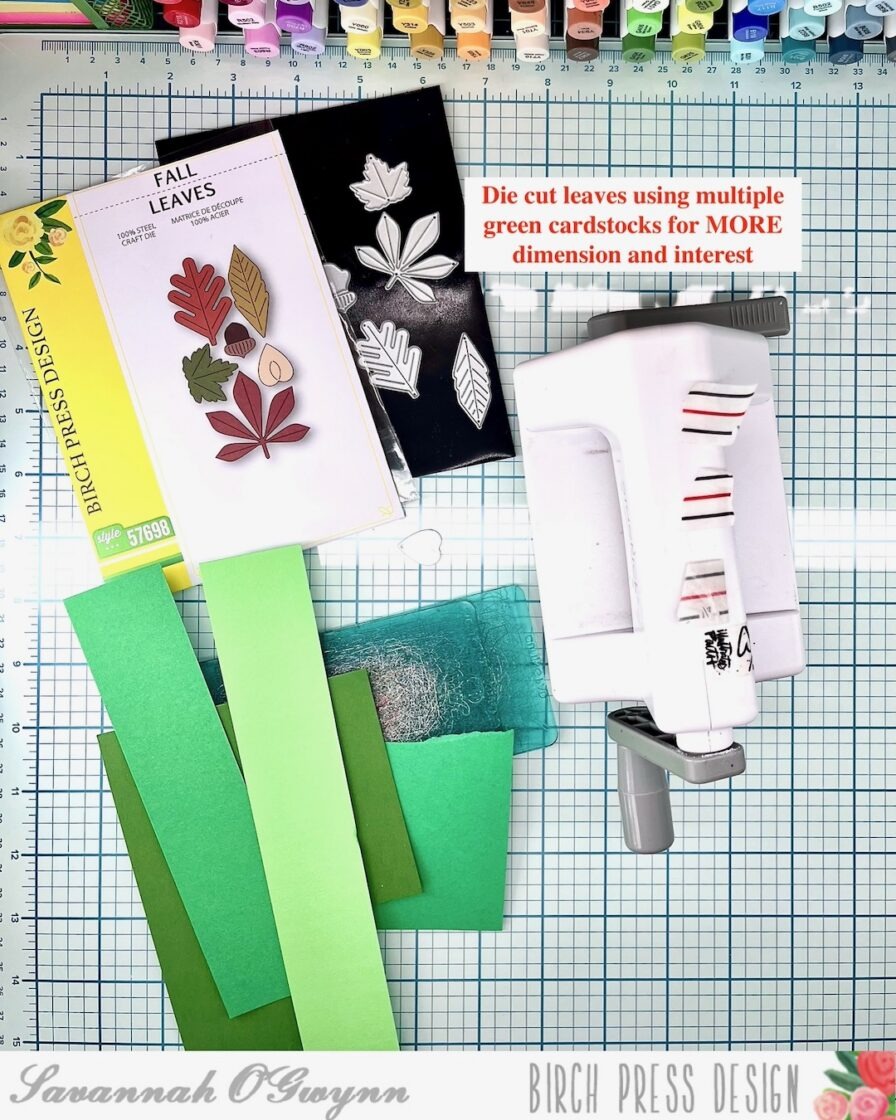
    Here are some tips and tricks that I used to create this card:

    **I also cut off the branches on the white tree and some of the brown tree. This allowed me to add flowers below the tree 🙂

    **You can actually die cut any or all of the leaves from this Fall Leaves set for your creation! I decided to use only one leaf image- LOL!

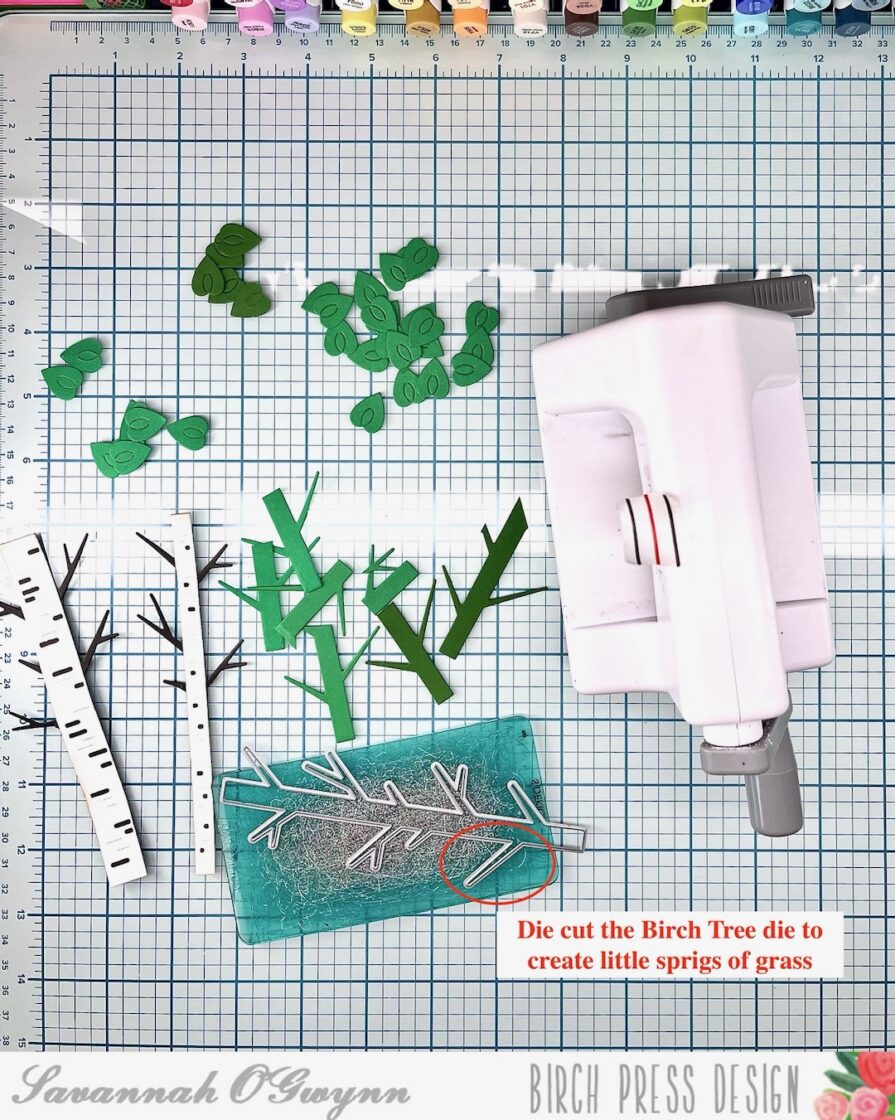
    **I stretched my dies again by using the Birch Tree branches for grass images!

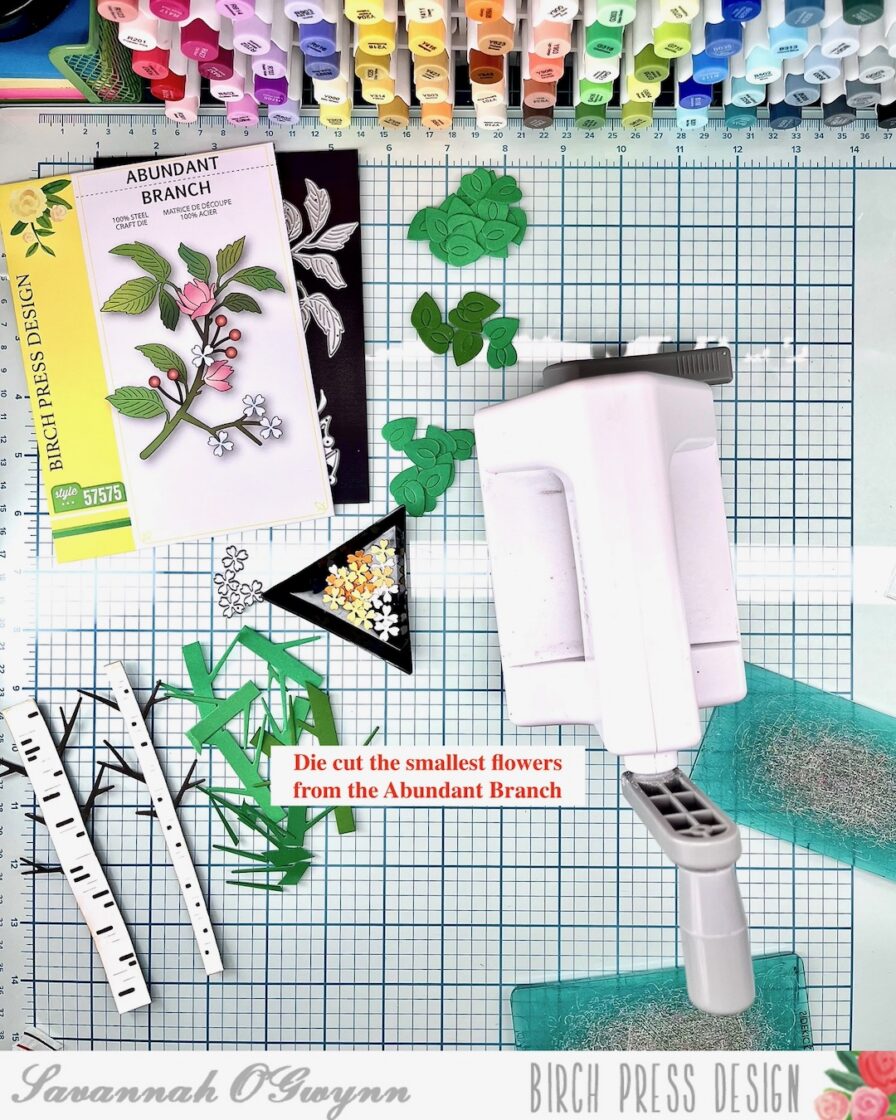
    #SAVfact: I love to mix and match my supplies- you can see here that I added the smallest flowers from the Abundant Branch set for my grass/flower images.

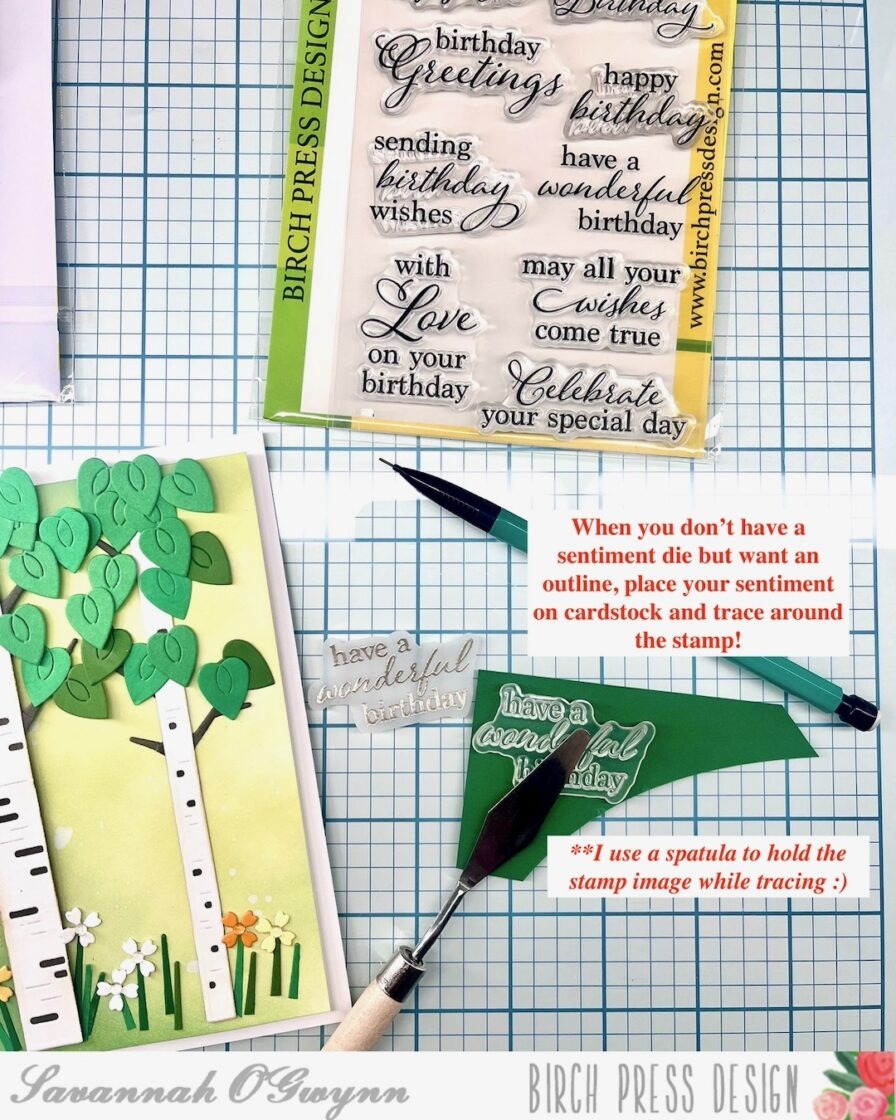
    **I don’t have a die set to match this sentiment set… so I used my stamp image to create an outline 🙂 I use a spatula to hold the image while tracing because when I use my fingers the stamp gets stuck to it! LOL!


    Join me as I continue this Birch Tree series- I honestly think I might even make MORE than just the Birch Tree in different seasons! I’ll keep you posted 🙂 I think it’s going to be FUN trying to make different Birch Tree designs!

    I hope that you are inspired and will join me in making different Birch Tree designs and cards!

    I’ll be back with MORE soon!
    Please remember to share what you create using these tips, tricks, and techniques or if you were inspired by my creation- I’d love to see what you make with this idea! 

    THANKS so much for stopping by! Happy crafting:) 


    HUGS <3 Sav

  • Fall Birthday Inspiration by: Annette Allen

    Fall Birthday Inspiration
    by: Annette Allen

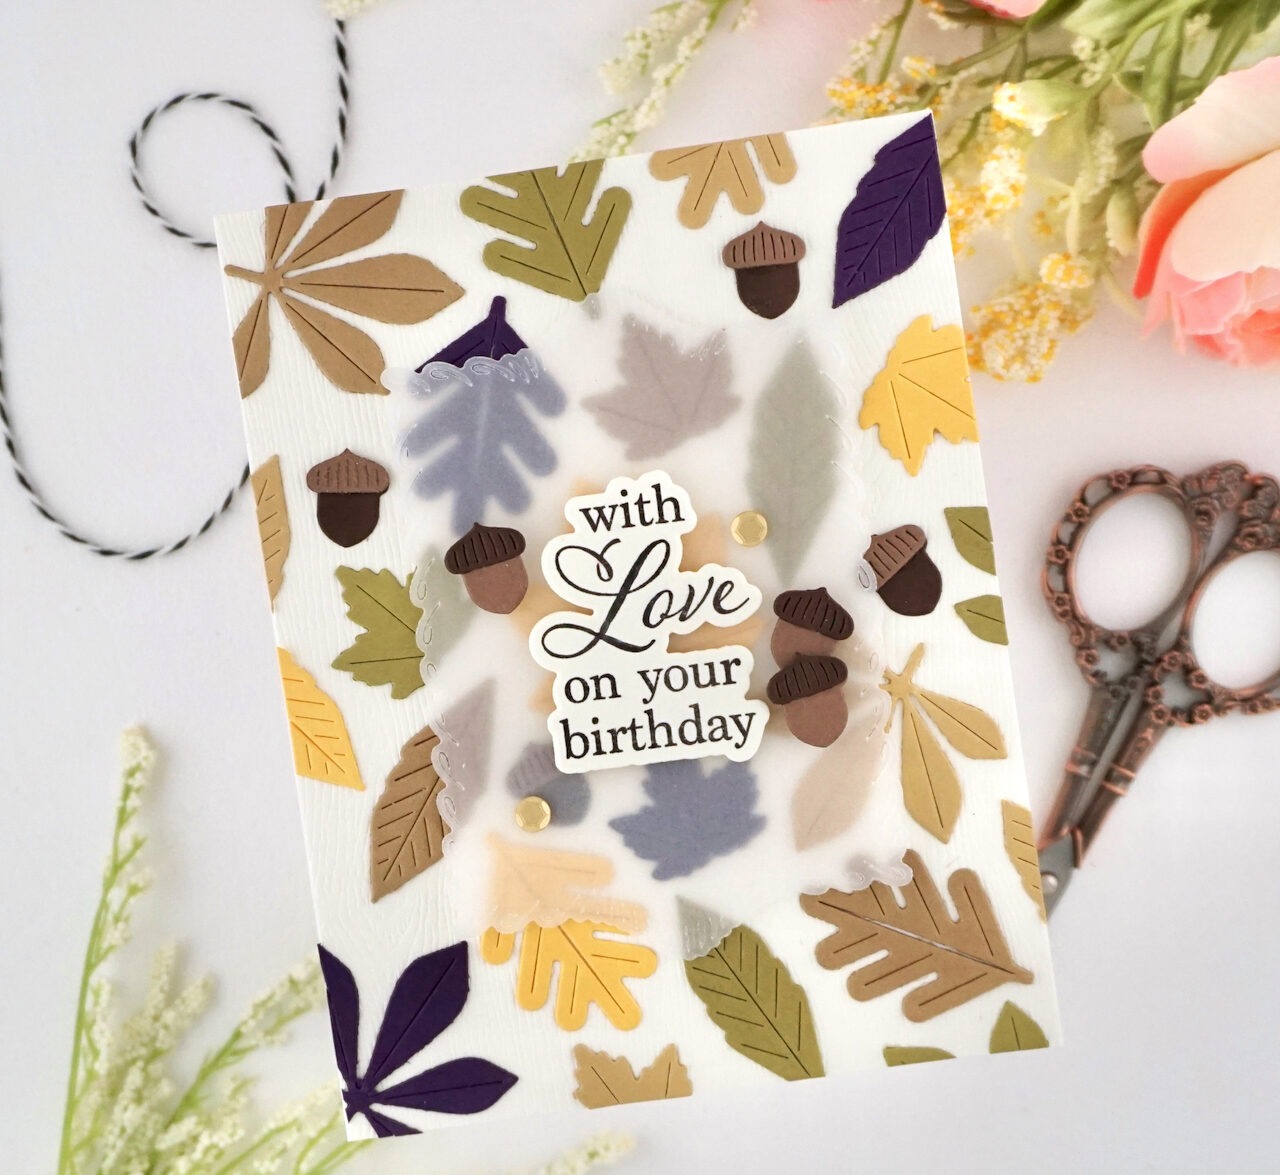
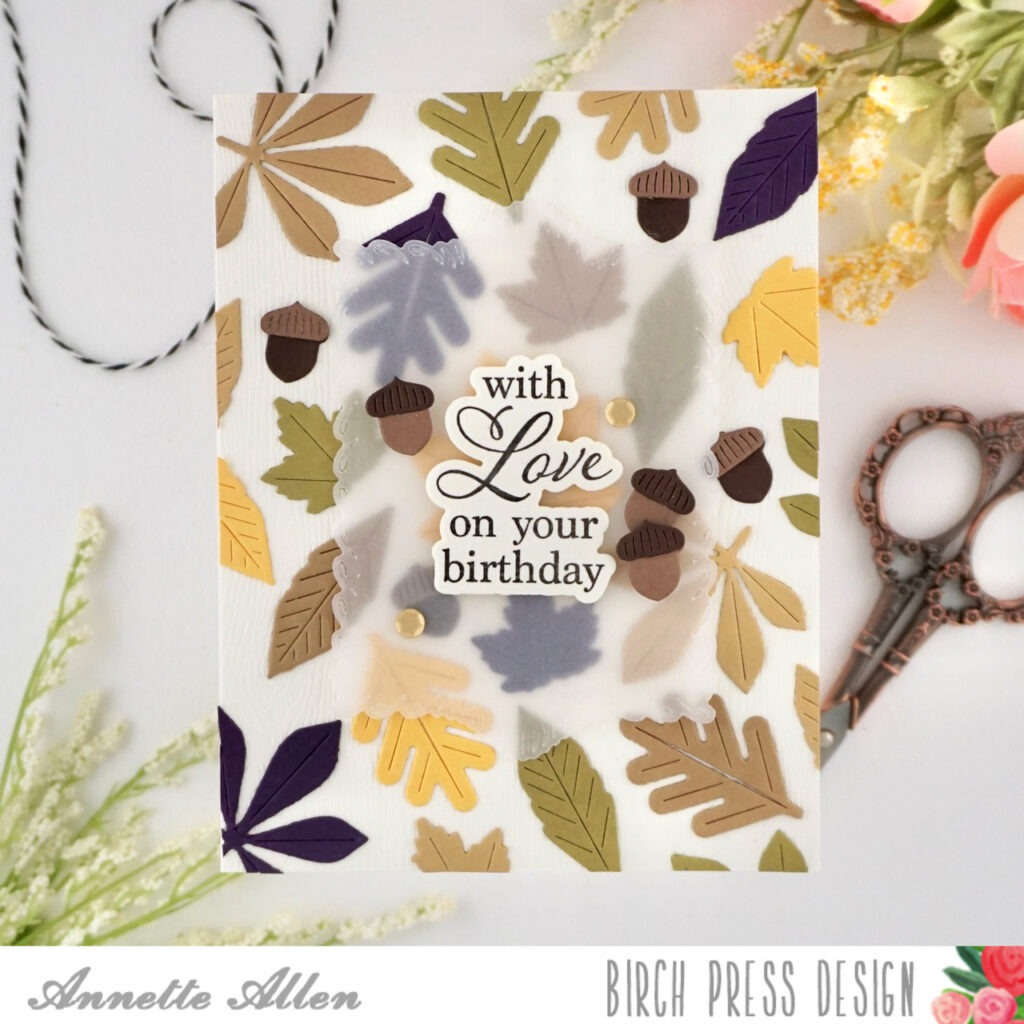
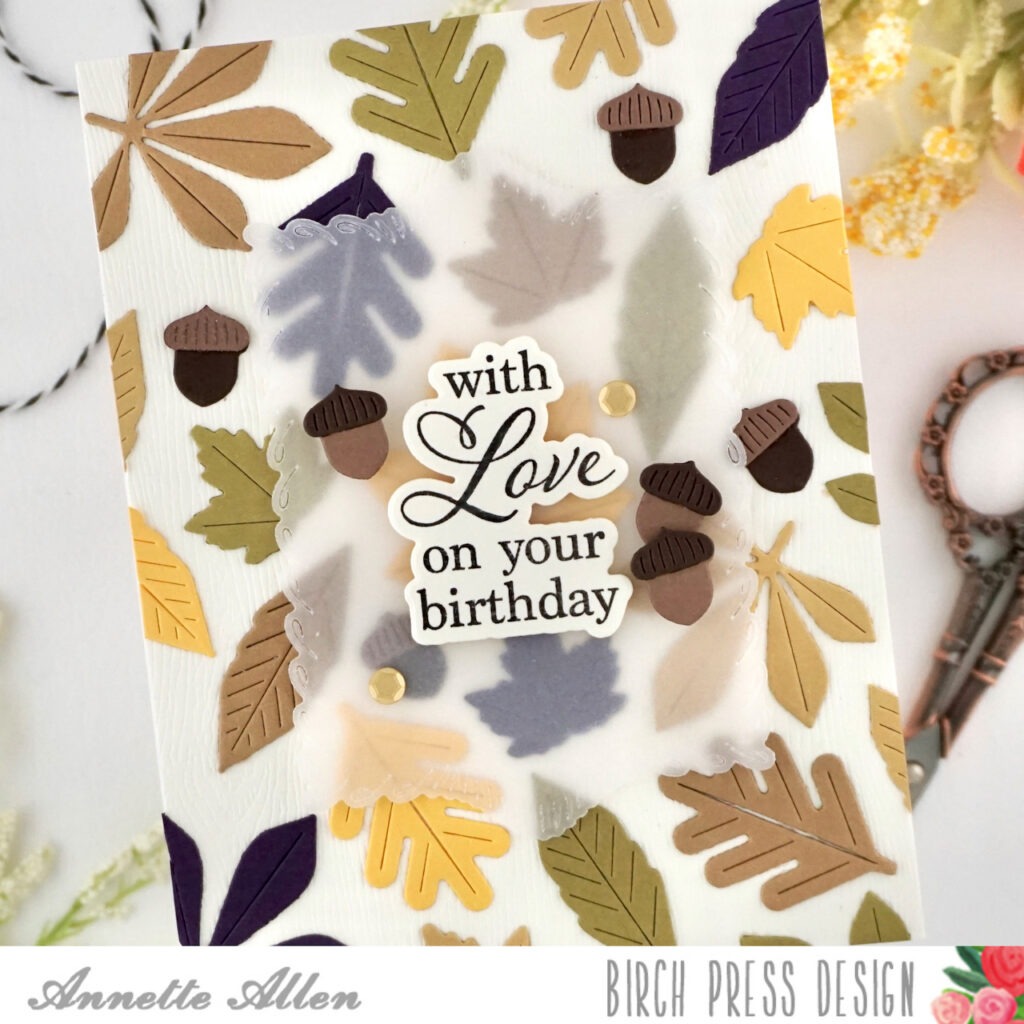
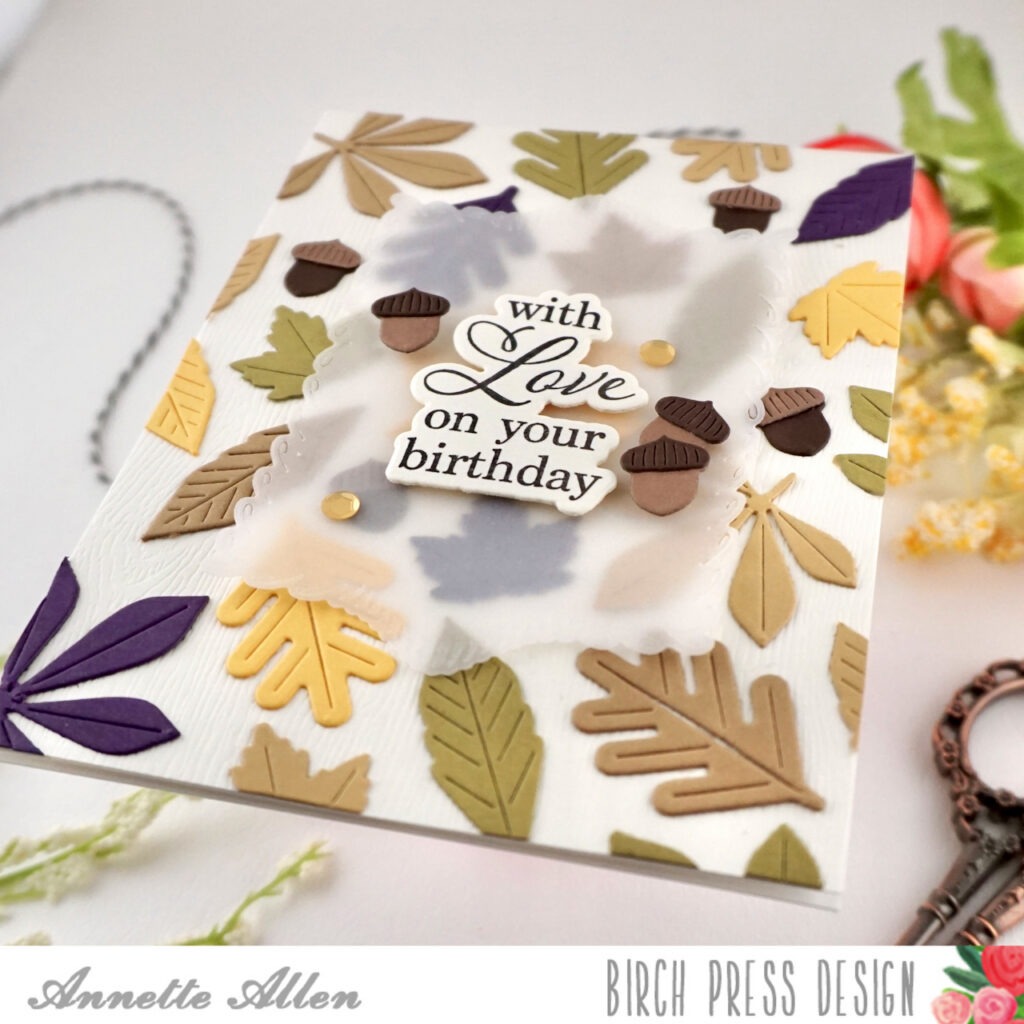
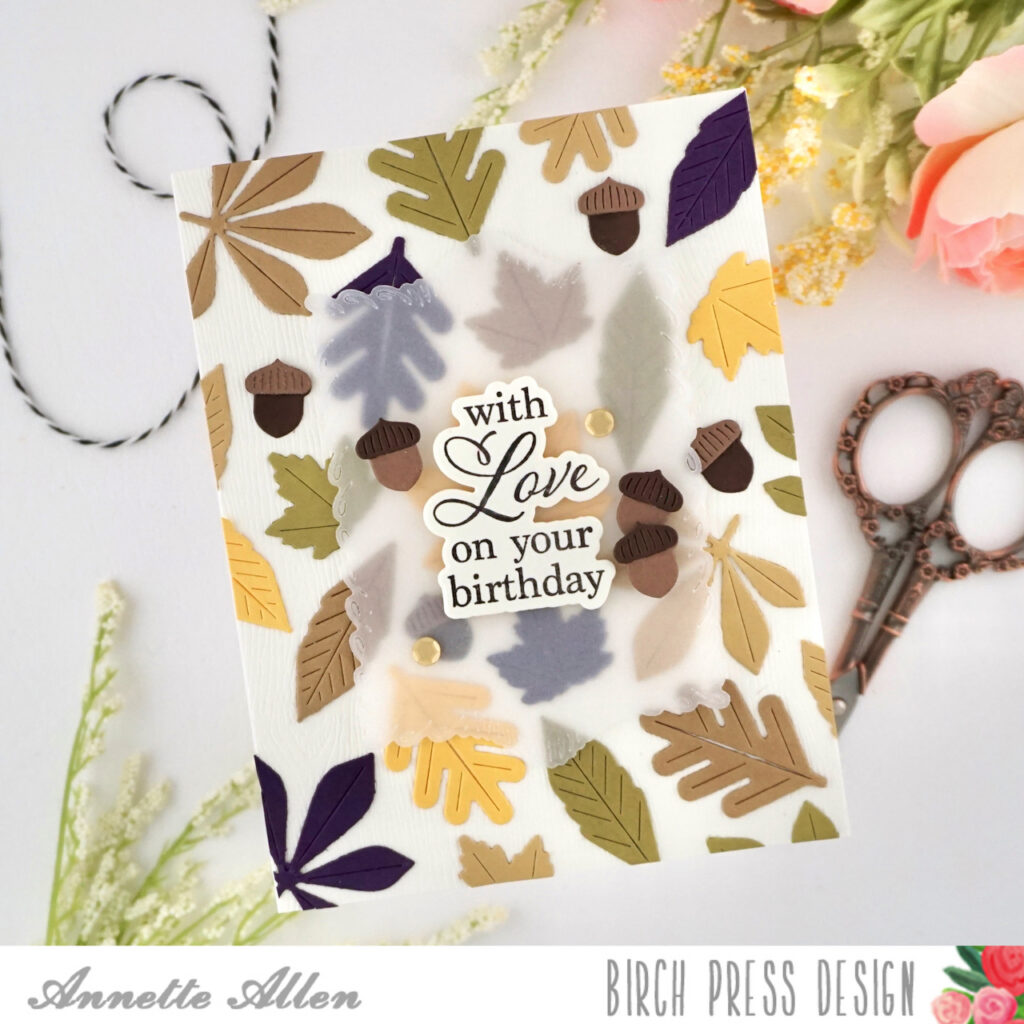
    It’s almost Fall and I am ready for the leaves to change but for now I will have to settle for these pretty leaves from the new Birch Press Design Fall Leaves Craft Die Set. I went all out with my background, so let’s get started.

    Create card from white cardstock A2 size.

    Cut an A2 panel on the BPD Woodgrain Paper (Cream). Adhere your panel to your card base using liquid glue or tape runner.

    Die cut the BPD Fall Leaves (57698) on fall color cardstock. I went with browns, plum, greens and yellow. Die cut each design in all colors.

    Now it is time to adhere those pretty leaves to your background. Use liquid glue and mix it up. Adhere them until you are happy with your design.

    Die cut the third largest Loop Stitch Frame (57688) on vellum.

    Stamp sentiment from the Elegant Birthday Sentiments (CL8166) on cream colored cardstock and die cut using the coordinating dies. Adhere to the center of the Loop Stitch Frame using foam tape.

    Now flip your vellum over and only add foam tape where your sentiment is. We do not want any adhesive to be shown on the front. Adhere the vellum to your card.

    Die cut more of the acorns and add them as embellishments next to the sentiment and also add a couple of gold sequins.

    Such a simple card. Lots of die cutting but so worth it when you see the details on the leaves. I am happy with how it came out. What do you think?

    Thank you for stopping by!