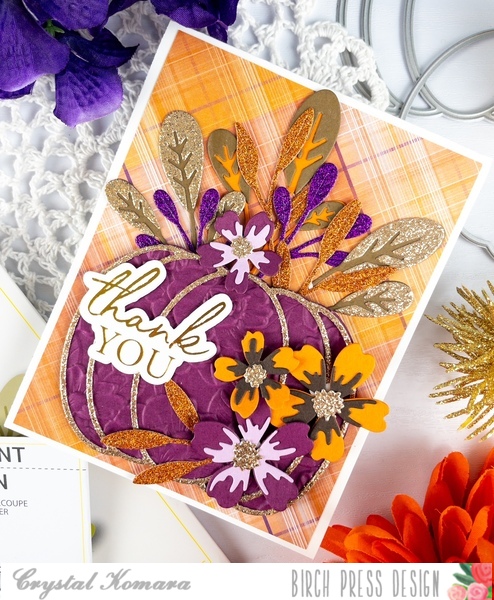
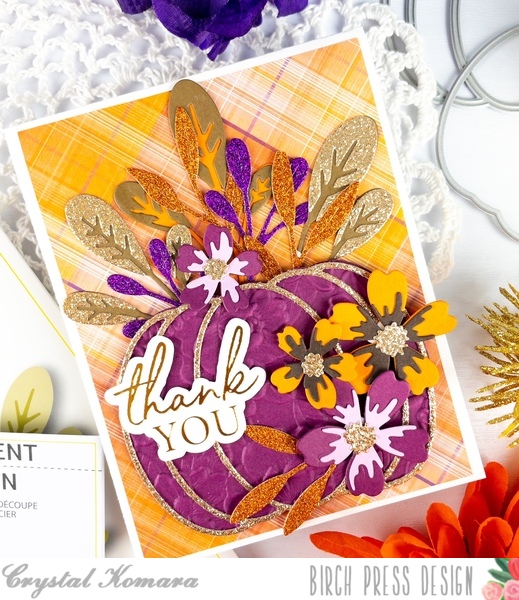
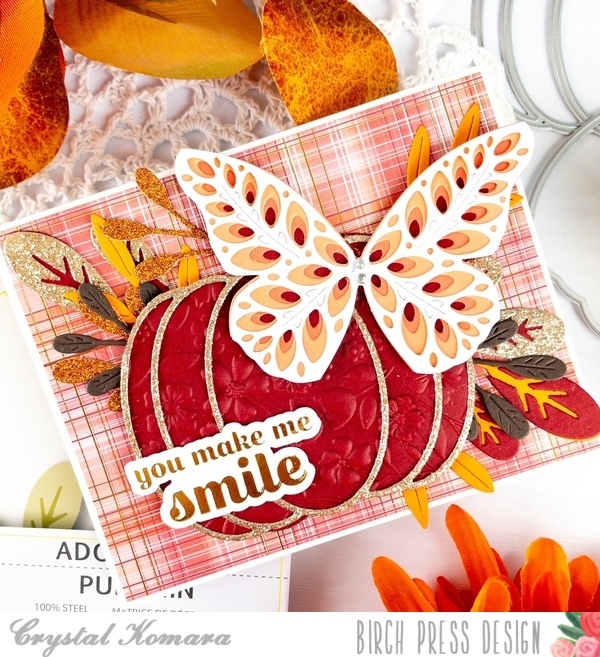
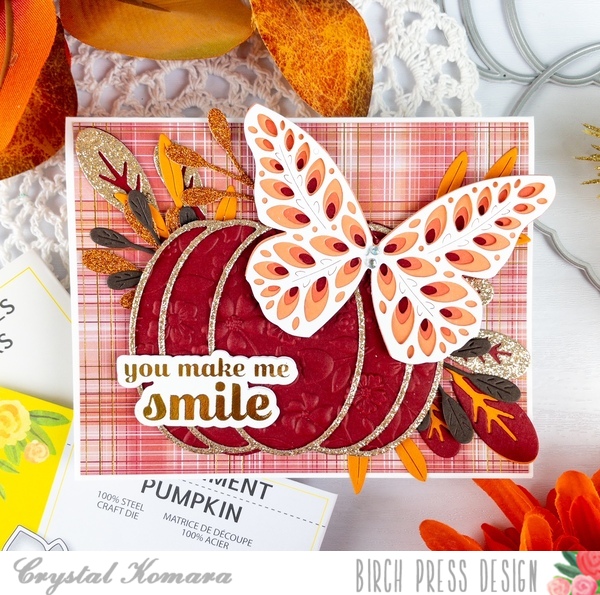
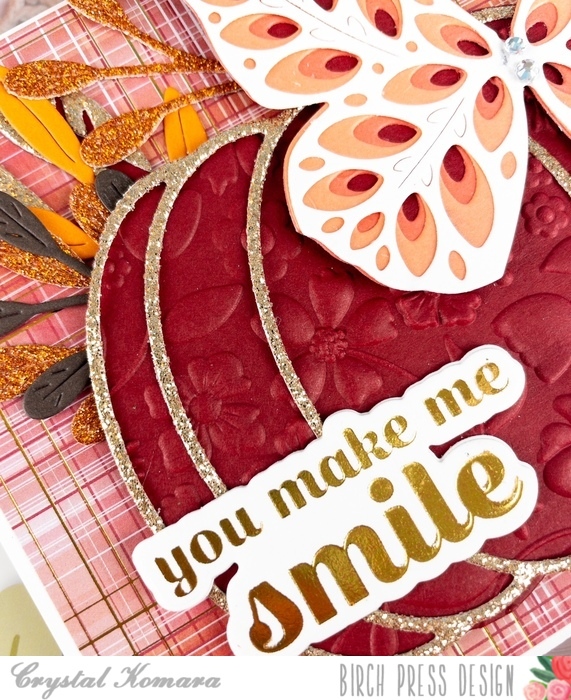
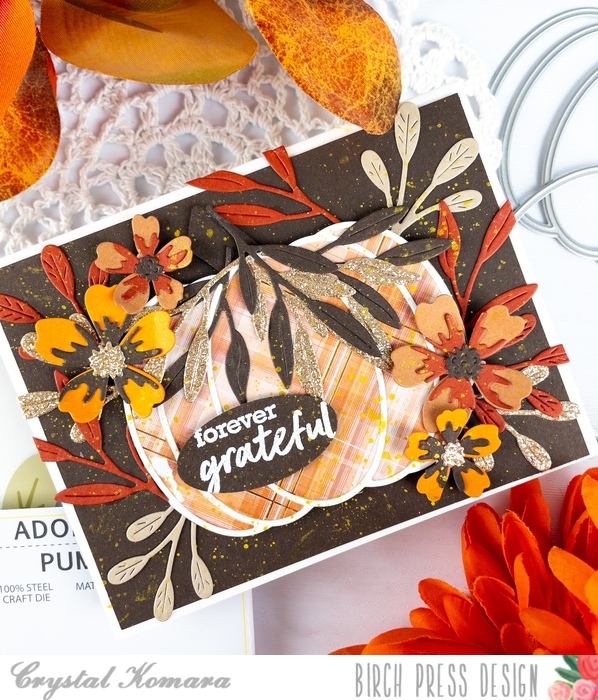
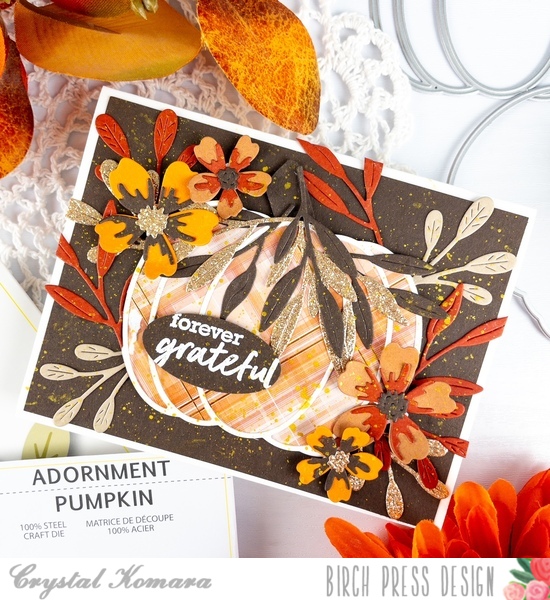
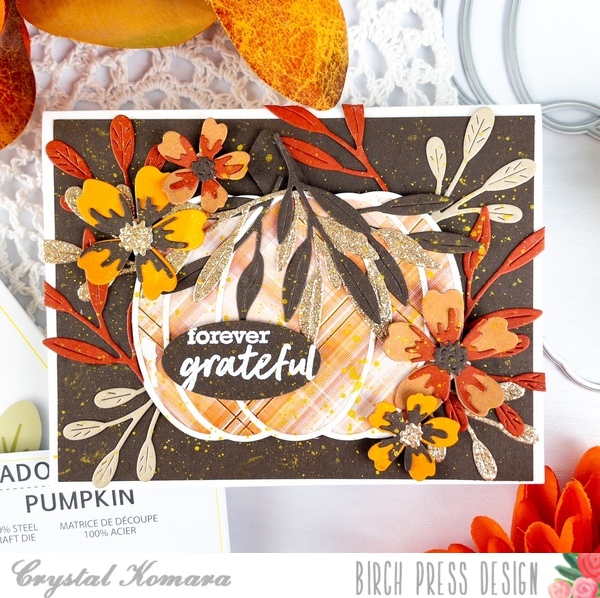
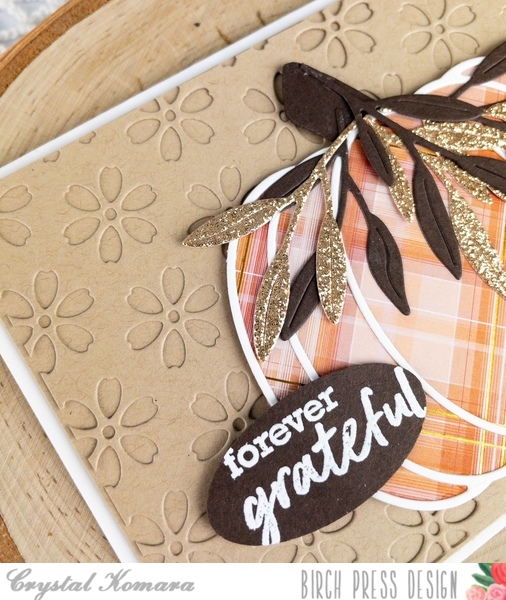
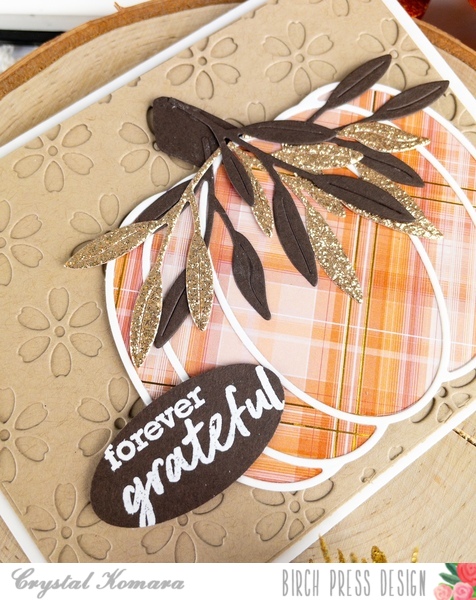
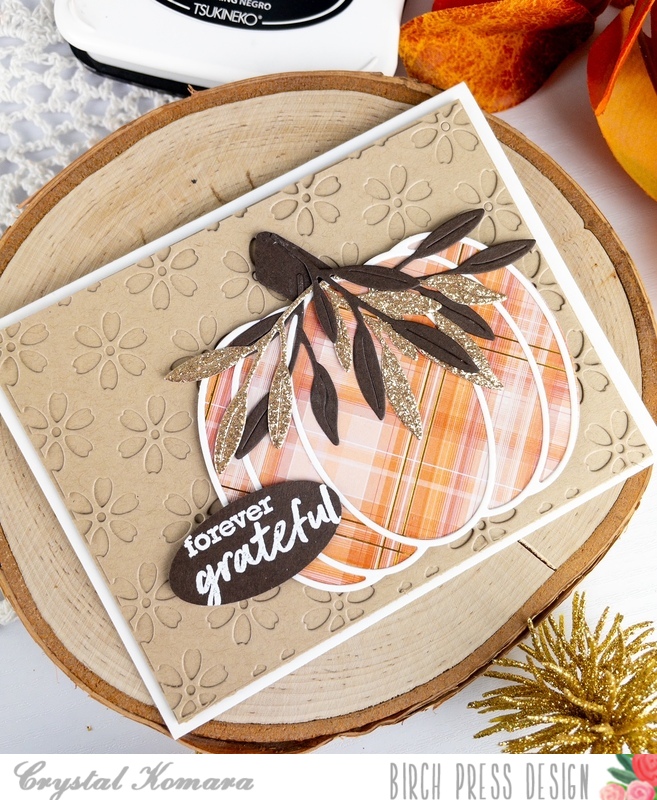
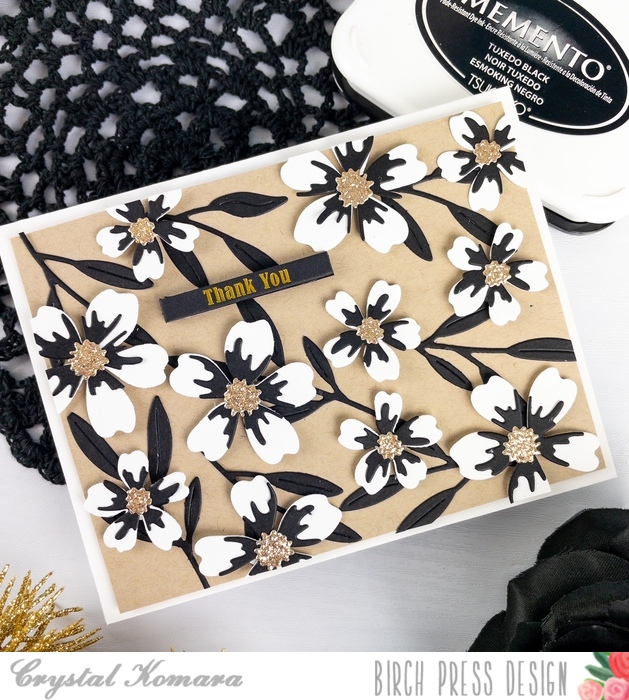
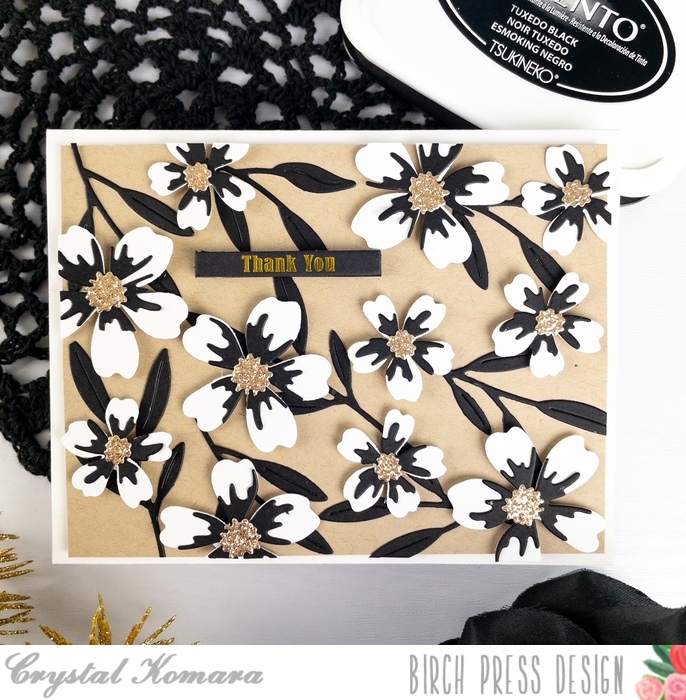
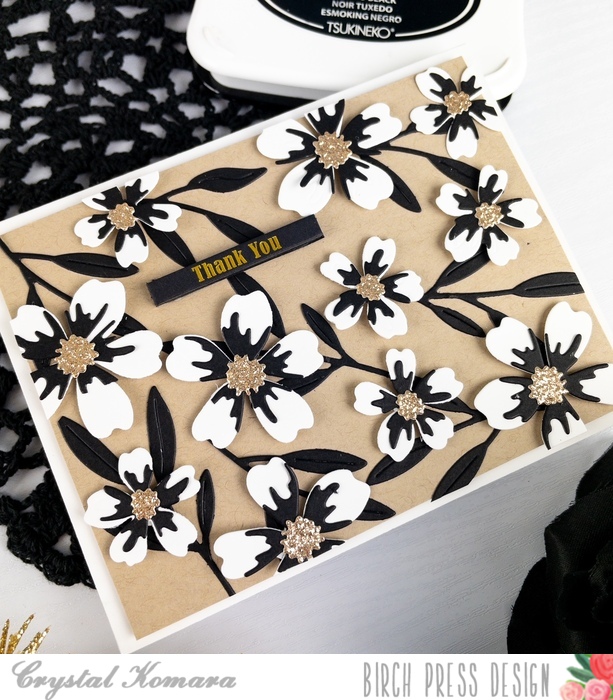
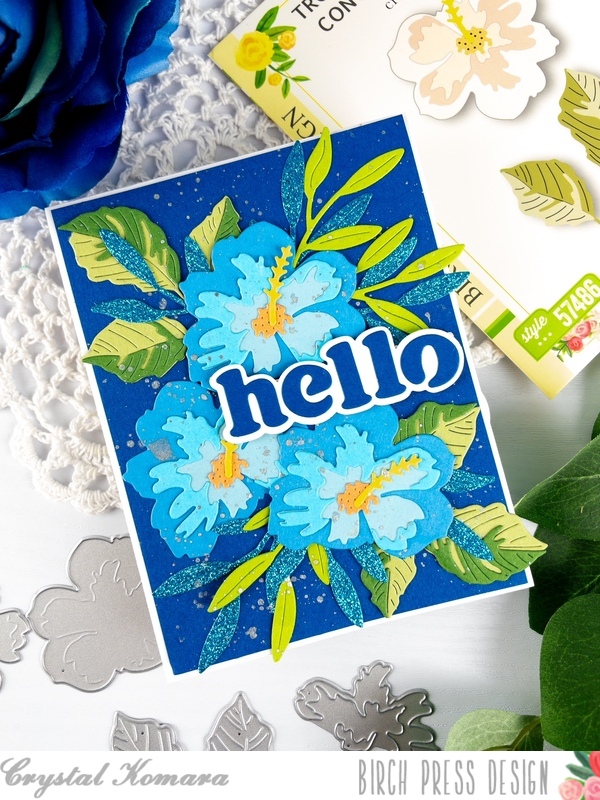
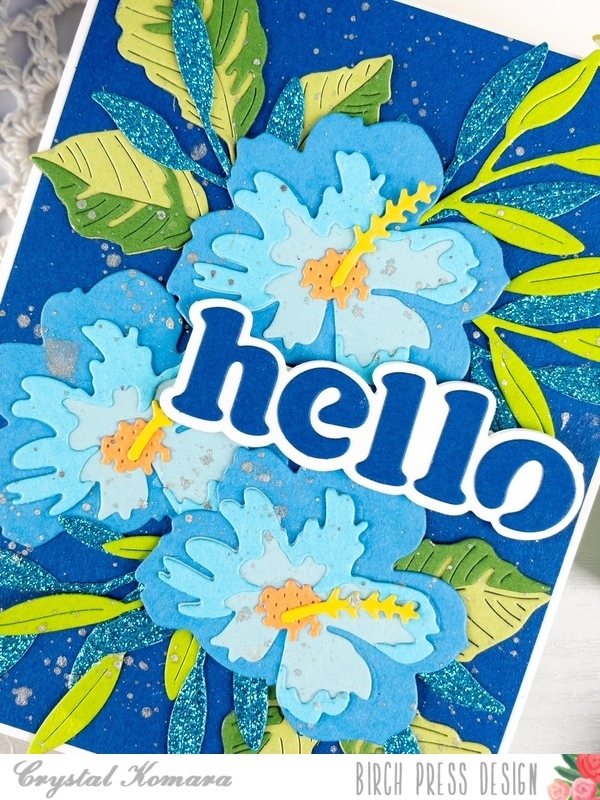
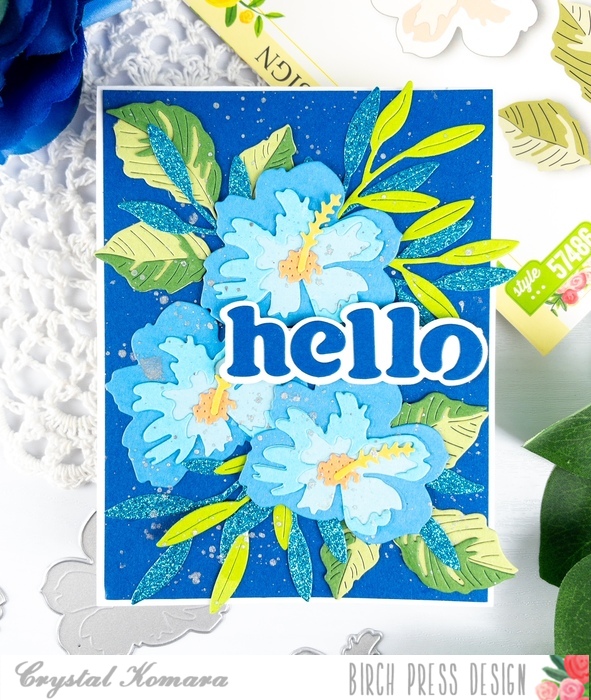
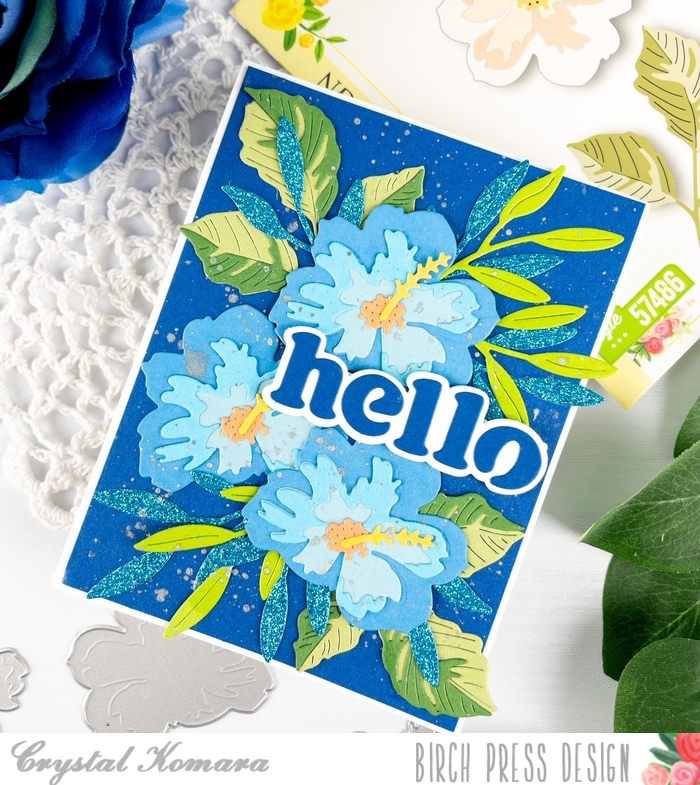
Hello friends and happy Monday! I hope you all enjoyed a wonderful weekend. It has been incredibly rainy here in the Northeast where I live (Massachusetts). This is Design Team member Crystal Komara here with you today sharing my first card made using the new Block Print Garden Heart dies.

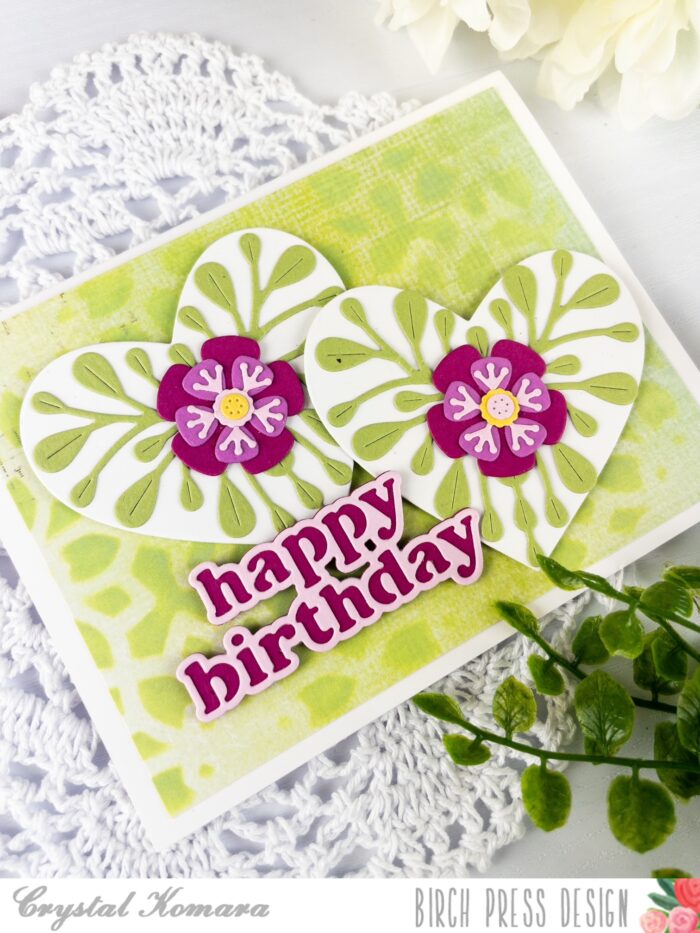
The base of this card is made with 110 lb. Neenah Solar White Smooth cardstock.
Let’s make this card:
- I cut a 5 1/4″ x 4″ piece of Neenah Solar White Smooth cardstock and used Layer A of the Viola Plate Layering set as a stencil. I stenciled directly over the steel die using Ranger Distress Oxide ink in the color Twisted Citron.
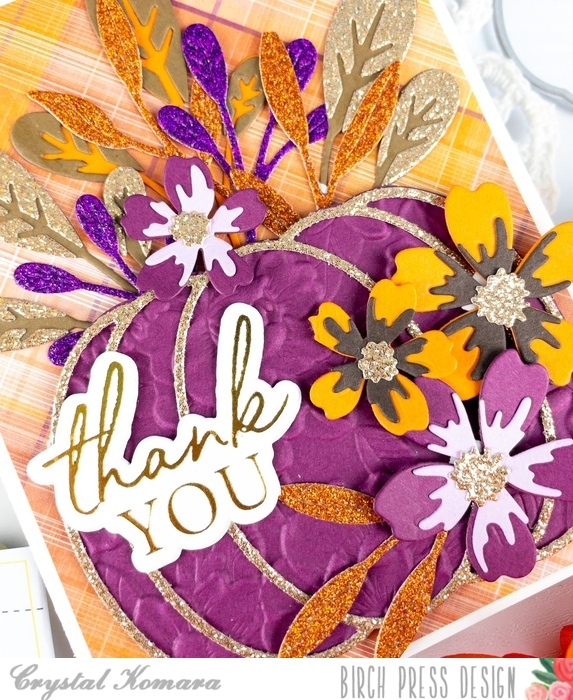
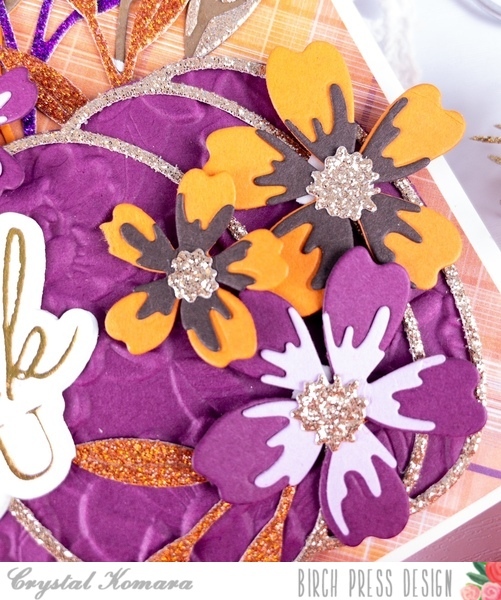
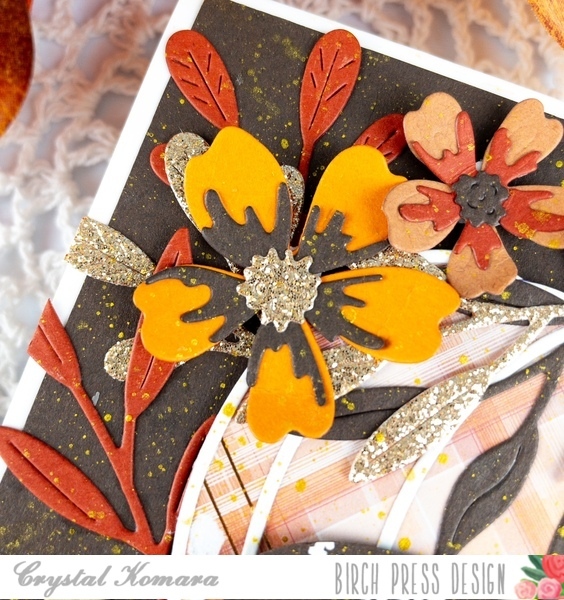
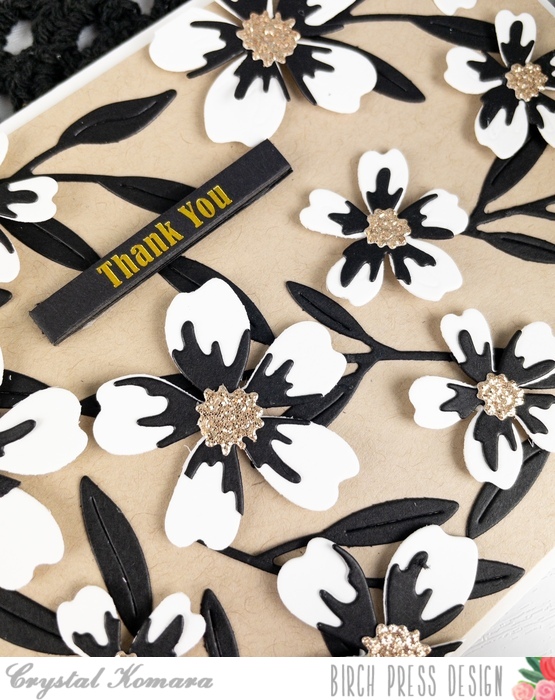
- I die cut the Block Print Garden Heart itself from white cardstock. I die cut the leaves of the heart from green cardstock .
- I die cut various pieces of the flower from three different colored pink cardstock.
- I die cut the center of the flowers from yellow cardstock.
- I adhered the flower pieces together using a fine-tip liquid glue.
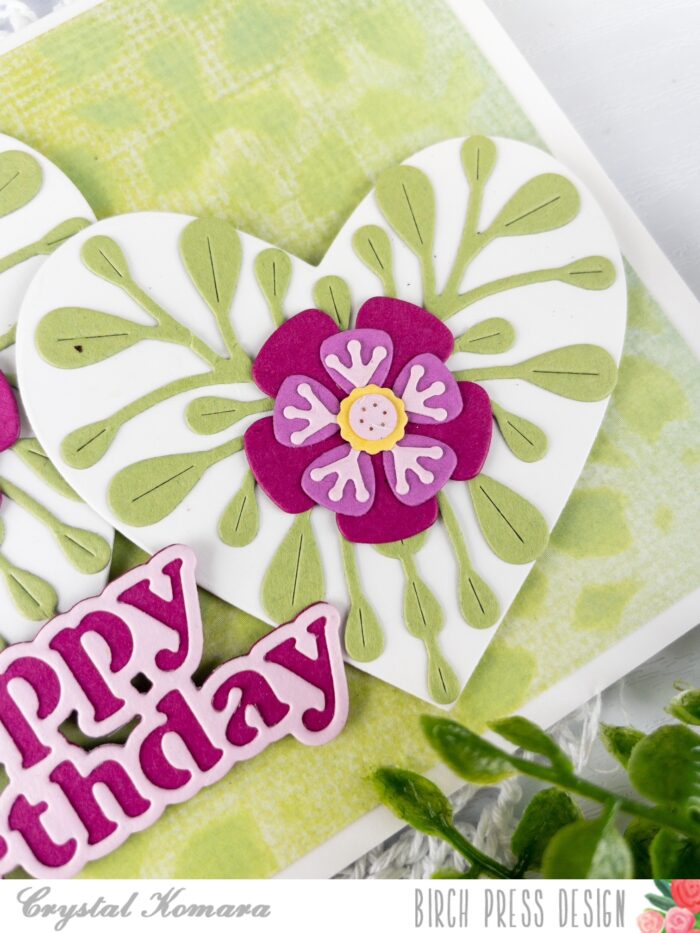
Once both flower hearts were assembled, I adhered them to the card front using 3M foam adhesive for added dimension.
Lastly to create the sentiment, I die cut the Happy Birthday Vintage Sentiment from two different colored pink yardsticks. I adhered the two layers together with a fine-tip liquid glue. Then I adhered the sentiment to the card using 3M foam adhesive.
I really love this beautiful new Block Print Garden Heart die set and can’t wait to create with it again! Thanks for visiting and have a wonderfully creative day!