Hello, sweet BPD friends and fans!
I am super excited to share my next Birch Tree Series design using Block Print Birch Tree dies! **You can read about my first Birch Tree design HERE– it was a summer theme.
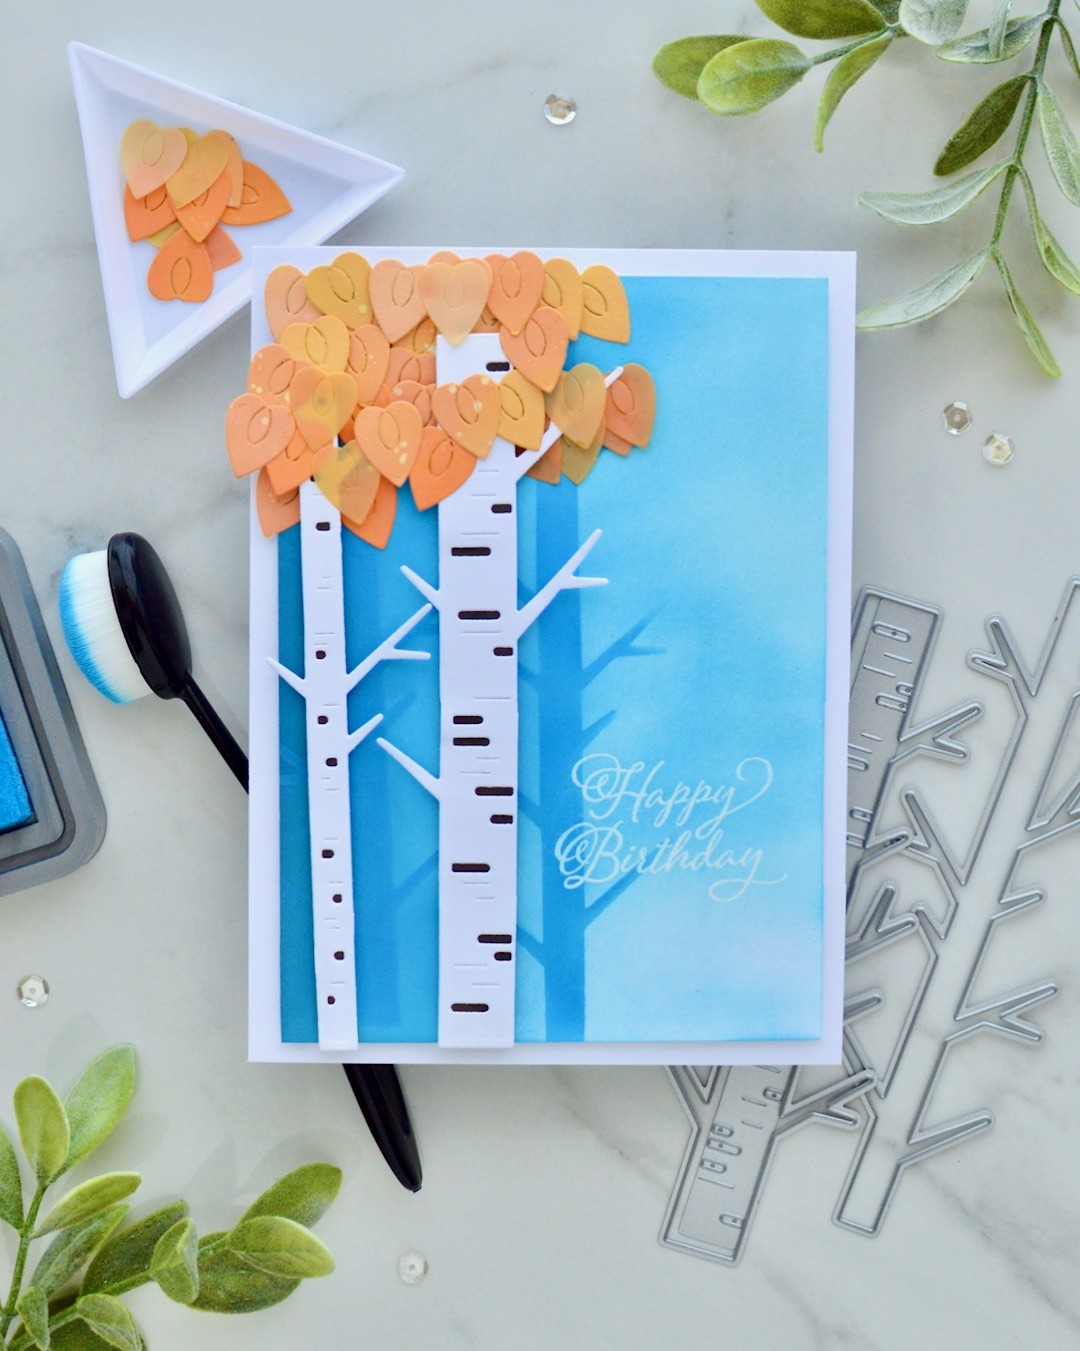
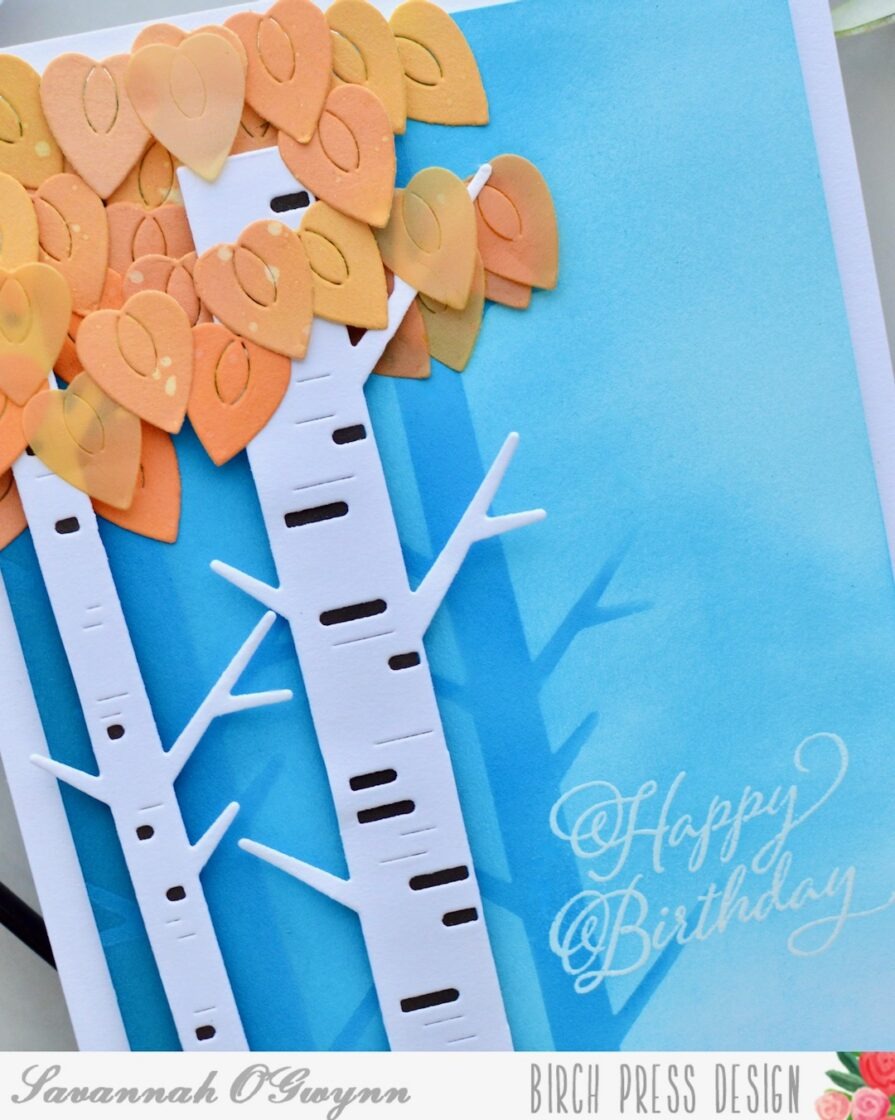
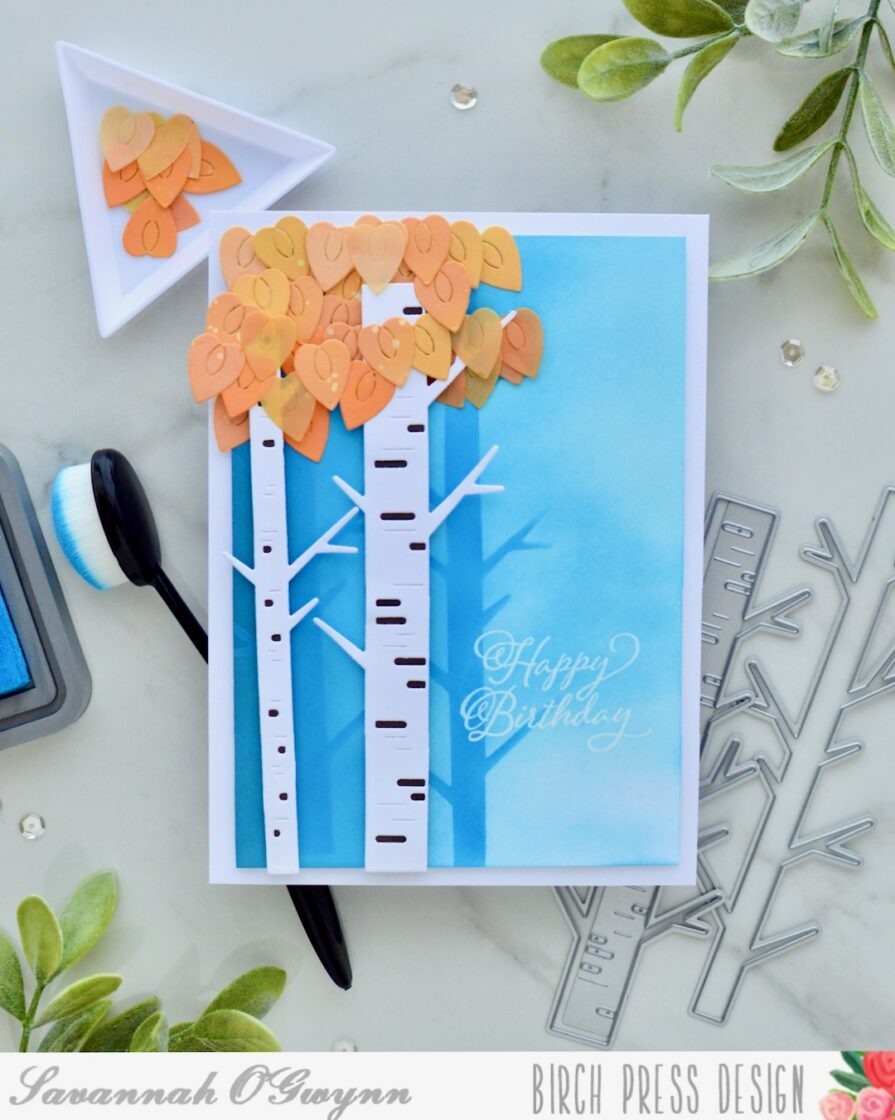
This second design is more fall themed because it’s almost October! I went with a misty, shadowy background and orange ink blended leaves.
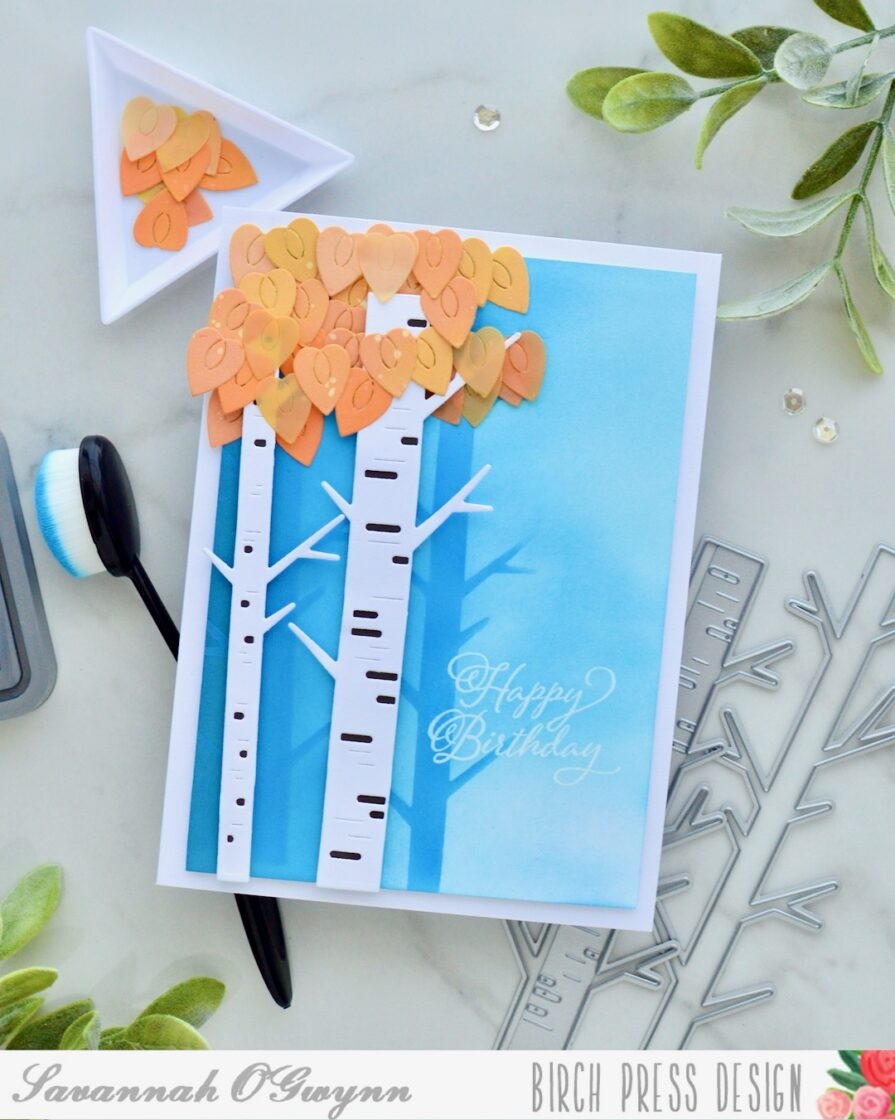
Here are a few tips and tricks when creating this design:
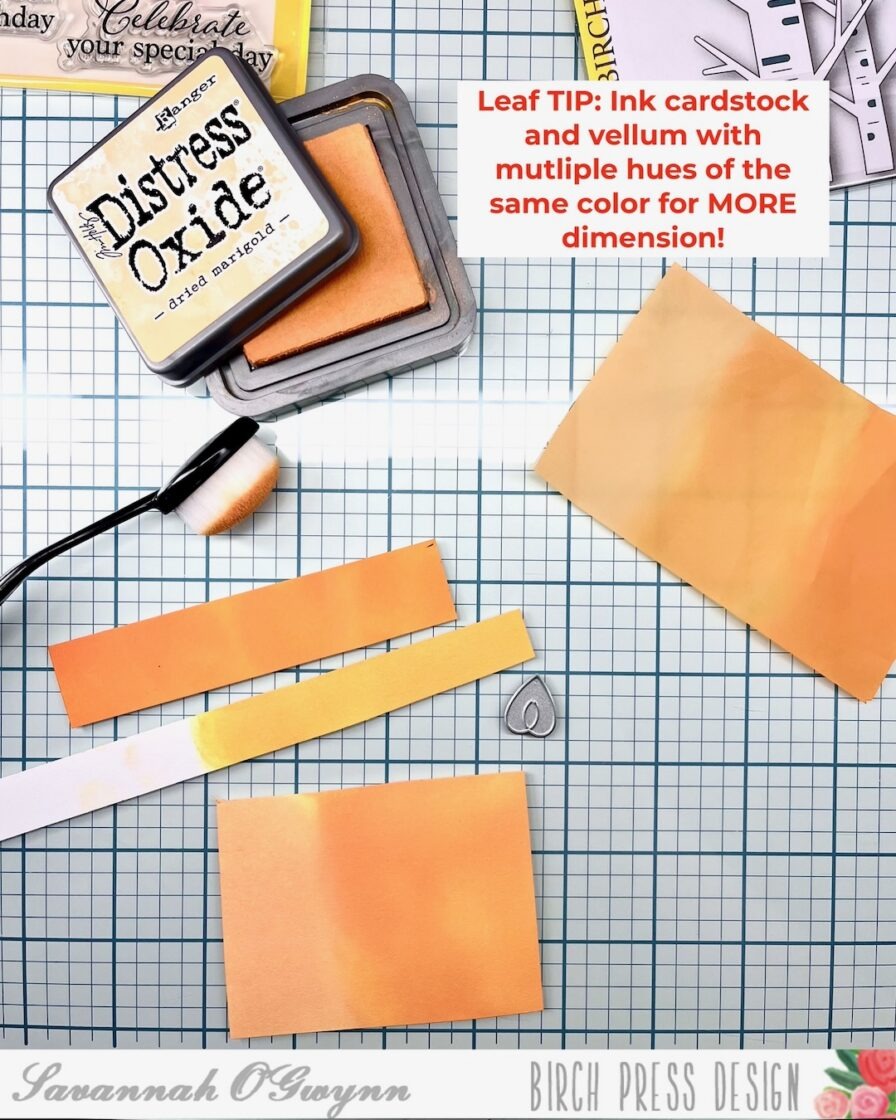
TIP: You can use multiple hues of the same color or multiple ink colors for the leaves. You can also different cardstock types for extra dimension.
I used three different hues of orange inks, as well as thick white cardstock, thin white cardstock, and vellum paper, for my leaves.
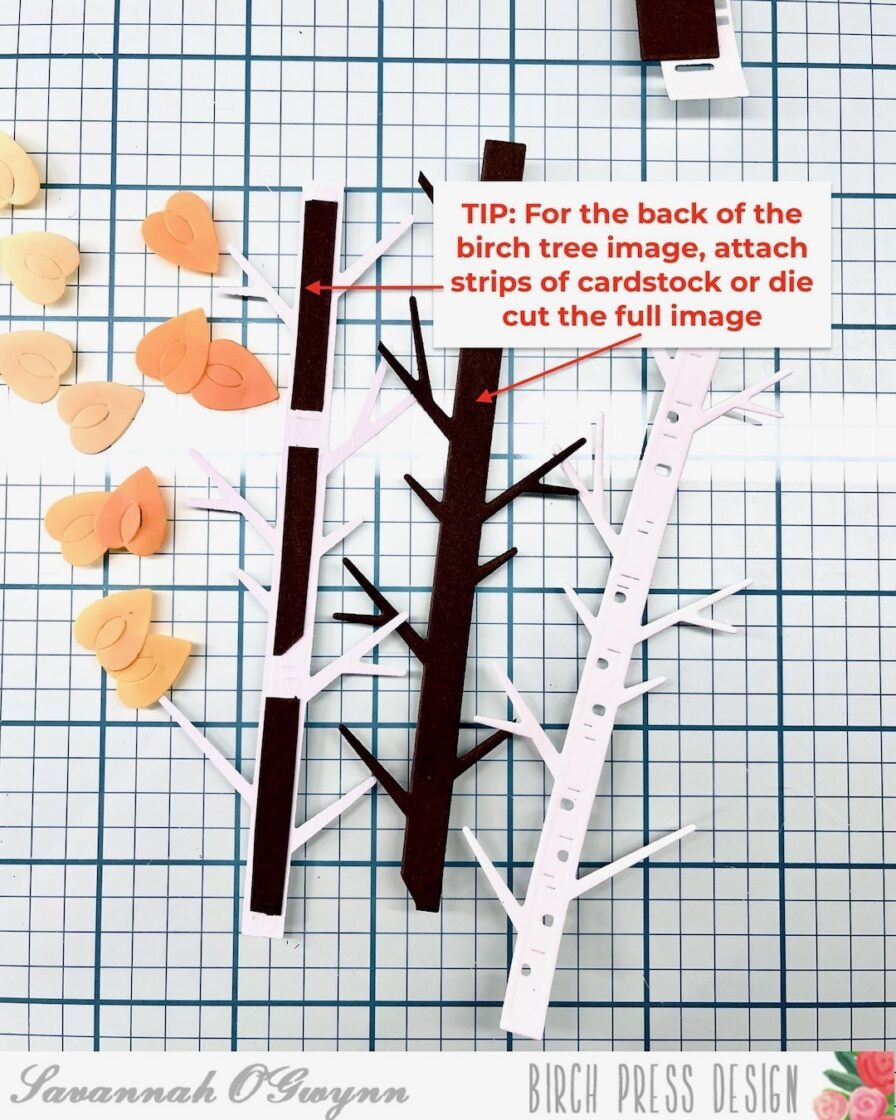
TIP: There are two different ways to fill in/cover the holes of the birch tree die image. You can attach just strips [scraps] of darker paper or die cut a second tree using the darker cardstock to layer your tree image.
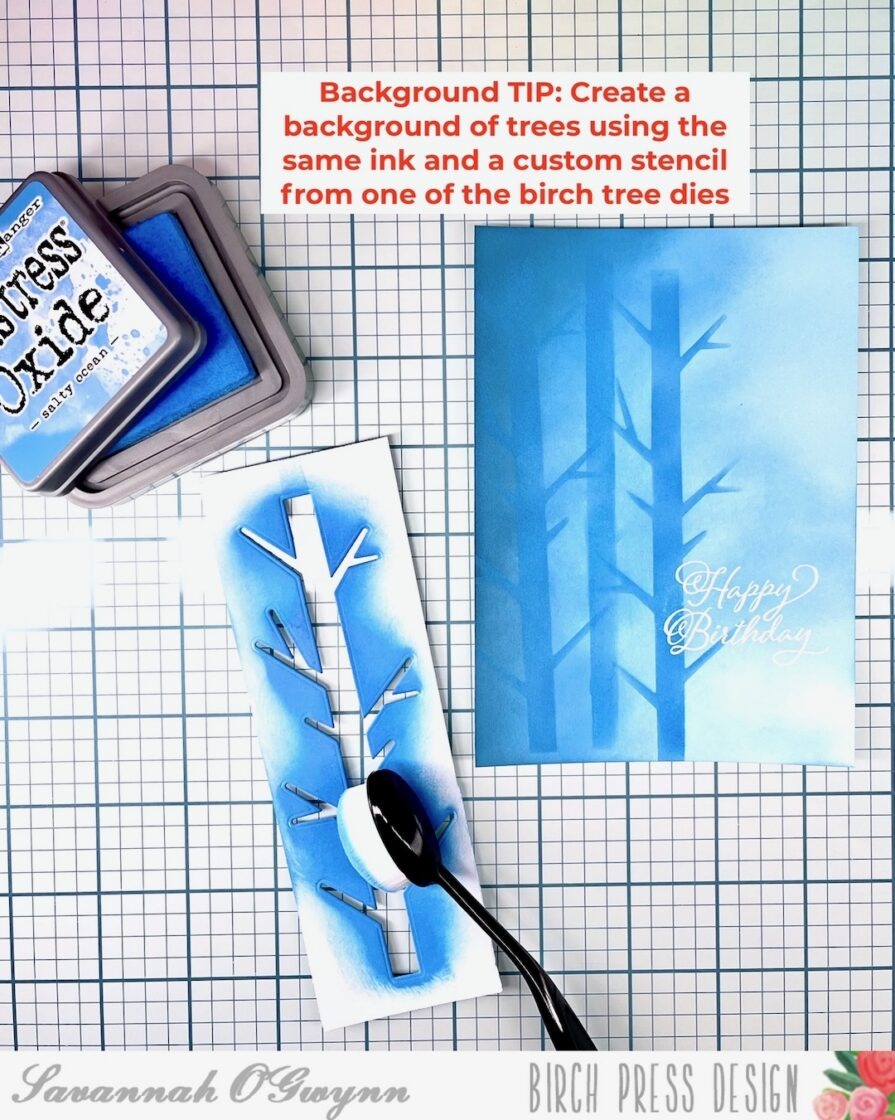
TIP: Create a stencil by die cutting a tree image.
You can die cut both sizes of trees for your stencil(s) or use just one tree image like I did. BONUS TIP: I would only one image per stencil piece this way you can cleanly add ink for your stenciled image. I also used the same ink as the background as the stenciled trees- this helped create a layer of interest but also helped the trees blend in and not stick out too much. Once the background was completed I added some darker ink blending to the left side of the cardbase.
Join me as I continue this Birch Tree series- which type of card design or theme with the Birch Tree die do you think I will make next? Should I do winter? Or a fun design? I’ll keep you posted 🙂
**Don’t forget to see my first Birch Tree Series designs HERE.
I hope that you are inspired and will join me in making different Birch Tree designs and cards!
I’ll be back with MORE soon!
Please remember to share what you create using these tips, tricks, and techniques or if you were inspired by my creation- I’d love to see what you make with this idea!
THANKS so much for stopping by! Happy crafting:)
HUGS <3 Sav