Category: Embossing Folder

  • A Colorful Celebration | By Natasha Vacca

    Hello Birch Press friends, it is Natasha here today and I am sharing a colorful celebration card using the beautiful Eloquent Butterfly layer dies! I had a lot of fun creating today’s card, so let’s get started!

    I started by cutting out each layer of the Eloquent Butterfly die set. I started with layer C using a piece of card stock from my scrap bin. Once the layer was die cut, I added a pink spray to the butterflies for added texture. Then I die cut layer B using the Memory Box Fresh Aqua paper pad. I chose an aqua shade of card stock from the pack. I added a blue and pink dye ink to each butterfly, spritzed with water, then added gold metallic watercolor splatters. I then die cut layer A using white card stock. I then added distress oxide ink, embossing powder, glaze, and foil to the top layer for added texture and interest.

    I then adhered each layer together using liquid glue. I then die cut the antennae for the butterfly using the Butterfly Basics die set. I die cut 2 antennae using the Memory Box Vintage Pastel Mirror pad. I then adhered these using liquid glue. I set my butterflies aside to create my background.

    For the background I chose a colorful gelli print from my background stash. I then ran this through my die cutting machine with the Memory Box Ringadings embossing folder. I added some gray dye ink to the folder as well to add texture to the dry embossed background. Next I trimmed the panel with my deckle edge trimmer, distressed the edges of the panel, and then added distress ink around the edges for more interest. I then adhered this panel to an A2 card base.

    To complete my card I adhered the butterflies to the card front, then chose a sentiment strip from my stash to complete my card. I had a lot of fun creating this colorful celebration! I hope you enjoyed it too! I will be back soon with more crafty inspiration!


    Supplies


    Supplies


  • Sparkly Butterfly Greetings | By Natasha Vacca

    Hello Birch Press friends, it is Natasha here today to share a card with you using lots of color and sparkle! For today’s card I am using the Butterfly Basics die set! Let’s get started!

    I started by creating 2 colorful background panels using Distress Mica Stain. I used 3 different colors to create my backgrounds. I spritzed each panel, allowed them to dry, then picked up some color with water. I repeated this process until I was happy with each panel.

    Once each panel was dry, I die cut 2 butterflies using the Butterfly Basics die set. I love these large butterflies! I then die cut the antennae for each butterfly using the Memory Box Vintage Pastel Mirror Pad. I then adhered the antennae to the butterfly using liquid glue. I set these aside to work on my background.

    Next I ran a piece of white card stock through my die cutting machine with the Memory Box Geometric Crystals embossing folder. I then tore a section of the panel off for a distressed look. I trimmed the panel down and then chose a piece of coordinating pattern paper. I then adhered these to an A2 card base.

    To complete my card I added foam tape to the back of each butterfly then adhered them to my card front. I chose a sentiment from my stash and added a piece of pattern paper to compliment my design.

    I had so much fun creating today’s card! I will be back soon with more crafty inspiration!


    Supplies


    Supplies


  • Prime Peony Hello | by Crystal Komara

    Prime Peony Hello | by Crystal Komara

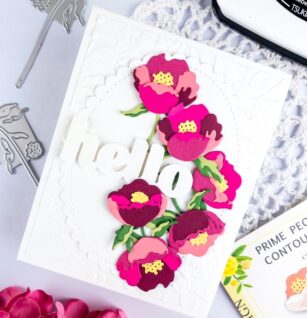
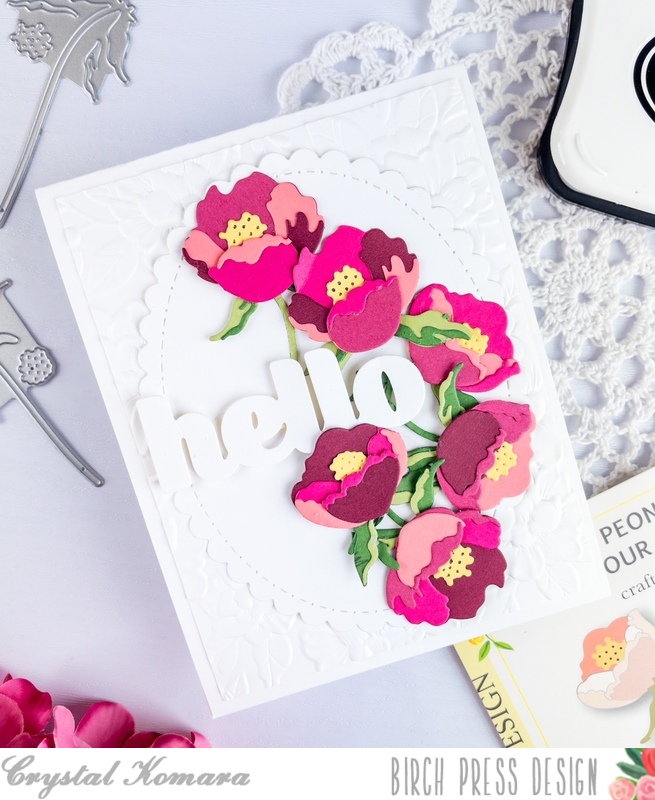
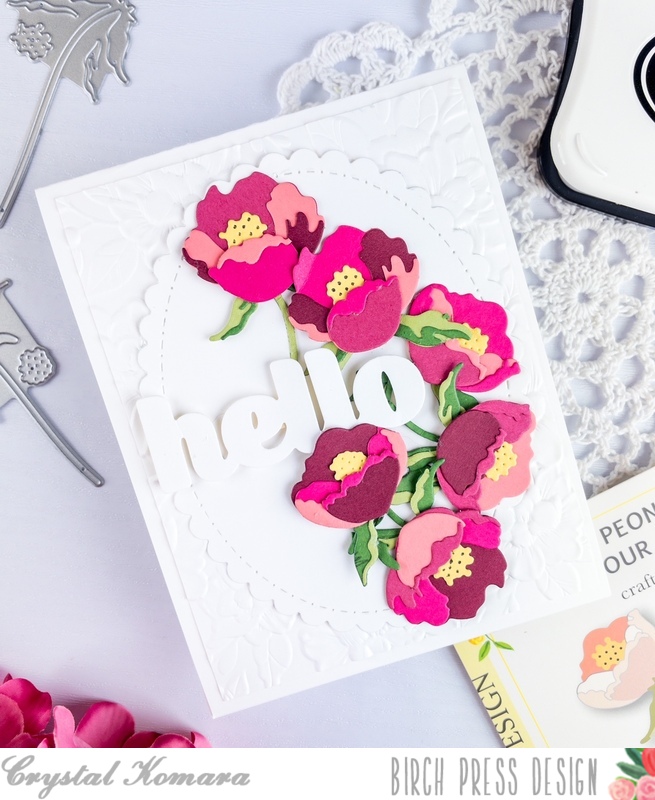
    Hello readers! Now that spring is officially here (oh but wait, is it??) Oh well, I declare spring IS here! Let’s celebrate with all things floral. This is Design Team member Crystal Komara here with you today sharing this hello card made using the Prime Peony Duo Contour Layers.

    Card details:

    The base of this A2 sized card is made from 80 lb. Neenah Solar White Smooth cardstock. I cut a 5 1/4″ x 4″ piece of the same Neenah White cardstock and ran it through my Big Shot using the Blooming 3D embossing folder from Memory Box Co. (a sister company of Birch Press Design). I adhered this embossed background directly to the card base. Next, I die cut a large oval from white cardstock.

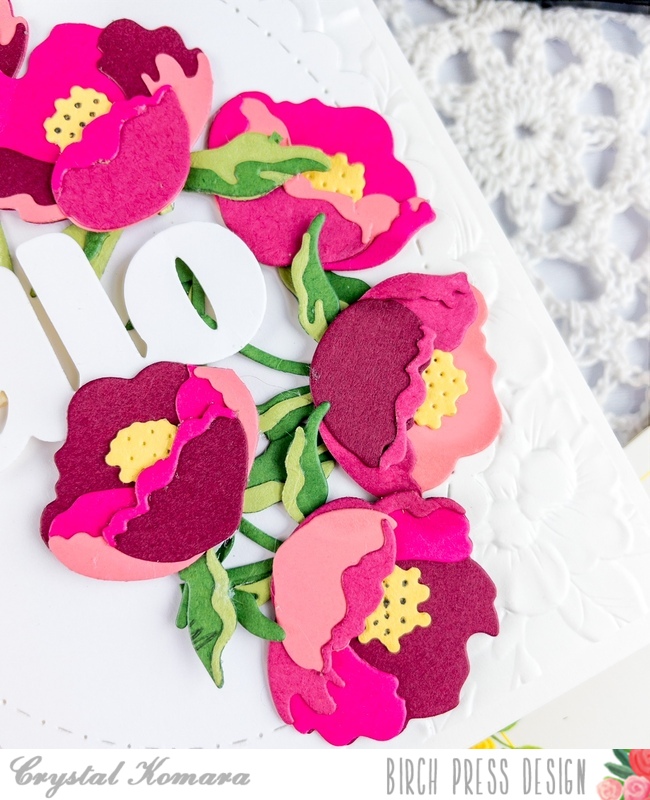
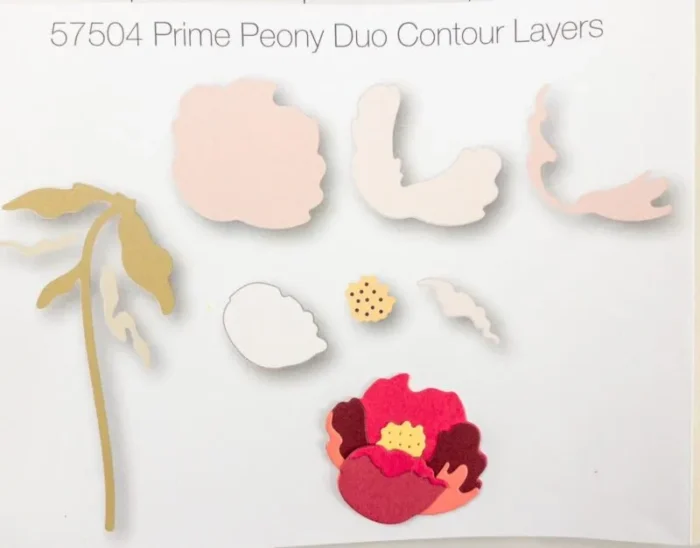
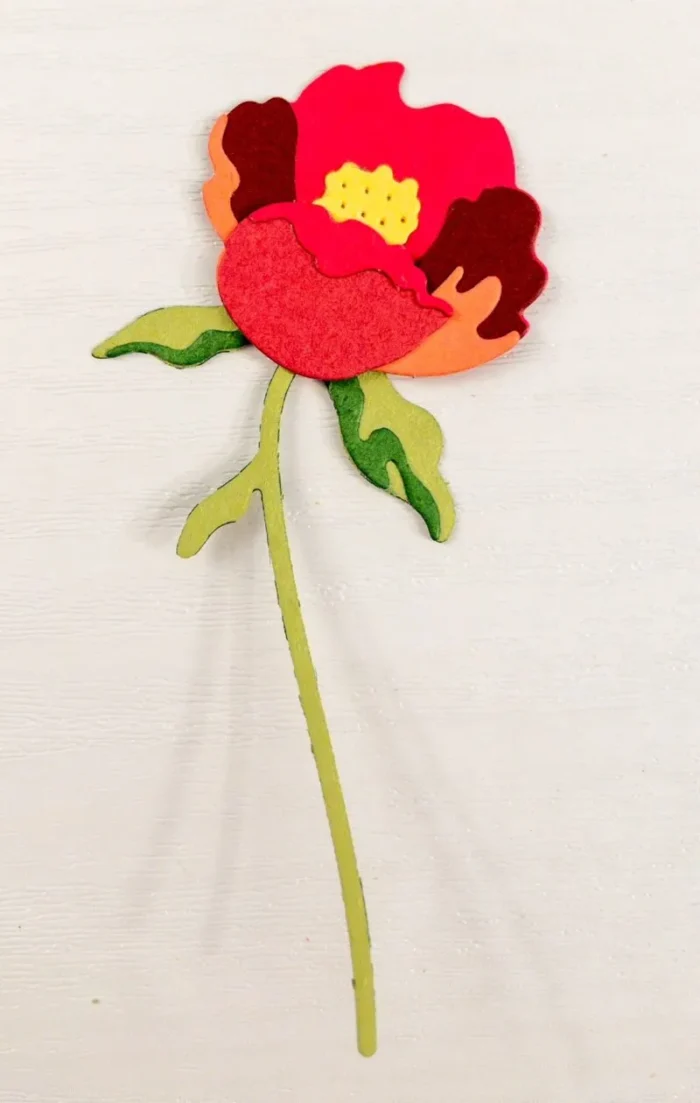
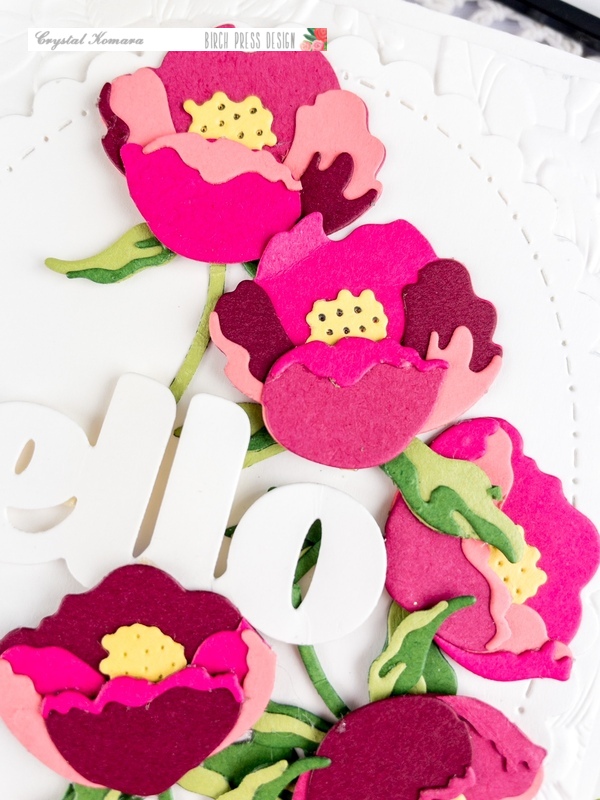
    To create all the peonies, I die cut the various layers of the Prime Peony from different colored pink cardstocks and then using the image provided, I was able to assemble them (with only limited curse words!) Trust me, I’m not proud of my less-than patience.

    After adhering all the peony pieces together I adhered them to the card using 3M foam adhesive for added dimension. Lastly, for the sentiment, I used the Big Hello Sugar Script die. I die cut just the top layer (not the shadow layer) from white cardstock. I cut this layer three times and them on top of each other before adding them to the card.

    I hope you have enjoyed this card! Thanks for visiting and have a wonderfully creative day!

    Supplies

  • Rainbow Roundabout | by Crystal Komara

    Rainbow Roundabout | by Crystal Komara

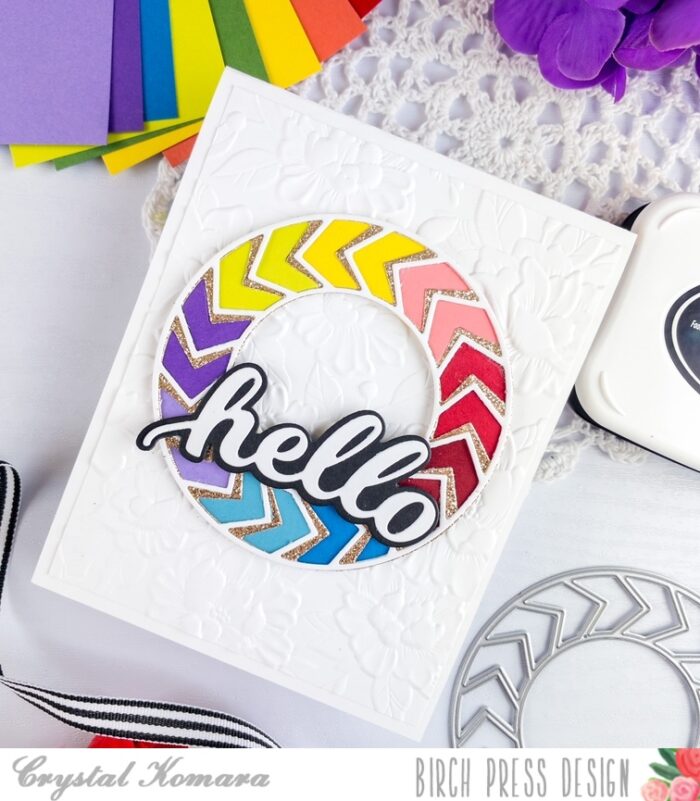
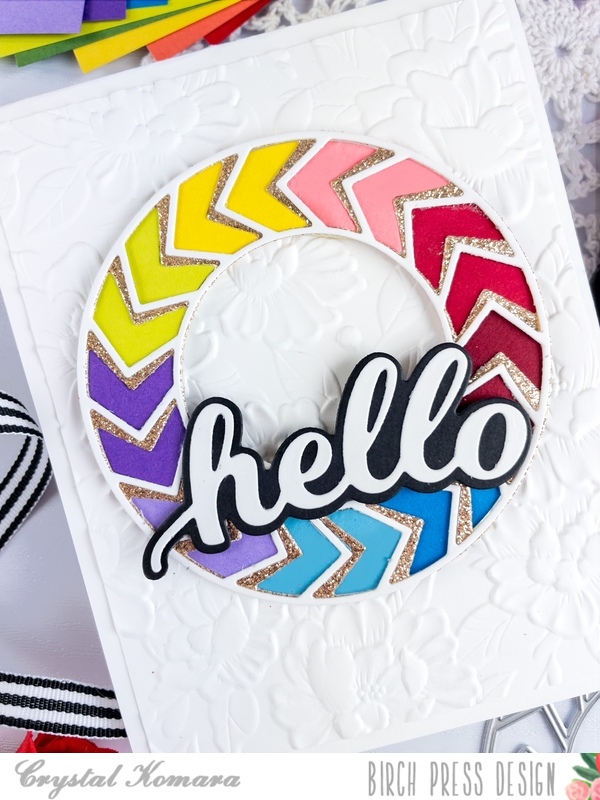
    Hello readers! This is Birch Press Design Team member Crystal Komara here with you today sharing some rainbow inspiration using the Roundabout Layer Set. I love creating rainbow colored cards, I just find them so cheerful and uplifting!

    Card details:

    The base of this A2 sized card is made from 80 lb. Neenah White Solar Smooth cardstock. Using the same Neenah white cardstock, I cut a 5 1/4″ x 4″ piece and ran it through my Big Shot using the Blooming 3D embossing folder from Memory Box Co. (a sister company of Birch Press Design).

    Continue reading below to see how I created and assembled the rainbow roundabout itself, it was a little bit tricky!

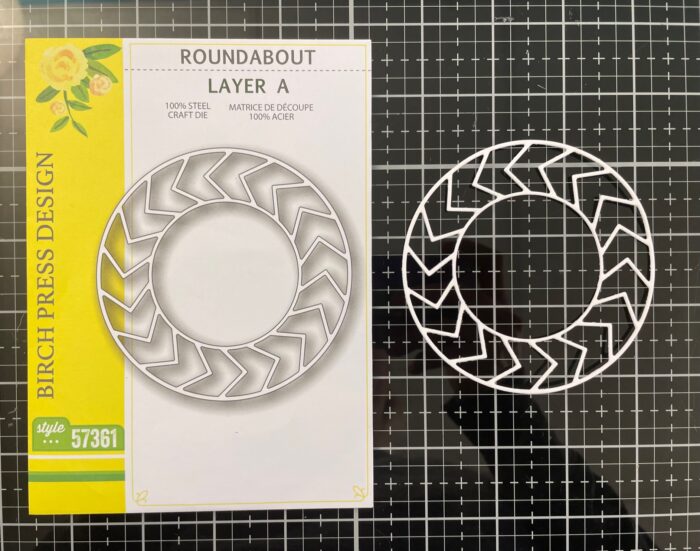
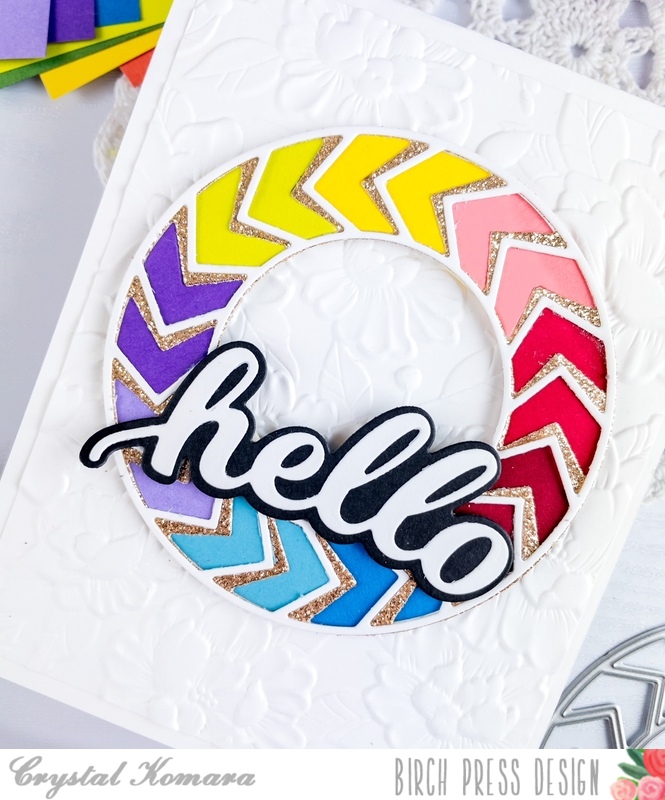
    Step 1: Die cut Layer A of the Roundabout Layer Set from white cardstock.
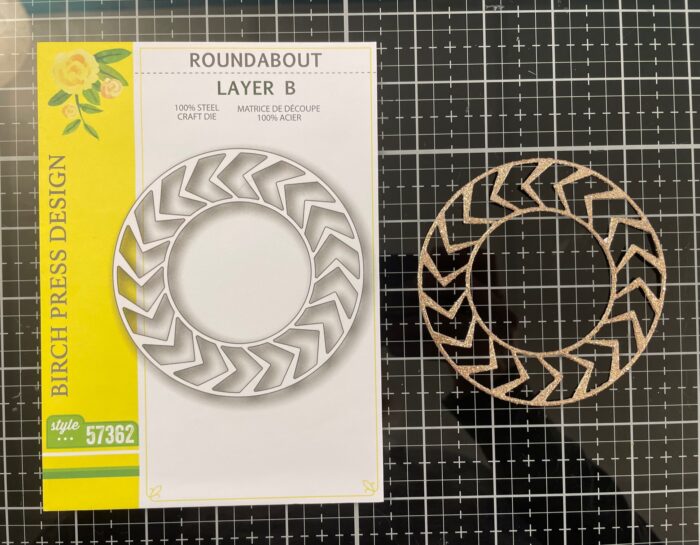
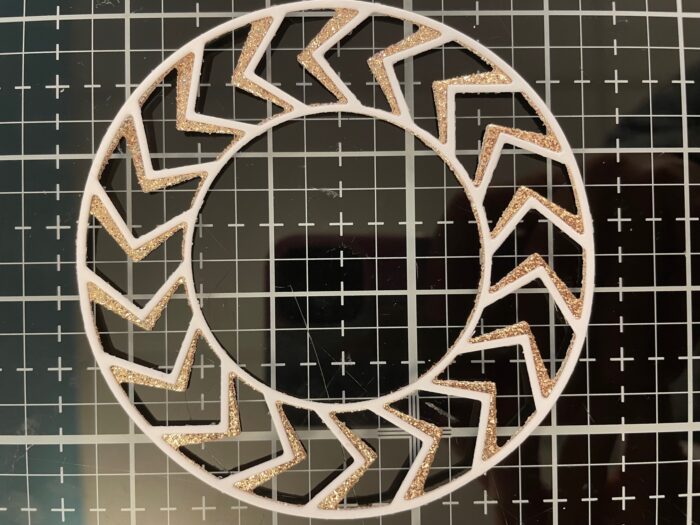
    Step 2: Die cut Layer B of the Roundabout Layer Set from gold glitter cardstock.
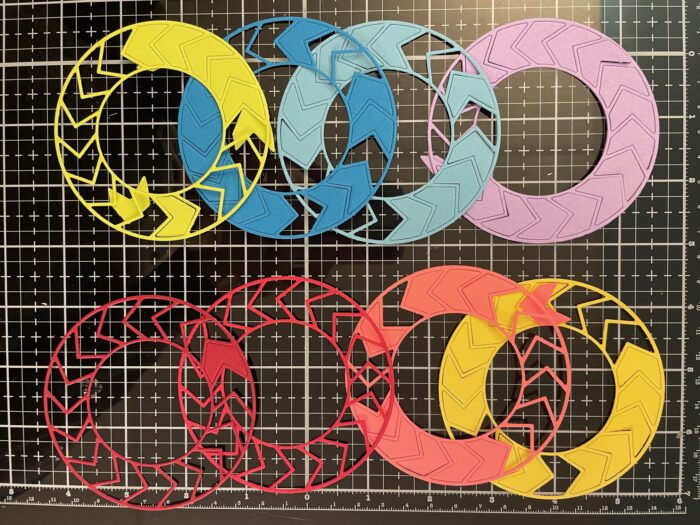
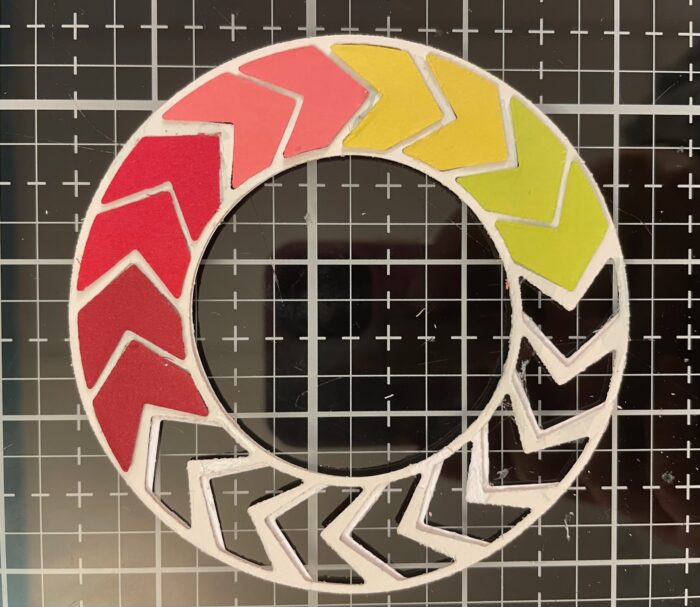
    Step 3: Die Cut Layer A from the Roundabout Layer Set from all the colors of the rainbow – ROYGBIV. Red, orange, yellow, green, blue, indigo and violet.
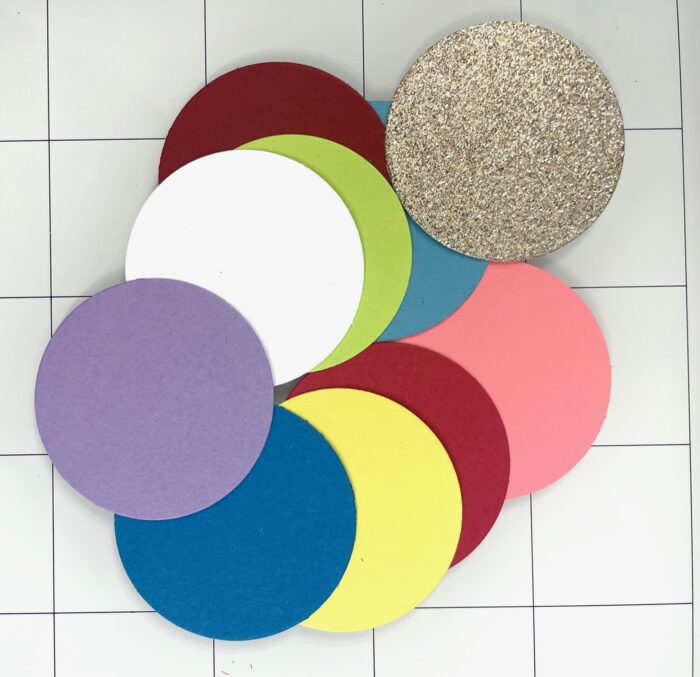
    Step 4: Save the large solid circles for another card!
    Step 5: Adhere Layer A (white cardstock) over Layer B (gold glitter cardstock) using a fine-tip liquid glue.
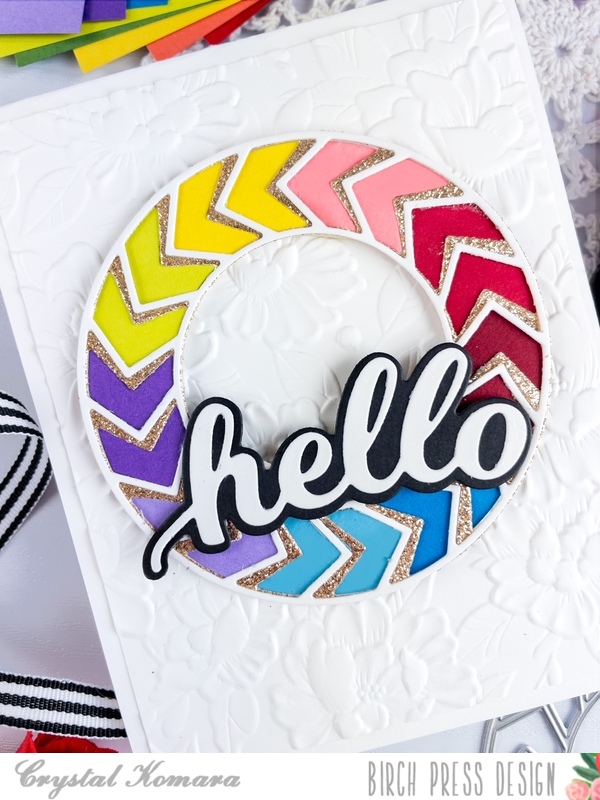
    Step 6: Piece all the little shapes back into the die in a rainbow array.

    I then adhered 3M foam adhesive to the back of the roundabout and adhered it to the center of the card.

    Using the Hello Honey Script word die, I die cut the back shadow layer from black cardstock and the thinner top outline from white cardstock. I adhered both layers together with a fine-tip liquid glue and then adhered the entire sentiment to the card using 3M foam adhesive for added dimension.

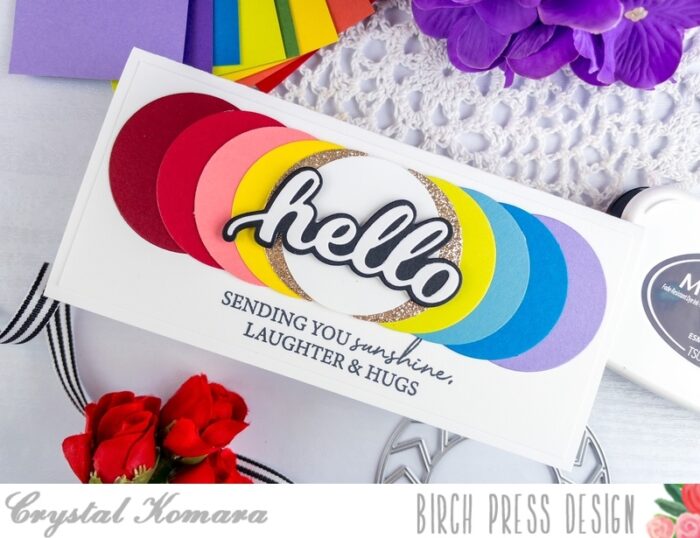
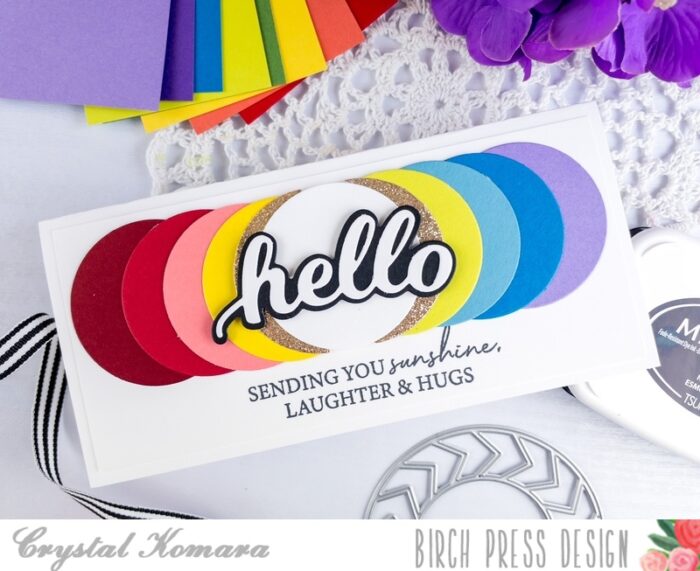
    I also created a second card using the leftover solid circles that were die cut from the Roundabout Layer Set.

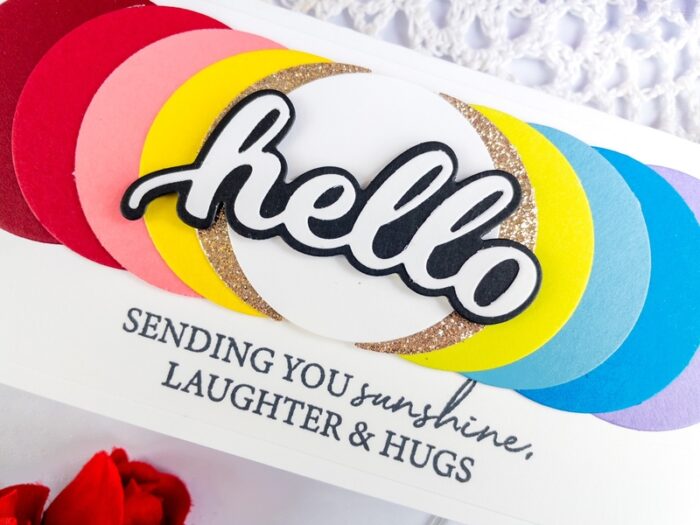
    This mini slimline card measures 6 1’2″ x 3″. Honestly, I made up my own dimensions on this card, so don’t take these measurements as being any sort of a “professional” size! I placed all the die cut circles leftover from the Roundabout Layer Set in a rainbow array horizontally across the card. I stamped the sentiment “sending you sunshine, laughter and hugs” in Memento Tuxedo Black ink. This sentiment is from the Kind Hearts clear stamp set.

    Using the same Hello Honey Script word die, I die cut the back shadow layer from black cardstock and the thinner top outline from white cardstock. I adhered both layers together with a fine-tip liquid glue and then adhered the entire sentiment to the card using 3M foam adhesive for added dimension.

    I hope you have enjoyed these two very colorful ways to use the Roundabout Layer Set. Thanks for visiting and have a wonderfully creative day!

    Supplies

  • A Springtime Thank you | By Natasha Vacca

    Hello Birch Press Friends, it is Natasha here and I am excited to be back on the blog today! Today’s card features 2 of the new die sets in the latest release from Birch Press Designs. I am using the beautiful Sprouting Crocus Contour Layers die set and the Thank you Noted Script hot foil plate and die set. So let’s get started!

    I started today’s card by creating 2 backgrounds using sprays. One panel was made using shades of purple and the other panel was created using green spray inks. Once the panels were complete and dry, I die cut the Sprouting Crocus Contour Layers die set using both panels. The flowers in purple and the stems in green.

    Next I added a bit more ink to each layer of the blooms and the leaves. On the flowers I used purple and pink ink. On the leaves I used green and brown. I applied the inks using a sponge dauber. Next I adhered the Crocus flower layers together using liquid glue. I then set these aside.

    Next I chose a background from my stash. I ran the background through my die cutting machine with the Memory Box Ringadings 3D embossing folder. After one pass I removed the panel and added Distress Oxide in the shade Aged Mahogany to the raised areas of the folder. I added the ink directly to the embossing folder by gently swiping it onto the folder. I then lightly spritzed the folder with water and placed the card stock into the folder and ran it through my die cutting machine a 2nd time. I really like the texture this provides to the background.

    I then trimmed the panel using my paper trimmer. I roughed up the edges and added ink using a sponge dauber and distress ink. I added splatters to the panel using gold and white metallic water color. To complete my card, I adhered the panel to an A2 card base with a piece of pattern paper to frame the embossed panel. I then adhered the crocus flowers using foam tape and liquid glue to my dry embossed panel. I completed the card with the beautiful Thank you Noted Script sentiment. I love this hot foil sentiment! I adhered the sentiment using foam tape.

    Thank you so much for stopping by today! I will be back soon!


    Supplies


    Supplies


  • Bright Florals with Sprays | By Natasha Vacca

    Bright Florals with Sprays | By Natasha Vacca

    Hello Birch Press friends! I am excited to be back up on the blog today sharing a colorful floral card using 2 new dies sets from Birch Press Designs latest release! For today’s card I am using the new Phlox Blooms and Contour Layers and the Sylvan Berries and Leaves Contour Layers. I had a lot of fun, so let’s get started!

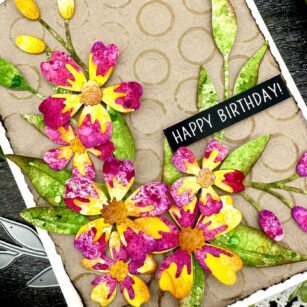
    I love these beautiful new florals and leaves and couldn’t wait to create a card with lots of color! I am dreaming of warmer days! I started by selecting 3 colors of sprays from my collection (pink, yellow, and green). I sprayed each color onto a piece of Canson Mixed Media card stock. I allowed each panel of color to dry, spritzed with water, then used a paper towel to add texture. I repeated the process several times. I allowed each panel to fully dry, then die cut the florals and leaves.

    Once all the florals and leaves were die cut, I added dye ink to each of the die cut leaves, stems, and flowers. I applied the dye ink using a sponge dauber. On the leaves and stems I used a dark green and brown shade. On the yellow I used a dark orange and on the pink florals I used a deep shade of purple. Next I adhered the floral and leaf layers together using liquid glue. I set these aside to work on my card panel background.

    Next I chose a piece of kraft card stock from my stash. I ran the card stock through my die cut machine using the Memory Box 3D folder – Ringadings. I then lightly sanded the rings using a sanding tool. Next I added a bit of Distress Ink in Walnut Stain to a few of the rings. I then trimmed the panel using my Deckle Edge trimmer. I then used a distress tool to add a bit more distressing to the card panel. Next I added more Walnut Stain to all 4 sides of the panel. I then adhered the Ringadings card panel to an A2 card base.

    To complete the card I adhered the leaves and florals to the card panel using a combination of liquid and foam adhesive. I chose a Happy Birthday sentiment from my stash. I added a few Fairy Drops to a few of the leaves. I adhered these with liquid glue.

    I had a lot of fun creating today’s card! I hope you enjoyed it! I will be back soon!


    Supplies


    Supplies


  • Morning Rose Happy Birthday | By Natasha Vacca

    Hello Birch Press friends, I am so excited to be back on the blog today sharing a few favorite floral die sets. On today’s card I used the Morning Rose and Triple Buds Contour Layers, Tropical Hibiscus, and the Fuddled Leaf Branches die sets. I had fun creating today’s card, so let’s get started!

    I started today’s card by choosing my color palette using 2 paper pads from Memory Box: Sunny Orange and Fresh Aqua. I chose 2 shades of aqua and 3 shades of orange. I then started die cutting the leaves from the Tropical Hibiscus Contour Layers and the Fuddled Leaf Branches Contour Layers die sets. Next I die cut the florals using the Morning Rose and Triple Buds Contour Layers die set using the orange shades of card stock.

    Once all the layers of flowers and leaves were die cut I added texture using Distress Oxide inks. I love adding ink blending to add more texture to the die cuts. Once I was happy with the ink blending, I added more texture using shimmer sprays. I then set these aside to dry. Once all the layers were dry, I adhered them together using liquid glue.

    Next I used 2 different shimmer sprays to create a background. Once all the layers were dry, I ran the inked background through my die cutting machine with the Memory Box 3D Geometric Crystals embossing folder. To add a bit more texture I added ink and distress crayons to the raised areas of the dry embossed background.

    Next trimmed the panel using my paper trimmer then distressed the edges using my scissors. I then adhered the panel to an A2 card base. I then adhered the leaves, floral buds, and rose to the card front using foam tape and liquid glue. I completed the card using a sentiment strip from my stash.

    I had so much fun creating today’s card! I love these florals from Birch Press! They are so fun and easy to use! I hope you enjoyed today’s card. I will be back soon with more crafty inspiration!


    Supplies


    Supplies


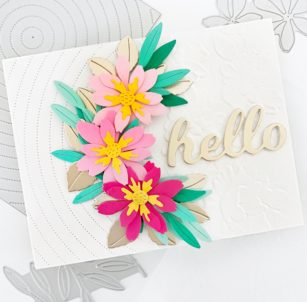
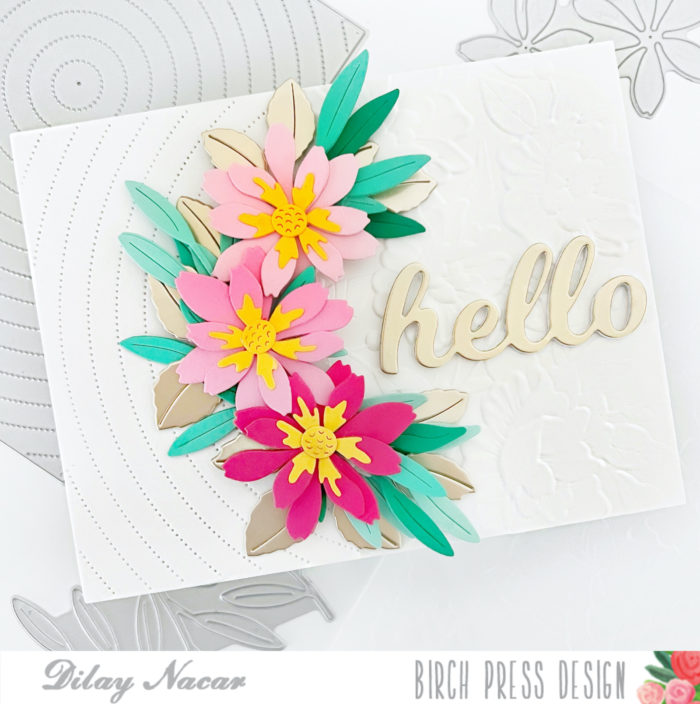
  • Floral Hello | By Dilay Nacar

    Floral Hello | By Dilay Nacar

    Happy Friday, crafty friends! Dee here today sharing this fresh floral card featuring the Star Flowers Contour Layers dies combined with a few other favorites!

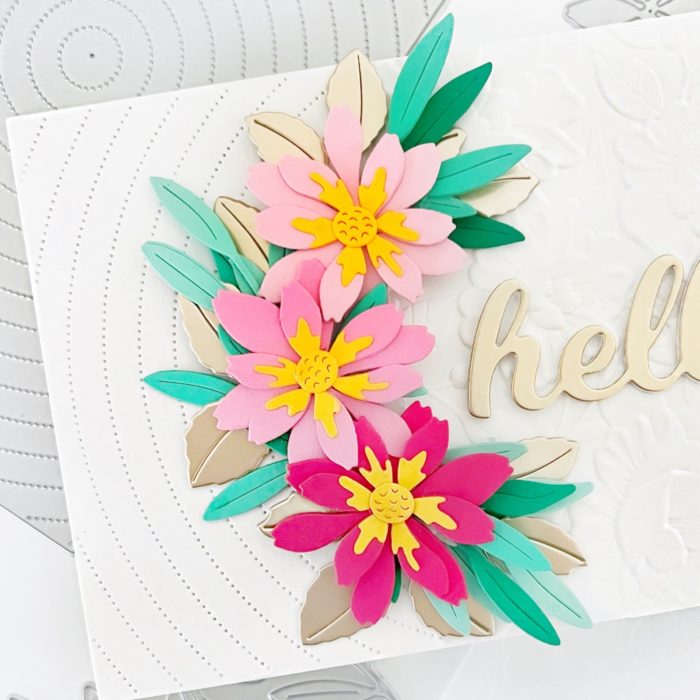
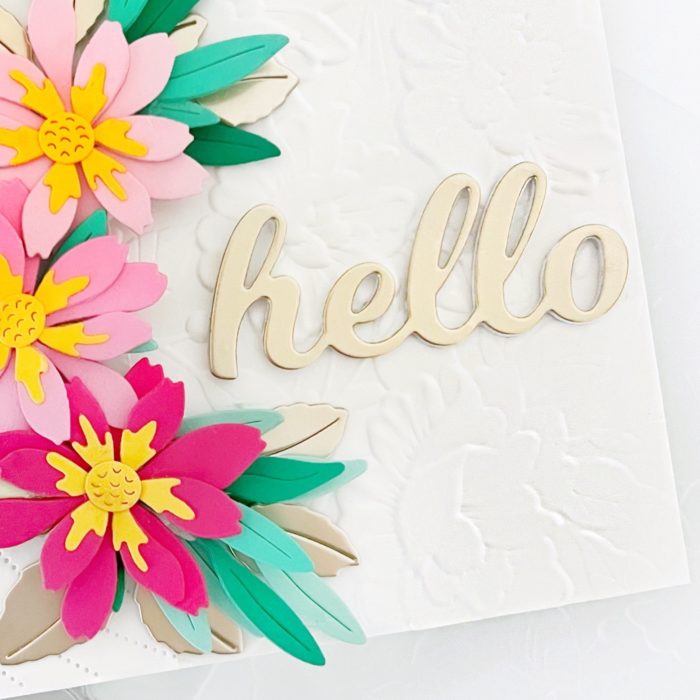
    First, I created the background by die cutting the Pinpoint Radial Plate die and cutting it in half. Next, I embossed an A2-sized card base with the Memory Box Blooming 3D Embossing Folder, then adhered the partial Pinpoint background on top.

    Next, I cut the Star Flower Contour Layer dies twice in three shades of pink cardstock and die cut the centers in yellow cardstock, then adhered them together. I die cut leaves from the Dainty Rose and Leaves and Tiny Tuft Flowers and Leaves die sets in different shades of teal, and metallic cardstock, then adhered them, tucked in, behind the flowers. 

    To finish, I cut the hello from the Hello Topper in the same metallic cardstock and adhered it over the top. Thanks so much for joining me today!


    Supplies

  • Clean and Simple Holiday Card | By Dilay Nacar

    Clean and Simple Holiday Card | By Dilay Nacar

    Hello and welcome back, crafty friends! Dee here today, sharing this clean and simple card featuring the gorgeous Meridian Ornament Layer Set!

    To create the base, I embossed an A2-sized white panel using the Memory Box Ringadings embossing folder, then adhered it onto the top folding card base.

    Next, I cut the Meridian Ornament Layer dies in white, mirror gold, and gold glitter cardstock. Once complete, I adhered the layers together and then onto the center of the background. I cut the bow and ornament cap from the Christmas Ornament Pop-Up Easel set, then adhered them onto the ornament. To finish, I added a few gold embellishments and a simple sentiment strip from my stash! 

    Thank you so much for joining me today!


    Supplies

  • Find Joy in Snow | by Toni M Maddox

    Find Joy in Snow | by Toni M Maddox

    Hello, Birch Press fans! Toni here with you today sharing a (relatively) clean and simple holiday/winter card in pink and black. I love that color combination, don’t you?

    I cut out the BPD Crochet Snowflake using the Memory Box Delicate Pastel Glitter and Vintage Pastel Mirror Pads along with white cardstock.

    I adhered that to the card front which I had embossed using the Memory Box Open Studio Ringadings 5 3D Embossing Folder.

    To finish the card, I added a few Memory Box Open Studio Autumn Jewels and the BPD Find Joy that I coated in clear Wink of Stella.

    It would be really easy to mass produce this design, changing out the colors, for a series of unique cards.
    I hope you enjoyed today’s card and have a great rest of your week!

    Supplies