Hello, friends! Toni here with you today sharing my love of all things spooky!
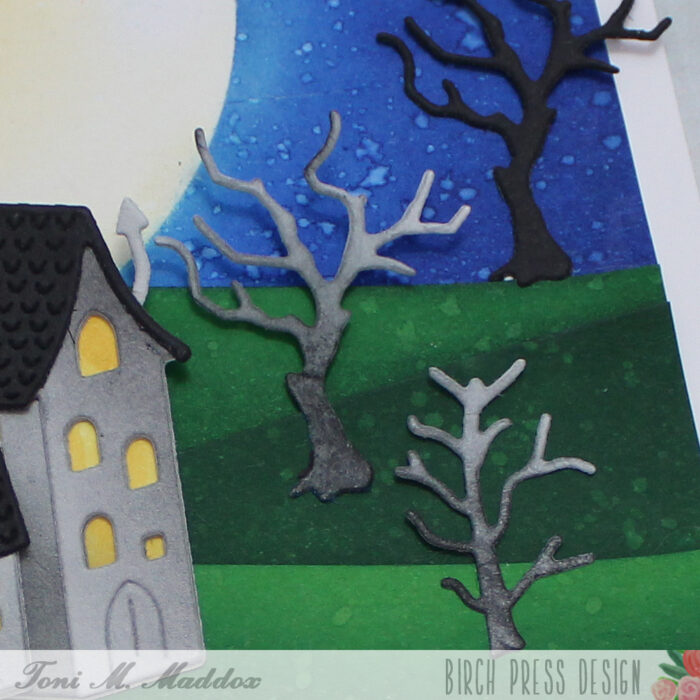
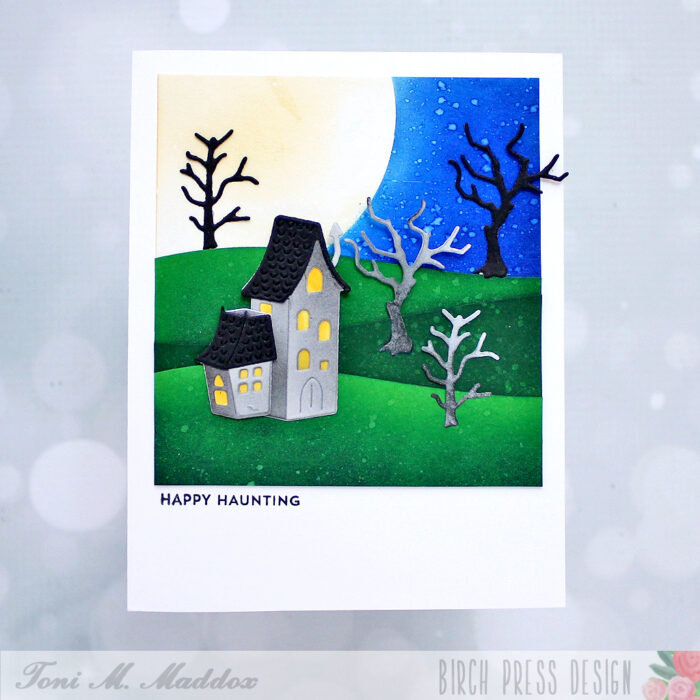
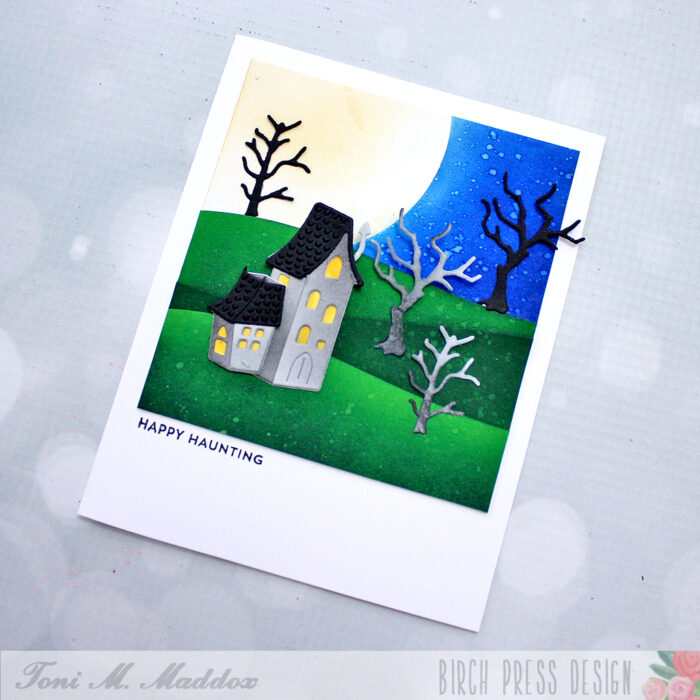
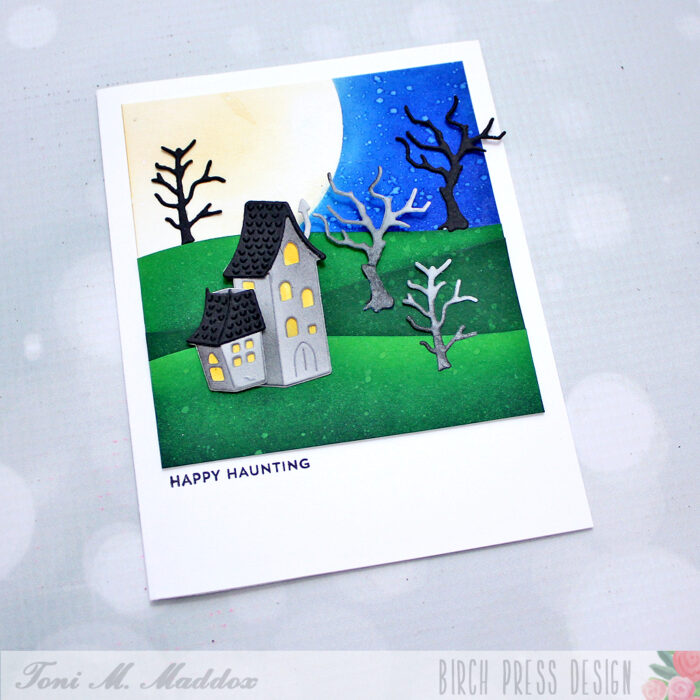
I masked a moon on the card front and sponged around it with Catherine Pooler Something Borrowed, Suede Shoes, and Dress Blues.
I cut out the Littletown Spooky Manor and Wavy Hillside dies. I used white cardstock for most of it but used Memory Box Cilantro cardstock for the hills.
I really like the Wavy Hillside layers as you can easily adjust their position as needed to create the vertical height you want.
I used Catherine Pooler Grass Skirt and Deck the Halls for the hills. For the trees and house, I used Catherine Pooler Midnight along with Distress Oxide Weathered Wood and Mustard Seed. Of course, I spattered the lot with a tiny bit of water for that worn look I love.
For a full list of products used and to see my other projects, feel free to visit my blog, Frankie Helps Craft. Have a great rest of your week!
I hope you enjoyed today’s card and have a wonderful rest of your week.
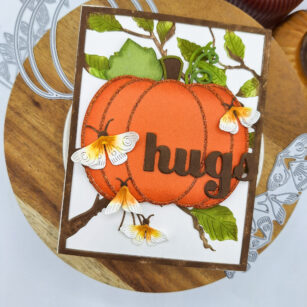
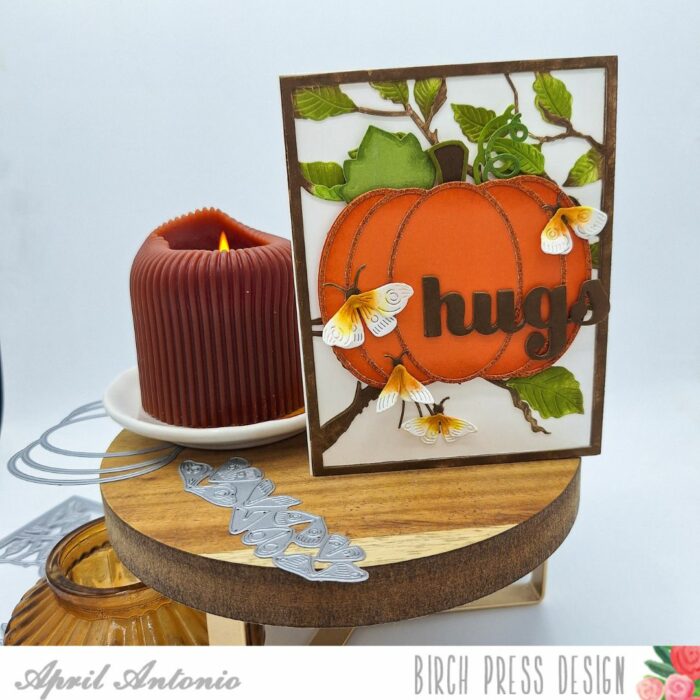
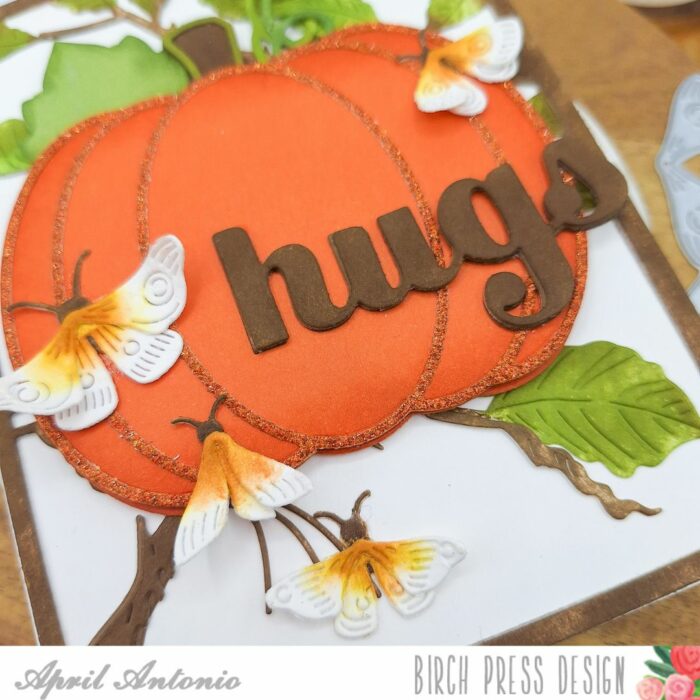
Hello friends! Design Team member April here today sharing a card in honor of the first day of Fall. Time to light some cozy candles, grab a warm blanket, and sink into a fun afternoon of crafting.
Here’s how I pulled this card together:
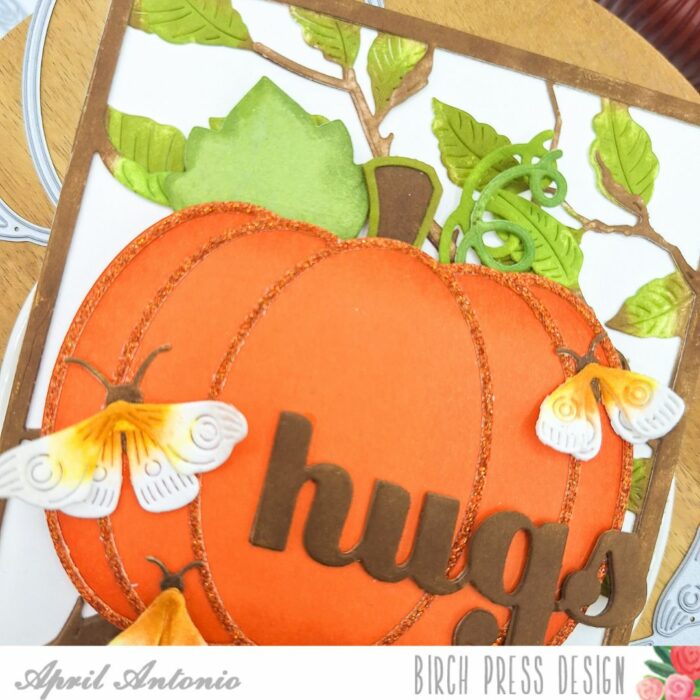
I used layer A and B from the Forest Canopy Layer set and ink blended on the leaves and branches with green and brown inks. I glued both layers together, and then used a tape runner to attach them to an A2 card front.
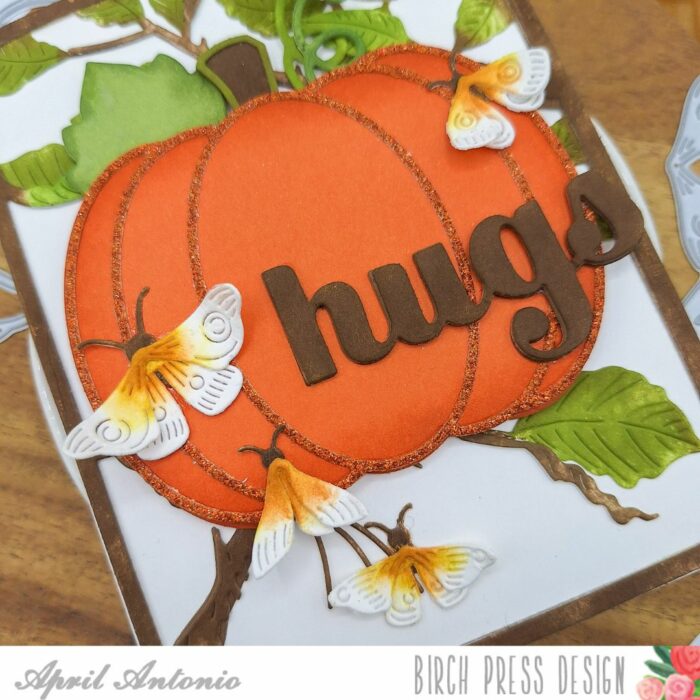
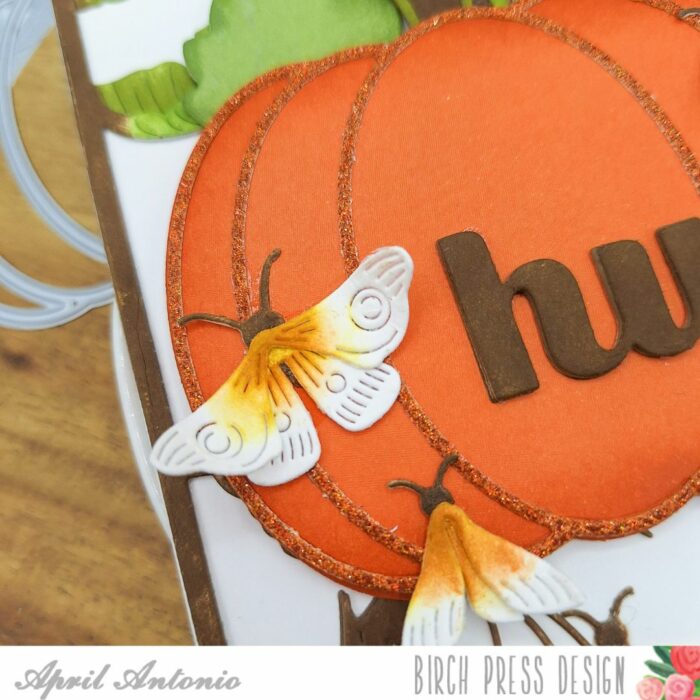
I then used a sheet of orange cardstock from the Sunny Orange cardstock pack to cut the background of the Adornment Pumpkin die set. I cut this out twice and used foam tape to glue the two pieces together.
I cut the outline part from a piece of orange cardstock from the Glitzy Glitter pad. I finished off the pumpkin by ink blending the stem and leaves and adding them to the top.
For my sentiment I used the Big Hugs Sugar Script die, cutting it out three times and ink blending brown onto the layers, and gluing them together.
Lastly, I cut out all the dies from the Evening Moths die set from white cardstock.
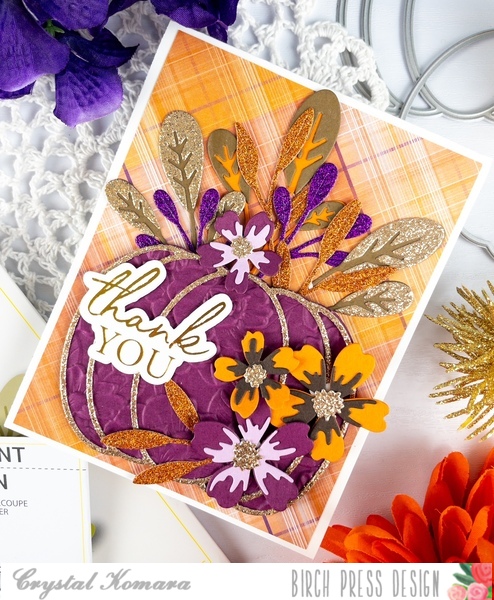
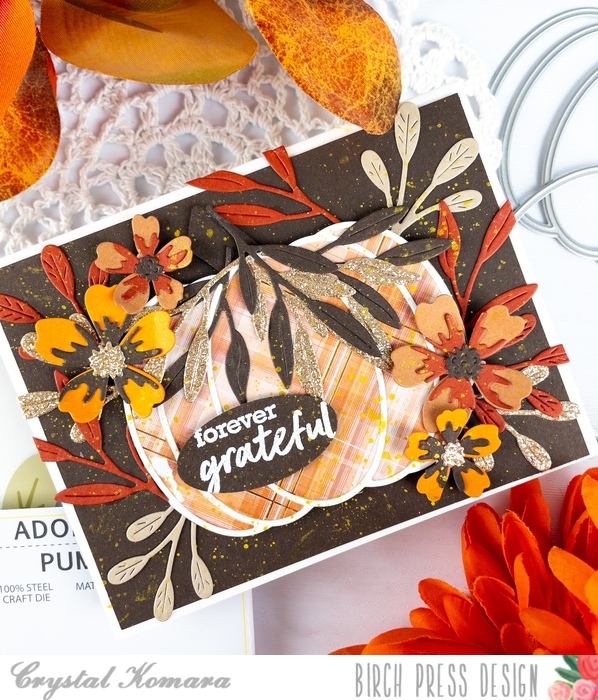
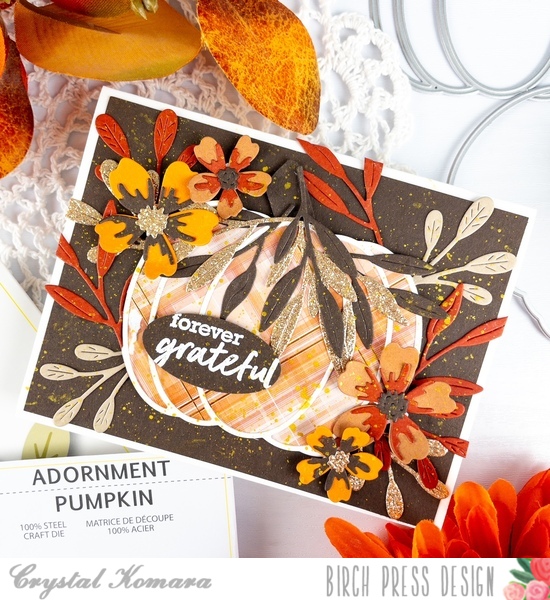
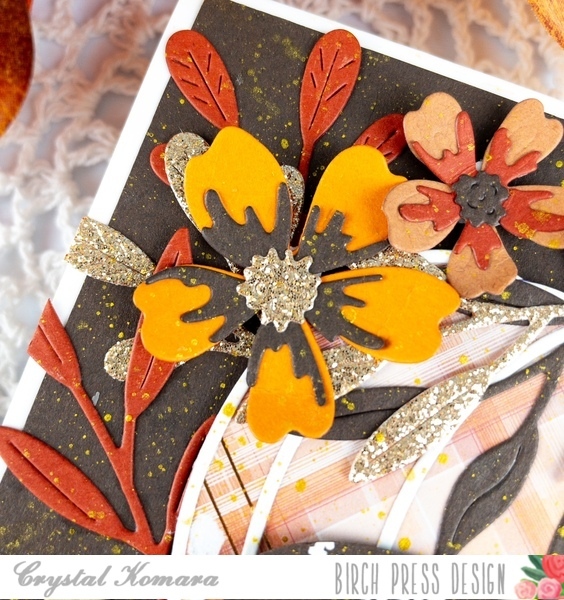
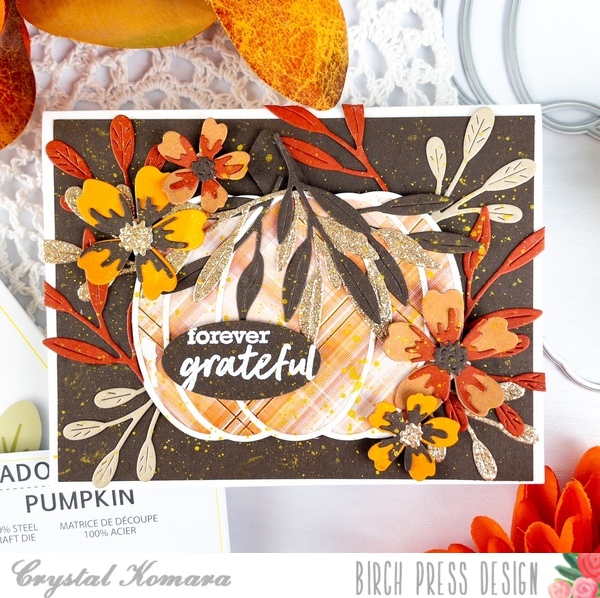
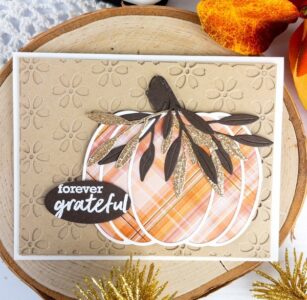
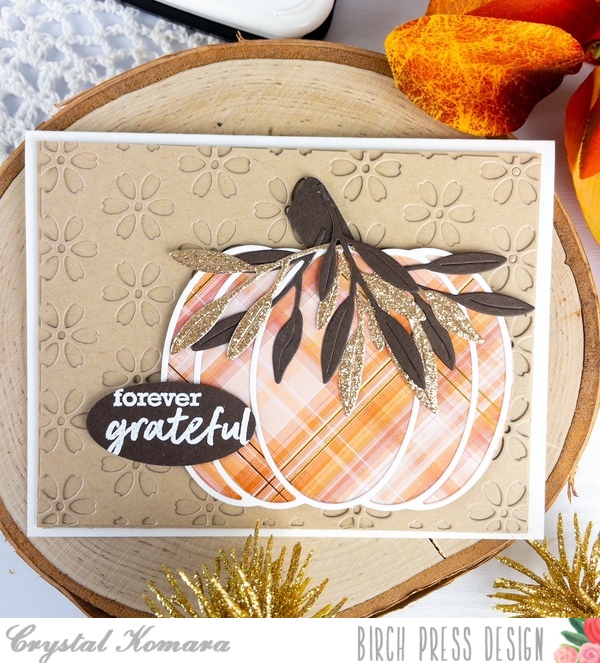
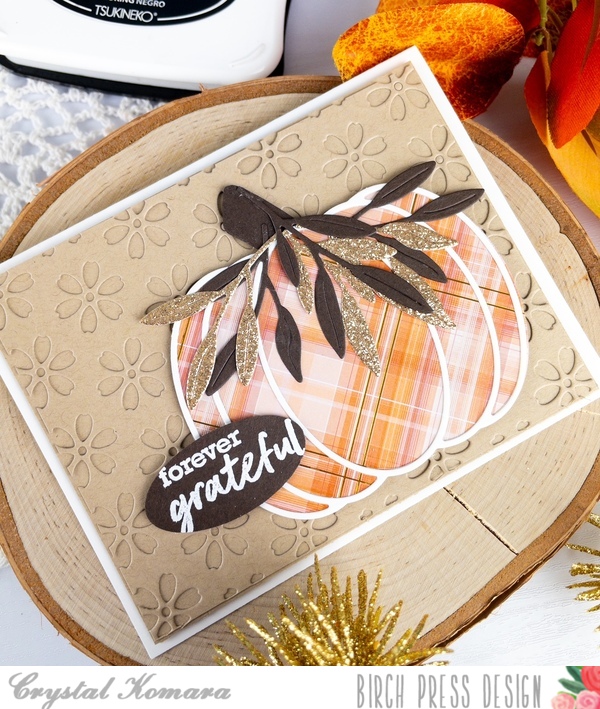
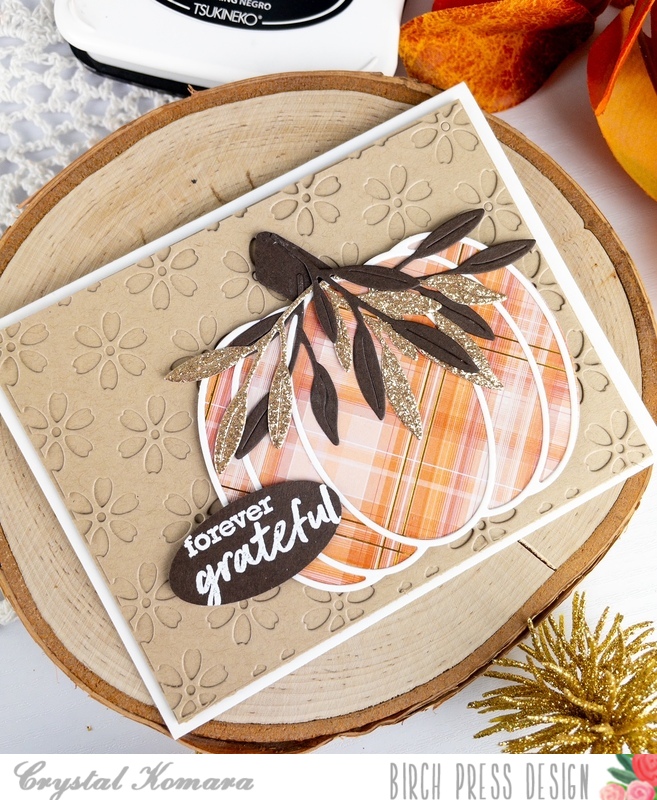
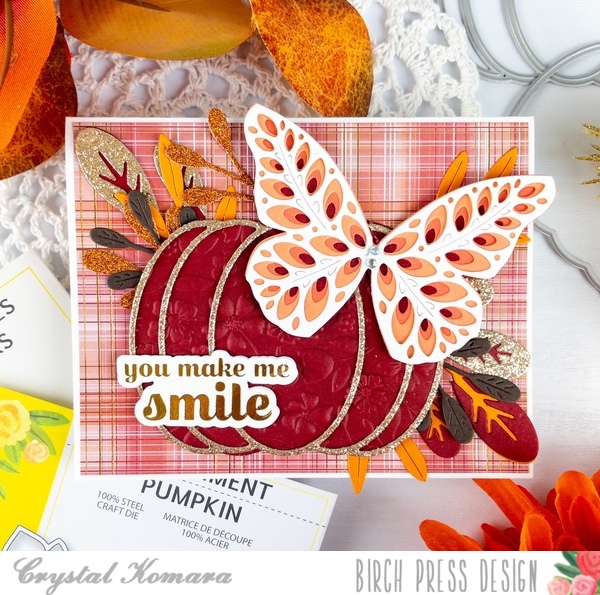
Hello fall friends! This is Design Team member Crystal Komara here to inspire you today! I have been sharing a lot of detailed intricate die cut cards lately, so today I thought I would keep my card a little more simple. I know that those intricate contour dies can be intimidating to some (as they were to me at first), but Birch Press Design makes so many gorgeous products, that you can cater the level of detail to your own personal taste.
Card details:
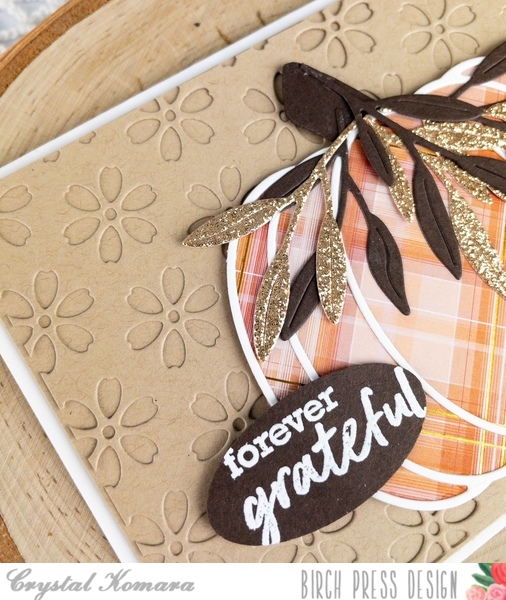
The base of this A2 sized card is made from 80 lb. Neenah Solar White smooth cardstock. I cut a 5 1/4 x 4″ piece of Kraft cardstock and adhered it directly to the card base. Then, using Layer Plate B of the Flora Plate Layer Set, I die cut that from Kraft cardstock and adhered it directly to the previous Kraft layer (so it’s kind of see through).
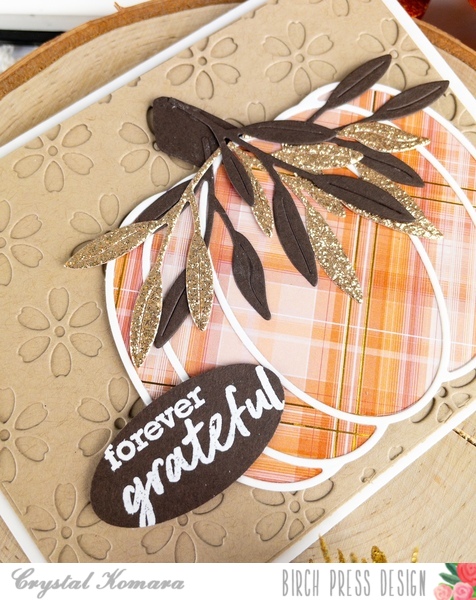
I die cut the base of Adornment Pumpkin from plaid cardstock from the Gladiola paper pack by Memory Box Company (a sister company of Birch Press Design). I LOVE their paper packs, they are all stunning. I cut the outline of the Adornment pumpkin from white cardstock. I layered the two together using a fine-tip liquid glue before adhering the pumpkin to the card with 3M foam adhesive for dimension.
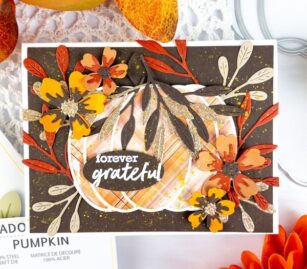
I die cut a bunch of leaves using the Tiny Tufts Leaves and Flowers contour set. I die cut these leaves in both a dark brown and gold glitter cardstock. I adhered the leaves to the top stem of the pumpkin. Lastly, I stamped the sentiment “forever grateful” from the Brush Sentiment clear stamp set. I stamped the sentiment in Versamark ink on dark brown cardstock and heat embossed the sentiment with white embossing powder. I then used an oval punch to punch out the sentiment. I adhered the sentiment to the pumpkin using 3M foam adhesive.
Fall is one of my favorite seasons to make cards for. I promise you will be seeing lots more ways to use this Adornment Pumpkin in the very near future!
Thanks for visiting and have a wonderfully creative day!
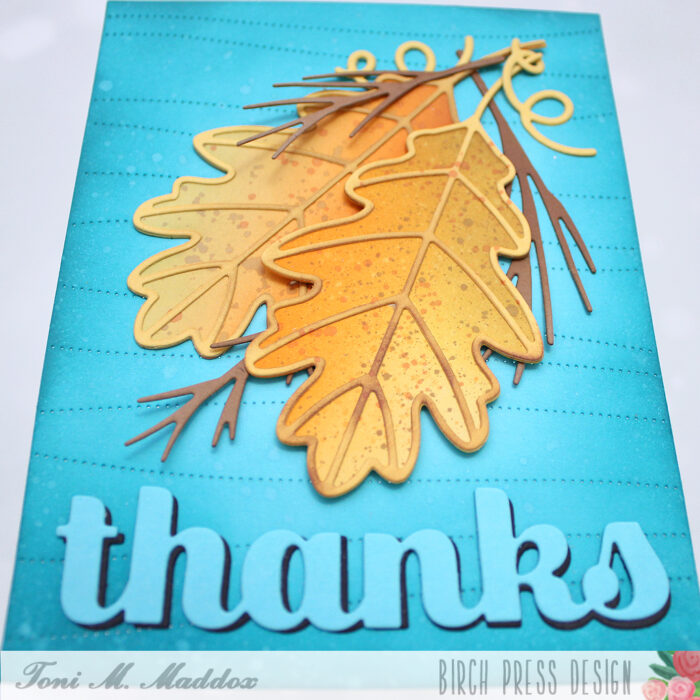
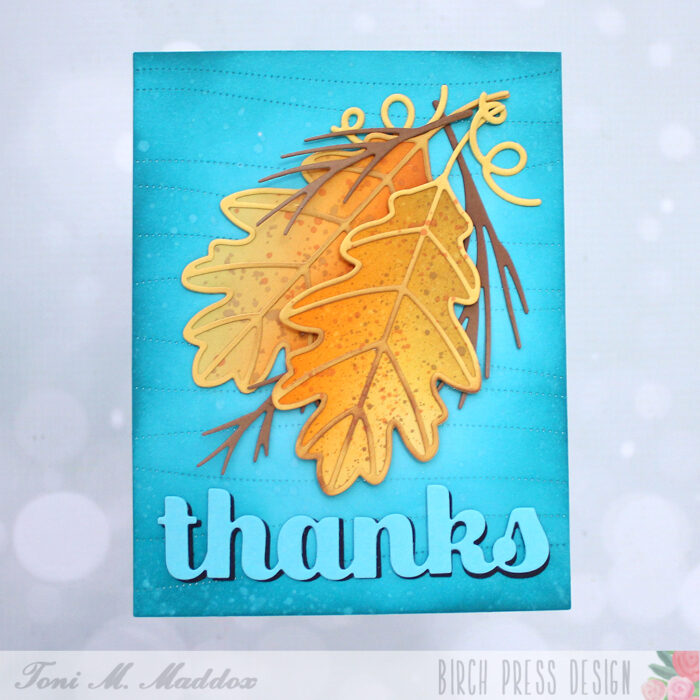
Hello, Birch Press fans! Toni here with you today after a bit of a hiatus. I’m glad to be back!
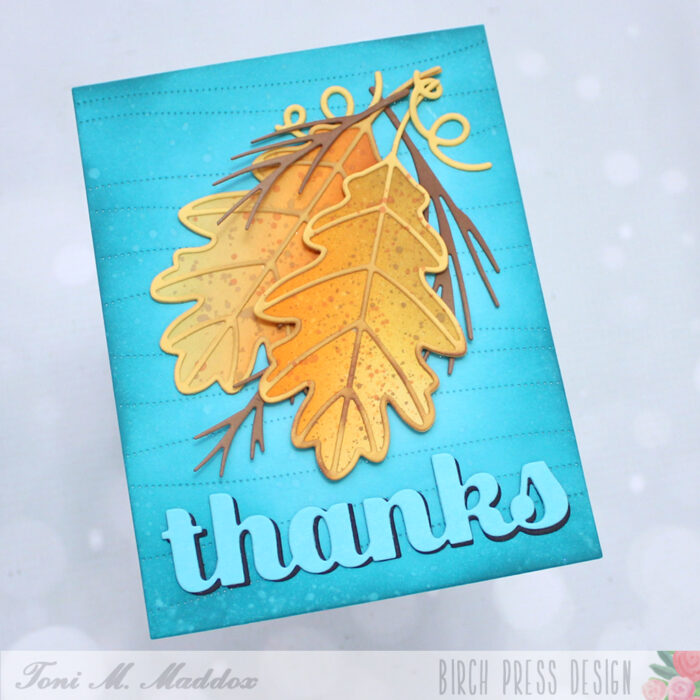
For today’s card I used a base of Memory Box Pool Party Solid Core Cardstock which I cut with the Pinpoint Contour Plate then sponged with Catherine Pooler All That Jazz, leaving the center alone to create a highlighted area.
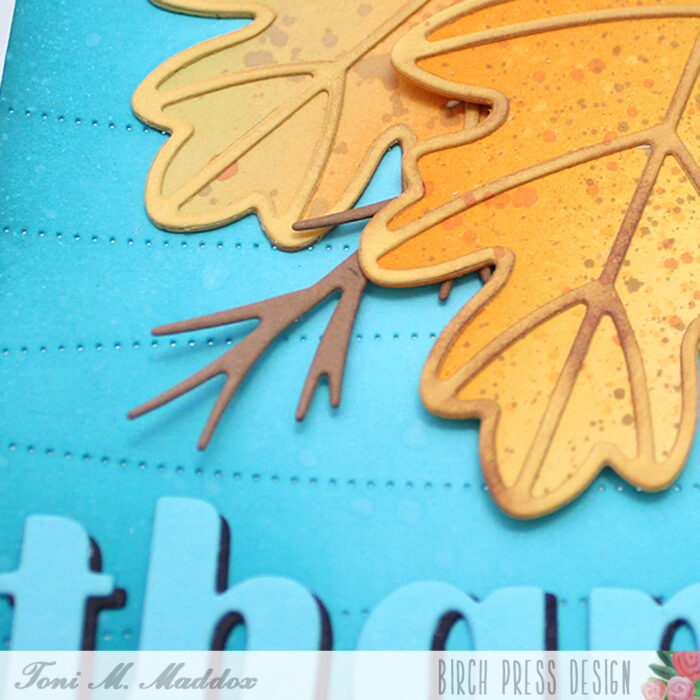
Next I cut out the Adornment Oak Leaf twice from Memory Box Golden Wheat Solid Core Cardstock. This cardstock is amazing. It has two different shades on either side of the paper!
I sponged my leaves with Catherine Pooler Limoncello, Tiara and Tiki Torch inks, and spattered with Distress Oxide Vintage Photo and Crackling Campfire. If you look at the bottom Oak Leaf, I didn’t sponge the bottom left so you can see the two colors. I just flipped the paper over as to cut out the outline.
I added some Hillside Branch and Bramble Contour Layers cut from a dark kraft cardstock and Adornment Pumpkin curls out the Golden Wheat cardstock.
To finish the card I cut the Sugar Script Big Thanks from the reverse side of Pool Party as well as black cardstock to create a shadow.
I hope you enjoyed today’s card and have a great rest of your week!
Hello Birch Press Design readers! This is DT member Crystal Komara here with you today and I can’t believe it’s November already! I have been loving the new Adornment Pumpkin dies and since I love creating with alcohol ink backgrounds so much, I decided to put the two together for this elegant card:
Card details:
The base of this A2 sized card was made from 80 lb. Neenah Solar White Smooth cardstock. To create the background, I die cut all three layers of the Viola Layering Plates from the same Neenah white cardstock and adhered them together with a fine-tip liquid glue.
Using the Adornment Pumpkin 2-piece die set, I die cut the pumpkin shadow from white cardstock and I die cut the intricate layer pieces from an orange pre-made alcohol ink background. I simply used Valencia orange alcohol ink on Yupo paper to create the alcohol ink piece. Just one color! I adhered the pumpkin together and die cut the stem from brown cardstock and the leaves from olive green cardstock. I adhered the assembled pumpkin to the center of the card using 3M foam adhesive for dimension.
On a thin white strip of cardstock, I stamped the sentiment “forever grateful” from the Brush Sentiments stamp set. I notched the left end of the sentiment strip before adhering it to the card.
Thanks for visiting and have a wonderfully creative day!
Hello! Rosemary here on the blog today. Hard to believe that there are just a fews days left in October. Where has this year gone?! Today I’m sharing a fall inspired sympathy card although that was not my original idea. Originally I had started working on something that would be a small mixed media decor piece. Unfortunately, I went a little overboard and did not like what I had created. Thankfully, I was able to used all of these pretty leaves I had created with mica sprays on today’s card.
As indicated above I used lots of distress mica sprays to achieve the colors you see in the various leaves. I used the Forest Leaf and Berries Contour Layers and Oval Leaf Branches Contour Layers dies to cut the leaves. I used one of the dies from the Memory Box Curved Cap Pinpoint Layers die set to die cut the arch from kraft cardstock and then stamp it with the sentiment from the Kind Hearts stamp set using VersaFine CLAIR Acorn ink. I inked around the edges of the die cut panel with Aged Mahogany distress ink. I die cut another panel of kraft cardstock with a rectangle die from the Memory Box A2 Rectangle Frames die set and adhered it to an off white cardstock base with double sided adhesive.
I layered the arched panel on to the card front using foam tape and then built up my swag with the various different leaves. When I originally laid out the pieces for the swag it included the two smaller leaves in the lower corner. However when I started to put everything together they didn’t quite fit and so I added them to the corner instead. I used liquid adhesive to secure all the pieces in place.
I finished off the card with some autumn fairy jewels on each cluster of leaves. I think they added the perfect little something the card needed.
I hope you enjoyed today’s card and it inspires you to create something for fall. Thanks for stopping by and have a wonderful day!
Hello Birch Press Design readers, this is DT member Crystal Komara here to share a fun Halloween themed card with you. Hopefully it will remind you of candy corn, which are the colors that I was inspired to use on the pumpkin itself!
Card details:
The base of this A2 sized card is made from 80 lb. Neenah Solar White Smooth cardstock. I cut a 5 1/4″ x 4″ piece of black cardstock that I ran through my Big Shot with the 3D Blooming Embossing folder from Memory Box Company (a sister company to BPD).
Using the Adornment Pumpkin dies, I die cut both the outer shadow and inner intricate frame from white cardstock. Then I ink blended Squeezed Lemonade and Dried Marigold Distress Oxide ink onto the pumpkin. I splattered black acrylic paint all over the pumpkin to “grunge it up”.
I die cut the pumpkin stem from brown cardstock and the two leaves from an olive green cardstock. I adhered the pumpkin to the card using 3M foam adhesive for added dimension. Lastly, I added the “boo” sentiment also with 3M foam adhesive.
I love how this card turned out with a candy corn colored pumpkin! It’s fun for Halloween without being terrifyingly spooky! Thanks for visiting and have a wonderfully creative day.
Hello Crafty friends! I am excited to be back up on the blog today sharing the beautiful new Adornment Pumpkin die set! I love the large pumpkin and how this die set creates a beautiful focal image! So let’s get started!
I started by die cutting the Adornment Pumpkin using paper pads from Memory Box. I die cut the pumpkin using the Sunny Orange pad, the leaves using Lush Green, and the stem from the Earth Neutral paper pad. I die cut each of the pieces using a colored cardstock and then a white piece of card stock as well.
Once all the layers were die cut, I adhered the colored layer on top of the white card stock using liquid glue. Next I added a bit of color to each of the layers using Distress Oxide inks. I applied the ink on top of the colored card stock and then added water droplets for added texture.
Next I darkened the edges of each die cut using a dye ink. I set the pieces aside to work on the background. For the background I trimmed a piece of white woodgrain paper down to an A2 card size panel. I then used distress oxide inks to create a wood background. I added a bit of distress paint using a sponge for added texture and color.
Once the panel was completely dry, I trimmed the panel using my deckle trimmer. I then distressed the edges using my distress tool and distress ink. I then adhered the background panel onto a top folding A2 card base. I adhered the pumpkin, leaves, and stem to the card front using liquid glue. I completed the card with a sentiment strip from my stash.
I had a lot of fun creating today’s card! I hope you enjoyed this and I will be back soon!
Hello friends! This is DT member Crystal Komara here with you today with what just might be my new favorite card ever that I’ve designed for Birch Press Design. Now, I’ll admit, I was initially hesitant to use the contour dies, becuase oh-so-much die cutting, but I promise, the end result is always SOOooo worth the work!!
Card details:
The base of this A2 sized card is made from 80 lb. Neenah Solar White Smooth cardstock. I cu ta 5 1/4″ x 4″ piece of black cardstock and dry embossed it using the Blooming 3D Embossing Folder from Memory Box Co, a sister company of Birch Press Design. This is my go-to floral embossing folder, it’s so elegant.
Then I just began die cutting lots and lots of the Oval Leaves contour dies in yellow, orange and gold cardstock. I mismatched up the layers, so that I layered yellow with orange and rust with gold. There was no method to this matching up madness.
Lastly, I flicked some gold acrylic paint onto the entire image and I love how this effect came out! It added a bit of grunge, but also a bit of sparkle!
I love this card so much that I want to try re-creating it in other color palettes too, so be sure to check back in regularly to see what myself and the rest of the Design Team are creating to inspire you!
Welcome back to the blog! Today I’m bringing you a cozy Autumn themed card using some beautiful floral images, and emboss resist inking.
To start todays card I used the large floral image stamp from the Gracious Floral stamp and die set and heat embossed it with white powder onto a piece of white cardstock.
I then used my mini blending brushes and a few different ink colors to blend all the flowers and leaves, making sure to use darker colors towards the bottom of center of flowers and lighter colors towards the top.
TIP: color blending like this can be very forgiving. I was not worried about the colors overlapping each other, because once it’s all blended out it looks cohesive.
Once I was satisfied with the color blending, I took a clean paper towel and wiped it across my image to remove any residual ink from the white embossed part. Then I used the coordinating die to cut the image out.
To add some extra interest and shine to my flower I sprinkled a few drops of water so the ink would lift in those places, and also rubbed some shine powder across the image so it would sparkle a bit.
Separately, I took the Pinpoint Contour Plate die and cut it from a piece of white cardstock, and glued it to an A2 card base. I then arranged the floral image into the center of the card and adhered it using foam dots.
Next I took the ‘Just Because’ that is in the same Gracious Floral set and stamped it in black ink and heat embossed it with clear powder. I used the matching die to cut it out, and cut it out two more times from white cardstock. I glued all the layers together to add some dimension to the sentiment, and then added it to my card front.
Lastly, I had to add some bling of course! I used jewels from the Autumn Fairy Jewels set to bling out the flowers. Some I filled in the center with jewels, and others I just did a few or filled in petals.
That is it! I hope you enjoyed reading through my process to create this colorful, fall themed card and see you next time!