Category: Hot Foil

  • Gilded Birthday | by Crystal Komara

    Gilded Birthday | by Crystal Komara

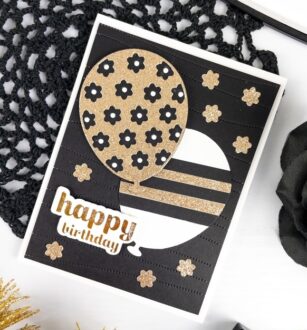
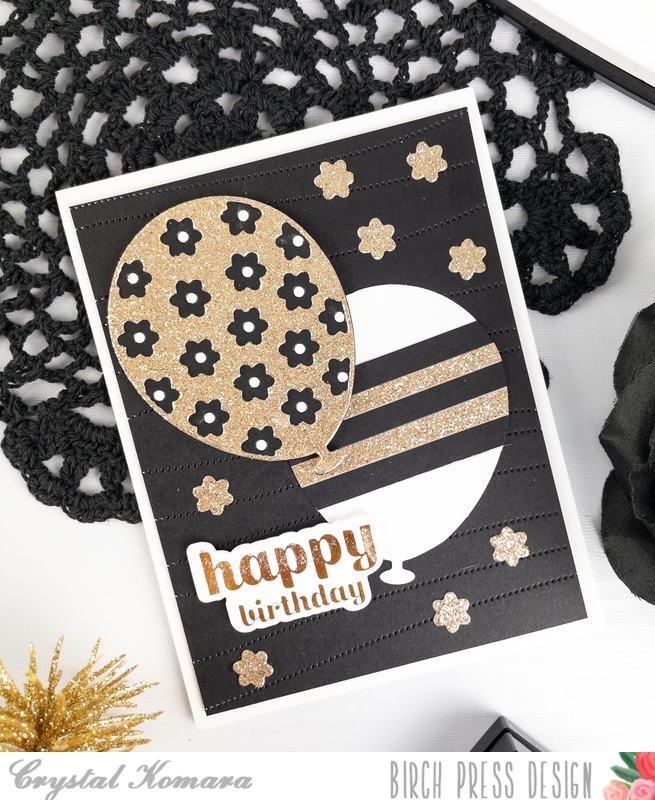
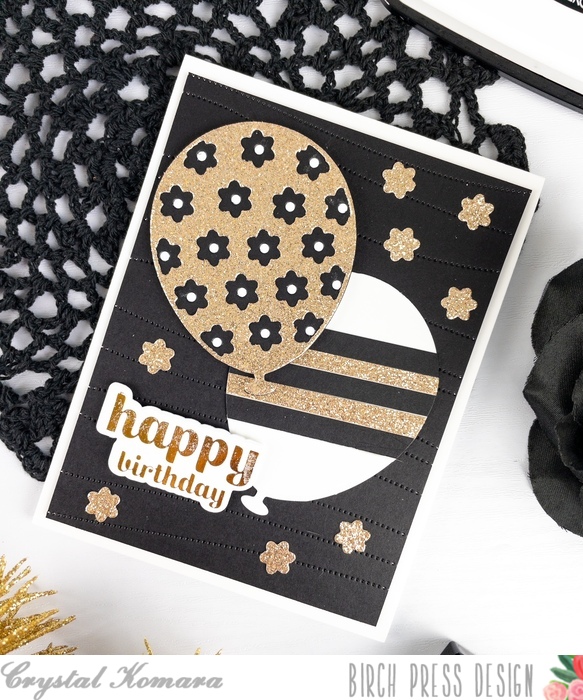
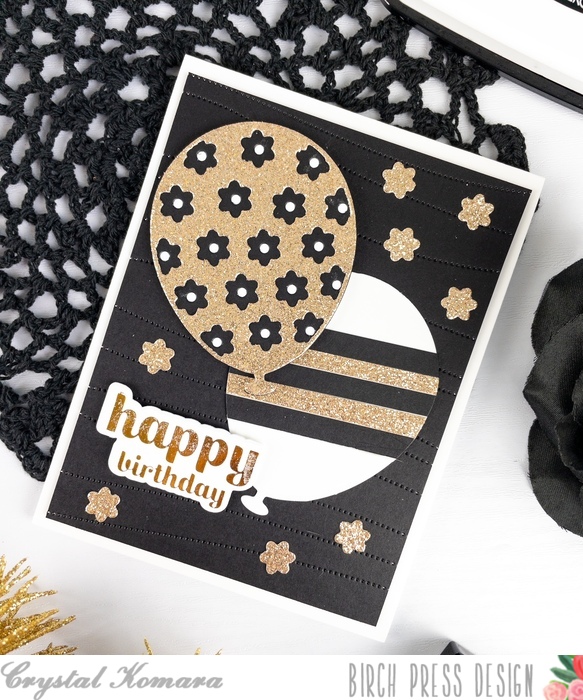
    Hello friends and welcome to October! Wow, how the seasons fly, but things sure are getting pretty with the fall foliage here in New England. This is Design Team member Crystal Komara here today sharing an elegant black and gold birthday card today using the Floral Balloon Layer Set.

    I love the large size of these balloons, they really make a statement. By layering the balloons with black, gold and white, it really makes the card seem more elevated and elegant.

    Card details:

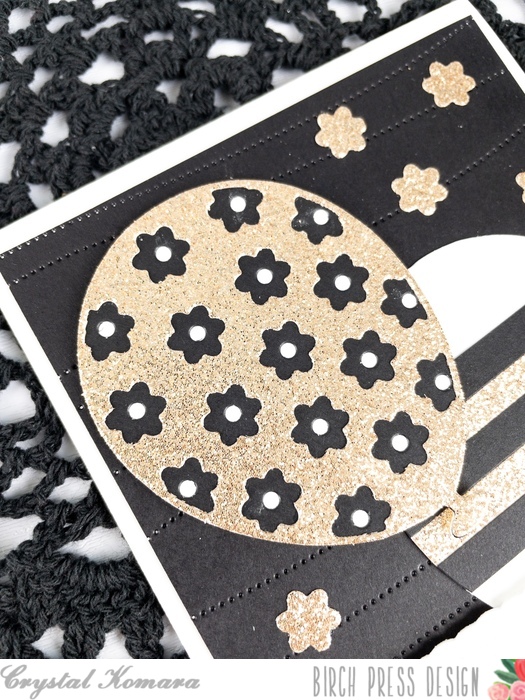
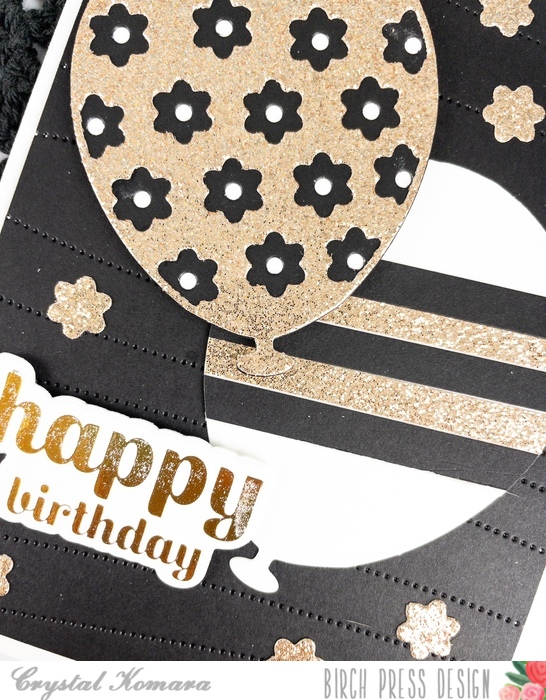
    The base of this A2 sized card is made from 80 lb. Neenah Solar White Smooth cardstock. Using the Pinpoint Contour Plate, I die cut the background from black cardstock. Next I die cut the balloons using the Floral Balloon Layer Set. I cut one white ballon and then added strips of gold and black cardstock. For the second balloon, I die cut Layer A (the top layer) from gold glitter cardstock, Layer B (the middle layer) from black cardstock and Layer C (the bottom layer) from white cardstock. I adhered all three layers together with a fine-tip liquid glue. I adhere the top gold balloon to the card using 3M foam adhesive for added dimension. The white balloon is adhered directly to the card base, without foam.

    For the sentiment, I heat foiled the “happy birthday” in gold foil on white cardstock. This sentiment is from the Sugar Script Sentiments 2 foil plate and coordinating die. I used the coordinating die to cut the sentiment out and adhered it to the card using 3M foam.

    Thanks for being here and spending time exploring all that Birch Press Design has to offer for your creative paper craft hobby! Have a wonderfully creative day!

    Supplies

  • Late Summer Evenings | by Toni M Maddox

    Late Summer Evenings | by Toni M Maddox

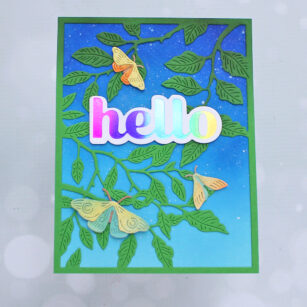
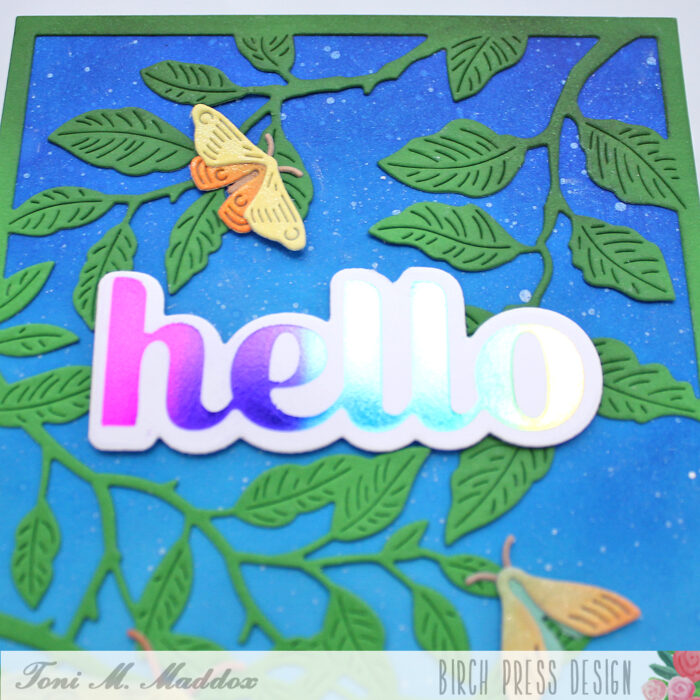
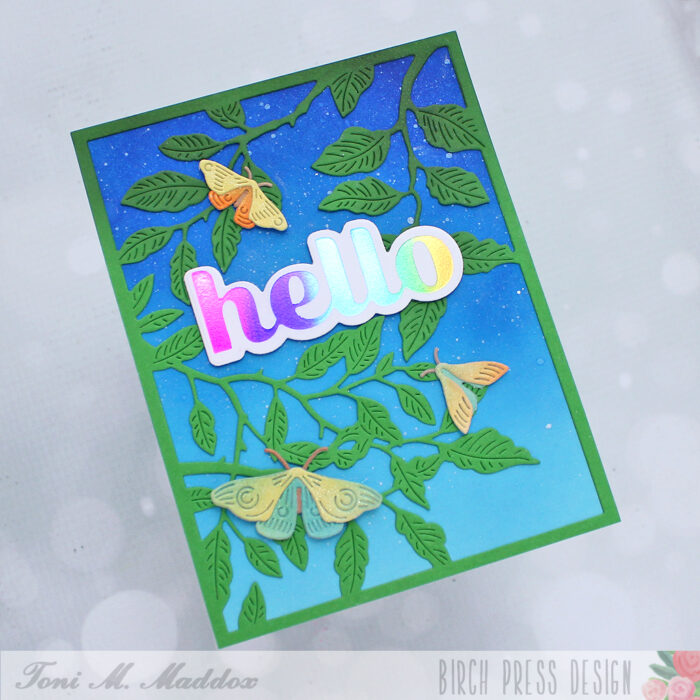
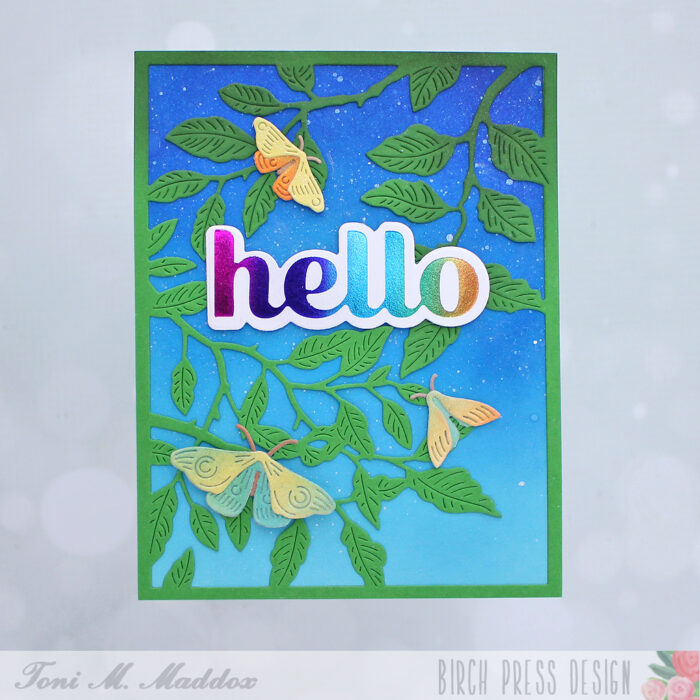
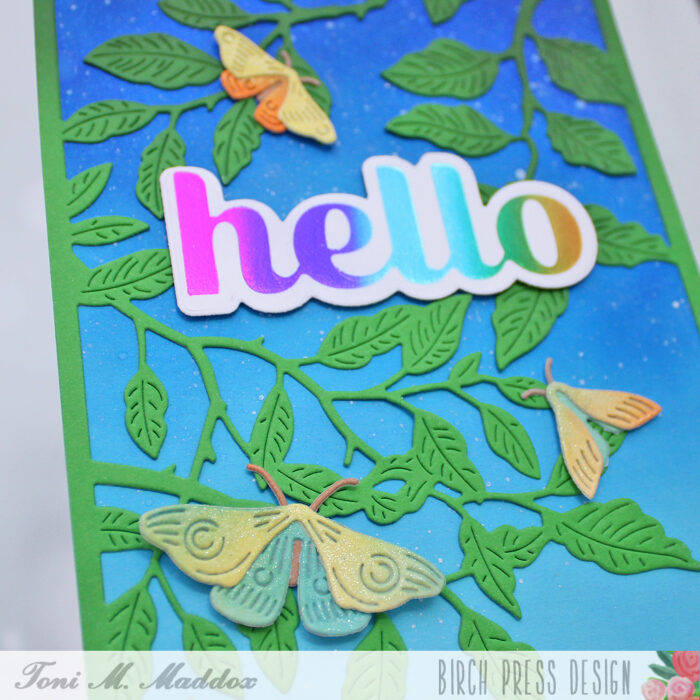
    Hello, Birch Press fans! Toni here with you sharing a card the reminds me of warm summer evenings.

    I cut the card base from Memory Box Fresh Aqua paper and sponged it with Catherine Pooler Suede Shoes and Something Borrowed. I spattered this with water and Copic Opaque White.

    I next cut out Forest Canopy Layer C from Memory Box Cilantro Paper and sponged it with Catherine Pooler Eucalyptus.

    For the Memory Box Evening Moths, I randomly sponged a piece of scrap cardstock with Catherine Pooler Tiara, Tiki Torch and Something Borrowed.

    Lastly I foiled the Hello Sugar Script hot foil plated with Glimmer rainbow foil and cut it out with the coordinator word outline die. So pretty!

    I hope you enjoyed today’s card and have a great rest of your week!


    Supplies


  • Thanks | by Rosemary Dennis

    Thanks | by Rosemary Dennis

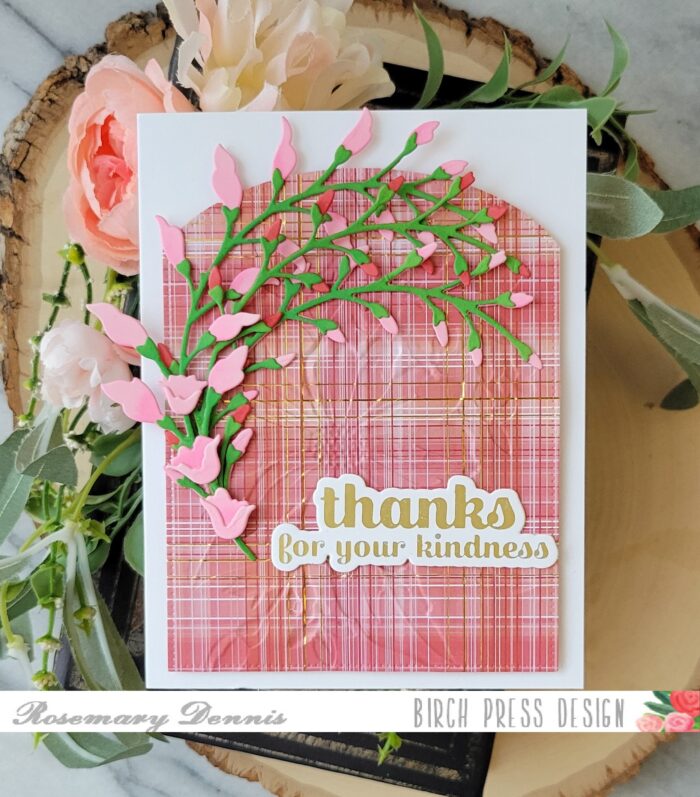
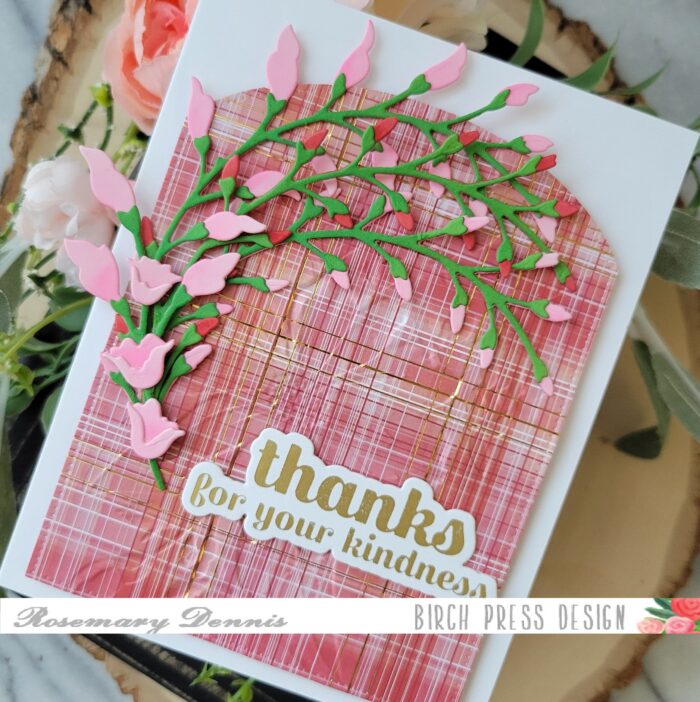
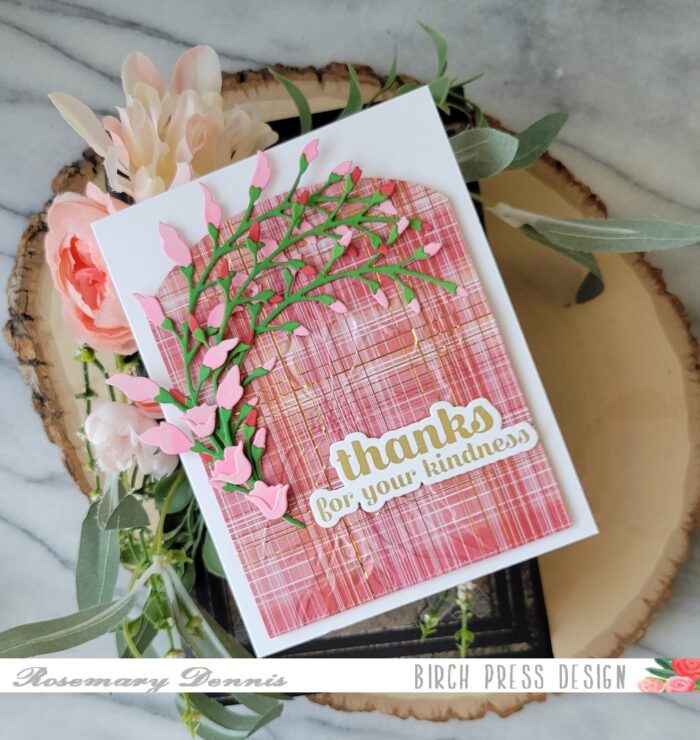
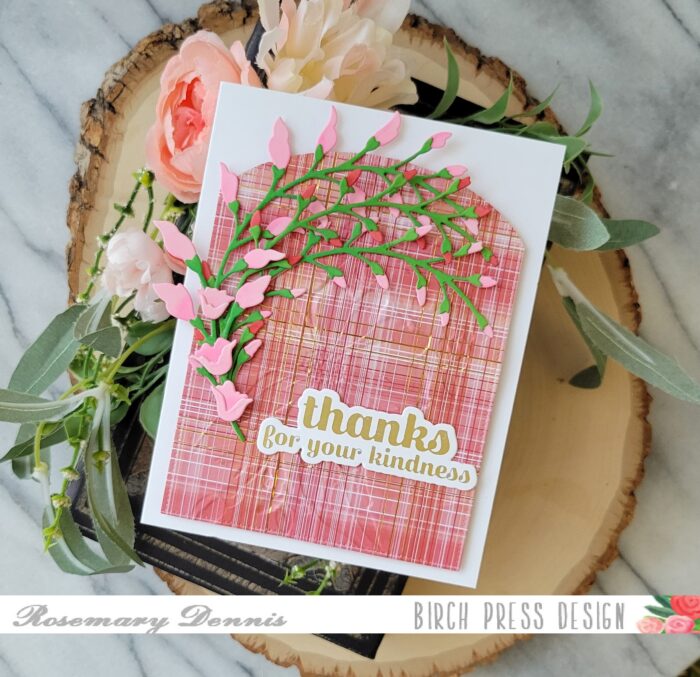
    Hello everyone! Rosemary here on the blog today. I have a card today that I made using the new Floral Arch Contour Layers die set. When I pulled the package for this die set out of the box I gasped at how beautiful it is! I couldn’t wait to make a card with it.

    On the packaging the image is shown in shades of pink and that is what I went with initially. As I was making the card I decided to throw a little red into the mix since there is red in the patterned paper I used.

    I decided to die cut the pieces from colored cardstock and then to blend on some additional ink for more color. The green cardstock I used to die cut the top stems was a lot lighter when I started out, but I love the deeper green color I acheived!

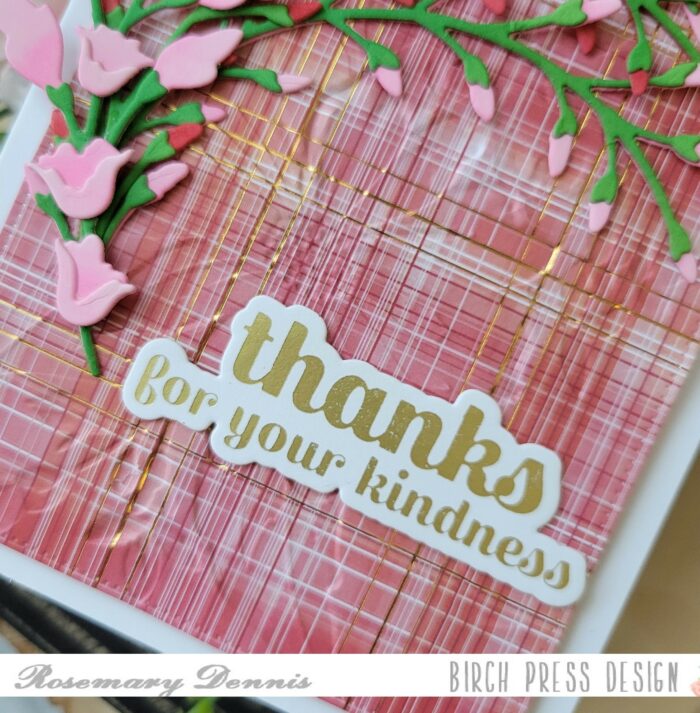
    After die cutting and inking all the pieces I adhered everything together using liquid adhesive. I thought that the second largest dies from Memory Box Curved Cap Pinpoint Layers die set would be perfect for the floral arch. I die cut it from a sheet of paper from the Gladiola Plaid 6×6 paper pad and then embossed it with the Open Studio Gracious Floral embossing folder. When I embossed the paper I actually embossed the wrong side, but decided that I liked the debossed side as it was a bit subtler. I adhered the panel to a white cardstock base with strong double sided tape.

    I adhered the floral arches with liquid adhesive and then added the sentiment from the Sugar Script Sentiments 2 hot foil set. I’m almost out of these sentiments so time to foil some more! The foiled sentiment worked perfectly since as you can see there are little touches of foiling in the plaid paper.

    I hope you enjoyed today’s card. Thanks for stopping by and have a wonderful day!

    Supplies

  • Hugs & Roses | by Rosemary Dennis

    Hugs & Roses | by Rosemary Dennis

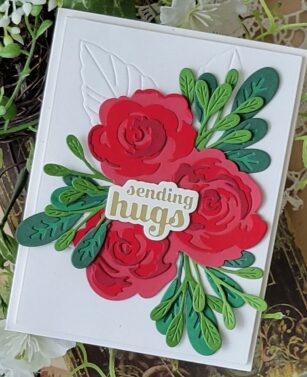
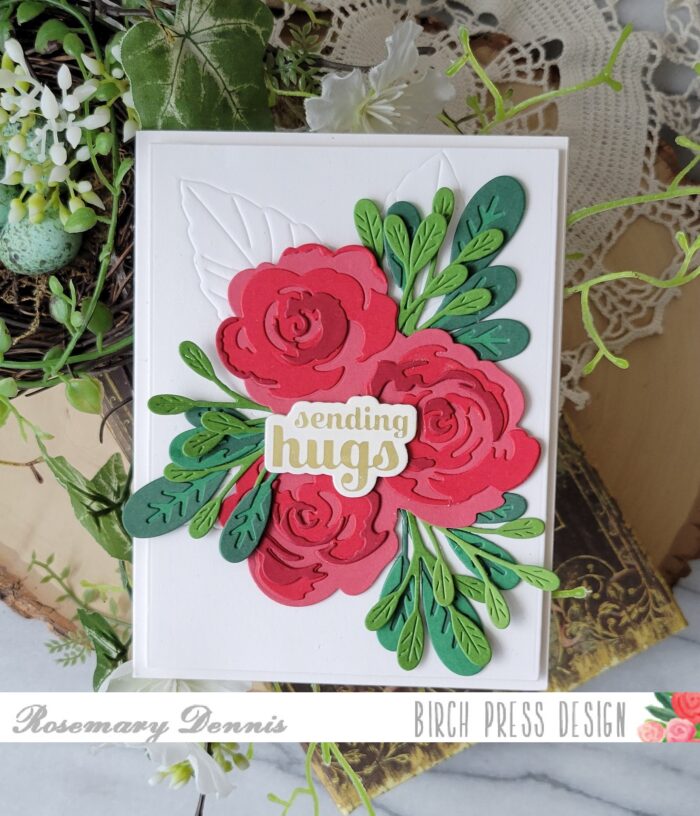
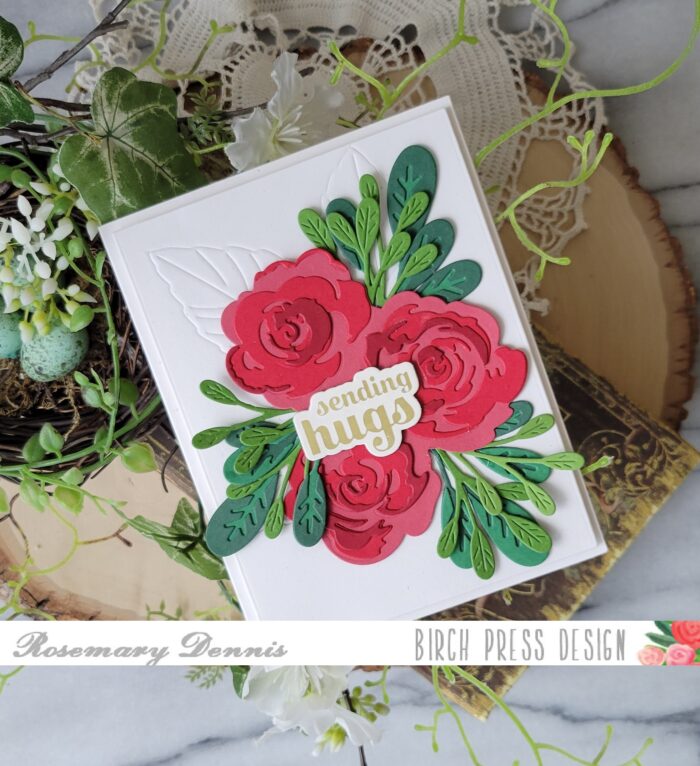
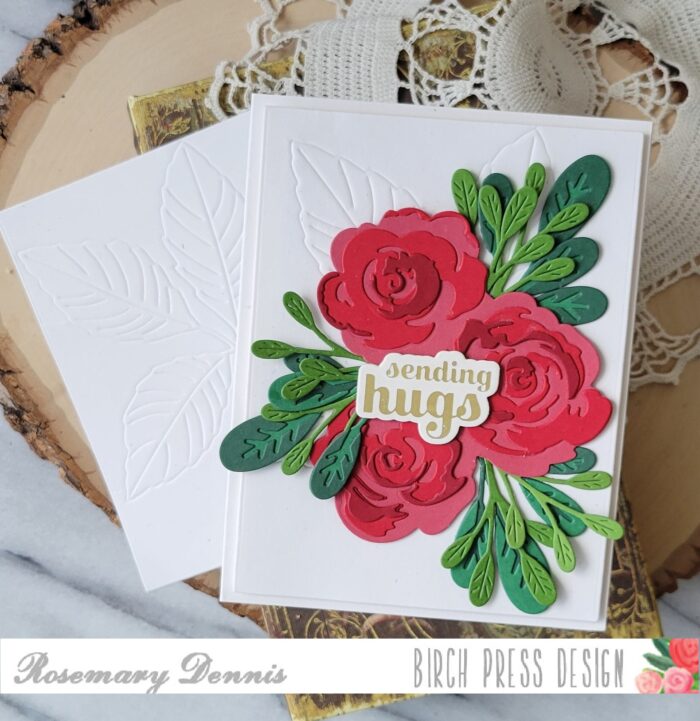
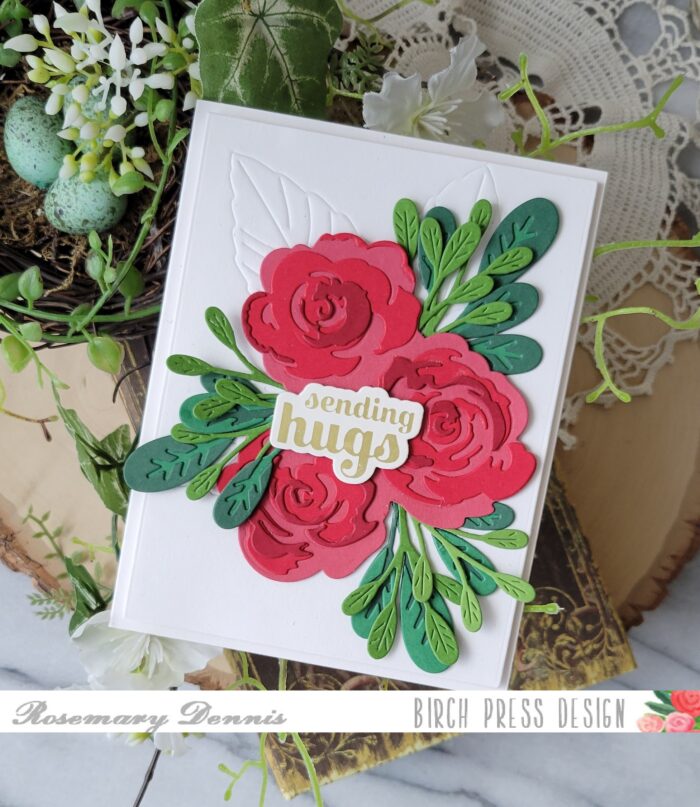
    Hello friends! Rosemary here on the blog today with another card full of layers and texture. This time I used multiple tried and true Birch Press Design dies and one hot foil plate set for my card. Let’s have a look at what I created.

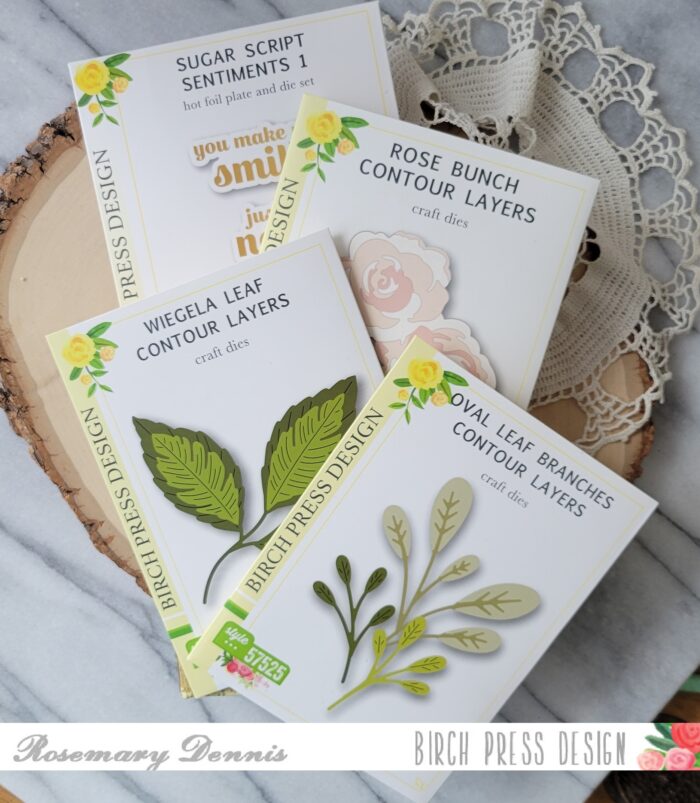
    Quite sometime ago I pulled out multiple Birch Press Design floral die sets that I had not used in awhile (or never!) to use on future cards. I went to this pile and pulled out the Rose Bunch Contour Layers die set as I had actually never used it on a project before. I then pulled out my Memory Box 6×6 cardstock pads and chose the Greenery and Blush pads to use for the flowers. Three darker shades of red and three shades of green were pulled from the pads to use for all the die cutting.

    Once I had those items selected I selected the die set I wanted to use for the foliage to go with the roses. I decided to go with the Oval Leaf Branches Contour Layers die set because of the variety of little leafy branches in the set. I used the lightest shade of green for the smaller branches and then the two darker colors for the larger branches. I die cut everything and then assembled all the various pieces.

    As I indicated I’m kind of into adding more texture to my projects and one way is with embossing. Birch Press has so many different dies that can be use for embossing on cardstock. For this card I decided to use the Wiegela Leaf Contour Layer die set. I used the main die to emboss my off white cardstock panel. I then layered on the roses and all the little branches. Layering the branches did require me to cut some of the branches apart to get the look I wanted, but that is one of the things I like about die cuts. The ability to modify them as needed!

    The embossed panel shown with the card was my first impression. It turned out okay with a little bit of cracking, but I decided to do a second one and this time I spritzed the panel with a little water before embossing it. The second one turned out perfect! Unfortunately I covered up most of the embossing, but the embossing was more there to just add another element.

    I finished off the card with a foiled sentiment from the Sugar Script Sentiments 1 hot foil plate and die set. I love the little touch of gold that it adds to the card. Well, that’s it for me. I hope you enjoyed today’s project. Thanks for stopping by and have a great day!

    Supplies

  • Happy Birthday Bloom | by Crystal Komara

    Happy Birthday Bloom | by Crystal Komara

    Hello crafty readers! This is Design Team member Crystal Komara on the blog today sharing one of my most recent card creations using the Perky Bloom Contour Layer. This bold and oversized flower has quickly become one of my favorite contour layering dies from Birch Press Design this release.

    Card details:

    The base of this A2 sized card is made from 80 lb. Neenah Solar White Smooth cardstock. I dry embossed a 5 1/4″ x 4″ sheet of black cardstock using the Blooming 3D embossing folder from Memory Box Company (a sister company of Birch Press Design). This is one of my favorite embossing folders. I adhered the black embossed cardstock directly to the card base.

    To create the flower, I used light pink, dark pink and yellow cardstock. I die cut the Perky Bloom Contour Layer multiple times from each of these colors of cardstock and then kept layering them to see which color combination I liked best. The good news was I die cut so many colors that I have plenty of other pieces leftover to make more cards! When I was satisfied with the flower, I adhered the flower to the card using 3M foam adhesive for added dimension.

    For the leaves, I used the Wiegala Leaf Contour Layers. I die cut the leaves from two different shades of green cardstock and layered the two together using a fine-tip liquid glue. Lastly I heat foiled the sentiment using the Sugar Script Sentiments 2. I used the ‘happy birthday” sentiment from this set. I heat foiled white cardstock in gold foil. Then I used the coordinating die cut to cut the sentiment out. I adhered the sentiment to the card and then added a couple clear rhinestones to resemble watery dew drops.

    I hope you have enjoyed this beautiful birthday card. Thanks for visiting and have a wonderfully creative day!

    Supplies

  • Hello | by Rosemary Dennis

    Hello | by Rosemary Dennis

    Hello everyone! Rosemary here on the blog today. Hope your April is off to a great start. It is a little bit of a cold start to April here in the Pacific Northwest, but that is the PNW for you, lol! Today I’m sharing a card created using the sweet Prime Peony Duo Contour Layers dies and a foiled sentiment from the new Sugar Script Sentiments 2 set. Let’s have a look at what I created.

    I started off my card by deciding that I wanted to use some pretty patterned papers and do a little bit of inking on the papers once I had them die cut. I pulled out the lovely Memory Box Anemone Plaid and Anemone Grove 6×6 pads and went with a purply-blue plaid for the flowers and a dark green plaid for the stems. I die cut all the pieces and then added some distress ink in Milled Lavendar to some of the pieces.

    I didn’t add any additional color to the stems as they were dark enough already. I then adhered all the pieces together. For the flowers I used a combination of liquid adhesive and thin foam squares to provide lift to some of the petals. Liquid adhesive was used soley on the leaves. I also decided to use the green flower centers that were die cut when I die cut the stems as I liked the look. In the close up photo above you can see the shading on flowers that was added with the distress ink.

    After the glue had set on the flower for a little bit I adhered the stems with additional liquid adhesive. I die cut a piece of the Anemone Grove paper with a rectangle die and adhered that to a white cardstock base. I then die cut Memory Box white woodgrain cardstock with a Curved Capped Pinpoint Layers die and added some Milled Lavendar distress ink to the top portion of the die cut and then lightly around the edges. I adhered that piece with thin foam squares.

    The flowers were then adhered to the panel using liquid adhesive. I finished the card with the sentiment that I foiled in matte gold and a few purply blue fairy gems.

    I hope you enjoyed today’s project. Thank you for stopping by and have a lovely day!

    Supplies

    Supplies

  • You Are The Best | by Rosemary Dennis

    You Are The Best | by Rosemary Dennis

    Hello everyone! Rosemary here on the blog today with a bright and sunny card I made using the new Perky Bloom Contour Layers, Wiegela Leaf Contour Layers and Sugar Script Sentiments 2 products. I also used the Pinpoint Contour Plate and papers from the new Memory Box Sunrise and Greenery 6×6 cardstock pads.

    I don’t often use yellow cardstock as I don’t have alot of it and most of the shades I have don’t really coordinate. That is a thing of the past with the Sunrise cardstock pad! The yellows in the pad coordinate perfectly! I went through the pad and pulled out the ones I wanted to work with and die cut the various layers from each. The Perky Bloom die is one piece so after diecutting I did have a few extra pieces that I didn’t need for my flower. I just simply tucked those inside the packaging the die comes in for future use! I used a combination of liquid adhesive and thin foam squares when I put together my flower. The leaves were simply adhered together using liquid adhesive.

    I used a Memory Box arched die to cut the white panel. The arch is only on one side of the side so to create the second arch I simply flipped the arch to the other side and die cut that portion of the panel. I then laid the panel on the Pinpoint Contour plate and ran it through my die cutter. This panel was adhered to a panel of yellow cardstock that I die cut with a rectangle using foam tape for dimension. I like how the arched panel fits perfectly inside with just the ends showing the yellow peeking out!

    Now it was time to add the flower and leaves to the panel. I glued down the leaves and then added the flower I made sure to only add glue to the center of the flower so I could slip in the thin foam squares when I wanted to to provide dimension and lift to the flower petals. The last thing to do was foil the sentiment. I used matte gold foil and my hot foil machine. I foiled all the sentiments in the Sugar Script Sentiments 2 set as I wasn’t sure which one I wanted to use. I settled on “you are the best”. I used the die for the sentiment to cut additional layers from scrap cardstock and adhered them to the sentiment with liquid adhesive. The sentiment was then added to the card also using liquid adhesive. I had some yellow nuvo drops that I added to the tips of the stamen for a little more dimension.

    I hope you enjoyed today’s card. I had a lot of fun creating it! Thanks for stopping by and have a wonderful day!
    Supplies

  • Shimmery Birthday | by Allison Frazier

    Shimmery Birthday | by Allison Frazier

    Hello, Birch Press friends! I am excited to be back on the blog today. I have been busy lately making some backgrounds with shimmer powders and decided to use one today. What better way to show off a new hot foil plate, right? This happy birthday sentiment is from the new Sugar Script Sentiments 2 hot foil plate and die set. I have always been such a huge fan of the Sugar Script sentiments, and I love how they’re now available as hot foil plates!

    I started with one of the shimmery backgrounds that I made recently. This panel is the result of several colors of shimmer powders and lots of water spritzing! I cut the panel with the Pinpoint Contour Plate and then trimmed it down even more to be 4″ x 5.25″. I put some thin foam tape on the back of the panel and adhered it to an A2 card base.

    I used the Curved Leaf Branch die to cut some watercolor paper, and then I used some pink and yellow shimmer powders to lightly color the branch. I adhered this to the panel with liquid glue, making sure not to adhere the actual leaves down. I love the dimension this creates!

    I hot foiled the sentiment onto white card stock using pink satin hot foil, and I love how it came out! I love satin/matte hot foil, but don’t be fooled – it still has shimmer to it when the light hits it!

    To finish the card, I scattered some fairy crystals and drops around the branch. I hope this card brings a smile to your face! Thank you so much for joining us today.


    Supplies


    Supplies


  • Mixed Media Tag | by Rosemary Dennis

    Mixed Media Tag | by Rosemary Dennis

    Hello everyone! Rosemary here on the blog today. Hope everyone had a lovely Valentine’s day. I did as I got several things that I love! Today I’m sharing a tag that I created using several different techinques. I used the new Early Blossom Contour Layers dies, as well as the Simple Dragonfly Contour Layers dies and the layer A of the Herbarium layering die set. I had a lot of fun creating this tag!

    I started off by spraying my premade cream colored tag with the spray stains that you see in the photo: Speckled Egg, Antique Linen and Lost Shadow. I sprayed on each stain individually and then spritzed the tag with a little bit of water. I didn’t want too much movement of the colors. I did dry the tag a bit with my heat tool in between each layer of color. Once I had the background to my liking I set it aside to fully dry.

    As the tag dried I got to work on my flowers and dragonflies. I die cut them from white cardstock and used a grip mat to hold all the pieces in place while I blended on the inks in a color family that moves from the light pink to a more reddish color for the flowers and dragonflies. The leaves were inked in two shades of green. I used liquid glue to adhere all the pieces together. While they were drying I moved onto the next layer for the tag.

    I have a small jar of Solar Paste in the color Golden Hour and I thought it would look perfect with the background on the tag. I used the A plate from the Herbarium set to create a stencil and then added the embossing paste. I was right that the embossing paste would look nice with the background. I just love how it turned out. As the tag was drying I decided to custom color some chunky white twine I had using two of the spray stains. I used Speckled Egg and Antique Linen for the twine.

    Once the paste was dry I began adding all my elements to the tag. I must admit that I was a little worried that the pinks in the flowers wouldn’t play well with the background colors. But as I added the flowers to the tag I realized that the colors worked perfectly! I finished off the tag with the sentiment the Sugar Script Sentiments 1 set and the twine. I had previously hot foiled it on cream woodgrain cardstock and so it worked perfectly with the tag. The tag is large enough that in the future I can turn it into a card!

    I hope you enjoyed learning how I made my mixed media tag. Thank you for stopping by and have a wonderful day!
    Supplies