Category: Jeanne Jachna

  • Floral Star Helloby Jeanne Jachna

    Floral Star Hello
    by Jeanne Jachna

    Hello my crafty friends! I hope you’re having a great day! It’s Jeanne here and I’m sharing a rainbow color block card made with the new Floral Star layered die set.

    I love using color block technique when using die cuts. The repeated crisp clean lines of the background and the die cuts themselves are a match made in heaven.

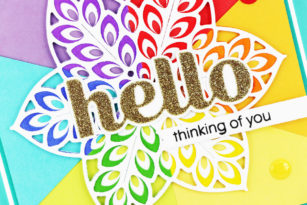
    I determined a good size for the base would be 4 1/2″ . I split the panel down the center and then marked where the petal tips would be on the graph paper. I cut the red, yellow, purple and green squares 2 1/4″ square and adhered them together on their reverse side. I used the graph paper as a template to cut the blue and orange pieces.

    I cut all three layers of the Floral Star Layer Set from white card stock. I inked the “B” layer with distress ink masking off each section with sticky tape. I applied the ink with a mini cosmetic brush that I found on Amazon.

    I assembled the three Floral Star Layers and adhered them to the card base aligning the colors on the die cut with the colors on the background panel.

    A Big Sugar Script Hello cut from gold glitter paper adds some sparkle and shine! The “Thinking of You” stamped sentiment is from the You Are Awesome stamp set.

    I can never resist a rainbow! It includes ALL my favorite colors!

    Finished Size 4.75″ Square

    Supplies

  • Glitter Flutter Butterflies by Jeanne Jachna

    Glitter Flutter Butterflies
    by Jeanne Jachna

    Happy Saturday! I hope you’re having a great day and that the sun is shining so you can spend some time outdoors today! I am so happy the weather is warmer and I can feel the sun on my face!

    Today I’ve got a glittery card so share made with the Flutter Plate Layer B. Here’s how I made it sparkle!

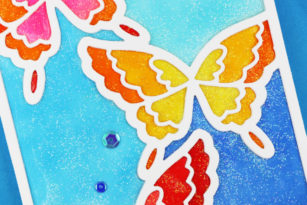
    I applied packing tape to the back of a card stock panel before I die cut the panel. The tape prevents the panel from cutting all the way through providing an outline for me to color with markers.

    I colored the panel with Copic markers but any marker will work. Don’t worry about staying in the lines.. no one will see!

    I mixed Glossy Accents with micro find crystal glitter and then spread it over the colored panel with a spatula and then attached a panel cut from white card stock. When it was dry I attached another white die cut panel to add some depth and give a stained glass look.

    This card is so sparkly and glossy it’s like candy for the eyes.

    The simple sentiment is from the Best Friend stamp set.

    I hope you’ll give this technique a try!

    Finished Size 4.25 x 5.5″

    Supplies


  • Sun Ray Triangle | by Jeanne Jachna

    Sun Ray Triangle | by Jeanne Jachna

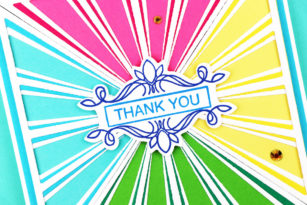
    Hi and thanks for stopping by! It’s Jeanne here today! You know I can’t resist a rainbow of color! Today I’m playing with the Sun Ray Triangle layering die set.

    Birch Press Design has three new layering triangle sets that this technique would work well with.

    I started by cutting the top and bottom layers from white card stock. I die cut the center layers from colored card stock. Once the layers were assembled I adhered a slightly lighter shade of card stock behind them.

    After the panels are assembled I noticed some weren’t completely smooth on the edges. I used an inexpensive nail file to make them flat so they would fit together tighter.

    I topped the panel with a sentiment from Awesome Ticker Tape Messages inked in shades of blue Versafine Claire ink.

    I love the candy stripe look of the colorful stripes!

    Supplies

  • Midnight Mandala by Jeanne Jachna

    Midnight Mandala
    by Jeanne Jachna

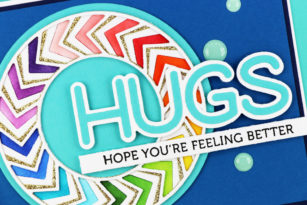
    Hi friends! Big hugs to you as the shelter in place continues! I hope you’re all safe and healthy and have all you need. Today I’m playing with the new Midnight Mandala stencil.

    This technique is fun and easy and I hope you give it a try. All you need is a stencil, distress ink, glitter and glossy accents.

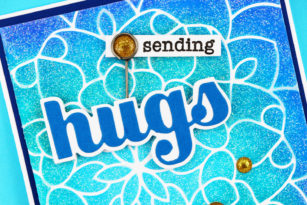
    You can tape your stencil in place but if you want to treat yourself, invest in a can of Pixie Spray. It holds the stencil firmly in place and lifts off easily – no more tape and you’re hand’s free. I inked the stencil in ombre shades of blue distress ink.

    I love the shine of glossy accents and the sparkle of glitter so I mixed them together and spread the mixture thinly and evenly over the inked stencil. When you’ve got complete coverage gently lift the stencil and wash it immediately with warm soapy water.

    Just look at all that sparkle and shine!

    I didn’t want to cover up these pretty shades of blue so I added a simple sentiment – the Big Hugs Sugar Script adhered with adhesive foam tape and a stamped “Sending” from the Memory Box Cherry Blossom Wreath tucked in a Tim Holtz Trinket Pin.

    Easy right? I hope you’ll give this a try! You’ll love the raised texture that reminds me of embossing!

    Supplies

  • Enchantment by Jeanne Jachna

    Enchantment by Jeanne Jachna

    Hi friends! I hope you’re all safe and well! Now more than ever I’m turning to crafting for a sweet escape and a way to deal with stress.

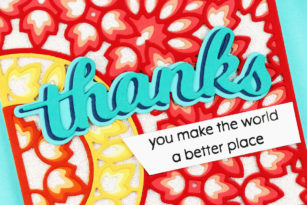
    Today I’m sharing a card made with the beautiful new Enchantment layered die set. The set includes three full size (A2 4.25 x 5.5″) cover plates with lots of versatility.

    Not only can you mix and match the three layers , you can also switch out the colors of the half circles on the left margin of the die. I cut the die from shades of red, yellow and orange and layered them over a glittery panel of card stock from the Memory Box Pastel Glitter Pad. TIP: When layering dies always complete the entire bottom layer first, then the entire middle layer etc. This allows you to fit the die cuts tightly together with no gaps.

    I die the the Thanks Honey Script word die from three shades of blue. I chose a contrasting color so the word die would contrast with the background.

    This die set has so much potential – imagine all the different shades and colors you can assemble the layers in!

    Finished Size 4.25 x 5.5″

    Supplies


  • Frilly Triangle & Giveaway By Jeanne Jachna

    Frilly Triangle & Giveaway
    By Jeanne Jachna

    Hi Friends! I hope you’re having a great day! We’re celebrating our new Spring Release with lots of giveaways! My favorite item this release is the new Frilly Triangle Layer Set.

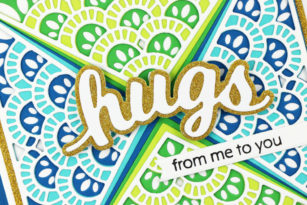
    I love the intricate layered design that reminds me of peacock feathers.

    My tip for getting these as tightly together as possible is to adhere them one layer at a time to your card base like I did here. Once your bottom layer is in place you can start stacking.

    I chose light and dark shades of green and blue for lots of contrast. The top layer is white to repeat the pattern of the bottom layer.

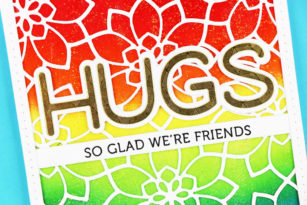
    I layered the assembled background on a panel of gold glitter paper, and repeated the gold on the background of the Hugs Honey Script sentiment.

    We will be having giveaways on our Instagram Account March 21-29, 2020. One comment will be chosen at random from each of the Instagram posts during the blog blitz. Only one prize per person per giveaway. We use a random number generator to select winners from comments. You have until midnight US EST April 1 to leave a comment on each and every Instagram post that you want to enter. Winners will be announced on the Instagram posts on April 3.

    For a chance to win the Frilly Triangle Layer Set…..

    1.) Follow Birch Press Design on Instagram
    2.) Double Tap (LIKE) the post with this giveaway
    3.) Tag A Friend in the comments
    Good luck! And thanks for joining us!  

    Finished Size 4.5″ Square

    Supplies

  • Ring Tile Stencil Thanks by Jeanne Jachna

    Ring Tile Stencil Thanks
    by Jeanne Jachna

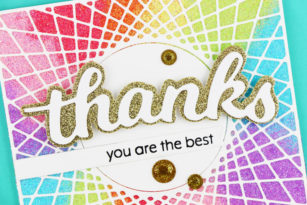
    Hi friends! I hope you’re having a great day. Have you seen the new products in the store? I’m excited by all the wonderful designs…. dies, stamps and STENCILS!!!

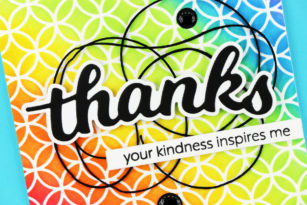
    Today I’m playing with the new Ring Tile Stencil. I love the large open areas and intricate design.

    The most important part of working with stencils is making sure they stay in place while you ink so you can achieve well defined images. My secret weapon is Thermo Web Pixie Spray. It’s a light tack adhesive that is repositionable and won’t tear your paper.

    I inked the stencil with a rainbow of Distress Inks using a cosmetic brush.

    The panel was so pretty I couldn’t cover it up. I adhered a Thanks Honey Script sentiment layered over some black twine. A simple sentiment and a sprinkle of black enamel dots let the background take center stage.

    I hope you’ll explore the world of stencils – they’re fun to work with and each is as unique as you!

    Finished Size 4.25 x 5.5″

    Supplies


  • String Art Frame Thanksby Jeanne Jachna

    String Art Frame Thanks
    by Jeanne Jachna

    Hello my crafty friends! I hope you’re having a great day. There’s more new in the store and I’m excited to share a card made with the new String Art Frame.

    I wish you could see this one in person! It’s a rainbow of sparkly color!

    I started by adding double sided adhesive to a white card stock panel the same size as my card base. Then I removed the protective sheet and adhered the String Art Frame to the sticky panel.

    Next I sprinkled colorful glitter over the open areas of the die cut where the double sided adhesive is exposed. I pressed the glitter into the panel with my finger tips, but you could burnish with a roller or a bone folder.

    The colorful sparkly background is a feast for the eyes!

    I added a simple sentiment using the Thanks Honey Script word die (that comes with a detailed and background die) and a stamped sentiment from the new You Are Awesome stamp set.

    This sparkly technique will work well with lots of your die cuts. I sure hope you’ll give it a try!

    Finished Size 4.25 x 5.5″

    Supplies
  • Valentine Gift Tag Trio  by Jeanne Jachna

    Valentine Gift Tag Trio
    by Jeanne Jachna

    Hi crafty friends! It’s Jeanne here today and I’m sharing some pretty Valentine Gift tags to delight your favorite Valentines!

    Tags are perfect for dressing up anything from a simple bag of home made chocolate chip cookies to something extra special for your sweetie!

    I assembled several Flora Hearts in different shades of card stock. Each middle layer is cut with glitter paper from the new Memory Box Delicate Pastel Glitter 6″ pad.
    The hearts are topped with Love die cut word sentiments and a stamped “sending” from the Lingo Thanks clear stamp set.

    The hearts are layered over Poppystamps Double Stitched Tags cut from coordinating, and gold glitter card stock.

    I think these hearts are gorgeous and plan to make another bunch that I will adhere to wood picks to top cupcakes!

    Supplies