Category: Layered Background Die

  • Find Joy | by Crystal Komara

    Find Joy | by Crystal Komara

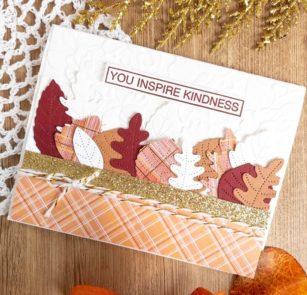
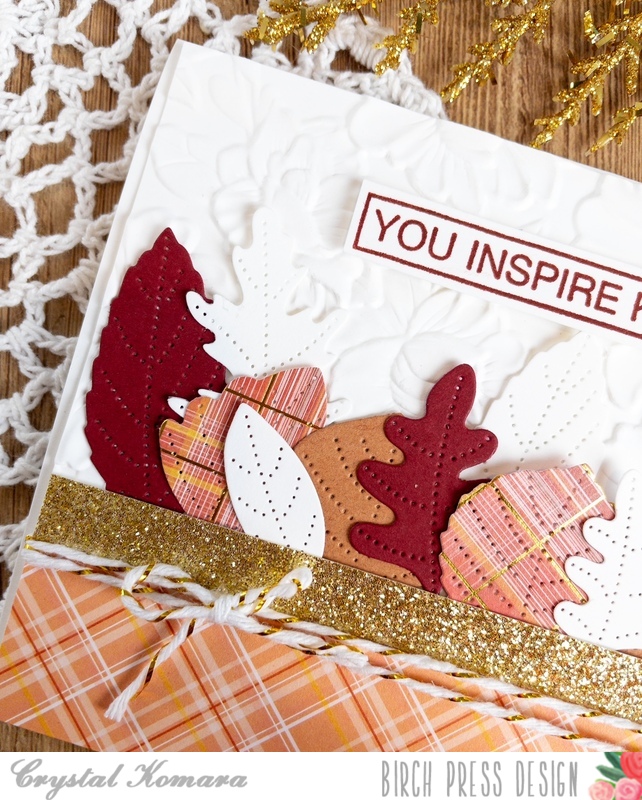
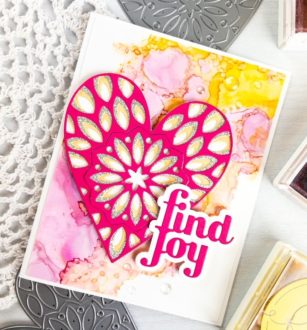
    Hello friends! This is Design Team member Crystal Komara here on the blog today sharing a card that filled with love, joy and alcohol! Ink, that is! ; ) I was really pleased with how this card came out, since I had ended up pulling a random piece of alcohol ink background from my scrap bin. It is so cheerful and uplifting!

    Card details:

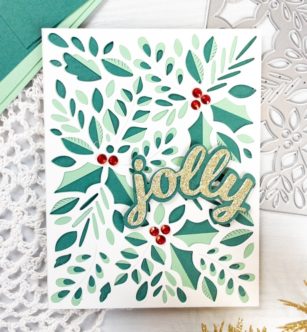
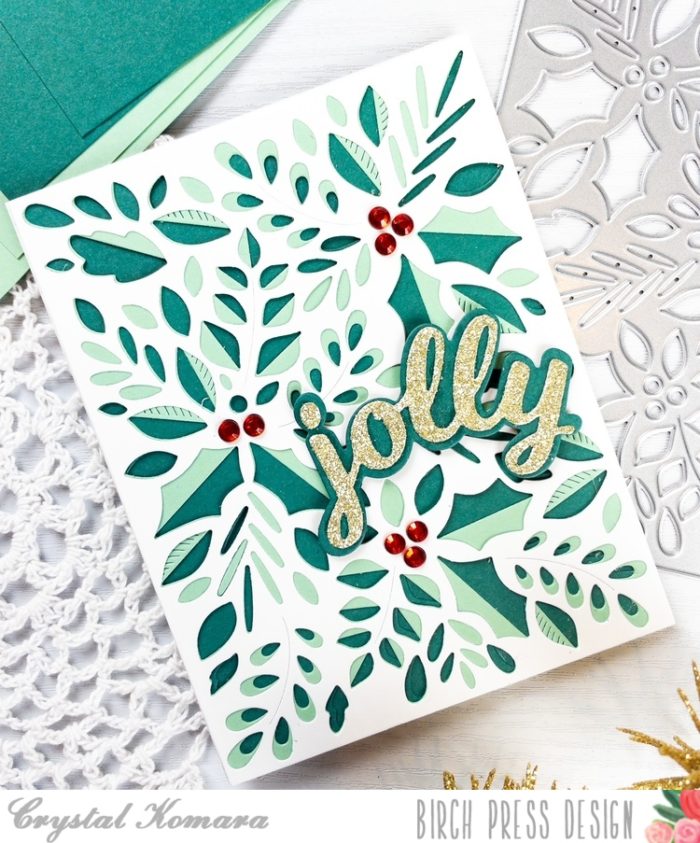
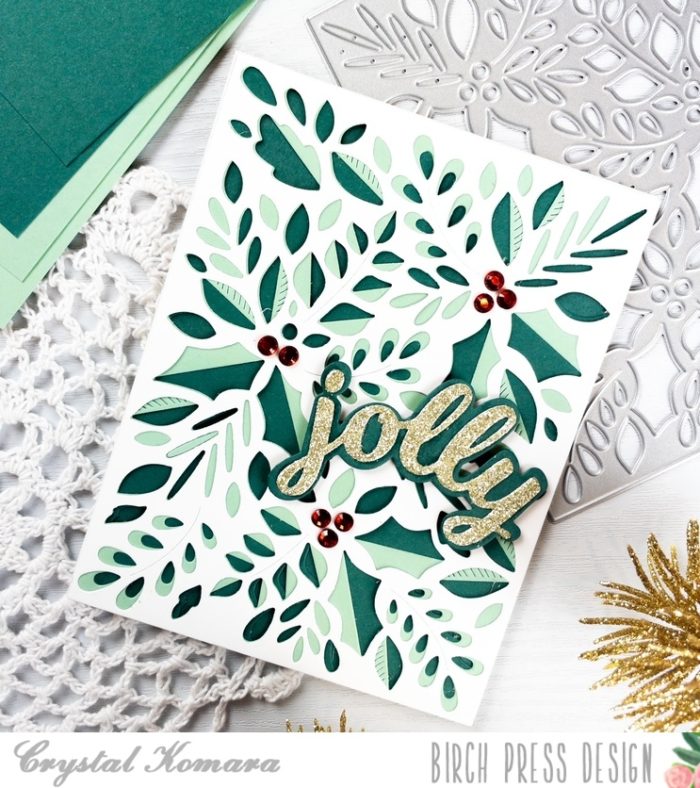
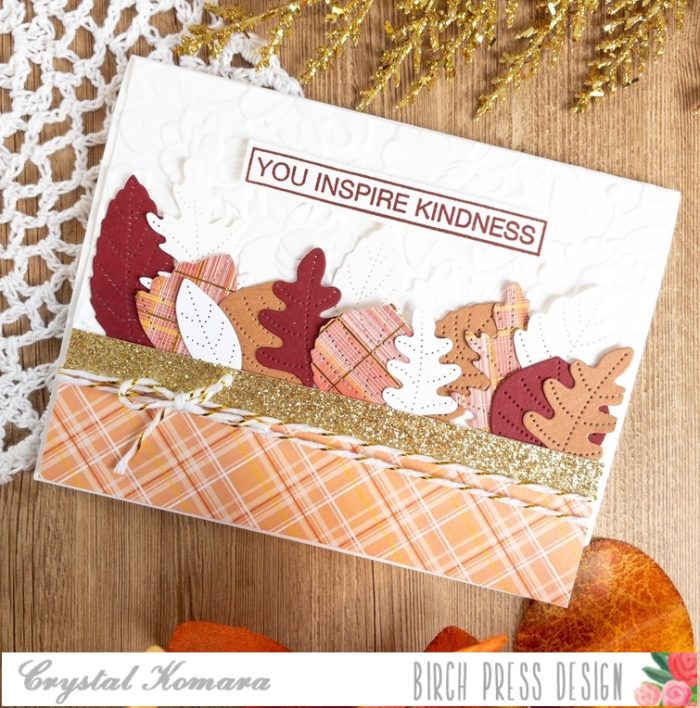
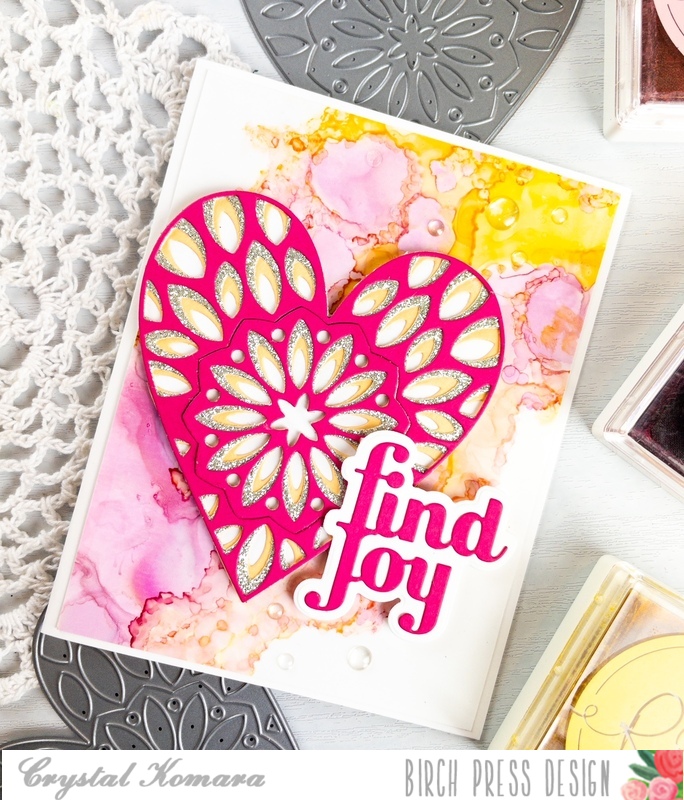
    The base of this A2 sized card is made from 80 lb. Neenah Solar White Smooth cardstock. On a sheet of 5 1/4″ x 4″ Yupo paper, I created an alcohol ink background in peaches and pinks. Honestly, I keep about 50 alcohol ink background pieces on reserve in a bin to pull from and it makes creating cards kind of quick and easy! This background was one of those “pre-made” pieces.

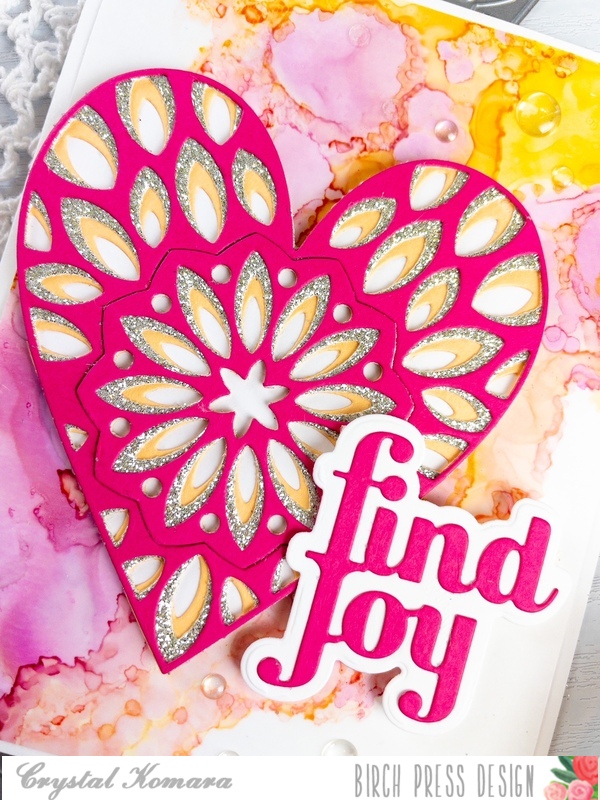
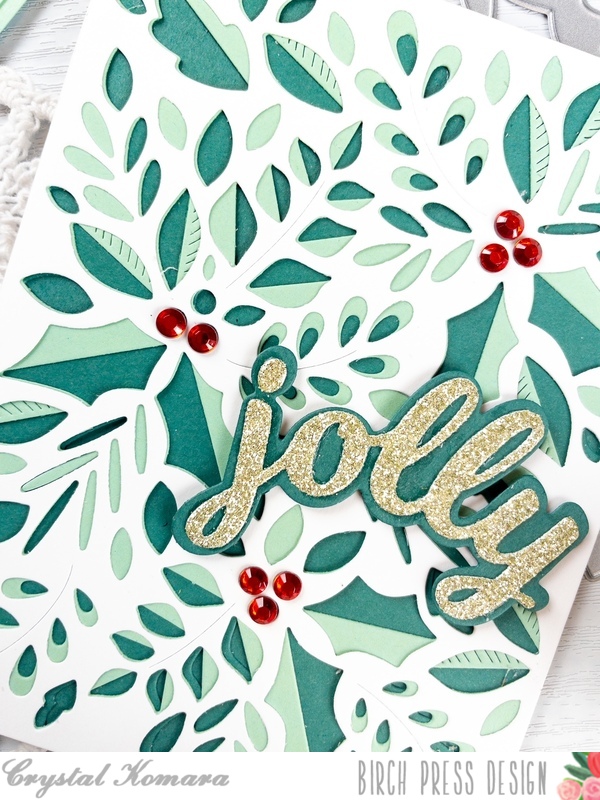
    For the center focal piece I used the Kinsley Heart Layering Plates. Layer C (bottom layer) was cut from peachy/orange cardstock. Layer B (middle layer) was cut from gold glitter cardstock and Layer A (top layer) was cut from pink cardstock. I used the 6″ x 6″ paper packs in both Sunny Orange and Berry Reds for the cardstock. The glitter paper came from the 6″ x 6″ Festive Glitter paper pack. I adhered the three layers of the heart together with a fine-tip liquid glue.

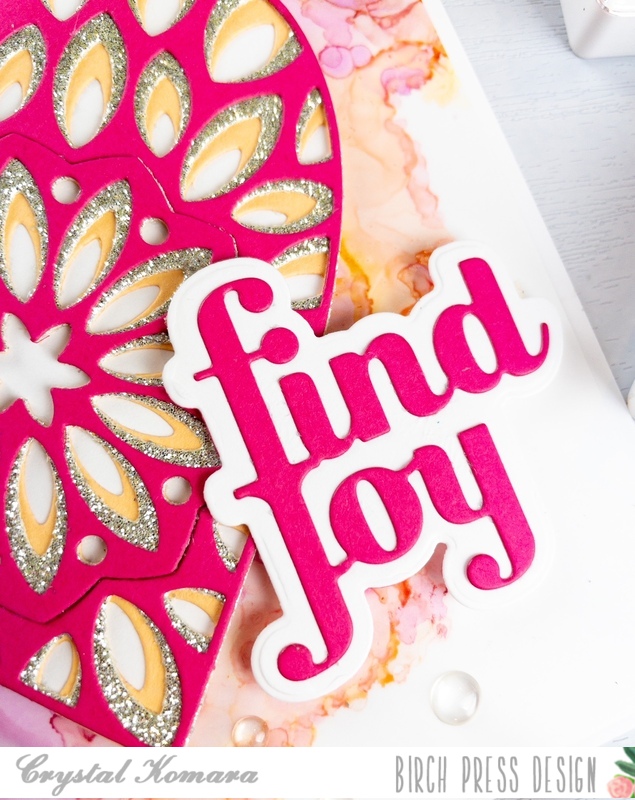
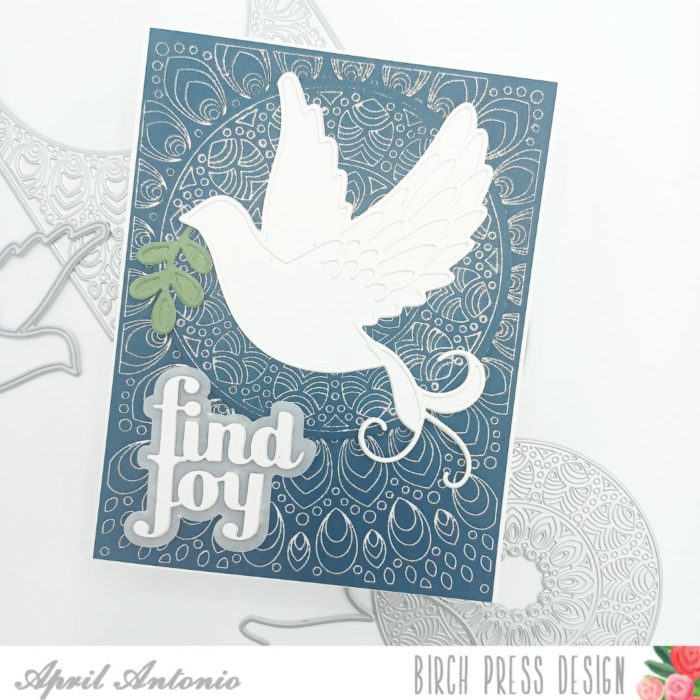
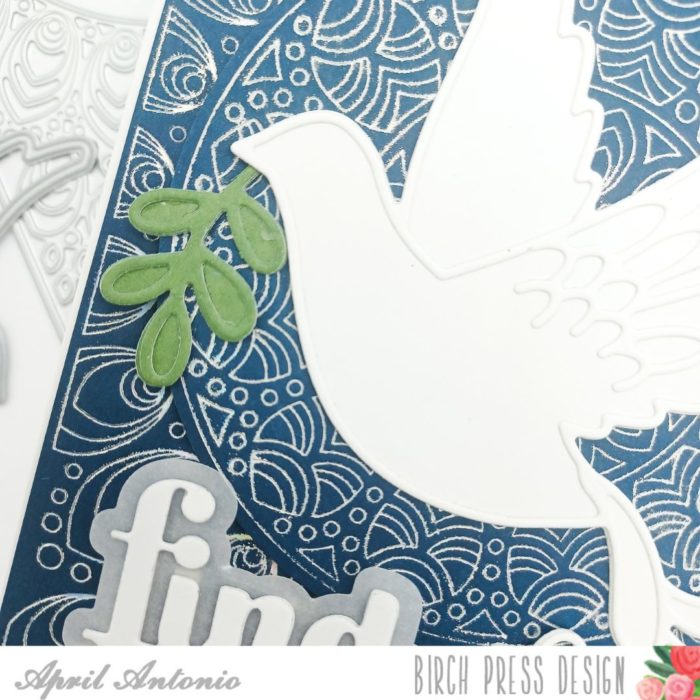
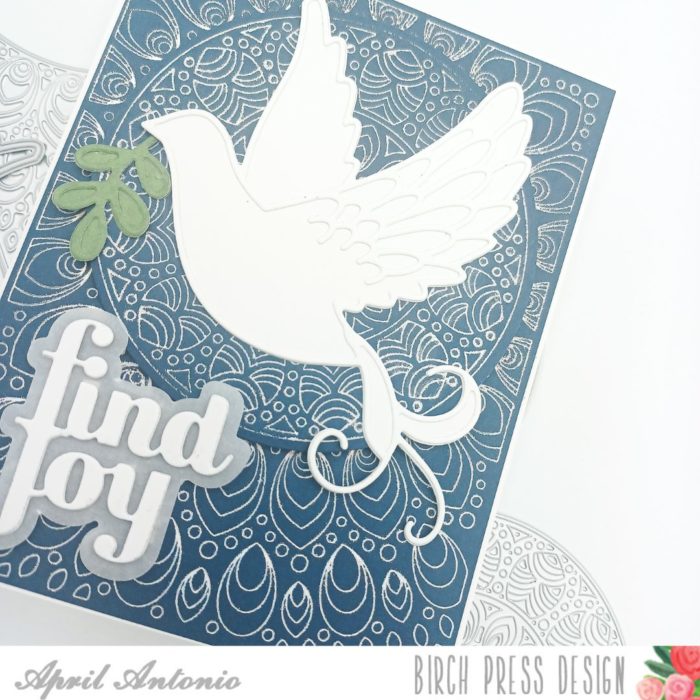
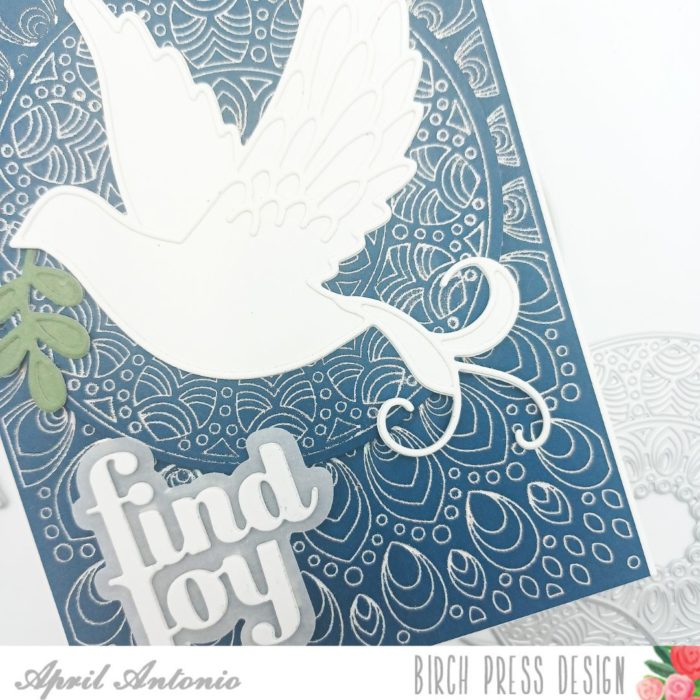
    I used the Find Joy and Outline die to create the sentiment. The shadow or outline of the word “find joy “was die cut from white cardstock. The thinner inside was cut from pink cardstock from the same Berry Red 6″ x 6″ paper pack. I adhered the two layers together with a fine tip liquid glue. Lastly I adhered both the heart and sentiment to the card with 3M foam adhesive for added dimension.

    Alcohol inks are a great way to add interest and uniqueness to your cards! Thanks for visiting and have a wonderfully creative day!

    Supplies

  • Dove of Peace | by Toni M Maddox

    Dove of Peace | by Toni M Maddox

    Hello, Birch Press fans! Toni here with you today sharing a watercolored holiday card.

    I started the card by cutting out a BPD Herbarium Plate layer out of white and mounting it on kraft.

    The BPD Adornment Dove dies are a set of two, one that I used to cut the watercolored panel and the other for the white outline.

    I cut the BPD Peace Honey Script outline in the same watercolored paper (check out that fab shimmer!) and mounted the word in white on top. Super easy and pretty card–my favorite type!

    I hope you enjoyed today’s card and have a great rest of your week!

    Supplies

  • Jolly Herbarium Layer Plate | by Crystal Komara

    Jolly Herbarium Layer Plate | by Crystal Komara

    Hello crafty readers! This is Design Team member Crystal Komara here with you today. I am so excited to be sharing a card made using the beautiful new Herbarium Layering Plates. This 3-piece full cover layering plate set is my favorite from this latest holiday release from Birch Press Design!

    Swoon! Honestly, it’s just gorgeous if I do say so myself! With a mixture of mint green and teal cardstocks with a splash of gold glitter paper in the sentiment, it’s just pure holiday elegance!

    Card details:

    The base of this A2 sized card is made from 80 lb. Neenah Solar White Smooth cardstock. I die cut Layer A of the Herbarium Layering Plate from white cardstock. I die cut Layer B from mint cardstock and Layer C from a darker teal green cardstock. These beautiful colors are from the 6″ x 6″ Fresh Aqua paper pack. I layered all three layers together with a fine-tip liquid glue. I placed the layers underneath a heavy book to let them dry well and dry flat.

    I die cut the word “jolly” from the Jolly Honey Script word die. I die cut the bottom shadow layer from the same darker teal green cardstock and the top outline layer from gold glitter cardstock. I adhered the two layers of the sentiment together and then adhered them to the card using Scotch 3M foam adhesive for added dimension. Lastly, I added a couple red rhinestones as the berries on the card.

    I really, really, love how this card came out. In fact, I know that I’ll be trying to recreate it in a variety of color combinations.

    Thanks for visiting and have a wonderfully creative day!

    Supplies

  • Adornment Santa | By Dilay Nacar

    Adornment Santa | By Dilay Nacar

    Hello, crafty friends! Dee here today with this layered Christmas card featuring products from the latest holiday release! 

    First, I created the background by die cutting each of the Herbarium Plate Layers A, B, and C and adhering them together. 

    Next, I die cut the Adornment Santa pieces using red cardstock for the hat and glitter cardstock for the beard, then adhered those together.

    To finish, I adhered the completed Santa over the Herbarium Plate Layers and added a sentiment strip from my stash! 

    I hope you enjoyed this cute and simple Christmas card featuring Santa! Thank you so much for stopping by, friends!


    Supplies


    Supplies


  • Finding Joy | By April Antonio

    Finding Joy | By April Antonio

    Happy Saturday Birch Press family! Today I’m leaning far into pre-Christmas card prep and sharing a project using some supplies from the newest release.

    I’m fairly new to hot foiling and have definitely caught the foiling bug. I started this card by hot foiling the Gilded Grace hot foil set — both the cover plate and the insert circle, with Silver foil. I like to use the Spellbinders Silver or Gemini Aurora foil colors for silver. I trimmed the cover plate hot foil sheet down to slightly smaller than an A2 sized card, and then cut out the circle using the coordinating circle die.

    Next I used heavy weight white cardstock to die cut the Adornment Dove. I die cut both the outline and the solid piece. But before cutting out the outline piece, since it is so thin, I covered the cardstock with a double sided adhesive sheet.

    I also cut out the green sprig that came with the Adornment Dove set, using the Lush Green paper pad set.

    For the sentiment, I used the Find Joy die set that comes with the phrase ‘find joy’ and shadow. One thing that is really nice is that all of the words are connected to create only once piece. I cut this out twice and glued them together with liquid glue. I cut the shadow from vellum, and layered it behind the words.

    Lastly, I assembled everything together. I used a white A2 card base, put the background on first, adhered the hot foil circle with foam tape, glued the dove and green sprig on top and adhered the ‘find joy’ with small foam strips.

    Usually at this point I will add some sort of sparkle, but the hot foil background is so decadent this card didn’t need anything else!

    Keep on coming back to see more amazing projects by my fellow design team members, and have a great weekend.

    Supplies

  • Autumn Breeze Twist | by Crystal Komara

    Autumn Breeze Twist | by Crystal Komara

    Hello Birch Press Design readers! Happy September, and welcome to the beginning of fall, my favorite time of the year. This is Design Team member Crystal Komara here with you today sharing a unique way to use the Autumn Breeze Layer Plate.

    The base of this A2 sized card is made from 80 lb. Neenah Solar White Smooth cardstock. I cut a 5 1/4″ x 4″ piece of the same white cardstock and ran it through my Big Shot using the Memory Box Blooming 3D embossing folder. I adhered this to the card base. I cut a 5 1/2″ x 1″ strip of decorative Madras Plaid coral paper for the bottom of the card. I cut a 5 1/2″ x 1/2″ strip of gold glitter paper above the plaid paper for contrast.

    Using Layer Plate B of the Autumn Breeze Layering Plates, I ran the plate through my Big Shot multiple using white cardstock, burgundy cardstock, rust cardstock and the same Madras Coral plaid cardstock. Using the stitched leaf cutout pieces only, I adhered them in a line across the center of the card.

    I stamped the sentiment “you inspire kindness” in cherry ink on white cardstock. This stamp is from the Awesome Ticker Tape clear stamp set. I adhered the sentiment to the card using 3M foam adhesive for added dimension.

    Ooh, I just can’t wait to create more fall themed cards. I’m here for all the cozy sweater vibes and yes, even the PSL (pumpkin spiced lattes) too! ; )

    Thanks for visiting and have a wonderfully creative day!

    Supplies

  • A Rustic Snowflake Greeting | By Natasha Vacca

    Hello crafters! I am excited to be back on the blog today sharing the beautiful new Crochet Snowflake layering die set! Let’s get started!

    For today’s card I am using the beautiful Crochet Snowflake layering die set. This is truly beautiful and has many possibilities! I started by die cutting all 3 layers. I die cut each layer 3 times for added dimension. I die cut Layer B and C using white card stock. I die cut layer A, 2 times using white card stock and one time using a glitter card stock from the Glitzy Glitter paper pad. Once all my layers were die cut I adhered them together with liquid glue.

    I set my snowflake aside and started to work on the card panel background. As I shared in my title I wanted to create a rustic feel for today’s card. I used a gelli print from my stash for the card panel. I also used a distress tool and distressed the edges of the panel. I love the added feel this provides.

    I added additional texture by adding distress ink, as well as embossing glaze to a couple corners of the card panel. Next I added a piece of twine from my stash. I wrapped this around the card panel twice and tied the twine. Next I adhered the card panel to a brown card base. I then added foam tape behind the Crochet Snowflake for additional dimension. I adhered this on top and then added a sentiment strip from my stash to the center of the snowflake!

    Today’s card was a lot of fun! I love layering dies! They are truly beautiful and the Crochet Snowflake has so many possibilities! Thank you for stopping by! I will be back soon!


    Supplies


  • Glitter Herbarium

    Glitter Herbarium

    Hello, Birch Press Friends! I am happy to back with you today sharing another new product. I can’t stop making holiday cards, and the new Herbarium Layer Plates make it so easy to create stunning cards.

    I used several shades of teal card stock for this card. Instead of using all of the layer plates, I used just the A Layer. I cut the A Layer out of both a regular piece of card stock and a piece of glitter card stock. I offset the glitter piece behind the regular piece and adhered them together with liquid glue. I then glued those to an A2 card base made from another color of teal card stock.

    I took the glitter holly leaf shapes that were leftover from die cutting and placed them back into their spots, but I popped the tip of them up on foam dots to create some dimension. I covered the berry-shaped holes with some red Fairy Crystals.

    I used the Big Joy Sugar Script die for the sentiment, cutting the shadow from the teal glitter card stock and the main word from white card stock. To bring in some more white, I added some white dots all over the design with a white paint pen.

    Thank you so much for joining us today. I hope this card inspires you and brings a smile to your face!

    Wishing you a crafty day,
    Allison


    Supplies


    Supplies


  • Flora Joy | by Toni M Maddox

    Flora Joy | by Toni M Maddox

    Hello, everyone! Toni here with you today sharing a card using my beloved blue and red combo, this time for a holiday card.

    I cut out the two bottom layers of the BPD Herbarium Plate Layer Set out of Memory Box Fresh Aqua 6×6 cardstock and the top layer out of white. I mounted this on a dark aqua base.

    I love the faux shading the layers and paper create. Did you notice the shade lines as well? Brilliant!

    I used a Copic to color the berries red and added “Joy” cut from the BPD Mod Alphabet die set.

    I hope you enjoyed today’s card and have a great rest of your week!


    Supplies


  • Glossy and Bright Butterfly

    Glossy and Bright Butterfly

    Hello, Birch Press Friends! I have been loving glossy black card stock so much lately, and I thought it would be great for a butterfly. So today I am sharing this card featuring the Glimmer Butterfly Layer Set.

    I started by making the butterfly. I used yellow card stock for the bottom layer, pink card stock for the middle layer, and the glossy black card stock for the top layer. I adhered the layers together with liquid glue. I added some clear fairy jewels as an embellishment.

    For my background, I used Layer A from the Epiphany Plate Layer Set. I die cut it from white card stock and adhered the main outside layer to a white A2 card base. I also adhered the inner ring to the card base. I kept the small center piece to use at a later time. I never throw pieces out! I added some clear fairy jewels around the ring to accentuate the circle.

    I white heat embossed the sentiment onto black card stock and then cut it out with the matching die. I also used the die to cut two layers of white card stock and adhered those to the back of the sentiment for dimension.

    Thank you so much for joining us today. I hope this card inspires you and brings a smile to your face!

    Wishing you a crafty day,
    Allison


    Supplies


    Supplies


    Supplies