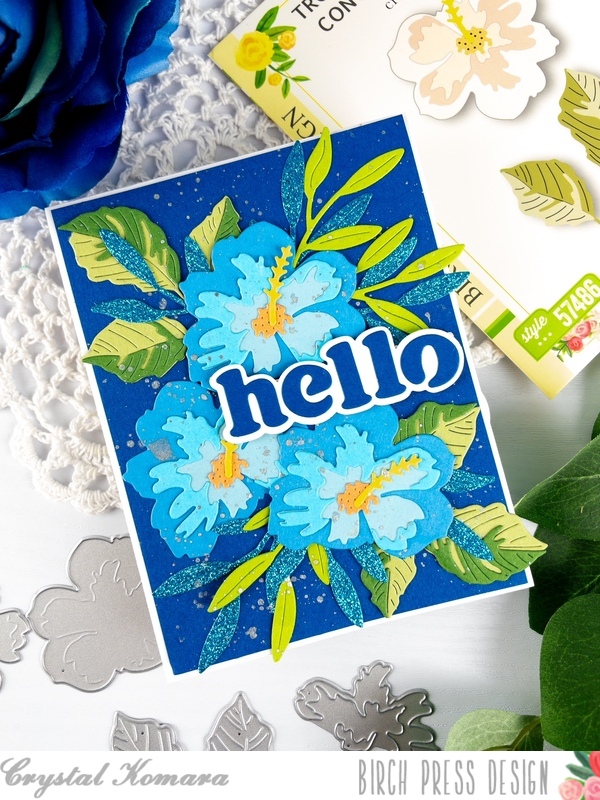
Hello crafty readers! This is Design Team member Crystal Komara here sharing a very detailed card using the beautiful Tropical Hibiscus Contour Layers. Now, contour layering dies have been around for a while now, but in all honesty, it’s taken them a little while to grow on me. I go through my love ’em and hate ’em phases. Well, I am currently in my die cutting era right now! I can’t stop, because each card comes out so elegant and gorgeous, it just makes all that die cutting and piece work worth it!
Card details:
The base of this A2 sized card is made from 80 lb. Neenah Solar White Smooth cardstock. I then cut a 5 1/4″ x 4″ piece of royal blue cardstock and adhered it directly to the card base.
Next, I went to town just die cutting all those hibiscus layers (from three different colors of blue) and then the leaves in two shades of green. Really, I don’t measure or count anything as I’m doing all that die cutting, I just keep cutting and then put it all together in the end. Yes, I always have leftover and mismatched pieces, but I just add a couple of the “extras” to the inside of the card and any leftover pieces go in my scrap bin for another time.

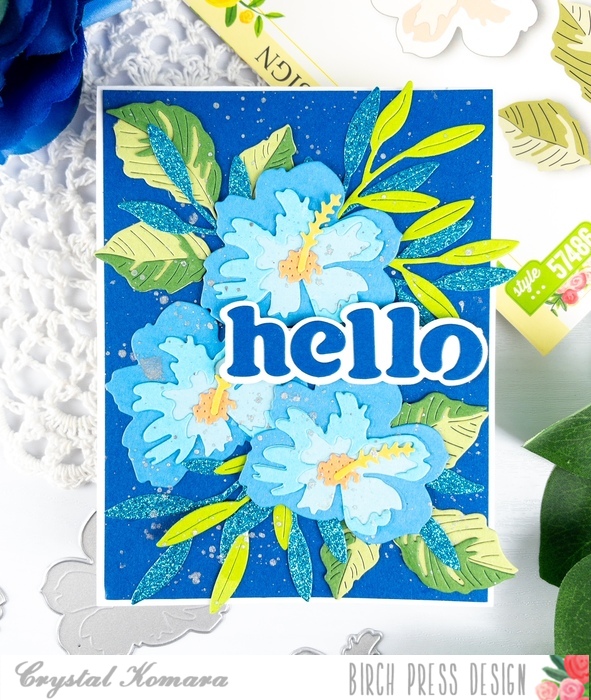
Once I adhered all the flowers and leaves together and situated them on the card in a visual appealing way, I added the sentiment. I used the Big Hello Vintage Sentiment die. I die cut the bottom layer from white cardstock and the top layer from royal blue cardstock. I adhered both layers together with a fine-tip liquid adhesive. Lastly I adhered the entire sentiment to the card using 3M foam for added dimension.
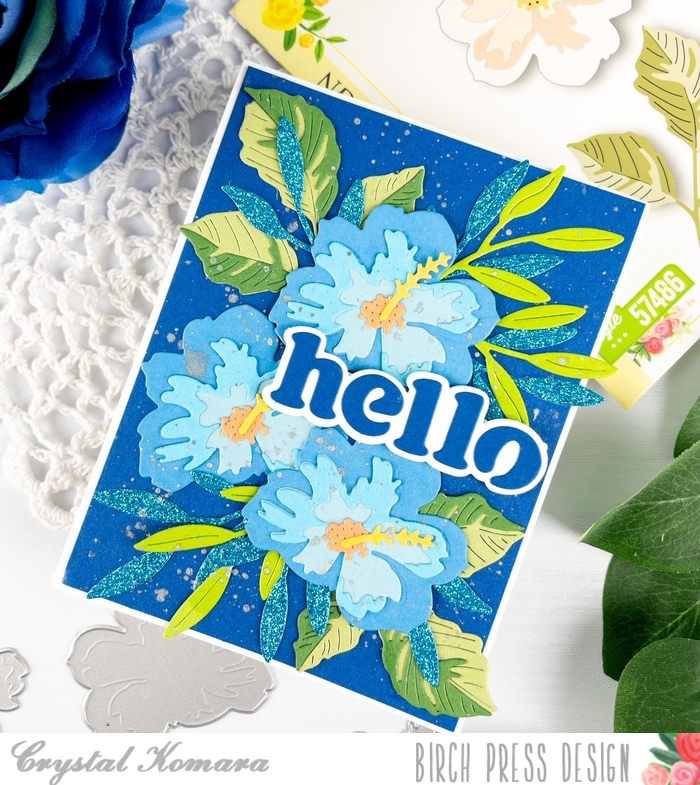
Now, is this card “perfect” – goodness NO! I bet you didn’t realize that I splattered silver ink all over the card when I intended on splattering gold. Do I love it? No. But there was already so much work done that I wasn’t about to start all over. And, let’s be real, no one would ever know but me! Shhhh. . .
Thanks for visiting and have a wonderfully creative day!

Supplies