Category: Natasha Vacca

  • Holiday Poinsettia | By Natasha Vacca

    Holiday Poinsettia | By Natasha Vacca

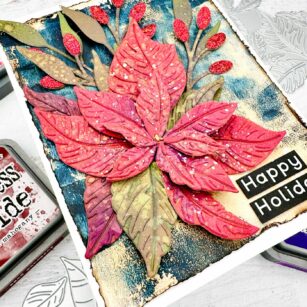
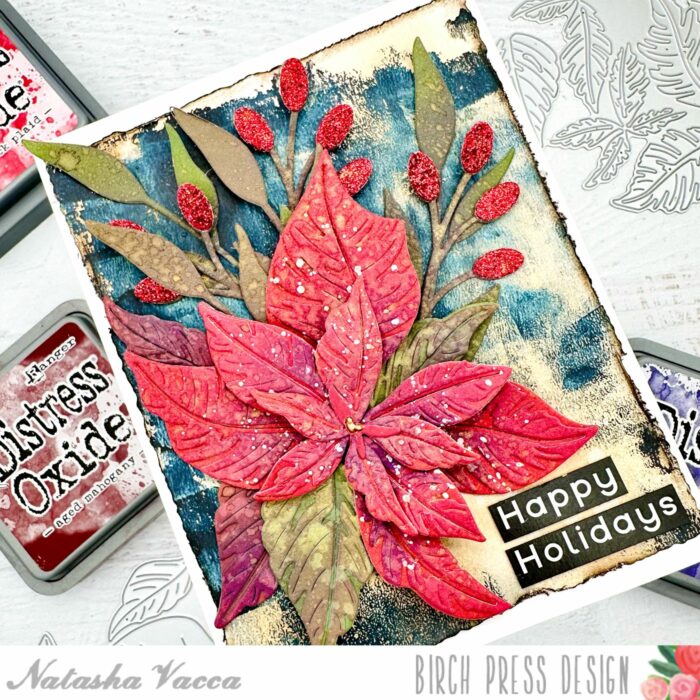
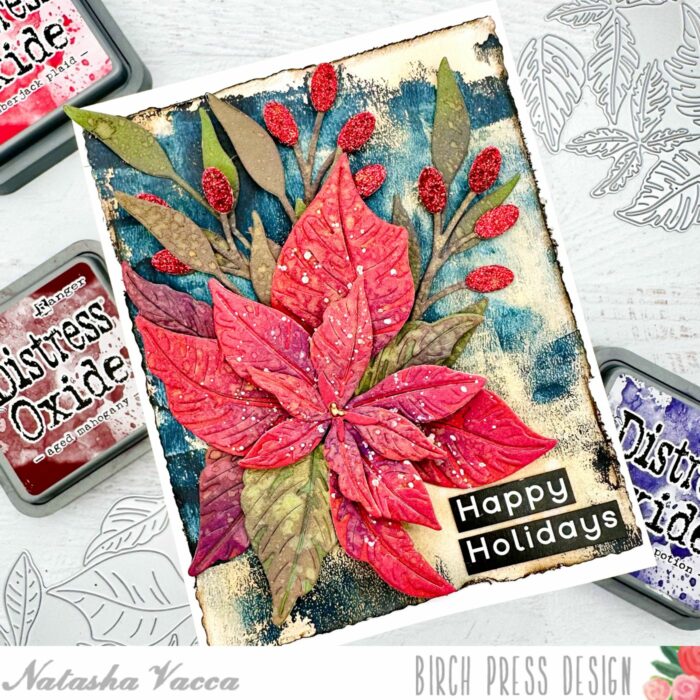
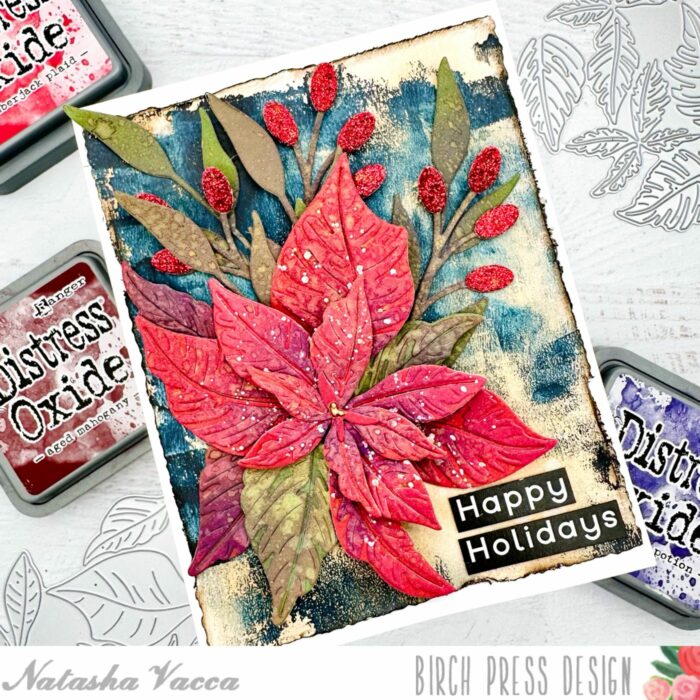
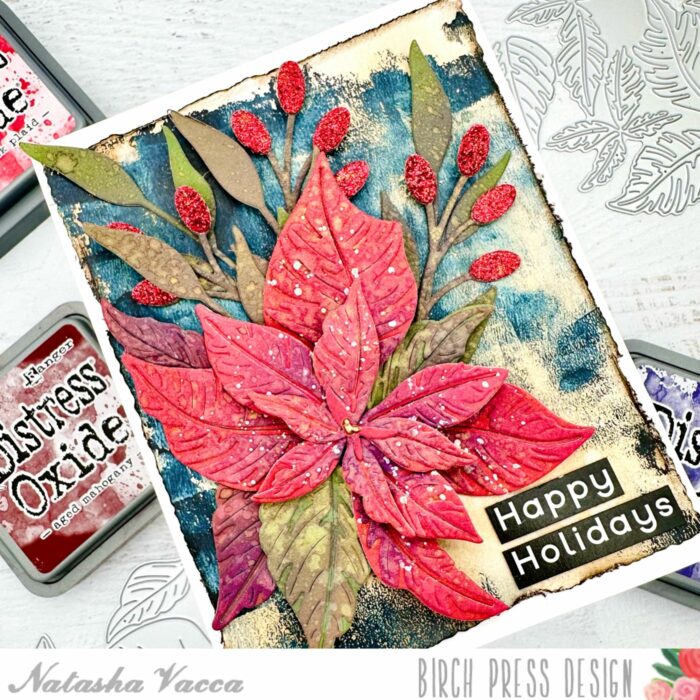
    Hello Crafty friends! I am excited to be back on the blog today sharing a card using the beautiful Splendid Poinsettia Contour Layers die set! I love this large floral die and the amazing details, so let’s get started!

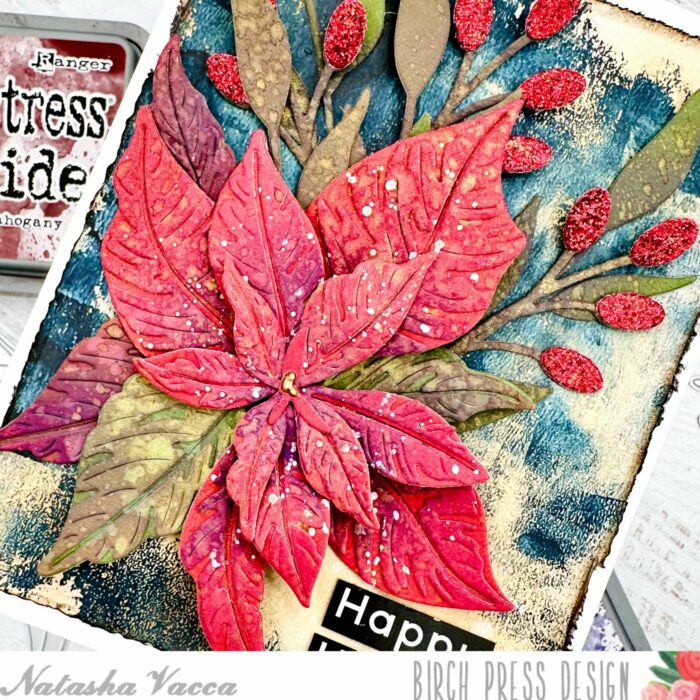
    I started by die cutting the Splendid Poinsettia using paper from the Memory Box paper pad collection in Lush Green and Berry Red. I chose 2 shades of red and 2 shades of green. I then die cut some additional leaves using the Sylvan Berries and Leaves Contour Layers die set using the Earth Neutral paper pad from Memory Box. I cut the berries from this set using a red glitter paper from the Festive Glitter paper pad.

    Once all the layers were die cut I added several shades of Distress Oxide to each layer for added color and texture. I applied water droplets to each layer as well and picked up color using a paper towel. I love the added texture this provides.

    To add a bit more texture and dimension to all the layers I added a spray from Lindy’s Gang. I love the added shine this gives to all the floral and leaf layers. I allowed everything to completely dry, then adhered all the layers together using liquid glue. I used my fingers to shape the leaves on the Poinsettia for added dimension. I added a few white splatters to the leaves and flower and set it aside.

    Next I used a gelli print from my stash. I trimmed the panel using my deckle trimmer and then added Distress Oxide to the panel to give it more of an aged look. I applied distress ink to the edges of the gelli print, then adhered this to an A2 card panel.

    I adhered the poinsettia, leaves, and berries using liquid glue to the top of the card panel. I completed the card with a sentiment from my stash. I had a lot of fun creating today’s holiday card!

    Have a great day! I will be back soon!


    Supplies


    Supplies


  • Butterfly Congratulations | By Natasha Vacca

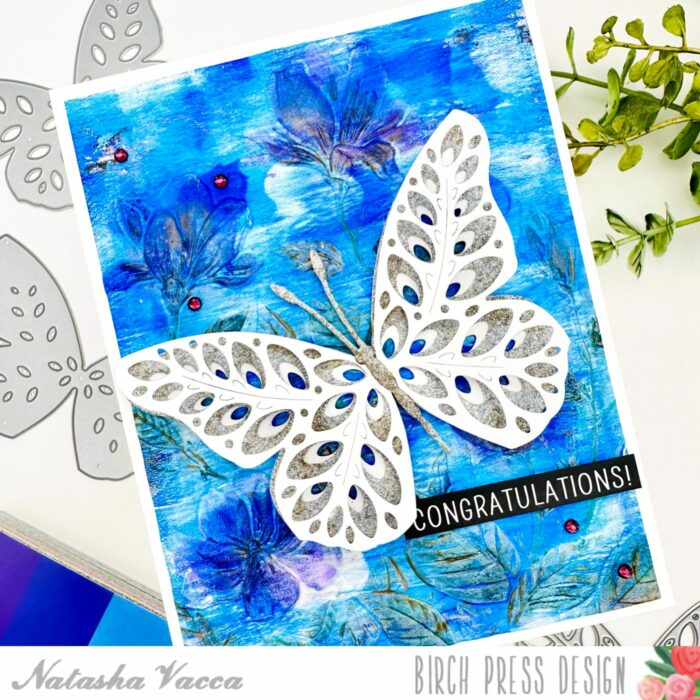
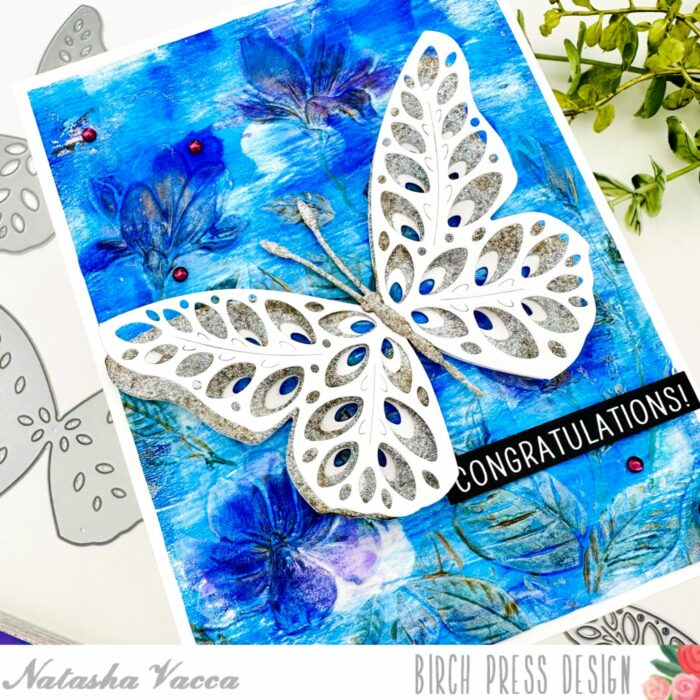
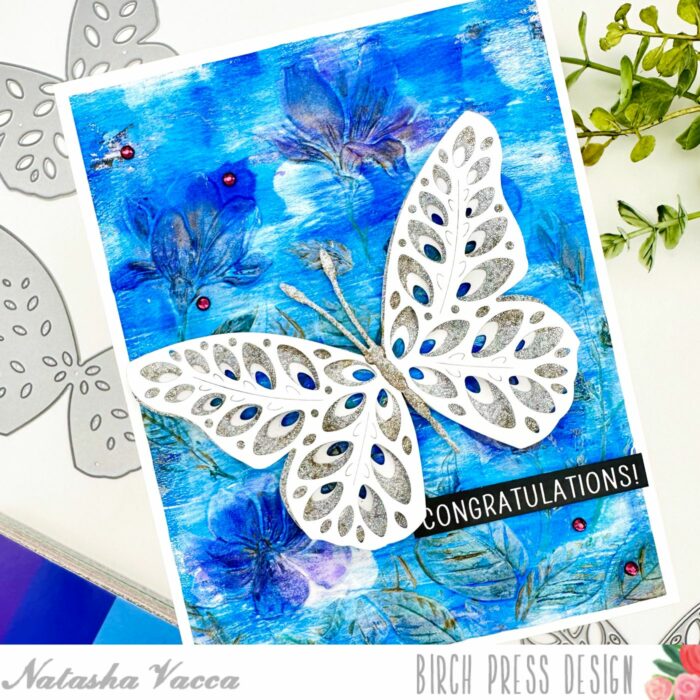
    Butterfly Congratulations | By Natasha Vacca

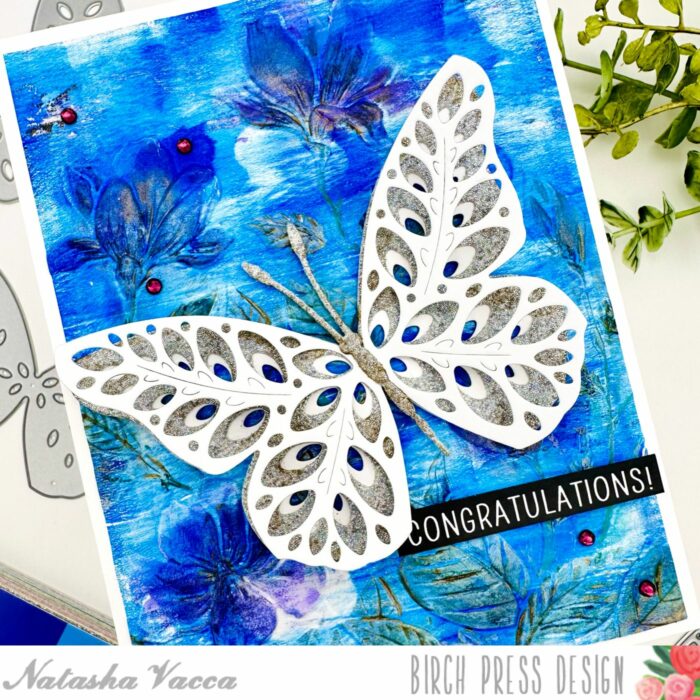
    Hello Birch Press friends! I am excited to be back up on the blog today sharing a card using the beautiful Eloquent Butterfly layering die set! So let’s get started!

    I started by die cutting Layer A and C using white cardstock from the Eloquent Butterfly layering die set. I die cut Layer B using the Memory Box Glitzy Gltter Pad using a silver cardstock from the pad. I also die cut the antennae from the Butterfly Basics die set using the same silver cardstock. I wanted to distress the glitter cardstock a bit and added a distressed gold paper glaze to areas of silver glitter cardstock. I then adhered the layers of the butterfly together using liquid glue.

    Next I started to work on the background for my card using the Marvelous Magnolia 3D embossing folder from Memory Box. I dry embossed a gelli print from my stash. Once the florals were embossed I used some oil pastels on the flowers, leaves, and stems to add color to the embossed background.

    I also added the same paper glaze from the butterfly onto areas of the leaves. I allowed the panel to completely dry, then trimmed the panel using my paper trimmer. I then adhered the floral background onto an A2 card panel.

    Next I adhered the butterfly using liquid glue. I chose a sentiment from my stash to complete my card. I added a few purple gemstones from the Autumn Fairy Jewels collection. I had fun creating today’s card and I will be back soon!


    Supplies


    Supplies


  • Warmest Wishes | By Natasha Vacca

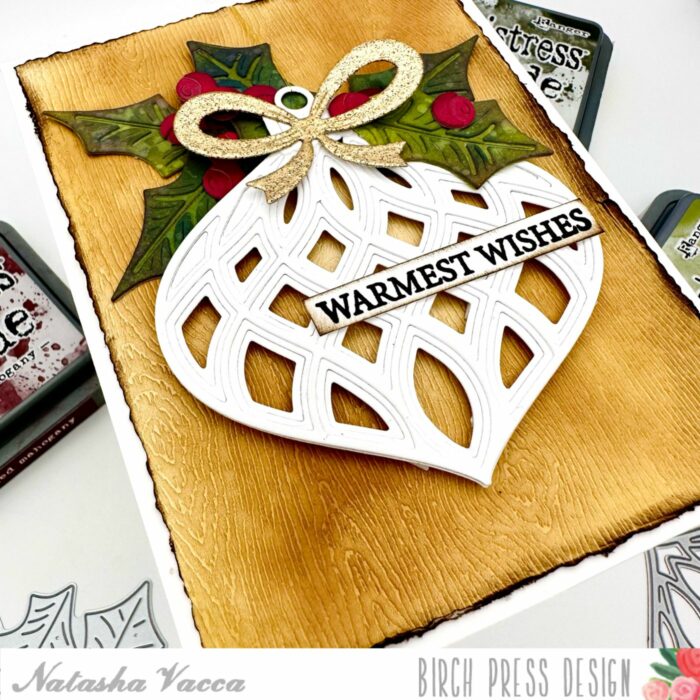
    Warmest Wishes | By Natasha Vacca

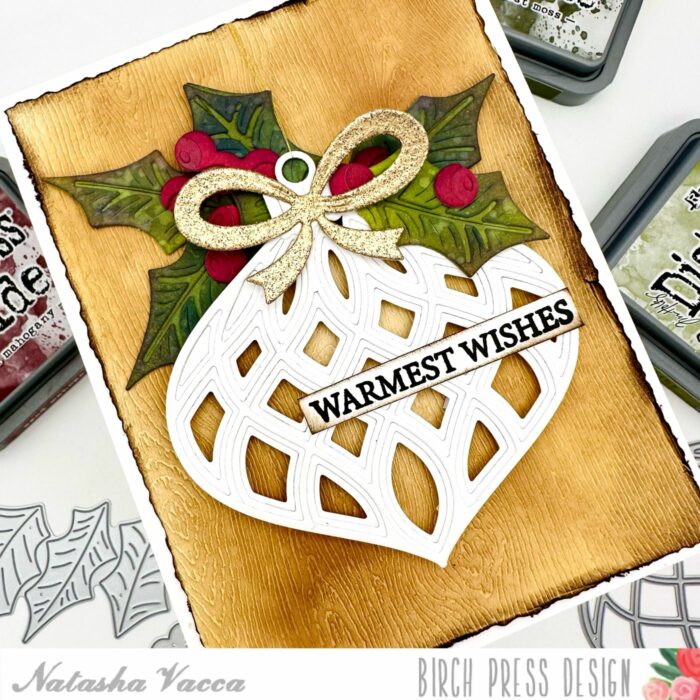
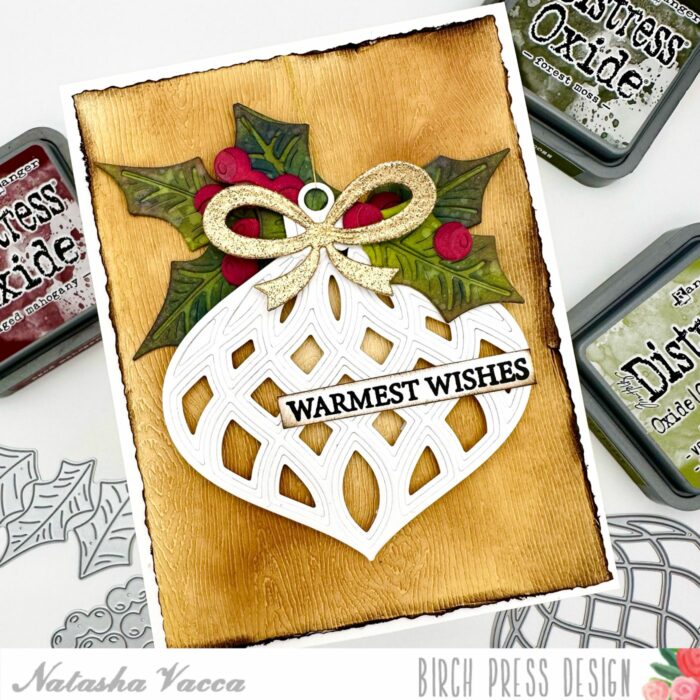
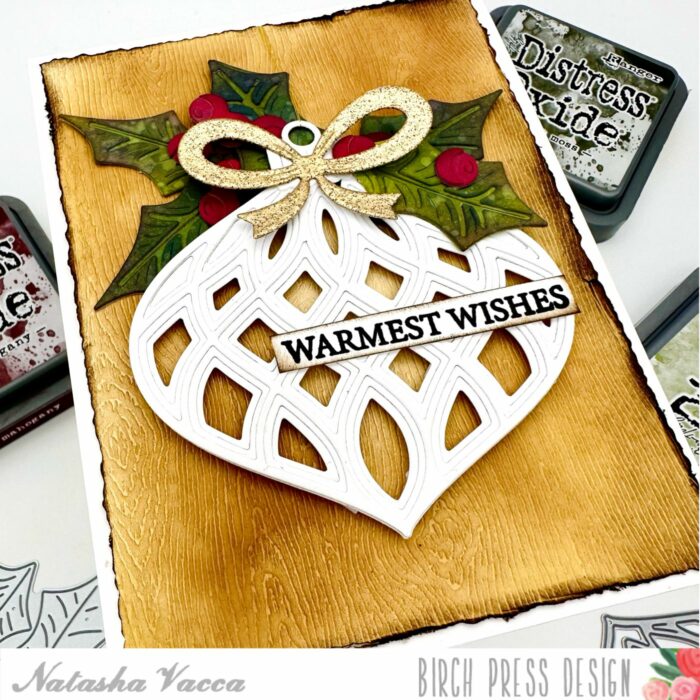
    Hello Crafty Friends, I am excited to be back up on the blog today to share a vintage feel holiday card with you! For today’s card I am using 2 of the latest dies: Jolly Holly Contour Layers and Revello Ornament. Let’s get started!

    I started by die cutting the Revello Ornament using white card stock. I die cut each layer (A, B, and C), then adhered them together with liquid glue. Next I die cut the Jolly Holly Contour Layers using the Memory Box paper pads: Lush Green and Berry Red.

    Once the leaves and the berries were die cut, I added distress oxide inks to each layer. I used several colors for each, then added water droplets to the leaves and picked up some color using a paper towel. Once all the layers were dry, I adhered them together with liquid glue and set them aside to dry. I also die cut the bow and ornament topper from the Christmas Ornament Pop Up Easel die set. I heat embossed the bow using a weathered gold embossing powder.

    Next I started to work on my background using a piece of Wood Grain Paper in the color Cream. I used distress oxides to create a vintage inspired background. Once I was done inking the background I used my deckle trimmer to cut down the panel. I then distressed the edges using my distress tool and distress ink.

    I completed the card by adhering the wood grain panel onto an A2 card base. I then adhered the leaves, berries, ornament, bow and topper using a combination of liquid glue and foam tape. I also added a piece of gold twine for the ornament. I completed the card using a sentiment from the Glad Tidings stamp set.

    I had a lot of fun creating today’s card and I hope you enjoyed it! I’ll be back soon!


    Supplies


    Supplies


  • Adornment Pumpkin | By Natasha Vacca

    Adornment Pumpkin | By Natasha Vacca

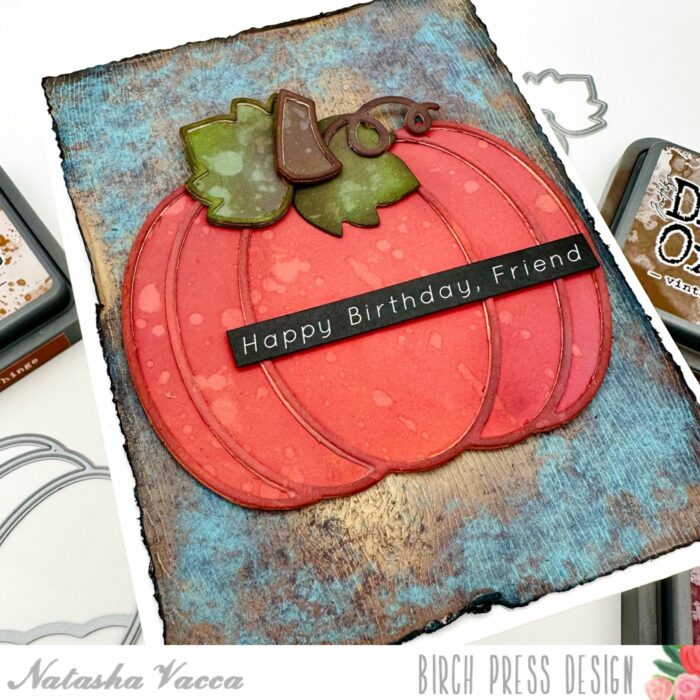
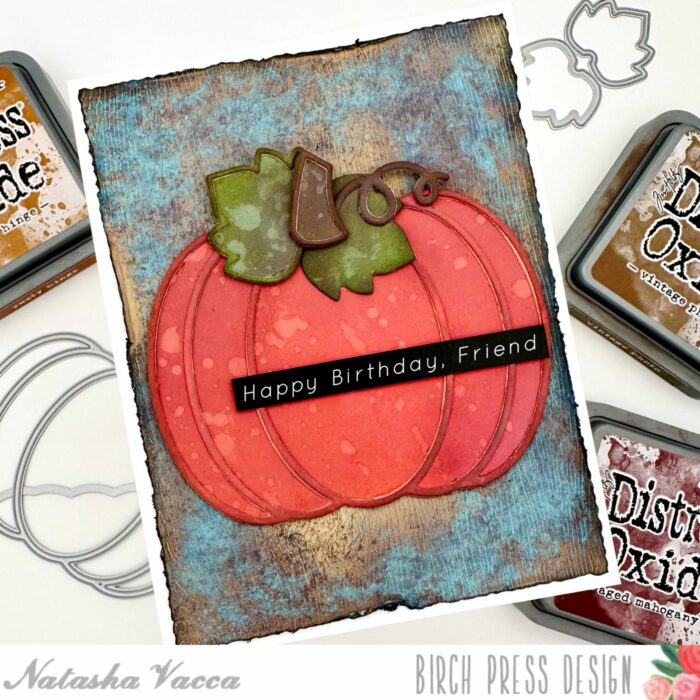
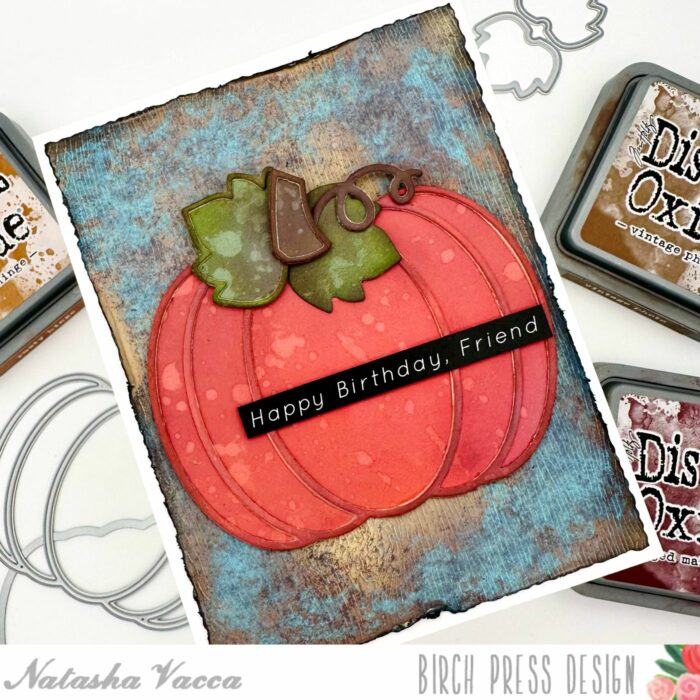
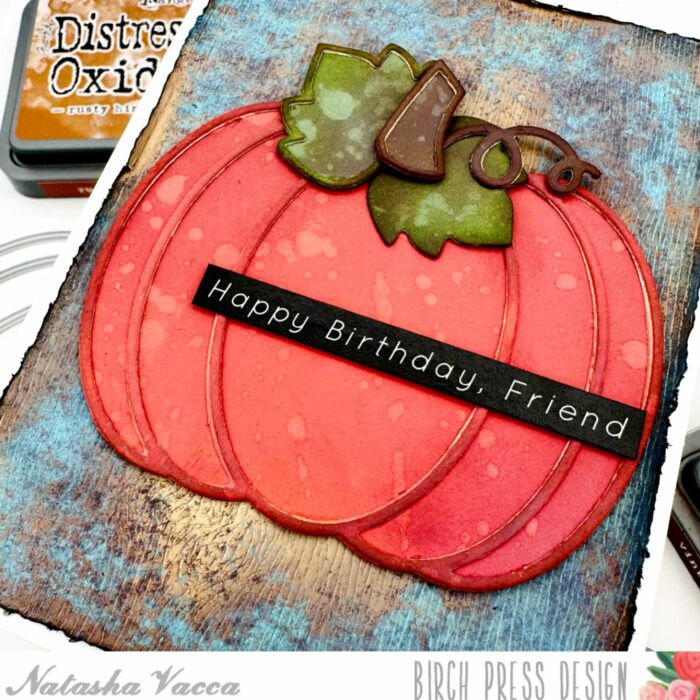
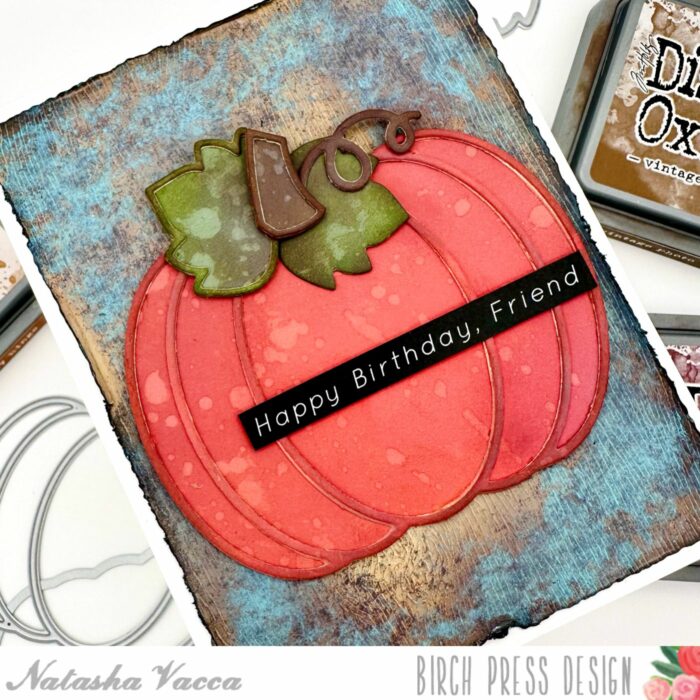
    Hello Crafty friends! I am excited to be back up on the blog today sharing the beautiful new Adornment Pumpkin die set! I love the large pumpkin and how this die set creates a beautiful focal image! So let’s get started!

    I started by die cutting the Adornment Pumpkin using paper pads from Memory Box. I die cut the pumpkin using the Sunny Orange pad, the leaves using Lush Green, and the stem from the Earth Neutral paper pad. I die cut each of the pieces using a colored cardstock and then a white piece of card stock as well.

    Once all the layers were die cut, I adhered the colored layer on top of the white card stock using liquid glue. Next I added a bit of color to each of the layers using Distress Oxide inks. I applied the ink on top of the colored card stock and then added water droplets for added texture.

    Next I darkened the edges of each die cut using a dye ink. I set the pieces aside to work on the background. For the background I trimmed a piece of white woodgrain paper down to an A2 card size panel. I then used distress oxide inks to create a wood background. I added a bit of distress paint using a sponge for added texture and color.

    Once the panel was completely dry, I trimmed the panel using my deckle trimmer. I then distressed the edges using my distress tool and distress ink. I then adhered the background panel onto a top folding A2 card base. I adhered the pumpkin, leaves, and stem to the card front using liquid glue. I completed the card with a sentiment strip from my stash.

    I had a lot of fun creating today’s card! I hope you enjoyed this and I will be back soon!


    Supplies


    Supplies


  • Adornment Wreath | By Natasha Vacca

    Adornment Wreath | By Natasha Vacca

    Hello Crafty Friends! It is Natasha here today and I am excited to be back on the blog today! Today I am sharing the beautiful new Adornment Wreath die set! So let’s get started!

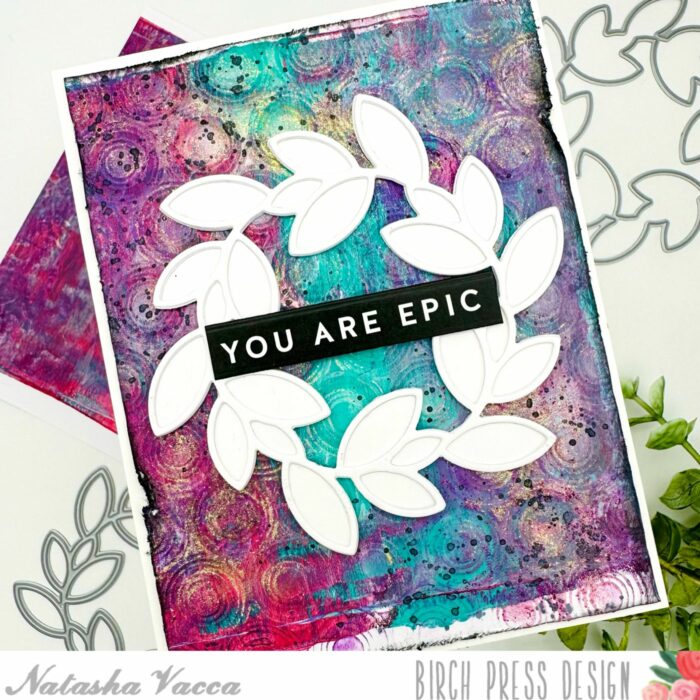
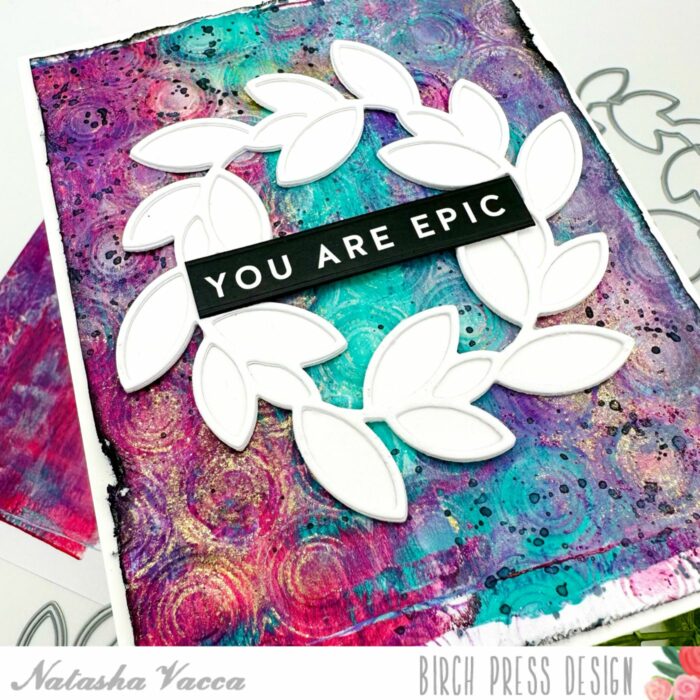
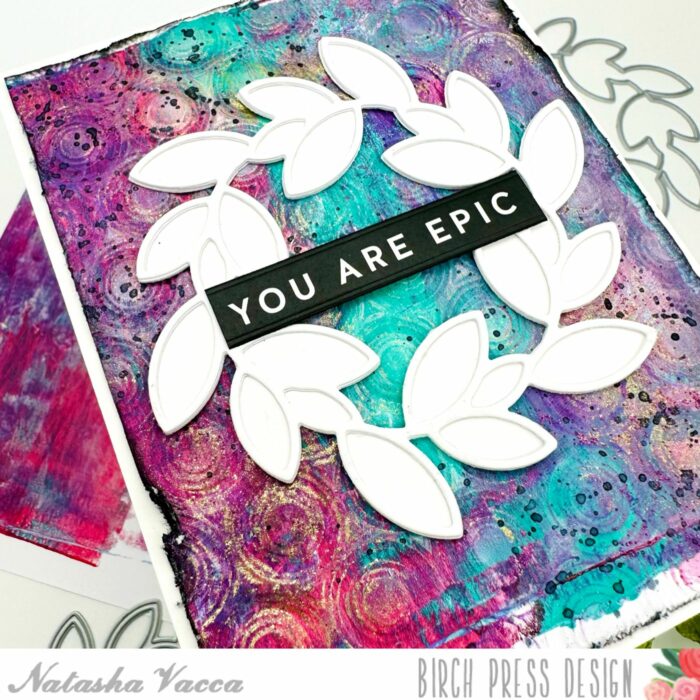
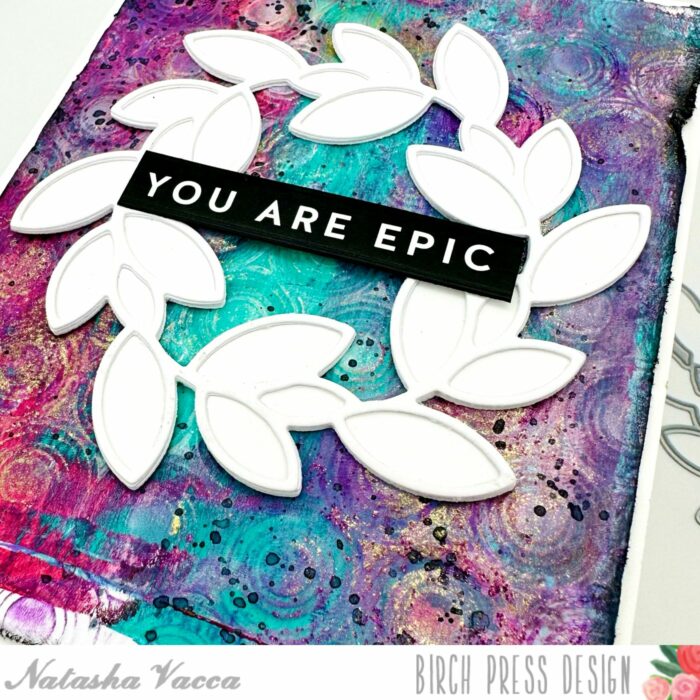
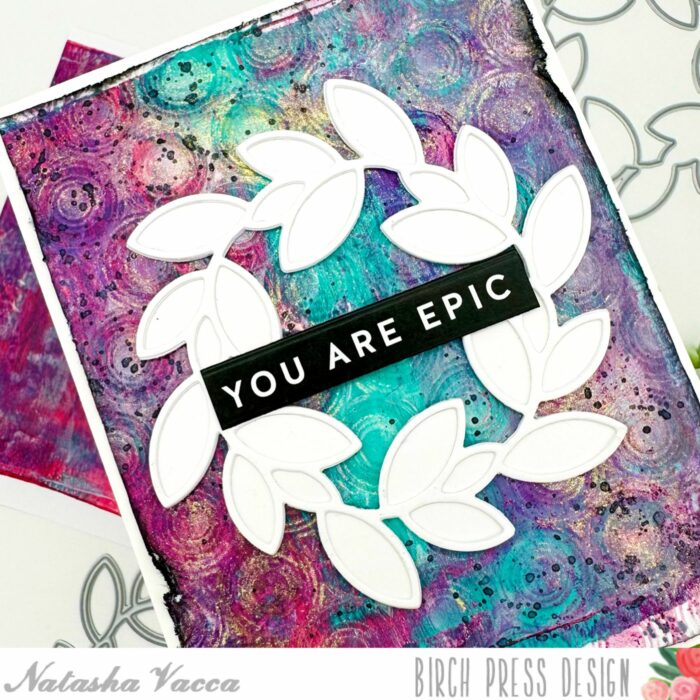
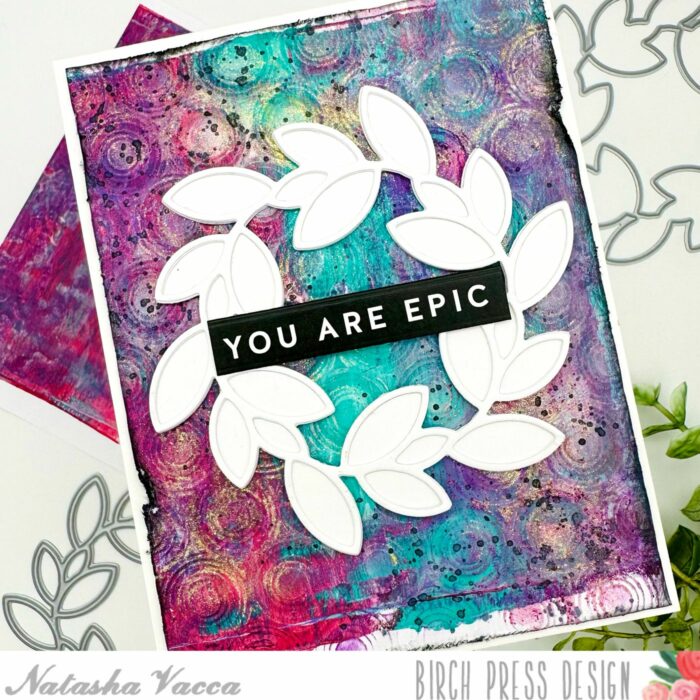
    I love this gorgeous wreath and wanted to create a card using the wreath as my focal image. I started by die cutting the Adornment Wreath. I die cut the base layer 2 times using white card stock and the top layer 2 times as well. Once these were die cut, I adhered them together using liquid glue. I set the wreath aside to work on my background.

    For my background I chose a gelli print from my stash. I chose a background with beautiful pops of color to compliment the white wreath. I then ran the background through my die cutting machine with the Ringadings embossing folder from Memory Box.

    Next I added some distressing to my dry embossed background, using both distress crayons, as well as paper glaze. I love the added shine and sparkle from the Gold paper glaze.

    I then added some black splatters to the background and set it aside to dry. Once it was dry I trimmed the panel and distressed the edges using my distressing tool. I then added some Black Soot distress ink to the edges of the panel. I adhered the panel to my A2 card base.

    I completed my card by adhering the wreath to my card front using liquid glue. I chose a sentiment strip from my stash and adhered this with foam tape.

    Thanks so much for stopping by today! I will be back soon!


    Supplies


    Supplies

  • Rustic Poinsettia | By Natasha Vacca

    Rustic Poinsettia | By Natasha Vacca

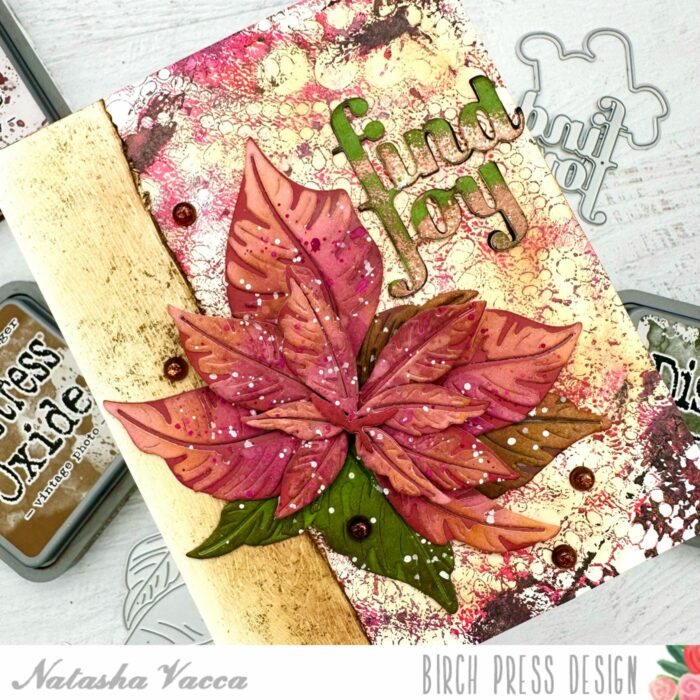
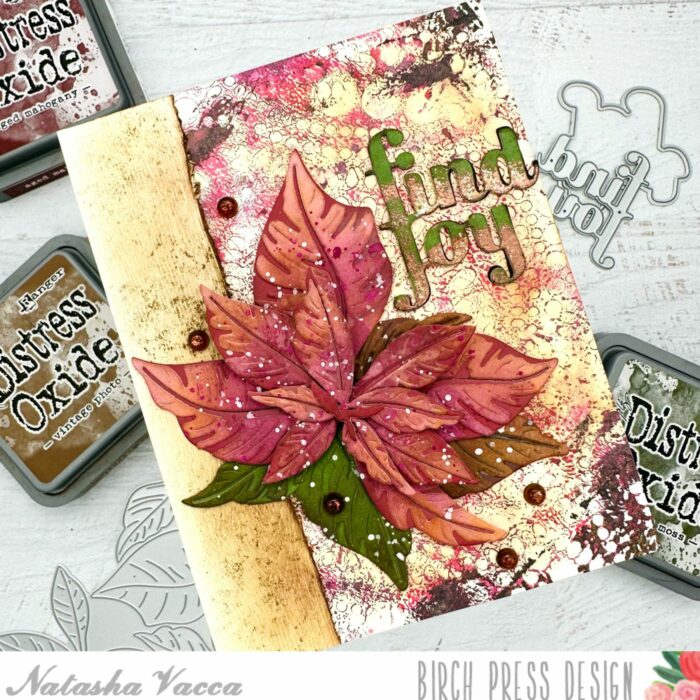
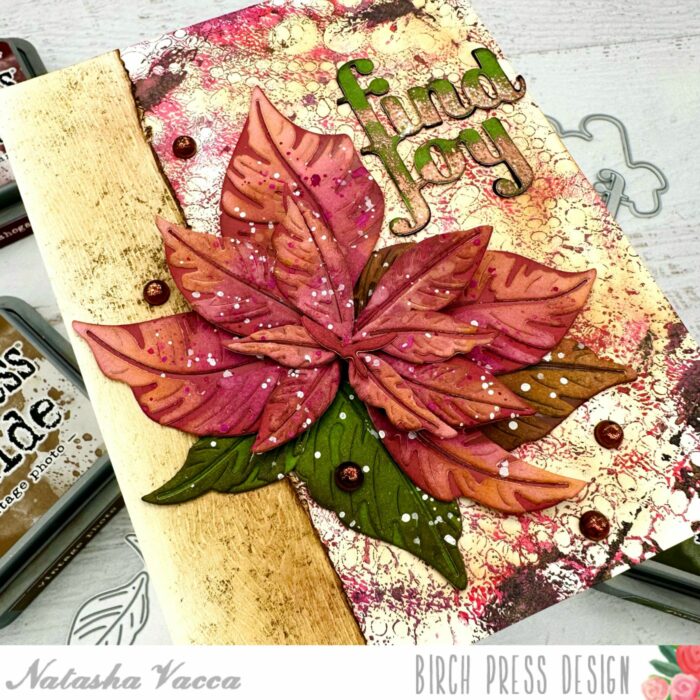
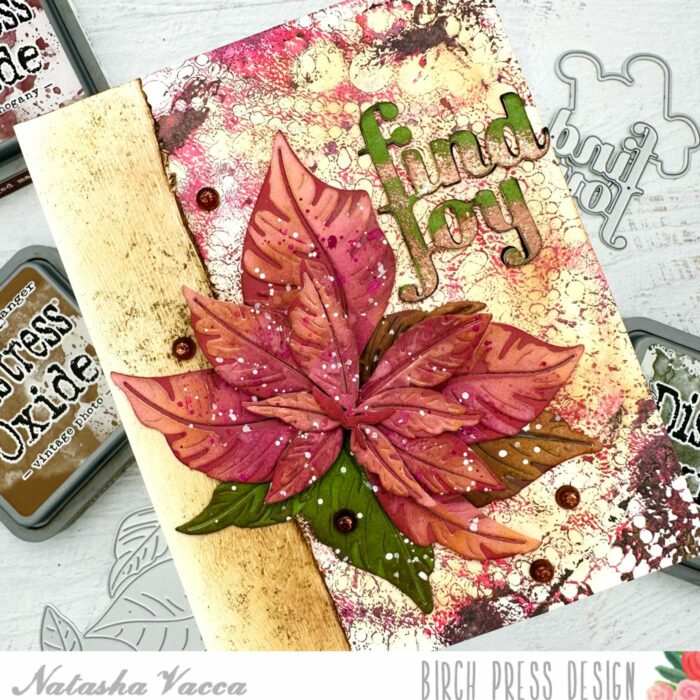
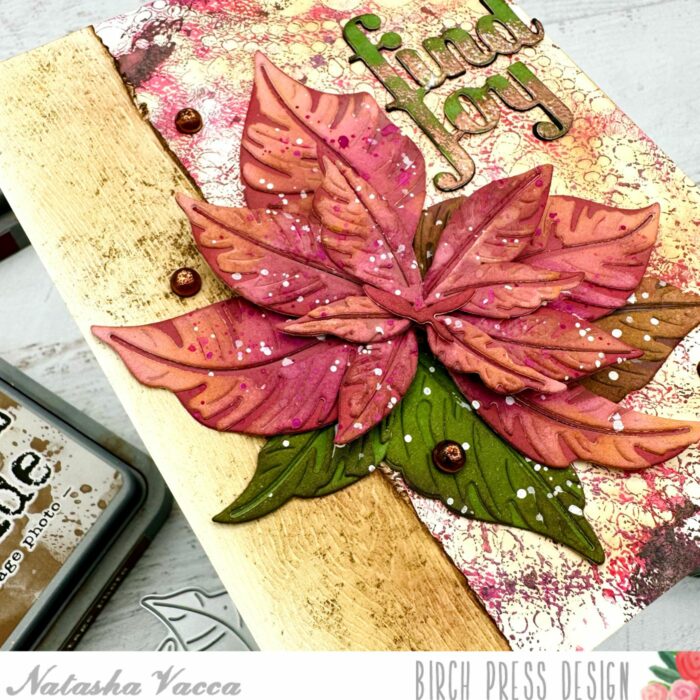
    Hello Crafty friends! I am excited to be back on the blog today sharing the beautiful new Splendid Poinsettia Contour Layer dies. I had so much fun creating a rustic inspired holiday card, so let’s get started!

    I started with the beautiful Poinsettia die and the Berry Red paper pack from Memory Box. I chose 2 shades of red and pink paper from this pack. I cut the Poinsettia using both colors of paper. I then die cut the leaves for the Poinsettia using the Lush Green paper pad from Memory box. Once all the parts were die cut, I wanted to add more dimension using inks.

    On my die cuts I used a combination of distress oxide inks, as well as dye inks. I ink blended the layers for the flower and leaves until I had the dimension and colors I was looking for. I added water droplets to each layer and picked up some color using a paper towel. I then added white splatter to each layer using a paintbrush and allowed them to dry.

    Once all the splatters were dry, I adhered the Poinsettia and leaf layers together using liquid glue and foam tape. Next I chose a background from my stash. I chose a colorful background from my gelli prints to use as a focal point behind my Poinsettia. I then trimmed about a 1 inch rectangle from the Cream Woodgrain Paper Pack. I distressed the edges using my paper trimmer and my distress tool. I then inked up the woodgrain paper using distress oxide inks.

    Next I adhered the gelli print panel to an A2 card base. I adhered the 1 inch strip of wood grain on the left side of the card panel. I then adhered the Poinsettia and leaves using liquid glue.

    I completed the card using the Find Joy and Outline sentiment. I had previously made the top layer using green paper and added texture using heat embossing. I die cut 2 more layers for added dimension. Once all the layers were adhered, I added this to my card front. I added a few gems from the Fairy Dewdrops in Christmas Fairy.

    I had so much fun creating today’s card and I hope you enjoyed it too! I will be back soon with more crafty inspiration!


    Supplies


    Supplies


  • A Fall Thank You | By Natasha Vacca

    A Fall Thank You | By Natasha Vacca

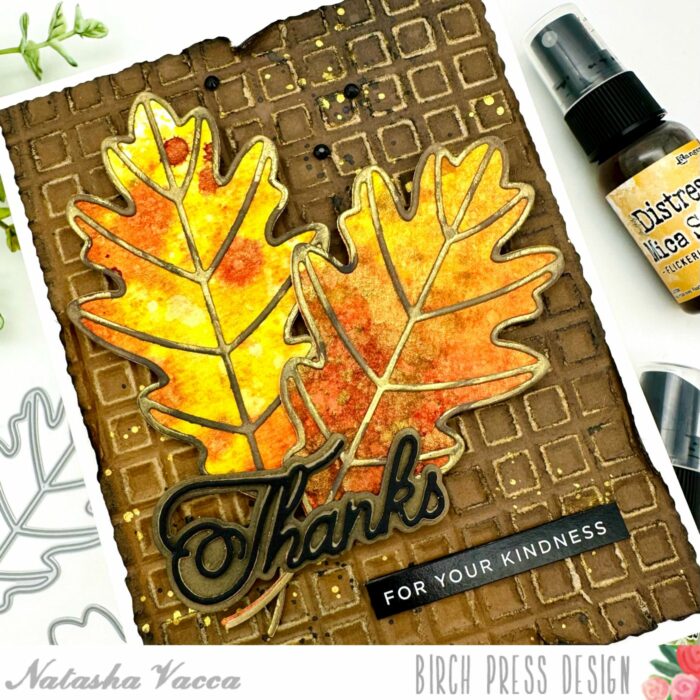
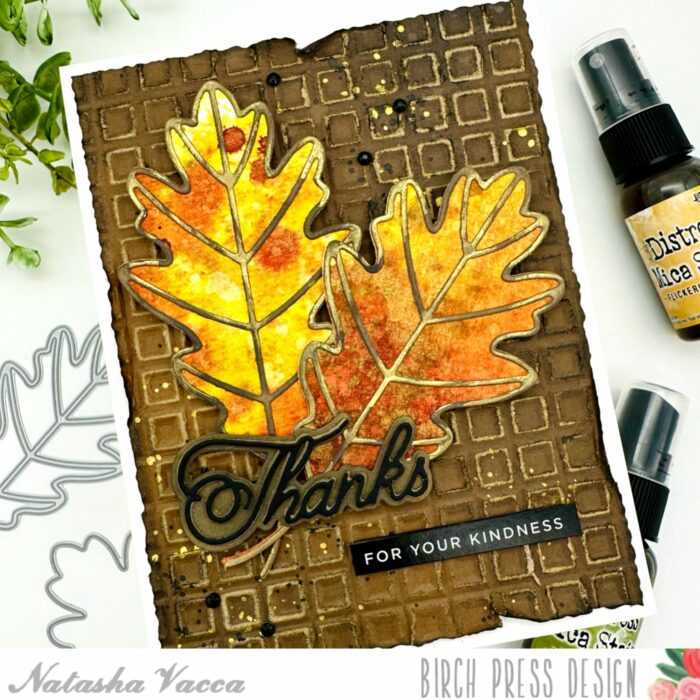
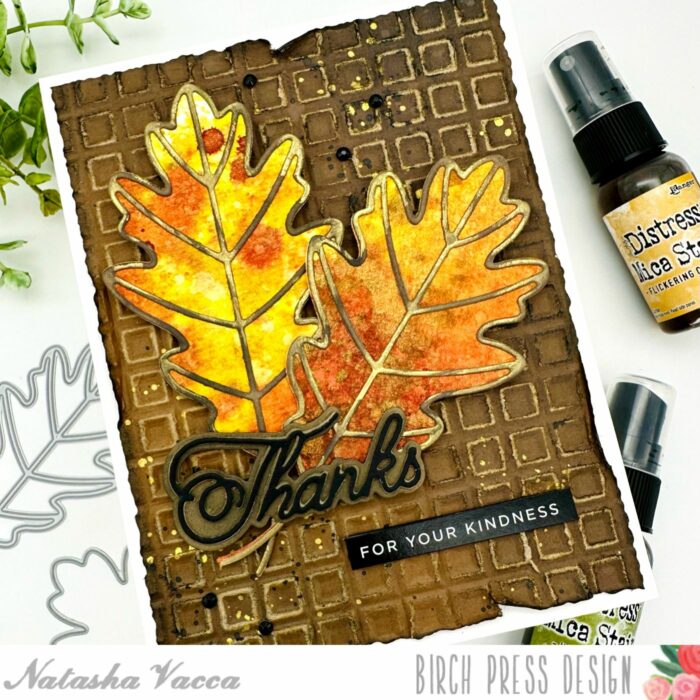
    Hello Birch Press friends, it is Natasha here and I am excited to be back with you today! Today I created a fall thank you card using the new Oak Leaf die set. I am a summer girl at heart, however I do love the colors of Fall! So let’s get started!

    I started by creating 2 panels using mixed media paper and my Distress Mica Stains. I chose 3 colors to use today to create the panels. The panels will be used to die cut my leaves. I spritzed the colors onto my paper one at a time, heat set them with my heat tool, added water droplets, and picked up the color with a paper towel. I continued this process until I had the colors and texture I was looking for. I set the panels aside to completely dry as I worked on my background.

    Next I chose a piece of kraft paper from my stash and dry embossed the panel using the Memory Box Geometric Crystals embossing folder. I then used a sanding tool to distress the dry embossed panel in various sections. To add a bit more texture and dimension to the panel I applied Distress Oxide inks to the panel in 3 of the corners.

    Next I trimmed the panel using my Deckle Trimmer and distressed the edges using Distress Ink. I added splatters to the panel using black and gold splatter. I set the panel aside to completely dry.

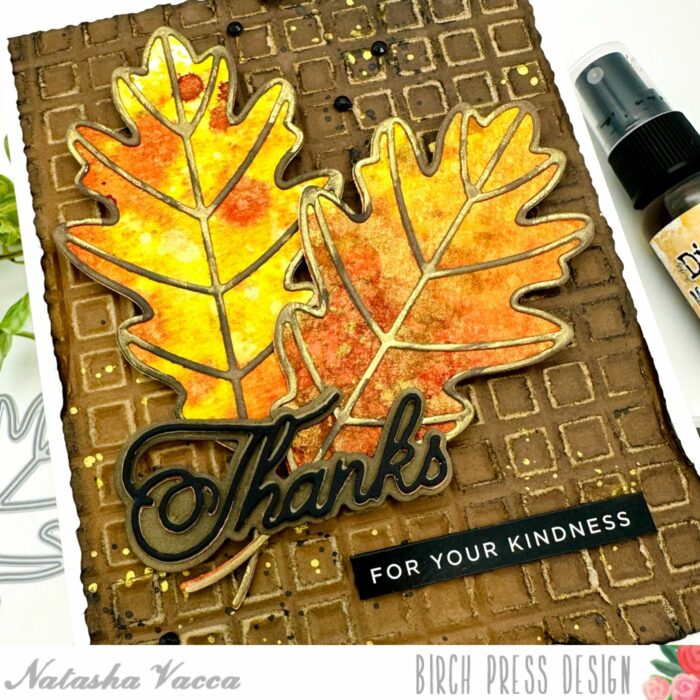
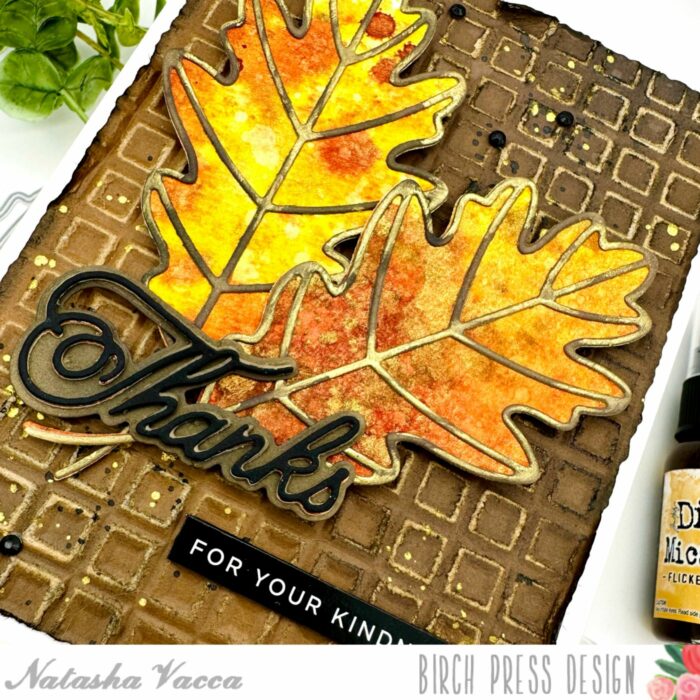
    Next I took my 2 panels I created using the Distress Mica Stains and die cut 2 leaves using the new Oak Leaf Die set. I also die cut the top layer using white card stock. I then ink blended the top layer of the leaves using oxides and once dry added Foundry Wax for added shine. I then adhered both layers of the leaves together using liquid adhesive.

    To complete my card, I adhered the dry embossed panel onto an A2 card base using liquid adhesive. I adhered the leaves with foam tape. I chose the sentiment from Handwritten Thanks and Outline die set. I die cut the script Thanks 3 times, using black card stock, as well as from the Rainbow Reflections Mirror Pad. I adhered the layers together using liquid glue and added this to my card front. I chose a sub sentiment from my stash and completed the card with a few gems from Autumn Fairy Jewels. Thanks so much for stopping by today! I will be back soon!


    Supplies


    Supplies


  • Just for You Mixed Media Tag | By Natasha Vacca

    Just for You Mixed Media Tag | By Natasha Vacca

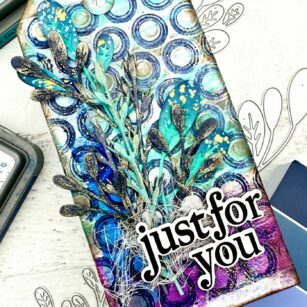
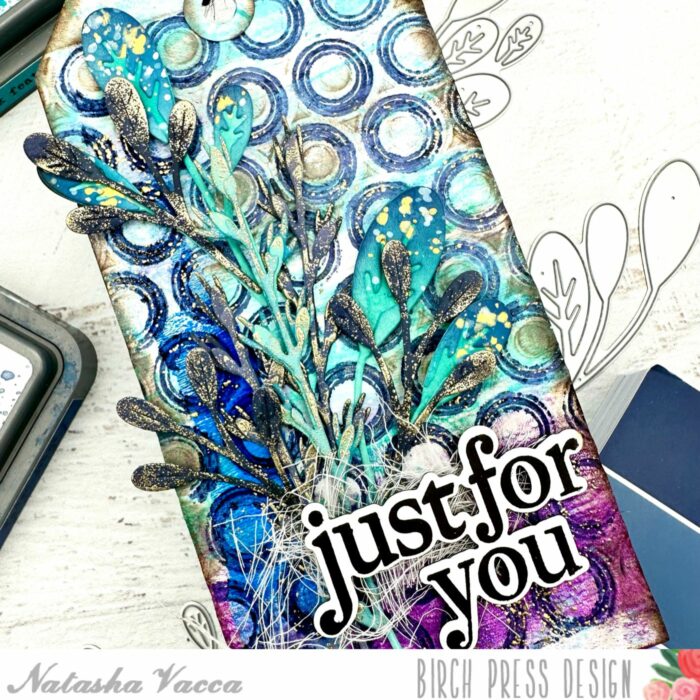
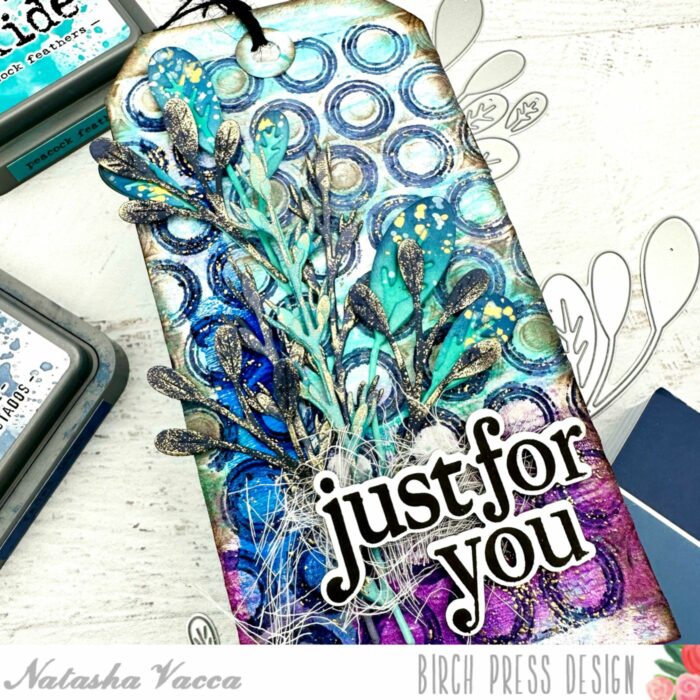
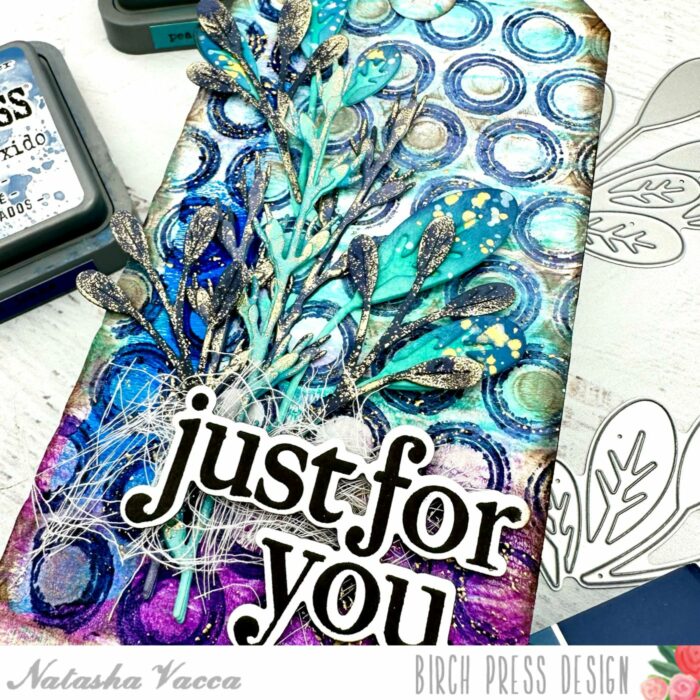
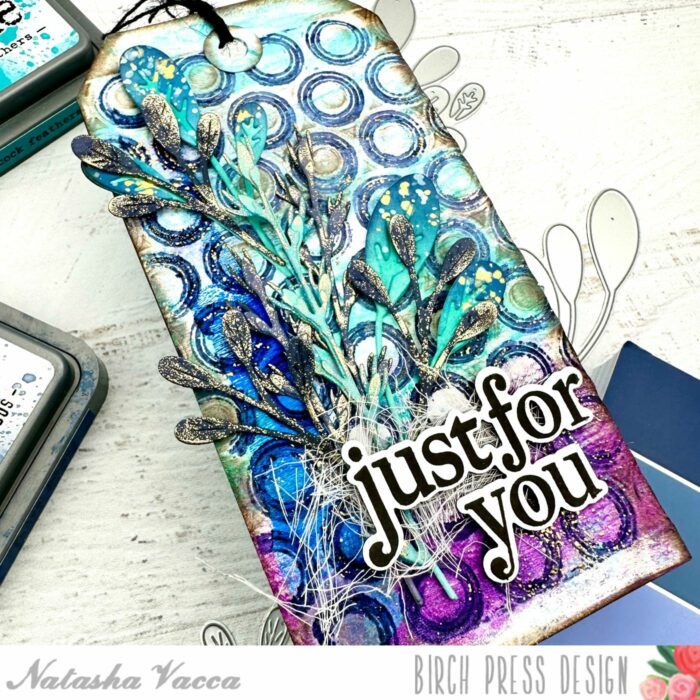
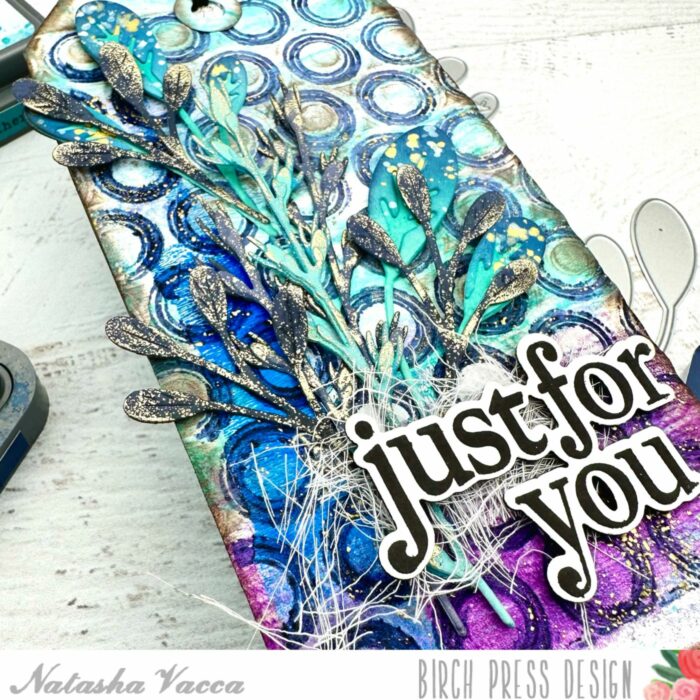
    Hello Birch Press Friends, I am excited to be back on the blog today sharing a mixed media tag using 2 new dies from the latest collection: Oval Leaf Branches Contour Layers and Budding Twigs Contour Layers. So let’s get started!

    I started by die cutting the branches and twigs from the Oval Leaf Branches Contour Layers and Budding Twigs Contour Layers die sets. I die cut them from 2 shades of cardstock from the Stormy Blue and Fresh Aqua collection from the Memory Box paper pads. Once all the layers were die cut I added a bit of color to each layer using distress oxides. I then spritzed them with water and used a paper towel to pick up some of the color.

    Next I added embossing powder to all the die cuts. I applied embossing ink, then powder, and heat set them with my heat tool. I did wipe off some of the powder before heat setting them for a distressed look. I set the die cuts aside to work on my background.

    For the background I chose a gelli print from my stash and trimmed it into a tag. Next I ran the tag through my die cutting machine with the Ringadings 3D embossing folder. I then applied dye ink to one side of the folder and ran it through the machine again. Next I added embossing ink to the folder and ran it through one more time. I then added a gold embossing powder to some sections of the background and heat set it with my heat tool.

    Next I inked up the edges of the tag as well as some areas on the top of the tag with distress ink. I then determined the placement for the branches and the twigs. I adhered them with liquid glue and foam tape.

    Next I stamped the sentiment from the Gracious Floral stamp and die set. I completed the tag with a bit of cheesecloth and twine at the top of the tag. I adhered the sentiment with foam tape to complete the tag.

    Thank you so much for stopping by today! I will be back soon!


    Supplies


    Supplies


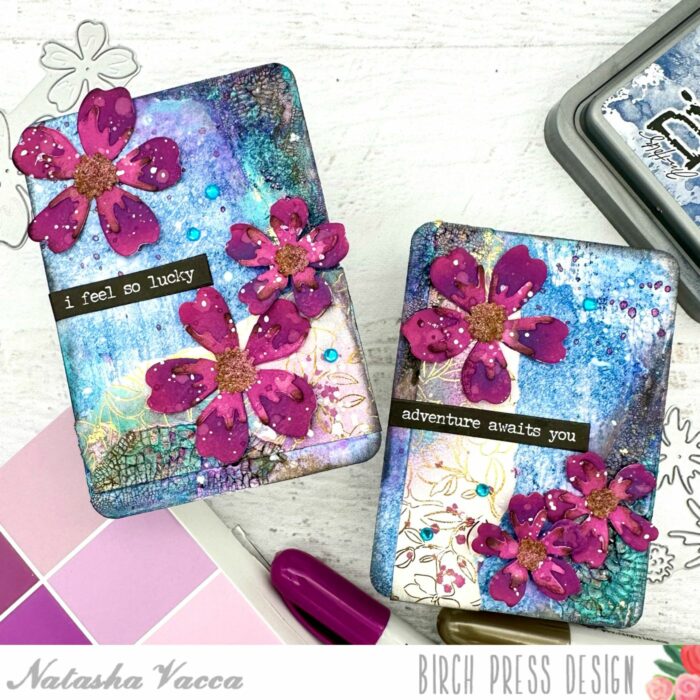
  • Phlox Blooms ATC’s | By Natasha Vacca

    Phlox Blooms ATC’s | By Natasha Vacca

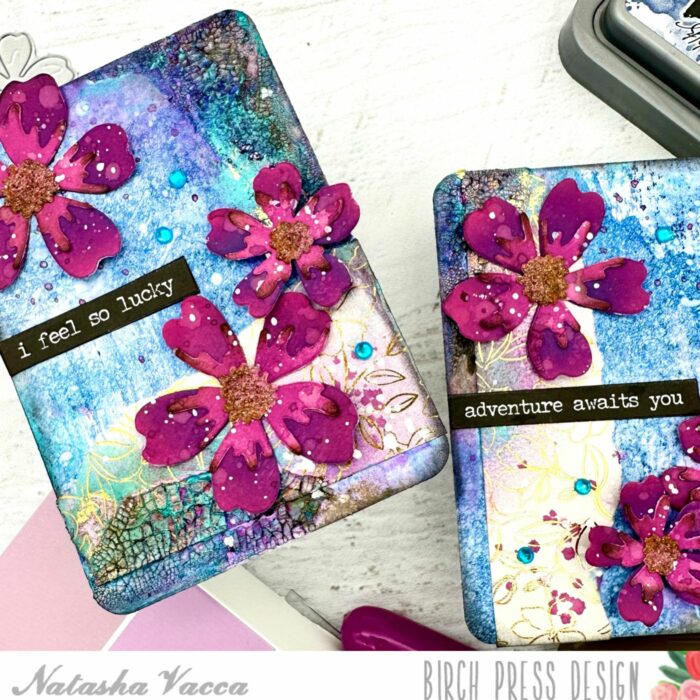
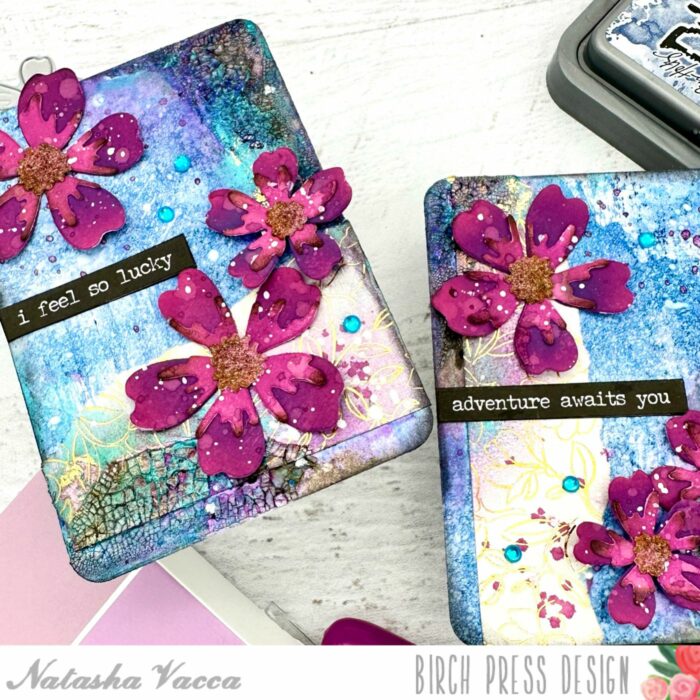
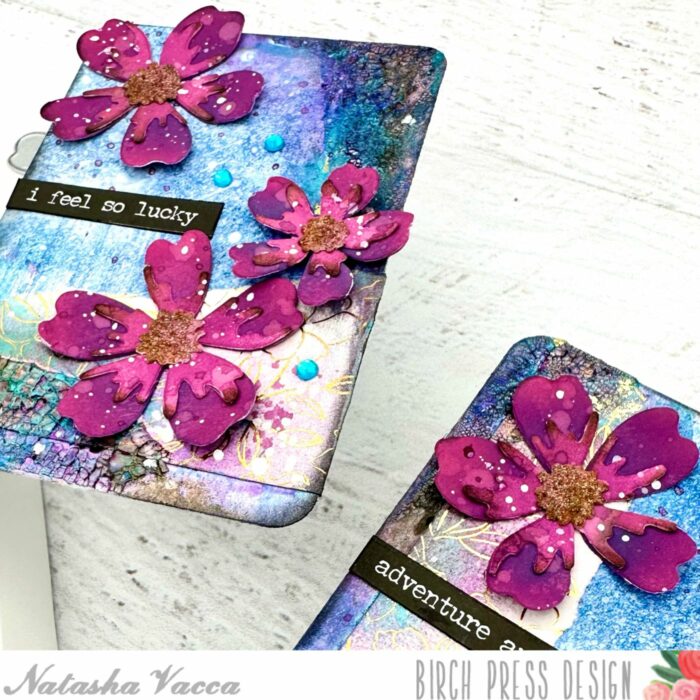
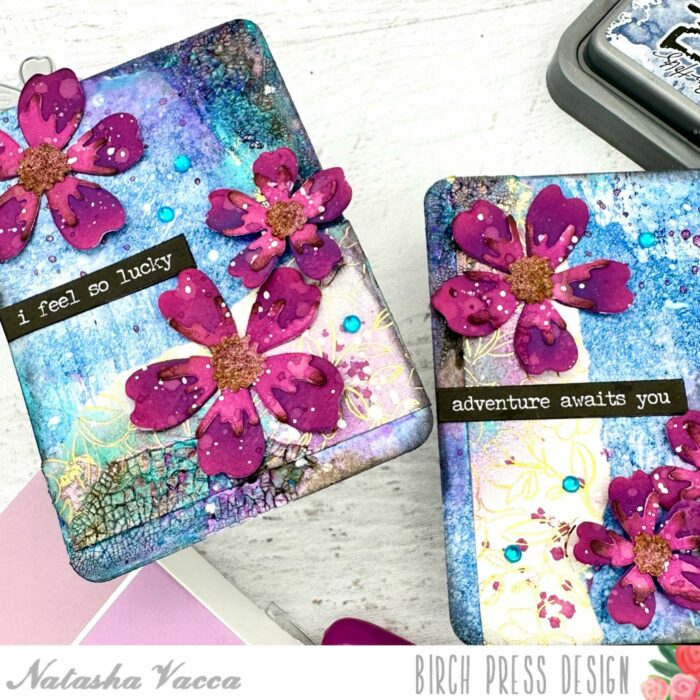
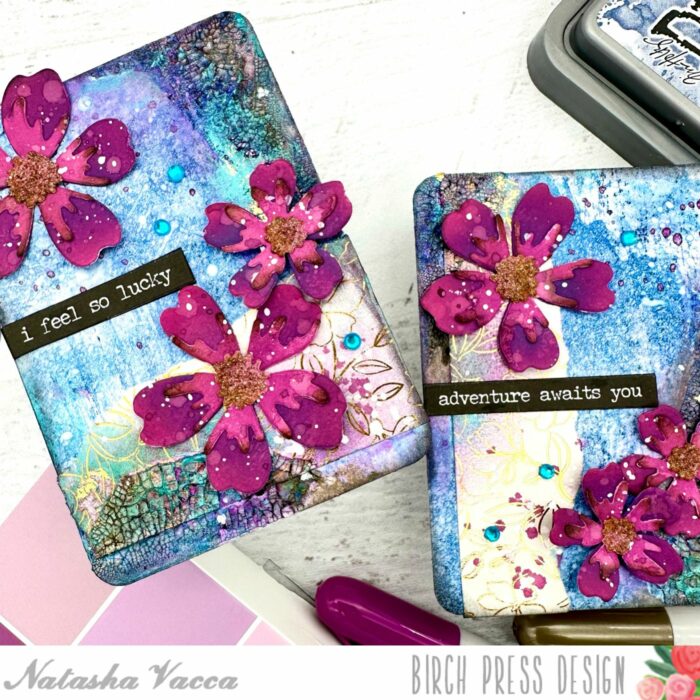
    Hello Crafty friends! I am excited to be back on the blog today sharing a couple of mixed media ATC’s using the Phlox Blooms and Leaves Contour Layers die set. So let’s get started!

    I started by die cut the floral images from the Phlox Blooms and Leaves Contour Layers die set. I cut enough for 3 florals per ATC. I die cut the flowers using the Vibrant Violet paper pad from Memory Box. I chose 2 shades of pink for the flowers and the center of the flower. Once everything was die cut, I used several shades of Distress Oxide ink to add more depth and texture to the flower images.

    Once the flowers were all inked up I adhered the flowers together using liquid blue. Next I heat embossed the center of the flower using a gold embossing powder and then adhered the center to the flowers. I also added a few splatters to each flower. I then set the flowers aside to work on my backgrounds.

    For the background I chose a blue panel from my stash of pre-made backgrounds. I trimmed the panel into 2 ATC’s (Artist Trading Cards). Next I chose a piece of pattern paper from the Magnolia Grove paper pad from Memory Box. I tore the paper and then adhered this to each ATC using liquid glue.

    I then added a clear crackle paste to each ATC in a couple of places. I allowed the paste to dry and when it was completely dry I added a bit of distressing using distress crayons, as well as paper glaze for added shine and texture. Next I inked up the edges of each ATC using black distress ink.

    I then added white and purple splatters to each of the backgrounds. Once the splatters were dry, I adhered the flowers using liquid glue and foam tape. I completed my ATC’s with a couple of sentiment strips and a few gems from the Fairy Jewels – Brights collection!

    Thank you for stopping by today! I will be back soon!


    Supplies


    Supplies


  • Mixed Media ATC’s with Curved Leaf Branch | By, Natasha Vacca

    Mixed Media ATC’s with Curved Leaf Branch | By, Natasha Vacca

    Hello Birch Press friends, I am excited to be back on the blog today. I love creating with dies and today I am going to share some mixed media ATC’s (Artist Trading Cards) with you! For the focal image I will be using the Curved Leaf Branch Contour Layers die set. So let’s get started!

    I started by die cutting 3 of the Curved Leaf Branch layers using white card stock, as well as a set using the Vibrant Violet paper pad. Once the leaves were die cut, I set the white leaf branches aside. I wanted to keep these one layer. On the violet leaf branch, I added oxide ink to the leaves, as well as to the top layer on the leaves. I used several shades of ink to add contrast to the leaves. I adhered on the 2nd layer of the leaves using liquid glue and then set these aside.

    Once my leaves were die cut, I trimmed 3 different gelli prints into ATC size (2.5 x 3.5). On each of the ATC’s I added a variety of texture using texture paste and crackle paste. I added the paste using a spatula to the edges, as well as used the Gilded Grace Inside Stencil Set. I chose one of the stencils from the set and added the stencil to my backgrounds and applied texture paste through the stencil. I allowed the paste to dry completely before moving onto the next step.

    Once the paste was dry, I added a bit more texture by applying distress crayons and gold glitz to the paste areas. I continued to work on the areas until I was happy with the texture of my backgrounds. Once everything was dry, I added a strip of washi tape to each ATC, with a bit of white gesso for added distressing. I also added white splatters to a couple of the ATC’s as well.

    Next it was time to adhere the leaves onto the ATC panels. Under each leaf I used gold thread and adhered this to the panel with a glue dot. I then adhered the leaves onto each ATC on top of the gold thread. I added sentiments from my stash, as well as a stamped sentiment from the Gracious Floral Stamp and die set. I trimmed the sentiments and adhered them to my ATC’s.

    I added a butterfly die cut to two of the ATC panels. I die cut the Simple Butterfly Contour Layers die set using the Vibrant Violet paper pad. I added Distress Oxide ink to each layer of the butterfly and then adhered it together. I thought this was a sweet and simple addition!

    I hope you enjoyed stopping by today and learning how to create ATC’s, as well as how to use your layering stencils to add texture!

    Have a great day and I will be back soon!


    Supplies


    Supplies


    Supplies