Category: Seeka

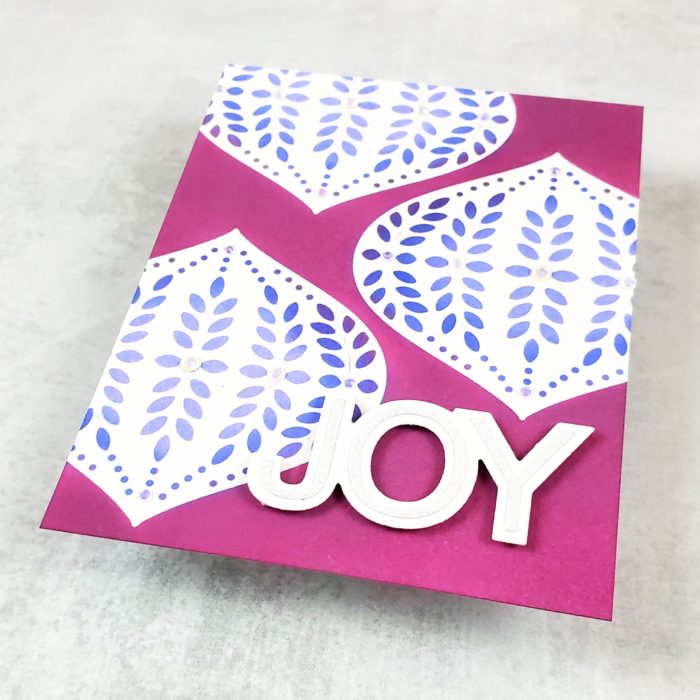
  • Masked Marisol Ornament | By Seeka

    Masked Marisol Ornament | By Seeka

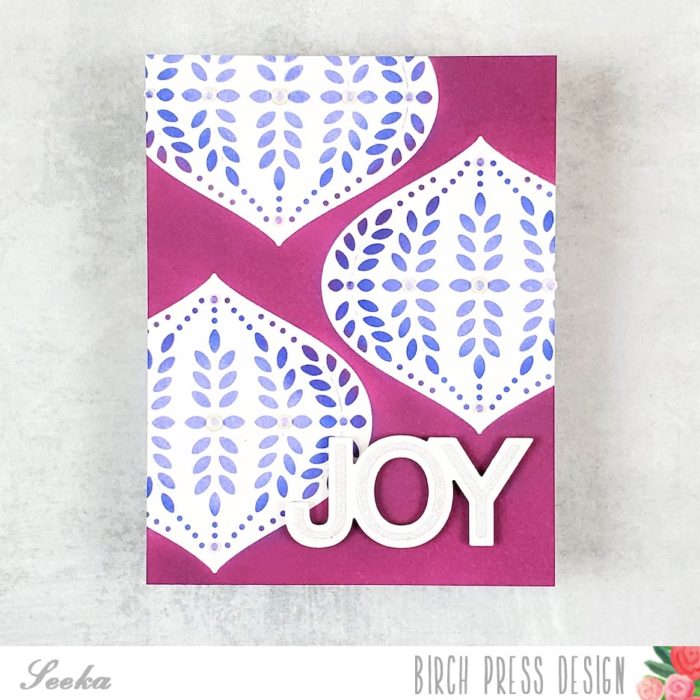
    Hello! It’s Seeka here, and today I have another example of stretching your supplies!

    I began by using the Marisol Ornament Layer B die to cut three masks out of masking paper (I happened to use Avery Removable ID Labels).
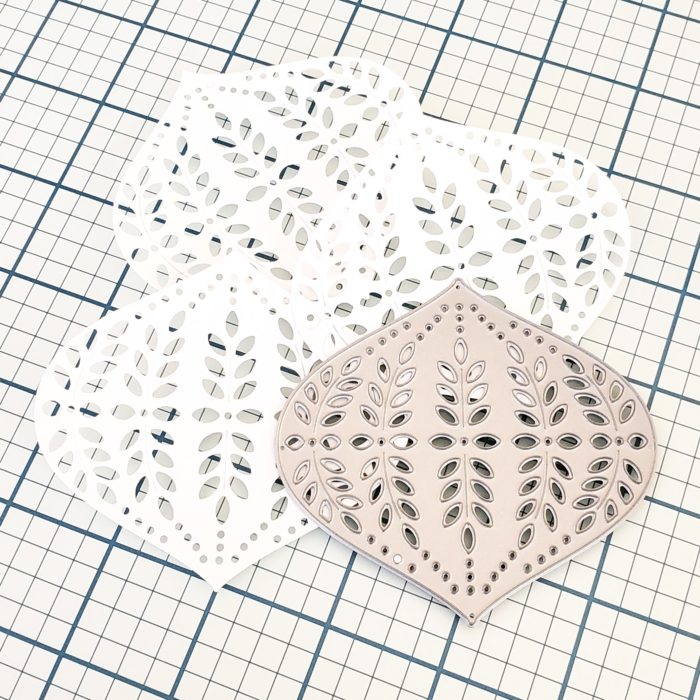
    Next, I remove the release paper and stuck the three masks onto an A2-sized piece of bristol smooth cardstock. Using foam daubers, I applied Shaded Lilac Distress Oxide ink over the masks, making sure to ink all the little openings.

    Then I used a foam blending tool to add Seedless Preserves between the masks. This color acts as the background. Since the foam blending tool doesn’t allow for precise color application, a bit of Seedless Preserves colored the edges of the ornaments. To use this to my advantage, I used another dauber to blend Blueprint Sketch ink over the areas where Seedless Preserves and Shaded Lilac met, to soften the transition from wine to purple.
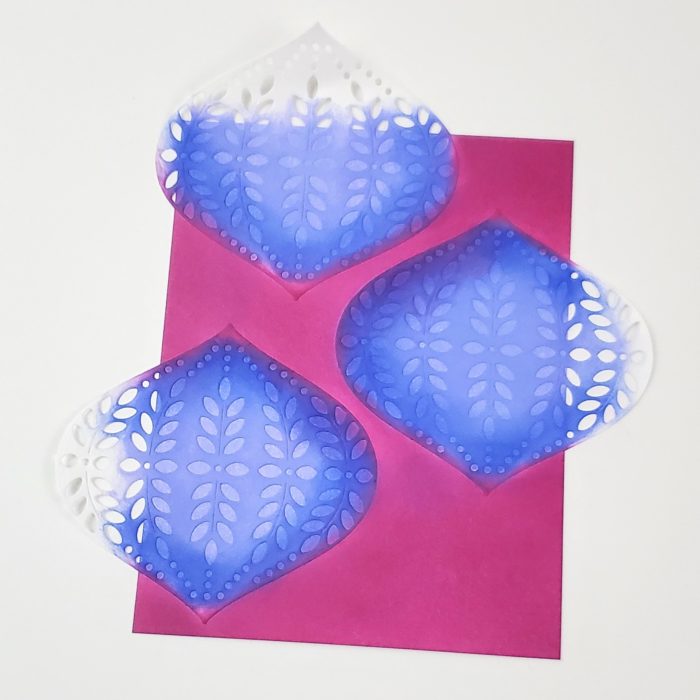
    Next, I removed the masks and adhered some small clear jewel embellishments to the ornaments.
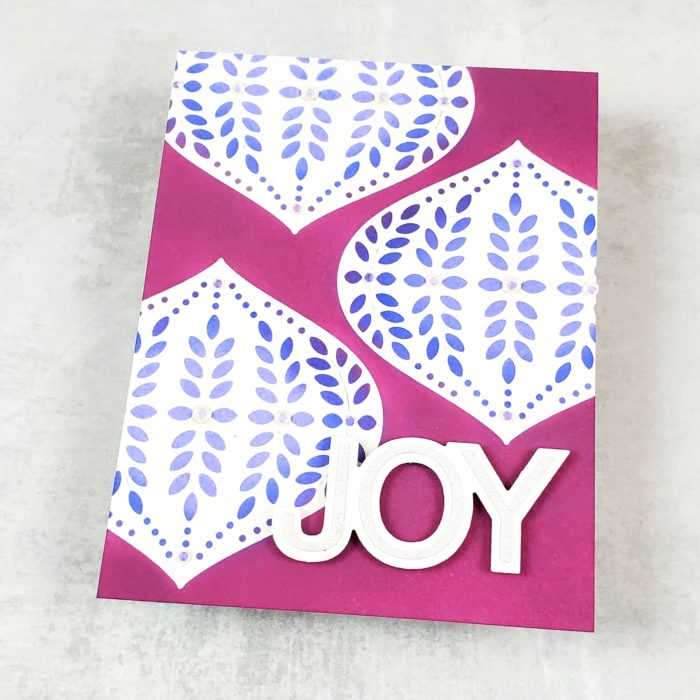
    For the sentiment, I used the Simple Joy die and cut the shadow layer out of white cardstock, and the detail layer out of silver glitter paper. I adhered the detail layer to the shadow layer and then used foam tape to adhere the sentiment to the background.

    To finish, I adhered the card front to an A2-sized card base.

    Thank you so much for visiting!


    Supplies


  • Sunny Hugs | By Seeka

    Sunny Hugs | By Seeka

    Hello there, it’s Seeka here and today I have a sunny card featuring the Cora Layer die set.

    I started by cutting three Layer As out of light green cardstock, and three Layer Bs out of light blue cardstock.

    Next I adhered the green layers to the blue layers.

    I created a yellow frame by cutting a rectangle out an A2-sized piece of yellow cardstock. I adhered the frame to a panel of white cardstock and then adhered the three Cora blooms across the panel.

    I trimmed the Cora die cuts where they hung off the panel.

    Using the Big Hugs Sugar Script die, I die cut the sentiment from teal cardstock and then adhered it to the shadow layer, which I die cut from vellum. I used foam tape to adhere this to the card front along with a stamped sentiment from the Blooming Spring stamp set.

    To finish, I adhered the card front to an A2-sized card base.

    Thanks so much for visiting!


    Supplies


  • Kinsley Die Cut Inlay | By Seeka

    Kinsley Die Cut Inlay | By Seeka

    Hi there, it’s Seeka and I hope you’re having a nice week!

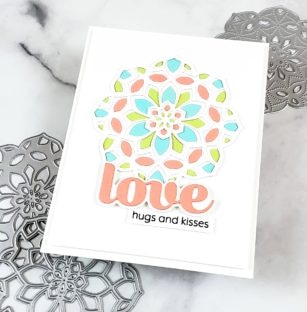
    Today I’m using color cardstock for this die cut inlay card featuring the beautiful Kinsley Layer dies.

    I started by cutting layers A and B out of white cardstock and gluing layer B to a white A2-sized panel. Next I cut three more layer Bs, out of pink, blue, and green cardstock, taking care to temporarily hold all of the fallout pieces in place with Post-it Tape. Using tweezers and glue, I adhered the little pink, blue, and green fallout pieces into the Layer B that I’d adhered to the panel.

    I continued to fill in pieces until I completed the pattern. Because there are so many extra fallout pieces, I could easily have made two more cards.

    Next I stamped the “hugs and kisses” sentiment from You Are Awesome stamp set in black ink onto a strip of white cardstock.

    Then, I used the Big Love Sugar Script dies to cut the “love” out of the same pink cardstock, and the shadow layer out of white cardstock. I adhered the two layers together.

    To assemble the card, I adhered the Kinsley Layer A die cut over my inlaid piece, and then adhered the two sentiments with foam tape. I trimmed 1/8″ off of each side of the panel and then used foam tape to adhere it to an A2-sized card base.

    Thank you so much for visiting!

    Supplies

  • Stenciled Viola Plate | By Seeka

    Stenciled Viola Plate | By Seeka

    Hello there, it’s Seeka here and I hope you’re having a good day! Lately I’ve been doing a lot of ink blending. I find it to be soothing, and a quick way to create some beautifully inked backgrounds. One of the things I love about Birch Press Designs’ layered dies is that you can often take the top layer, usually the most intricate, and turn it into a stencil.

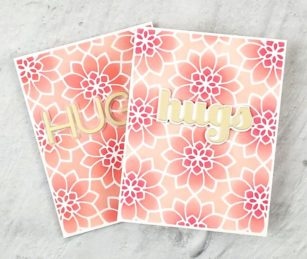
    For my card today, I used the Viola Plate Layer A die to cut a piece of Avery Removable ID Labels. I use Avery 6465 but you can use any removeable adhesive sheet that is A2-size or larger.

    I removed the backing from one end of the die cut piece and positioned it over an A2-sized piece of Strathmore Bristol smooth cardstock. Then I gently peeled away the rest of the backing as I smoothed my makeshift stencil down over the cardstock.

    Using a foam blending tool, I blended Tattered Rose Distress Oxide ink over the entire panel. Then I blended Abandoned Coral over the centers of each bloom in the pattern. Next I used an ink dauber to blend Picked Raspberry over the very center of each bloom.

    Once I had the three colors down, I gently peeled away the stencil.

    For my sentiment, I used the Big Hugs Sugar Script die. I cut the word Hugs once out of some pearlescent ivory cardstock and twice out of heavy white cardstock. I adhered the three layers together with the ivory layer on top, and then adhered this piece to the shadow layer, which I’d cut out of vellum. I backed the sentiment with foam tape and adhered it to the card front which I in turn adhered to a card base.

    I made a second card following the same steps, but substituted the Jumbo Lingo Hugs die for the sentiment.

    Thank you so much for visiting!


    Supplies


  • Blended Fiori Plate | By Seeka

    Blended Fiori Plate | By Seeka

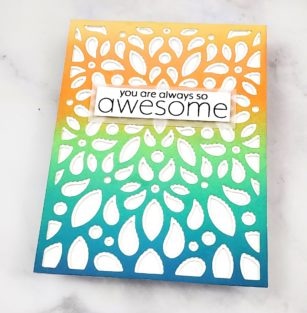
    Hello! It’s Seeka here and today I have a card featuring ink blending and the pretty Fiori Plate Layer dies.

    I confess that I forgot to take in-progress photos so I sincerely apologize! That said, this card was very simple to put together so I think it will be easy for you to follow along.

    I started by blending six colors of Distress Oxide inks onto an A2-sized panel of Strathmore Bristol Smooth cardstock. I didn’t set out to use six colors, but as I played around, I added more colors. From top to bottom they are: Scattered Straw, Carved Pumpkin, Twisted Citron, Cracked Pistachio, Peacock Feathers, and Faded Jeans.

    When the panel was dry, I used the Fiori Plate Layer A die to die cut it. Then I used the Fiori Plate Layer B to die cut three pieces of heavyweight white cardstock. I stacked and andhered these three Layer B die cuts together and then adhered the ink-blended Layer A on top.

    For the sentiment, I stamped a couple of sentiments from the You Are Awesome stamp set onto a strip of white cardstock. Then I used foam tape to adhere the sentiment strip to a slightly larger piece of vellum.

    To assemble the card, I adhered the sentiment to the die cut background and then adhered that, in turn, to an A2-sized card base.


    Supplies


  • Summer Stripes | By Seeka

    Summer Stripes | By Seeka

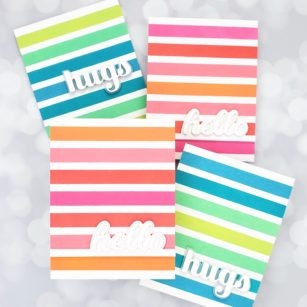
    Hello! Seeka here, and today I’ve got some fun striped cards for you. It was so fun and satisfying to make these, I hope you’ll give it a try!

    I started by using purple tape to temporarily secure the Bold Stripes stencil to a piece of Strathmore Bristol Smooth cardstock. Then I laid two strips of scrap paper on either side of the center stripe so that I could eaisly blend color over that single stripe without accidentally getting ink onto the neighboring stripe.

    Using foam blending tools, I blended stripes of Picked Raspberry, Abandoned Coral, Worn Lipstick, and Carved Pumpkin Distress Oxide inks onto the panel. For my blue cards, I used Broken China, Peacock Feathers, Cracked Pistachio, and Twisted Citron.

    Next I used shadow die of the Hello Topper die set to cut along the edge of a scrap piece of bristol smooth cardstock. I left a margin at the bottom that was the same height as the spaces between the stripes on my panel.

    Next I used the sentiment die from the set to cut four “hellos” and then stacked and adhered them together before adhering them to the shadow layer. Using foam tape, I adhered the sentiment piece to the background.

    For the blue cards, I used the Big Hugs Sugar Script die set, cutting the shadow layer from vellum and using the same stacked sentiment technique.

    Thank you so much for visiting!


    Supplies


  • Triple Hello | By Seeka

    Triple Hello | By Seeka

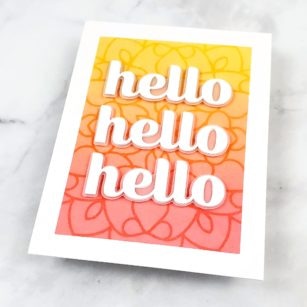
    Hi there, Seeka here and today I’m sharing a card that combines an ink-blended background with a stenciled overlay.

    I started with a 4.25″ x 5.5″ piece of Strathmore Bristol Smooth cardstock. Using Post-It tape, I masked off the borders and then used foam blending tools to blend Mustard Seed, Carved Pumpkin, and Abandoned Coral Distress Inks over the exposed area.

    I let the panel dry for a few minutes and then removed the Post-It tape and replaced it with fresh tape. Next, I placed the Midnight Mandala stencil over the panel and used washi tape to hold it in place. Using a clean foam blending tool and tamping motion, I applied Hero Arts Unicorn white pigment ink over the stencil and onto the background. To keep my white ink pad pristine, I smooshed some ink onto my glass work surface and then picked it up from there with the blending tool.

    I removed the stencil and the Post-it tape and set the panel aside to dry.

    Next I used the Big Hello Sugar Script die set to die cut “hello” six times from white cardstock. I stacked two and adhered two layers together to end up with three sentiments. I adhered each to the shadow layer of the sentiment which I cut from vellum.

    To assemble the card, I adhered the three hellos to the background with foam tape, and then adhered the card front to a card base.

    Thank you so much for visiting!


    Supplies

  • Sunny Dazzler | By Seeka

    Sunny Dazzler | By Seeka

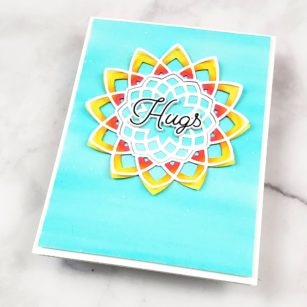
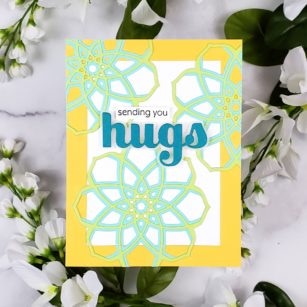
    Hi there, Seeka here and today I’m sharing a sunny card using the Dazzler Layer die set.

    First, I die cut Dazzer Layer C from white cardstock. Then I used three markers (Copic RV14, Y17, and Y15) to color the outer ring. I started with RV14, a pink, along the inside of the die cut and then added Y17, an orange-y yellow, next to it. This was very quick coloring with not a lot of attention to blending.

    Then I added Y15, a yellow, around the outside edge.

    Next, I used used the Dazzler Layer A die to cut another piece of white cardstock. I added a bit of glue around the inside of this die cut and adhered it over my Copic-colored piece, leaving the tips of each point un-glued, and curling them up a bit so that they stand up from the bottom die cut for a bit of dimension.

    Then, I created a quick watercolor background using a Cool Aqua Karin Brushmarker Pro pen. I scribbled the pen over a piece of watercolor paper and then used a paintbrush and clean clear water to spread out the color, not blending out too smoothly and leaving a bit of color variation. I also added some white paint splatter using watered down white guache.

    I trimmed my watercolor panel down to 4″ x 5.25″ and then adhered the my die cut piece to it. I also adhered the center die cut from Layer C (I love that each die layer results in two separate pieces!).

    For the sentiment, I used the Best Friend stamp set and die cut the word “Hugs.” I die cut three more layers and then stacked and adhered all four layers together and then adhered the sentiment to the center of the star.

    To finish, I used foam tape to adhere the card front to an A2-sized card base.

    Thanks so much for coming by!


    Supplies


  • Stencilled Die Cut | By Seeka

    Stencilled Die Cut | By Seeka

    Hello there! It’s Seeka here, and I thank you so much for spending a bit of your day with us. For my card today, I used a die cut as a stencil to create a clean and simple (and easy!) card.

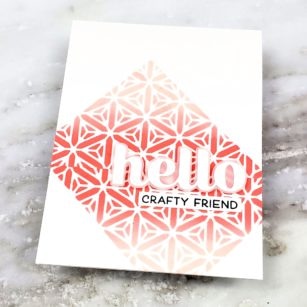
    I started by using the Prism Triangle Collage die to cut a piece of scrap 80# cardstock. This pretty die doesn’t cut out a triangle, rather it leaves a beautiful triangle-shaped lattice pattern in your paper. This became my stencil.

    I used low-tack paper tape to hold an A2-sized piece of bristol smooth paper on my glass work surface and then placed and taped my stencil over top. Using foam blending tools, I blended Abandoned Coral and Tattered Rose Distress Oxide inks over the stencil, blending the two to create an ombre effect. Because my stencil was made out of paper and not as durable as a plastic stencil, I took care not to drag my blending tool too much. Instead, I used a strong tamping motion.

    When I finished, I removed the stencil and rotated it 180 degrees. I aligned the base with the triangle I’d just finished stencilling, and shifted it a bit to the left. I used the same colors to ink blend and then removed the stencil.

    For the sentiment, I used the Big Hello Sugar Script die to cut a piece of white cardstock. I cut the shadow layer out of vellum and then adhered the two together. Then, I stamped “crafty friend” (from the Just Because stamp set) in black pigment ink onto white cardstock.

    To assemble the card, I adhered the die cut sentiment with foam tape and then adhered the sentiment strip flush to the card front. Then I adhered the card front to an A2-sized card base.

    Thank you so much for visiting!


    Supplies


  • Hello Crafty Friend | By Seeka

    Hello Crafty Friend | By Seeka

    Hello! Seeka here and today I’m sharing a quick and easy card featuring the Ring Tile stencil and the Hello Topper die.

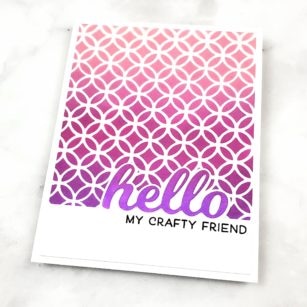
    I started off by using low-tack Purple Tape to tape an A2-sized piece of bristol smooth cardstock to the stencil. Then I used foam blending tools to blend Victorian Velvet, Seedless Preserves, and Wilted Violet Distress Oxide inks over the stencil, blending the colors where they met to create a gradient effect.

    Next, I die cut the Hello sentiment and shadow layers out of white cardstock. I cut the sentiment four times, and the shadow layer twice, so that I could stack and adhere them together for a bit of dimension. Using the negative space of a die cut to help hold the sentiment in place, I blended Seedless Preserves and Wilted Violet over one layer of “Hello” before adhering all of the pieces together.

    I trimmed the background to 4″ x 5.25″ and then adhered the sentiment’s shadow layer along the bottom, trimming off any excess that extended past the edges of the background. Then I stamped the “my crafty friend” sentiment in pigment ink. This sentiment is part of a stamp from the Just Because stamp set.

    To finish, I adhered the ink-blended sentiment onto the shadow layer, and then adhered the card front to an A2-sized card base.

    Thank you so much for visiting!


    Supplies