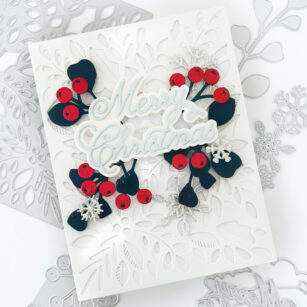
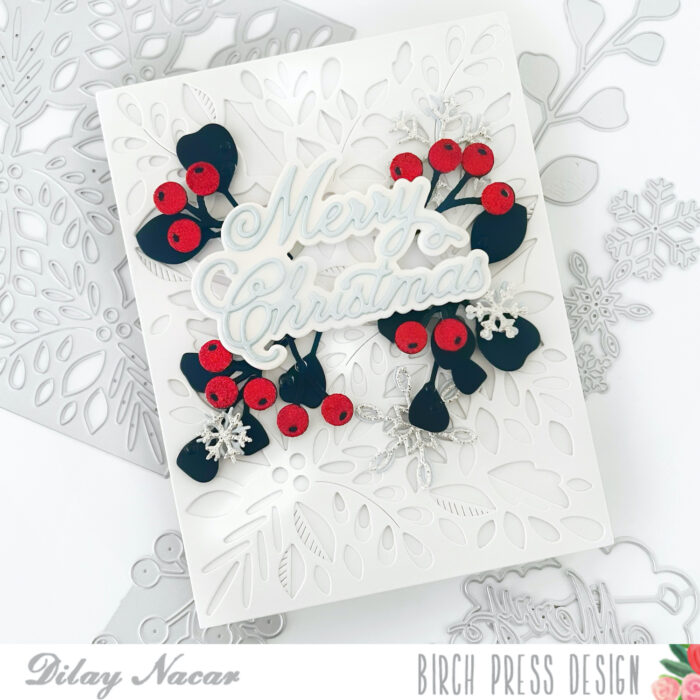
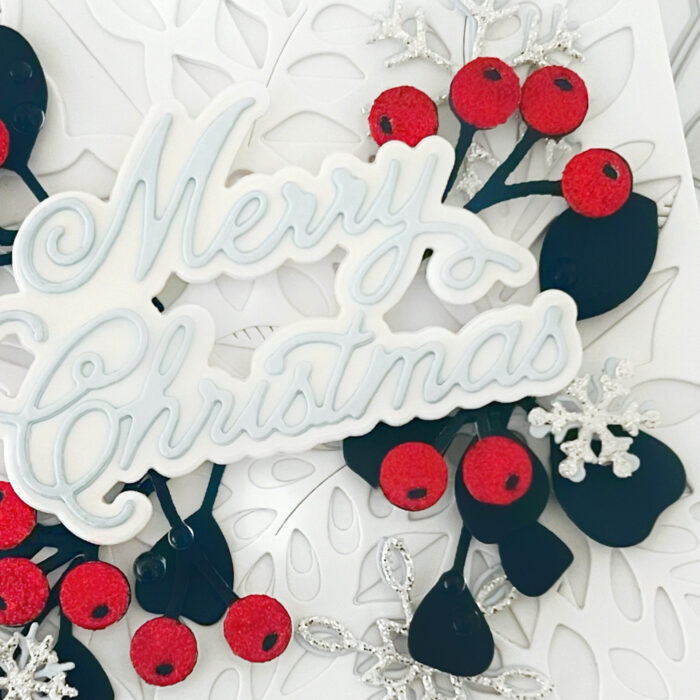
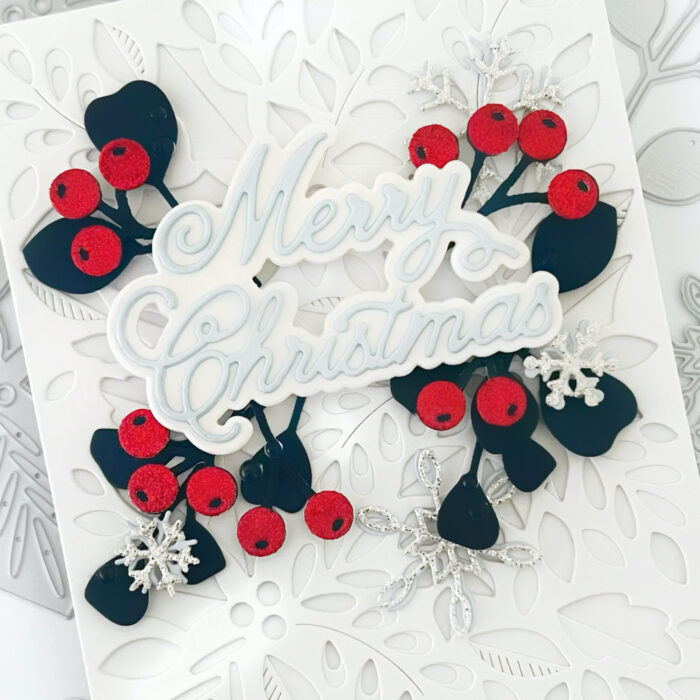
Hello, crafty friends! Dee here today with this Merry Christmas card showcasing the Herbarium Plate Layers!
First, I created the background by die cutting each of the Herbarium Plate Layers (A, B, and C) and adhering them together, then onto a top-folding card base.
Next, I cut the Felicity Snowflakes and the Eucalyptus Stem and Berries Contour Layers in various red, blue, and silver glitter cardstock and adhered them over the top of the Herbarium Plate Layers. To finish, I added the Handwritten Merry Christmas die cut to the center using foam tape.
I hope you enjoyed this sparkly layered Christmas card! Thank you so much for stopping by, friends!
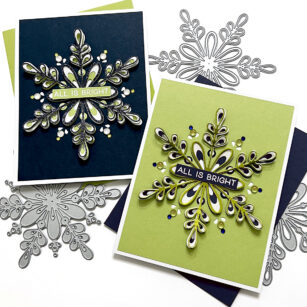
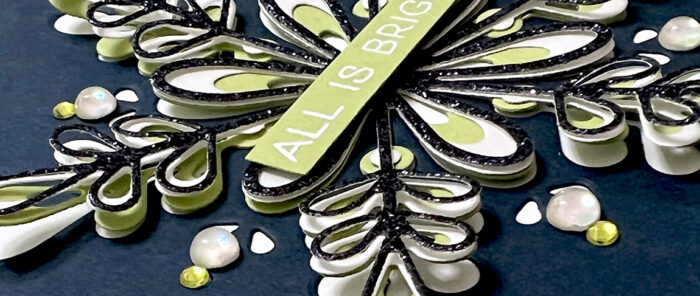
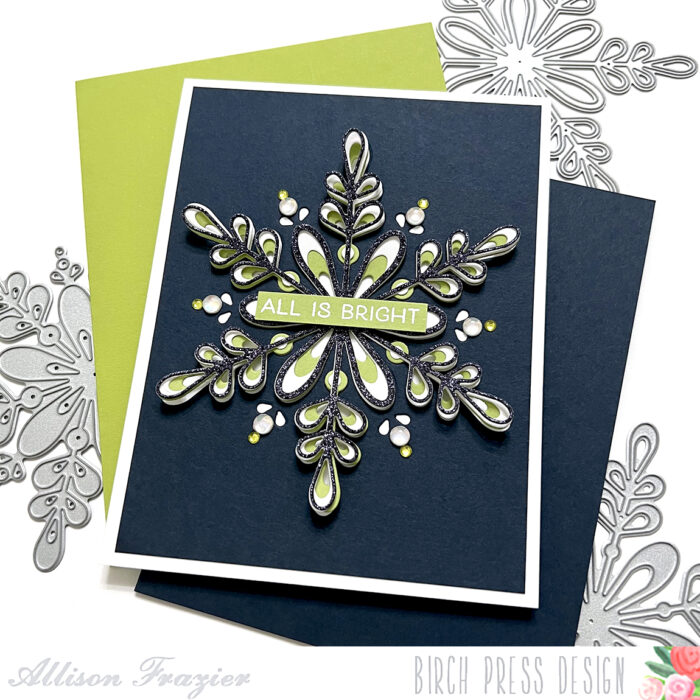
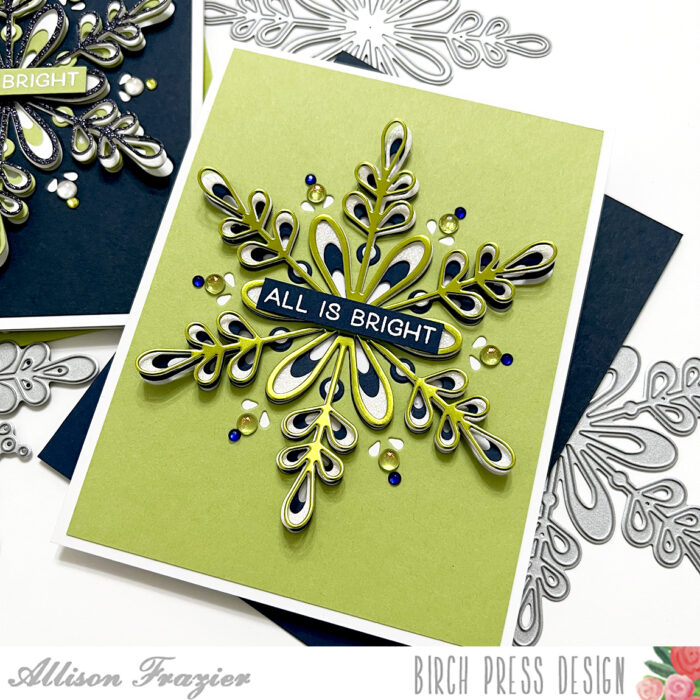
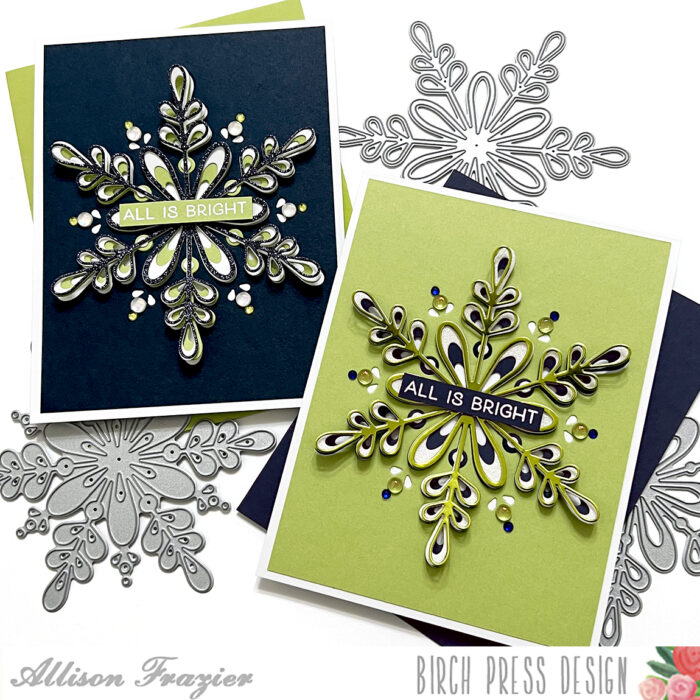
Hello, Birch Press friends! I have a pair of cards to share with you today featuring the gorgeous Crochet Snowflake Layer Set. One of the great things about using a layering die set is that you can easily and quickly make more than one card in one sitting!
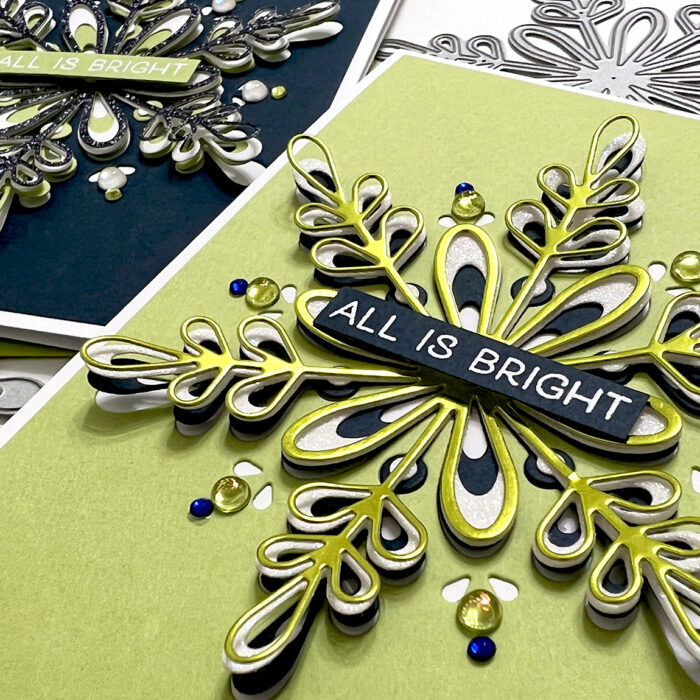
I started by cutting two card stock panels to 4″x5.25″ – one in navy blue and one in lime green. I lined up the Crochet Snowflake Layer C die in the middle of each panel to cut out the snowflake. I adhered each of the resulting panels (with the cutout in the middle) onto a white A2 card base. I then adhered the green snowflake onto the navy card panel and the navy snowflake onto the green panel, lining up each snowflake into the exact position as the cutouts in the panels. In order to enhance the look of dimension on my cards, I only glued the very center of each snowflake onto the card panel. This way, the edges of the snowflakes pop up from the background.
For Layer B, I made a white glitter snowflake for my green card and a white foil snowflake for my navy card. I adhered only the center of these snowflakes right on top of the center of the Layer C snowflakes.
For Layer A (the top snowflake), I used a navy glitter card stock for my navy card and a lime green mirror card stock for my green card. Again, I only adhered the center of each of these snowflakes on top of the Layer B snowflakes.
The Layer C snowflake die creates some fun cutout designs in the card panel. You won’t see these on the actual snowflake – you’ll only see them if you end up using the panel that you cut the snowflake from. I added a mix of jewels and gemstones to the round cutouts of the design, again choosing colors that would complement my cards. I finished the cards with a heat embossed sentiment from the retired stamp set called “Joy and Peace.”
Thank you so much for joining us today. I hope these cards inspire you and bring a smile to your face!
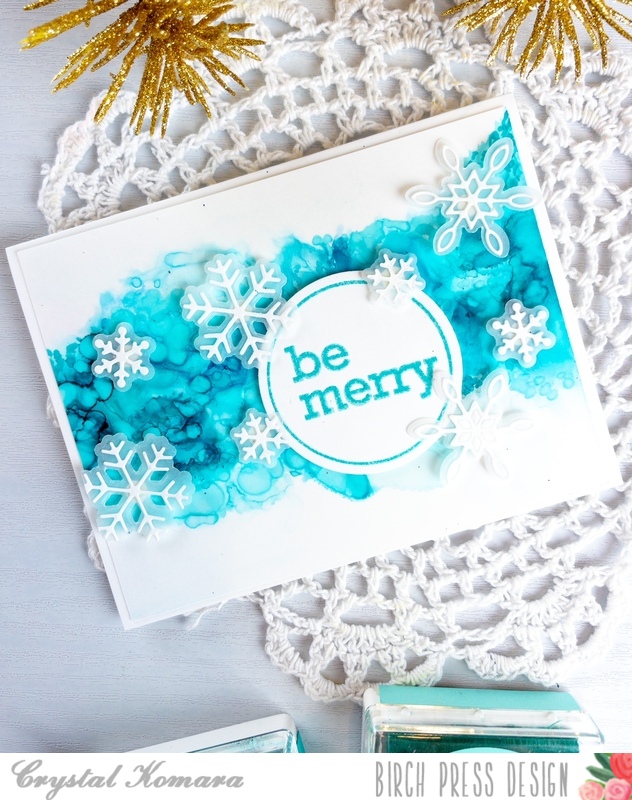
Hello friends! This is Design Team member Crystal Komara here with you today. If there is one thing I love when it comes to cardmaking, it’s the alcohol. Ink, that is! ; ) Initially I never thought I would have enjoyed working with alcohol inks as much as I have because, well. . . they’re messy. They stain. They are a tad unpredictable in outcome and all that just terrifies me. Yet, somehow I learned to love them and now can’t feature them enough on my cards.
Card details:
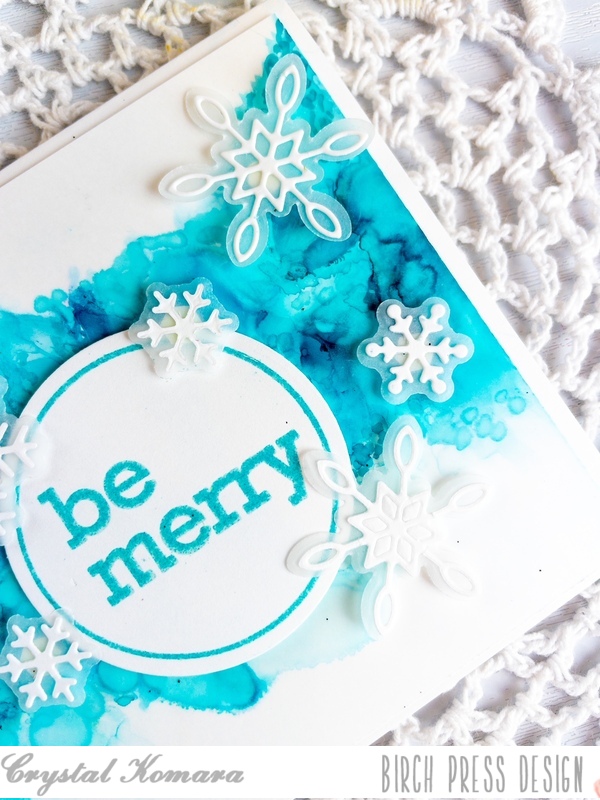
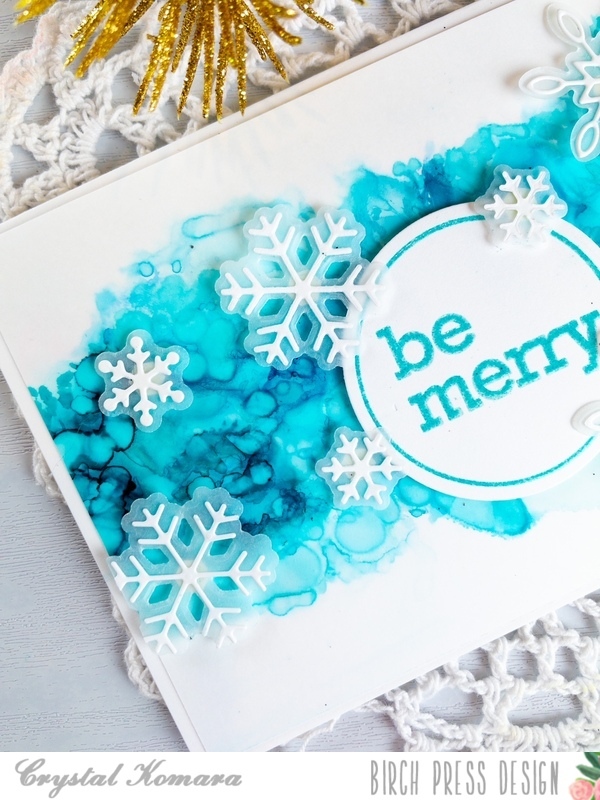
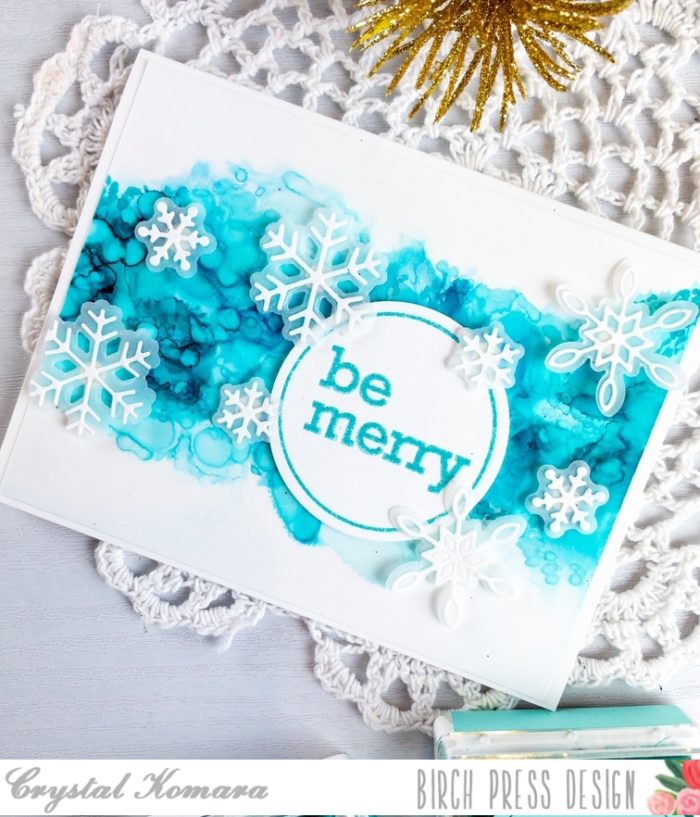
The base of this A2 sized card is made from 80 lb. Neenah Solar White Smooth cardstock. I cut a 5 1/4″ x 4″ piece of Yupo (polysynthetic paper) and “ink blew” Ranger Adirondack alcohol ink in the color Stream over the Yupo paper. That’s it, just one ink color was all I used! As it moves around and dries, you get puddles of ink that look like other darker and lighter colors, but I assure you, I used just one color. Nice and easy!
Using the Felicity Snowflakes dies, I cut the outer layer from vellum cardstock and the top thinner layer from white cardstock. I adhered the two layers together with liquid adhesive and then I adhered the snowflakes to the card with a small pop dot (which you can actually see through the vellum, it’s too hard to hide).
Using the Contempo Christmas Greetings stamp set and coordinating die, I stamped the sentiment in Versamark ink on white cardstock and heat embossed it with turquoise embossing powder. I used the coordinating circle die to cut out the sentiment. I adhered the sentiment to the card with Scotch 3M foam adhesive for added dimension.
Now that I think about it, you could make this same card in ANY color! Red or green alcohol ink would be very traditional, but I’m also thinking pinks and purples for a pop of pizazz too!
Thanks for visiting and have a wonderfully creative day!
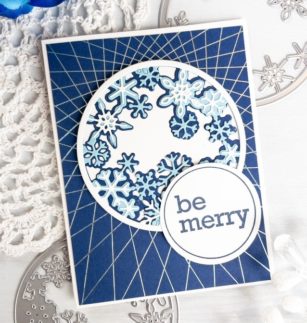
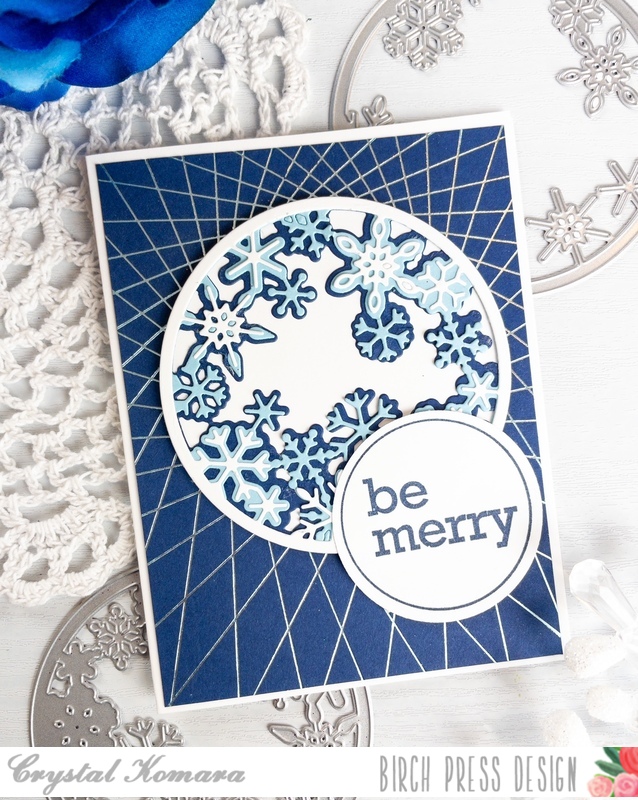
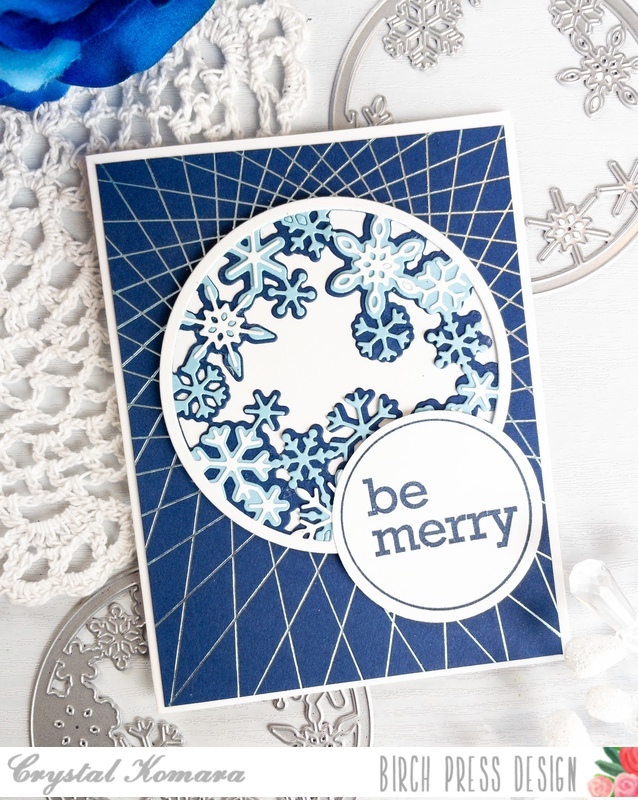
Hello friends! This is Design Team member Crystal Komara here with you today sharing more holiday themed inspiration using products from the latest Birch Press Design Release. Birch Press Design never ceases to amaze me with its elegant layering dies, contour dies and foil plates. Some of my most loved cards have been as a result of these gorgeous and elevated products.
Card details:
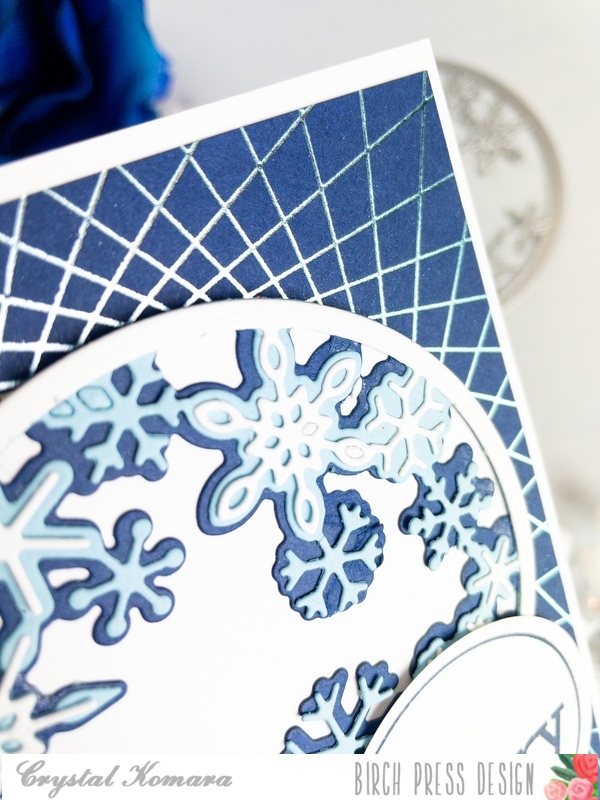
The base of this A2 sized card is made from 80 lb. Neenah Solar White Smooth cardstock. I cut a 5 1/4″ x 4″ piece of navy cardstock from the 6″ x 6″ Ocean Blue paper pack. Using my Gemini Foilpress machine and the String Art Hot Foil Frame, I heat foiled a cerulean blue foil onto the navy cardstock. I know that it kind of looks like silver foil in these photos, but it is ever-so-slightly more blue tinted in person.
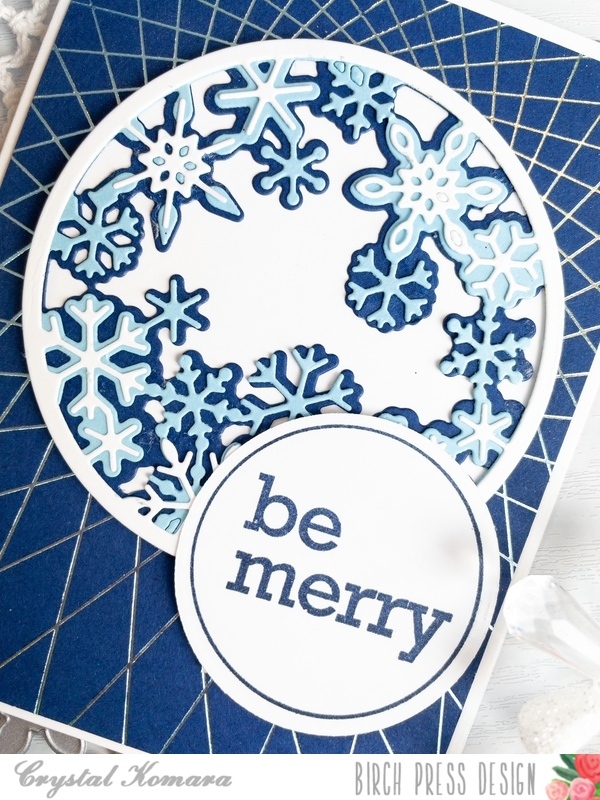
Using the Snowy Circle Layer Set, I created the center focal piece. I die cut Layer C (bottom layer) from navy cardstock. I die cut Layer B (middle layer) from a sky blue cardstock. I die cut Layer A (top layer) from white cardstock. Again, I used cardstock from the 6″ x 6″ Ocean Blues paper pack. I used a fine-tip liquid adhesive to adhere all three layers together and then I lined the back of the three layers with a solid sheet of white cardstock. I adhered the entire Snowy Circle image to the center of the card using 3M foam adhesive.
Lastly, I stamped the sentiment “be merry’ in navy ink on white cardstock. This sentiment is from the Contempo Christmas Greetings stamp set. I used the coordinating circle die to die cut the sentiment out. I adhered the sentiment to the lower right side of the snowflakes with 3M foam adhesive.
I hope you have enjoyed today’s card. Thank you for visiting and have a wonderfully creative day!
Hello Birch Press friends! I am excited to be back on the blog today sharing a Rustic Holiday card using the Crochet Snowflake Layering die set! I love the layers in this set and had a lot of fun creating a rustic holiday design! So let’s get started!
For today’s card I started with the Crochet Snowflake Layering die set. I started by die cutting Layer C out of a gel print from my stash. Then I die cut Layer B using the Earth Neutral Paper Pad by Memory Box. I chose a brown piece of card stock from the collection and die cut layer B. Next I die cut Layer A using the Festive Glitter Pad by Memory Box. Once all 3 layers were due cut, I adhered the layers together using liquid glue.
Next I started to work on the background for my card. I started with a gelli print from my stash. I adhered the gelli print onto a piece of kraft card stock. Next I distressed the edges using a distress tool. I then added distress ink around the edges, as well as a green shade of embossing glaze. I added embossing ink to various section of the card panel, then added the glaze and heat set with my heat gun. I added a bit more distress ink to darken sections of the edges and card panel.
I then added a few paper strips using gelli prints. I wanted to keep that distress look and ripped the paper strips for added texture. I added a small piece of text pattern paper to the center as well. I adhered the strips together using liquid glue. I then added splatters to the card panel background using white acrylic paint, as well as metallic splatters. Once dry, I adhered the strips to the card panel, and adhered the Crochet Snowflake using foam tape.
To complete my card I chose the Find Joy and Outline sentiment die set. I die cut the shadow layer using vellum. I die cut the Find Joy script using paper from the Lush Green paper pad from Memory Box. I die cut the sentiment Find Joy 4 times and adhered them together with liquid glue. I added a bit of distress ink to various sections of the sentiment with my blending tool. I then adhered this to the vellum shadow layer and then onto the card panel using liquid glue.
I completed the card with a few Fairy Drops. Thanks so much for stopping by today! I had a lot of fun and I hope you enjoy making a Rustic Holiday card!
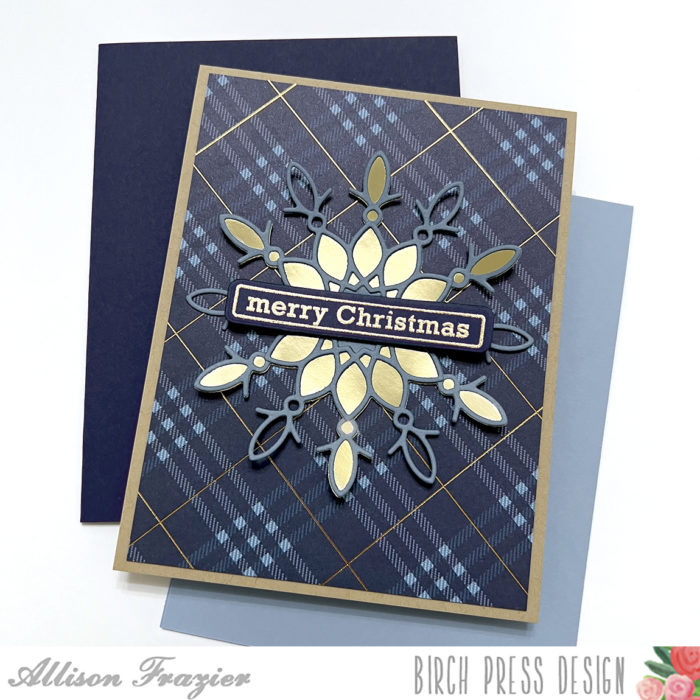
Hello again, Birch Press friends! Allison here, and today I’m sharing a masculine holiday card. It seems like many of us often struggle when it comes to making masculine cards. My solution is usually to find a good plaid, or to pick some darker colors and go with a clean and simple design. In this case, I did both!
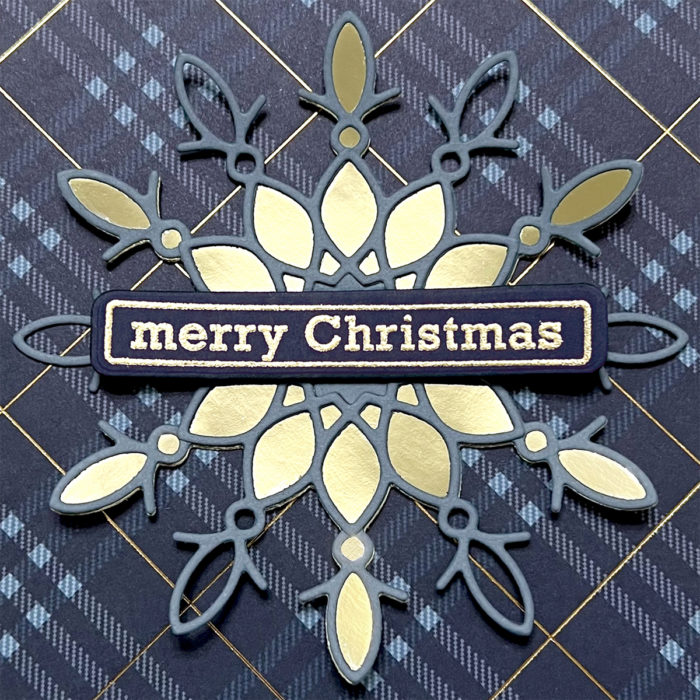
I started with the gorgeous new Adornment Snowflake die. I cut the shadow/solid layer from gold foil card stock. I cut the detailed layer from a grayish-blue color (twice to give it a bit of dimension), and then I offset it when I adhered it to the gold layer so that it gave my snowflake twelve points instead of six. There are so many ways that you could adorn this snowflake, but I chose to keep it simple for this card.
This plaid paper is so gorgeous – it has very thin gold foil stripes in the design. I cut the panel down so that I could leave a little margin of my Kraft card base showing, and then I glued the snowflake to the center. I only glued the center of the snowflake – that way, the points can lift up for dimension. I gold heat embossed the sentiment onto navy card stock and cut it out with the matching die.
Thank you so much for joining us today. I hope this card inspires you and brings a smile to your face!
Hello crafters! I am excited to be back on the blog today sharing the beautiful new Crochet Snowflake layering die set! Let’s get started!
For today’s card I am using the beautiful Crochet Snowflake layering die set. This is truly beautiful and has many possibilities! I started by die cutting all 3 layers. I die cut each layer 3 times for added dimension. I die cut Layer B and C using white card stock. I die cut layer A, 2 times using white card stock and one time using a glitter card stock from the Glitzy Glitter paper pad. Once all my layers were die cut I adhered them together with liquid glue.
I set my snowflake aside and started to work on the card panel background. As I shared in my title I wanted to create a rustic feel for today’s card. I used a gelli print from my stash for the card panel. I also used a distress tool and distressed the edges of the panel. I love the added feel this provides.
I added additional texture by adding distress ink, as well as embossing glaze to a couple corners of the card panel. Next I added a piece of twine from my stash. I wrapped this around the card panel twice and tied the twine. Next I adhered the card panel to a brown card base. I then added foam tape behind the Crochet Snowflake for additional dimension. I adhered this on top and then added a sentiment strip from my stash to the center of the snowflake!
Today’s card was a lot of fun! I love layering dies! They are truly beautiful and the Crochet Snowflake has so many possibilities! Thank you for stopping by! I will be back soon!
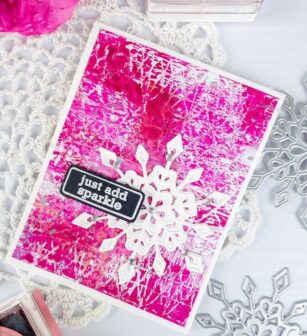
Welcome, crafty friends! Dee here today, sharing this fun and vibrant holiday card featuring the beautiful new Crochet Snowflake layer dies!
To begin, I cut the Crochet Snowflake layers A and B twice, once in white and once in silver glitter cardstock, and adhered them together.
Next, I sprayed white heavyweight cardstock with acrylic spray paint in vibrant multi-colors. Once dry, I die-cut the center with the Crochet Snowflake layer C. I adhered the panel onto a piece of white card stock and adhered the white and silver glitter layers on top of all. To finish, I added a sentiment strip from my stash and mounted the panel onto a top-folding card base.
I hope you enjoyed today’s card and are inspired to create something new! Thank you so much for joining me.
Hello crafty friends! I am excited to be back up on the Birch Press blog with you today! In today’s post I am going to share how I used several of the new holiday products to create Holiday gift tags! So let’s get started!
For today’s tags I am using 2 of the snowflake dies: Adornment Snowflake and Felicity Snowflakes. I started by die cutting each of these sets using white card stock and a blue from the Stormy Blue Collection ( Memory Box Paper Pad). I started with a lighter blue from the Stormy Blue collection for the base layer of each of the snowflakes. I then die cut the inner snowflake die using white card stock, as well as a darker shade of blue. Once everything was die cut, I adhered the inner layers of each snowflake together. For some I left white on the top, others were blue on top.
Next I embossed each of the inner snowflakes. I used a blue and a gold embossing powder. Once these were heat set, I adhered the embossed snowflakes to the shadow layer of each set (Adornment Snowflake and Felicity Snowflakes).
Next I created a watercolor background using mixed media paper, Lindy’s Magicals, as well as sprays. Once my backgrounds were dry, I die cut them into tags. Next I splattered the tags with both white and gold paint. I allowed these to dry. Once they were dry, I distressed the edges with a distress ink and then added embossing glaze to a few areas of the tags.
Once my tags and snowflakes were complete I chose 2 sentiments, both are from the latest Birch Press Designs release. For the larger tag, I die cut the Handwritten Merry Christmas and Outline sentiment. For the shadow layer, I die cut this using vellum. For the script I die cut it two times using white card stock, then a 3rd time using the Vintage Pastel Mirror Pad collection. I adhered the layers together using liquid glue. For the smaller tag, I used the beautiful Find Joy and Outline die set. I followed the same process as the previous sentiment. To complete the tags, I adhered the snowflakes and sentiments to the tag base and added twine from my stash. I added a few Fairy Drops as well to complete by tags.
Thank you for stopping by today and I hope you enjoyed these! I will see you soon!