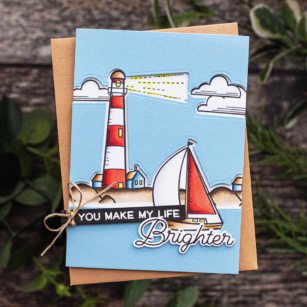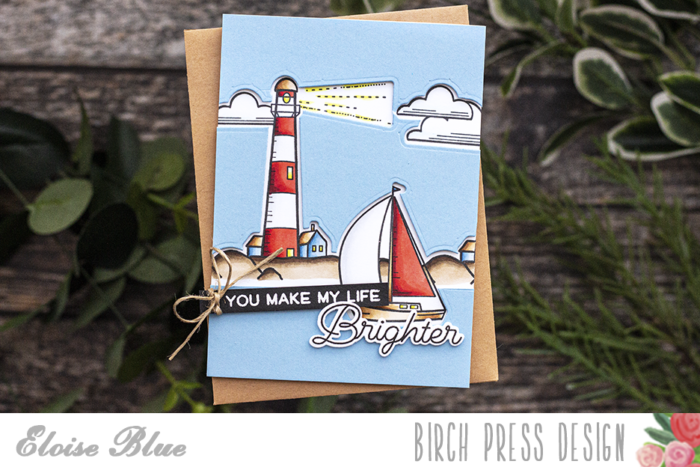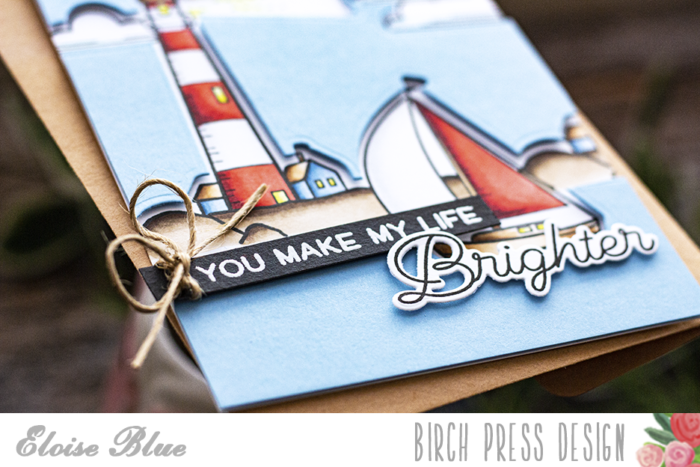
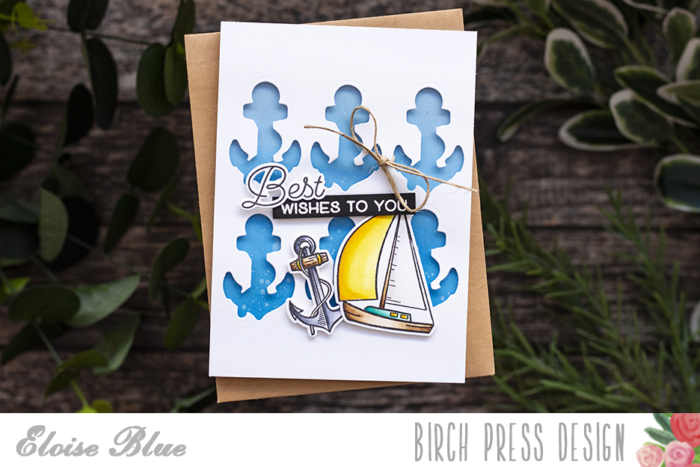
Hello friends, Eloise here and today I’m continuing on with the Summer theme and using the Let Your Dreams Sail Stamp Set once again.
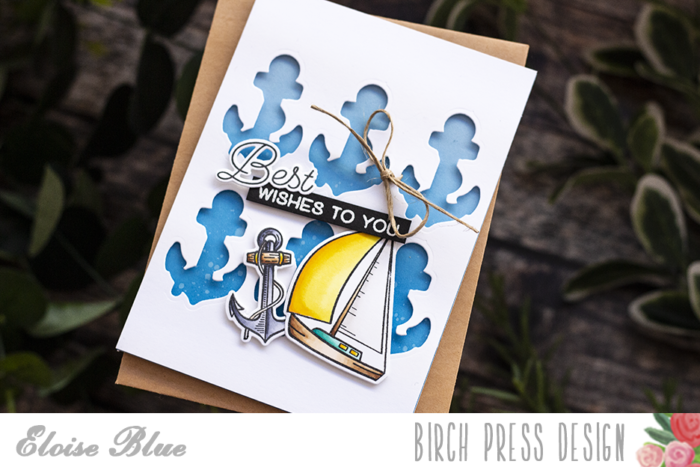
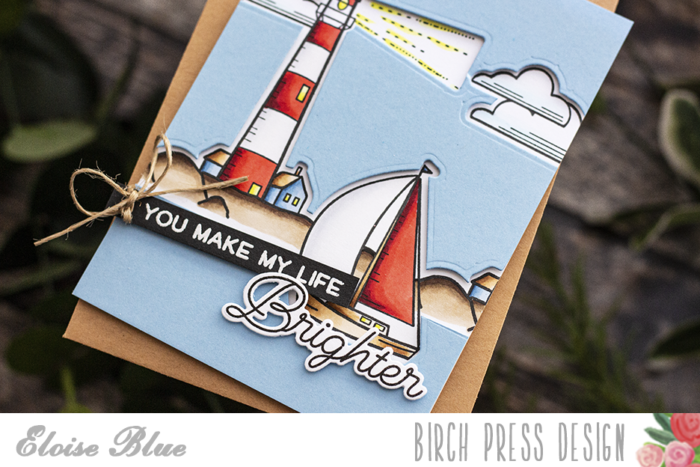
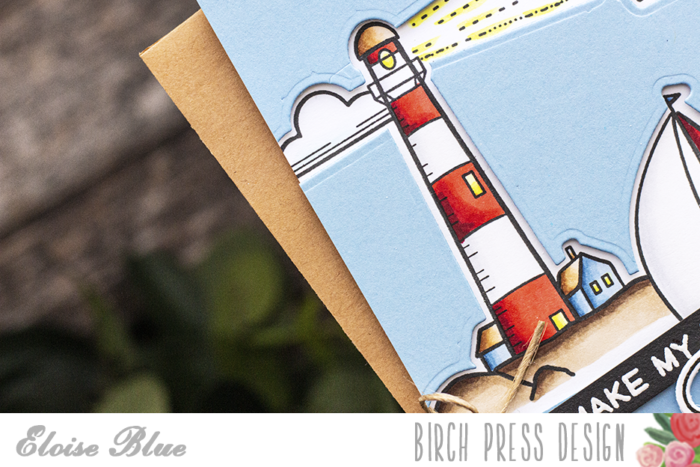
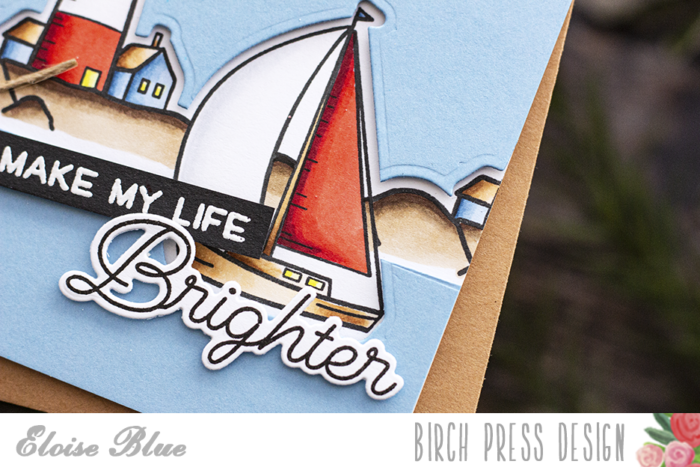
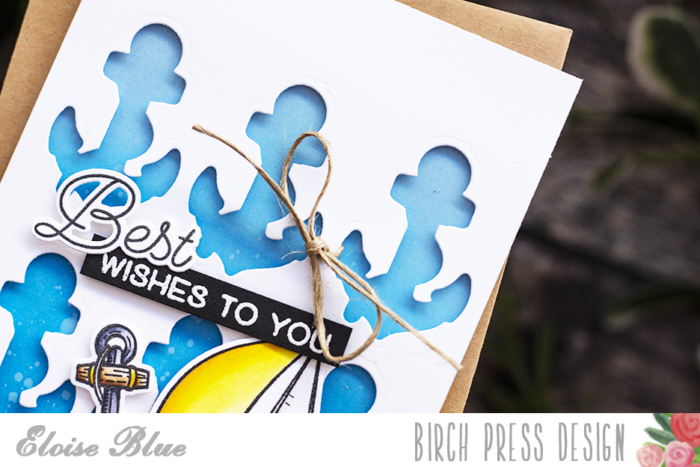
I started off with die cutting the anchor’s from the background. I used the die from the Let Your Dreams Set Sail Die Set and cut six from some white cardstock. I then stamped an additional anchor and sailboat onto some white cardstock, coloured them in with Copic Markers and cut them out.
(Copic Markers Used: Y13, Y15, Y18, YR15 / W00, W0, W1, 0 / BG11, BG23, BG45, BG49 / C1, C3, C5, C7 / E50, E53, E55, E57)

I took a piece of blue cardstock, cut it down to 4″ wide by 5 1/2″ tall and ink blended some Salty Ocean Distress Oxide Ink onto the bottom of it. I flicked on some water and dried it off with a heat tool.
I then added foam tape onto the back of the anchor panel and adhered it into place. I did the same for the anchor and sailboat image as well.
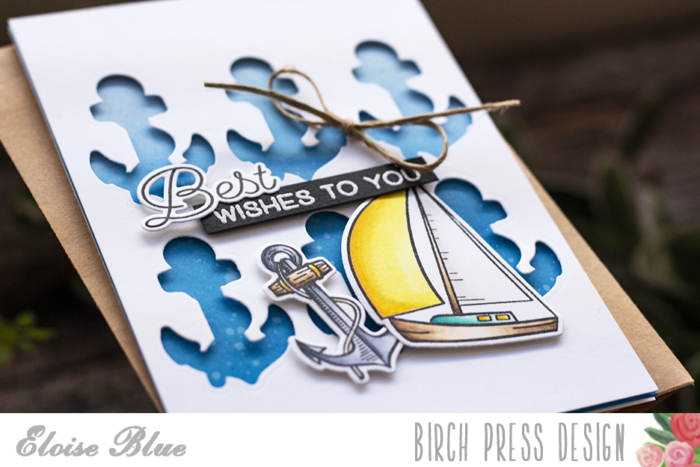
For the sentiment I used the Best Friend Stamp Set, stamped out the ‘Best’ sentiment and cut it out. I then white heat embossed the ‘Wishes To You’ onto a thin strip of black and adhered it onto the card as well. To finish up I tied a hemp cord bow around a couple of the anchors and that finished up my card for today.
Thanks so much for stopping by today and I’ll see you next time!

Supplies