
Hello Everyone!
I am here today featuring the Prismatic Triangle Layering Dies! These are perfect for those tough masculine cards we always struggle to make!
We can always add interest to any of our cards by dogging into our stash and all those backgrounds we made at one point with our inks!
I found a panel for each of my dies and started die cutting!


Once my panels were die cut and I layered my pieces together I wanted to fill in with some bold and metallic card stock!

I decided on a copper and black. I thought these were perfect for those open centers within each of my triangles.
But then a dilemma came in, I had extra prismatic triangles cut and I could not let go to waste!
So, I cut one more using only one of the layers. We will make another card using these die cuts as well! But let’s get back to our original card, we will circle back, LOL!
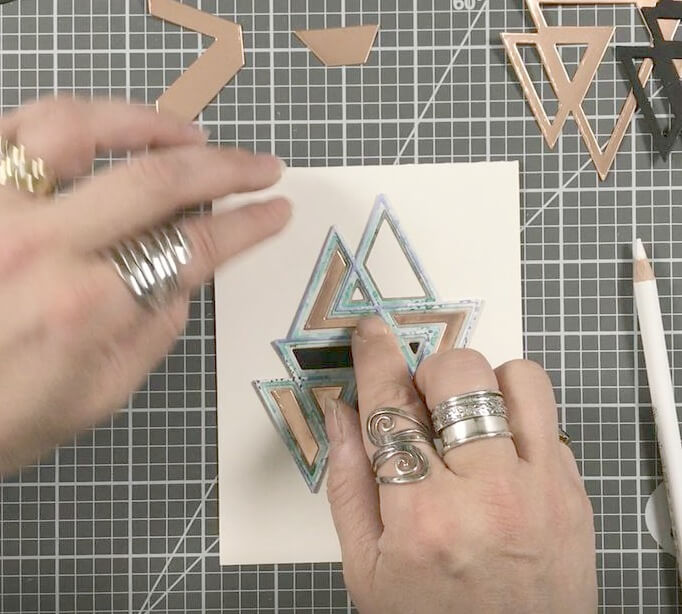
I layered my die cuts together using my liquid adhesive and it created a great marble stone effect. Once it was secured onto my standard A2 size card base I started inserting my copper and black card stock into the open areas like a puzzle!
I stamped my sentiment from the Just Because Clear Stamp Set into a shimmer piece of card stock and set in place across the front of triangles!

Now back to our happy addition!
I layered all those extra die cuts but offset set them on an angle from each other and adhered them the same as out first card right onto our standard A2 size card base.

I also cut a strip as wide as my die cut, and used that same die to cut into the strip. After I placed my triangles in place, I then placed my strips on either side to create the illusion that the triangles are coming out of the panel.
I die cut the Big Shine Sugar Script out three times to give my sentiment some dimension and adhered it to the center of my triangles and added some shimmer and shine using my shimmer pen and glaze.

As always, I hope you enjoyed today’s project… and if you want to see more details just click on the video below and see how these projects come together step by step!
Make sure you stay tuned for more wonderful projects coming soon! Have a great day and always remember… Be Creative!

Supplies