Welcome everyone! This is Amanda from Twiddler’s Nook today to share a trio of Christmas tags I made with the new ornament sets.

Let’s start with making the tag bases. I took a regular sheet of cardstock and folded it down the middle length-wise.

Then I place my base ornament die hanging off the folded edge about 1/4 inch and ran it through my die cutter. I got 3 tag bases out of 1 sheet of cardstock.

Then I moved on to creating the ornament fronts. I die cut the layers from different colors of cardstock and adhered them with liquid glue. Here are the layers to the Marisol ornament.

Then I moved on to the components from the original ornament basics set and created one from just those.

And lastly, I decided to create a twinkle ornament today too. These are so fun I really could have kept going.

As I mentioned earlier, I used liquid glue and adhered all of these layers together to create the fronts to my tags. Then I added the tag bases to the back of them. I die cut the ornament topper from the basics set and attached those to the tops. Let’s look at the finished product of each ornament.

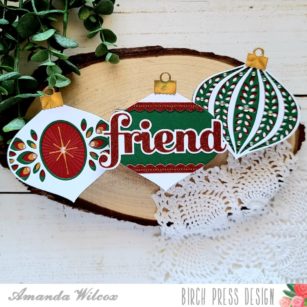
This is the one using just the ornament basics dies. Once it was finished I thought the middle was empty so I added the word “friend” across the middle. I love how this turned out!

Here is the marisol ornament all finished with some baubles added for extra texture and interest. I think this one is just gorgeous! Definitely my favorite.

And the twinkle ornament with some gems added to it to finish everything off as well. Isn’t it just so pretty? I can’t wait to try this one in silver and blue.
I hope you enjoyed these ornament tags today and find some inspiration to create something wonderful.
Have a fabulous day.

Supplies