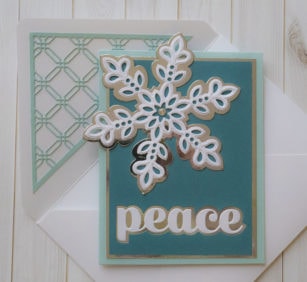
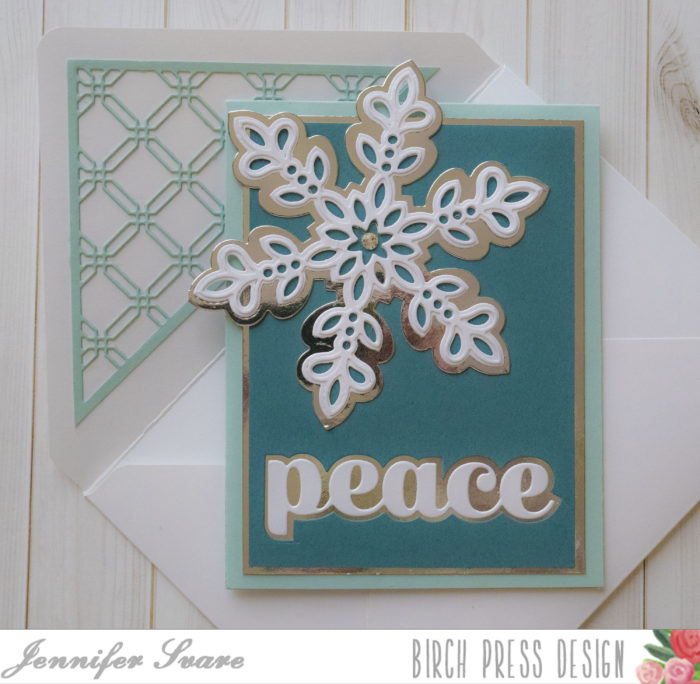
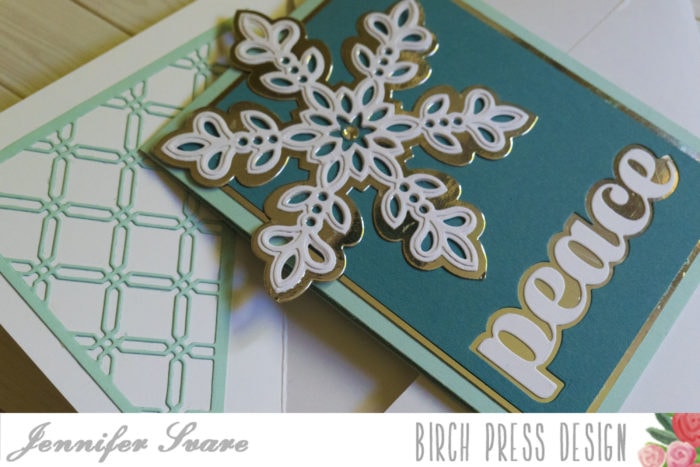
Hello! To receive a touch of handmade cheer at Christmas makes the holidays extra special, and Christmas cards are a great way to give that personal greeting so many look forward to.
The issue for many of us is the time it takes to create them. Starting early and finding a simple-yet-beautiful design is the key, and Birchpress Design makes it very easy to accomplish this!
In the video below, I’ll show how to create this card with a matching envelope and liner. Thank you so much for stopping by today, and I hope you enjoy the tutorial!
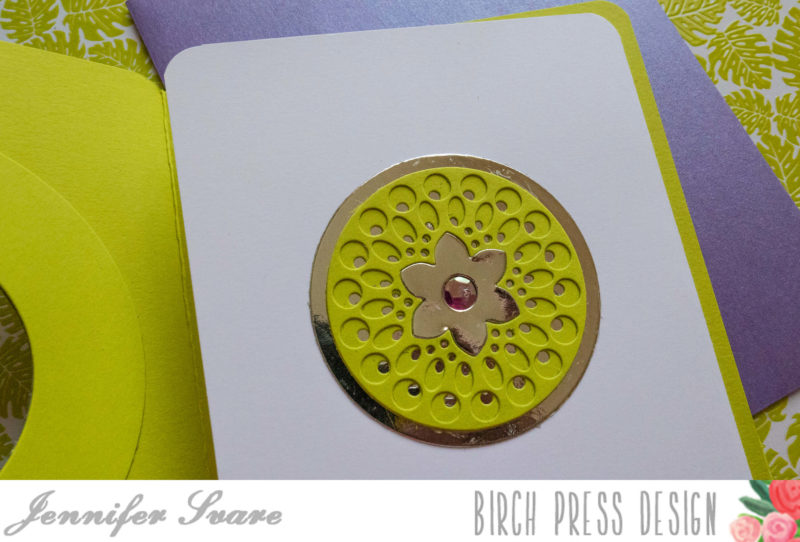
Hello! Thank you for stopping by today! In the video below, I’ll show how I made this fun-fold window card featuring the beautiful Bali layering die set.
Because the set allows for mix-and-match interior as well as exterior of the design, endless possibilities are available for creating unique color combinations… and window cards! The photo below shows what the card looks like when opened.
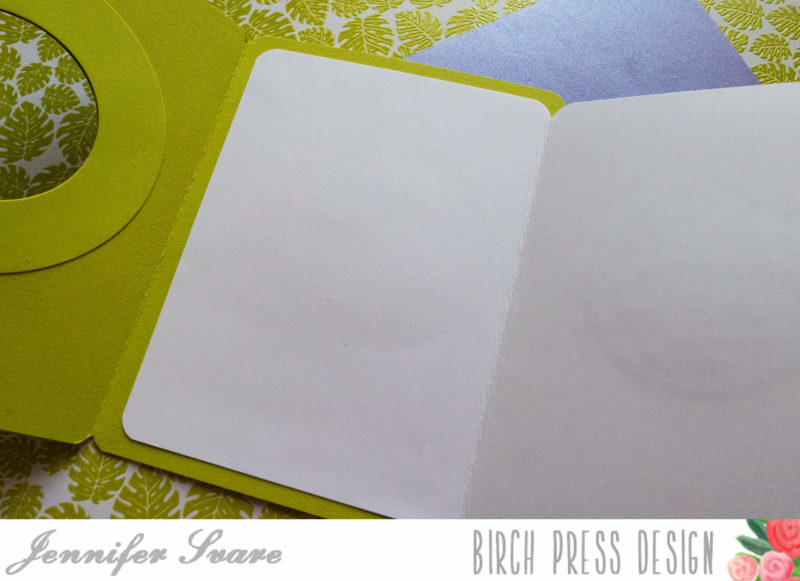
The interior panel also opens for a space for writing.
Such a fun, simple and unique card – I hope you give it a try! Check out the video below for step-by-step instructions:
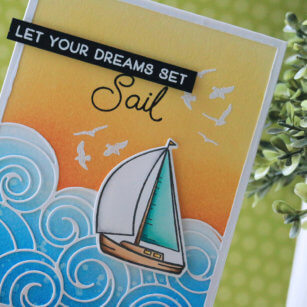
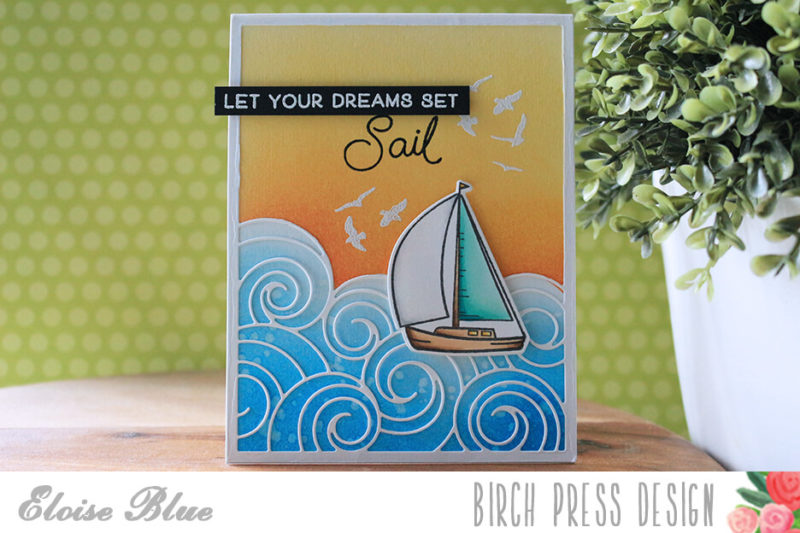
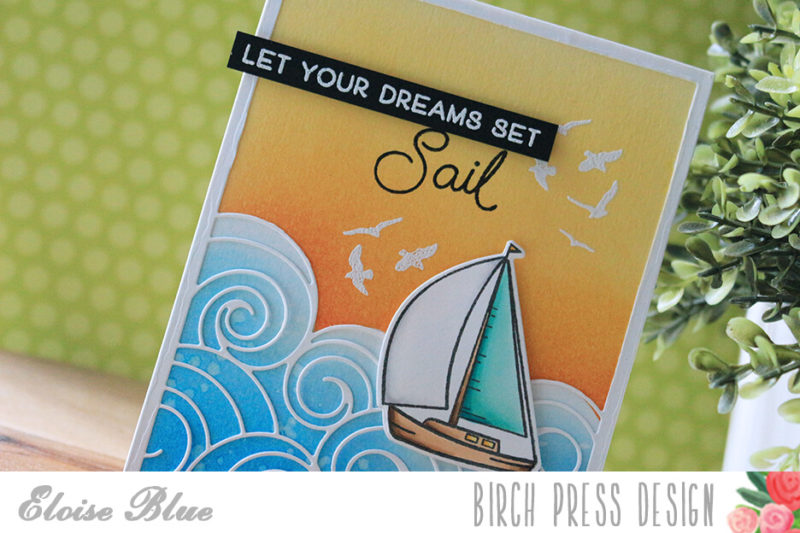
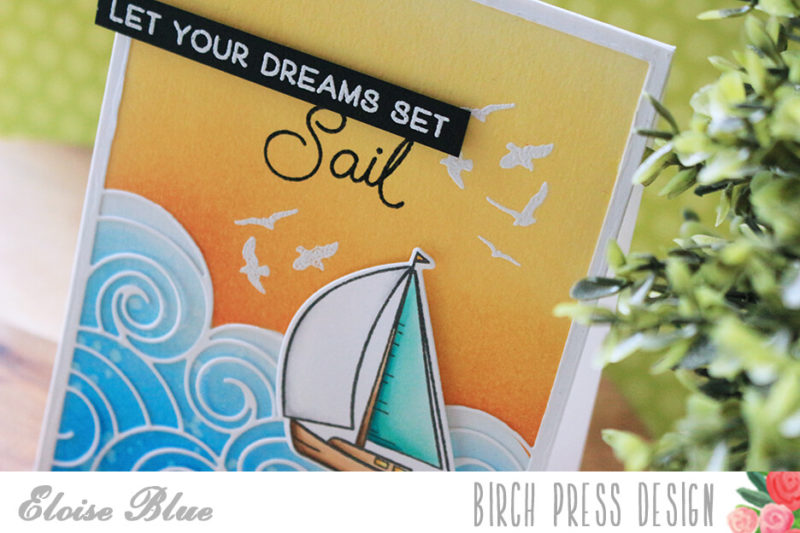
Hi friends, Eloise here and today I have a card to share with you all using the Let Your Dreams Sail Stamp Set along with just the A Plate from the Waves Plate Die. I’ll also be pulling in some Distress Inks to create a simple sunset background.
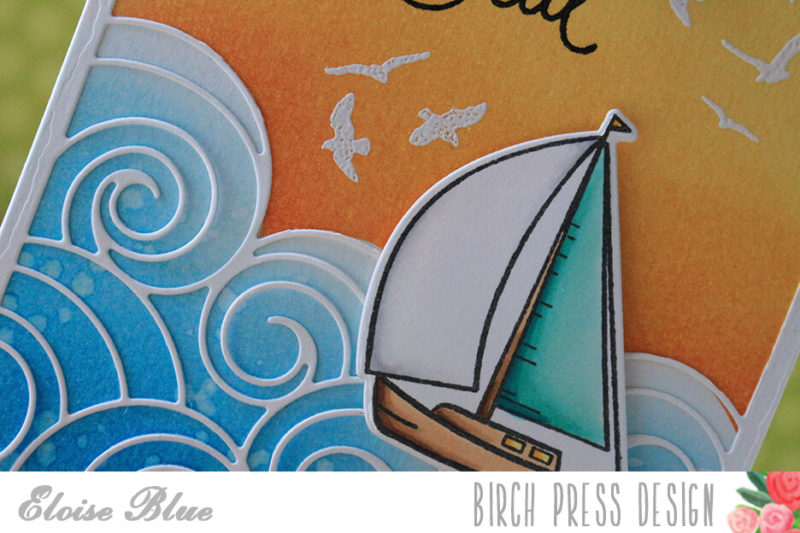
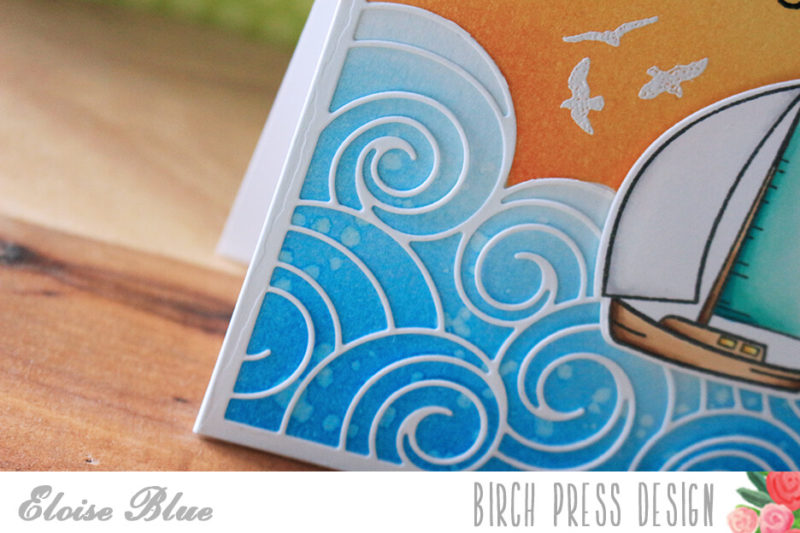
To begin my card today I started off with die cutting my background panel. I used the Waves Plate A Die and die cut it from some white cardstock. I used an exact knife to cut away some of the top excess waves, since I only wanted the waves to be focused along the bottom of the panel. I kept the frame in tact though, since I wanted it to frame off my design. Now my frame had been altered, I stamped out my sailboat from the Let Your Dreams Sail set and coloured it in with Copic Markers. I used the coordinating die to cut it out.
Now I was ready to work on the background. I first used the Waves Plate Die Cut as a template and traced the top of the waves onto some masking tape. I then cut it out with scissors and used it to mask off some watercolour paper. I used Abandoned Coral, Spiced Marmalade and Mustard Seed for the sunrise/sunset part of the background. I then used the negative mask and ink blended some Tumbled Glass and Salty Ocean at the bottom section.
Now my background was done, I adhered my Waves background over the top. I then stamped some of the birds from Let Your Dreams Sail Stamp Set around the background and white heat embossed those. I then adhered my sailboat over the top as well. To finish off, I stamped the ‘Sail’ sentiment directly on the background with black ink and then white heat embossed the additional ‘Let Your Dreams Set’ sentiment onto a thin strip of black cardstock and adhered it to my card as well.
That finished off my card for today, I hope you enjoyed. The video is linked down below if you would like to watch it.
Thanks so much for stopping by today and I’ll catch you next time.
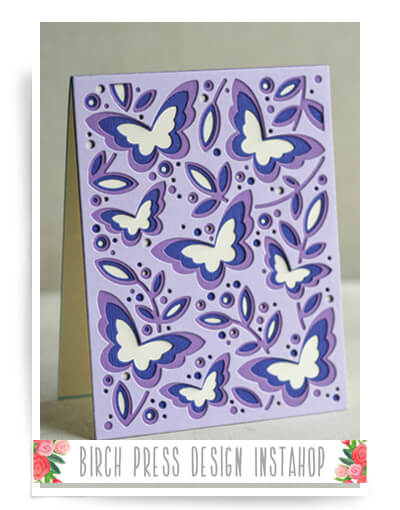
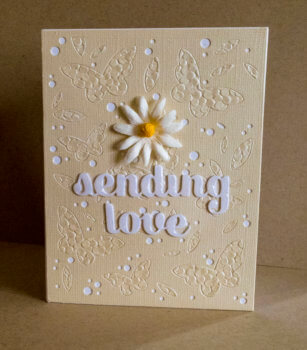
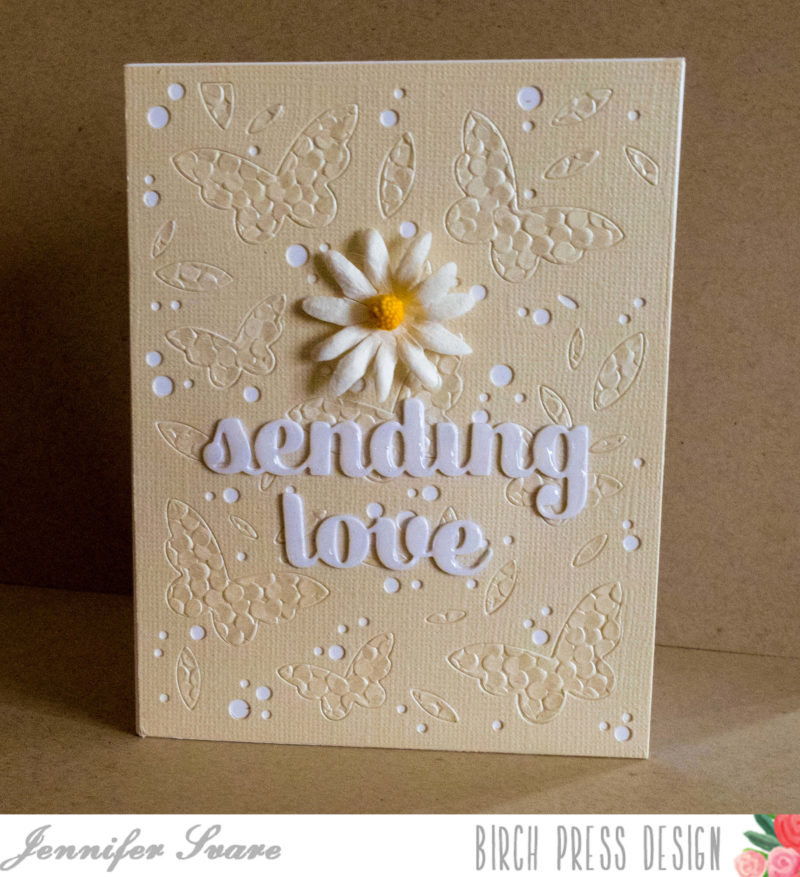
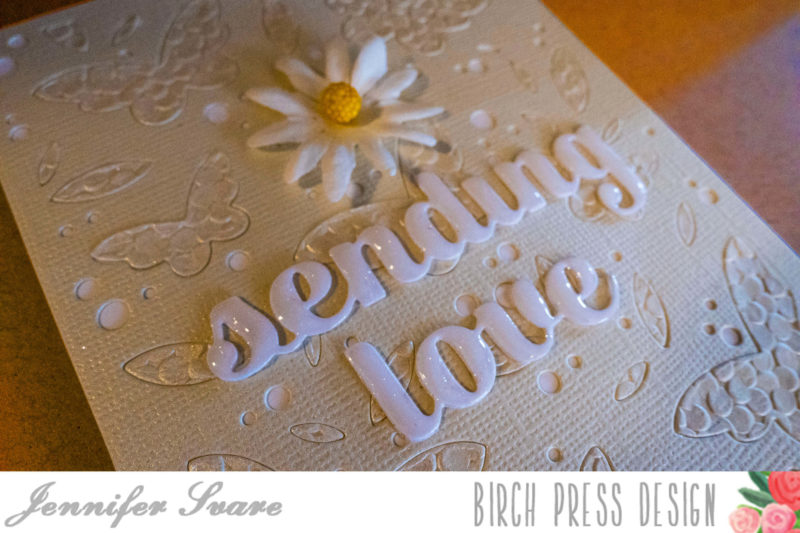
Hello! For today’s project, I used the Butterfly Garden Layer Plate B and inlaid butterflies using textured papers. I just love how they have a sheen that catches in the light, so when using the same color of card stock, it creates a simple elegance. I’ll show how the papers catch the light in the video below.
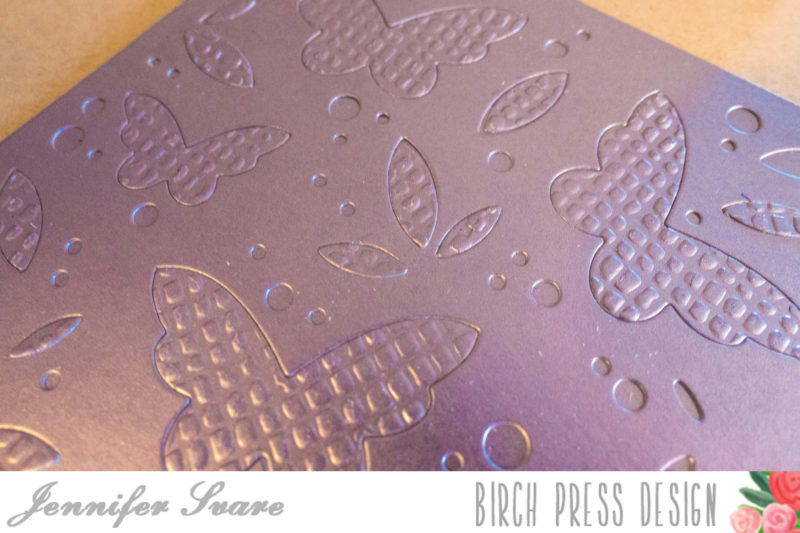
Textured papers are wonderful to use, but embossing also works! In the photo below, I used paper with a silky sheen to it and embossed it before die cutting it. Also, rather than using white as the base for the dots to show through, I used the same color as a base. This is a great, simple card base that could be embellished in many different ways.
Thanks so much for stopping by the blog today, and be sure to check out the video below for more details!
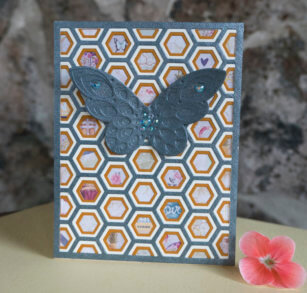
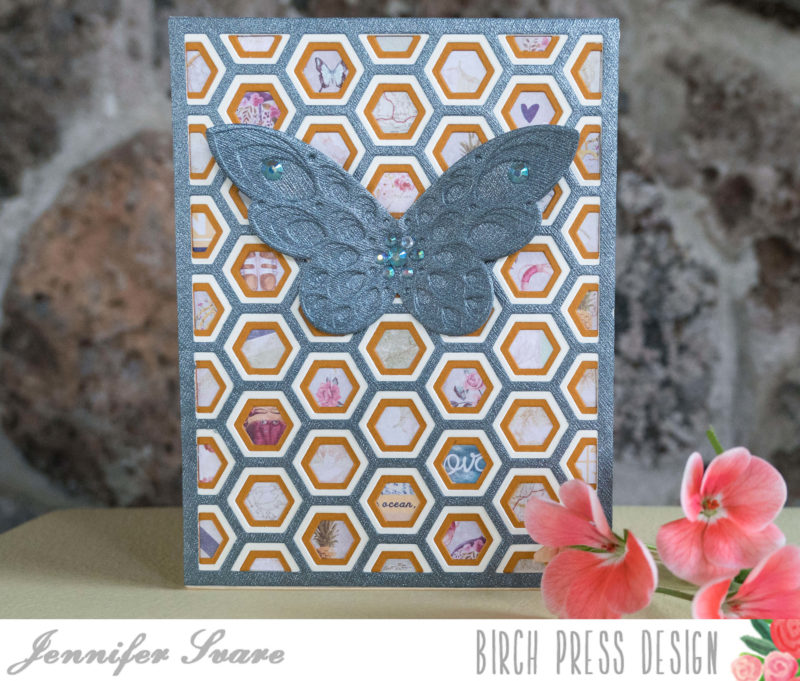
Hello! Today I got to make two very fun cards that I’ve been excited to make for a long time. I’m so glad I waited, because the new Sparkler Butterfly is the perfect touch for the focal point.
The cards use the Honeybee layering set, along with paper from the gorgeous St. Tropez and Wild & Free 6×6 paper pads. Each is unique, and so much fun to make! It’s almost like putting a puzzle together, except you get to choose where the pieces go. I sincerely hope you try this because you will be hooked!
When die cutting the patterned paper for the little hexagon inlays, it was so much fun to see what pieces came through. I love cards that have the depth of really looking into the details. There are so many fun things to look at. (I love the crab peeking out of the hexagon above).
Layering dies give limitless look and feel to cards because of the color combination, layering, and inlaying options. Using the same color for all of the butterfly layers really put the focus on texture.
The thought behind the “miss you” card is very sentimental… the “Miss You” from the Love and Miss You clear stamp set is the inside sentiment, and it fits perfectly with the hexagons’ message of fun flip flops, flowers, words, and a beachy feel of days in the past. The grayish blue adds to the nostalgic feel of the paper and balances the sadness of “missing you” with the happiness of the fond memories.
I glued only the center of the butterfly so the wings would sit off the base. A few jewels were added to the butterfly.
Many of these layering dies would work for this general idea and any of the Prima paper pads offer incredible, small details that are perfectly sized for the hexagons. The thank you card uses the beautiful Wild & Free paper pad, and the Big Thanks Sugar Script.
I cut the thanks out of ivory cardstock, and dusted it with a shimmer pen and a coat of glossy accents. The depth is incredible and I really love how this turned out.
Here’s a video of me making the thank you card, and I’ll share some tips I learned along the way!
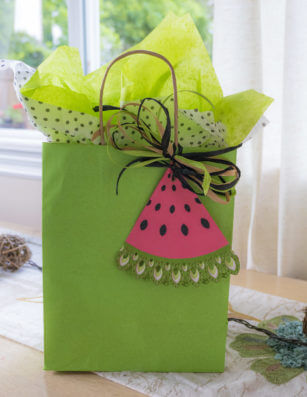
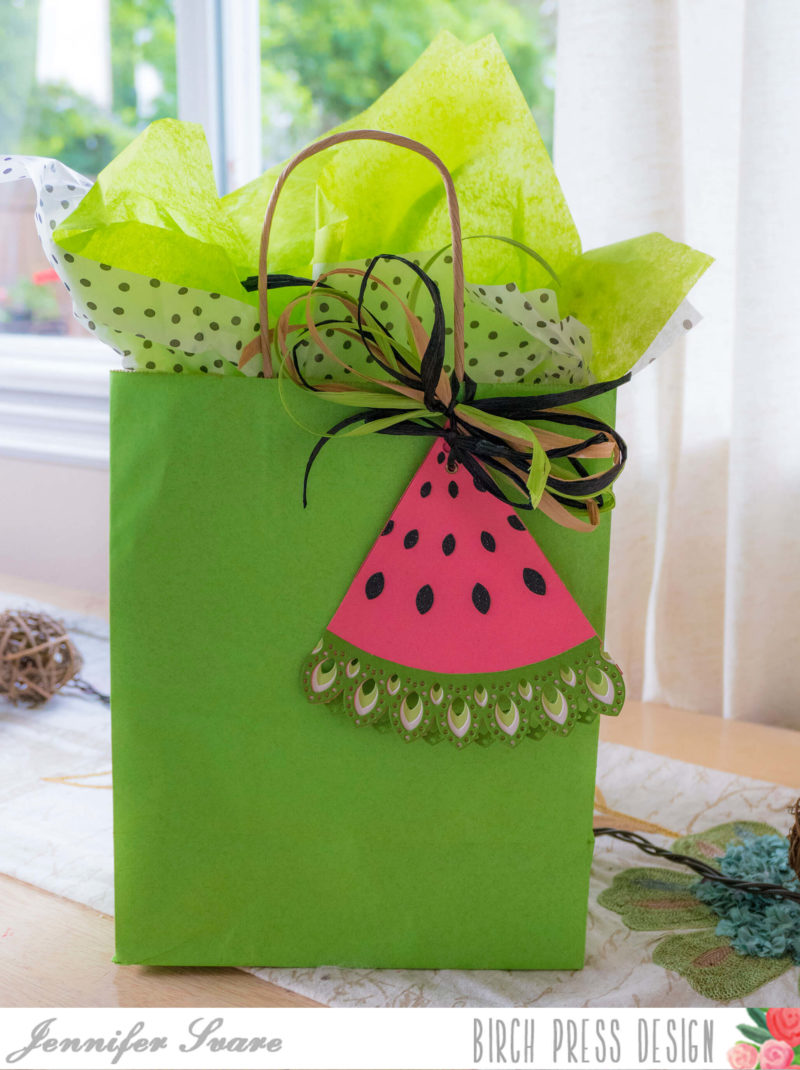
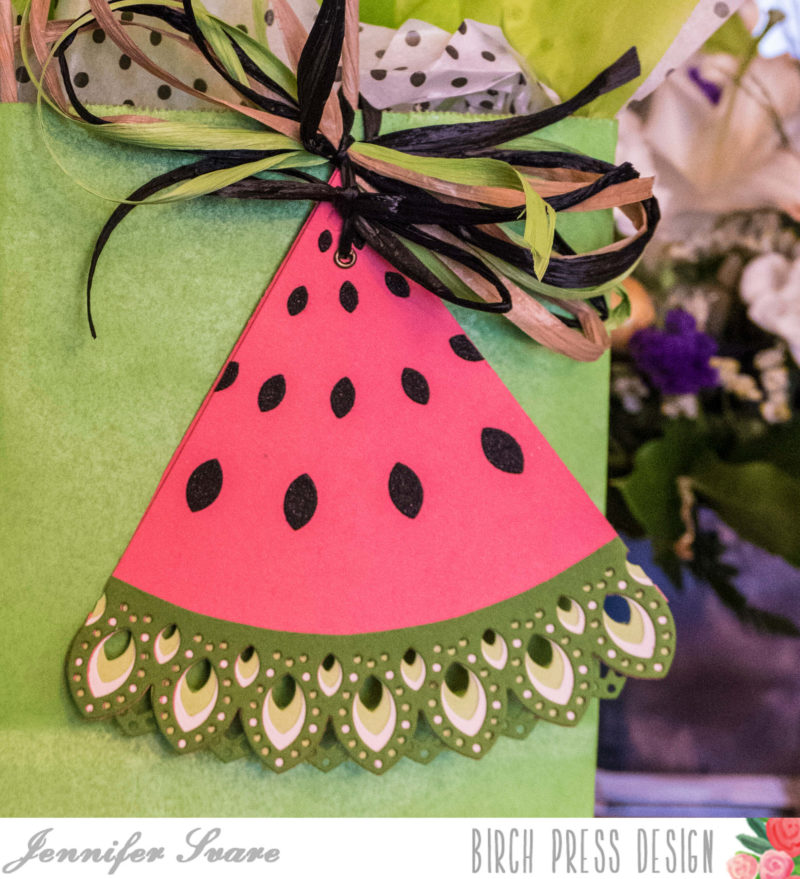
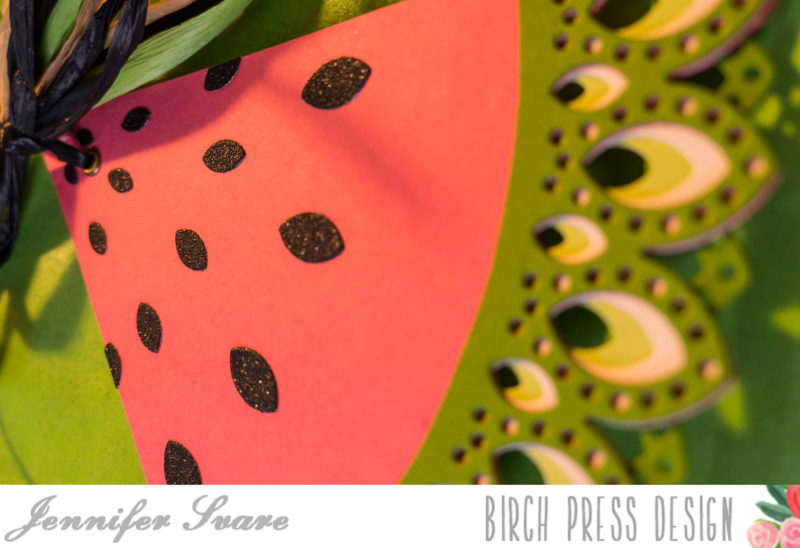
Hello! I’m so happy to be here today, and I’ve made a cheerful watermelon gift tag for today’s project.
I used the layers A, B, and C… but then added a staggered Layer A for some extra backing. The seeds are made from saving cutouts from black, sparkly paper.
Check out the video below for more information on how I made this tag!
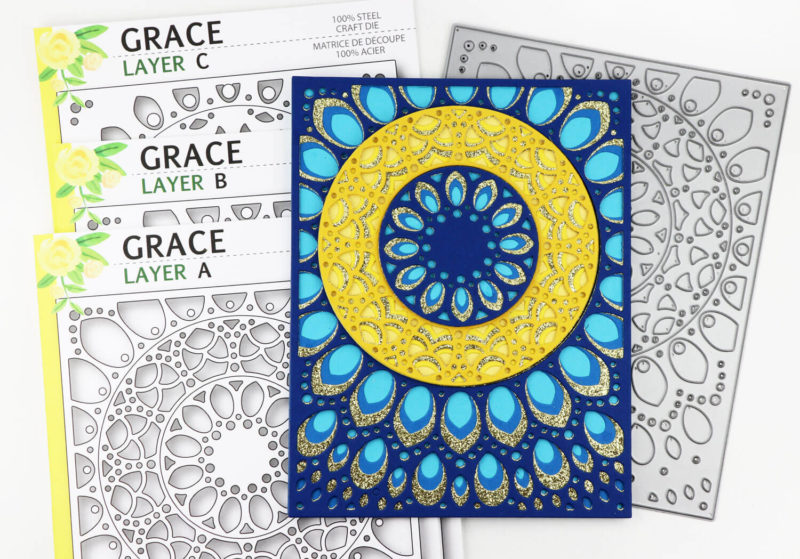
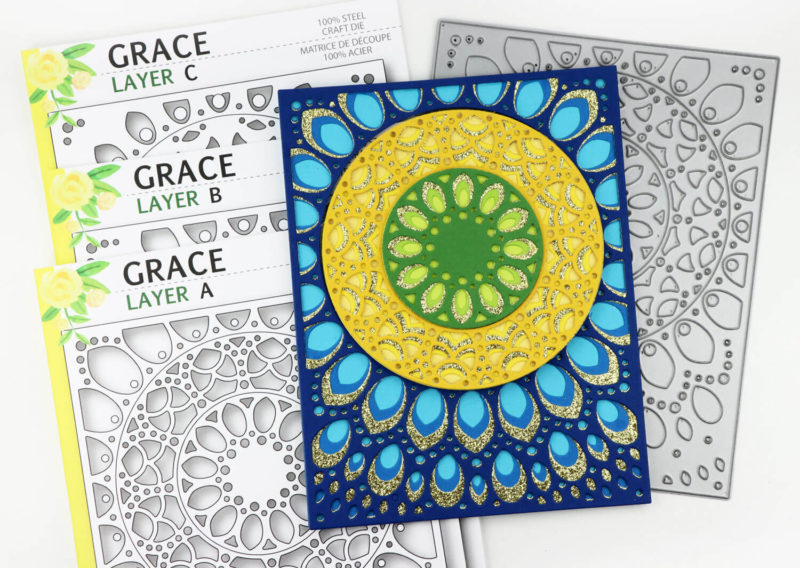
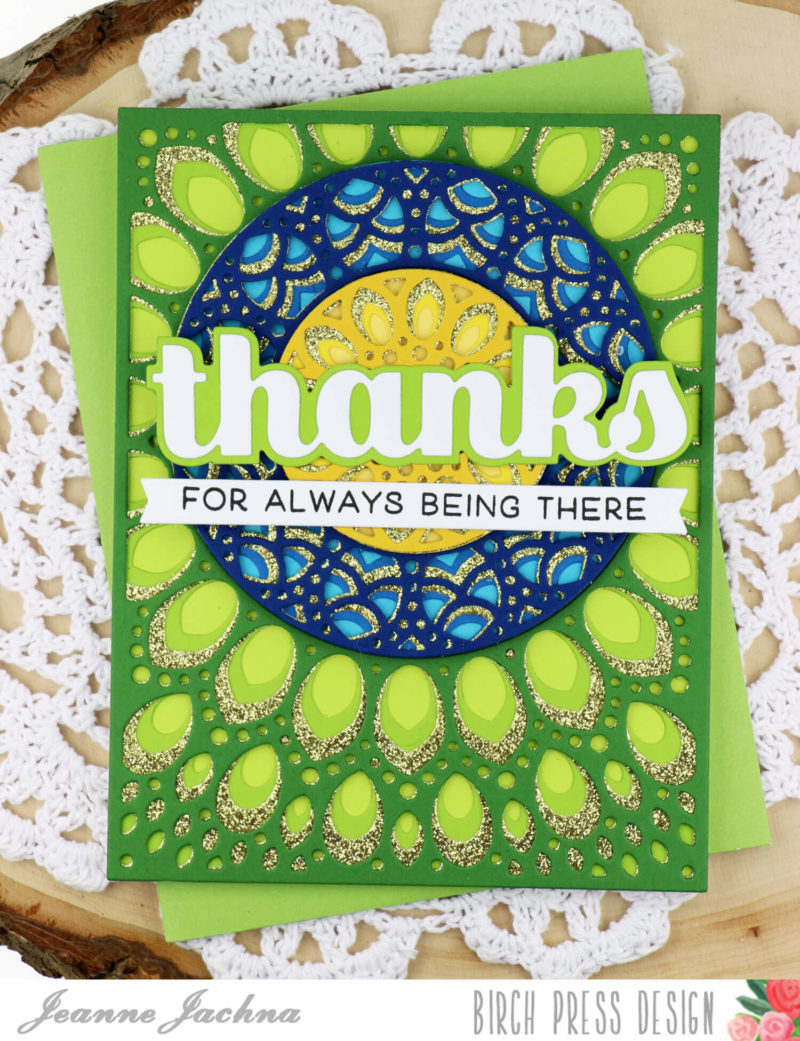
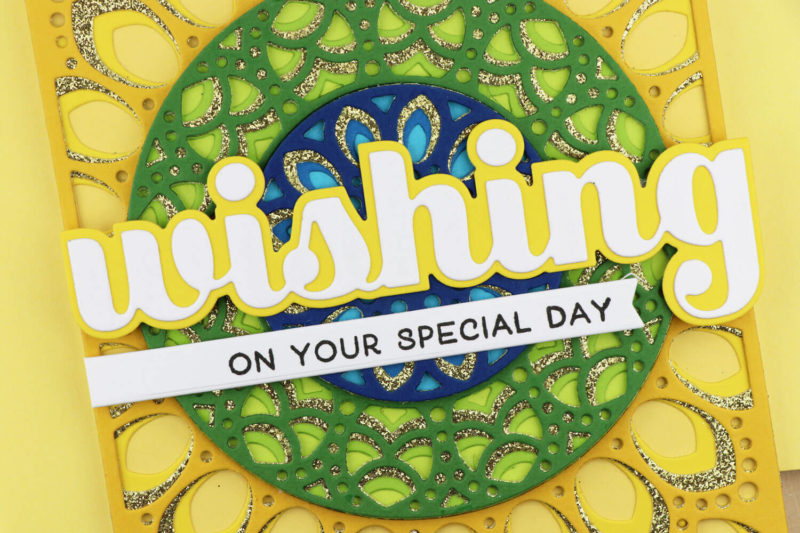
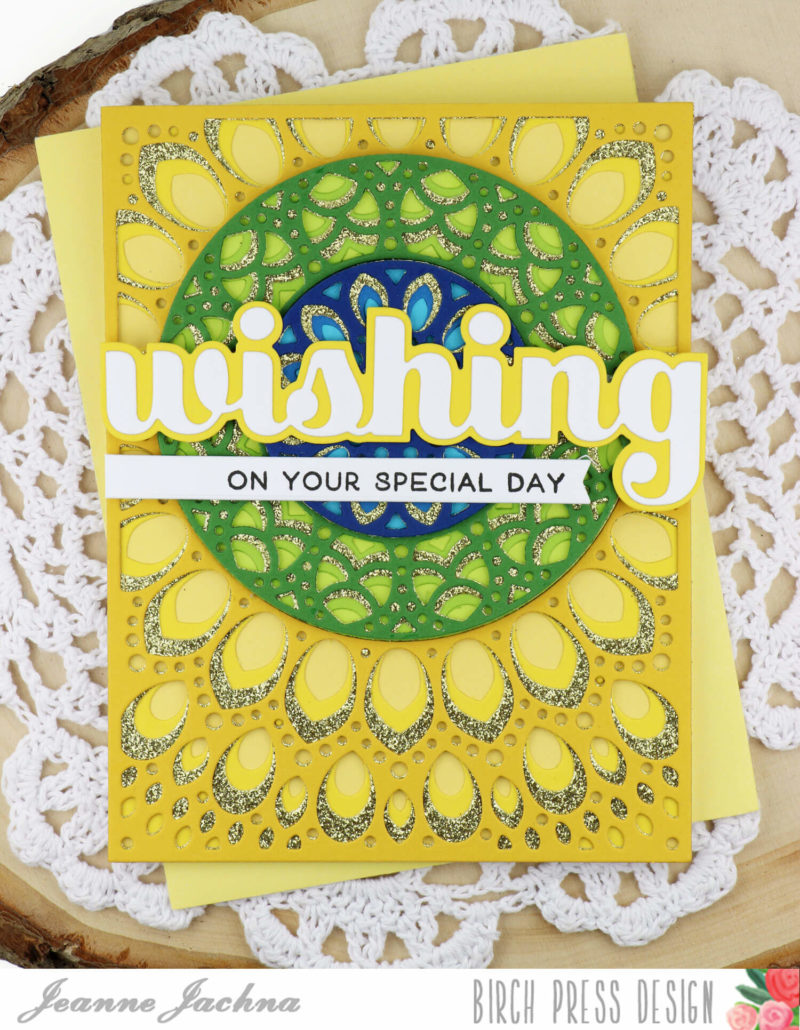
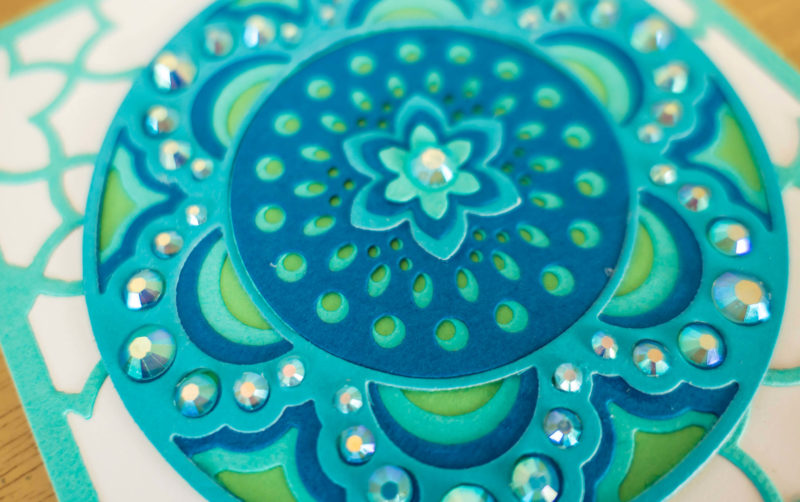
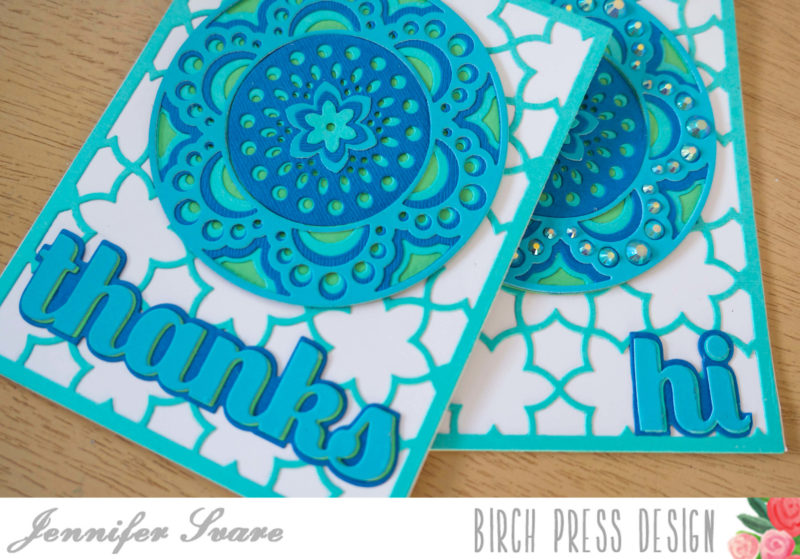
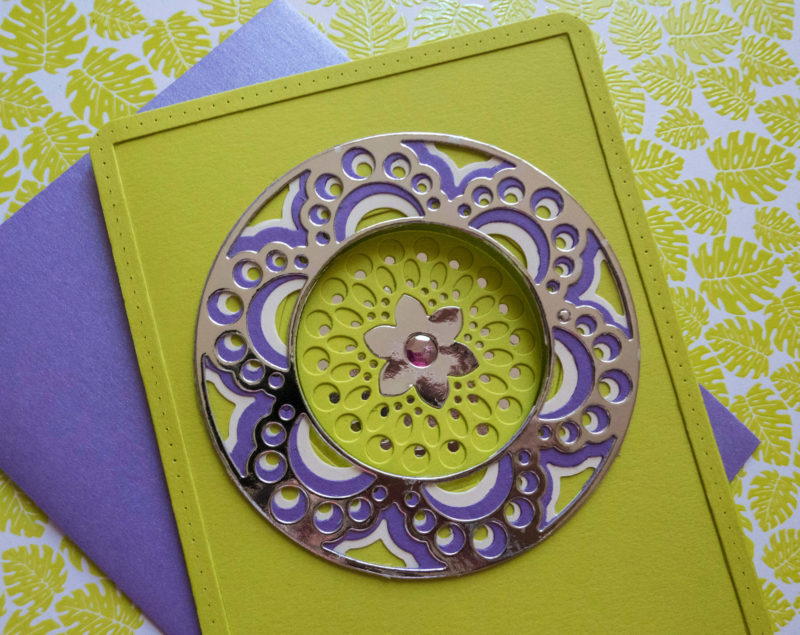
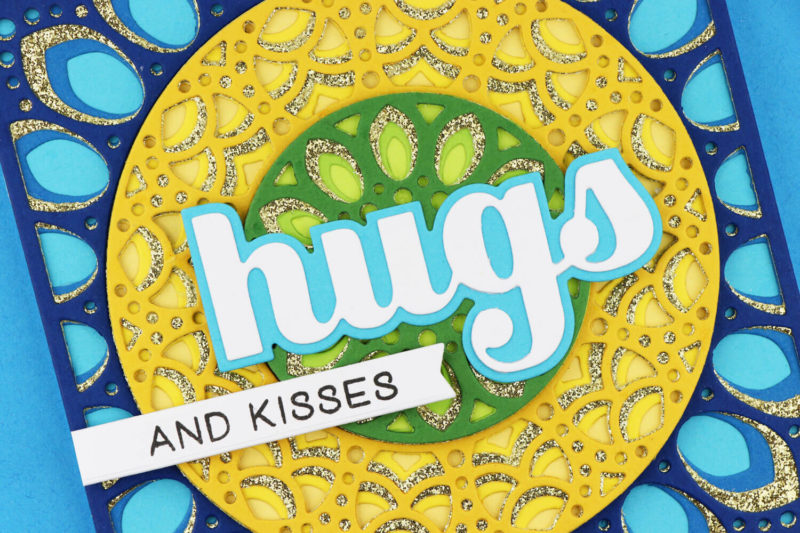
Jeanne here today with three cards made with the Grace Layered Die set. I love the mandala inspired designs that have me thinking of India – exotic and beautiful.
I made three cards in rich royal colors with a hint of gold. I was thinking of peacock colors – blues, greens and yellows. These dies are gorgeous, but where they really get interesting is in their versatility. If you look close you’ll see there are two circles inside the panel that are removable.
So you can switch out the ring with a different color..
Or the ring and the center circle. But it doesn’t have to stop there. The center ring can be switched out for the other circular shapes in the new release like Bali, Kaleidoscope, Adi, Prem or Viva. You can also use the center circles without the panel background. There’s lots of choices!
Today I just stuck with my three color choices and mixed up the rings and center circles to create these three cards.
The three die cut word sentiments in white are the new Big Sugar Script and they have outline dies. They’re bold enough to stand up to the intricate background dies. The stamped sentiments are from Just Because and Wishing You The Best clear stamp sets.
Imagine all the possibilities the flexibility of this release provides! Each card is unique and one of a kind with your choice of dies and colors!
Finished Size 4.25 x 5.5″
Our blog blitz is over but it’s not too too late to leave comments! You have until midnight US EST May 10 to leave a comment on each and every post that you want to enter. Winners will be announced on this blog on May 13.
We wanted to end the blog blitz with an extra special celebration – our very first Instagram Hop!! We sure hope you’ll join us. You can start here at our Instagram page!
TWO lucky winners (you and a friend you tag) will EACH WIN a complete cover panel die set (GRACE or BUTTERFLY Winner’s Choice – a $144 value).
The hop ends on May 9 @ midnight US EST and the winners will be posted on the Birch Press Design Blog on May 11. So what are you waiting for?
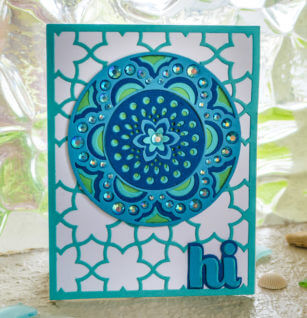
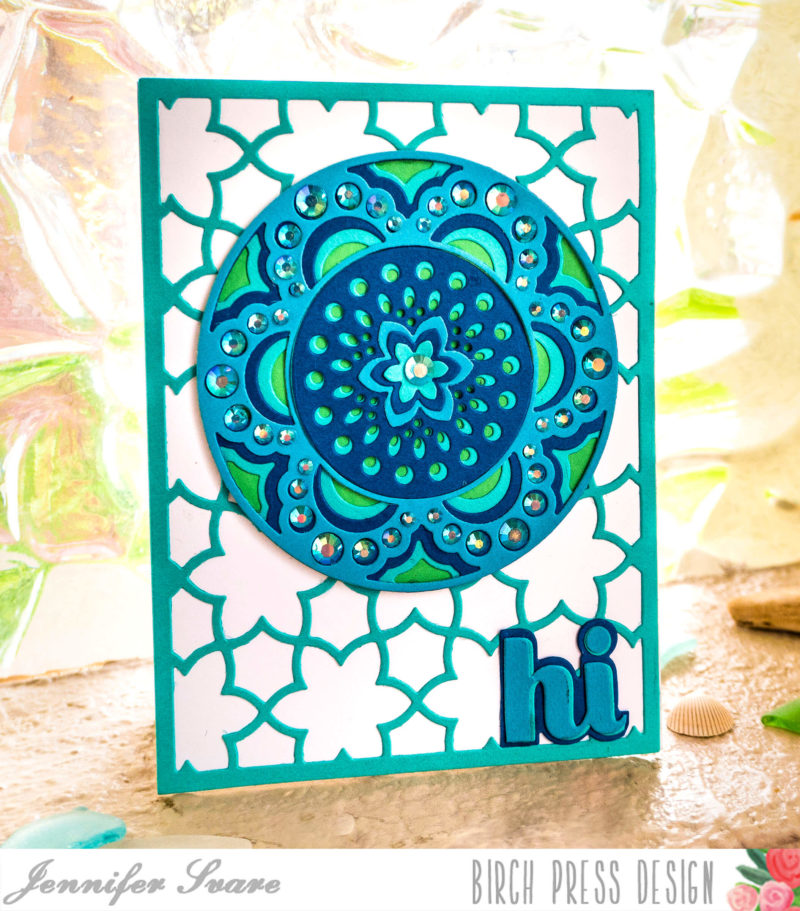
Hello! Welcome to Day 6 of the Blog Blitz! Today my project features the Bali set, along with the “Wishing” sugar script that has been cut down to say “Hi.”
All three layers were used for the outside of the Bali, but the inside used only Layers B and C, along with the Mandala Circle Base. The center flowers from negative space cut-outs were stacked for the center, with a jewel on top.
I loved adding the different sparkle gems to the centers of negative spaces, but it also looks good left without the bling. Here is an example of leaving it plain.
Check out the video here:
The winner from today’s post will receive the Bali Layer A craft die!
Here’s all of the details…
The blog blitz runs from May 1-6, 2018. We’ll be giving away a prize on every blog blitz post during this time. To enter to win you need to leave a comment on ONLY the posts that you wish to enter. To enter ALL the posts during the blog blitz you need to leave a comment on EACH ONE. One person will be chosen at random from each of the posts during the blog blitz. Only one prize per person per blog blitz. We use random number generator to select winners from comments. You have until midnight US EST May 10 to leave a comment on each and every post that you want to enter. Winners will announced on this blog on May 13. Good Luck! And LEAVE A COMMENT!! 🙂
On May 7 we’re having an Instagram Hop introducing you to the team and there’s a BIG PRIZE you won’t want to miss. Follow us on Instagram so you don’t miss it!
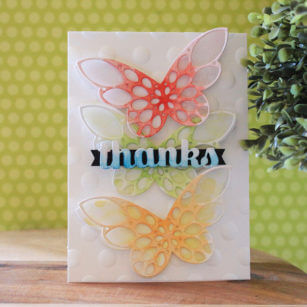
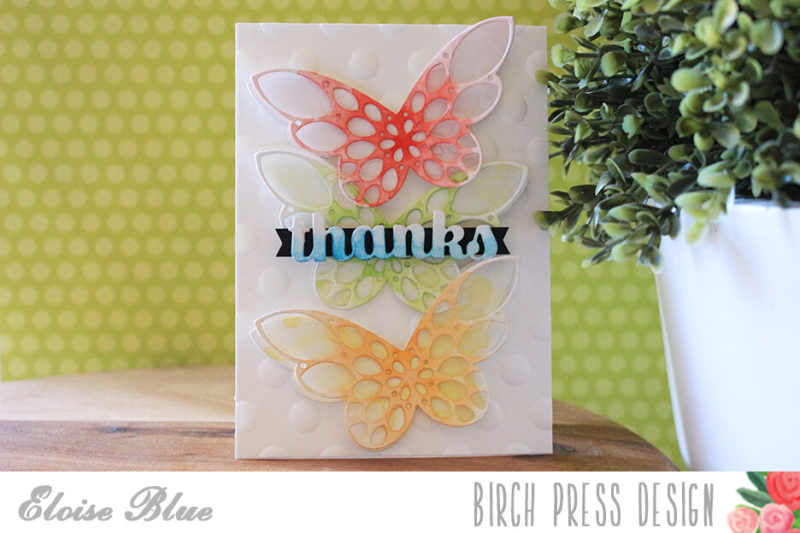
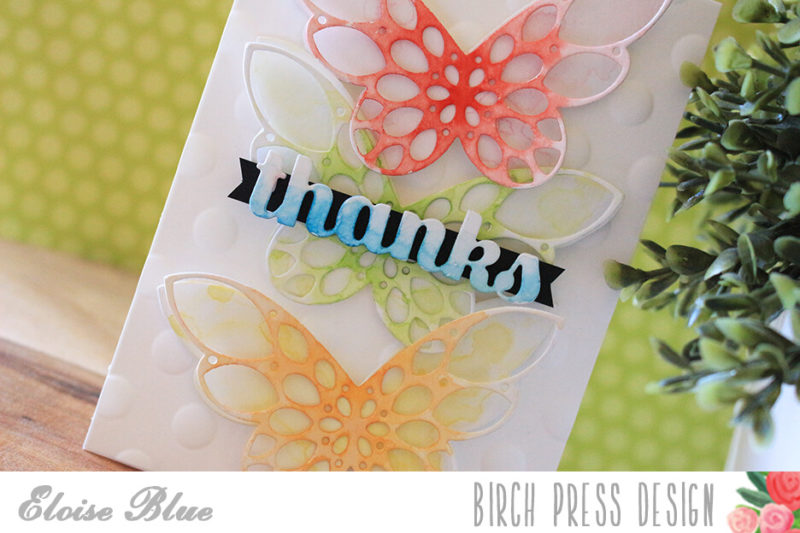
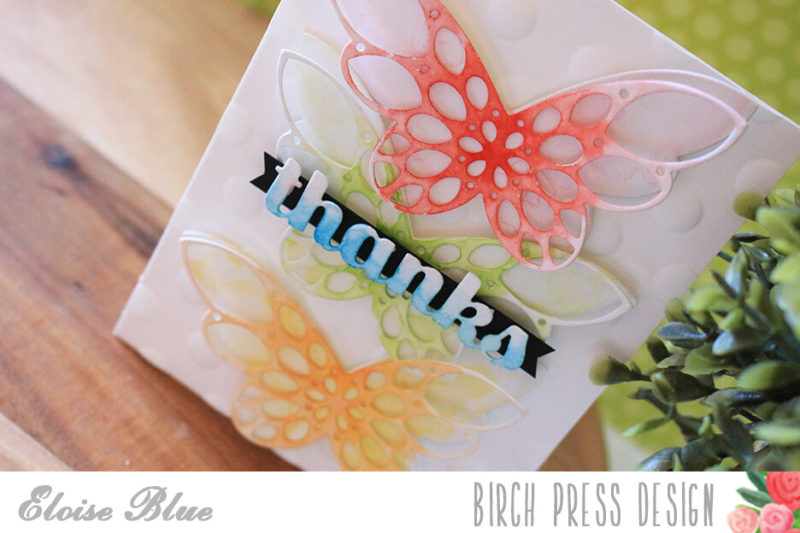
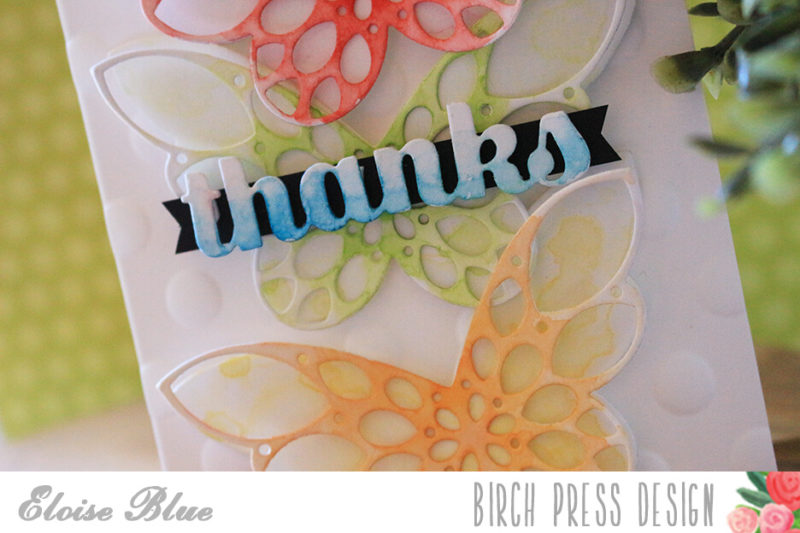
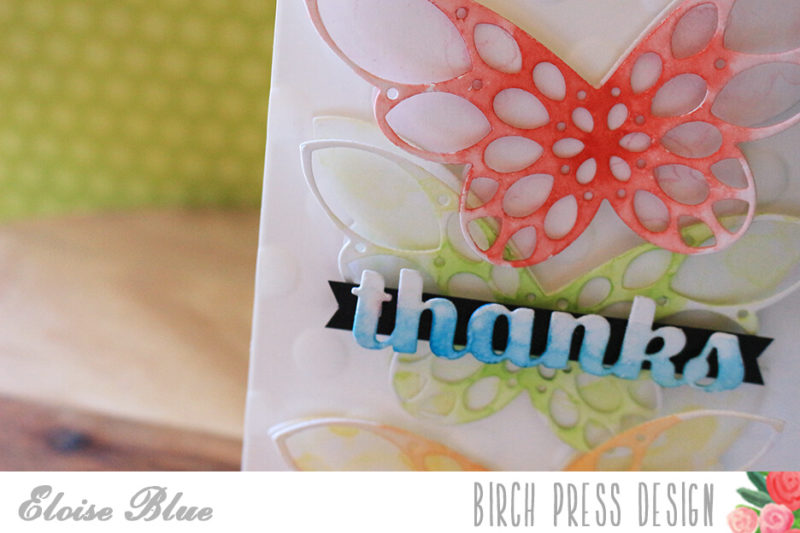
Hi everyone and welcome, Eloise here and today is Day Four of the Blog Blitz and I’m so excited to be sharing my project with you today. Each day until the 6th of May, the designers for Birch Press Design will be sharing projects using the brand new release. There will also be a giveaway every day the Blog Blitz goes on, so make sure you read below to see how you can enter to win. For my project today, I’ll be using the Sparkler Butterfly A and D Dies along with the Thanks Sugar Script Dies to create a thank you card.
To colour in my butterfly layers, I’ll be using my Mijello Misson Gold Watercolour palette and colouring each of my layers with two shades of the same colour. I coloured in a pink/red butterfly, a yellow/orange butterfly and a green butterfly. I did the A layer darker than the D layer, just for a little contrast. Once all my layers were coloured, I dried them with my heat tool. For my ‘Thanks‘ sentiment, I used a blue colour and water-coloured the bottom of the word and faded it up to white. I dried that also and set them off to the side.
Next, I took a piece of white cardstock and ran it through my Big Shot Machine with a Dotted Embossing Folder from We R Memory Keepers. Now that all my elements are ready, I can assemble my card. I used some foam squares to adhere the base of my butterflies to my card panel. I then used Multi Medium Matte adhesive to adhere my butterfly layers together. I set them off to the side to dry, then I used some foam tape on the back of the ‘Thanks‘ word and adhered it to a thin black strip of cardstock. I then used some detail scissors and cut v shapes at the end of each side. I added more foam tape to the back of my sentiment strip and adhered it to the centre of my middle butterfly. To finish off, I adhered my panel to a card base and that was my card completed.
Thanks so much for stopping by today, the video is linked down below for you all.
Now onto the giveaway details. The prize today is the Sparkler Butterfly A Die, like the one I used in my project pictured above. It works so well with all the layers, but even on it’s own. It’s super versatile and would be a great addition to your collection. The Blog Blitz is running from the 1st of May to the 6th of May. To be entered into this giveaway and all the others, make sure you leave a comment on the blog post. You have until Midnight US EST May 10 to comment and the winners will be announced on May 13. Good luck! Also, be sure to check by the Birch Press Design’s Instagram on May 7th. We will be having a Instagram Hop and there will be another giveaway so be sure to follow and hop along on that also.
Thanks again for stopping by, good luck and I’ll catch you all next time!


 Hello! Today I got to make two very fun cards that I’ve been excited to make for a long time. I’m so glad I waited, because the new
 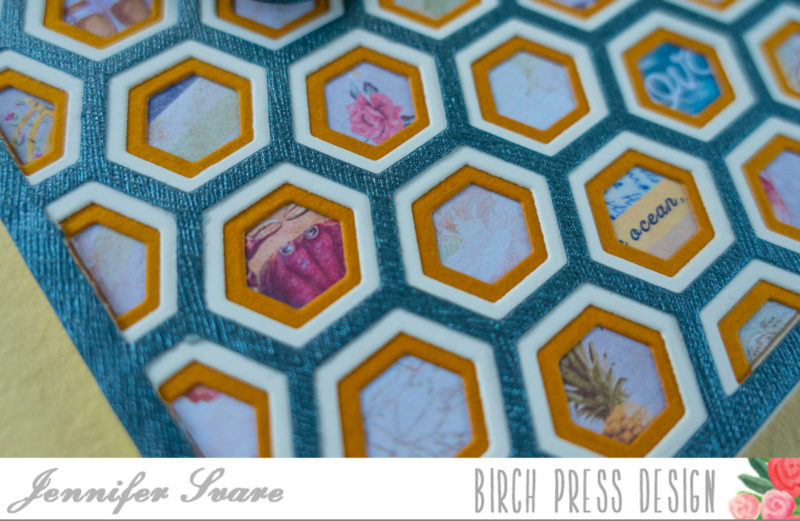 When die cutting the patterned paper for the little hexagon inlays, it was so much fun to see what pieces came through. I love cards that have the depth of really looking into the details. There are so many fun things to look at. (I love the crab peeking out of the hexagon above).
 Layering dies give limitless look and feel to cards because of the color combination, layering, and inlaying options. Using the same color for all of the butterfly layers really put the focus on texture.
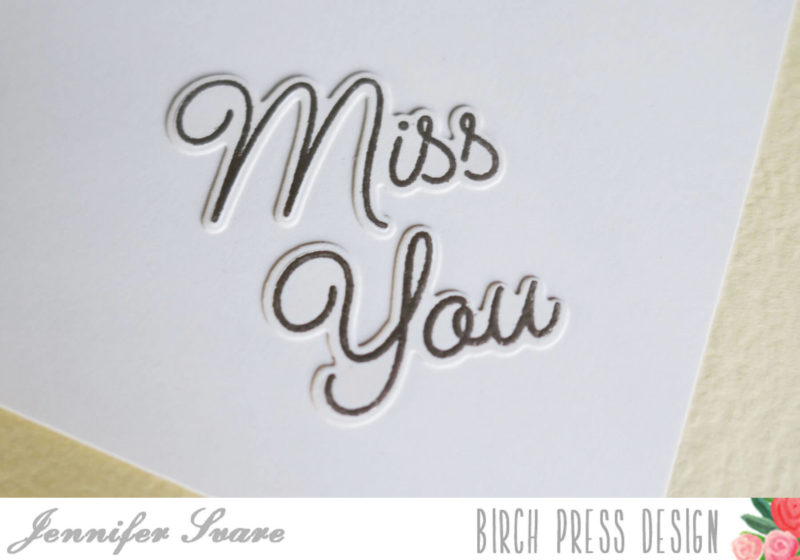 The thought behind the “miss you” card is very sentimental… the “Miss You” from the
  I glued only the center of the butterfly so the wings would sit off the base. A few jewels were added to the butterfly.
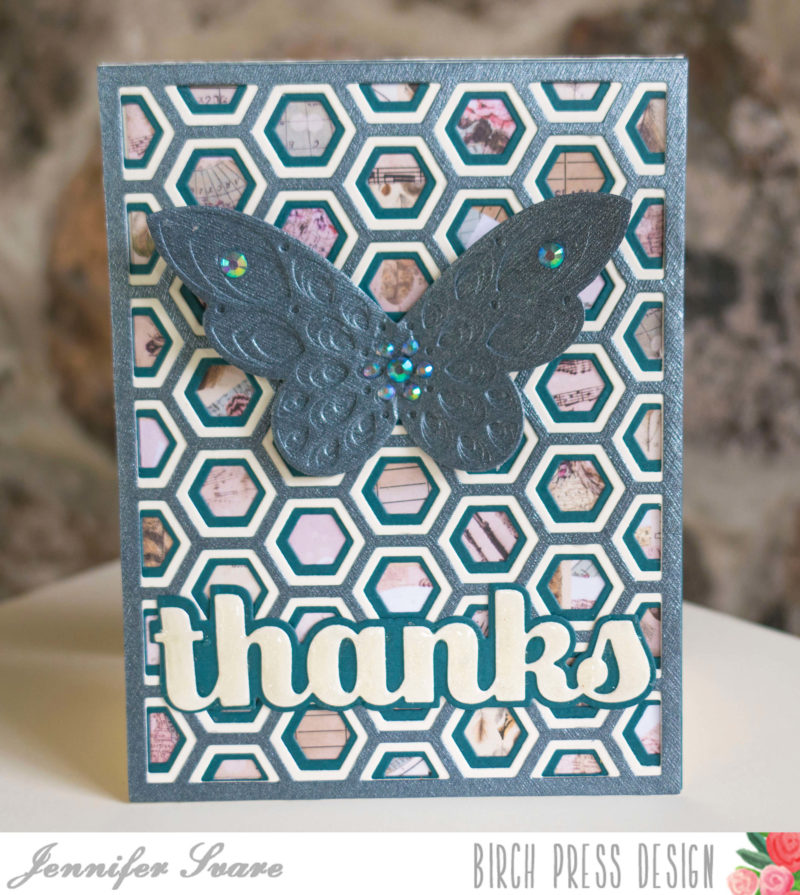 Many of these layering dies would work for this general idea and any of the Prima paper pads offer incredible, small details that are perfectly sized for the hexagons. The thank you card uses the beautiful
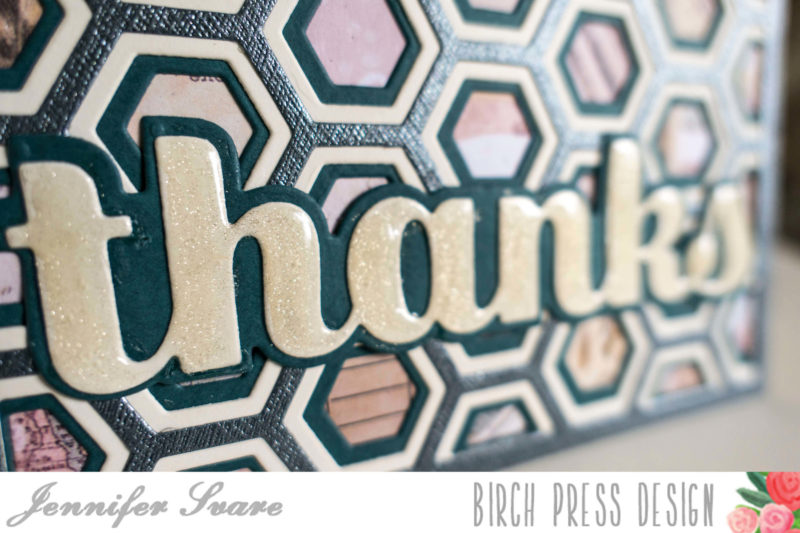


 Jeanne here today with three cards made with the Grace Layered Die set. I love the mandala inspired designs that have me thinking of India – exotic and beautiful.
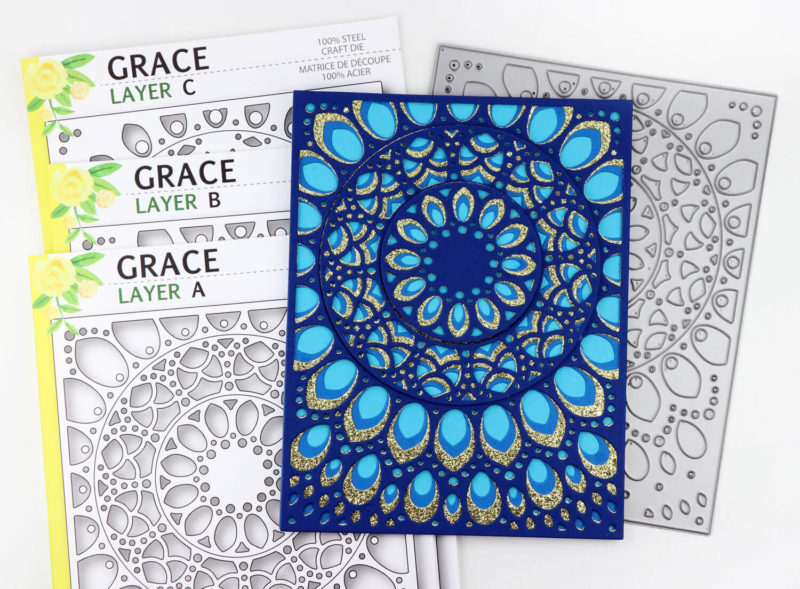 These dies are gorgeous, but where they really get interesting is in their versatility. If you look close you’ll see there are two circles inside the panel that are removable.