Category: Uncategorized

  • Rustic Poinsettia | By Natasha Vacca

    Rustic Poinsettia | By Natasha Vacca

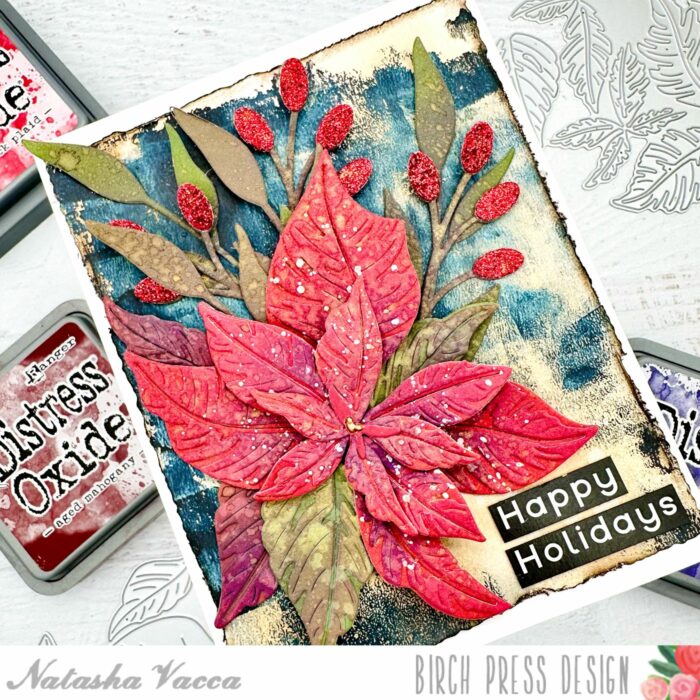
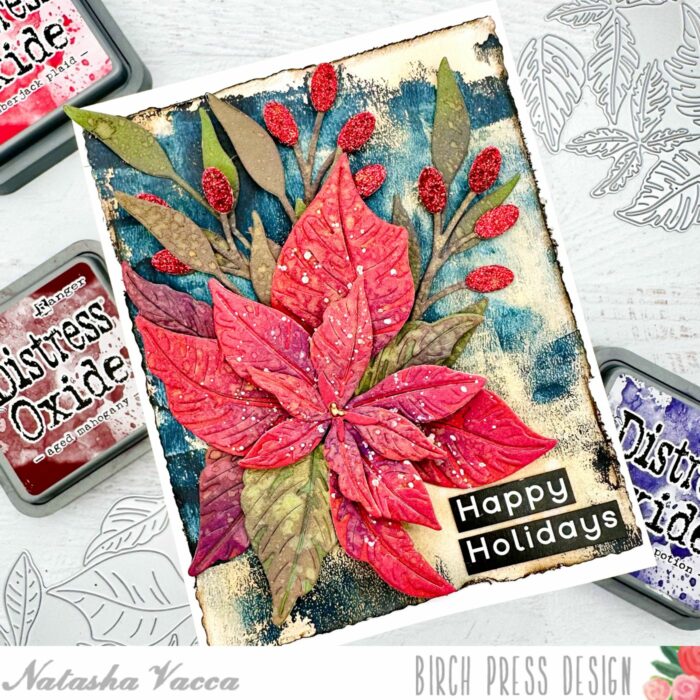
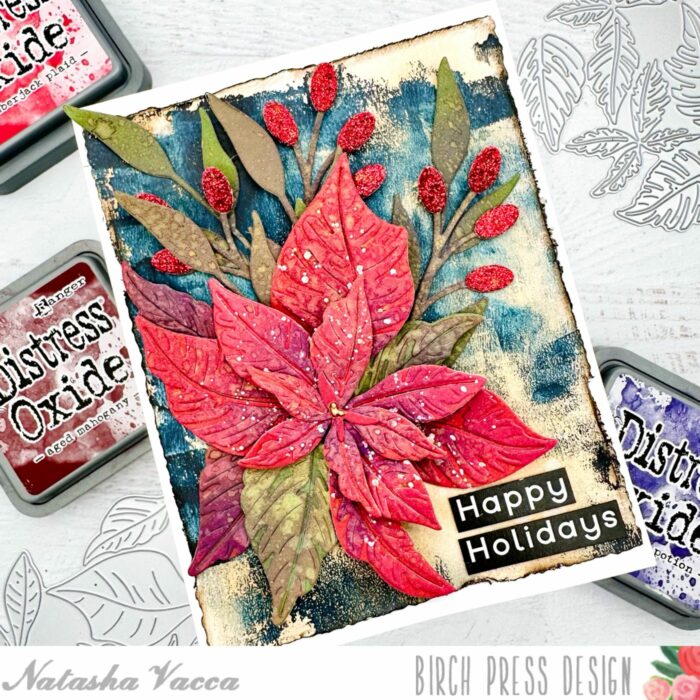
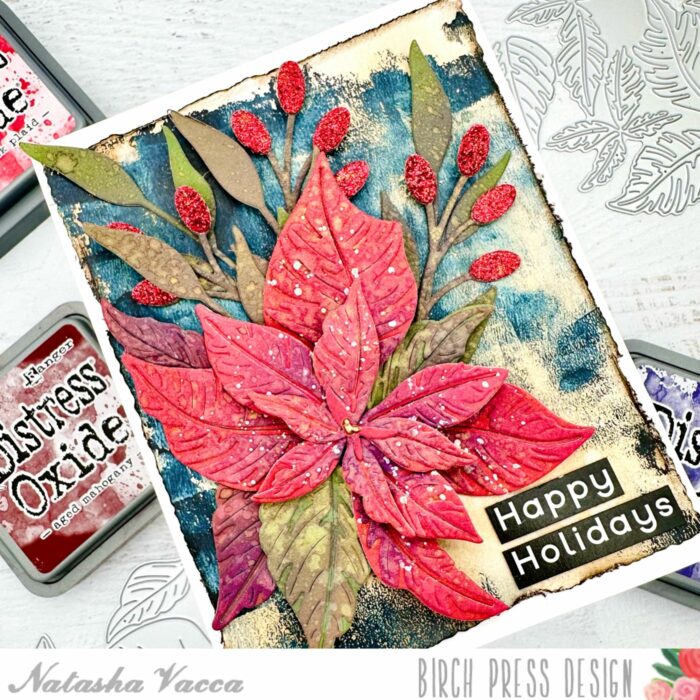
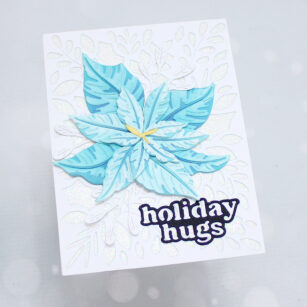
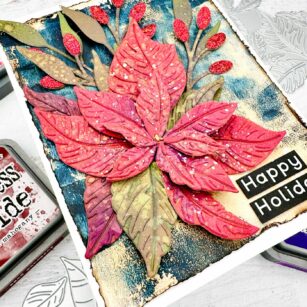
    Hello Crafty friends! I am excited to be back on the blog today sharing the beautiful new Splendid Poinsettia Contour Layer dies. I had so much fun creating a rustic inspired holiday card, so let’s get started!

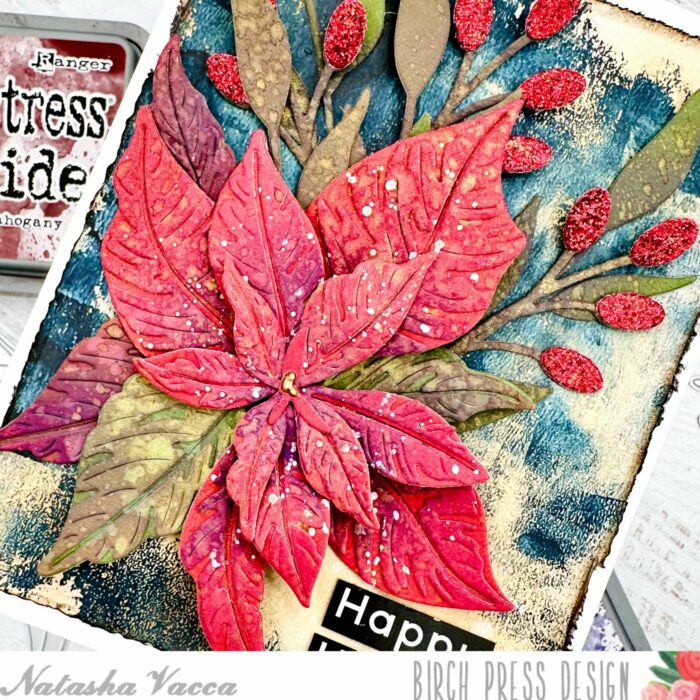
    I started with the beautiful Poinsettia die and the Berry Red paper pack from Memory Box. I chose 2 shades of red and pink paper from this pack. I cut the Poinsettia using both colors of paper. I then die cut the leaves for the Poinsettia using the Lush Green paper pad from Memory box. Once all the parts were die cut, I wanted to add more dimension using inks.

    On my die cuts I used a combination of distress oxide inks, as well as dye inks. I ink blended the layers for the flower and leaves until I had the dimension and colors I was looking for. I added water droplets to each layer and picked up some color using a paper towel. I then added white splatter to each layer using a paintbrush and allowed them to dry.

    Once all the splatters were dry, I adhered the Poinsettia and leaf layers together using liquid glue and foam tape. Next I chose a background from my stash. I chose a colorful background from my gelli prints to use as a focal point behind my Poinsettia. I then trimmed about a 1 inch rectangle from the Cream Woodgrain Paper Pack. I distressed the edges using my paper trimmer and my distress tool. I then inked up the woodgrain paper using distress oxide inks.

    Next I adhered the gelli print panel to an A2 card base. I adhered the 1 inch strip of wood grain on the left side of the card panel. I then adhered the Poinsettia and leaves using liquid glue.

    I completed the card using the Find Joy and Outline sentiment. I had previously made the top layer using green paper and added texture using heat embossing. I die cut 2 more layers for added dimension. Once all the layers were adhered, I added this to my card front. I added a few gems from the Fairy Dewdrops in Christmas Fairy.

    I had so much fun creating today’s card and I hope you enjoyed it too! I will be back soon with more crafty inspiration!


    Supplies


    Supplies


  • Autumn Leaves Bouquet | by Toni M Maddox

    Autumn Leaves Bouquet | by Toni M Maddox

    Hello, Birch Press fans! Toni here with you today all geared up for fall, my favorite season when the nights are cool, the days warm and the leaves are changing.

    I cut out and impressed the new Adornment Oak Leaf from a sturdy white cardstock which I sponged with Distress Oxide Mustard Seed and Lumberjack Plaid. Check out the detail on those leaves–just amazing!

    I spattered the leaves with water and Distress Oxide Festive Berries, Vintage Photo and Carved Pumpkin sprays.

    I arranged the leaves on the Memory Box Cream Woodgrain card front, tucking in a few Hillside Branches. I used a bow leftover from last year’s holiday cards (look at me using up leftovers!).

    The sentiment is from the Memory Box Gracious Floral set stamped in Versafine Vintage Sepia.

    I hope you enjoyed today’s card and have a great rest of your week!

    Supplies

  • A Fall Thank You | By Natasha Vacca

    A Fall Thank You | By Natasha Vacca

    Hello Birch Press friends, it is Natasha here and I am excited to be back with you today! Today I created a fall thank you card using the new Oak Leaf die set. I am a summer girl at heart, however I do love the colors of Fall! So let’s get started!

    I started by creating 2 panels using mixed media paper and my Distress Mica Stains. I chose 3 colors to use today to create the panels. The panels will be used to die cut my leaves. I spritzed the colors onto my paper one at a time, heat set them with my heat tool, added water droplets, and picked up the color with a paper towel. I continued this process until I had the colors and texture I was looking for. I set the panels aside to completely dry as I worked on my background.

    Next I chose a piece of kraft paper from my stash and dry embossed the panel using the Memory Box Geometric Crystals embossing folder. I then used a sanding tool to distress the dry embossed panel in various sections. To add a bit more texture and dimension to the panel I applied Distress Oxide inks to the panel in 3 of the corners.

    Next I trimmed the panel using my Deckle Trimmer and distressed the edges using Distress Ink. I added splatters to the panel using black and gold splatter. I set the panel aside to completely dry.

    Next I took my 2 panels I created using the Distress Mica Stains and die cut 2 leaves using the new Oak Leaf Die set. I also die cut the top layer using white card stock. I then ink blended the top layer of the leaves using oxides and once dry added Foundry Wax for added shine. I then adhered both layers of the leaves together using liquid adhesive.

    To complete my card, I adhered the dry embossed panel onto an A2 card base using liquid adhesive. I adhered the leaves with foam tape. I chose the sentiment from Handwritten Thanks and Outline die set. I die cut the script Thanks 3 times, using black card stock, as well as from the Rainbow Reflections Mirror Pad. I adhered the layers together using liquid glue and added this to my card front. I chose a sub sentiment from my stash and completed the card with a few gems from Autumn Fairy Jewels. Thanks so much for stopping by today! I will be back soon!


    Supplies


    Supplies

  • Just Because | Dilay Nacar

    Just Because | Dilay Nacar

    Hello and welcome, crafty friends! Dilay here today sharing this card featuring the brand new Oval Leaf Branches Contour Layer dies!

    To start, I created a base by cutting a piece of white cardstock down to 4.25” x 5.5” and then embossed it using the Memory Box Geometric Crystals 3D Embossing Folder. 

    Next, I stamped and die cut ‘just because’ from the Memory Box Gracious Floral Stamp Set and adhered it to the embossed card base.

    I then die cut each of the leaves from the Oval Leaf Branches Contour Layers in shades of pink, yellow, and blue and adhered them around the sentiment (creating a frame) using foam and liquid adhesive. 

    To finish, I added a few splatters of white ink and some clear embellishments and then mounted the card onto a top-folding card base! 

    I hope you enjoyed today’s simple card featuring new goodies from Birch Press Design!


    Supplies


  • Phlox Blooms ATC’s | By Natasha Vacca

    Phlox Blooms ATC’s | By Natasha Vacca

    Hello Crafty friends! I am excited to be back on the blog today sharing a couple of mixed media ATC’s using the Phlox Blooms and Leaves Contour Layers die set. So let’s get started!

    I started by die cut the floral images from the Phlox Blooms and Leaves Contour Layers die set. I cut enough for 3 florals per ATC. I die cut the flowers using the Vibrant Violet paper pad from Memory Box. I chose 2 shades of pink for the flowers and the center of the flower. Once everything was die cut, I used several shades of Distress Oxide ink to add more depth and texture to the flower images.

    Once the flowers were all inked up I adhered the flowers together using liquid blue. Next I heat embossed the center of the flower using a gold embossing powder and then adhered the center to the flowers. I also added a few splatters to each flower. I then set the flowers aside to work on my backgrounds.

    For the background I chose a blue panel from my stash of pre-made backgrounds. I trimmed the panel into 2 ATC’s (Artist Trading Cards). Next I chose a piece of pattern paper from the Magnolia Grove paper pad from Memory Box. I tore the paper and then adhered this to each ATC using liquid glue.

    I then added a clear crackle paste to each ATC in a couple of places. I allowed the paste to dry and when it was completely dry I added a bit of distressing using distress crayons, as well as paper glaze for added shine and texture. Next I inked up the edges of each ATC using black distress ink.

    I then added white and purple splatters to each of the backgrounds. Once the splatters were dry, I adhered the flowers using liquid glue and foam tape. I completed my ATC’s with a couple of sentiment strips and a few gems from the Fairy Jewels – Brights collection!

    Thank you for stopping by today! I will be back soon!


    Supplies


    Supplies


  • Mixed Media ATC’s with Curved Leaf Branch | By, Natasha Vacca

    Mixed Media ATC’s with Curved Leaf Branch | By, Natasha Vacca

    Hello Birch Press friends, I am excited to be back on the blog today. I love creating with dies and today I am going to share some mixed media ATC’s (Artist Trading Cards) with you! For the focal image I will be using the Curved Leaf Branch Contour Layers die set. So let’s get started!

    I started by die cutting 3 of the Curved Leaf Branch layers using white card stock, as well as a set using the Vibrant Violet paper pad. Once the leaves were die cut, I set the white leaf branches aside. I wanted to keep these one layer. On the violet leaf branch, I added oxide ink to the leaves, as well as to the top layer on the leaves. I used several shades of ink to add contrast to the leaves. I adhered on the 2nd layer of the leaves using liquid glue and then set these aside.

    Once my leaves were die cut, I trimmed 3 different gelli prints into ATC size (2.5 x 3.5). On each of the ATC’s I added a variety of texture using texture paste and crackle paste. I added the paste using a spatula to the edges, as well as used the Gilded Grace Inside Stencil Set. I chose one of the stencils from the set and added the stencil to my backgrounds and applied texture paste through the stencil. I allowed the paste to dry completely before moving onto the next step.

    Once the paste was dry, I added a bit more texture by applying distress crayons and gold glitz to the paste areas. I continued to work on the areas until I was happy with the texture of my backgrounds. Once everything was dry, I added a strip of washi tape to each ATC, with a bit of white gesso for added distressing. I also added white splatters to a couple of the ATC’s as well.

    Next it was time to adhere the leaves onto the ATC panels. Under each leaf I used gold thread and adhered this to the panel with a glue dot. I then adhered the leaves onto each ATC on top of the gold thread. I added sentiments from my stash, as well as a stamped sentiment from the Gracious Floral Stamp and die set. I trimmed the sentiments and adhered them to my ATC’s.

    I added a butterfly die cut to two of the ATC panels. I die cut the Simple Butterfly Contour Layers die set using the Vibrant Violet paper pad. I added Distress Oxide ink to each layer of the butterfly and then adhered it together. I thought this was a sweet and simple addition!

    I hope you enjoyed stopping by today and learning how to create ATC’s, as well as how to use your layering stencils to add texture!

    Have a great day and I will be back soon!


    Supplies


    Supplies


    Supplies


  • Mixed Media Large Cosmos | By Natasha Vacca

    Hello Birch Press friends, it is Natasha here and I am back today sharing ideas on how to create a mixed media card using your dies! For today’s card I am using 2 new dies: Large Cosmos Contour Layers and Curved Leaf Branch Contour Layers. Let’s get started!

    I started by die cutting the Large Cosmos Contour Layers die using the Vibrant Violet paper pad from Memory Box. I chose 2 shades of card stock from the paper pad. Once the floral was die cut, I added dye inks to the floral for added dimension. I then spritzed the floral layers with water droplets and picked up the color with a paper towel. I then adhered the floral together using liquid glue. For the center of the floral I chose a gold card stock from the Vintage Pastel Mirror Pad. I adhered this to the center of the floral and set this aside.

    Next I started to die cut the Curved Leaf Branch Contour Layers die. I chose 2 shades of blue card stock from the Fresh Aqua paper pad from Memory Box. Once the leaf was die cut, I added 2 shades of dye ink to the leaf image. I added water droplets as well and picked up the color with paper towel. Once dry, I adhered the leaf layers together. I then added brown distress ink to the leaf edges for added texture.

    Once the flower and leaf image was complete, I started to work on my background. I chose a gelli print from my stash with similar colors. I then dry embossed the background using the Ringadings 3D embossing folder. I added a bit more texture to the folder using dye ink in a dark grey on some areas of of the raised circles, as well as a blue glaze, and foundry wax. I allowed everything to dry, once the background was dry I added a few splatters to the background.

    Next I added 2 pieces of pattern paper from the Magnolia Grove paper pack. I chose 2 colors to coordinate with my card design and tore the strips for a distressed look. I then adhered the card panel, strips of paper, leaf and floral to my A2 card base.

    To complete my card I chose the Big Hugs Sugar Script die. I die cut the hugs sentimnent 3 times out of black card stock. I then adhered each layer together using liquid glue. I added a bit of foam tape behind the hugs sentiment for added dimension.

    I hope today’s card inspires you to use your dies to create a mixed media style card!

    I will be back soon with more crafty inspiration!


    Supplies


    Supplies


  • Gracious Floral | By Natasha Vacca

    Hello Birch Press friends, it is Natasha here today and I am excited to be up on the blog today! Today I am sharing a colorful card using the new Gracious Floral 3D embossing folder! This card was so much fun to create, using inks, stencils, and sprays, so let’s get started!

    For today’s card I started with a piece of Canson Watercolor card stock. I started by adding Lindy’s sprays to the card panel background. When working with sprays, I add color to the paper, allow the panel to dry, spritz with water, then pick up the color with a paper towel. I continue this process for the background until I have the colors/textures I am looking for. Once the panel was completely dry, I ran the panel through my die cutting machine with the new Gracious Floral 3d Embossing folder by Memory Box. I love the detail in this folder. Next I added color to the floral and leaves using the coordinating stencil.

    The stencil for this set is so amazing and truly so easy to use. The set comes with a coordinating guide telling you the stencil to use for each layer. I continued to add layers of color to my flower using the layering stencil using dye inks from my stash. Once the layers were complete, I spritzed the panel with water and picked up some more color using a paper towel. I love this step, as it adds more dimension to my images.

    Next I added splatters to the card panel using my dye inks, as well as white splatters. I allowed the panel to completely dry, then I die cut the panel using my deckle edge trimmer. I then distressed the edges a bit more using my distress tool. Next I darkened the edges using distress ink and then adhered the panel to an A2 card base. I completed my card with a sentiment from the Gracious Floral stamp and die set.

    Thank you so much for stopping by today! I love this collection and I hope I inspired you to get inky today! I will be back in a few days with more crafty inspiration using new dies from the latest Birch Press Designs release!


    Supplies


  • A Colorful Celebration | By Natasha Vacca

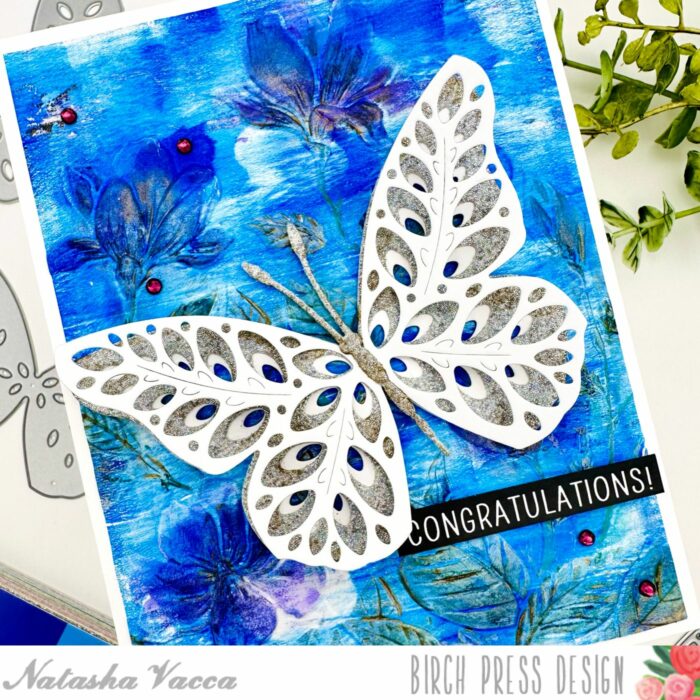
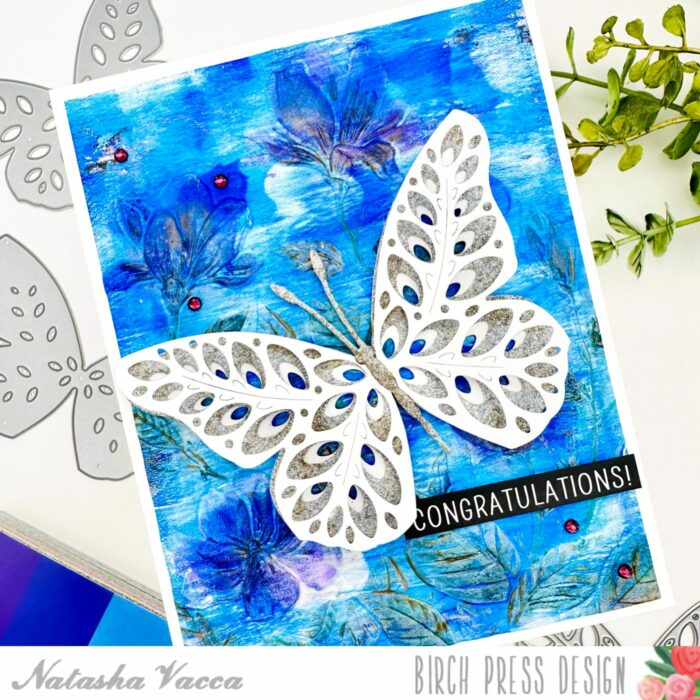
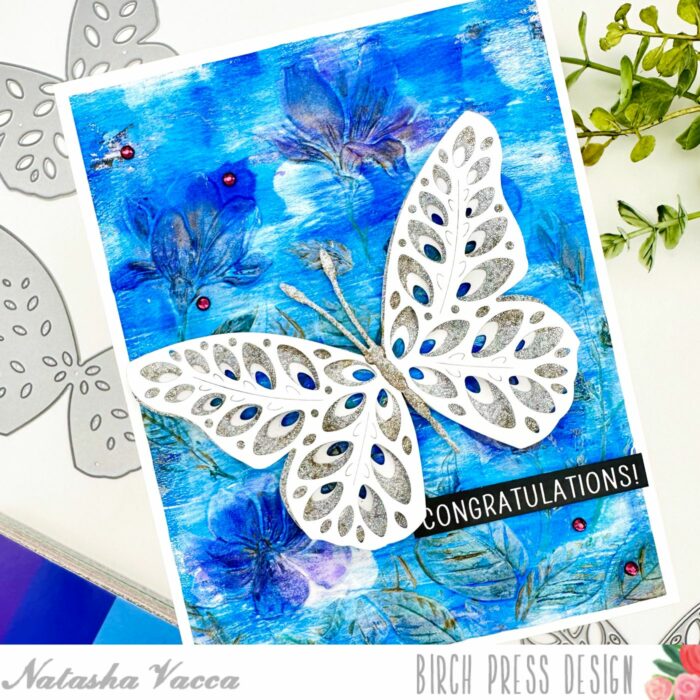
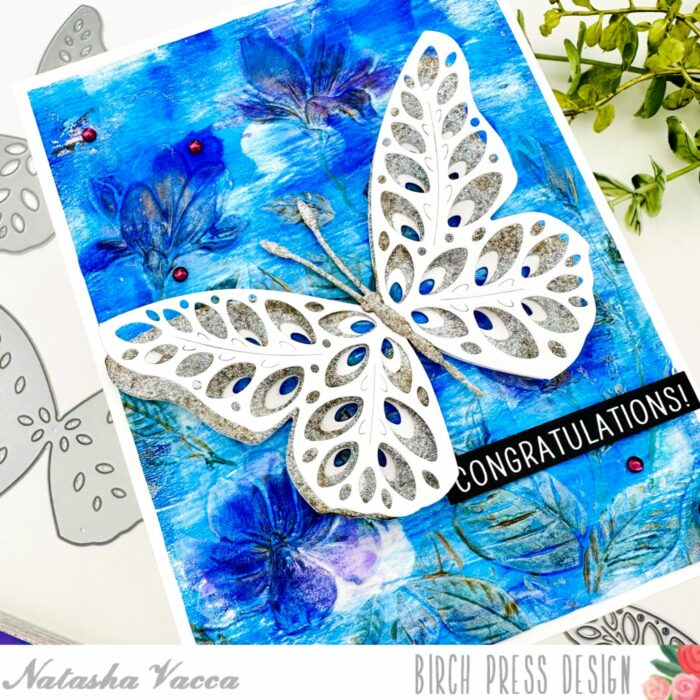
    Hello Birch Press friends, it is Natasha here today and I am sharing a colorful celebration card using the beautiful Eloquent Butterfly layer dies! I had a lot of fun creating today’s card, so let’s get started!

    I started by cutting out each layer of the Eloquent Butterfly die set. I started with layer C using a piece of card stock from my scrap bin. Once the layer was die cut, I added a pink spray to the butterflies for added texture. Then I die cut layer B using the Memory Box Fresh Aqua paper pad. I chose an aqua shade of card stock from the pack. I added a blue and pink dye ink to each butterfly, spritzed with water, then added gold metallic watercolor splatters. I then die cut layer A using white card stock. I then added distress oxide ink, embossing powder, glaze, and foil to the top layer for added texture and interest.

    I then adhered each layer together using liquid glue. I then die cut the antennae for the butterfly using the Butterfly Basics die set. I die cut 2 antennae using the Memory Box Vintage Pastel Mirror pad. I then adhered these using liquid glue. I set my butterflies aside to create my background.

    For the background I chose a colorful gelli print from my background stash. I then ran this through my die cutting machine with the Memory Box Ringadings embossing folder. I added some gray dye ink to the folder as well to add texture to the dry embossed background. Next I trimmed the panel with my deckle edge trimmer, distressed the edges of the panel, and then added distress ink around the edges for more interest. I then adhered this panel to an A2 card base.

    To complete my card I adhered the butterflies to the card front, then chose a sentiment strip from my stash to complete my card. I had a lot of fun creating this colorful celebration! I hope you enjoyed it too! I will be back soon with more crafty inspiration!


    Supplies


    Supplies


  • Sparkly Butterfly Greetings | By Natasha Vacca

    Hello Birch Press friends, it is Natasha here today to share a card with you using lots of color and sparkle! For today’s card I am using the Butterfly Basics die set! Let’s get started!

    I started by creating 2 colorful background panels using Distress Mica Stain. I used 3 different colors to create my backgrounds. I spritzed each panel, allowed them to dry, then picked up some color with water. I repeated this process until I was happy with each panel.

    Once each panel was dry, I die cut 2 butterflies using the Butterfly Basics die set. I love these large butterflies! I then die cut the antennae for each butterfly using the Memory Box Vintage Pastel Mirror Pad. I then adhered the antennae to the butterfly using liquid glue. I set these aside to work on my background.

    Next I ran a piece of white card stock through my die cutting machine with the Memory Box Geometric Crystals embossing folder. I then tore a section of the panel off for a distressed look. I trimmed the panel down and then chose a piece of coordinating pattern paper. I then adhered these to an A2 card base.

    To complete my card I added foam tape to the back of each butterfly then adhered them to my card front. I chose a sentiment from my stash and added a piece of pattern paper to compliment my design.

    I had so much fun creating today’s card! I will be back soon with more crafty inspiration!


    Supplies


    Supplies