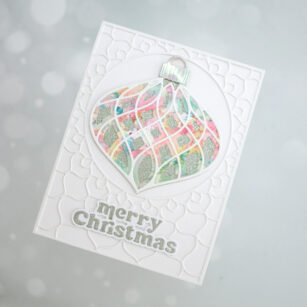
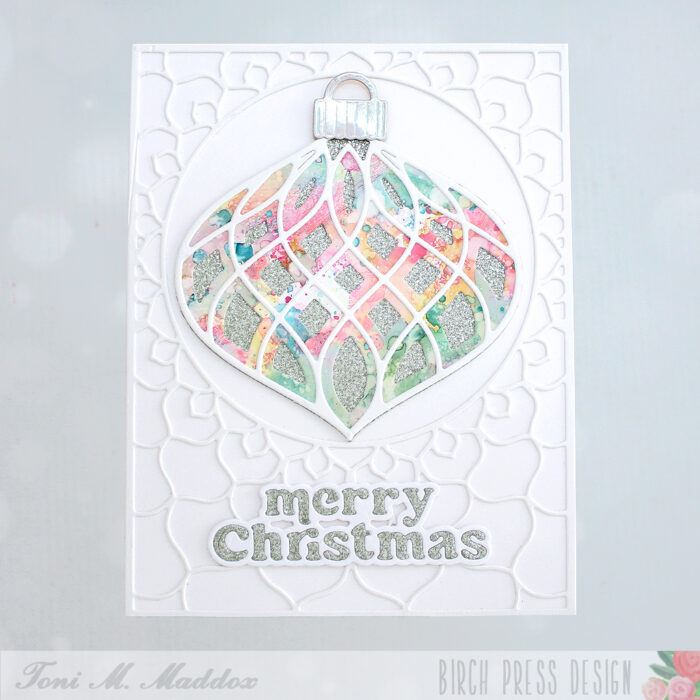
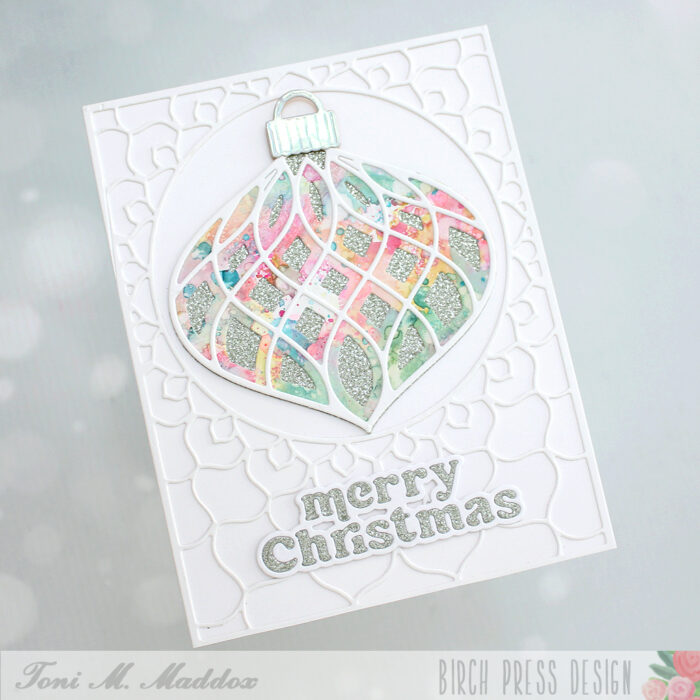
Hello, Birch Press fans! Toni here with you today with a holiday card featuring the Revello Ornament Layering Dies. I’m a huge fan of Birch Press ornament dies and was thrilled to work with this one.
This set is the 3 layering dies only. If you want a solid base for the ornament you can pair it with the Ornament Basics die set like I did or fussy cut one for yourself. Ornament hangers are also included or you can find a fancy scored one in the Radiant Ornament set.
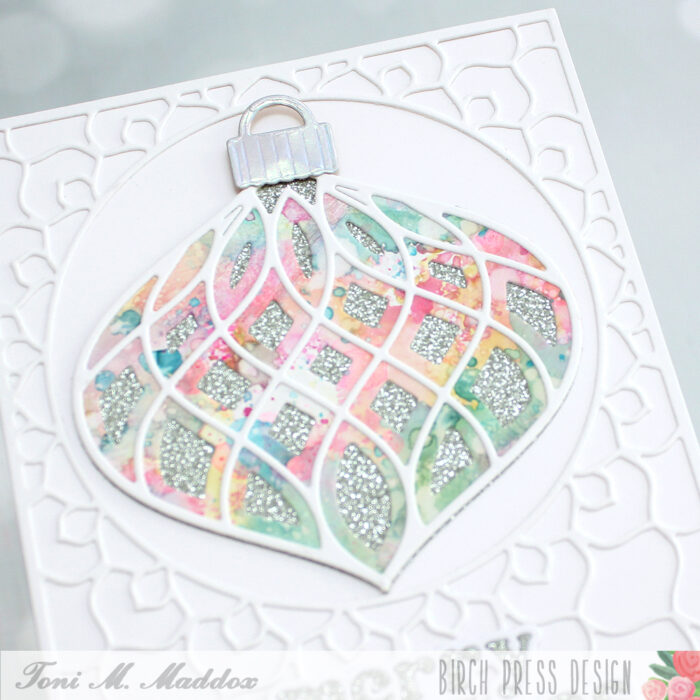
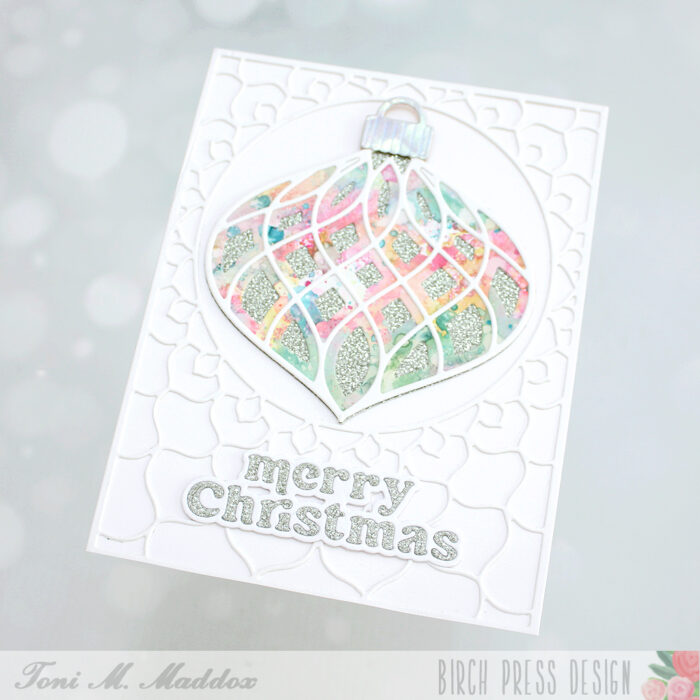
The ink-smooshed panel was made using Distress Oxide Picked Raspberry, Mustard Seed, Cracked Pistaschio, and Peacock Feathers. I used two of the three layers (A and C) so that more of my smooshed panel would show.
I used a glitter cardstock from my stash for the bottom layer of the ornament as well as for the Merry Christmas letters. I then adhered the lot onto Epiphany Layer A mounted on the card base.
I hope you enjoyed today’s card and have a great rest of your week!
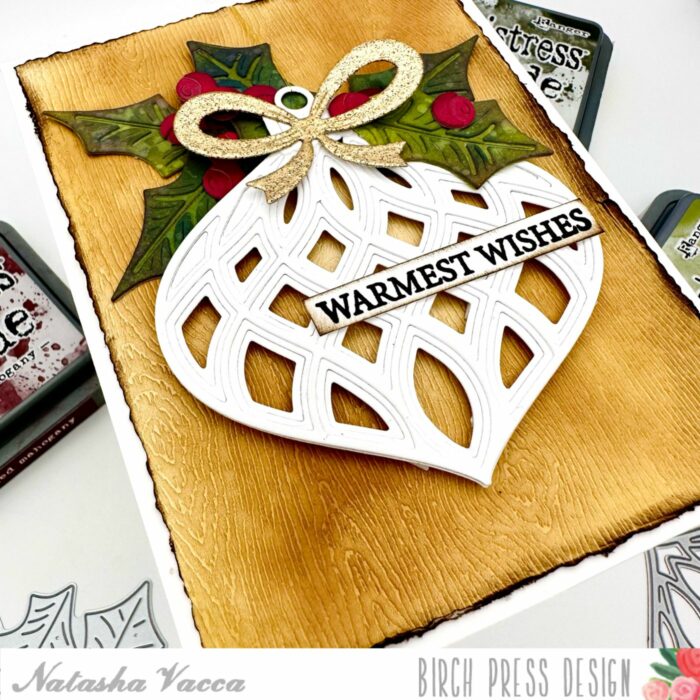
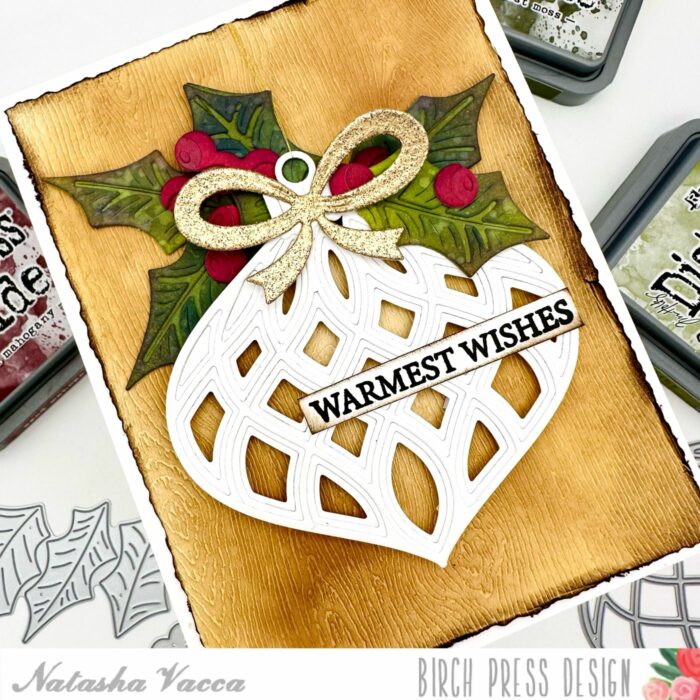
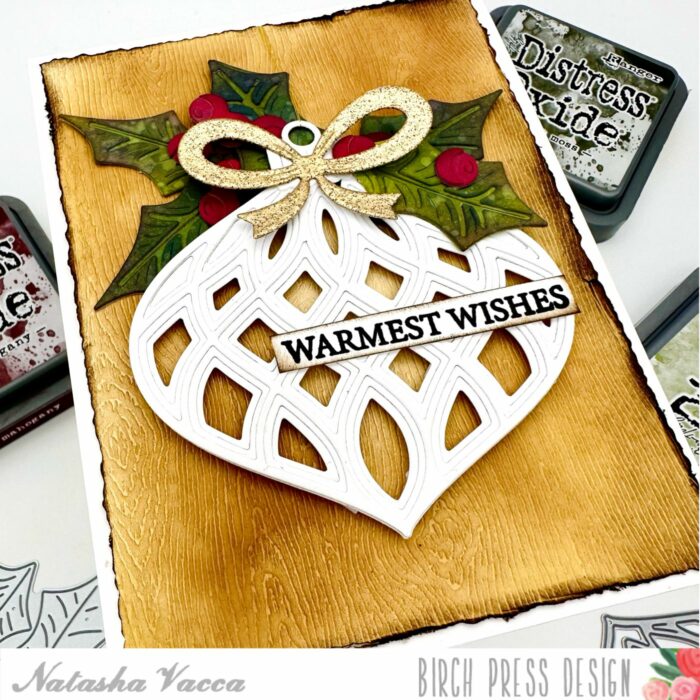
Hello Crafty Friends, I am excited to be back up on the blog today to share a vintage feel holiday card with you! For today’s card I am using 2 of the latest dies: Jolly Holly Contour Layers and Revello Ornament. Let’s get started!
I started by die cutting the Revello Ornament using white card stock. I die cut each layer (A, B, and C), then adhered them together with liquid glue. Next I die cut the Jolly Holly Contour Layers using the Memory Box paper pads: Lush Green and Berry Red.
Once the leaves and the berries were die cut, I added distress oxide inks to each layer. I used several colors for each, then added water droplets to the leaves and picked up some color using a paper towel. Once all the layers were dry, I adhered them together with liquid glue and set them aside to dry. I also die cut the bow and ornament topper from the Christmas Ornament Pop Up Easel die set. I heat embossed the bow using a weathered gold embossing powder.
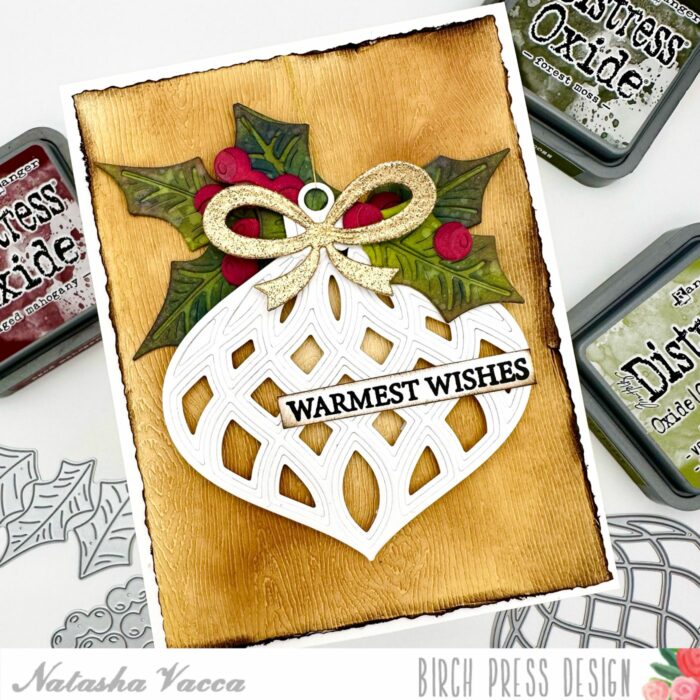
Next I started to work on my background using a piece of Wood Grain Paper in the color Cream. I used distress oxides to create a vintage inspired background. Once I was done inking the background I used my deckle trimmer to cut down the panel. I then distressed the edges using my distress tool and distress ink.
I completed the card by adhering the wood grain panel onto an A2 card base. I then adhered the leaves, berries, ornament, bow and topper using a combination of liquid glue and foam tape. I also added a piece of gold twine for the ornament. I completed the card using a sentiment from the Glad Tidings stamp set.
I had a lot of fun creating today’s card and I hope you enjoyed it! I’ll be back soon!
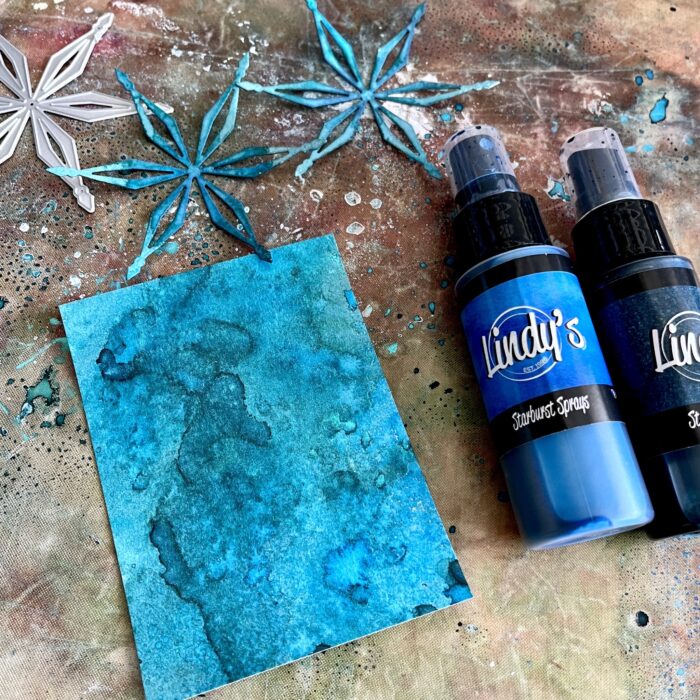
Hello, my dear friends! Welcome back to another card post from me, Sandhya. For today’s card, I used the Aurora Snowflake Layering die set and the Merry Christmas Sugar Script die. I used some shimmery sprays to add to the magical appeal of my holiday card.
I started by die-cutting all three layers of the Aurora Snowflake dies out of watercolor paper. Next, I picked out Bachelor Button Blue and Galactic Teal Starburst sprays from. Lindy’s Gang. I placed the Snowflake Layer B and a larger piece of watercolor cardstock on my craft mat and sprayed away. The trick to getting interesting layers is to alternate colors and dry the layers between spraying.
I then trimmed the watercolor piece into a card panel measuring 3.75″x5″. Next, I die-cut the Merry Christmas work out of the remaining inked panel. For the outline, I used watercolor cardstock.
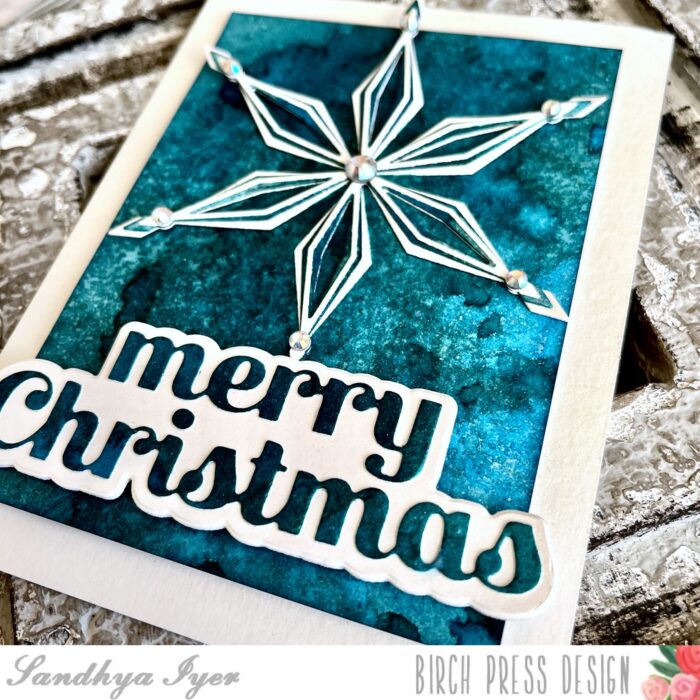
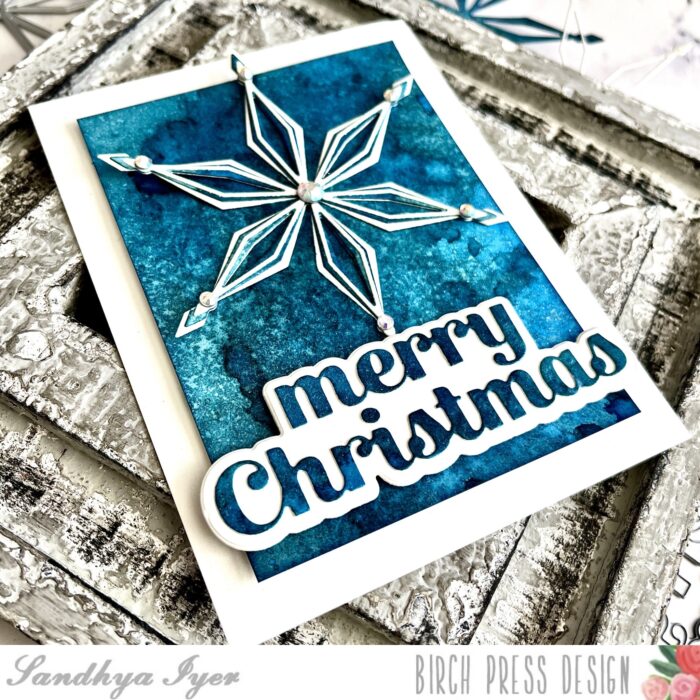
Next, I adhered the 3 snowflake layers together and adhered it to the inked panel. I added the sentiment below that with some foam tape. I also added a few gems to the snowflake for more bling.
Finally, I attached the completed panel to an A2 card base. I made the card base also with watercolor cardstock so it matches the white and texture on the sentiment outline. While it is hard to see the shimmer in the pictures, this card is a lot more shiny and attractive in real life.
This brings us to the end of today’s post. Thank you so much for stopping by and I hope to be back soon with more new card ideas.
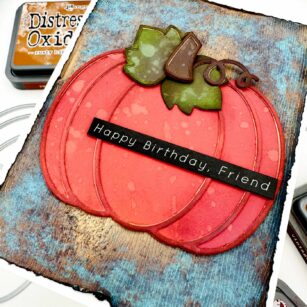
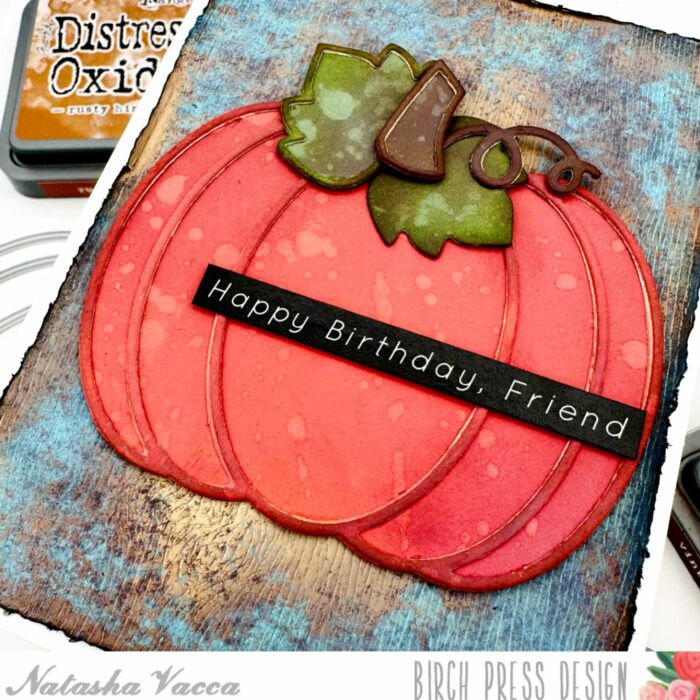
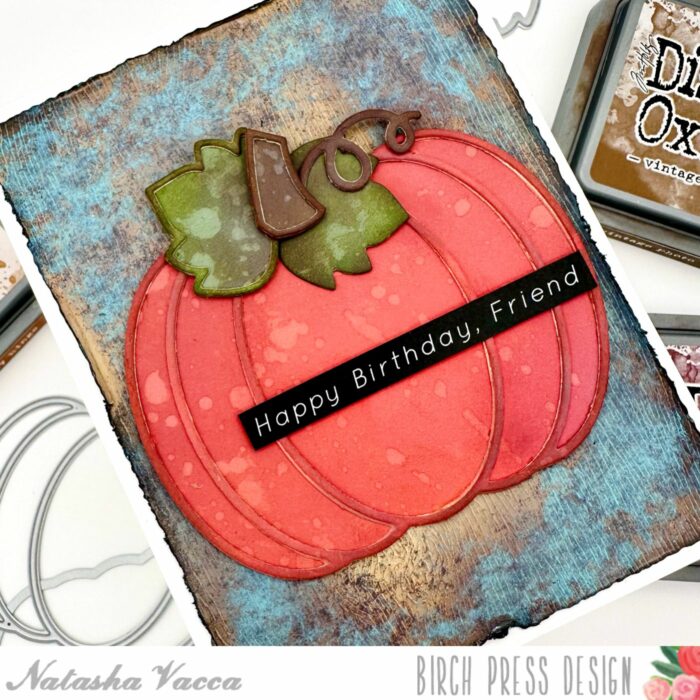
Hello Crafty friends! I am excited to be back up on the blog today sharing the beautiful new Adornment Pumpkin die set! I love the large pumpkin and how this die set creates a beautiful focal image! So let’s get started!
I started by die cutting the Adornment Pumpkin using paper pads from Memory Box. I die cut the pumpkin using the Sunny Orange pad, the leaves using Lush Green, and the stem from the Earth Neutral paper pad. I die cut each of the pieces using a colored cardstock and then a white piece of card stock as well.
Once all the layers were die cut, I adhered the colored layer on top of the white card stock using liquid glue. Next I added a bit of color to each of the layers using Distress Oxide inks. I applied the ink on top of the colored card stock and then added water droplets for added texture.
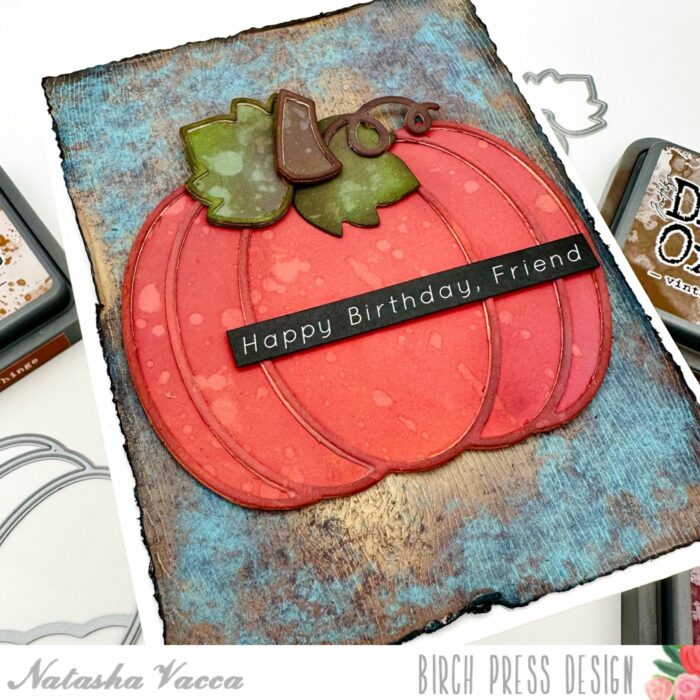
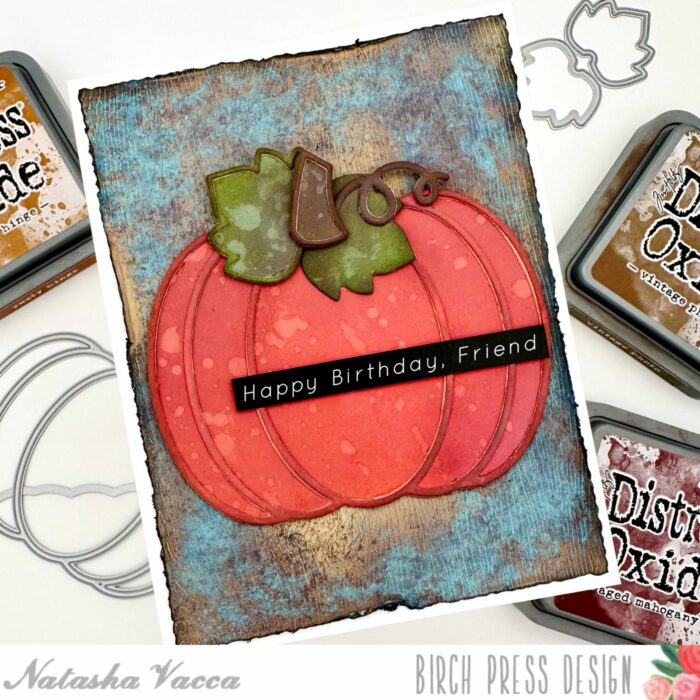
Next I darkened the edges of each die cut using a dye ink. I set the pieces aside to work on the background. For the background I trimmed a piece of white woodgrain paper down to an A2 card size panel. I then used distress oxide inks to create a wood background. I added a bit of distress paint using a sponge for added texture and color.
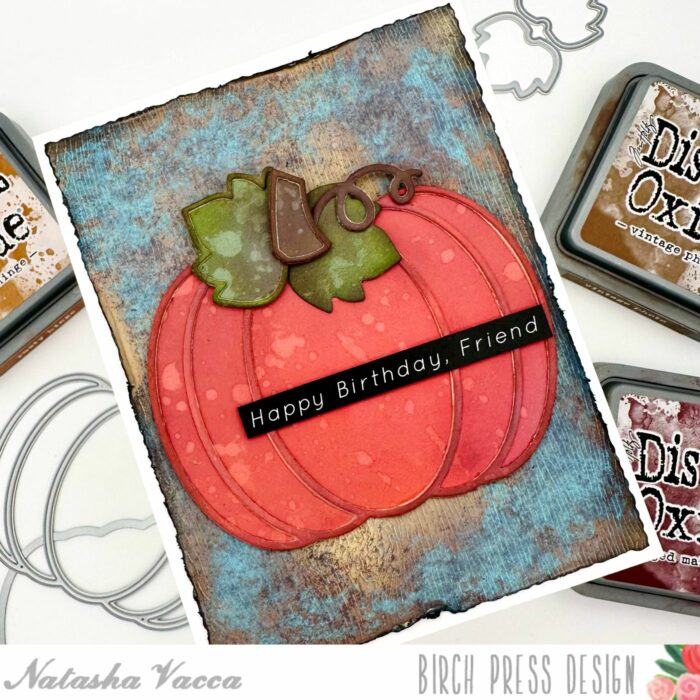
Once the panel was completely dry, I trimmed the panel using my deckle trimmer. I then distressed the edges using my distress tool and distress ink. I then adhered the background panel onto a top folding A2 card base. I adhered the pumpkin, leaves, and stem to the card front using liquid glue. I completed the card with a sentiment strip from my stash.
I had a lot of fun creating today’s card! I hope you enjoyed this and I will be back soon!
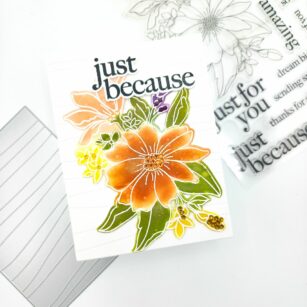
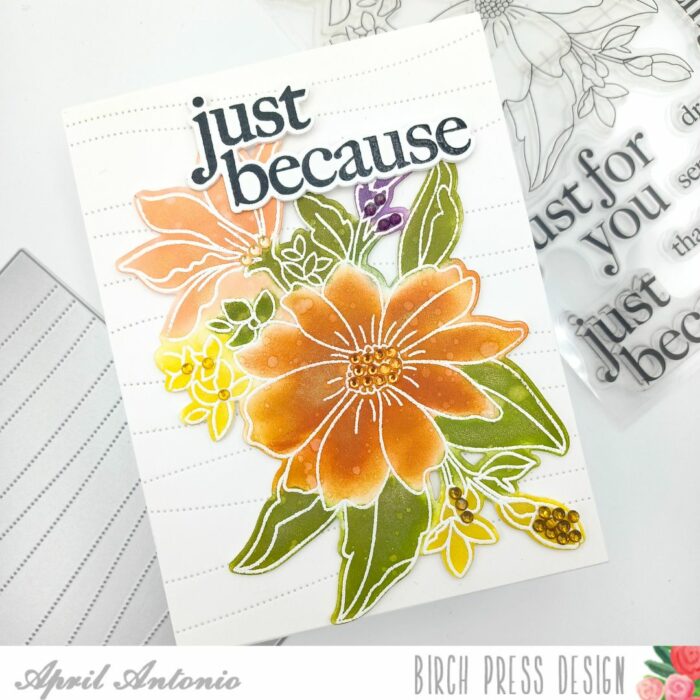
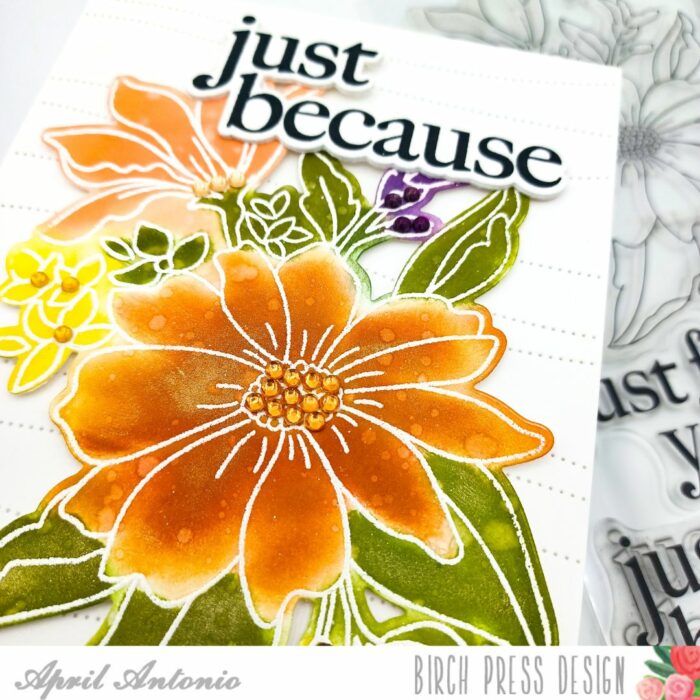
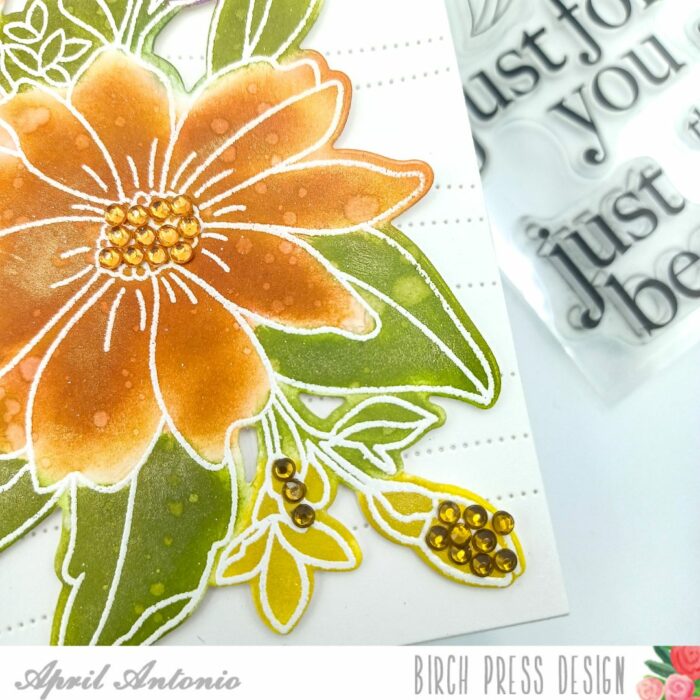
Welcome back to the blog! Today I’m bringing you a cozy Autumn themed card using some beautiful floral images, and emboss resist inking.
To start todays card I used the large floral image stamp from the Gracious Floral stamp and die set and heat embossed it with white powder onto a piece of white cardstock.
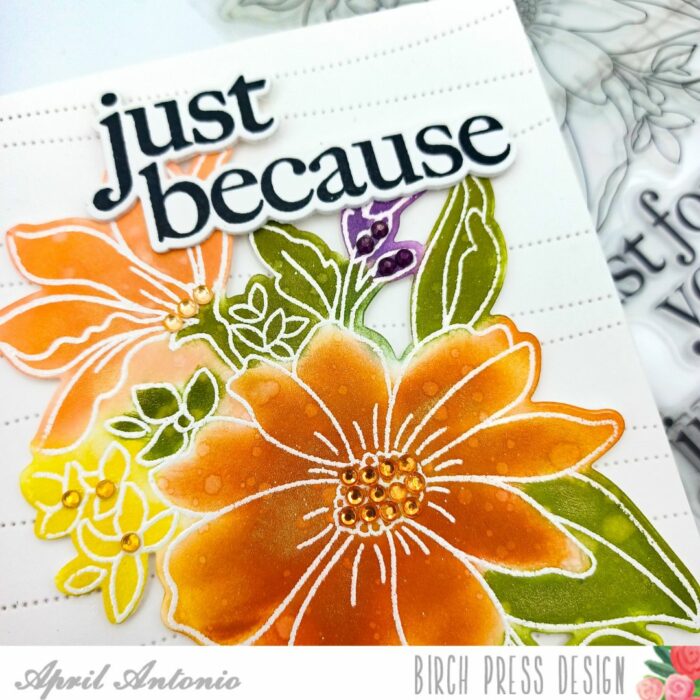
I then used my mini blending brushes and a few different ink colors to blend all the flowers and leaves, making sure to use darker colors towards the bottom of center of flowers and lighter colors towards the top.
TIP: color blending like this can be very forgiving. I was not worried about the colors overlapping each other, because once it’s all blended out it looks cohesive.
Once I was satisfied with the color blending, I took a clean paper towel and wiped it across my image to remove any residual ink from the white embossed part. Then I used the coordinating die to cut the image out.
To add some extra interest and shine to my flower I sprinkled a few drops of water so the ink would lift in those places, and also rubbed some shine powder across the image so it would sparkle a bit.
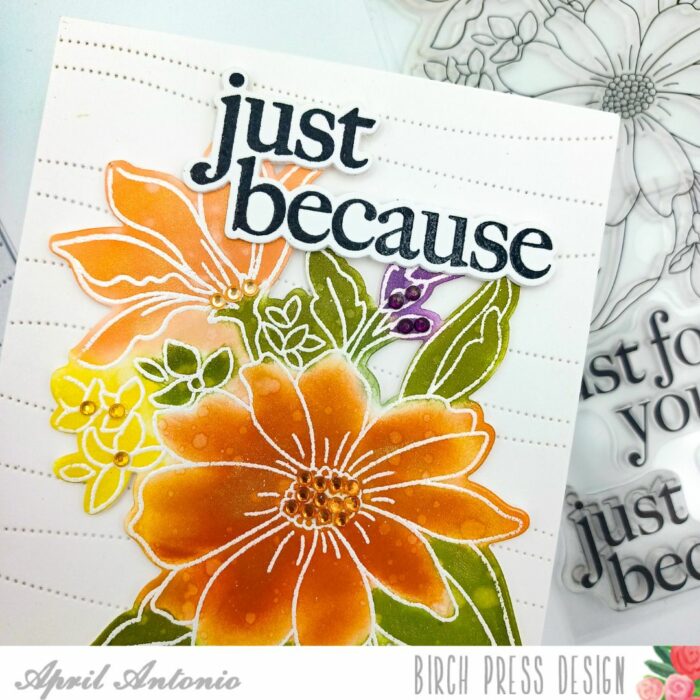
Separately, I took the Pinpoint Contour Plate die and cut it from a piece of white cardstock, and glued it to an A2 card base. I then arranged the floral image into the center of the card and adhered it using foam dots.
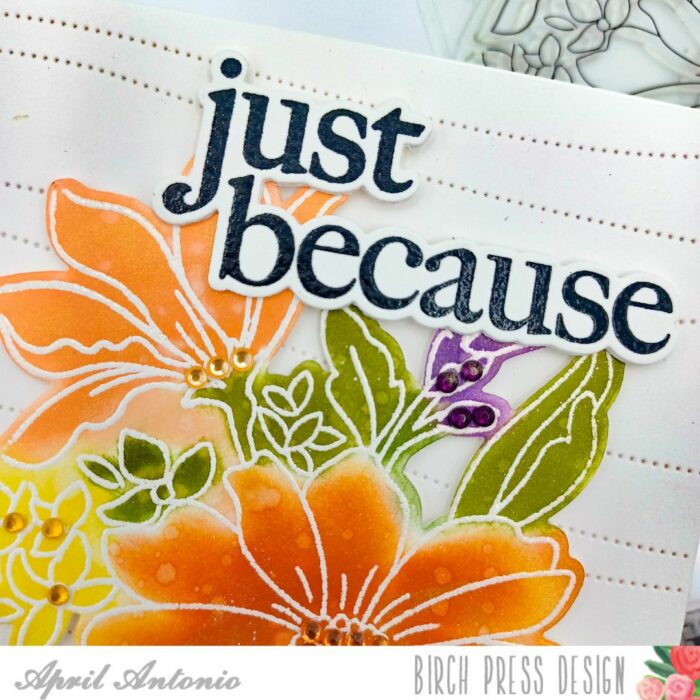
Next I took the ‘Just Because’ that is in the same Gracious Floral set and stamped it in black ink and heat embossed it with clear powder. I used the matching die to cut it out, and cut it out two more times from white cardstock. I glued all the layers together to add some dimension to the sentiment, and then added it to my card front.
Lastly, I had to add some bling of course! I used jewels from the Autumn Fairy Jewels set to bling out the flowers. Some I filled in the center with jewels, and others I just did a few or filled in petals.
That is it! I hope you enjoyed reading through my process to create this colorful, fall themed card and see you next time!
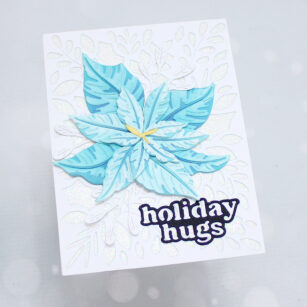
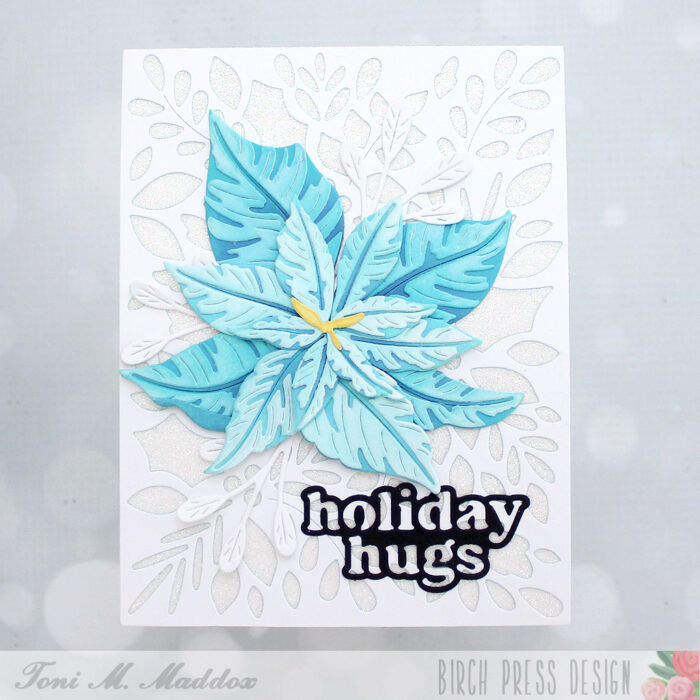
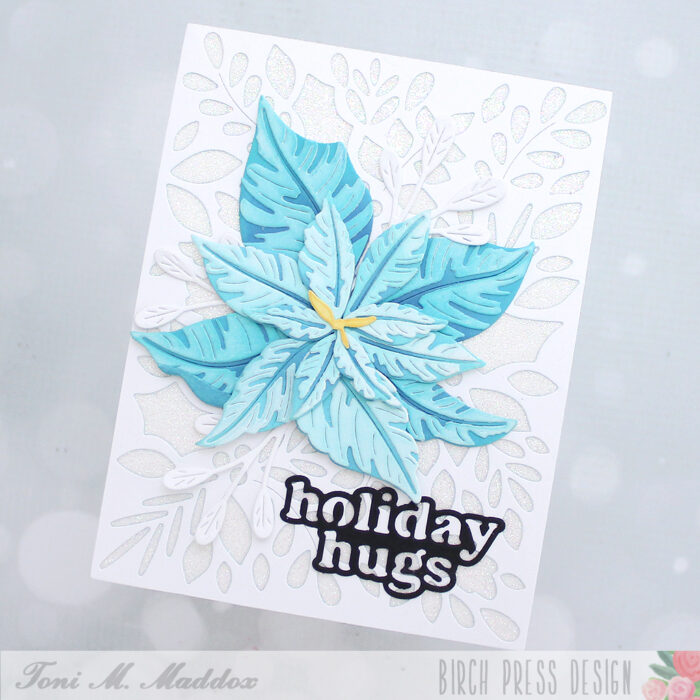
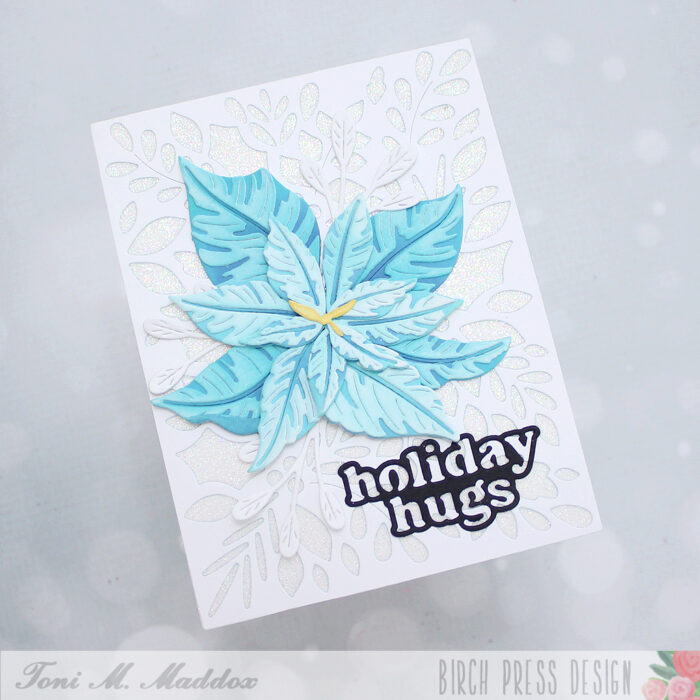
Hello, Birch Press fans! Toni here with you today with a glorious holiday card. Isn’t the Splendid Poinsettia die set absolutely stunning?!
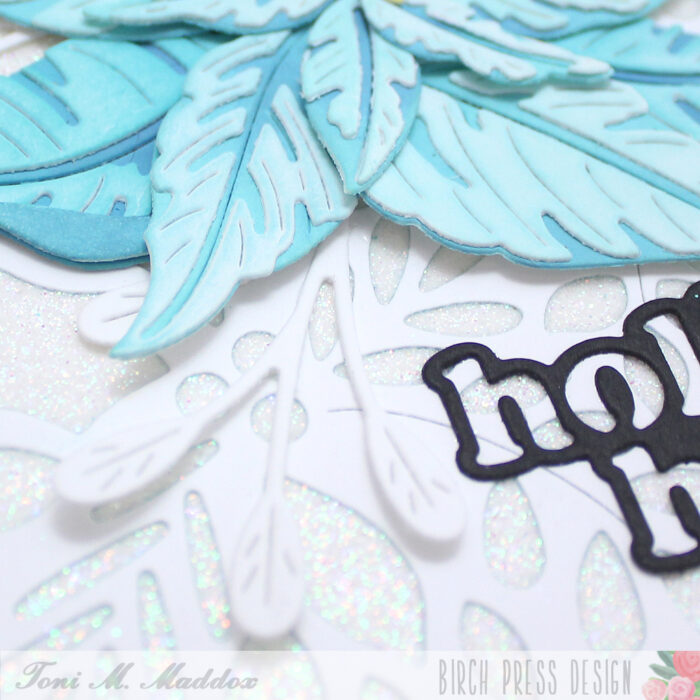
It was so easy to create this detailed bloom using Distress Oxide Salvaged Patina, Peacock Feathers and Uncharted Mariner with just a touch of Mustard Seed on the stamen. Gor-ge-ous!
For the card base I added a layer of double-sided tape then carefully positioned the Herbarium Plate Layer A on top. I then burnished Doodlebug Design Lily White Glitter into the openings with my finger. It’s messy to apply but the tape secures the glitter really well.
I glued down the poinsettia next (love it so much!), tucking in a few Oval Leaf Branches Contour Layer sprigs among the leaves.
I added the rather retro Holiday Hugs sentiment, opting to use only the outline so some of the glitter would show throught. You can’t have too much glitter!
I hope you enjoyed today’s card and have a great rest of your week!
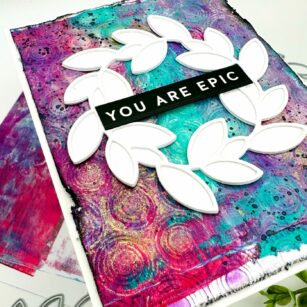
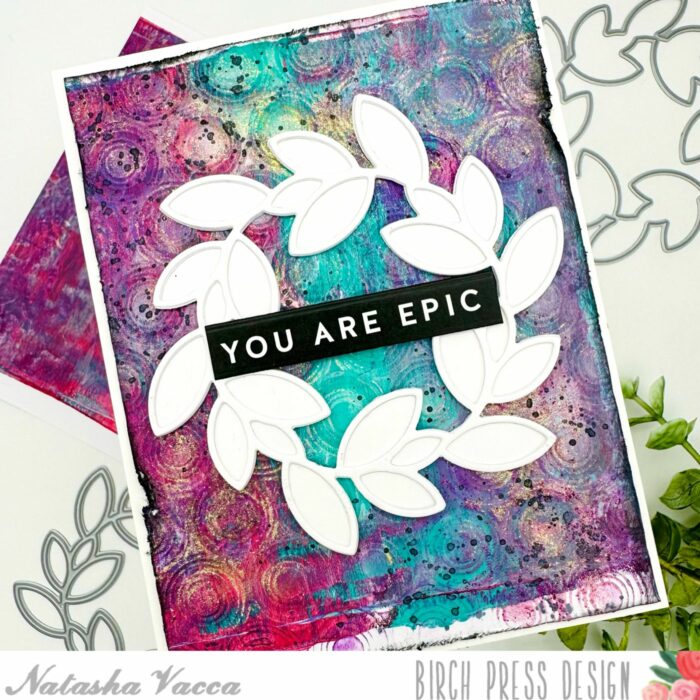
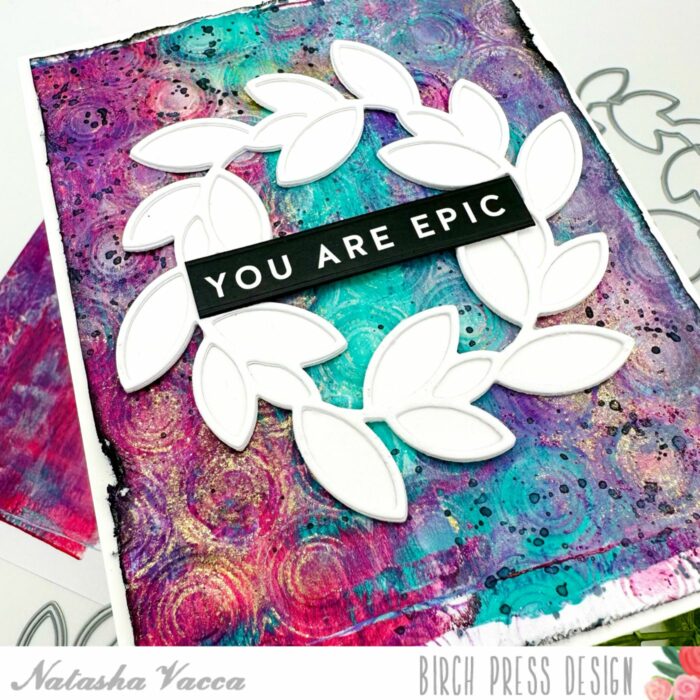
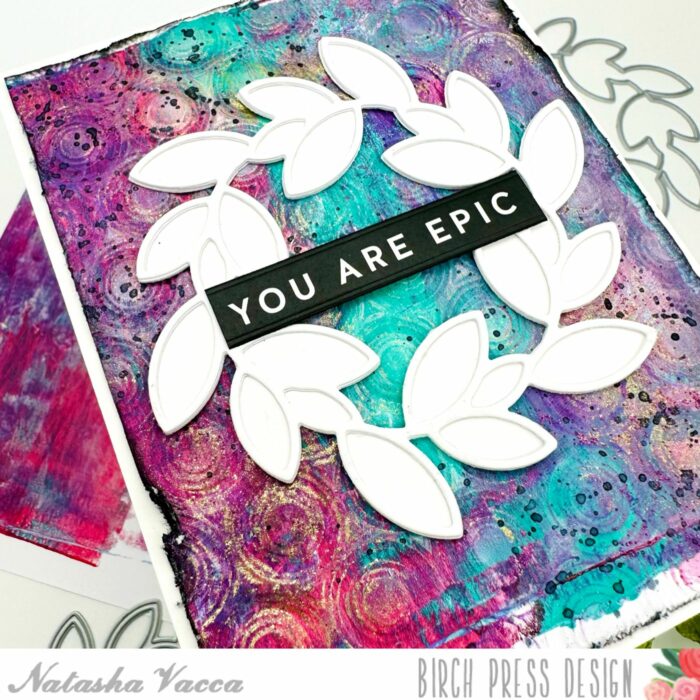
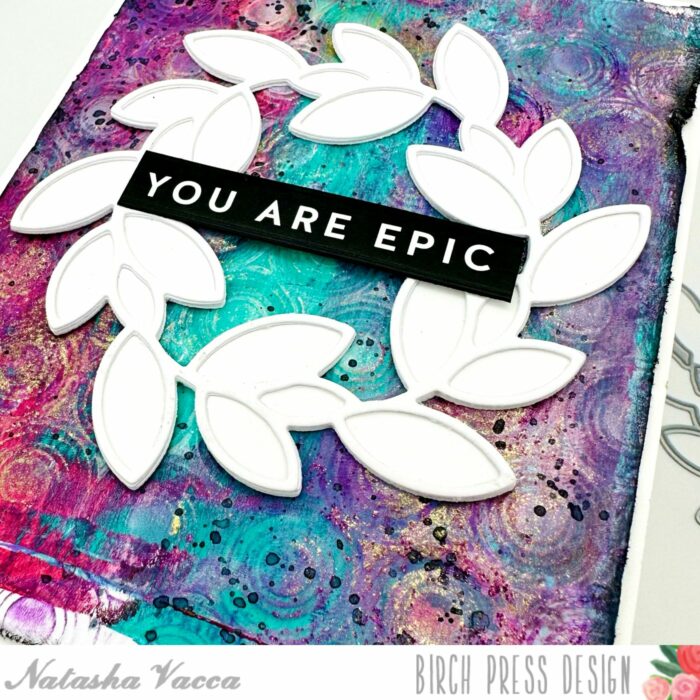
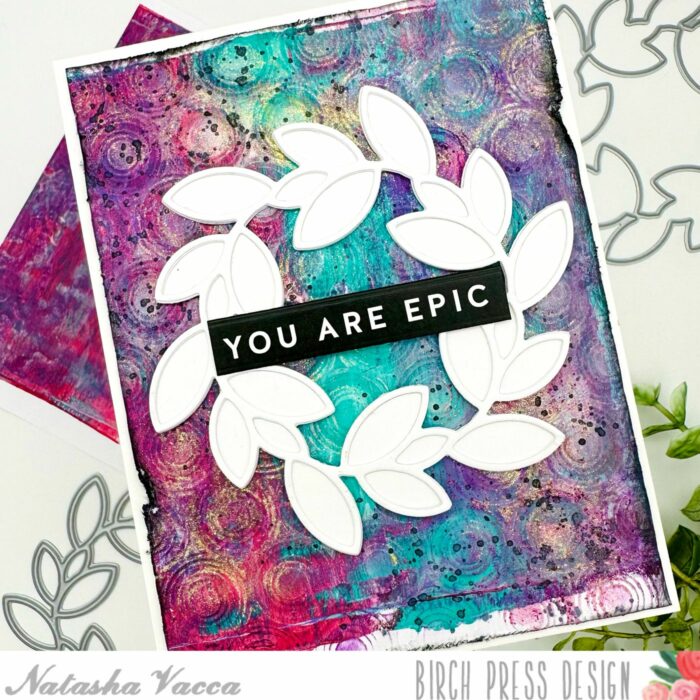
Hello Crafty Friends! It is Natasha here today and I am excited to be back on the blog today! Today I am sharing the beautiful new Adornment Wreath die set! So let’s get started!
I love this gorgeous wreath and wanted to create a card using the wreath as my focal image. I started by die cutting the Adornment Wreath. I die cut the base layer 2 times using white card stock and the top layer 2 times as well. Once these were die cut, I adhered them together using liquid glue. I set the wreath aside to work on my background.
For my background I chose a gelli print from my stash. I chose a background with beautiful pops of color to compliment the white wreath. I then ran the background through my die cutting machine with the Ringadings embossing folder from Memory Box.
Next I added some distressing to my dry embossed background, using both distress crayons, as well as paper glaze. I love the added shine and sparkle from the Gold paper glaze.
I then added some black splatters to the background and set it aside to dry. Once it was dry I trimmed the panel and distressed the edges using my distressing tool. I then added some Black Soot distress ink to the edges of the panel. I adhered the panel to my A2 card base.
I completed my card by adhering the wreath to my card front using liquid glue. I chose a sentiment strip from my stash and adhered this with foam tape.
Thanks so much for stopping by today! I will be back soon!
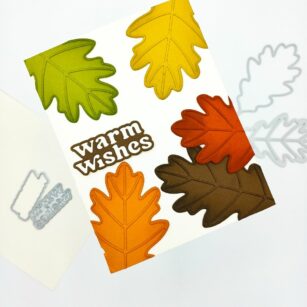
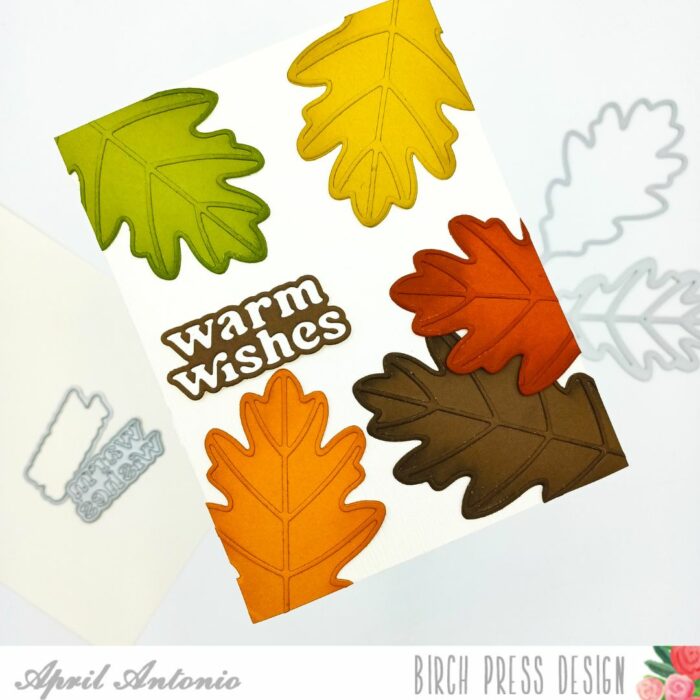
Fall is a beautiful time of year, and what better way to celebrate than with a handmade card? I’m excited to be back on the blog today to show you how to create a simple yet stunning fall card using some of the Fall themed supplies from the Birch Press Design store.
I chose a piece of woodgrain paper and cut it to size for my card front. I used the cream woodgrain to match the Fall theme, and cut the size to A2.
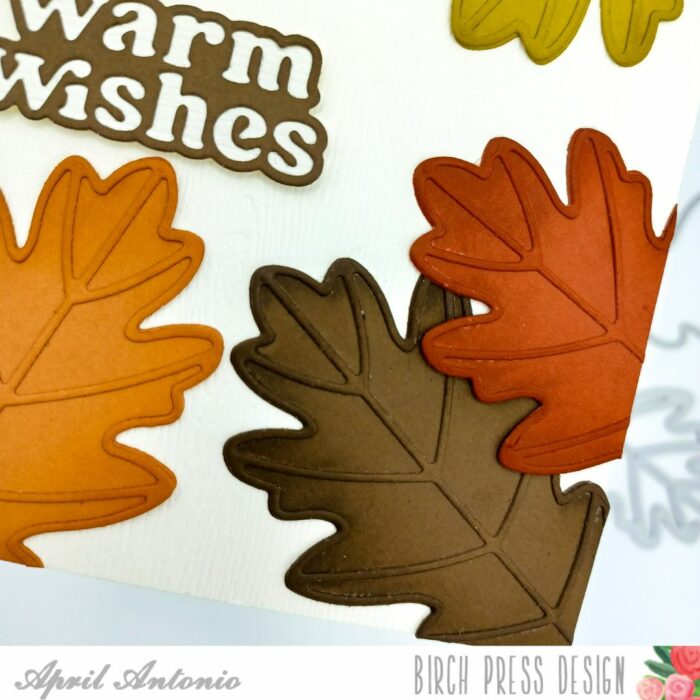
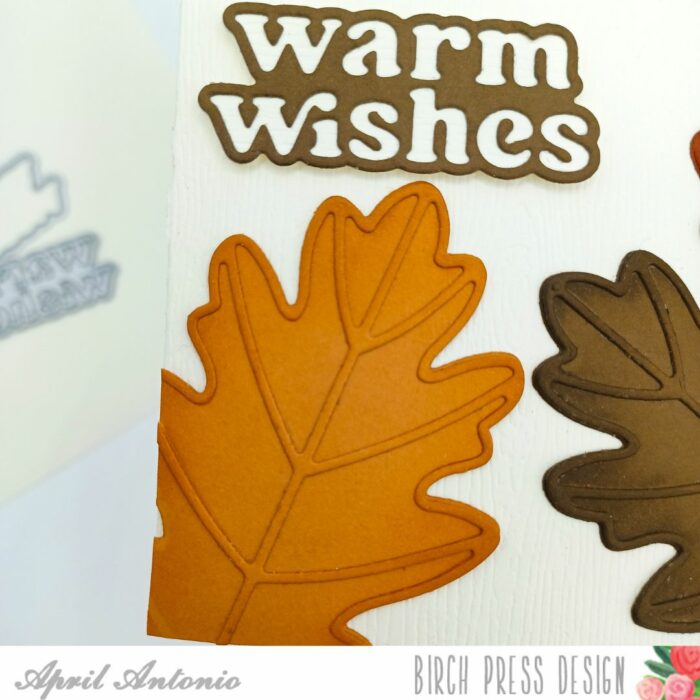
I die cut the leaves and veins using the Adornment Oak Leaf die in five different warm, Fall colors. I used the same color to cut the leaf and the vein, layering them on top of one another for added dimension.
TIP: the veins are delicate to handle. I put them upside down on a nonstick mat, and ran my tape runner over the back to get adhesive on them. It’s less messy than liquid glue and the nonstick mat insures the tape runner adhesive doesn’t get tape everywhere.
Next I die cut the warm wishes vintage sentiment from brown cardstock, and the background from the same cream woodgrain paper. I layered those on top of each other and added foam squares to the back for dimension.
To pull my card together I added my sentiment to the lower left of the card, and layered the leaves all around it, letting them hang off the edge. Once I was happy with their placement I glued them down with liquid glue, and used heavy duty scissors to trim off the excess.
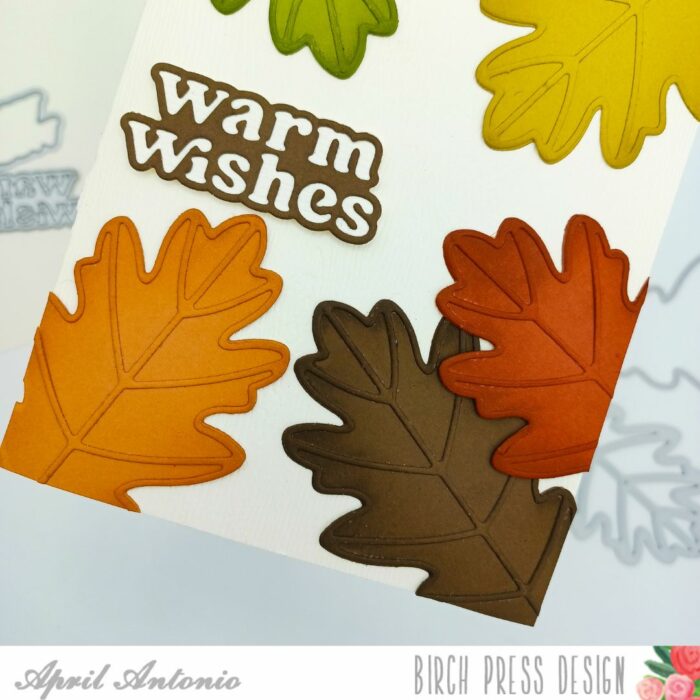
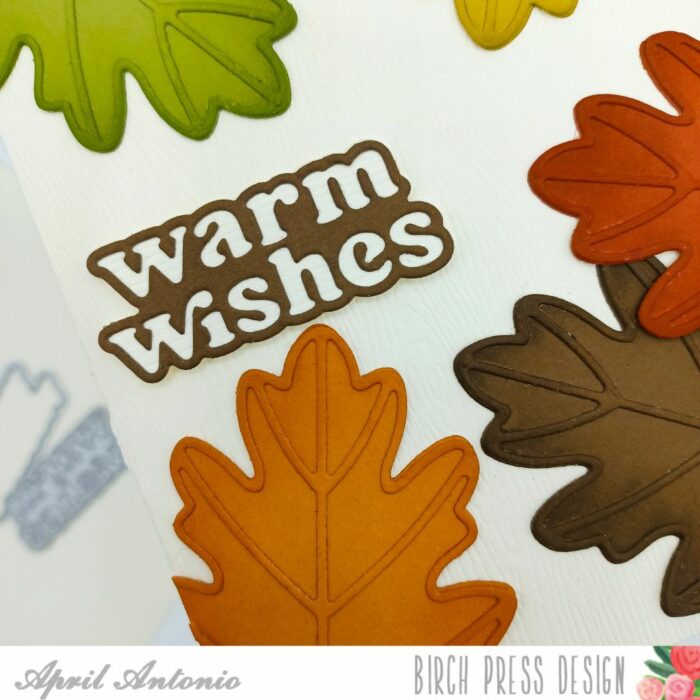
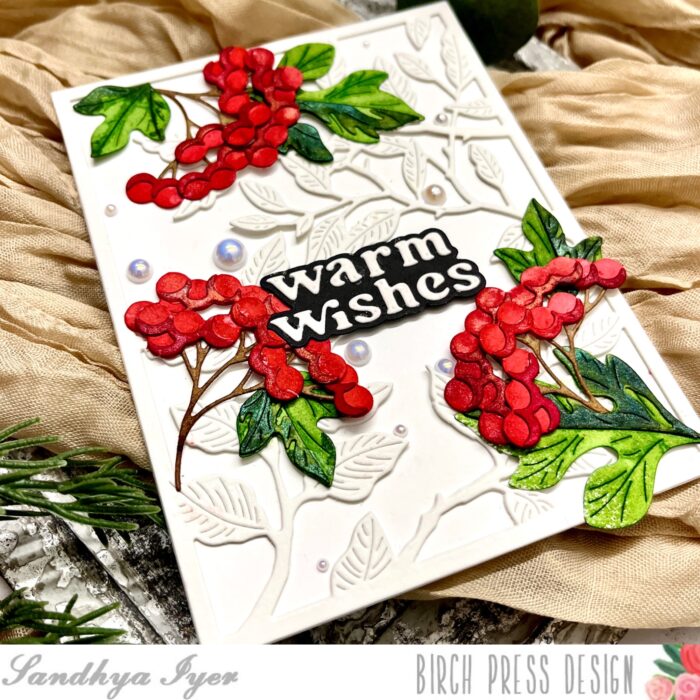
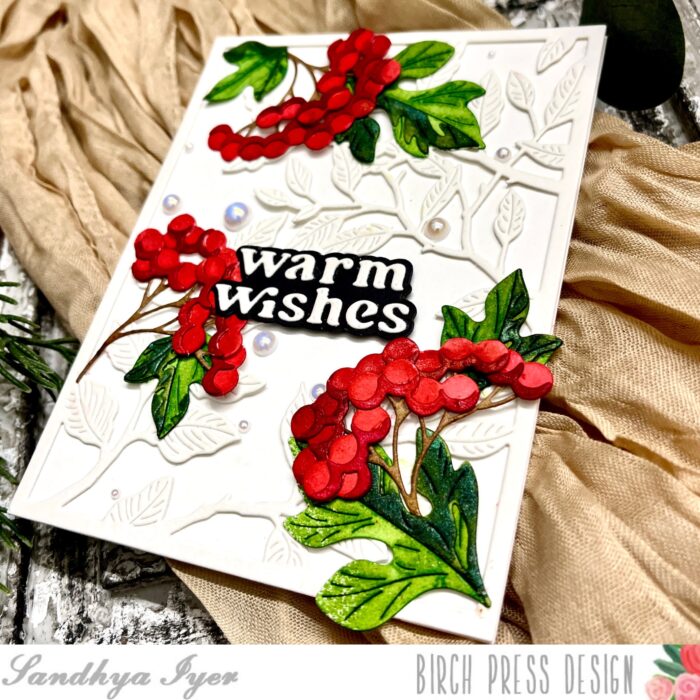
Hello Birch Press friends! This is Sandhya here with a fresh card to send warm wishes. It is kind of festive, more winter-like. I used the Forest Leaf and Berries Contour Layers and The Forest Canopy Layer C die sets for this card. For the sentiment, I grabbed the Warm Wishes Vintage Sentiment die.
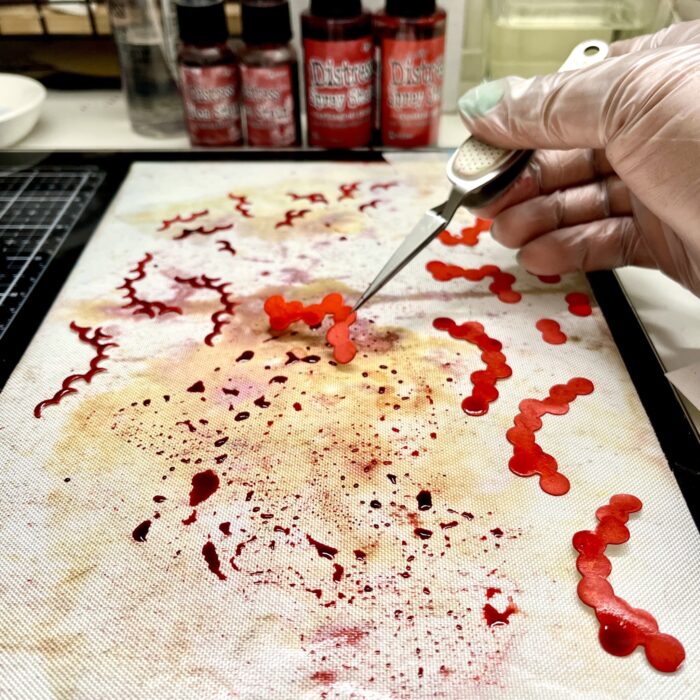
I started by die-cutting all the pieces from the Forest Leaf And Berries Die set out of watercolor paper. Next, I used Distress Spray Stains and Distress Mica stains to color the pieces. For the smaller pieces like the berries, it is easier to use tweezers and dip them into a buddle of color and then lay them out on a craft mat to dry.
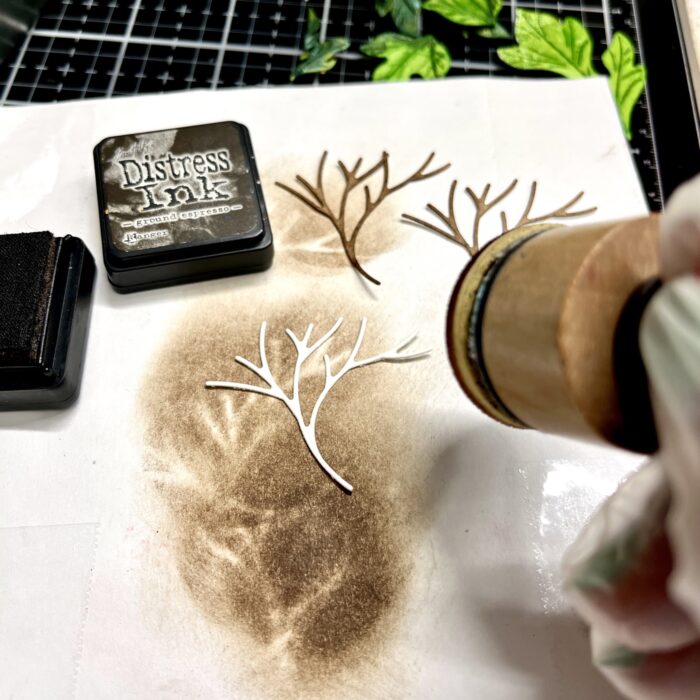
For the delicate branch, I used an ink blending tool and dabbed over it with Ground Expresso Distress Ink. Once all the colored pieces were dry, I assembled the berries and leaves per the instruction leaflet.
Next I die-cut the Forect Canopy Laver C out of Watercolor cardstock 2 times. I adhered the 2 layers together to create more dimension and then adhered it down on a white A2 card base. Then, I die-cut my sentiment and placed it towards the entre of the background.
Finally, I arranged the berry clusters and leaves around the sentiment and adhered them down with liquid adhesive. I also added a few flatback pearl embellishments to tie it all together. While it is hard to see the shimmer in the pictures, this card is a lot more shiny and attractive in real life.
This brings us to the end of today’s post. Thank you so much for stopping by and I hope to be back soon with more new card ideas.
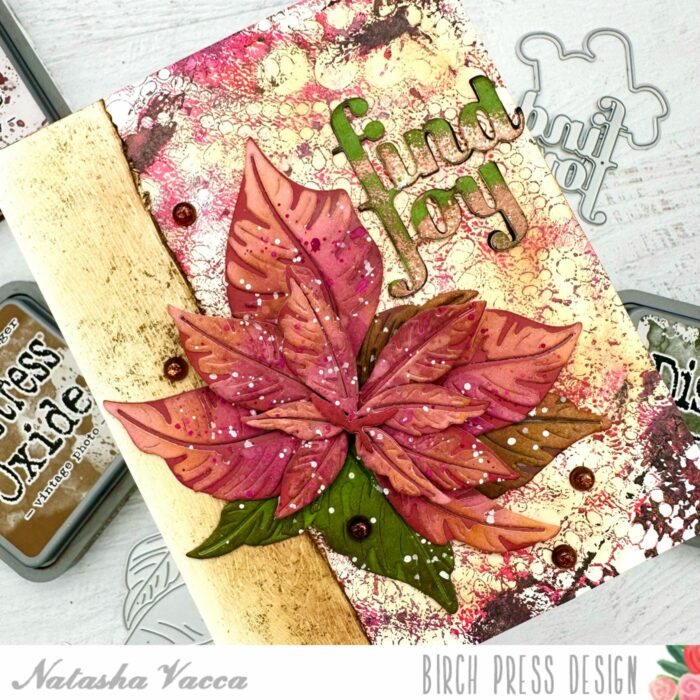
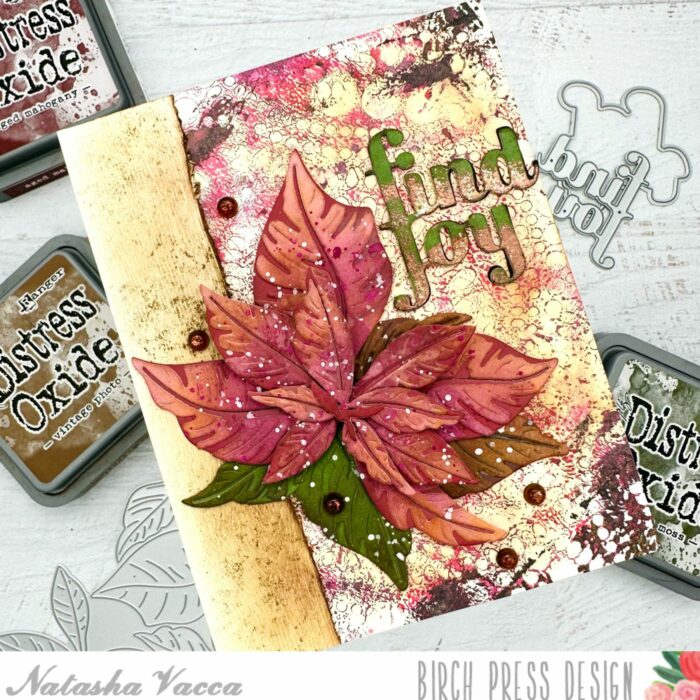
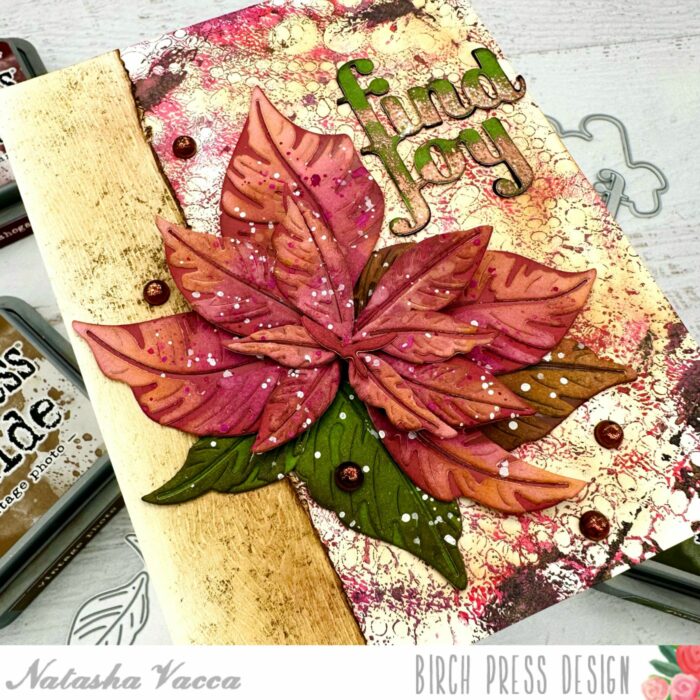
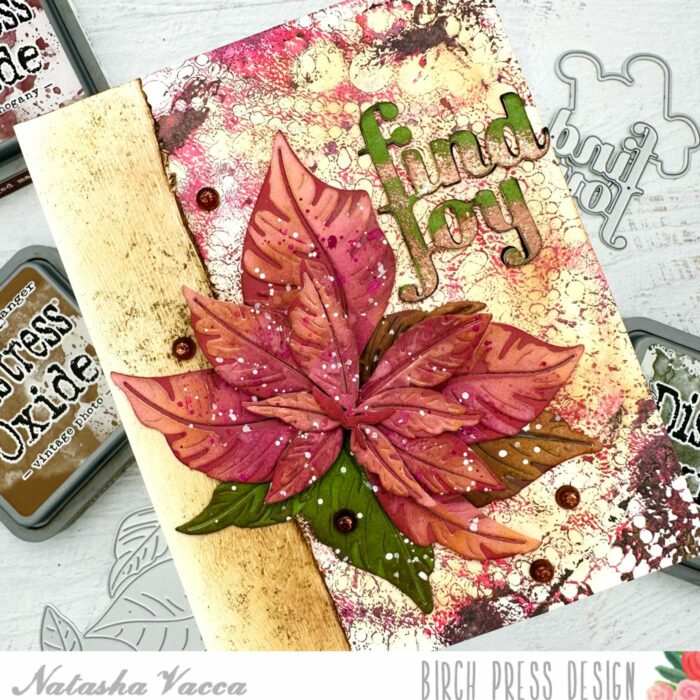
Hello Crafty friends! I am excited to be back on the blog today sharing the beautiful new Splendid Poinsettia Contour Layer dies. I had so much fun creating a rustic inspired holiday card, so let’s get started!
I started with the beautiful Poinsettia die and the Berry Red paper pack from Memory Box. I chose 2 shades of red and pink paper from this pack. I cut the Poinsettia using both colors of paper. I then die cut the leaves for the Poinsettia using the Lush Green paper pad from Memory box. Once all the parts were die cut, I wanted to add more dimension using inks.
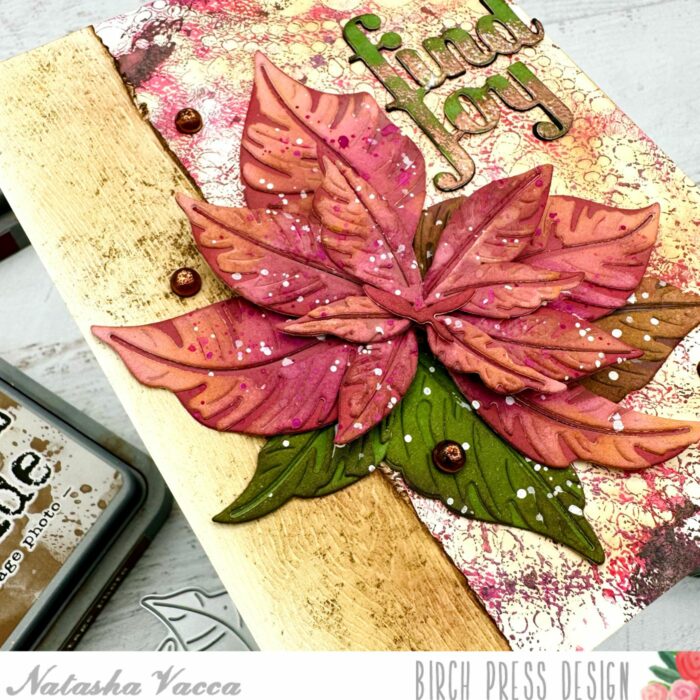
On my die cuts I used a combination of distress oxide inks, as well as dye inks. I ink blended the layers for the flower and leaves until I had the dimension and colors I was looking for. I added water droplets to each layer and picked up some color using a paper towel. I then added white splatter to each layer using a paintbrush and allowed them to dry.
Once all the splatters were dry, I adhered the Poinsettia and leaf layers together using liquid glue and foam tape. Next I chose a background from my stash. I chose a colorful background from my gelli prints to use as a focal point behind my Poinsettia. I then trimmed about a 1 inch rectangle from the Cream Woodgrain Paper Pack. I distressed the edges using my paper trimmer and my distress tool. I then inked up the woodgrain paper using distress oxide inks.
Next I adhered the gelli print panel to an A2 card base. I adhered the 1 inch strip of wood grain on the left side of the card panel. I then adhered the Poinsettia and leaves using liquid glue.
I completed the card using the Find Joy and Outline sentiment. I had previously made the top layer using green paper and added texture using heat embossing. I die cut 2 more layers for added dimension. Once all the layers were adhered, I added this to my card front. I added a few gems from the Fairy Dewdrops in Christmas Fairy.
I had so much fun creating today’s card and I hope you enjoyed it too! I will be back soon with more crafty inspiration!