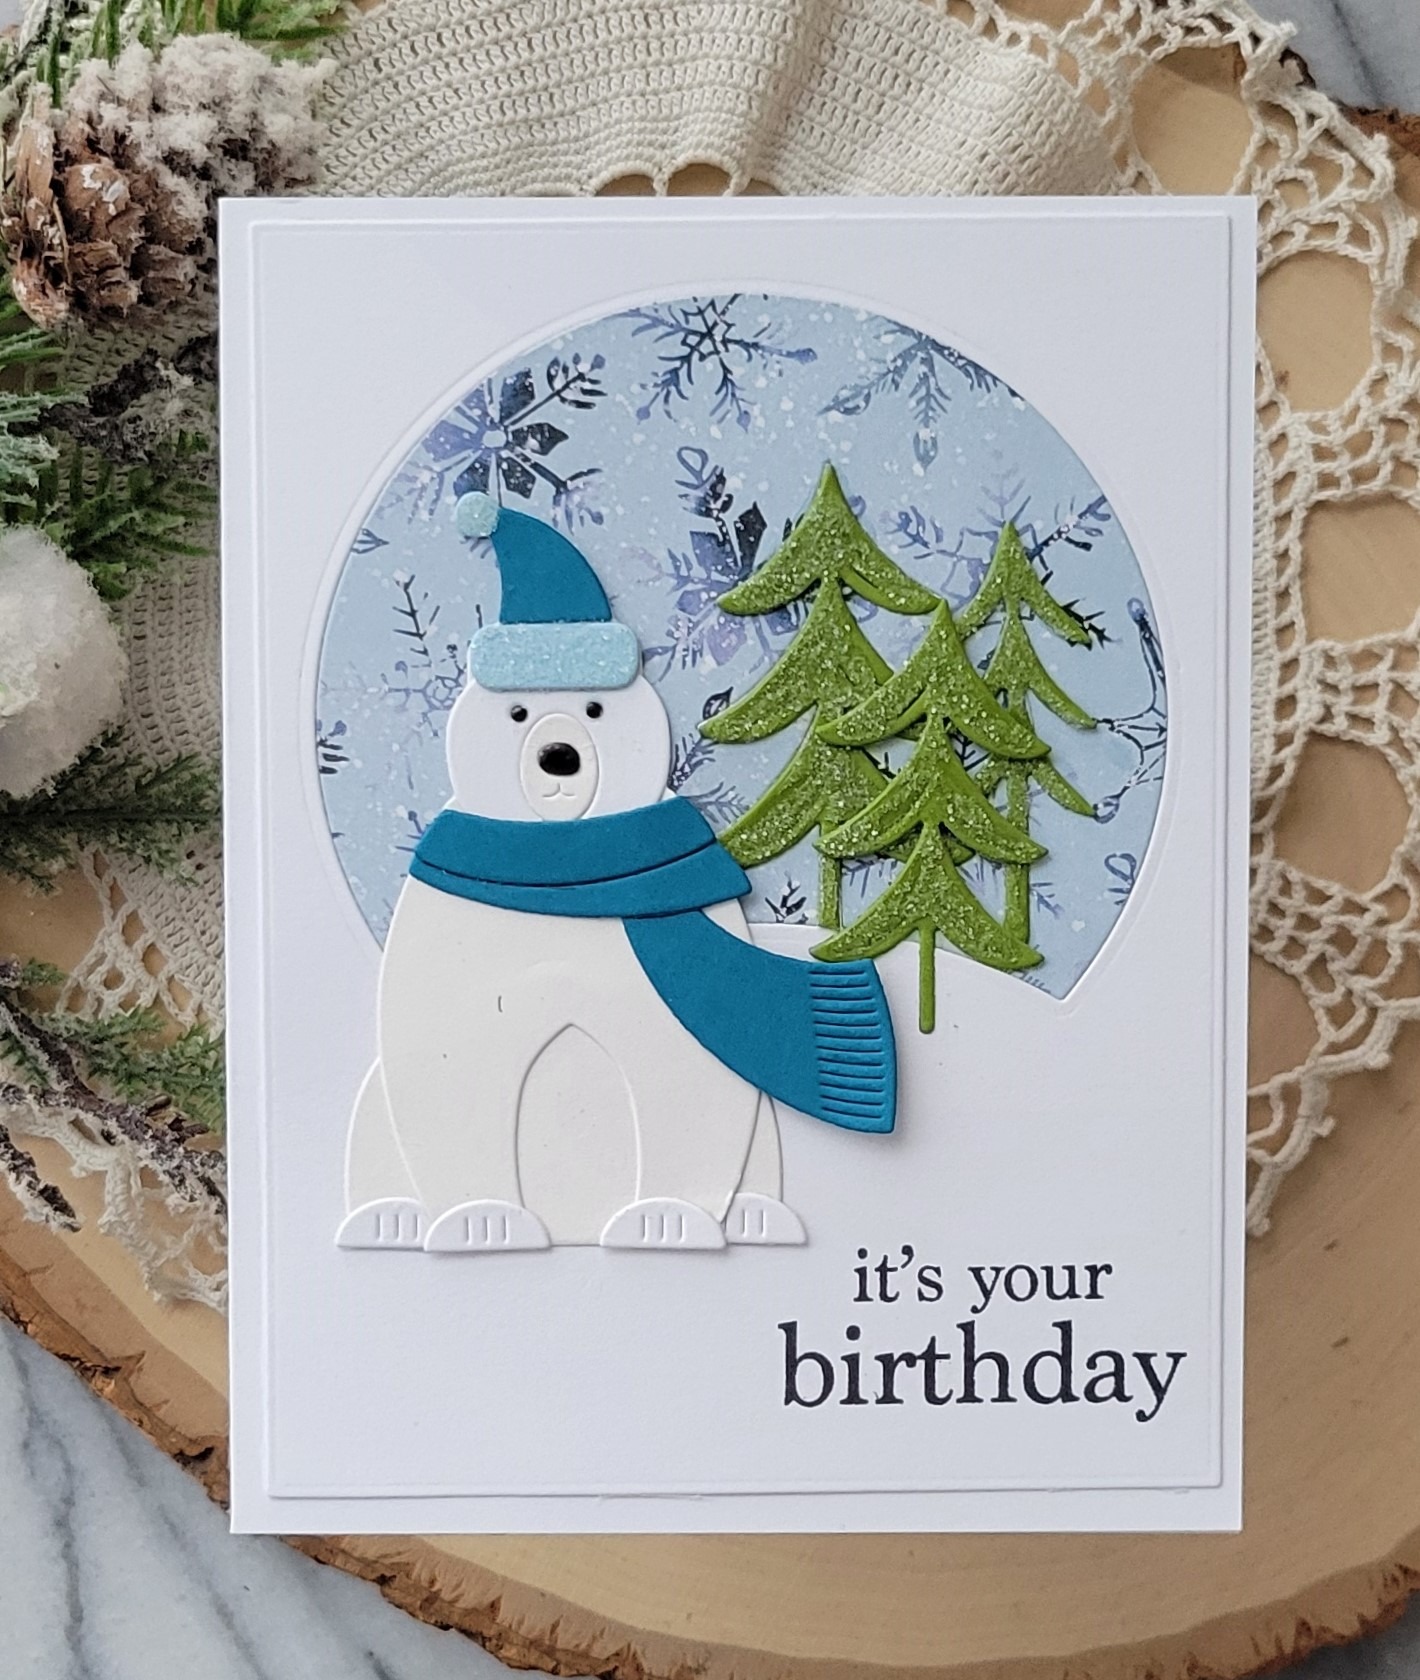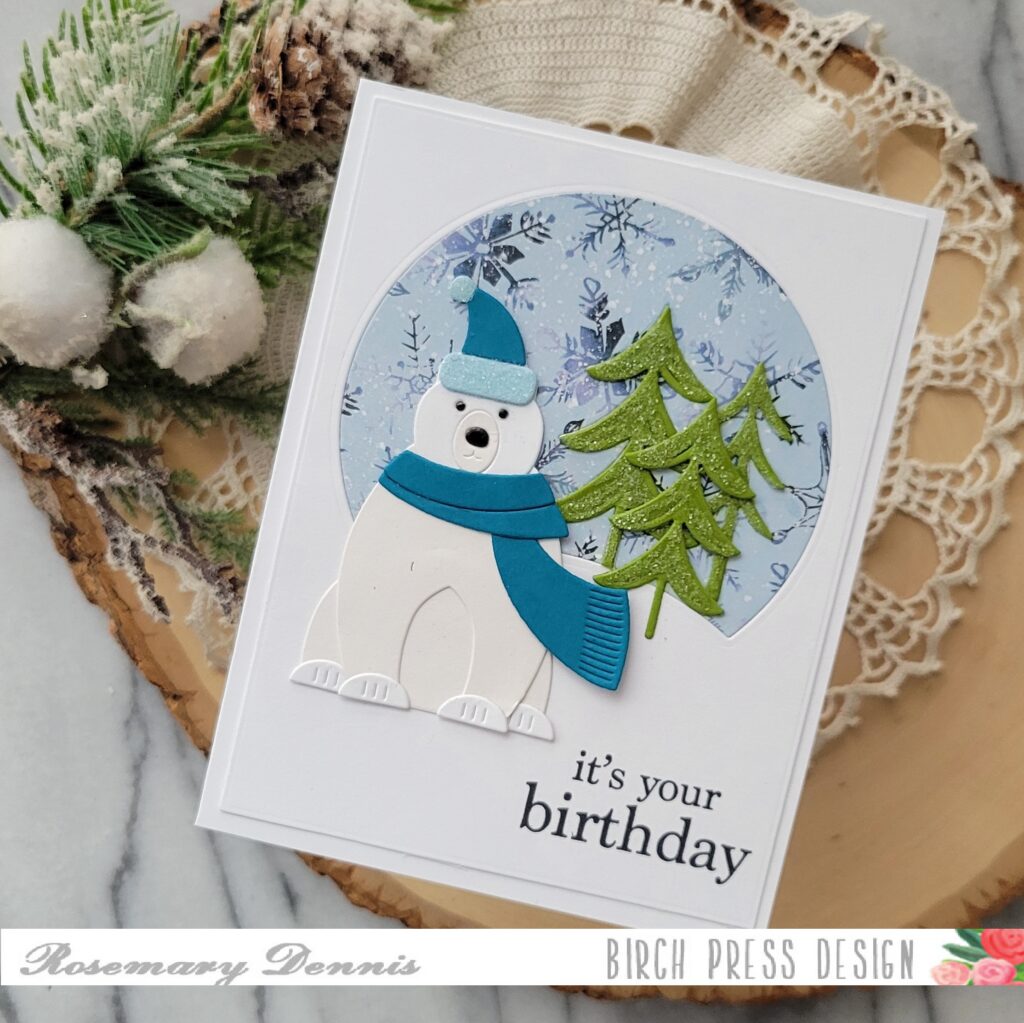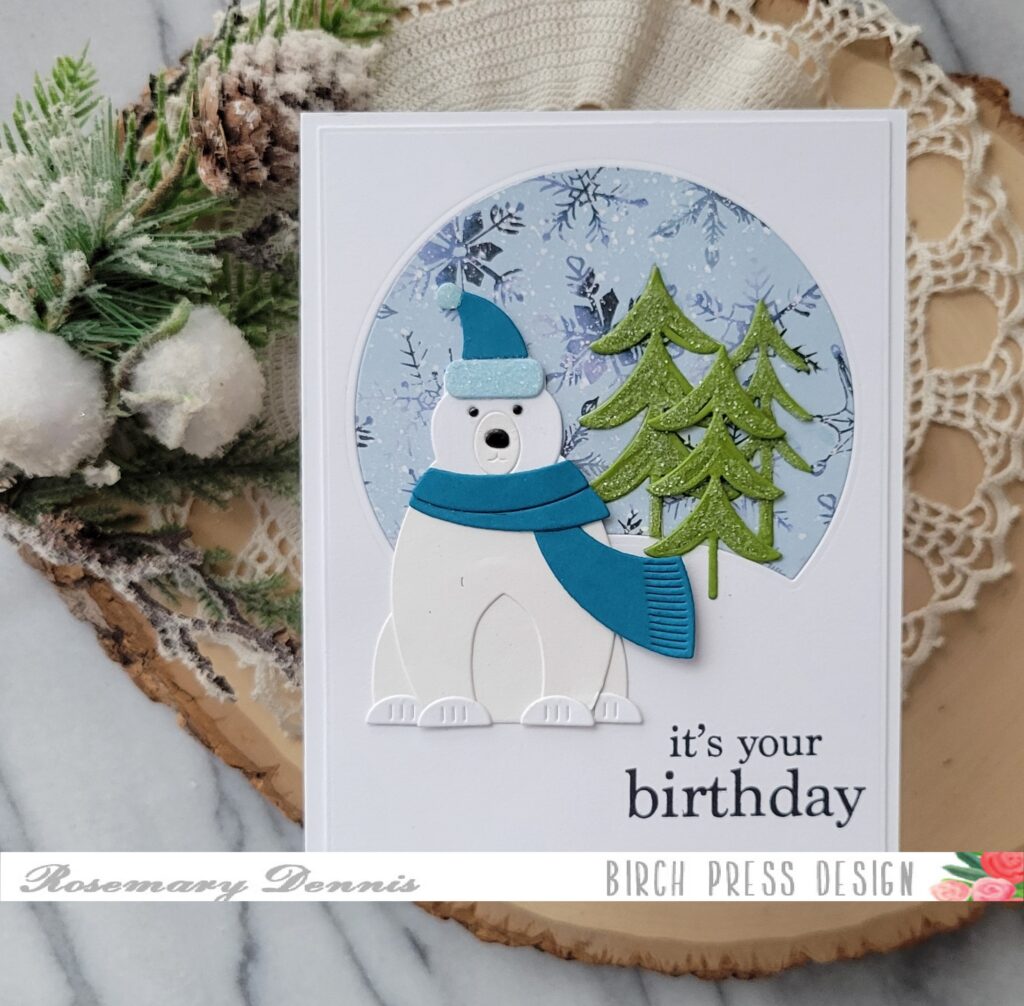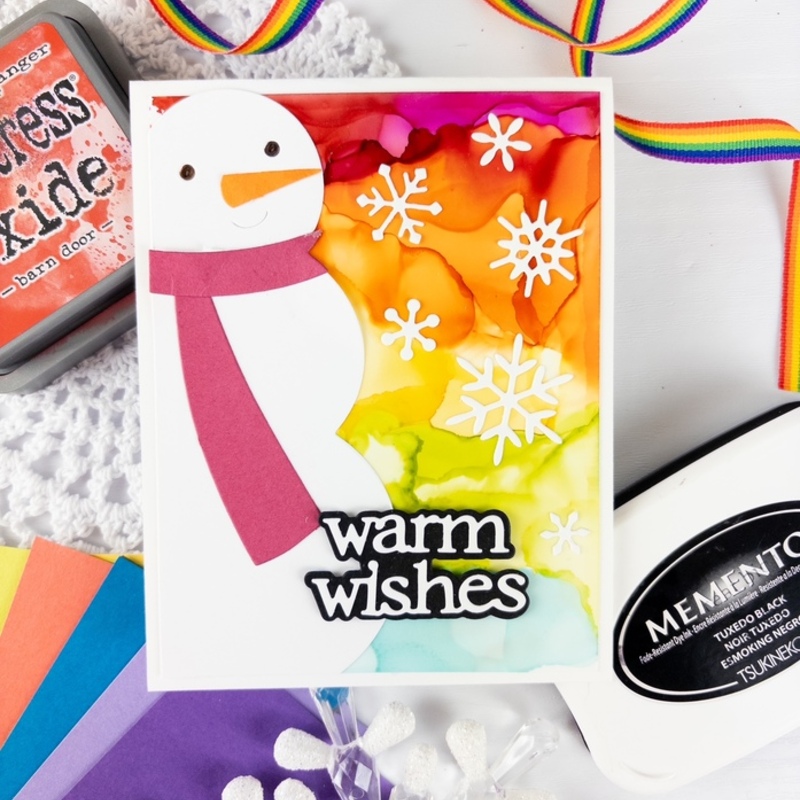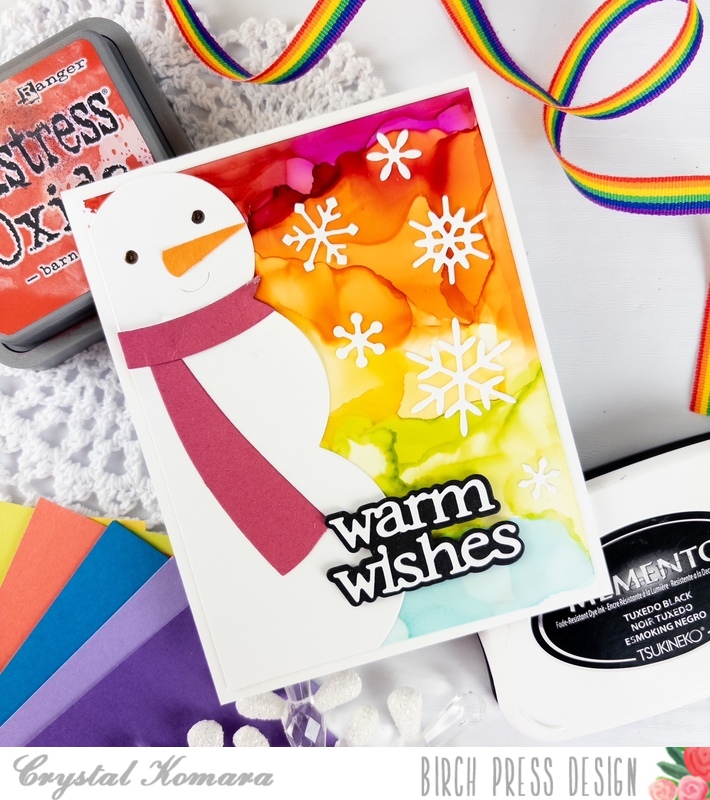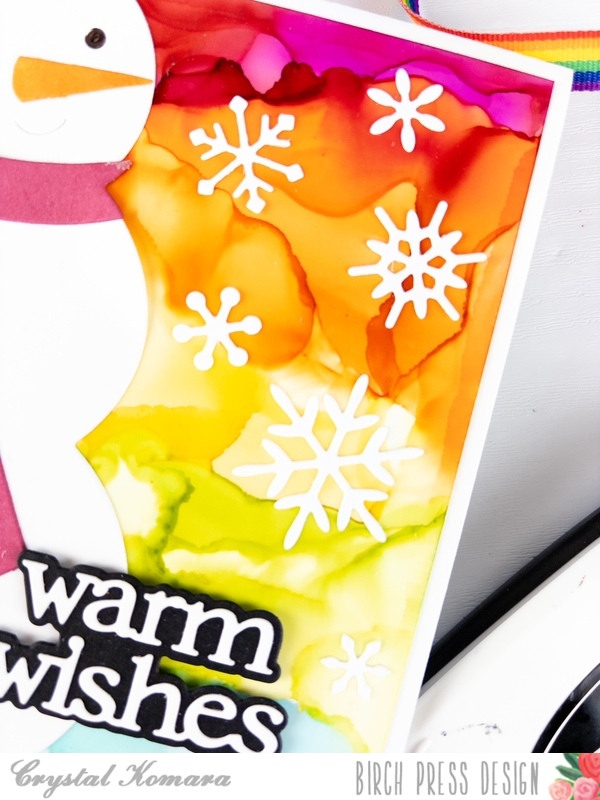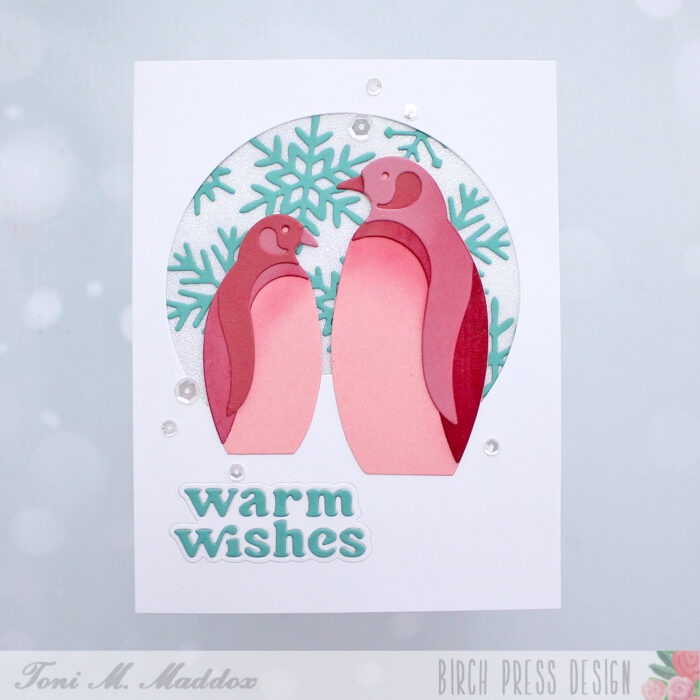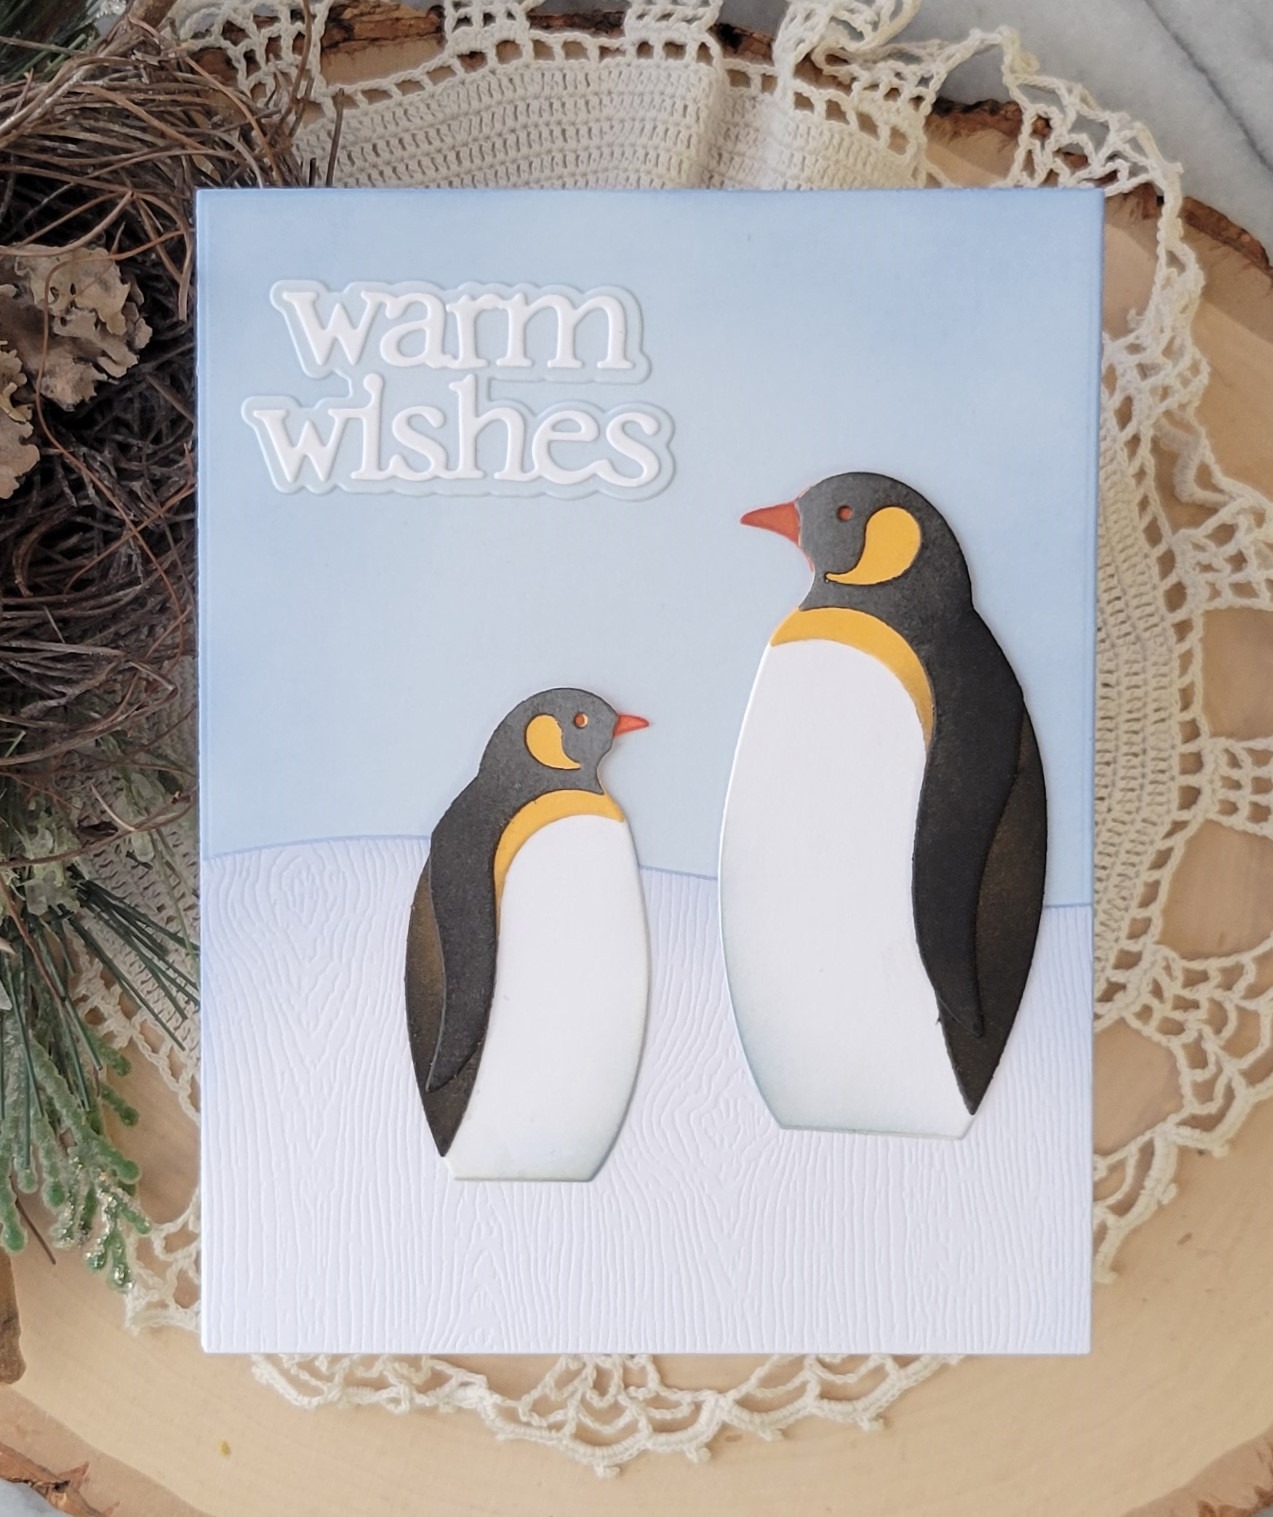
Hello everyone! Rosemary here on the blog today with a card that could be used for a winter birthday or a friendship card. Let’s look at what I made.
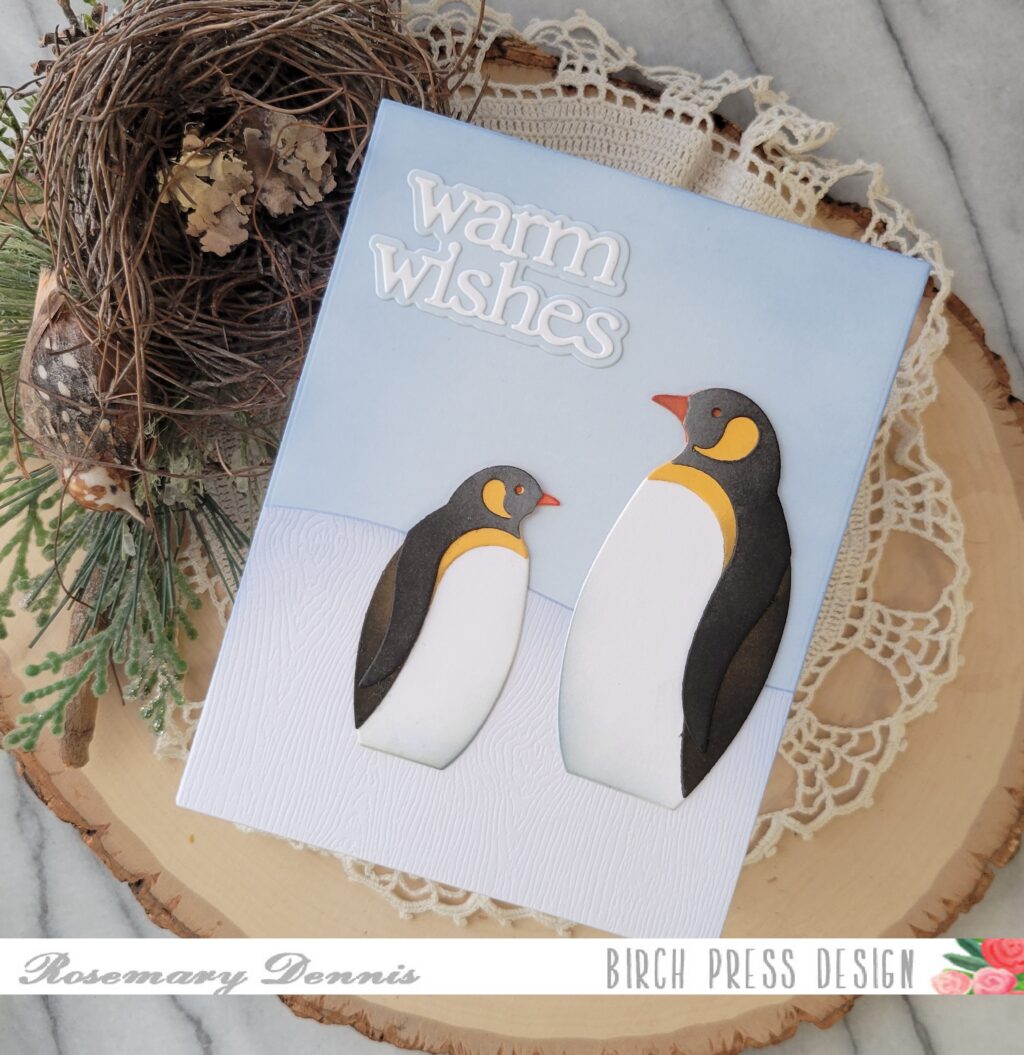
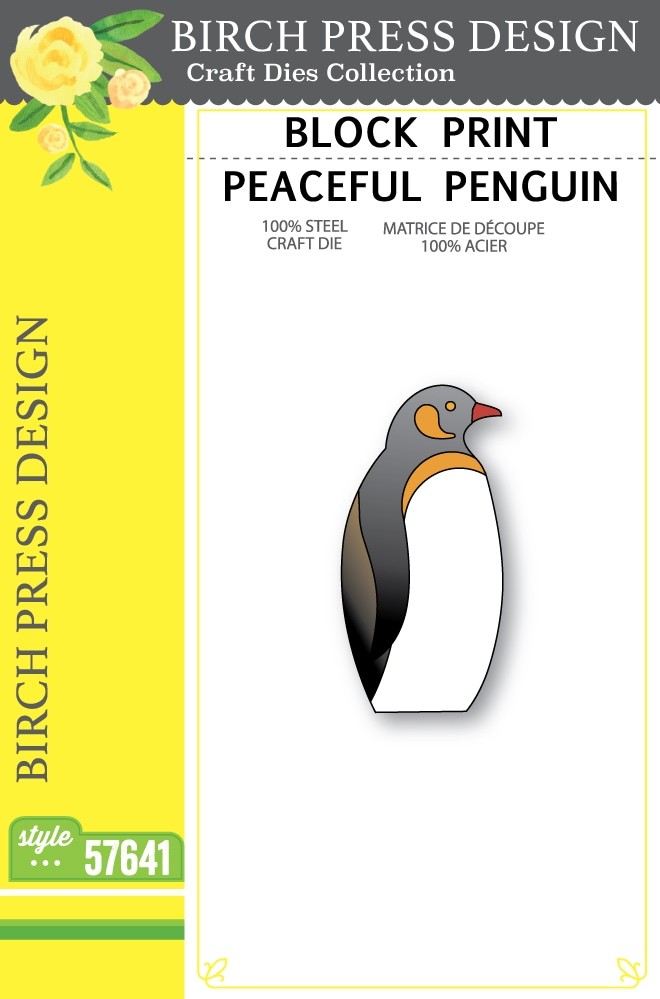
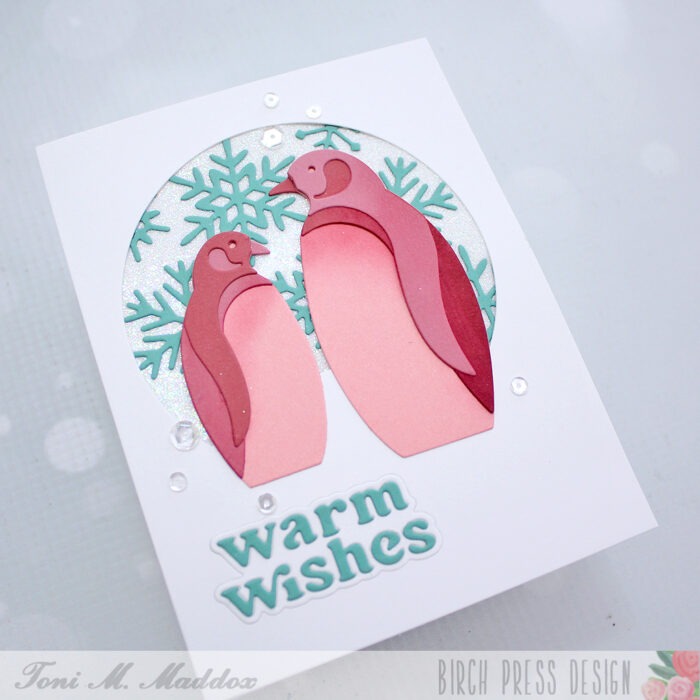
For my card today I used the Block Print Peaceful Penguin and Superb Penguin dies, as well as the Warm Wishes Dapper Script die set. These dies are from the winter release. I also used my favorite Wavy Hillside dies for the card. I started out by diecutting the pieces of my penguins.
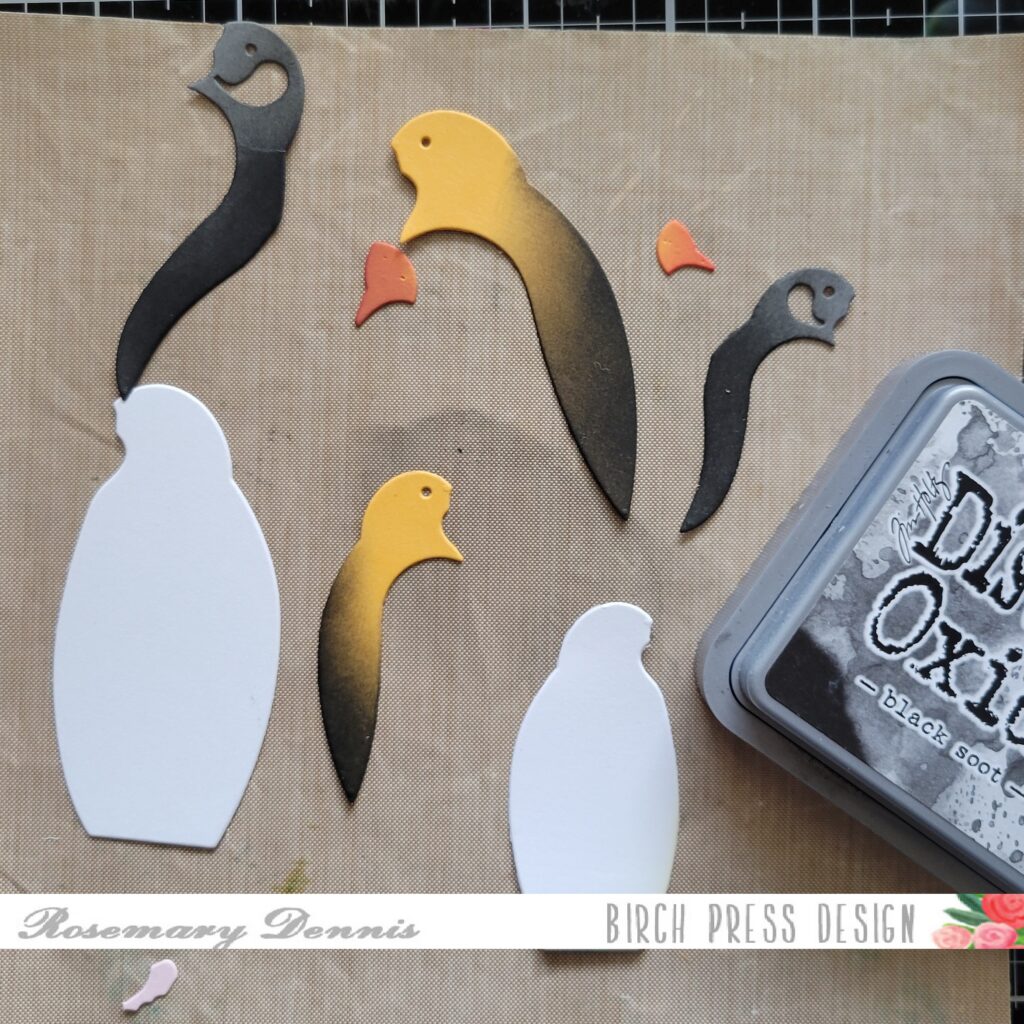
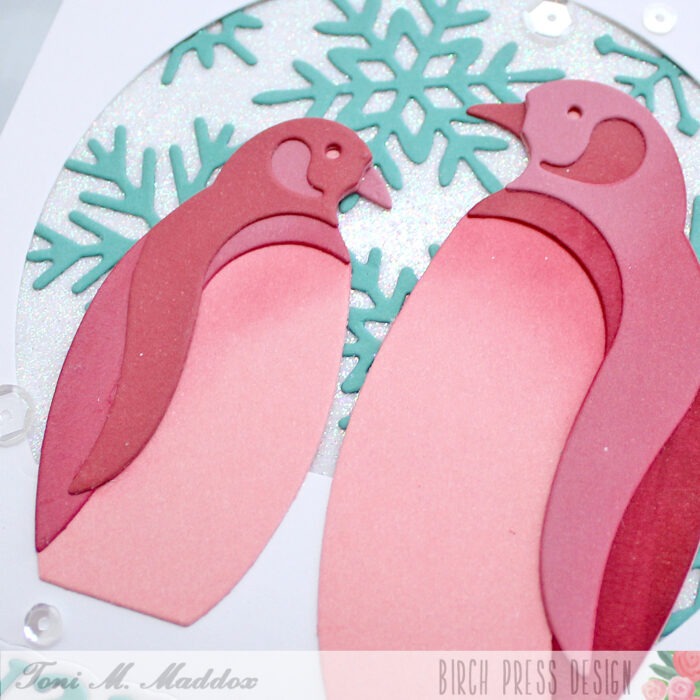
I die cut the bodies from white, the beaks and second layer from a medium yellow (from the Memory Box Sunset 6×6 pad) and then a gray cardstock from my stash. I used Black Soot distress oxide ink on the yellow second layer and the gray top layer to darken them up, but still have some of the yellow and gray in each penguin. I used Fired Brick distress oxide ink on the beaks.
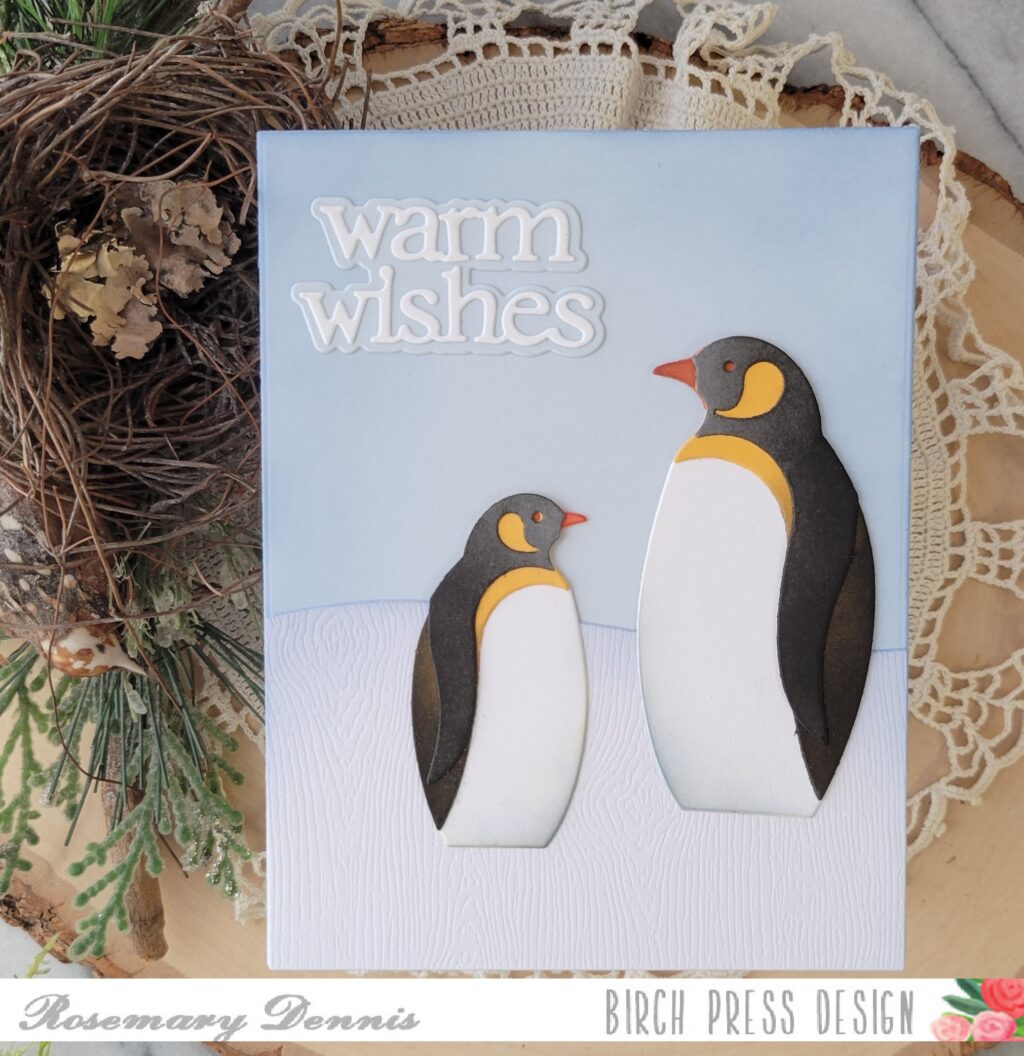
I let everything dry before adhering all the pieces with liquid adhesive. While the penguins were drying I die cut the wavy hill from Memory Box white woodgrain cardstock for some texture. A piece of light blue cardstock was die cut and then I did some light ink blending of a blue distress oxide ink around the edges. I don’t know what blue it is because I just used the residual ink on my blending brush for a soft look.
I added a little bit to the Wavy Hillside, as well. For the penguins I added a little bit of Pumice Stone distress oxide and then used the blue, again, over that. I layered the hillside onto the light blue panel with glue and then added my penguins, also with glue.
I finished off the card with the sentiment. I die cut the shadow layer from the same light blue cardstock as the background and the word layer from white cardstock. I adhered the words to the shadow layer with liquid adhesive and then adhere the sentiment to my card with liquid adhesive.
I hope you enjoyed today’s card. Have a wonderful day!