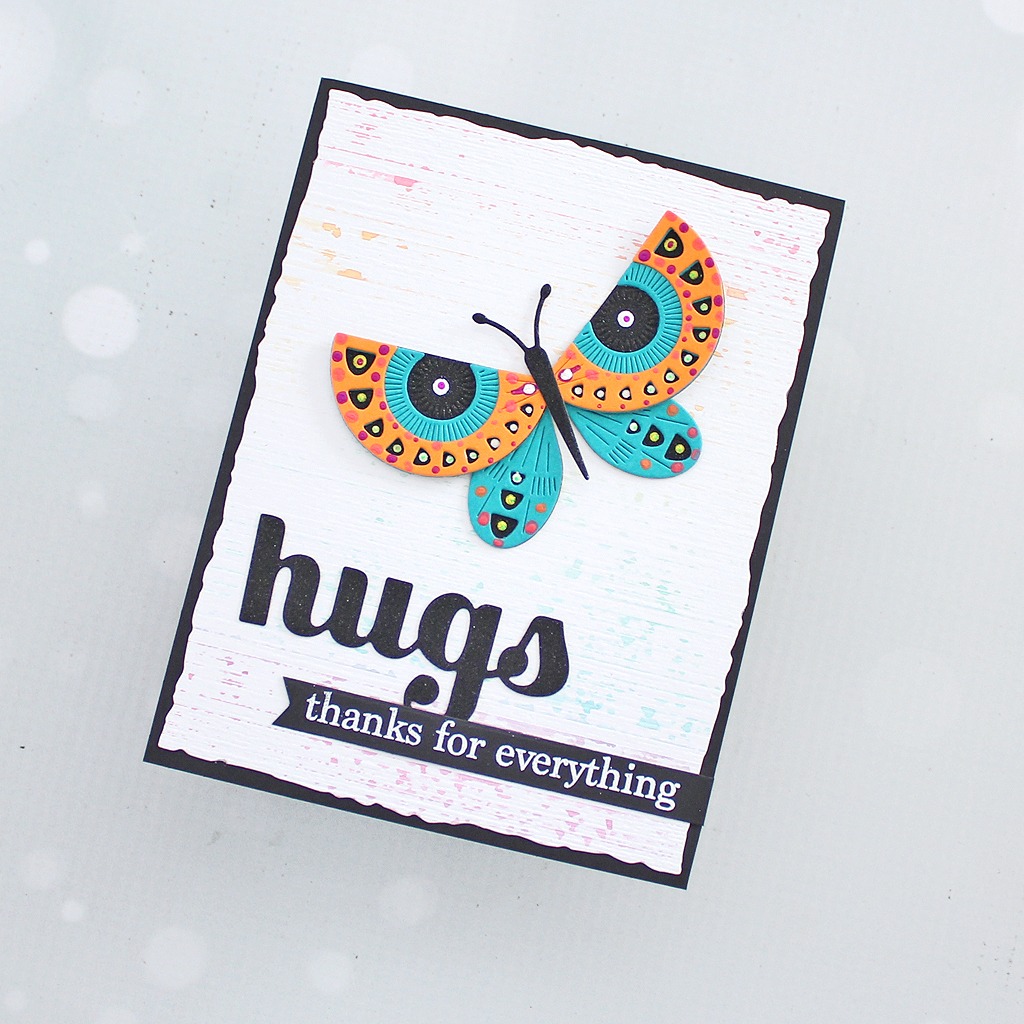
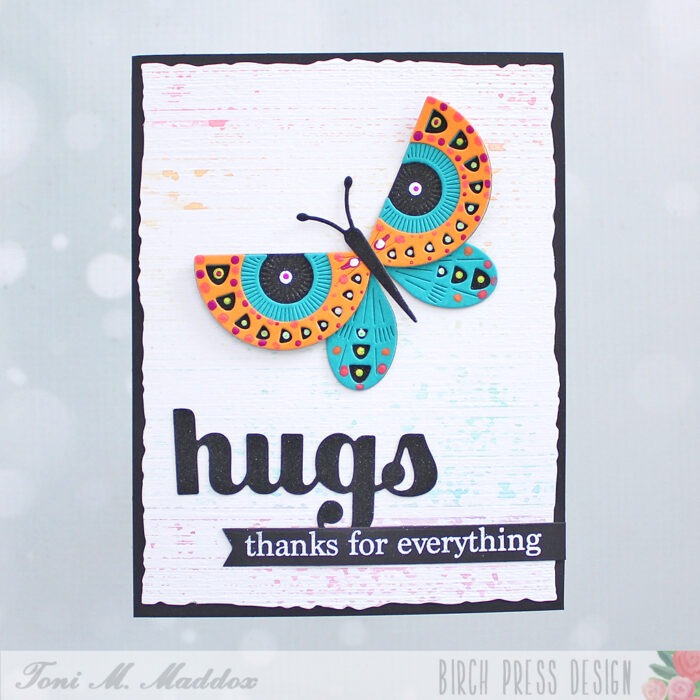
Hello, friends! Toni here with you today. You may recall I said I’d made a second card using the Linear Stripes stencil. Let’s dive right in!
Once I’d sponged up the card front of my previous card shown below, I noticed I had a LOT of ink left on the stencil. I certainly didn’t want all that inky goodness to go to waste so I spritzed the stencil with a bit of water and used it to smoosh a piece of Strathmore Bristol.
Once that had dried, leaving me with subtle rainbow lines, I embossed the panel with a textured linen embossing folder. I also cut it out using a deckle edge rectangle die.
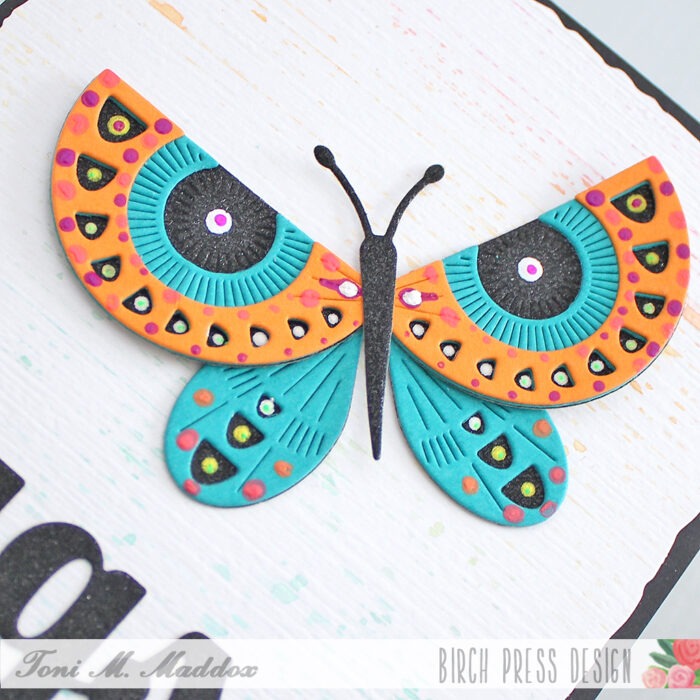
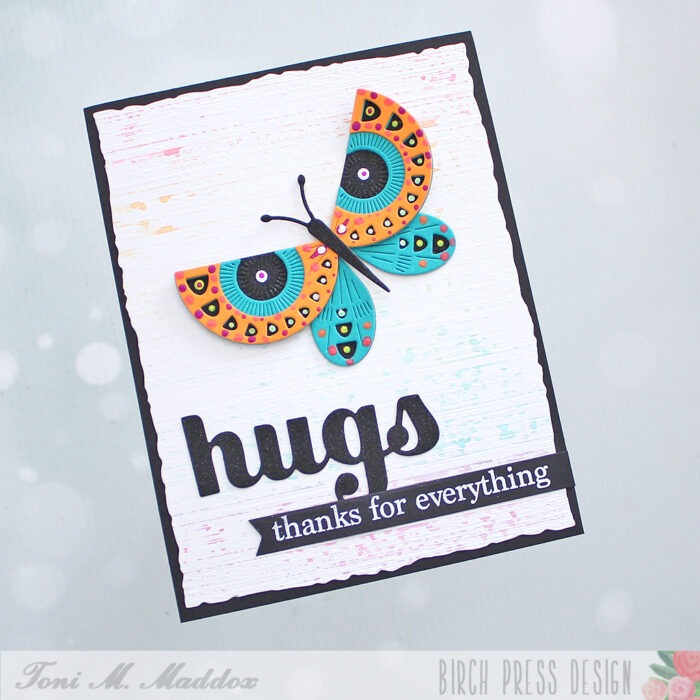
Next I constructed the Block Print Radiant Butterfly using a black glitter cardstock as the base.
I had recently seen a video about dot painting on canvas and thought I would try it on the butterfly using Art by Marlene neon acrylic paints and a stylus I had from ancient times when you had to emboss by hand (gasp!). Neat!
I diecut the Sugar Script Big Hugs sentiment from the same black glitter cardstock as the butterfly then topped it with an embossed Vintage Everyday Greeting.
I hope you enjoyed today’s card and have a great rest of your week!
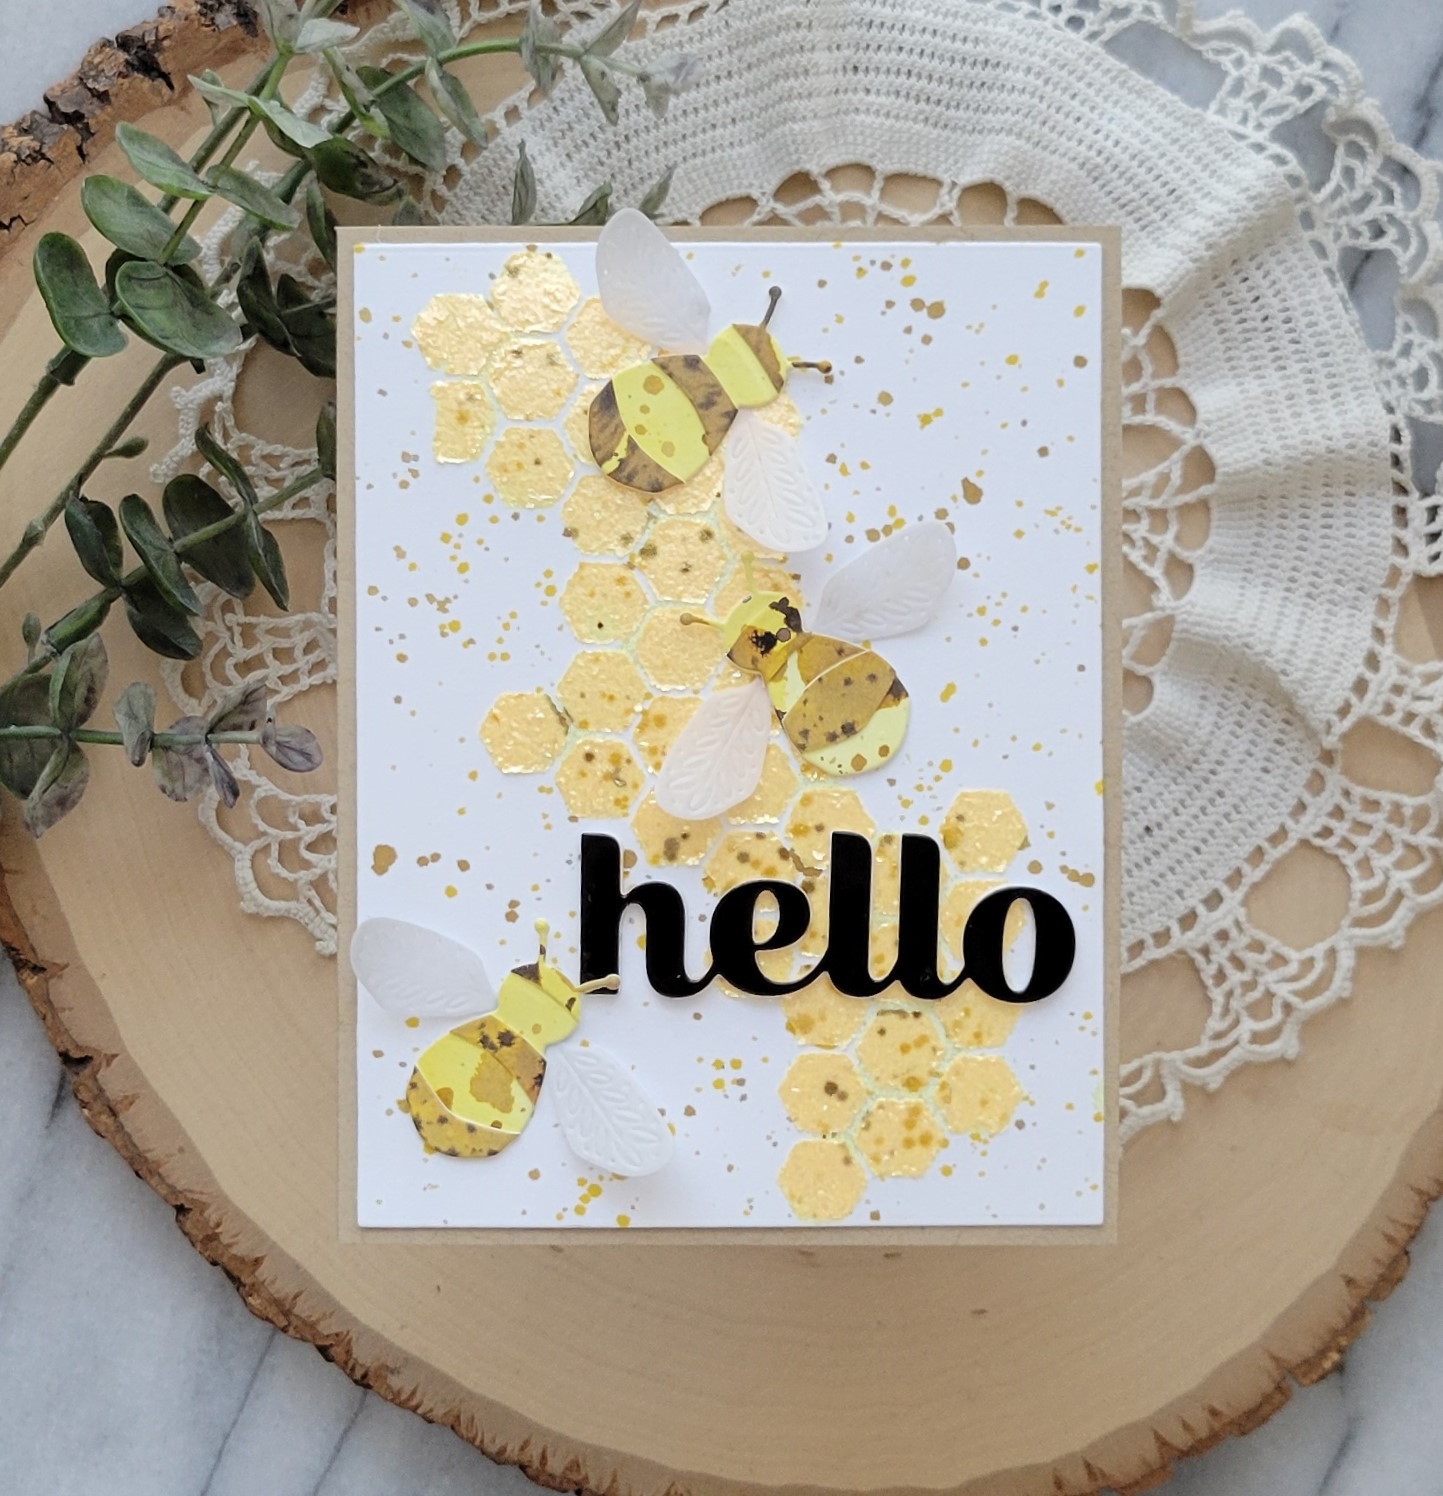
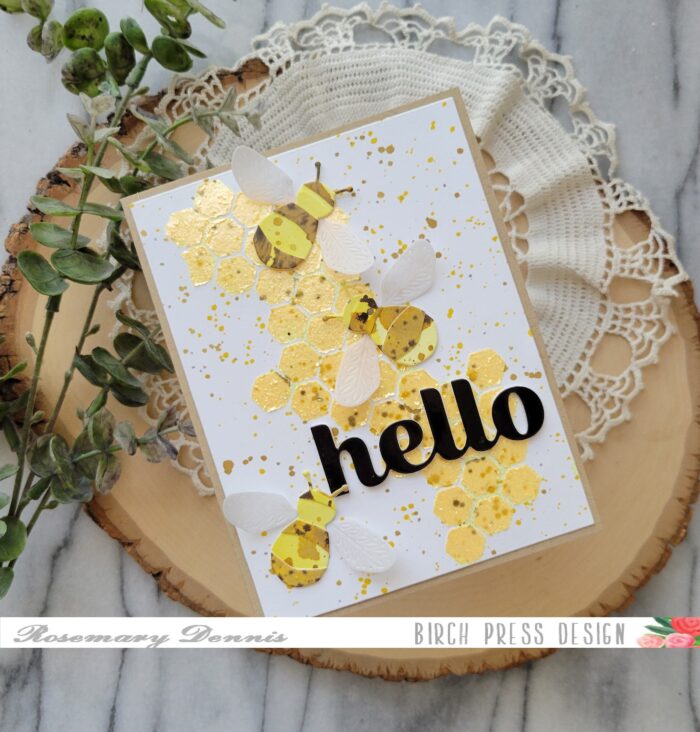
Hello friends! Have you been amazed by the projects the design team has created with the most current release? Well, I have! I have been buzzing with excitement to get something made and today is the day! Let’s have a look at what I made.
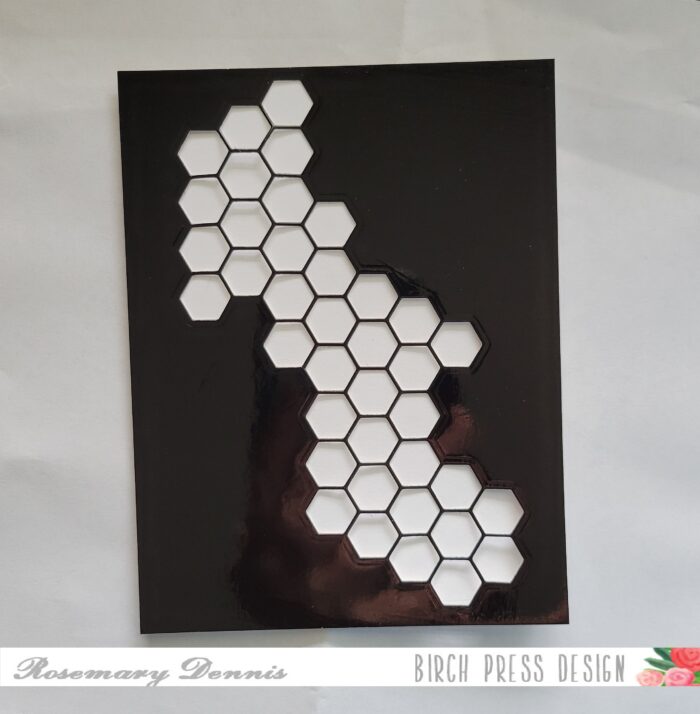
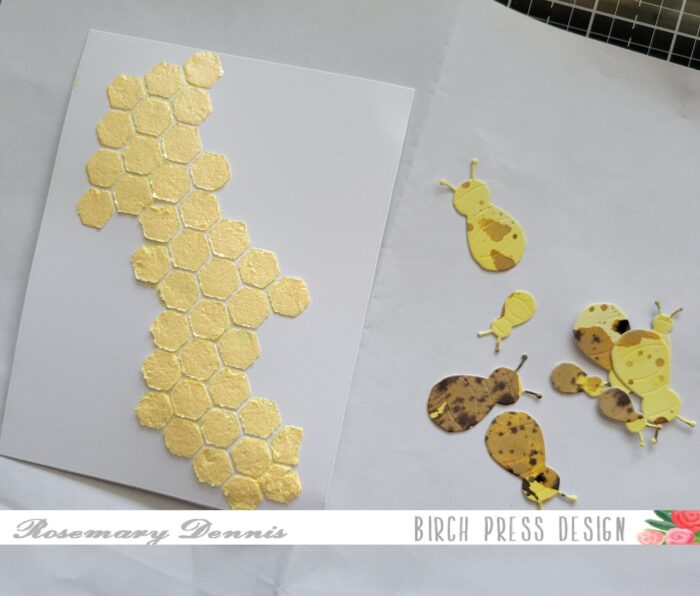
I had several ideas in mind and tried at least one of them, but wasn’t super happy with how it was turning out. I decided to shift gears and use up some yellow glitter paste I had out on my desk. I really wanted to use the Honeycomb Cut Out die and so I used it to create a stencil to use with the glitter paste.
After doing a quick test to see how my DIY stencil would turn out I decided to diecut it from some sturdier cardstock. For this I chose (and sacrificed) a piece of Memory Box glossy black cardstock. As you can see it would have also made a pretty neat background, too. I die cut a piece of heavy white cardstock with a rectangle die and then taped that to the back of my DIY stencil. The stencil worked pretty well with only a small amount of the paste seeping under. I peeled off my stencil and let my panel dry.
While my panel was drying I die cut my bees using the Block Print Buzzing Bumblebee from a piece of watercolor cardstock that I had initially planned to use for my background panel, but it was a bit of a fail. I think the bees I die cut from it are kind of fun and funky!
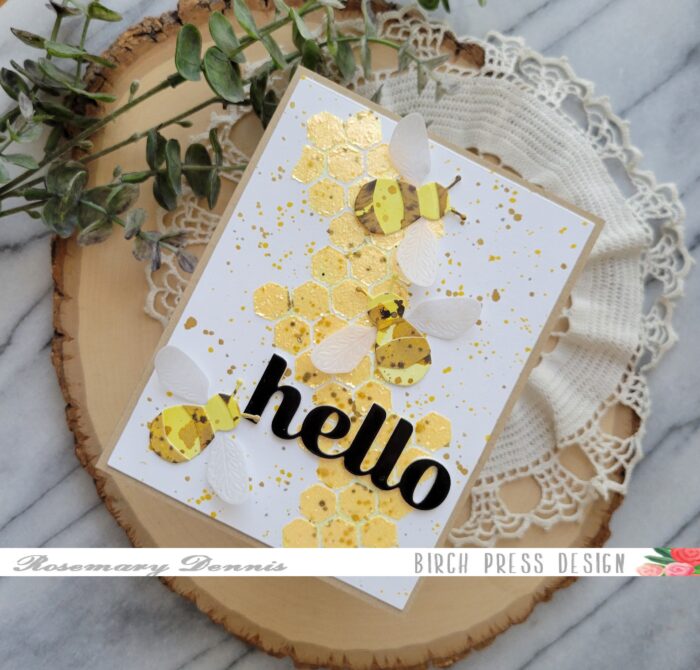
Once the glitter paste was dry and full disclosure that did take a long time because of the amount of paste that was applied using the stencil. I let the panel dry overnight to make sure it was fully dry before assembling my card. I even at one point placed something heavy on top so that it would dry flat.
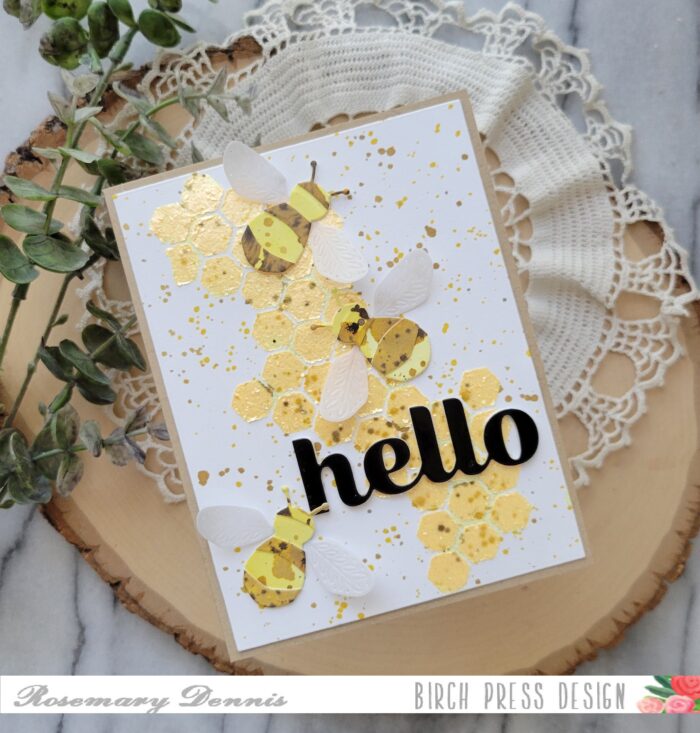
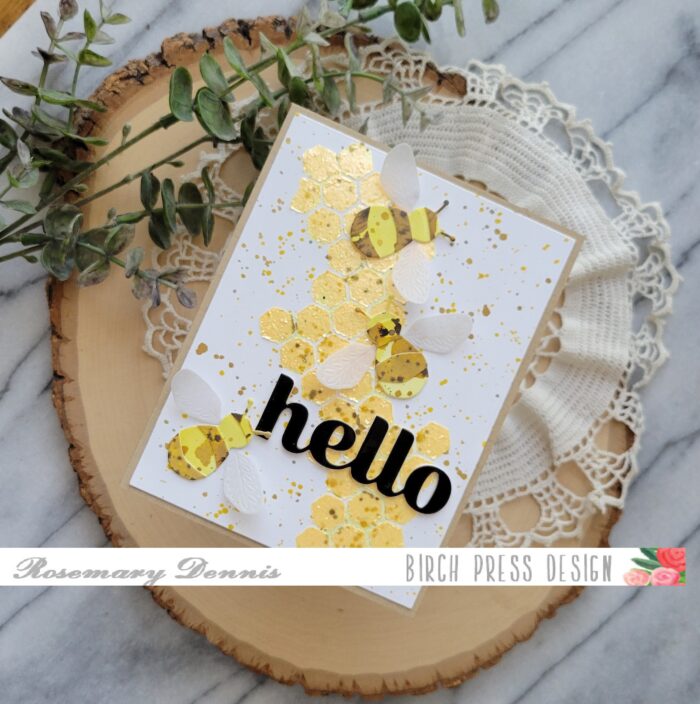
Since I was going for a mixed media vibe. I splattered the fully dry panel with distress ink in Gathered Twigs and appropriately Wild Honey. For the bees I die cut enough so that I could cut some apart to build the bees for my card. The wings were die cut from heavy weight vellum. I assembled my bees and then what kind of sentiment I would use. I settled on the Big Hello Sugar Script. Initially I die cut the hello from heavy weight cardstock and then splattered it, but there was too much splatter. So I used another piece of glossy black cardstock and stacked it on top of the splattered sentiment. Everything was adhered with liquid adhesive and then I added my panel to a kraft cardstock base.
Well, that’s it for me. I hope you enjoyed today’s card. Thanks for stopping by and have a truly lovely day.
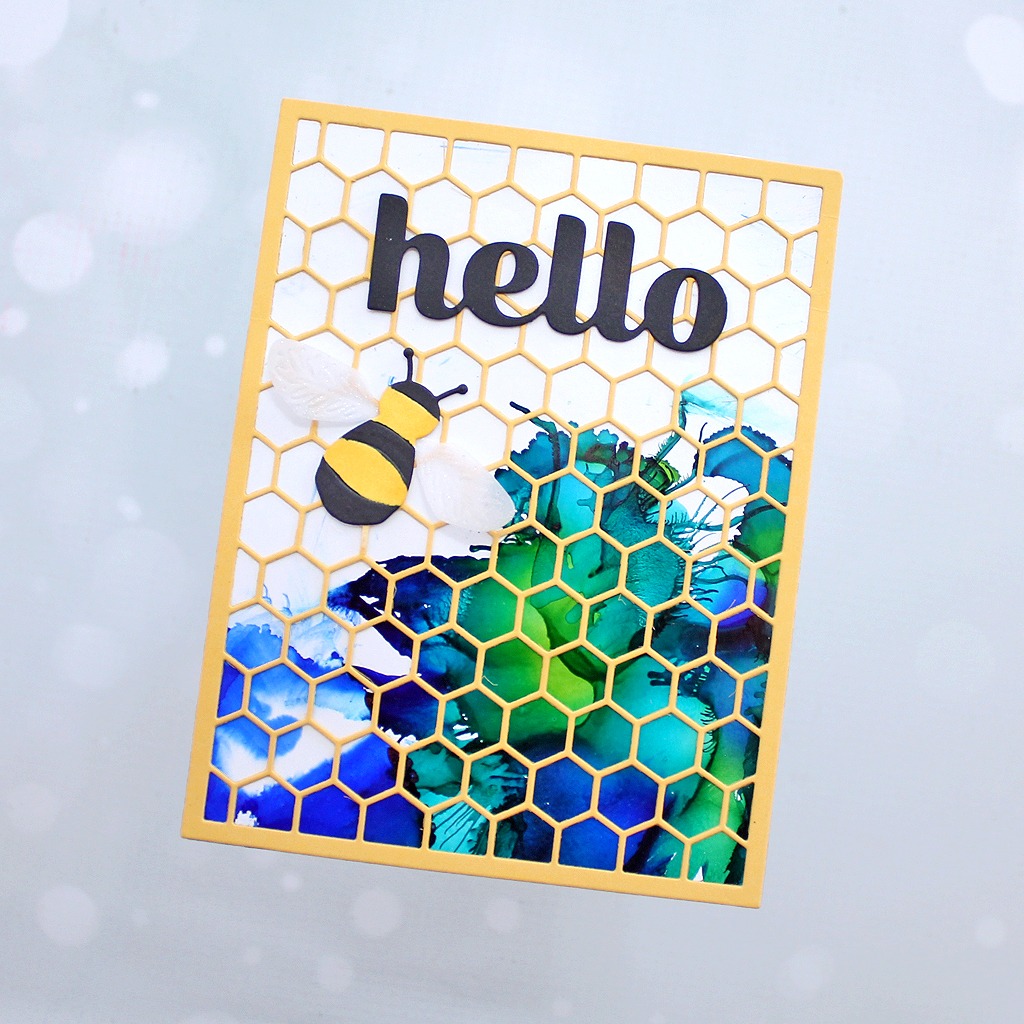
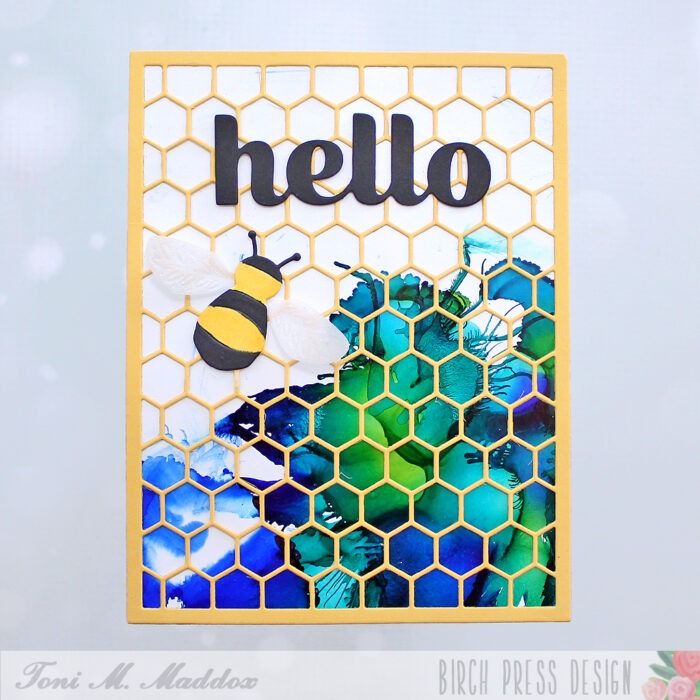
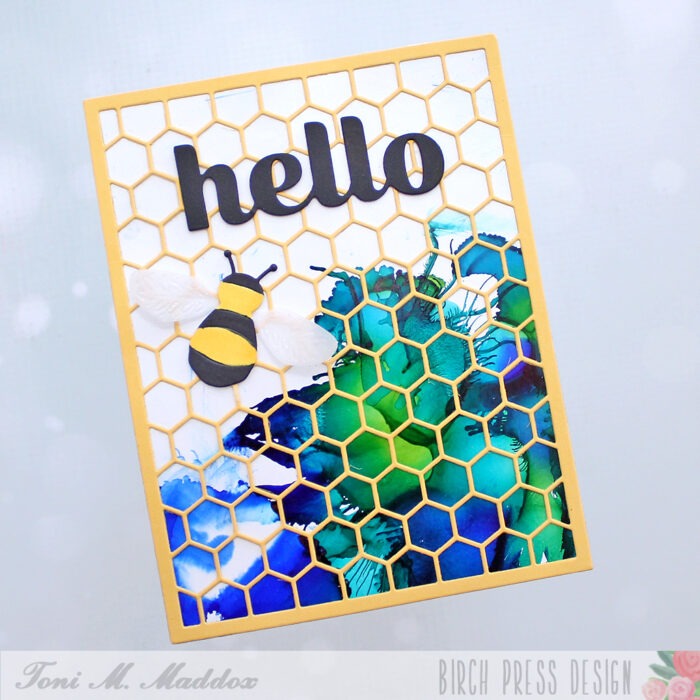
Blue honey? What’s going on here, Toni, you might be thinking to yourself. Well, a few years ago I read an article about some beekeepers who discovered their bees had made blue and green honey. It turns out the hives were just a couple of miles from a candy factory that had inadvertently left some product accessible to bees. Apparently bees gonna eat.
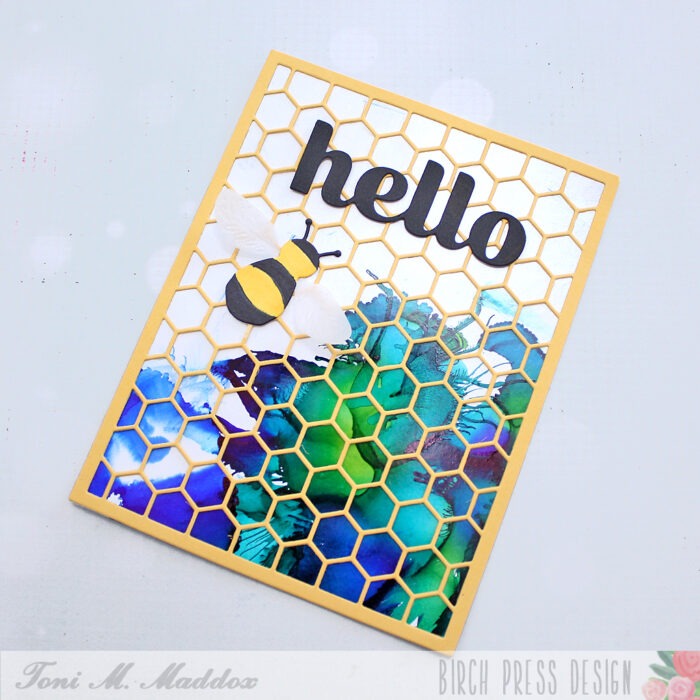
So, I took inspiration from that and used glossy photo paper with Adirondack alcohol inks to create a randomly colored blue-green base panel.
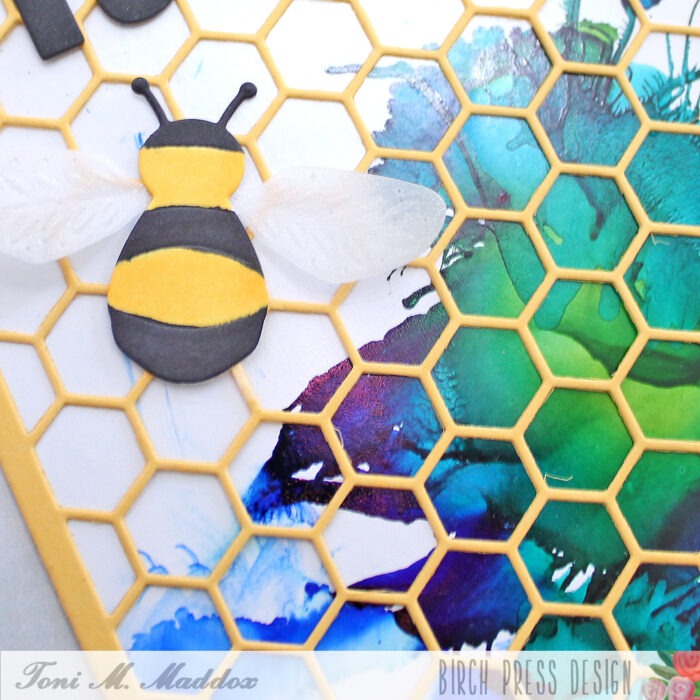
I cut the Honeycomb Plate from Memory Box Summer Squash cardstock, adhering that to the top.
I colored up the large Block Print Buzzing Bumblebee using Copics and applied Clear Wink of Stella to the vellum wings.
I cut the Sugar Script Big Hello from black cardstock and popped it on top.
I hope you enjoyed today’s card and have a great rest of your week!
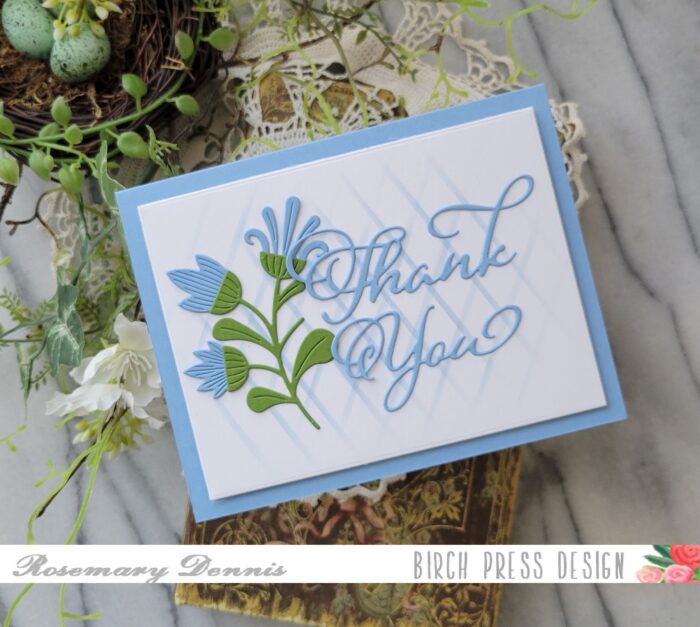
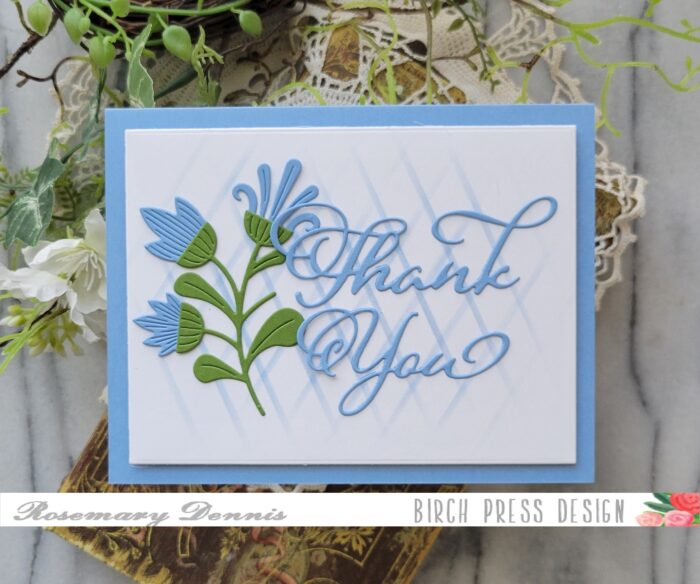
Hello and happy May! Rosemary here on the blog today with a fun and some what elegant thank you card. Let’s have a look at what I made.
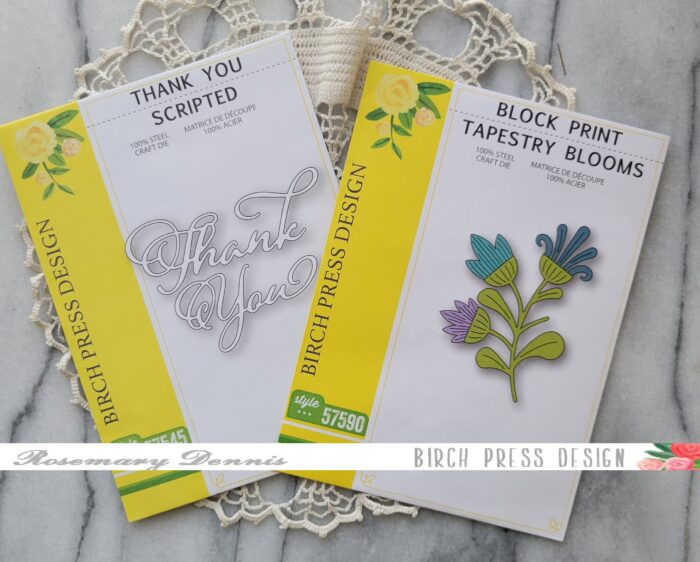
For this card I used the super pretty Block Print Tapestry Blooms die and the elegant Thank You Scripted die set. I went with a light blue and green color combo for this card.
To keep things simple I die cut all the flowers from a light blue Memory Box cardstock and the stem from the dark green. Then I assembled my flower stem. The sentiment was also die cut from the same light blue.
Time to figure out my layout and it was at this point I decided to pull out the Linear Lines stencil and create a simple partial diamond pattern on my white cardstock base. I used a light blue ink that coordinated with the blue cardstock I used for the flowers and the sentiment.
Now it was time to put the card together. I used cardstock in the same blue for my card base and adhered the background panel with thin foam squares. I then adhered the flower stem with liquid adhesive. Finally I added the sentiment. I purposefully only added glue to the main part of the sentiment to allow for some appearance of movement in the swirls on the sentiment.
I really like the slightly monochromatic look of the card and the simplicity. I hope you enjoyed today’s project. Thanks for stopping by and have a wonderful day!
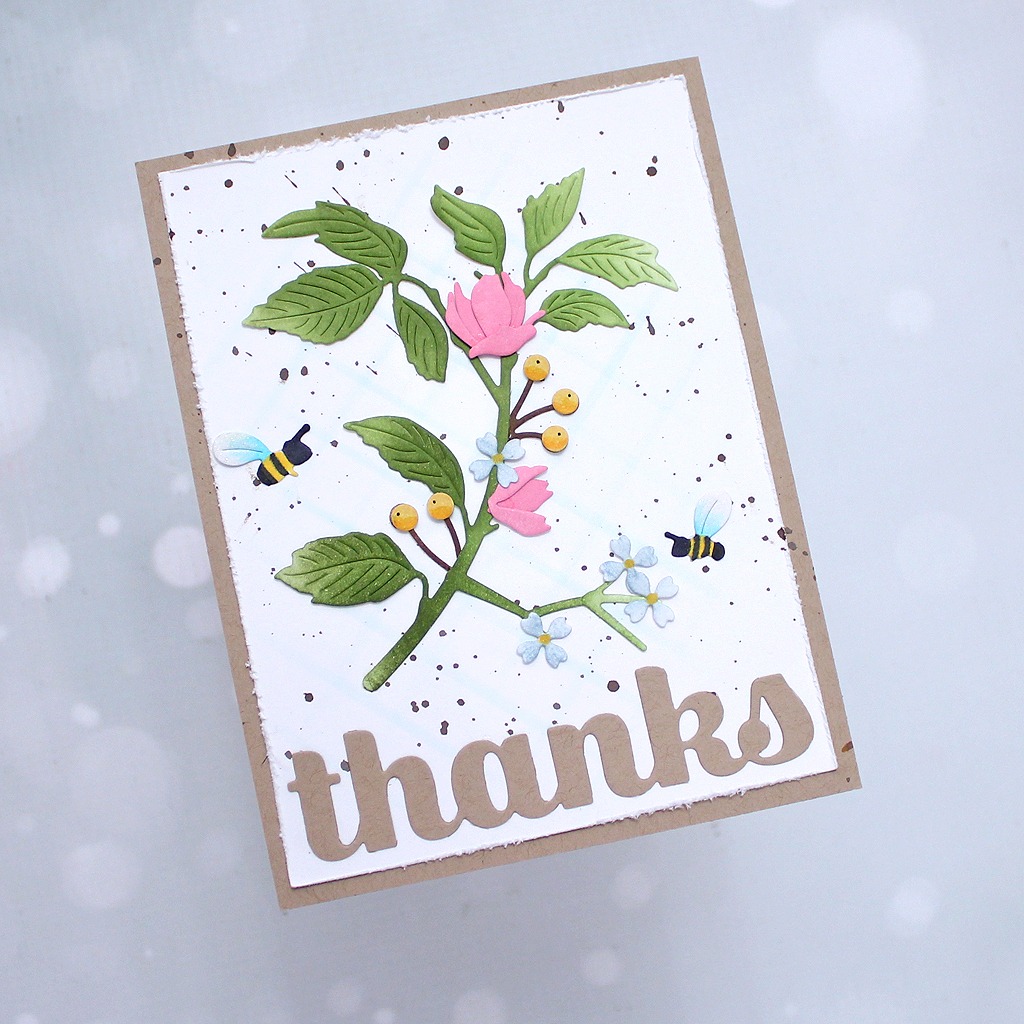
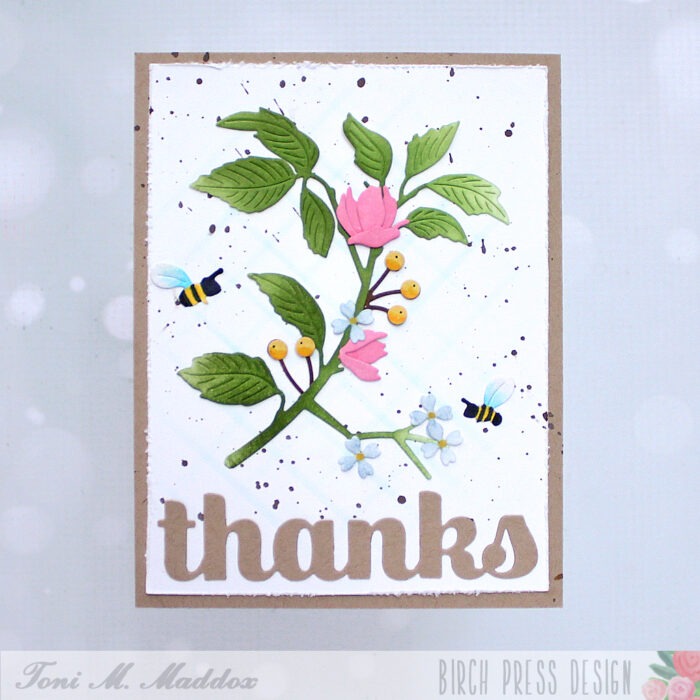
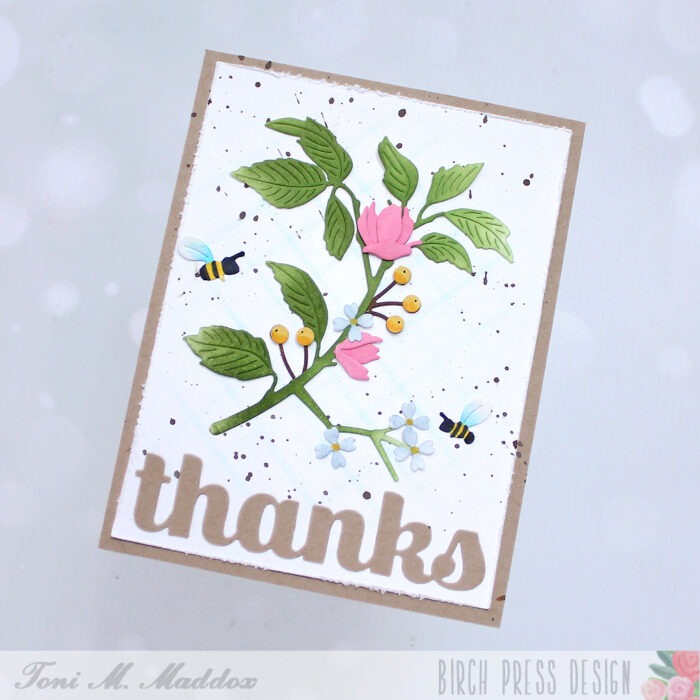
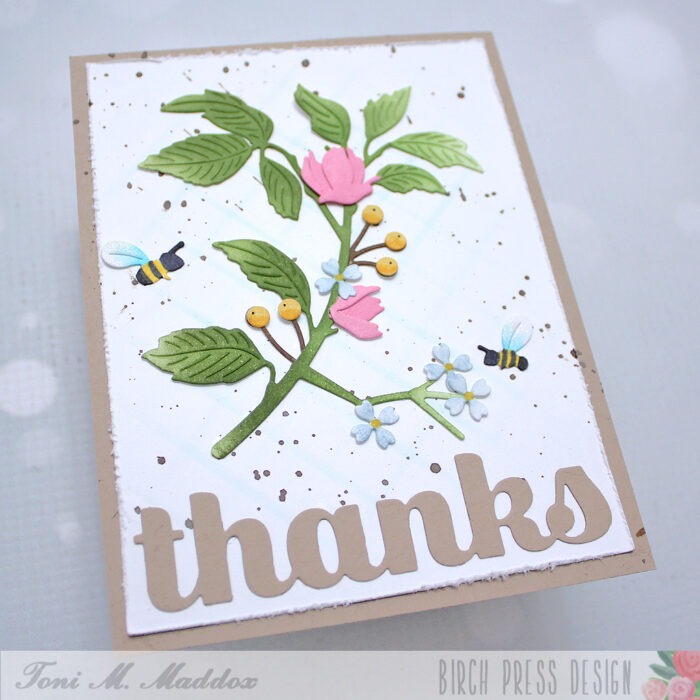
Hello, everyone! Toni with you sharing a pretty in pink floral thank you card.
I started my card by cutting out the Abundant Branch mostly in white with the exception of Memory Box Leaf Sprout for the leaves and Summer Squash for the berries.
I sponged Catherine Pooler inks on the elements to create a really soft watercolor look.
Next, I cut out the Flickering Fireflies, hand-trimmed them a bit, then colored them with Copics to transform them into bees.
I added a subtle check pattern on the background using the Linear Stripes stencil with Distress Oxide Salvaged Patina.
I distressed the edges of the card front and spattered it with Distress Oxide Vintage Photo before adhering the dies to it.
Finally, I attached the single layer Sugar Script Big Thanks sentiment cut from kraft, which blends in nicely with the mood of the card.
I hope you enjoyed today’s card and have a great rest of your week!
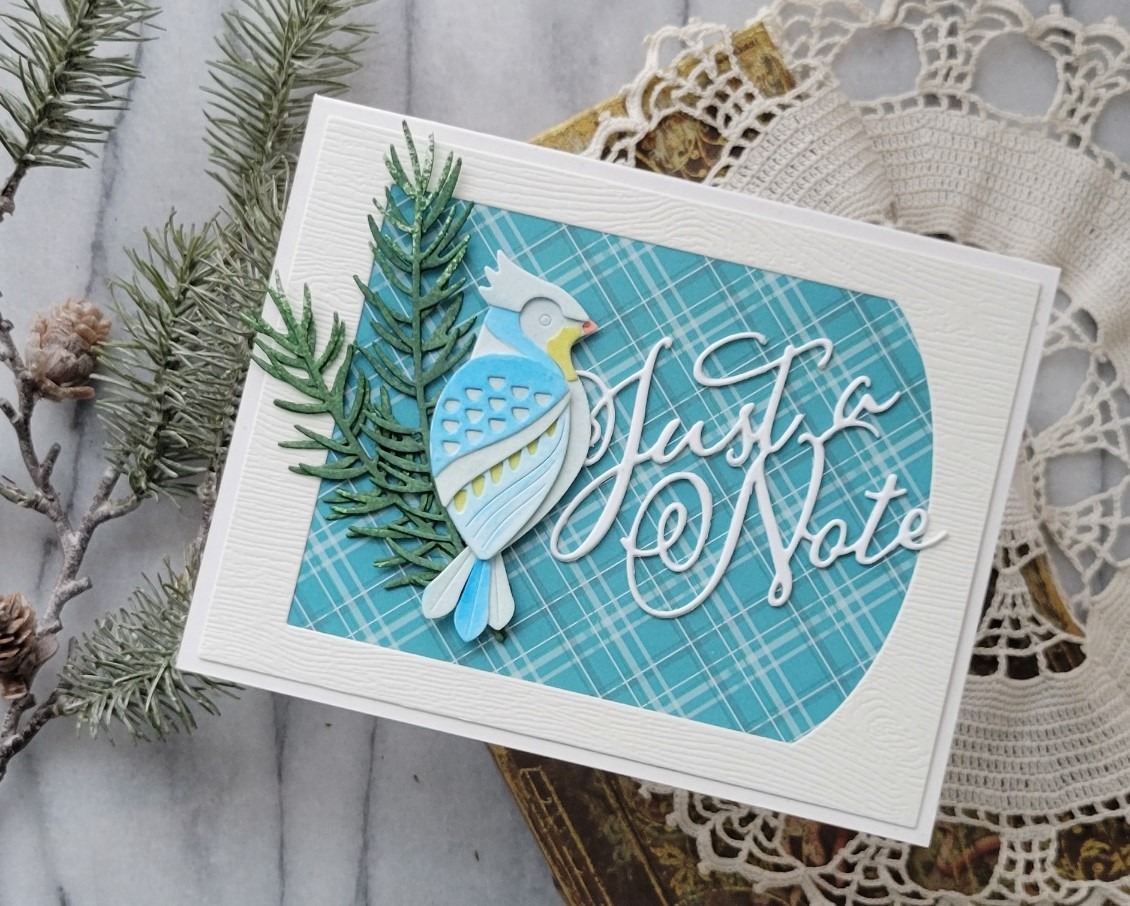
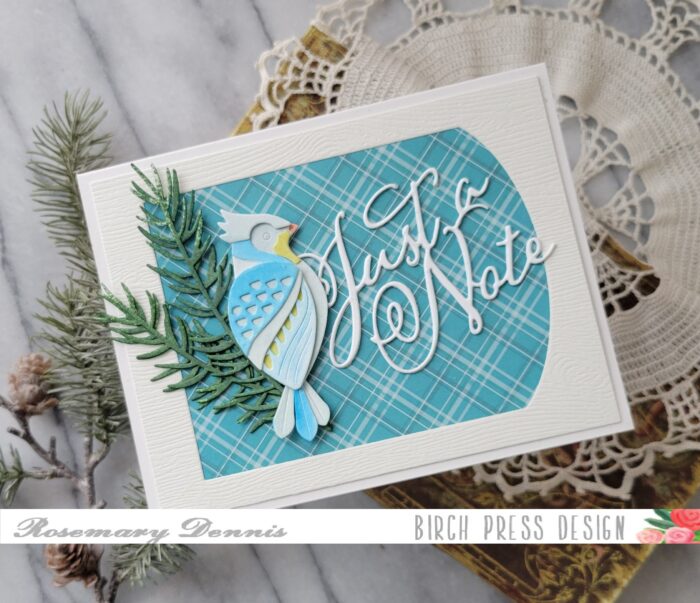
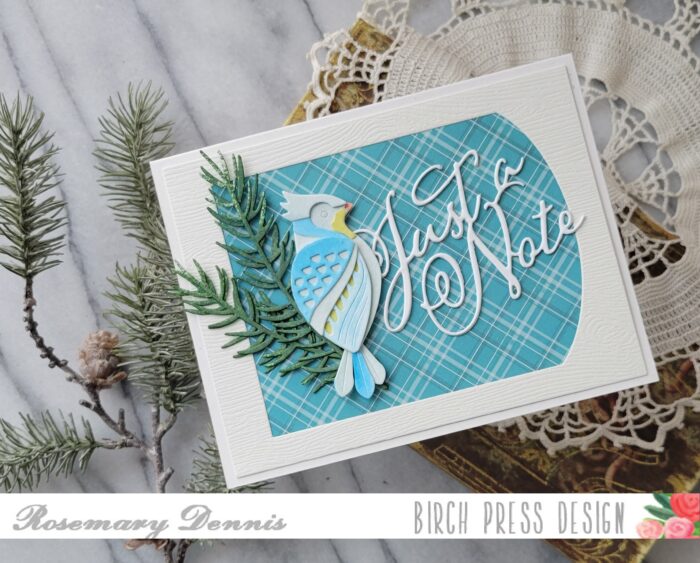
Hello everyone! Rosemary here on the blog today. Have you seen the all the new Block Print products that have been added to the Birch Press Design website? They are absolutely AMAZING and I can’t wait to create some projects with them! Today I’m sharing a card I made with the Block Print Tufted Bird die set. Let’s have a look.
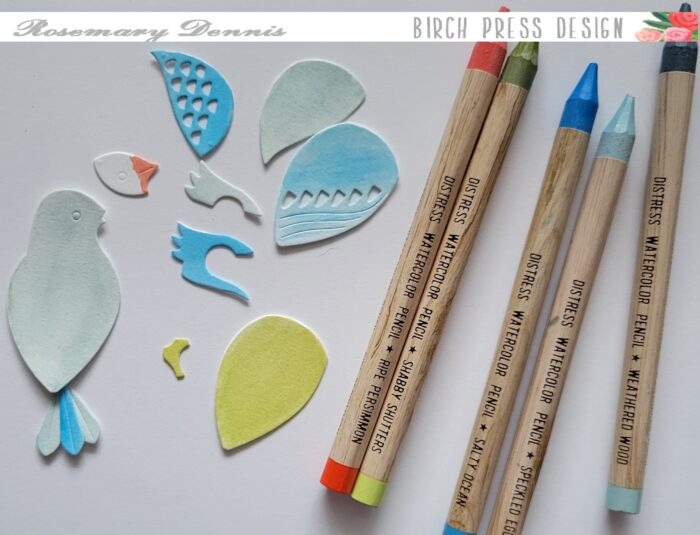
For this card I went with a softer approach using some Tim Holtz woodless distress watercolor pencils to color the pieces of my bird.
In the above photo you can see the watercolor pencils that I used and the pieces prior to assembling my little bird.
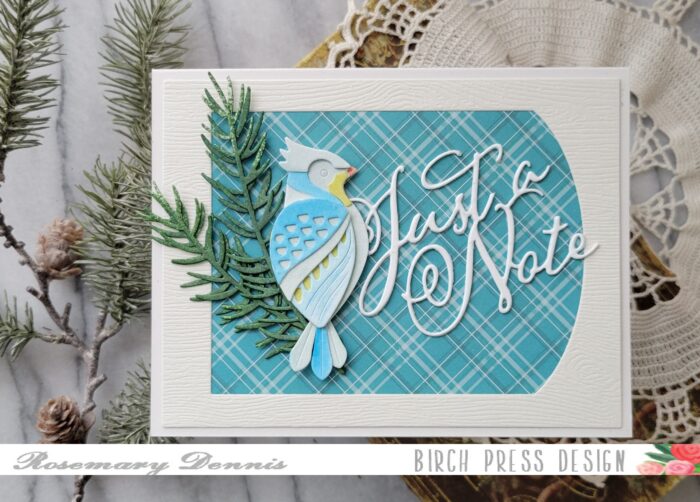
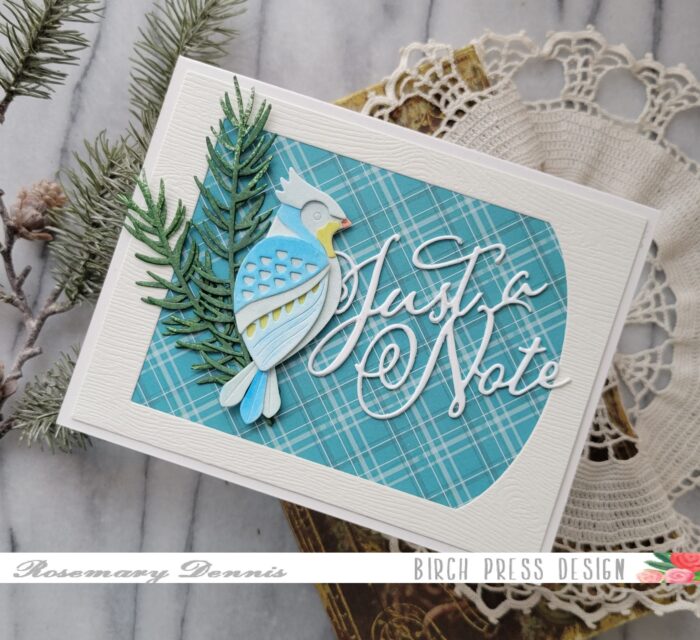
Once all the piece were dry I adhered everything together using liquid adhesive. Once I had the bird together I worked on the rest of the card. I decided to use some plaid patterned paper from the Memory Box Anemone Plaid 6×6 pad for the background for my little bird. Diecutting the paper with a rectangle die. I also diecut pine branches using Pine Needle Twig Contour Layers die set from watercolor cardstock and then sprayed them with distress spray stain in Rustic Wilderness.
I decided to create a frame around my plaid background by using a die from the Memory Box Curved Cap Pinpoint layers die set. I die cut cream Memory Box woodgrain cardstock with the same rectangle die I used for the plaid paper and then die cut the Curved Cap die from the center. The frame was then adhered to the plaid paper with liquid glue. I die cut the Just A Note Scripted die from watercolor cardstock twice and adhered them together.
Now all my pieces are ready to adhere to my card front. I adhered the pine branches and the sentiment first using liquid glue. To finish off the card I added the bird with a combination of thin foam squares and liquid adhesive.
Well, that’s it for me. I hope you enjoyed by project today. Thanks for stopping by and have a great day!
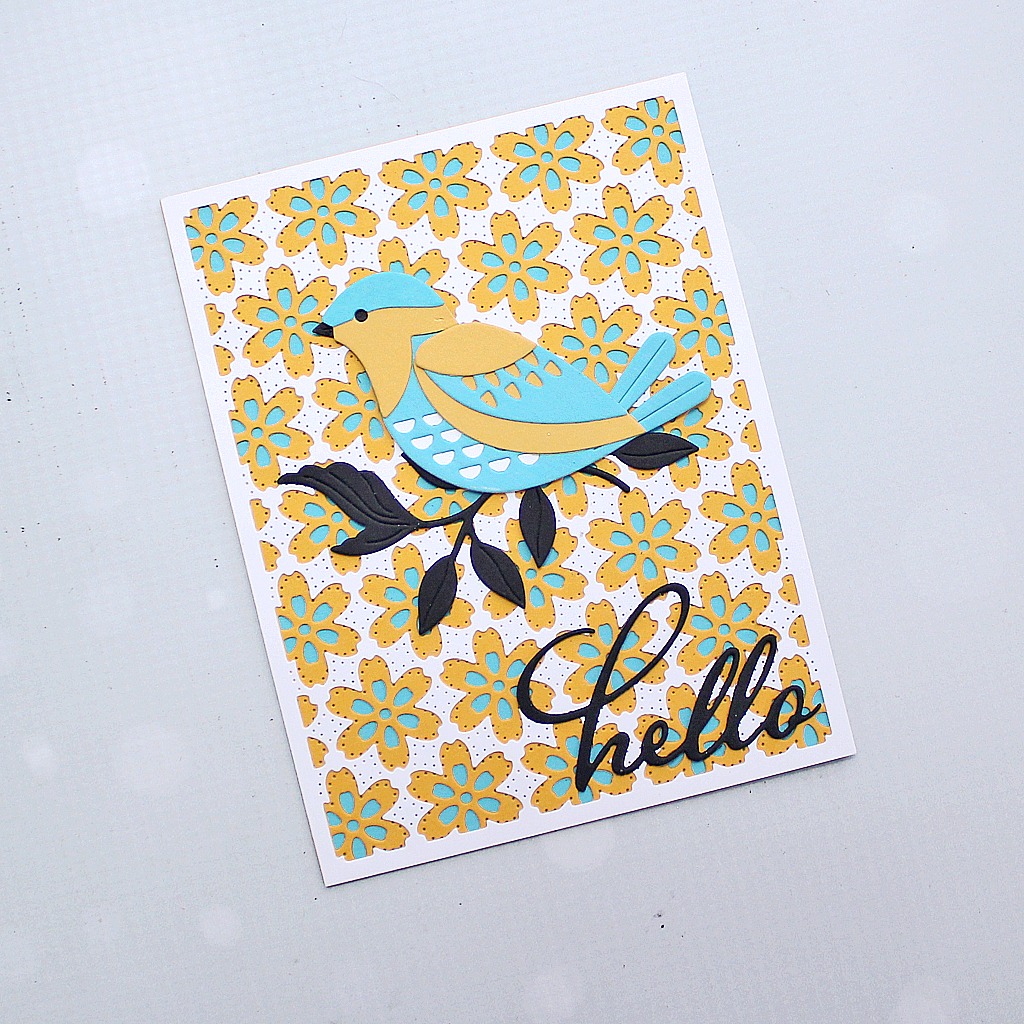
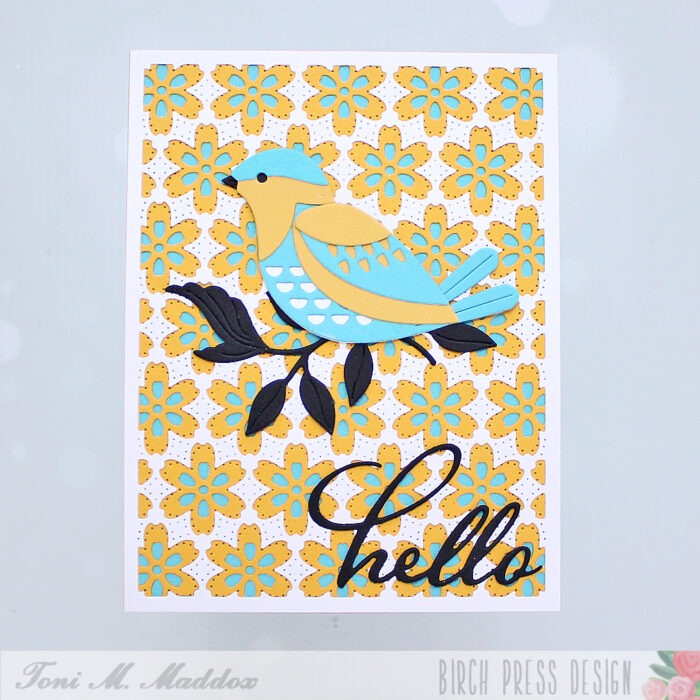
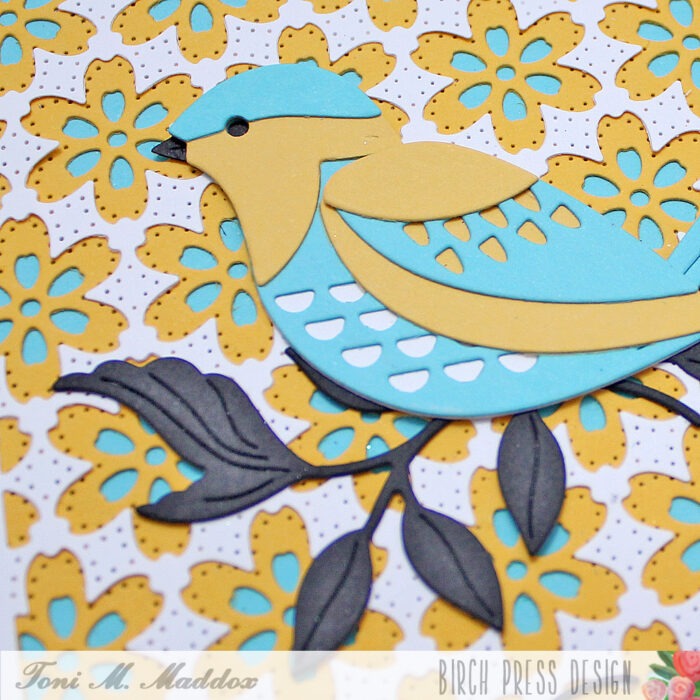
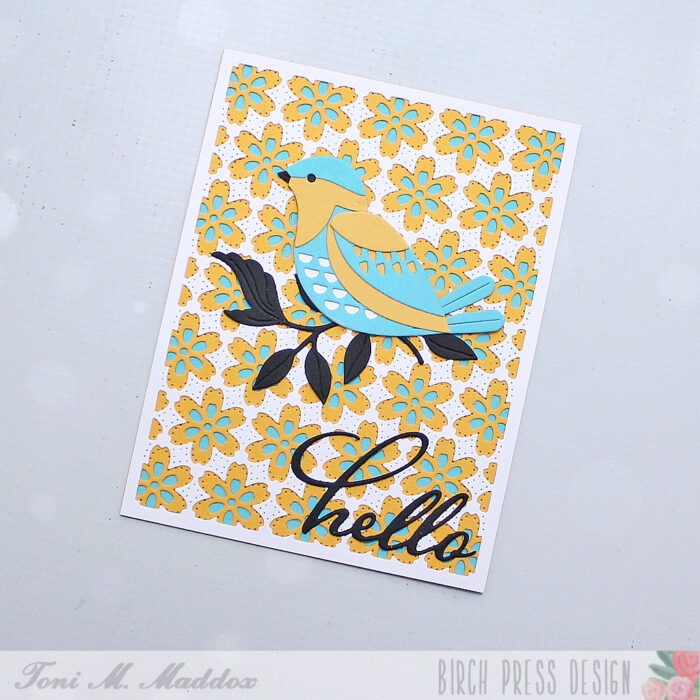
Hello, friends! Toni here today and I’m still loving the Block Print Birds. They lend themselves to all sorts of card designs.
For this one, I created a Scandinavian folk style of sorts using the Block Print Bright Bird, Foliage Bunch, and Hello Scripted on the Flora Plate Layer Set.
I love the boldness of the black against the more muted Memory Box Muted Squash and Pool Party colors.
I hope you enjoyed today’s card and have a great rest of your week!
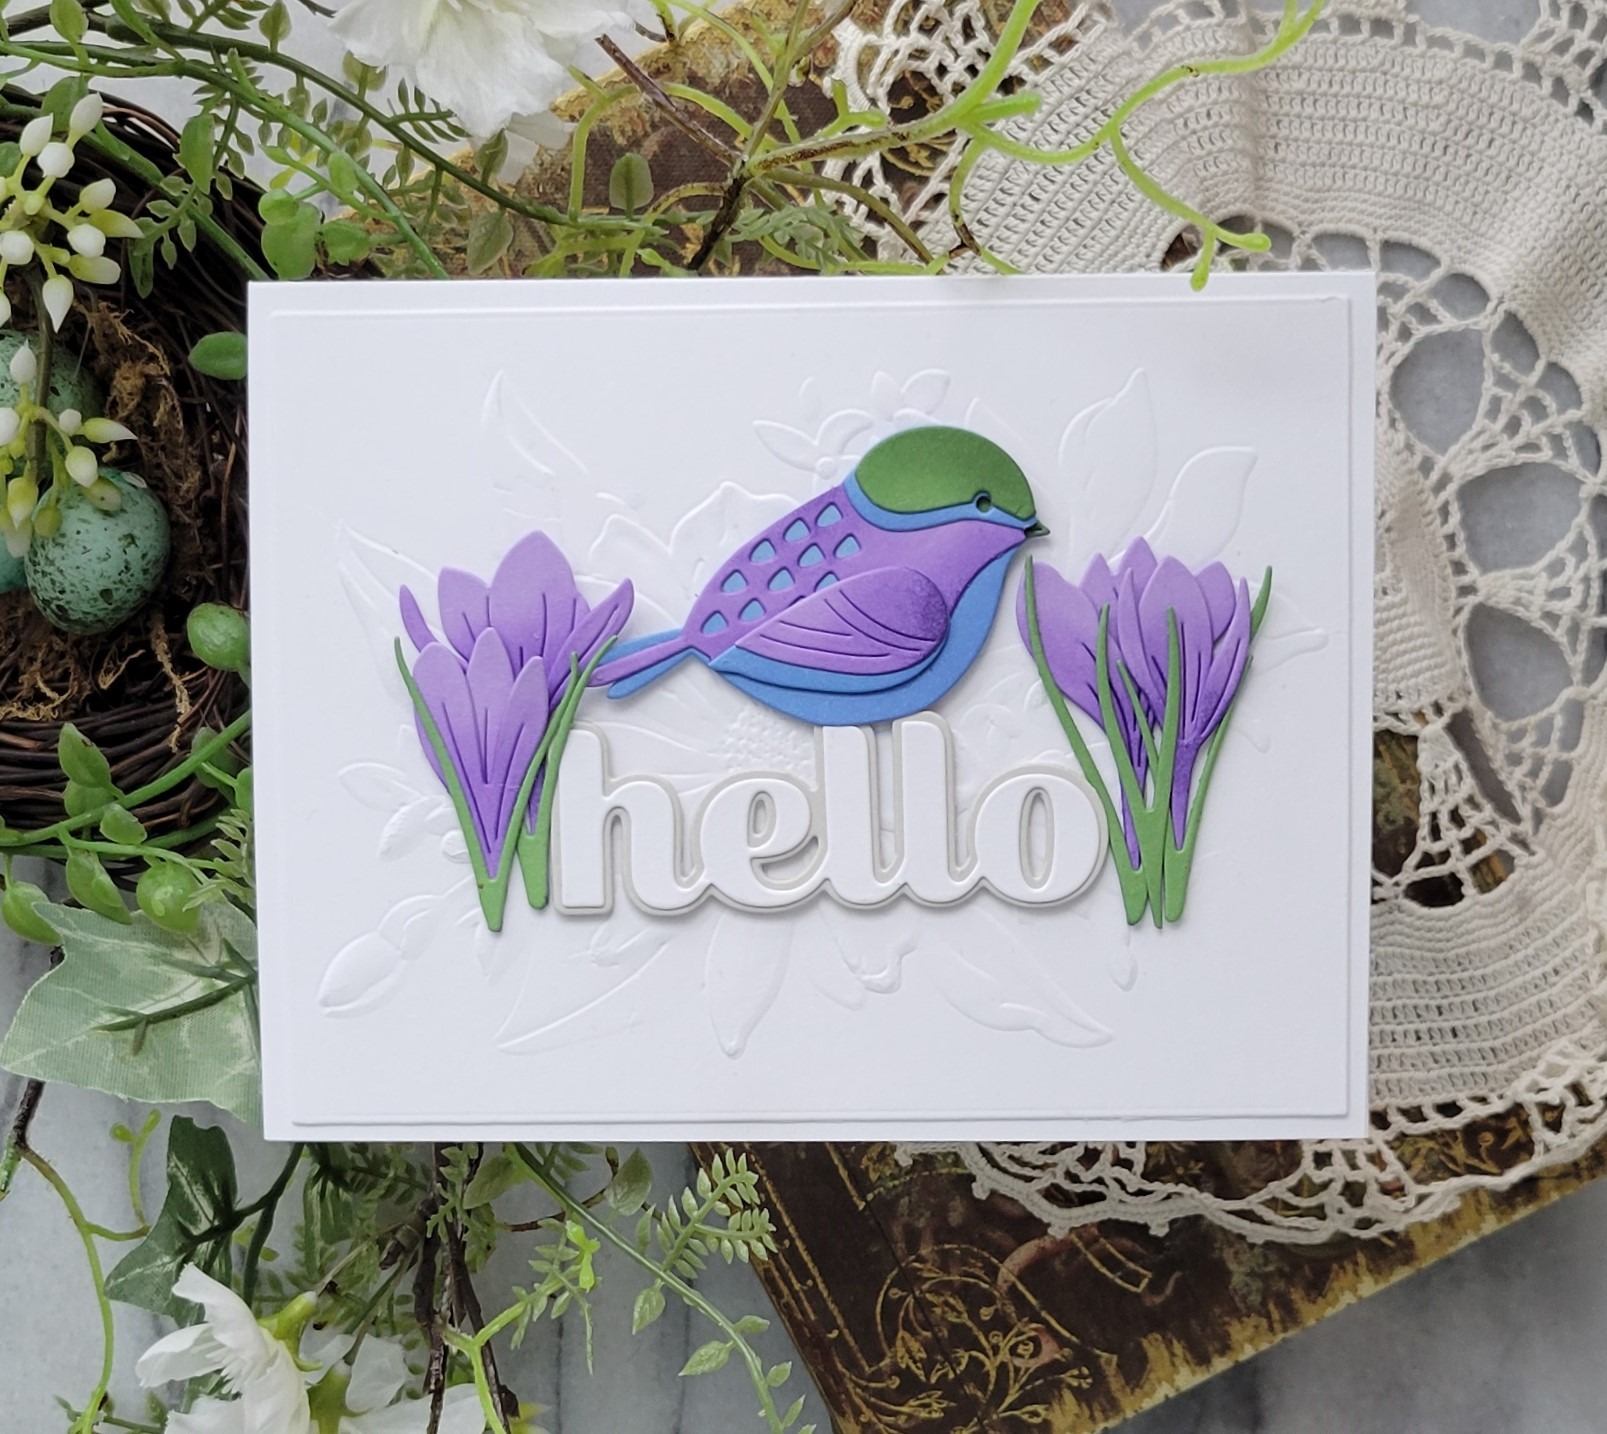
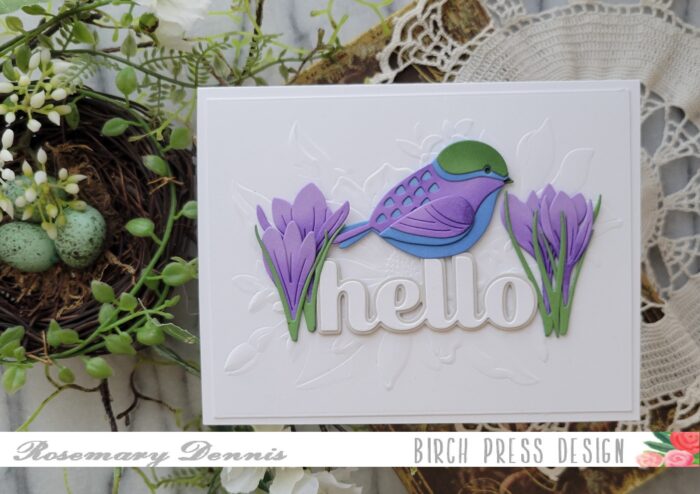
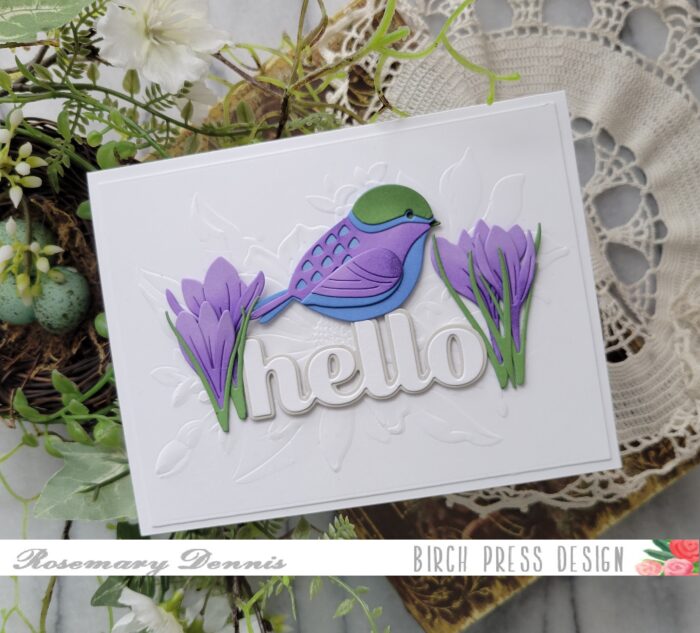
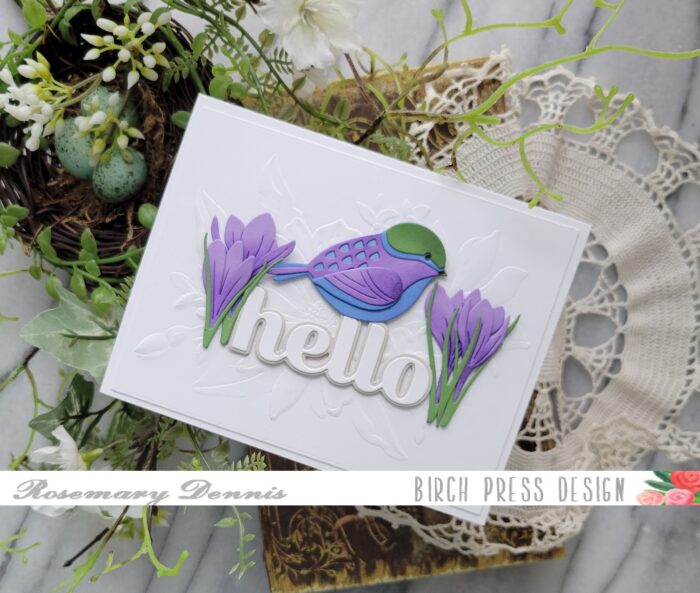
Hello, hello! Rosemary here today and I am back with a card featuring another super sweet Block Print die set. This time I’m using the Block Print Perched Bird. Let’s have a look at what I made.
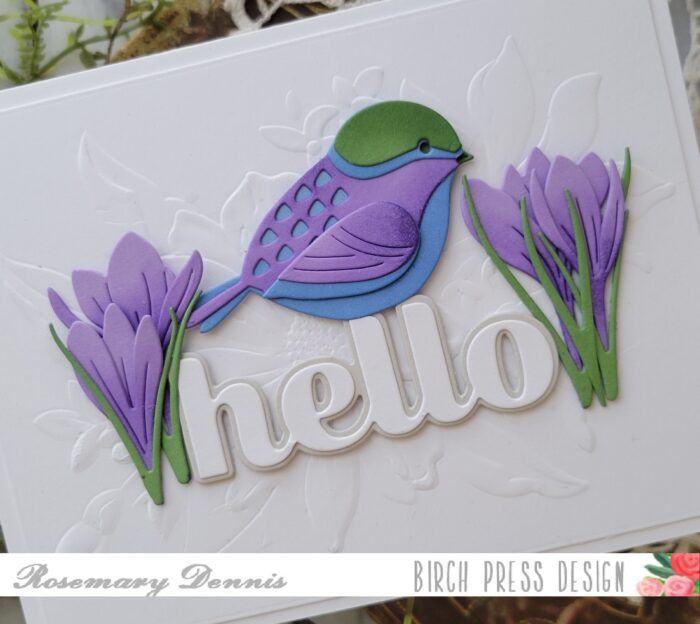
I knew I wanted to perch my little bird on one of the big Sugar Script die sets and settled on the Big Hello die set. I die cut the word from white cardstock and the shadow from a light gray. I did this because I wanted the focus to be on my little bird.
I decided to go with a blue/purple/green color combo because I thought it would be fun to add some flowers around the word and little bird. Since spring is on the way I decided to use the Sprouting Crocus Contour Layers dies.
I pulled out the colors of cardstock I wanted to use and then die cut all the pieces. To add some depth to the diecuts I did a little bit of inking to each piece with an ink color that was about two shades darker than the cardstock. Once everything was inked up I let the pieces dry a bit before adhering them together with liquid adhesive.
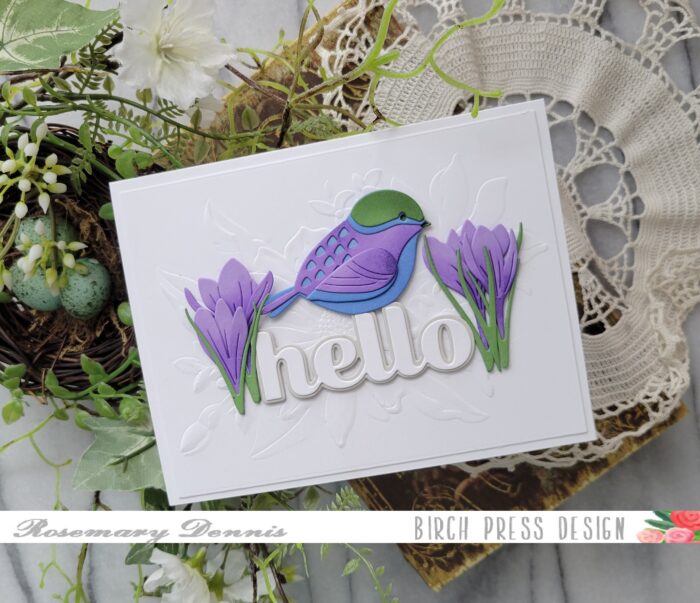
I wanted to add more interest to the background that my little scene would be sitting on. I initially had a different idea, but as I was looking through my products I saw the Memory Box/Open Studio embossing folders and decided to use one of them. I went with the Gracious Floral embossing folder. I embossed the white cardstock and then die cut it with a rectangle die. I did this because I wanted the embossing to be flattened just a little bit.
Now it was time to put it all together. I adhered the embossed panel to a white cardstock base and then arranged all my elements as you see. I used a combination of liquid adhesive and thin foam squares to adhere everything.
Well, that is it for me. I hope you enjoyed today’s project. Thanks for stopping by and have a wonderful day!
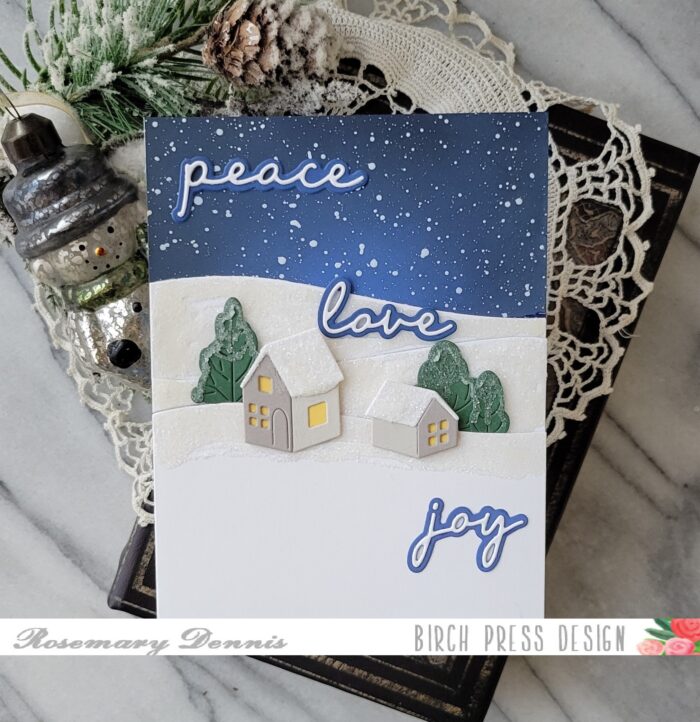
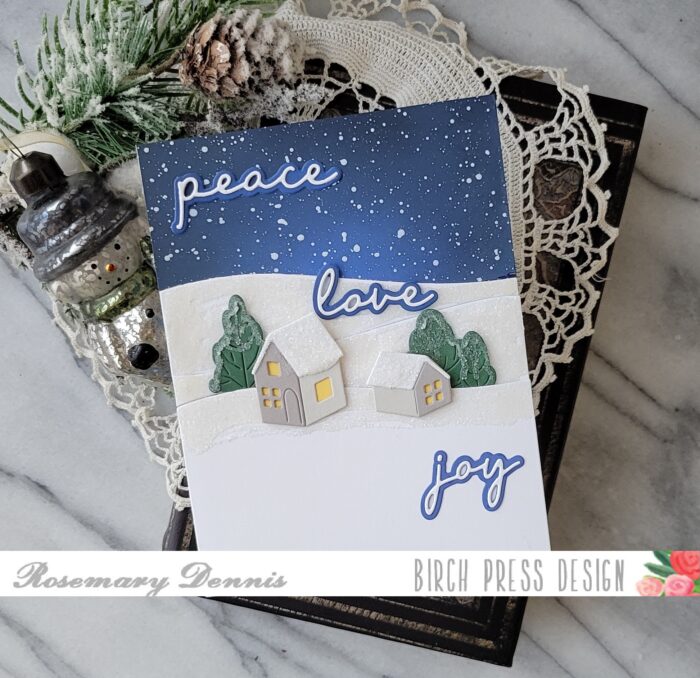
Hello, hello! Rosemary here on the blog today with a snowy scene card that was so much fun to make! Let’s have a look.
For my card I used the new Littletown Home, Wavy Hillside, and Peace Love Joy word die sets. The next few photos will show a little bit of my process for creating the card. I try to remember to take these kinds of photos, but sometimes get so involved in the process that I forget. This time I remembered!
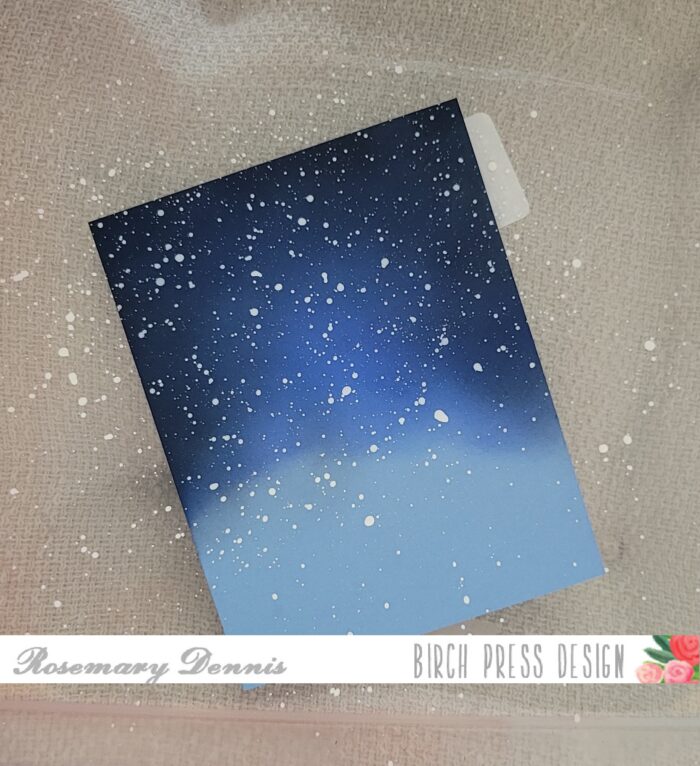
I started by cutting piece of light blue cardstock from the Lagoon 6×6 cardstock pad to 5 1/2 by 4 1/4. I pulled out several distress oxide inks in shades of blue and blended them onto the top of the cardstock. I knew I would be covering up the bottom so no need to waste time and ink there! Once I had the blues blended to my liking I added in some black using Black Soot distress oxide. I used Blueprint Sketch, Prized Ribbon and Chipped Sapphire for the blues (could only fit the Chipped Sapphire in the photo).
Once the ink blending was done I put the panel into my splatter box and liberally splatted the panel with white acrylic paint. I let the panel dry and moved on to the next step in my card process: creating the wintry hills for my little houses!
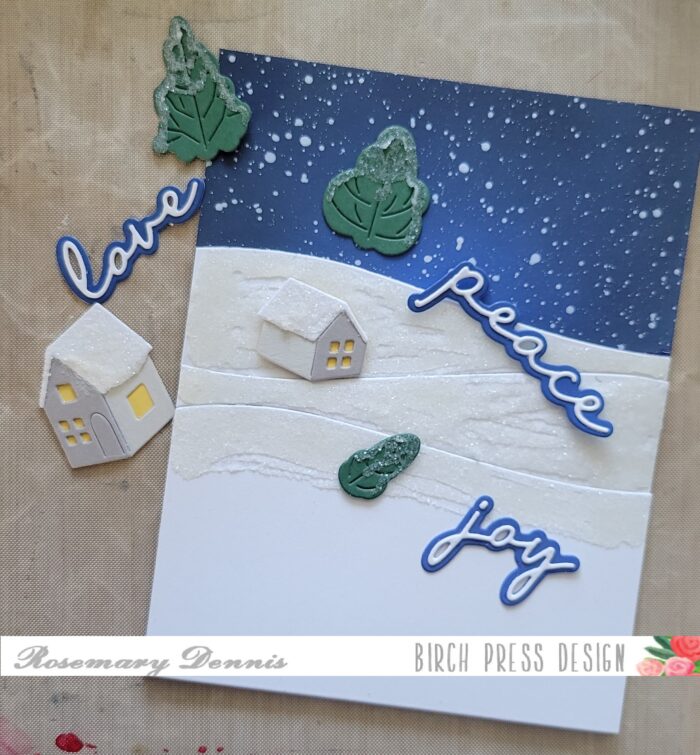
I used Glossy Accents to cover the hill pieces, but I didn’t cover the cardstock pieces completely as you can see in the above photo. I did this because I wanted a more realistic snow look to each piece. Giving it the look of high and low areas in the snow that are there in real life. I then covered each piece with Rock Candy glitter and let them dry.
Now it was time to make the little houses, trees and sentiments. I die cut the houses from white, grey and yellow cardstocks and then adhered them together. Glossy Accents was added to the roofs and then Rock Candy glitter for that icy, snowy look. For the trees I simply added some liquid adhesive and then sprinkled on the Rock Candy Glitter. I had a scrap of the light blue cardstock so I ink blended that with the blue distress inks I used and die cut the shadow layer of each word from that. The words were die cut from white and then adhered to the shadow layer with liquid adhesive.
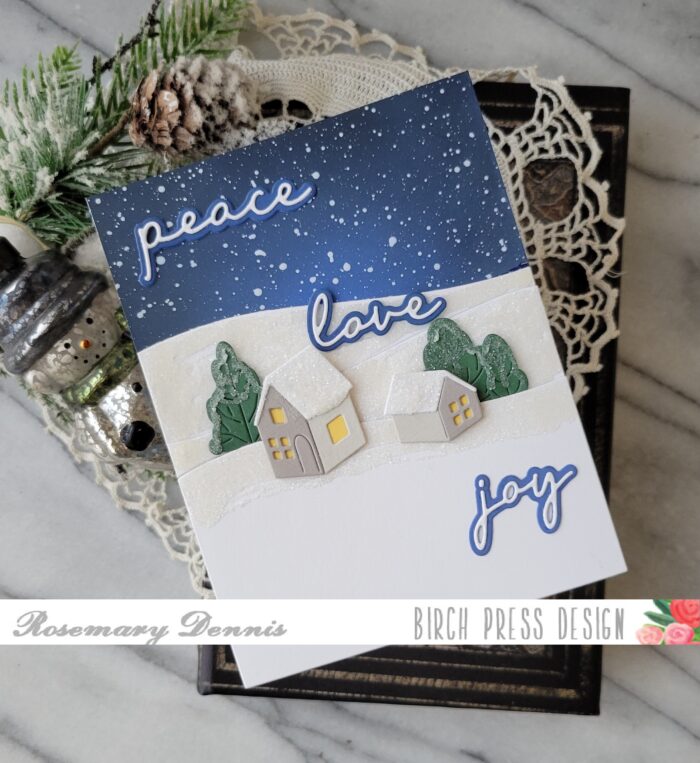
For the snowy hills I adhered the bottom one with foam tape. The middle layer was adhered with thin foam squares and the top layer with liquid adhesive. I layered the hills this way so that I could tuck the trees behind the bottom hill layer and the houses. The trees were adhered with a combination of liquid adhesive and thin foam squares. The houses were adhered in the same manner. The sentiments were adhered simply with liquid adhesive.
I hope you enjoyed today’s card and seeing a little bit of the process I used to create the card. Thanks for stopping by and have a wonderful day!
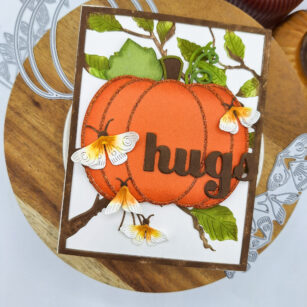
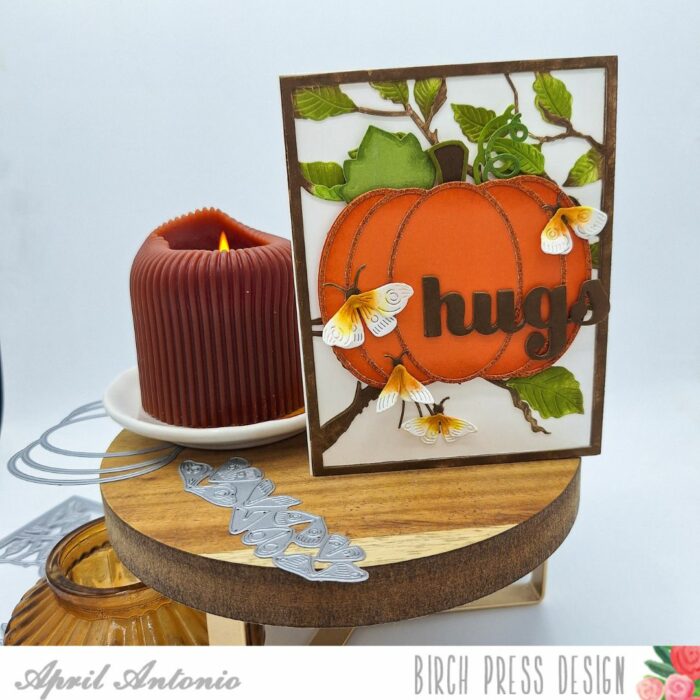
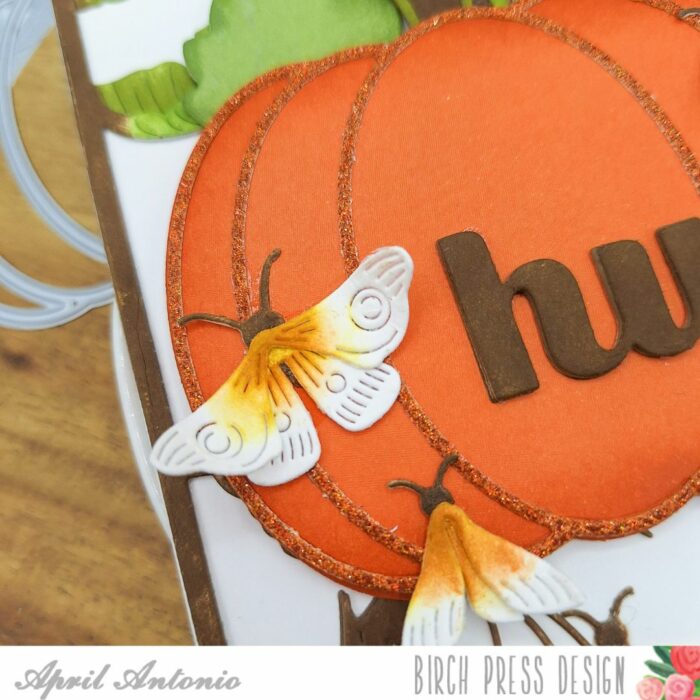
Hello friends! Design Team member April here today sharing a card in honor of the first day of Fall. Time to light some cozy candles, grab a warm blanket, and sink into a fun afternoon of crafting.
Here’s how I pulled this card together:
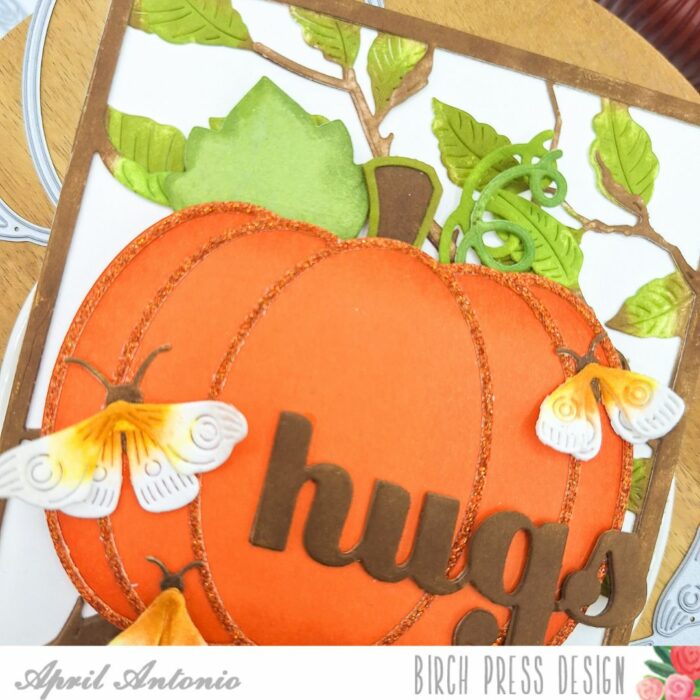
I used layer A and B from the Forest Canopy Layer set and ink blended on the leaves and branches with green and brown inks. I glued both layers together, and then used a tape runner to attach them to an A2 card front.
I then used a sheet of orange cardstock from the Sunny Orange cardstock pack to cut the background of the Adornment Pumpkin die set. I cut this out twice and used foam tape to glue the two pieces together.
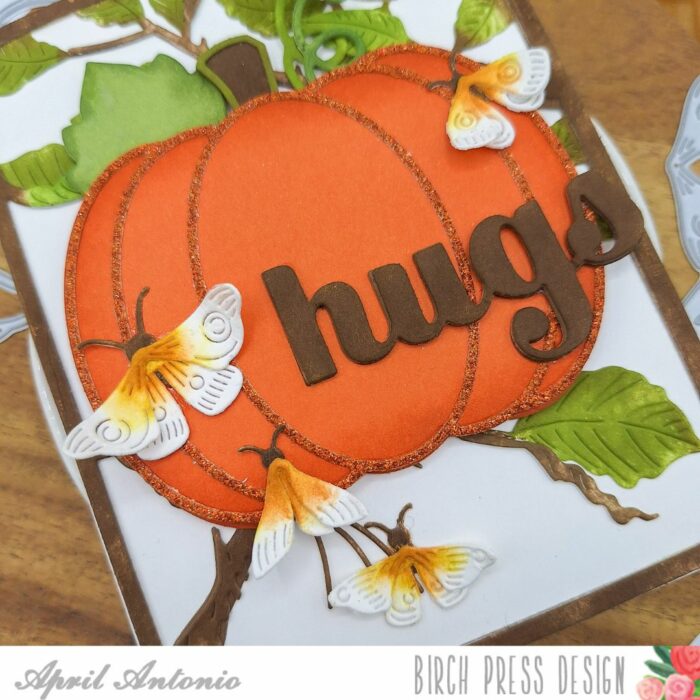
I cut the outline part from a piece of orange cardstock from the Glitzy Glitter pad. I finished off the pumpkin by ink blending the stem and leaves and adding them to the top.
For my sentiment I used the Big Hugs Sugar Script die, cutting it out three times and ink blending brown onto the layers, and gluing them together.
Lastly, I cut out all the dies from the Evening Moths die set from white cardstock.