Tag: crystal komara

  • Sending Hugs & Smiles | by Crystal Komara

    Sending Hugs & Smiles | by Crystal Komara

    Hello crafty readers! This is Design Team member Crystal Komara here today sharing a cheerful and uplifting slimline card made using the Eloquent Butterfly Layering set:

    I chose to create a slimline card because these butterflies are decent sized and I wanted to add multiples of them to this card. Because I used a black cardstock base, I also wanted lots of color from the butterflies to really stand out against the dark base.

    The base of this slimline card measures 8 1/2 ” x 3 1/2″. It fits inside a regular #10 business sized envelope.

    I hope you have enjoyed this cheerful and uplifting card! Thanks for visiting and have a wonderfully creative day!

    Supplies

  • H-E-L-L-O | by Crystal Komara

    H-E-L-L-O | by Crystal Komara

    H-e-l-l-o readers and happy June! This card will welcome you to summer many times over in an array of rainbow colors! This is DT member Crystal Komara here with you today sharing this fun clean and simple (CAS) card using the Jumbo Lingo Hello die and two single white curved leaf branches.

    Card details:

    The base of this A2 sized card is made from 80 lb. Neenah Solar White Smooth cardstock. Using the Jumbo Lingo Hello die, I die cut the sentiment many times from a variety of cardstock colors. To keep it simple, I die cut all the shadow bases from color cardstock and the thinner top layer all from white cardstock. I then arranged the “hello’s” in a pattern that seemed pleasing to my eye, while also not accidentally spelling out a bad word!

    Using the Contempto Greetings Stamp set, I stamped the hello circle in Versamark ink on black cardstock and then heat embossed it using white embossing powder. I used the coordinating die to die cut the sentient out. I adhered the sentiment to the center of the card using 3M foam adhesive to pop it up. I then die cut two white leaves using the Curved Leaf Branch and tucked them underneath the sentiment. Easy and colorful!

    I like how this card turned out, it’s fun for summer with those rainbow colors and what a cheerful way to greet anyone. Thanks for visiting and have a wonderfully creative day!

    Supplies

  • Happy Birthday Bloom | by Crystal Komara

    Happy Birthday Bloom | by Crystal Komara

    Hello crafty readers! This is Design Team member Crystal Komara on the blog today sharing one of my most recent card creations using the Perky Bloom Contour Layer. This bold and oversized flower has quickly become one of my favorite contour layering dies from Birch Press Design this release.

    Card details:

    The base of this A2 sized card is made from 80 lb. Neenah Solar White Smooth cardstock. I dry embossed a 5 1/4″ x 4″ sheet of black cardstock using the Blooming 3D embossing folder from Memory Box Company (a sister company of Birch Press Design). This is one of my favorite embossing folders. I adhered the black embossed cardstock directly to the card base.

    To create the flower, I used light pink, dark pink and yellow cardstock. I die cut the Perky Bloom Contour Layer multiple times from each of these colors of cardstock and then kept layering them to see which color combination I liked best. The good news was I die cut so many colors that I have plenty of other pieces leftover to make more cards! When I was satisfied with the flower, I adhered the flower to the card using 3M foam adhesive for added dimension.

    For the leaves, I used the Wiegala Leaf Contour Layers. I die cut the leaves from two different shades of green cardstock and layered the two together using a fine-tip liquid glue. Lastly I heat foiled the sentiment using the Sugar Script Sentiments 2. I used the ‘happy birthday” sentiment from this set. I heat foiled white cardstock in gold foil. Then I used the coordinating die cut to cut the sentiment out. I adhered the sentiment to the card and then added a couple clear rhinestones to resemble watery dew drops.
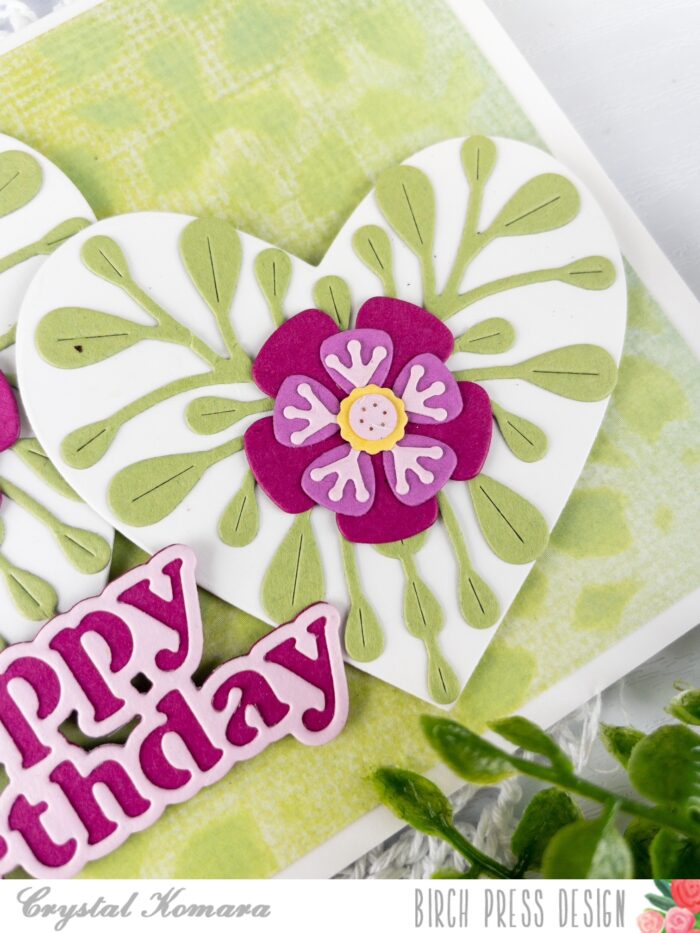
    I hope you have enjoyed this beautiful birthday card. Thanks for visiting and have a wonderfully creative day!

    Supplies

  • Eloquent Alcohol Ink Butterflies | by Crystal Komara

    Eloquent Alcohol Ink Butterflies | by Crystal Komara

    Hello Birch Press Design readers! This is DT Member Crystal Komara here today and I’m so excited at how today’s card turned out. I’m going to kind of toot my own horn here, for just a second, but it currently is my absolute favorite card! I know, I know, this changes over time and with each new card that I make, but for today, I’m gonna let this card have its moment and shine as my “favorite!”

    I have long used alcohol inks in my card making. I think they make for beautiful background and accent pieces. If you’d like to see more examples, please click on any of the following descriptive links:

    ~Alcohol Ink Leaves

    ~ Alcohol Ink Easter Eggs

    ~Alcohol Ink Birthday Balloons

    ~Alcohol Inks Hearts and Butterflies

    ~Alcohol Ink String Art

    When I have the time, I sit down and make a ton of alcohol ink art pieces, I’m talking like anywhere between 50-100 pieces at a time and then I put them in a bin and tuck them away. When I need to make a “quick card,” I simply pull from the pre-made bin and finish my card. Many of the alcohol ink backgrounds I create often feature rainbow colors, similar to today’s.

    Card details:

    The base of this A2 sized card is made from 80 lb. Neenah Solar White Smooth cardstock. I then cut one of the pre-made alcohol ink pieces down to 5 1/4″ x 4″ and adhered it directly to the card base. Next I created two butterflies using the Eloquent Butterfly Layering set. The first butterfly was made from pink cardstock and the second butterfly was made from orange/peach cardstock. For both of the butterflies, I die cut Layer A (the top layer) from white cardstock. I adhered the butterflies to the card using 3M foam adhesive for added dimension. Lastly I added a couple clear rhinestones on the body of the butterfly for even more sparkle.

    I hope you will enjoy this card as much as I do! Now excuse me while I go make twenty more of this one to send to friends!! Thanks for visiting and have a wonderfully creative day.

    Supplies

  • Vibrant and Perky Bloom | by Crystal Komara

    Vibrant and Perky Bloom | by Crystal Komara

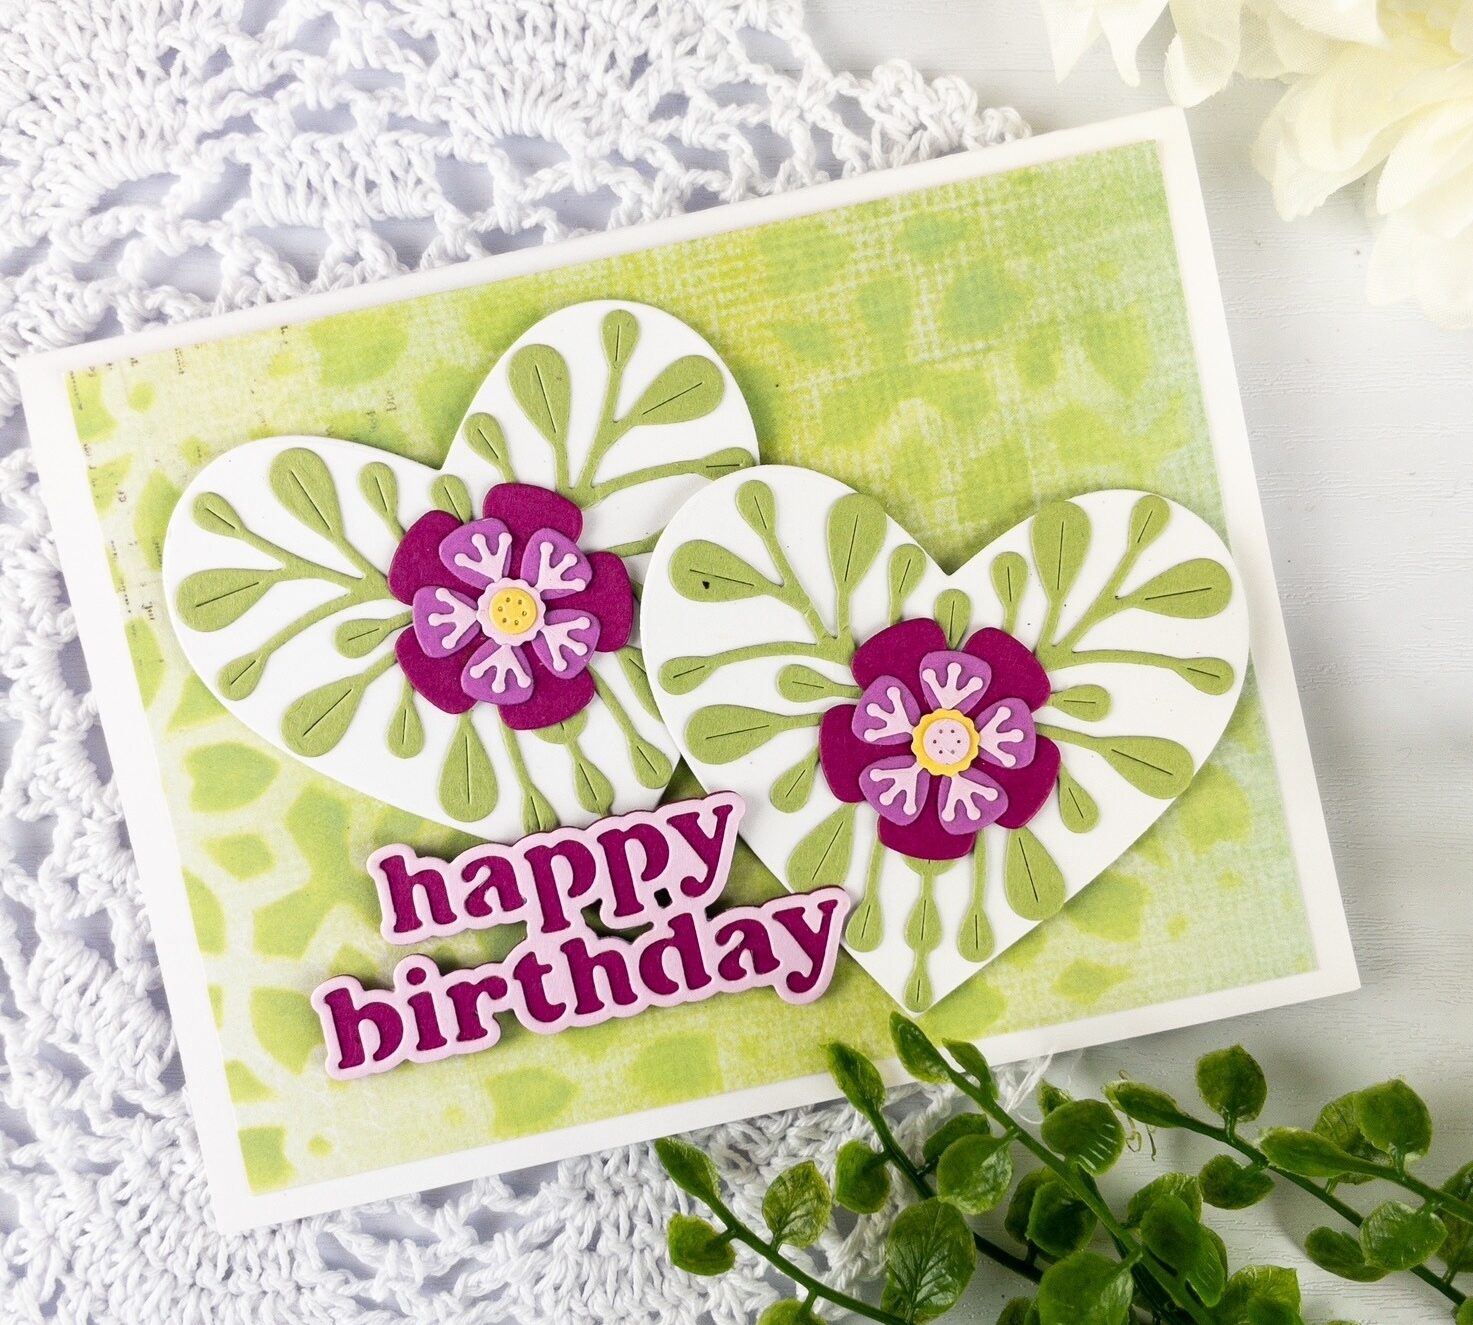
    Hello friends! Today I have a very bold and vibrant card to share with you using the new Perky Bloom Contour dies. I love mixing the Birch Press Design products with alcohol inks and I have frequently done so in the past. For other unique alcohol ink ideas, please check out my posts here, here and here. And, today, I have another one to add to my ever growing list!

    Card details:

    The base of this A2 sized card is made from 80 lb. Neenah Solar White Smooth cardstock. For the background of this card, I used a pre-created piece of alcohol ink art that I keep stored in a bin for easy pull-out and use to create “quick cards” with. This background was mostly a gold honey color, but I did splatter it with black ink for extra interest.

    I used the new Perky Bloom Layering dies to create the two flowers. I cut each layer of the die from pink, peach and yellow cardstock and then continued to layer them together until I had a color combination that appealed to my eye and seemingly worked with the busy background and well! I adhered the flowers to the card using 3M foam adhesive for added dimension.

    Lastly, I added one of the new foil greeting black tabs from Memory Box Company (a sister company to Birch Press Design). These new foiled tabs are beautifully made and are made of a nice thick chipboard. What a quick way to add an elegant sentiment!

    Sure, today’s card is very bold and vibrant, but doesn’t it also make you so happy and cheerful!? I hope you have enjoyed this card. Thanks for visiting and have a wonderfully creative day!
    Supplies

  • Hello Butterfly | by Crystal Komara

    Hello Butterfly | by Crystal Komara

    Hello friends and happy April! I feel like the days are finally getting warmer and we’re seeing the sun more here in New England. Spring has officially arrived! This is DT member Crystal Komara and I’m sharing a card using multiple products from Birch Press Design to include the Eloquent Butterfly and Field of Blooms Layering Dies.

    Card details:

    The base of this A2 sized card is made from 80 lb. Neenah Solar White Smooth cardstock. This is my go-to cardstock for e-v-e-r-y-t-h-i-n-g. I use it in all aspects of card making from stamping, die cutting, ink blending and Copic coloring. To create the background of this card, I used the Field of Blooms Layering die set. I die cut Layer A (the top layer) from white cardstock, Layer B (the leaves layer) from mint green cardstock, Layer C (the tulip layer) from dark pink cardstock and then put a sheet of light pink cardstock behind the entire die to create a second layer of tulips. Then I cut the background down from a full sheet into one measuring 4 1/4″ x 3 1/2.

    I adhere the background to the lower 1/3 of the card leaving room for the “hello” at the top of the card. For the hello I used the Jumbo Lingo word die. I die cut the bottom shadow layer from dark pink cardstock and the top layer from white cardstock. I adhere both layers together with a fine tip liquid adhesive. I then adhered the sentiment to the top of the card.

    To create the butterfly I die cut Layer A (the top layer) from the Eloquent Butterfly layering dies. Then I took a pre-created piece of alcohol ink art and used Layer C to die cut the butterfly shape out. I adhered the alcohol ink background behind Layer A. I adhered the butterfly to the card using 3M foam for added dimension.

    I hope you have enjoyed today’s spring-y card! Thanks for visiting and have a wonderfully creative day!
    Supplies

  • Floral Gold Cross | by Crystal Komara

    Floral Gold Cross | by Crystal Komara

    Hello friends! This is DT member Crystal Komara here with you today sharing more Easter inspiration using the beautiful new Floral Cross Layer Set. I have been enjoying playing around with these new dies and I can’t wait to see what my other team members create using it as well.

    Card details:

    The base of this A2 sized card is made from 80 lb. Neenah Solar White Smooth cardstock. I cut Layer A from the Flora Plate Layering Set using the same white cardstock and this became the first layer of the card adding some texture and design to the background. I die cut Layer A of the Floral Cross from white cardstock and Layer C (the bottom layer) from gold glitter cardstock. I layered the two together with a fine-tip liquid adhesive and then I adhered the cross to the card using 3M foam adhesive for added dimension.

    For the large flower I used the Perky Bloom Contour Layer Set. I die cut this flower from peach, pink and yellow cardstock. I adhere all the layers together and then die cut the stamen from black cardstock. I adhered the flower to the base of the cross and added a couple green vines running up through the cross.

    I am so happy with how this card came out and I am so in love with this elegant multi-layered cross and all its accompanying flowers and vines. I hope you will enjoy it too! Thanks for visiting and have a wonderfully crafty day!

    Supplies

  • Pink Petal Egg | by Crystal Komara

    Pink Petal Egg | by Crystal Komara

    Hello friends and happy Fri-YAY! I hope you have fun things planned for the weekend ahead. This is DT member Crystal Komara here with you sharing some Easter inspiration using the beautiful Petal Egg Layering set. This is one of my go-to dies for many spring themed cards. For other Easter inspiration using this same layering die set, please check out these ideas here and here. If you’re looking for more Easter inspiration using alcohol inks too (like today’s card) then you’ll love this pair of cards in purple too!

    Card details:

    The base of this A2 sized card is made from 80 lb. Neenah Solar White Smooth cardstock. On a 5 1/4″ x 4″ piece of Yupo polysynthetic paper, I created the background using magenta alcohol ink. Once that background dried, I adhered it directly to the card base. To create the egg, I die cut Layer A (the top layer) from white cardstock. I die cut Layer B (the middle layer) from a light pink cardstock. I die cut Layer C (the bottom layer) from a darker pink cardstock. I adhered all three layers together with a fine-tip liquid adhesive. Then I adhered the entire egg to the card using 3M foam adhesive.

    I stamped the sentiment “peace” in Versamark ink on dark pink cardstock. I heat embossed the sentiment with white embossing powder and then fussy cut the sentiment out. This sentiment is from the Glad Tidings stamp set. I also added butterflies surrounding the egg. The butterflies are from the Simple Butterflies Contour Layering dies. I die cut the butterflies from the same dark pink and white cardstock. The bodies/antenna of the butterflies was die cut from black cardstock.

    Easter falls really early this year on March 31st. I’ll be back later this month with more Easter inspiration to share! Thanks for visiting and have a wonderfully creative day!
    Supplies

  • Rose Bunch in Blue | by Crystal Komara

    Rose Bunch in Blue | by Crystal Komara

    Hello! Happy Friday friends! I hope you have great things planned for the weekend ahead. This is Design Team member Crystal Komara and I’m very excited to share today’s card with you in my favorite color – blue! This card uses lots of beautiful products from Birch Press Design including the Rose Bunch Contour Layering Dies, Mixed Berry Contour dies, Just a Note Noted Script Hot Foil plate and Rose Leaves Contour Layers! Continue reading to learn how I created this very detailed card:

    I’m not going to lie, putting the Rose Bunch Contour Layers together is the most cumbersome part of this card and it truly irritated me a little, but the end result – is SO worth it!

    Card details:

    The base of this A2 sized card is made from 80 lb. Neenah Solar White Smooth cardstock. I then adhered a 5 1/4″ x 4″ piece of bold blue cardstock directly to the card base. I then began cutting two sets of the Rose Bunch Contour Layers from three different colored blues cardstocks. (Please see the end of this post where I have pictures of how I die cut these pieces and assembled them). Once the flowers were assembled, I then assembled the leaves using a light green cardstock and a green glitter cardstock. (Again, there are additional photos at the end of this post. )

    I assembled the Mixed Berry Contour dies using gold glitter stems and two different colors of blue cardstock for the berries. This was just a lot of gluing of little tiny pieces!

    I adhered the leaves to the card first and then layered the roses on top. Once everything was situated where I wanted it, I peeled off the backing of the tape and pressed it all firmly into place. I splattered the entire card with a little gold paint. Lastly I heat embossed the sentiment using the Just a Note Noted Script hot foil plate. I used gold foil on white cardstock. I adhered the sentiment to the lower right side of the card using 3M foam adhesive for added dimension.

    Here are the closeup photos of how I die cut the roses and then assembled them:

    Step 1: Cut base from bold blue cardstock
    Step 2: Cut contour layers from another color blue
    Step 3: Begin to adhered the contour layers together
    Step 4: Assemble the Rose Leaf Contour Layers

    When it all comes together, this card is just simply beautiful and worth all the piece work of those contour layering dies! Thanks for visiting and have a wonderfully creative day!
    Supplies

  • Just a Note | by Crystal Komara

    Just a Note | by Crystal Komara

    Hello friends and happy week after Valentine’s Day! This is Design Team member Crystal Komara, and, as per my usual, I’m a wee bit late to the game. But, even though Valentine’s Day has passed, every day is a day to celebrate love and today’s card could be shared all throughout the year.

    Card details:

    The base of this card is made from 80 lb. Neenah White Solar Smooth cardstock. Using a sheet of red cardstock, I die cut Layer A from the Kinsley Heart Layer Plate set. I adhere this directly to the card base. I heat foiled the sentiment “just a note” using the Just a Note Script Hot Foil Plate. I used gold foil on white cardstock.

    To create the heart focal piece I used a layering heart die. Apparently the one I used must have retired, so might I suggest using the Caprice Heart Layering Die instead, which would yield da very similar look! I die cut Layer C from a bold pink cardstock, Layer B from a light pink cardstock and Layer C (the top layer) from red cardstock. I adhered all three layers together with a fine tip liquid glue. Once all three layers were adhered together, I placed the heart over a piece of gold glitter cardstock and trimmed it by hand to fit behind the entire heart.

    I adhere the heart to the center of the card and then adhered the gold foiled sentiment just slightly off center using 3M adhesive. Lastly I added a couple clear rhinestone gems for added texture.

    I hope you like this beautiful card! Thanks for visiting and have a wonderfully creative day!
    Supplies