Tag: mixed media

  • Warm Autumn Wishes with Adornment Pumpkin Die | by Colleen Balija

    Warm Autumn Wishes with Adornment Pumpkin Die | by Colleen Balija

    Hi friends!

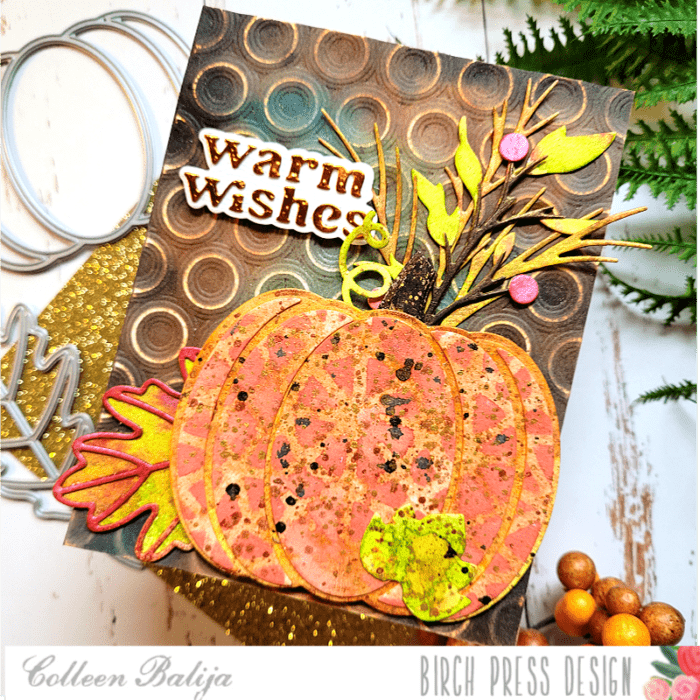
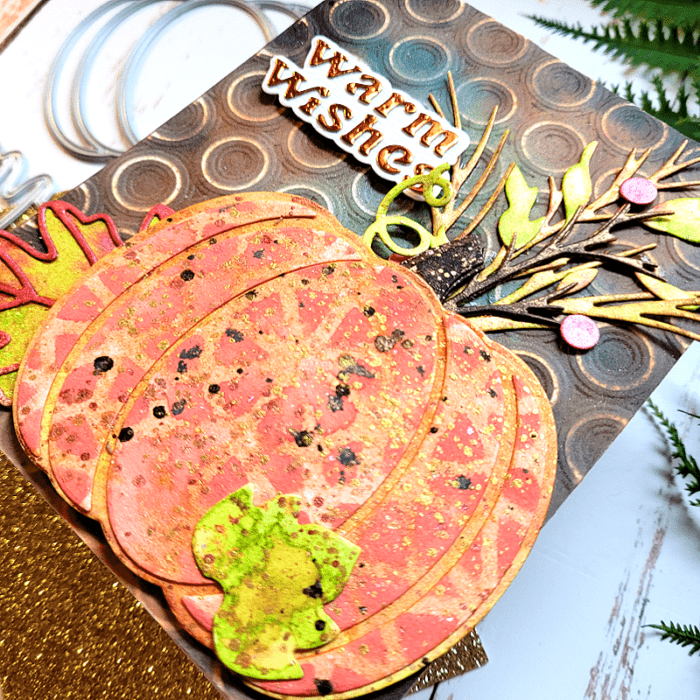
    With fall upon us in full swing, I wanted to make a festive autumn card using Adornment Pumpkin die set! I’ll also be using Warm Wishes layering die, Hillside Branch & Contour Layers, Adornment Oak Leaf die, Splendor Bevel Plate (Layer A only), Memory Box Cream Woodgrain paper, Memory Box Vintage Pastel Mirror paper, and Memory Box Ringadings embossing folder! All of the product links will be listed at the end of my post!

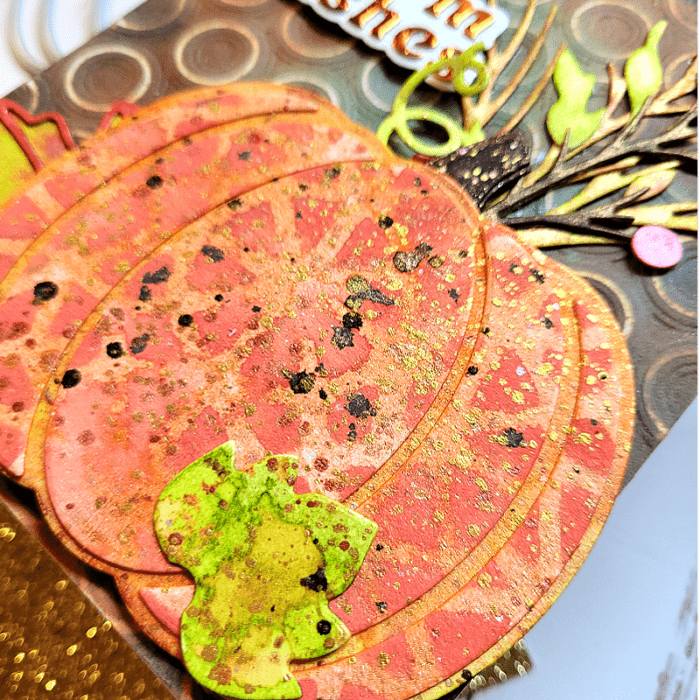
    I’ve been seeing pumpkin cards where the pumpkins have been stamped with a design, so I decided to do that with the Adornment Pumpkin! I die cut the layers on watercolor paper and sprayed them with Hero Arts Orange and Bright Yellow shimmer sprays. These sprays add a really cool shimmer that I wanted to get with my pumpkin! Next, I grabbed Splendor Bevel Plate Layer A and used it as a stencil, applying color through the die onto the top layer of the pumpkin using a darker orange ink. I applied green spray over the leaf and brown over the stem. Then I adhered the layers together and splattered gold and dark brown inks over the top. Then I set my festively decorated pumpkin aside for later! Below is a close up of the details on my pumpkin, I love it!!!!!

    Next step was to work on the foliage that I wanted to place around the pumpkin. I die cut Hillside Branch & Contour Layers and Adornment Leaf die on watercolor paper and then sprayed those the same way I sprayed my pumpkin. Then I adhered the layers together.

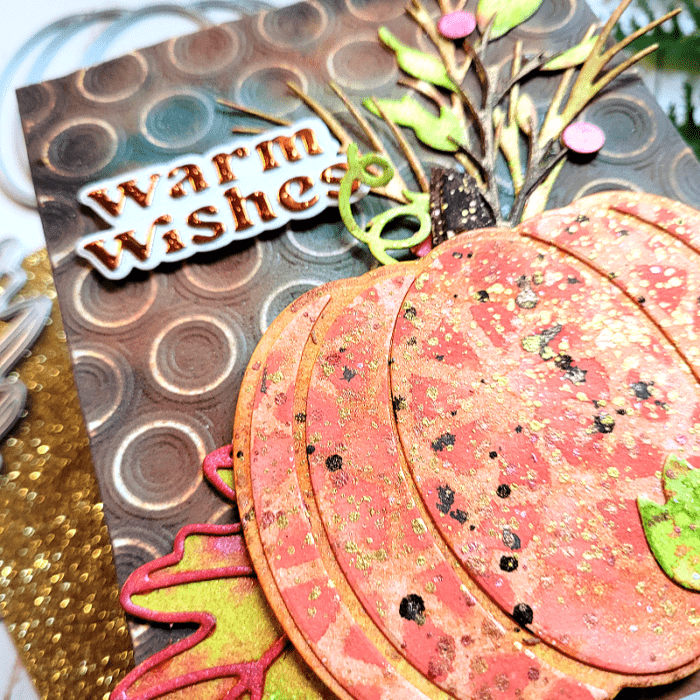
    Now for the background! I grabbed a colored card panel that I had in my stash (I occasionally create several background panels to be used when needed – it’s really handy!). Then I embossed the panel with Ringadings embossing folder. This folder is AWESOME! Next, I used a sanding tool to remove a layer of ink from the raised areas of the embossed image. You can see how the circles are almost white! This is an easy technique that adds another element of detail and is amazing for mixed media! I adhered the panel to a white 5.5×4.25 card base. Also, I die cut the layers of Warm Wishes using Memory Box Cream Woodgrain paper and a bronze shade from the Vintage Pastel Mirror paper. I adhered the pumpkin and tucked the foliage in behind it, and then finished with the sentiment.

    TIP: To place the letters of your sentiment in the exact position, I place the outer portion (negative) of the die over the base layer (which was the Woodgrain Cream color) but don’t adhere it! Then I add glue to the letters and tuck them inside the positive part of the die. I gently pull the negative portion off using a pick to ensure the letters stay in place and don’t lift with the outer die! Easy peasy!

    I love how the background is quite dark compared to the colorful pumpkin and foliage. That really helps the focal point to pop! Thanks for stopping by today!

    Supplies


  • Fall Adornment Oak Leaves | by Colleen Balija

    Fall Adornment Oak Leaves | by Colleen Balija

    Hey friends,

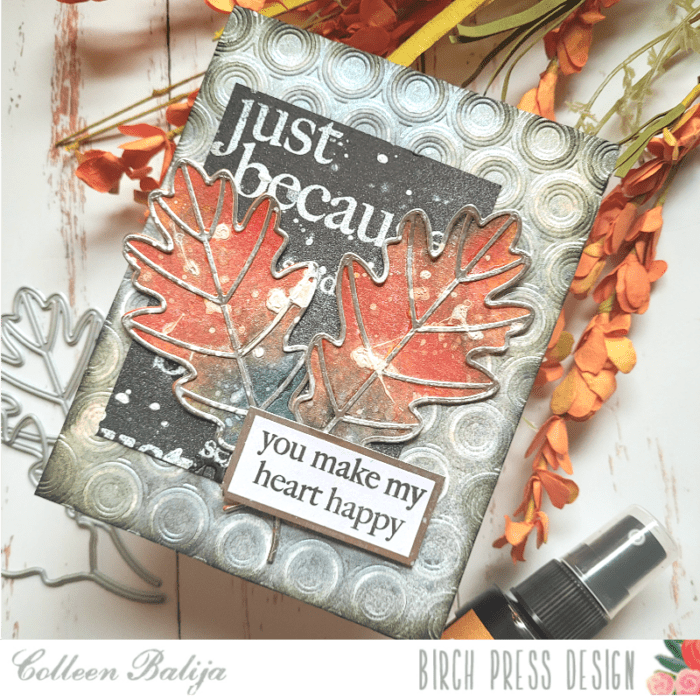
    It’s getting to that time of year when the leaves turn on the trees and we begin to crave hot cocoa and Pumpkin Spice Lattes! Yummm! Fall time of year can be messy and yet it can also take your breath away with the sights and smells! So today’s card is a tribute to all that is fall! I will be using the NEW Adornment Oak Leaf die, Membory Box Ringading embossing folder, and Memory Box Gracious Gloral stamp set.

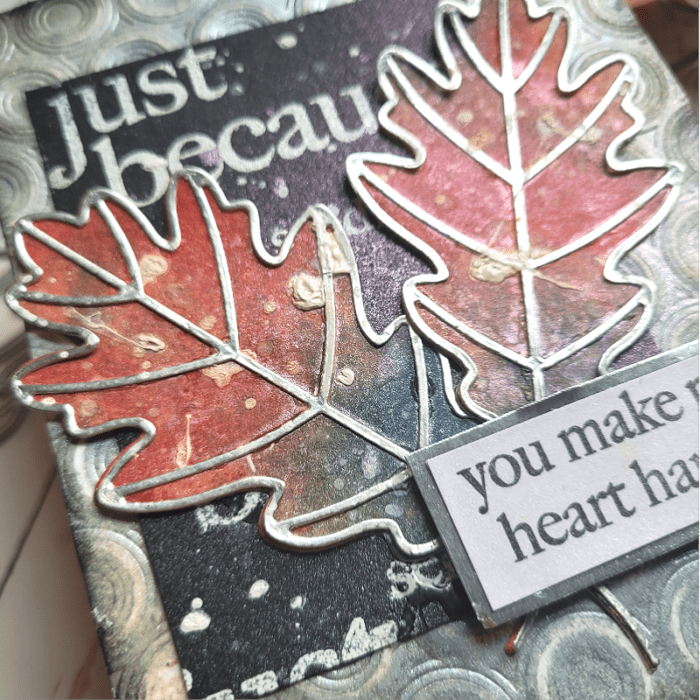
    I started with the Adornment Oak Leaves by die cutting two of the base layers onto a card panel that I had sprayed in various autumn colors. Next, I die cut the 2nd layer using silver cardstock. I splattered white ink over the leaves to finish and set them aside to dry.

    Next, I worked on the black backdrop that would sit behind the leaves and the background. I trimmed a piece of black cardstock and then heat embossed 2 sentiments from Memory Box Gracious Floral stamp in white embossing powder. Then I added some white splatters and set it aside to dry. This technique of randomly stamping a sentiment is a great mixed media tool that is easy to do and very effective! It takes a piece of plain black cardstock and adds subtle detail and interest!

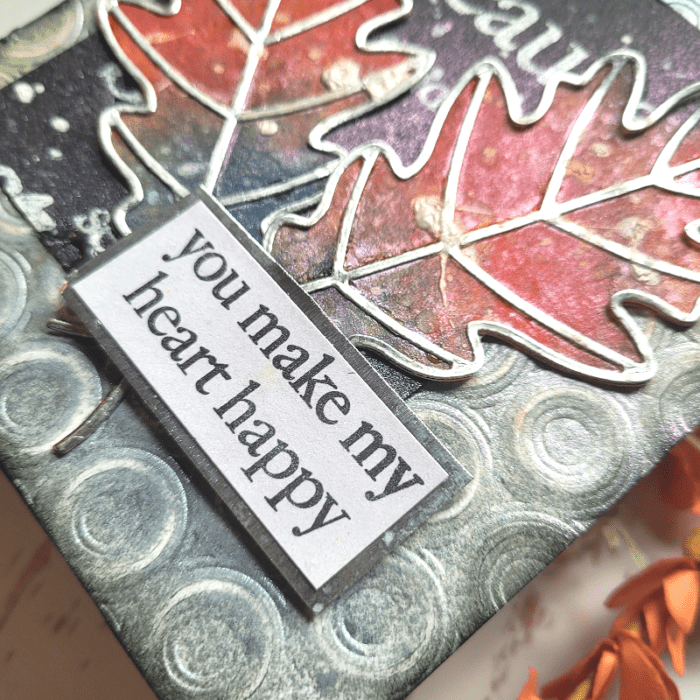
    The background panel was created using Memory Box Ringadings embossing folder, which I embossed over a card panel that was sprayed in shades of grey and tan Mica. The Mica adds texture and shine, another great mixed media tool! If you don’t have sprays, not to worry! Just use your inks and you’ll achieve a similar look.

    After I embossed the image, I went over the raised parts of it with a sander and removed some of the color. You can see in the photo below the distressed look this technique provides! And it’s so simple to do!!! By the way, you can find sanders at just about any craft store! It’s a great tool to keep in your stash!

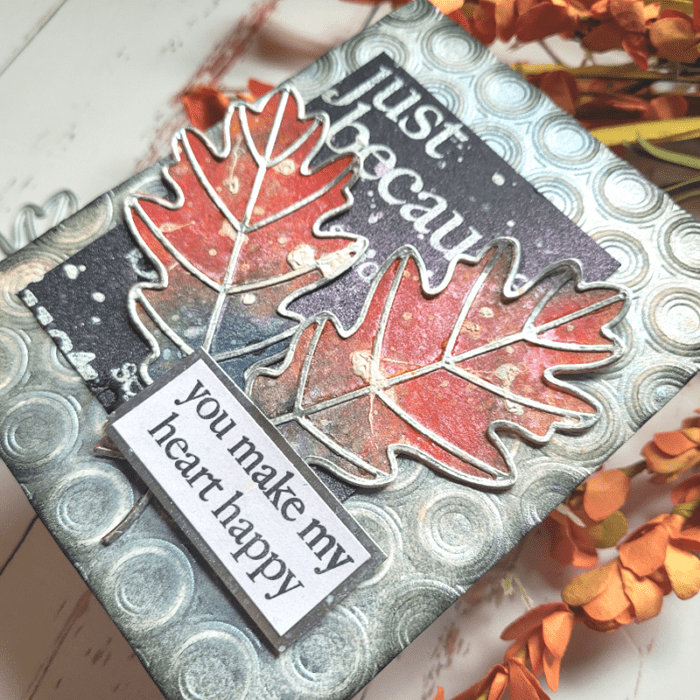
    The last step was to put everything together. I adhered the embossed panel over a 5.5×4.25 white card base, and then adhered the black panel over it, slightly off center to the left. Then I added the 2 Adornment Leaves and a sentiment from Memory Box Gracious Floral!

    This card may look complicated, but it was so easy to create, and you can do it with your own stash! Thanks so much for stopping by today!

    Supplies


  • Using Color Mood Boards for Inspiration Part 2 | by Colleen Balija

    Using Color Mood Boards for Inspiration Part 2 | by Colleen Balija

    Hi friends! I’m back for Part 2 of How to Use Color Mood Boards for Inspiration! If you haven’t watched my previous post, be sure to visit that one as well for more inspiration! I love to use mood boards for color, texture, and design layout for my cards. Everything is done for you, so all that’s left is for you to choose what inspires you and make your card! Here is the mood board that inspired today’s card:
    This mood board seemed old fashioned and rustic to me. I loved the hunter green from the apron, the yellow, brown, and blue from the words (lower right corner), the striking black words right above it, and the distressed shades beige from the manikin. The textures that I loved were from the manikin, the straw hat, and the large heart below the cherry apron. I wanted my card to be rustic and include a heart, flowers, and a mixed media touch with lots and lots of texture!

    Step one was to create a textured background based on my observations of the mood board. You can see in the photo below all of the subtle, effective detail to my background. Let’s talk about how I achieved this look!

    First, I duplicated the various shades of beige on the manikin using 3 shades of brown distress inks and then ink schmooshing onto watercolor cardstock. I placed the inks onto a glass media matt, sprayed with water, and then dipped the watercolor paper onto the ink. I kept repeating this process until I got the desired result. It helps to start with the lightest color of ink and heat each layer before adding the next layer. This creates a distressed look similar to the wood and manikin in the mood board.

    Next, I applied a dark teal shade of ink onto Flora Die Plate Layer B and then placed my inked-up card panel over the die plate and embossed it with my die cut machine (embossing techniques vary by machine – see the instructions for your machine on how to emboss with dies). The emboss technique creates an impression of the die onto your card panel without cutting all the way through it. When I removed the die plate, I was left with an embossed image of flowers edged with the teal ink! Then I went back over the raised image with a bright yellow ink to give the flower petals a pop of color! I adhered the card panel to a white 5.5×4.25 card base and added blue Fairy Jewels over each flower for added interest.

    Next step was to work on the flowers and add even more texture! In the photo below, you can see the color and texture with the Banner Hearts die, Mini Splendor Bevel Plates, and Phlox Blooms & Leaves dies.

    I die cut all of the above mentioned elements onto white cardstock. Then, I sprayed each of them using my Lindy’s sprays. Lindy’s sprays have subtle color variances and a bit of shine to them, so I knew they would be perfect for this mixed media project! After everything dried, I adhered the layers together. I placed the Mini Splendor Bevel Plates die over the card base about 2/3 of the way down. Then I placed the Banner Hearts die over it and to the right. I placed the 2 Phlox flowers and leaves over the lower part of the heart and finished with a “HB” (Happy Birthday) sentiment from Mod Alphabet stamp and die set. I chose that set because it reminded me of the bold yellow and blue words on the apron! Then I added “It’s Your Day” from Kind Hearts stamp to complete the sentiment.

    I love to find unique elements from color mood boards to use on my cards, and I generally get lots of comments about it! I think that’s because the mood boards really inspire me to get playful! See if you can find some unique color mood boards that inspire you to jazz up your cards! You can even use mine! Be sure to let your creative juices flow on the layout and design of your card! Thanks for stopping by today!

    Supplies