
There is nothing is more beautiful than the look and dimension of layered stamping. The Birch Press Design Let It Snow layered snowy tree looks so real it is hard to believe that there isn’t actually snow on it. As beautiful as layered stamps are sometimes they are not the easiest to stamp. Today’s tutorial is to help you to achieve the perfect layered result easily time after time. Once you master the technique you are set to mass produce the trees for holiday tags or to put on to your holiday cards.

The tree is three separate stamps, for today’s tutorial we are using two shades of green and a soft blue. We begin by stamping the first layer in the lightest shade of green.

Using the darkest shade of green we are going to add depth and dimension to the greenery on the tree. The following photo shows you where you will want to place the stamp for the second layer on the tree. You will notice there is an obvious notch at the bottom of the tree that the stamp fits right over.

See all the gorgeous dimension?

Now this is where the magic happens. For the third layer we are using the soft blue or a soft grey would be lovely too. There is a little swoosh that sits of top of that notch we were using when we stamped the second layer, that is where you line up the final stamp.

See how the layers have all come together.

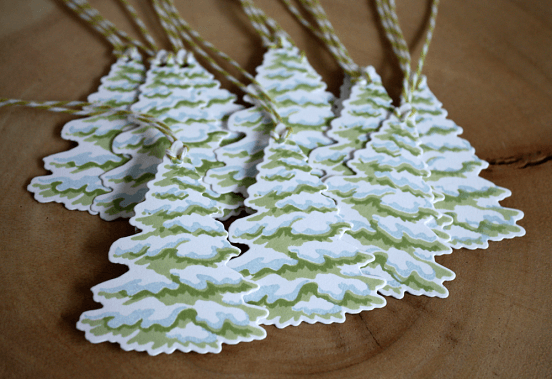
Once you have all your trees stamped, use the matching die to cut them all out. Doing the trees four at a time you can stamp them all out in virtually no time at all. Add a small hole it the top of the tree and add some twine and you are done.

Thanks for joining us again this week! We hope to see you again next Tuesday for more crafting inspiration!

Comments
3 responses to “Mass Producing Snowy Tree Tags | By Tracey McNeely”
Such a lovely set n such a lovely set of tags..
Absolutely beautiful!
Absolutely beautiful! They look so real! Thanks for sharing and stay blessed!