Hello Everyone and Welcome Back!
For today’s project we will be using the Nobilia Layering Die Set! The die set is very deceiving! So many die cuts that you can chose to put back together or not to get many looks from one die! Let’s get started and you will see what I mean!

I will be using a paper pad from Memory Box called Dashing Stripes and Dots. These colors are not your typical color pallet and that is what really attracted me to it! They are deeper color values.

After choosing my colors I started my die cutting, here is where I realized all the different cut outs that you will get and was pleasantly pleased… LOL When I made my first cut I saw the possibility of making a frame for all the panels that you get!, so not only will you get your layering pieces but also a frame that can be a different color all together to make them pop!

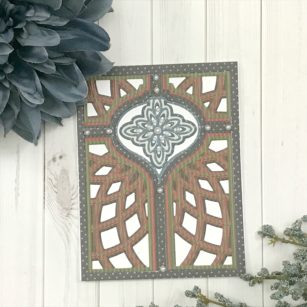
I used different color palette for my outer frame and panels and used another color palette for my focal point! Grabbed my liquid adhesive to adhere all my die cut pieces together, and yes I even had a few extras!


Grabbed my Standard A2 size card base (4 ¼ in x 5 ½ in) and started by placing my frame down first and then my panel inserts onto my card.

Added some pearl embellishments and our card is complete! But there is something else here that we can build, and that is a beautiful ornament for you tree or even a gift! Because I changed the color of my center point on my card, I had those die cuts left, let’s not let them go to waste! These are symmetrical dies so you can put a backing on them as well!


As always, I hope you enjoyed today’s project… and if you want to see more details just click on the video below and see how these projects come together step by step!
Make sure you stay tuned for more wonderful projects coming soon! Have a great day and always remember… Be Creative!

Supplies


Comments
One response to “A Different Holiday Card and Ornament! | By Desiree Kuemmerle”
Thanks for sharing your tips and the technique video, the card is lovely.