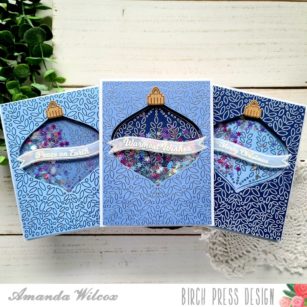
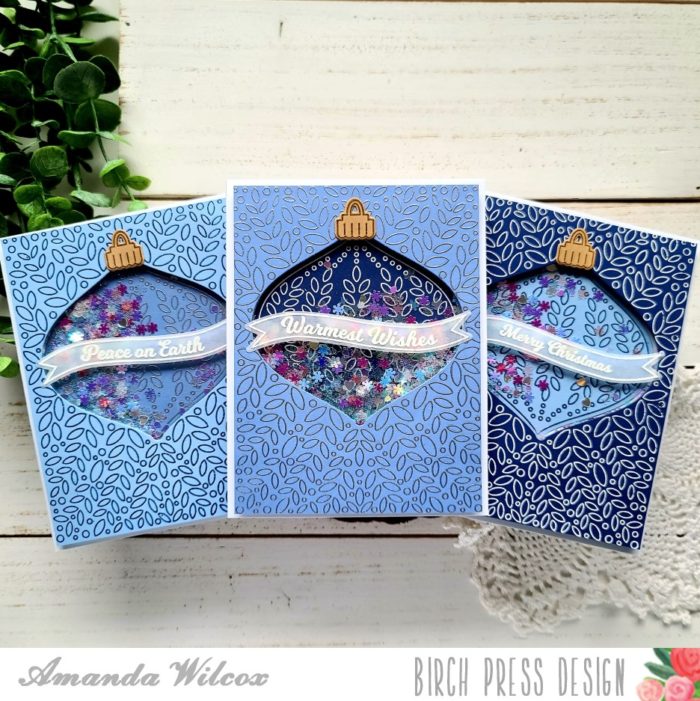
Hello everyone, thanks for stopping by. It’s Amanda from Twiddler’s Nook today sharing a trio of Christmas shaker cards.
These were really quick to put together and would be super fun to make in larger batches to mail to friends and family this Christmas. Let’s get started with how I did it.
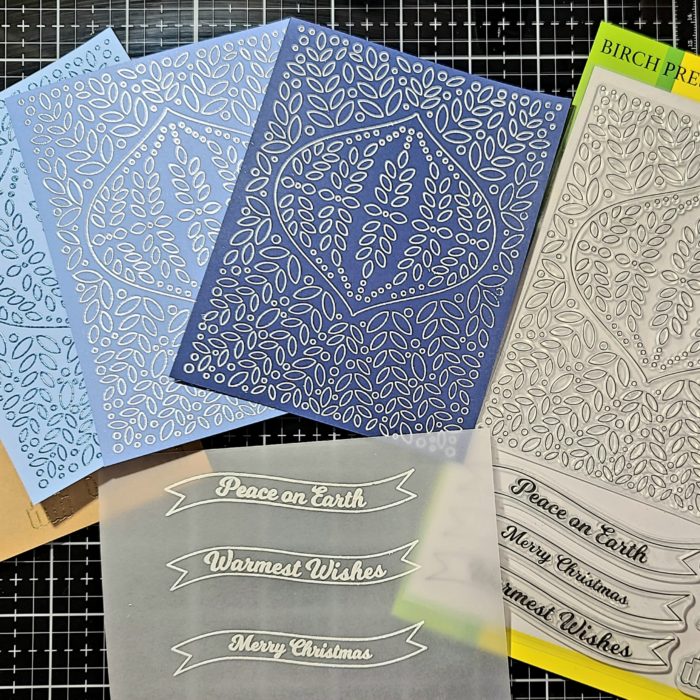
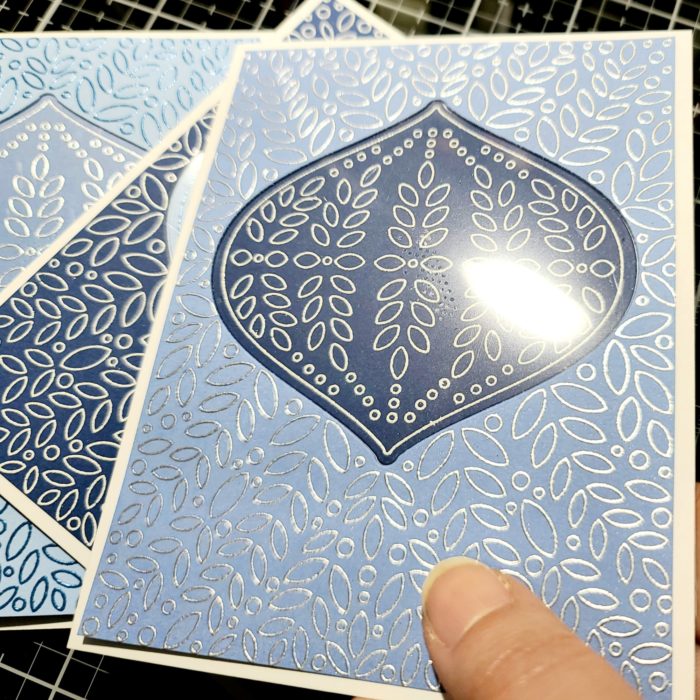
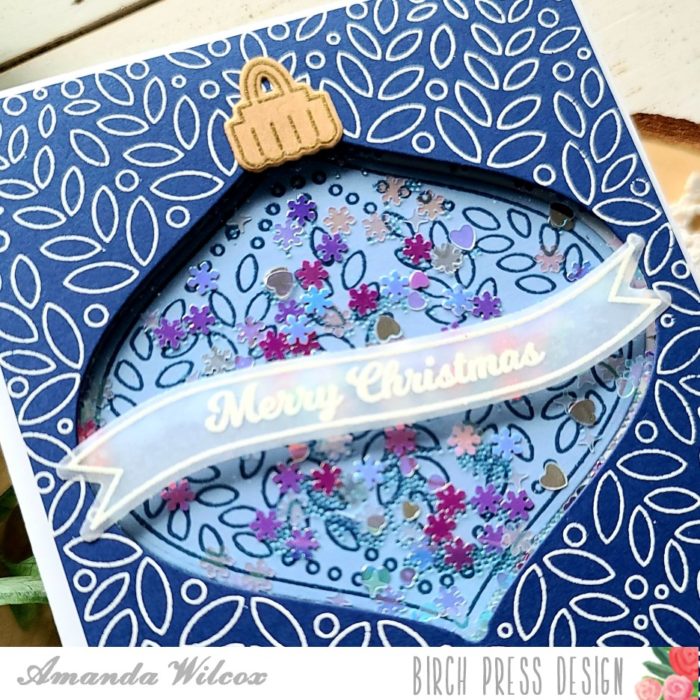
I chose 3 shades of blue that I liked together, pulled out a scrap of kraft and vellum; stamped and heat embossed my images. For the card front I chose silver, white and blue embossing powder. For the ornament tops I chose gold and the sentiment banners are white.
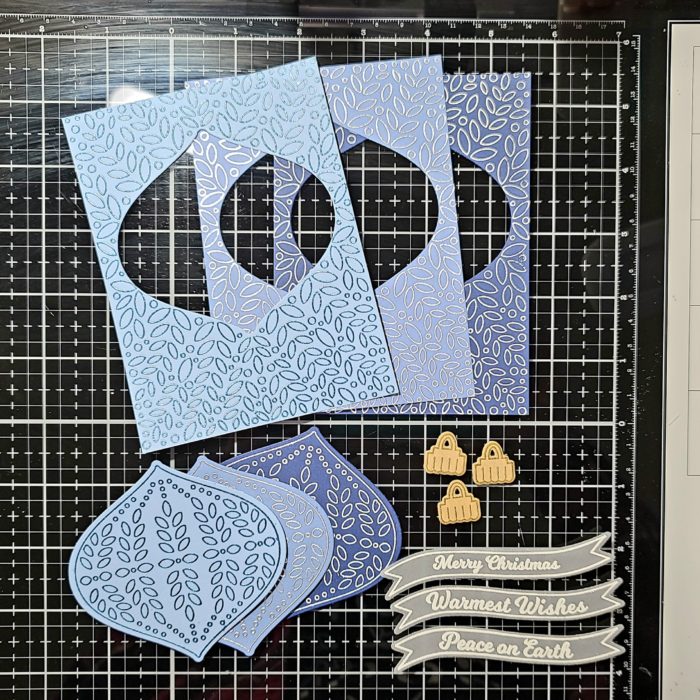
Next, I used the coordinating dies to cut everything out and trimmed the card front panels down to about 4×5.25.
I lined the back of each card front panel with adhesive and added acetate. Then I put removable tape runner on the ornament fronts and lined them up in the window, then added tape runner to the back of just the ornament that I wanted to stick to the card front. That way, when I laid my panel down centered just the ornament would stick and I could rub off the removable adhesive.
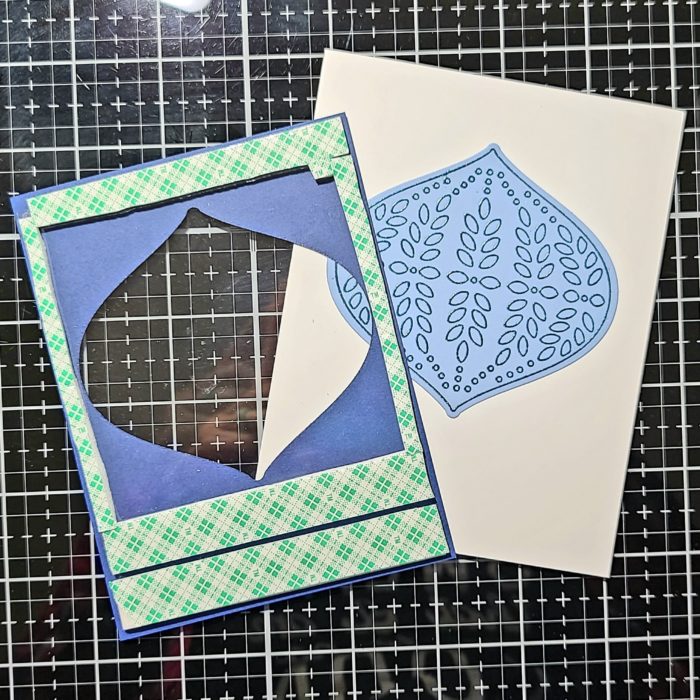
Next, I lined the back of the card fronts with foam tape, piled my shaker bits in the center of the ornament, removed the backing tape and adhered the window panel to the card base.
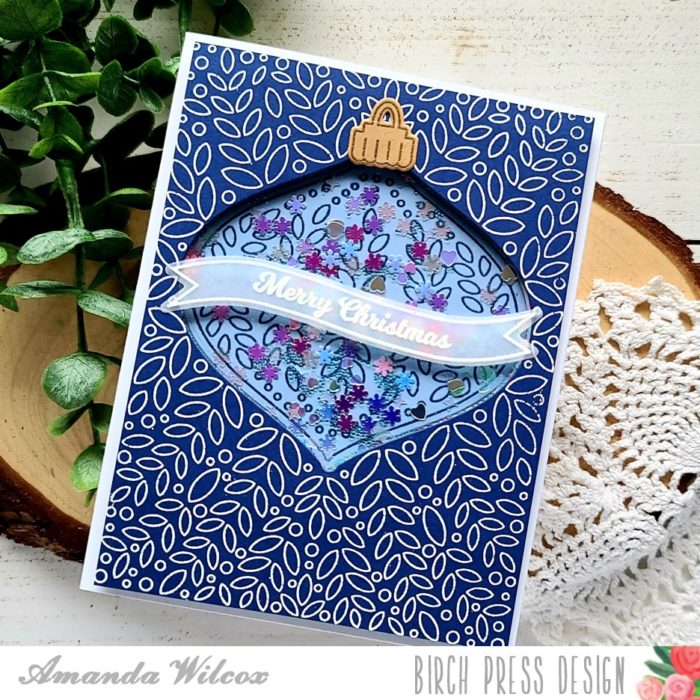
With those stuck down, I used liquid glue to add the ornament tops. A little secret I use with vellum pieces like this is to run it through my Xyron sticker maker to add adhesive to the entire back. This way you don’t have dots of adhesive showing through at all.
I love how these turned out! I think I’ll go back and make some traditional colored combinations as well.
I appreciate you sharing your time with me. Have a fabulous day!

Supplies

Comments
One response to “Christmas Shaker Trio | By Amanda Wilcox”
Beautiful! The minimal palette makes the shakers really stand out.